Host in-person signing
Home > Documents Signing - A Recipient's View > Host in-person signing
Host in-person signing
Hosting in-person signatures on a document is also a part of document workflow and is used for the approval purposes. However, the hosting activity does not involve digital signatures. Being a meeting host you need to facilitate the document signing process for the configured in-person signers.
Since hosting in-person signatures is a workflow activity, so these documents are shared with certain exclusive permissions (e.g. printing, downloading, access duration, password protection, etc.) by the respective document owner.
Host in-person signatures
- Click the "Documents" option, available at the top of the SigningHub screen.
Or click the "Pending" count link from your SigningHub Dashboard. - From your documents list, locate the pending document to host in-person signatures, and click the "Sign" button against it.
The document will be opened for hosting.
Alternatively, you can skip the above two steps and follow the document link in the notification email that has been sent to you by SigningHub. This will directly open the document for hosting in-person signatures. - Add/ download attachments as required (optional).
- Merge other PDF files as required (optional).
- Use the allowed document permissions as required (optional).
- Fill in the form components (if any configured for you).
- Fill in the form fields (if any configured for you).
- Add your initials (if any configured for you).
- Add signing related comments (if any).
- Go to each configured in-person signer one by one, and get their in-person fields signed by them.
A dialog will appear with the hosting instructions to facilitate the signing process.
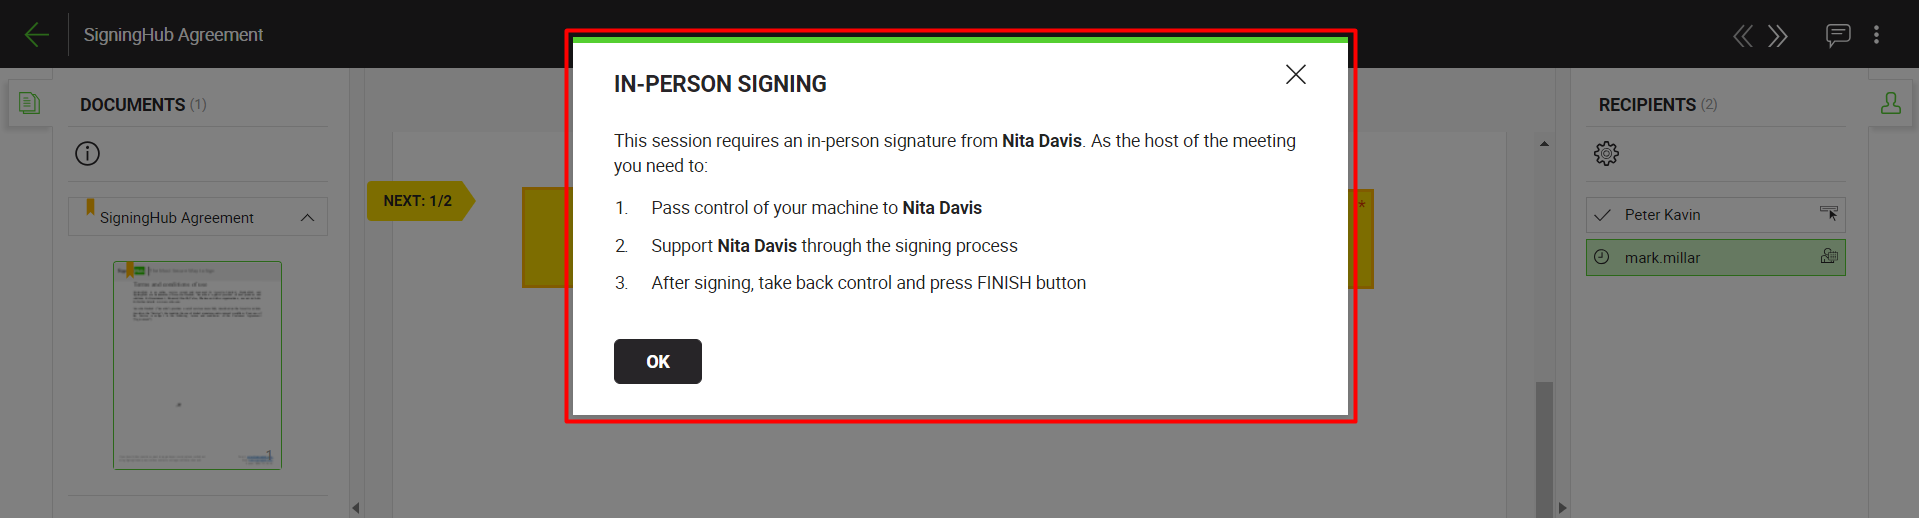
- After getting all the in-person signatures, click the "Close" button from the top right of document header.
In case the "Automatically proceed with workflow upon completion of mandatory actions by signer" option is turned off in your enterprise user role, then the "Finish" button will be displayed to conclude the signing process.
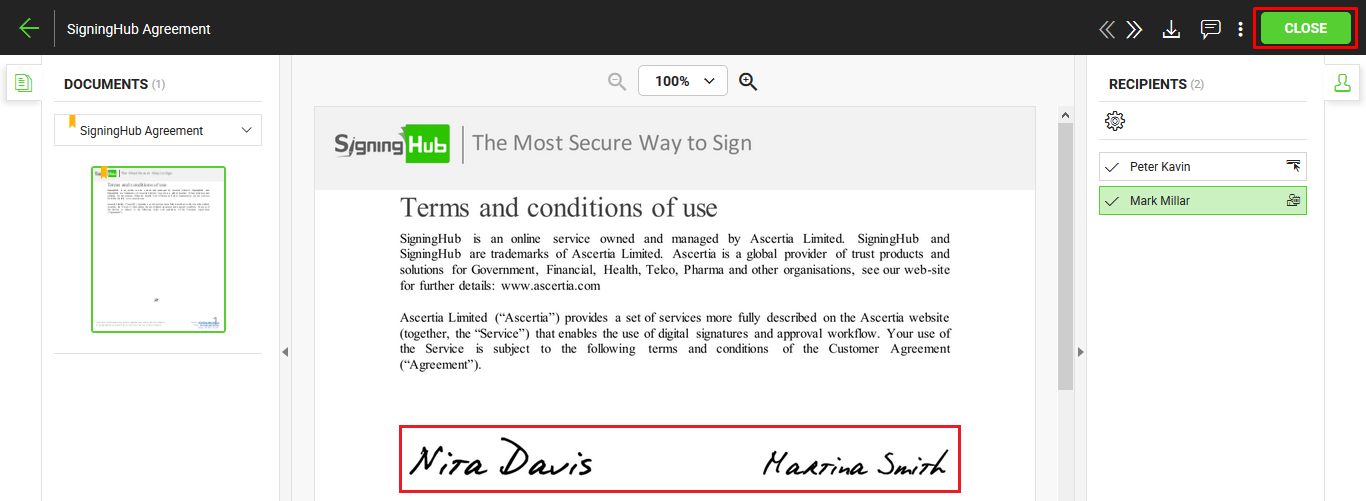
The document is now signed, and its status will be changed from "Pending" to "Signed" in your documents list. The document owner will also be notified about this action through an email.
1. In case a legal notice is configured for the meeting host, then each in-person signer will have to agree to it while signing their in-person field.
2. If you delete a pending document from your documents list without hosting in-person signatures, it is considered as declined.
3. An in-person signature can also be a witness digital signature, if it is generated by using a witness certificate which is a public signing certificate available on the server for digital signing.
4. An invisible signature doesn't have any visible appearance on a document. However it entails all other verifiable characteristics of e-signing, i.e. Time Stamping, Certificate Chain, Certificate Status, etc. An invisible signature can be a Digital Signature, Witness Digital Signature, or Witness In-Person Signature as configured in a workflow.
5. Fill in the field's data accordingly and click the "Next" button to traverse to your next field for data entry. Keep doing so till you reach the last field assigned to you. SigningHub will display the total and traversed counts of your assigned fields accordingly.
See also
Open a pending document
Add/ download attachments
Merge other pdf files
Document permissions
Fill in your form components
Fill in your form fields
Add your initials
Add your In-Person Signature
Agree to the legal notice
Add your Digital Signature
Add your e-signature
Add signing comments
Review a document
Update a document
Decline a document
View verification details
Change a recipient/ placeholder
Delegate your signing authority in a workflow