Electronic Seal Signing
- Introduction
- How it works?
- Enable "Electronic Seals" in your SigningHub License
- Configure the Role of Administrator in SigninHub Admin
- Configure a Connector in SigningHub Admin
- Configure an Electronic Seal Profile in SigningHub Admin
- Configure an Electronic Seal against your Service Plan in SigningHub Admin
- Configure the Electronic Seal against an Enterprise Role in SigningHub Web
- Create an Electronic Seal in SigningHub Web
- Add an Electronic Seal to a Workflow in SigningHub Web
- Add an Electronic Seal field to a Workflow in SigningHub Web
- Electronic Seal Signing in SigningHub Web
SigningHub allows you to add electronic seals in a workflow. Electronic Seal (eSeal), Advanced Electronic Seal (AdESeal), and Qualified Electronic Seal (QESeal) are the levels of assurance available for an electronic seal. Adding electronic seals will consume signatures quota of your (document owner's) account. Adding an electronic seal is subject to your SigningHub license, service plan configuration and the assigned enterprise user role.
- Enable the "Electronic Seals" module in your SigningHub license.
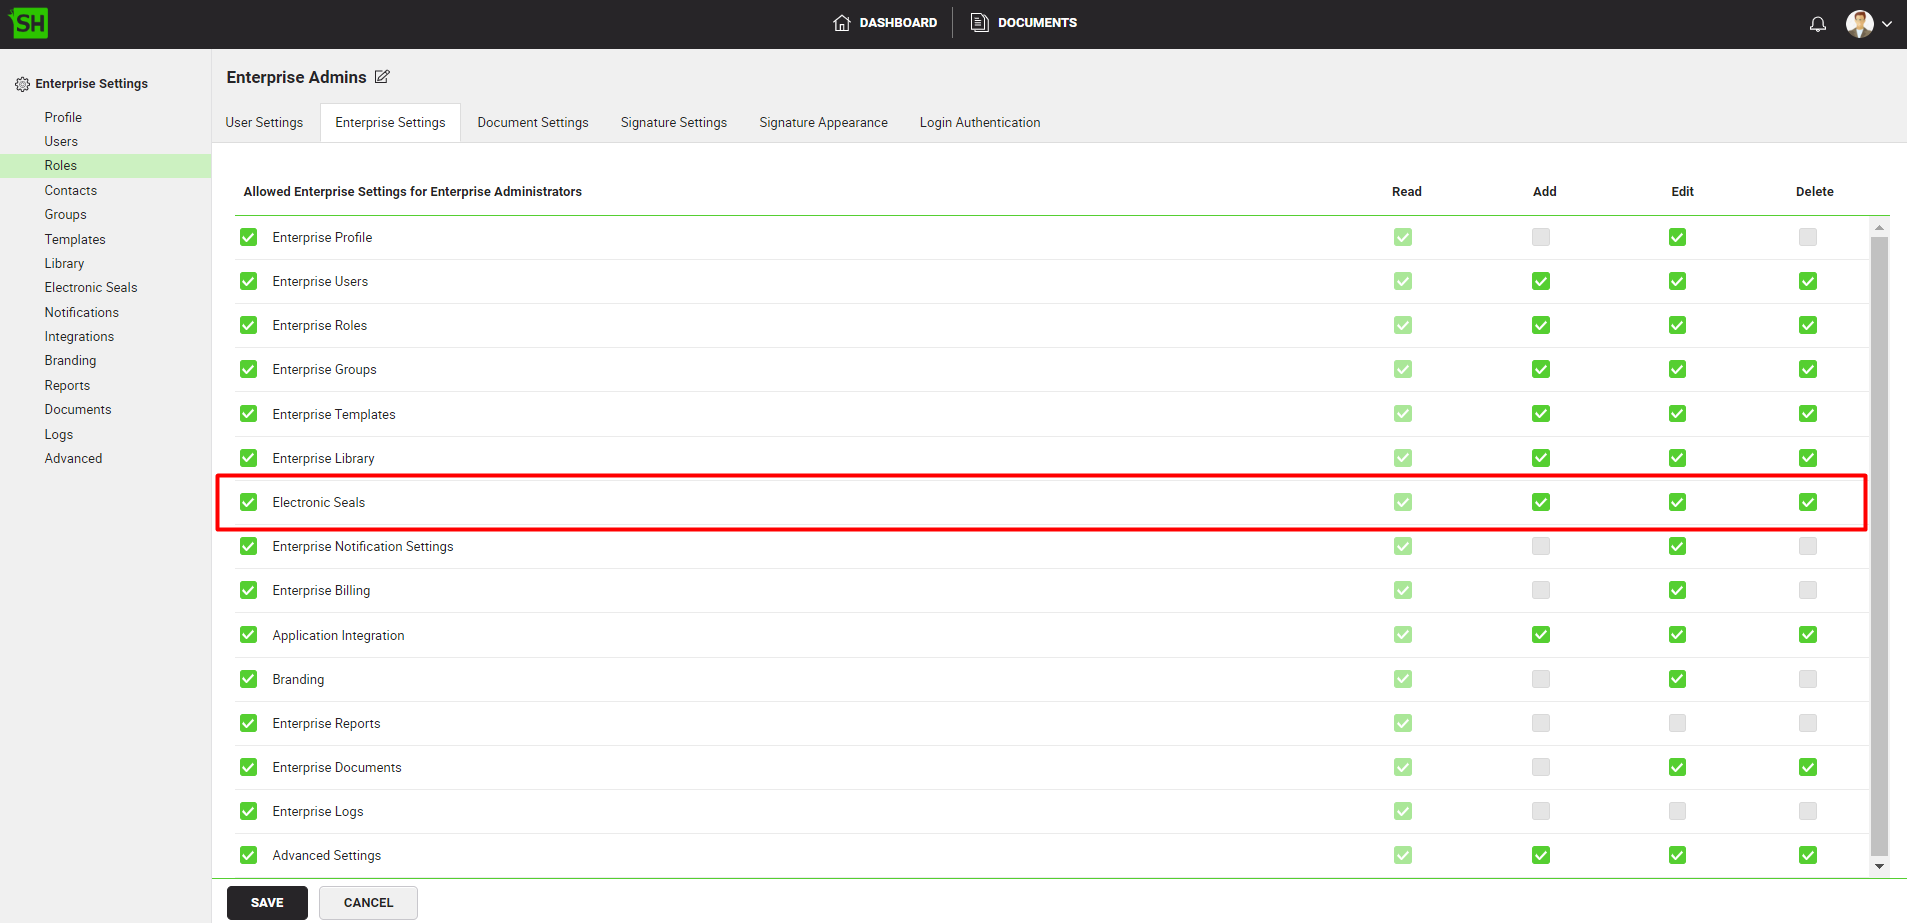
- Allow the electronic seals module against the role of administrator, in SigningHub Admin.
- To perform electronic seal signing, you must configure a connector, in SigningHub Admin.
- Configure an electronic seal profile, in SigningHub Admin.
- Configure an electronic seals against your service plan, in SigningHub Admin.
- Configure the electronic seal against an enterprise user role, in SigningHub Web.
- Create an electronic seal for your enterprise, in SigningHub Web.
- Once an electronic seal has been created for your enterprise, you can add this electronic seal to a workflow.
- Add an electronic seal field to your document.
- Signing of an electronic seal.
Enable "Electronic Seals" in your SigningHub License
The Electronic Seals feature is available through the license, if the "ELECTRONIC_SEALS" module is enabled in the license. When "ELECTRONIC_SEALS" module is enabled, it will consume the quota of "Signatures".
To see in detail, how to configure SigningHub License, click here. Contact the SigningHub support and request them to enable this module in your license.
Configure the Role of Administrator in SigninHub Admin
To see in detail, how to create a manage administrator roles in SigningHub, click here.
Make the following configurations against the administrator role.
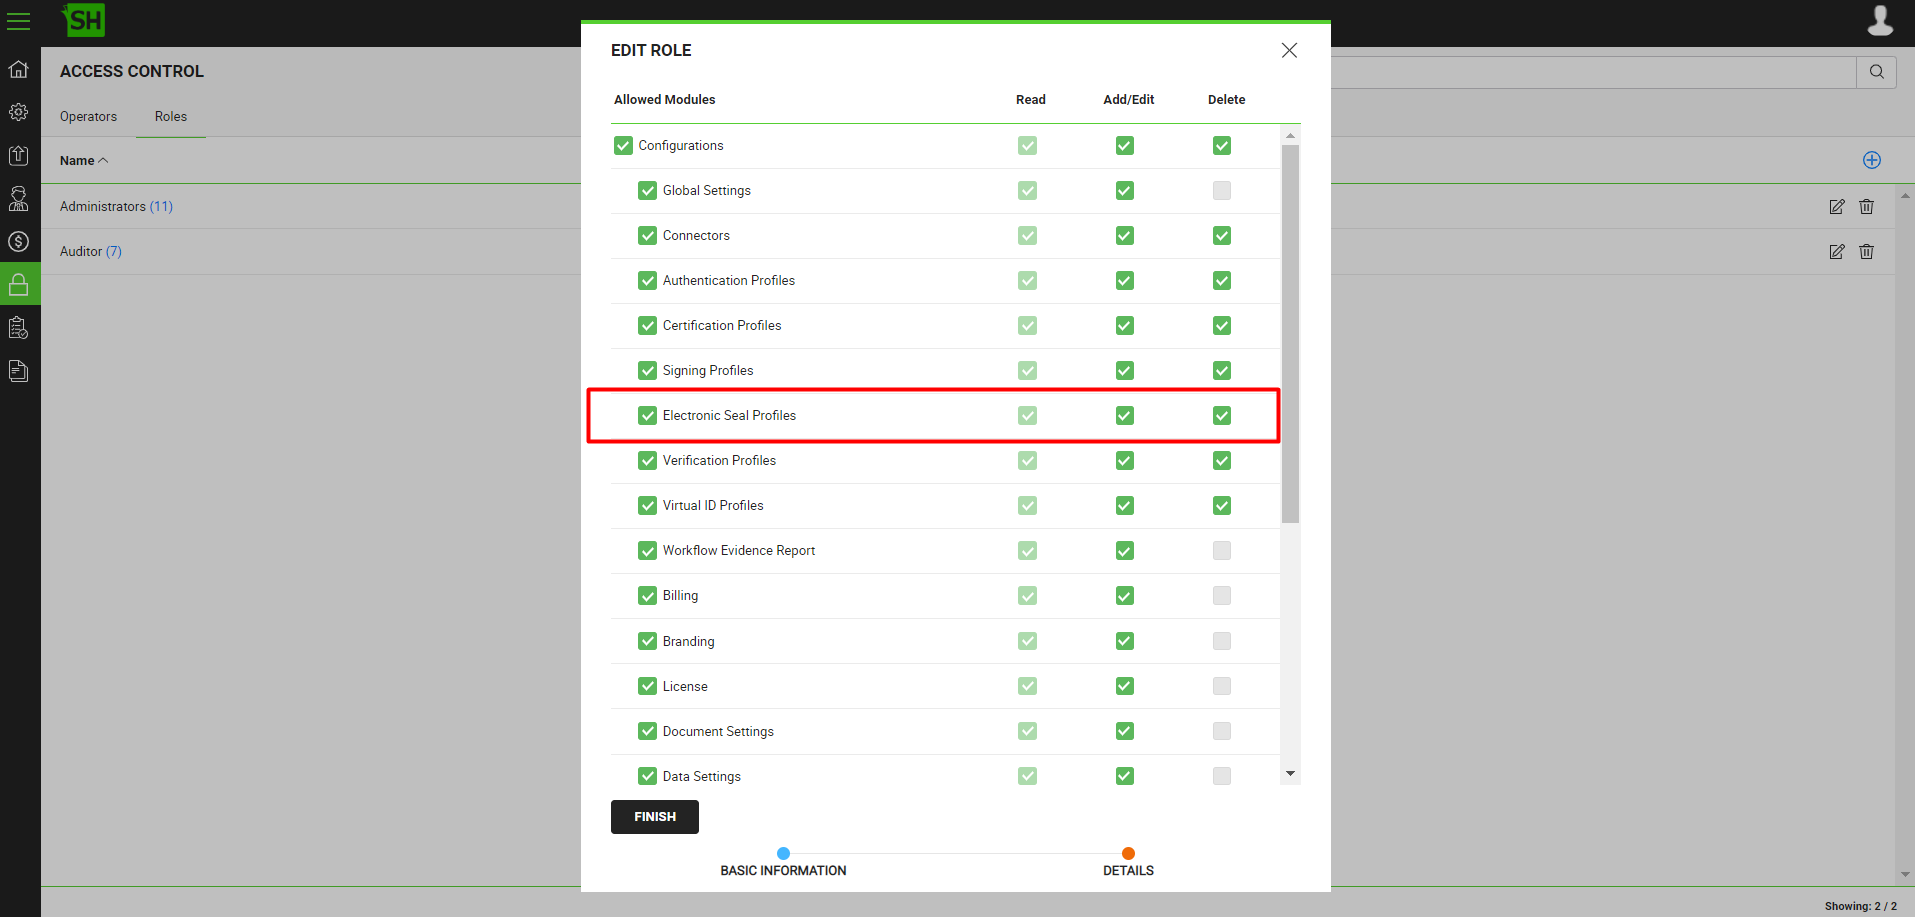
- From the Details screen, allow the "Electronic Seal Profiles" module for this role.
|
|
|

Configure a Connector in SigningHub Admin
Configure a connector, as shown below, for ADSS Electronic Seal or CSC Electronic Seal, respectively.
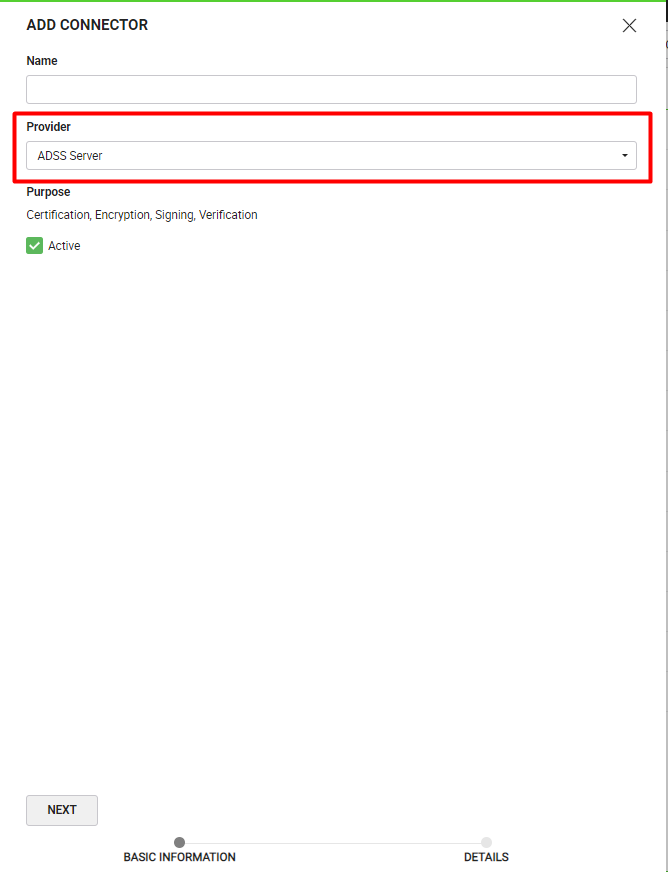
- ADSS Electronic Seal Connector
To see in detail, how to create an ADSS Server connector in SigningHub, click here.
Make the following configurations to a connector in SigningHub Admin:
- In the "Basic Information" section, choose "ADSS Server" as the "Provider".
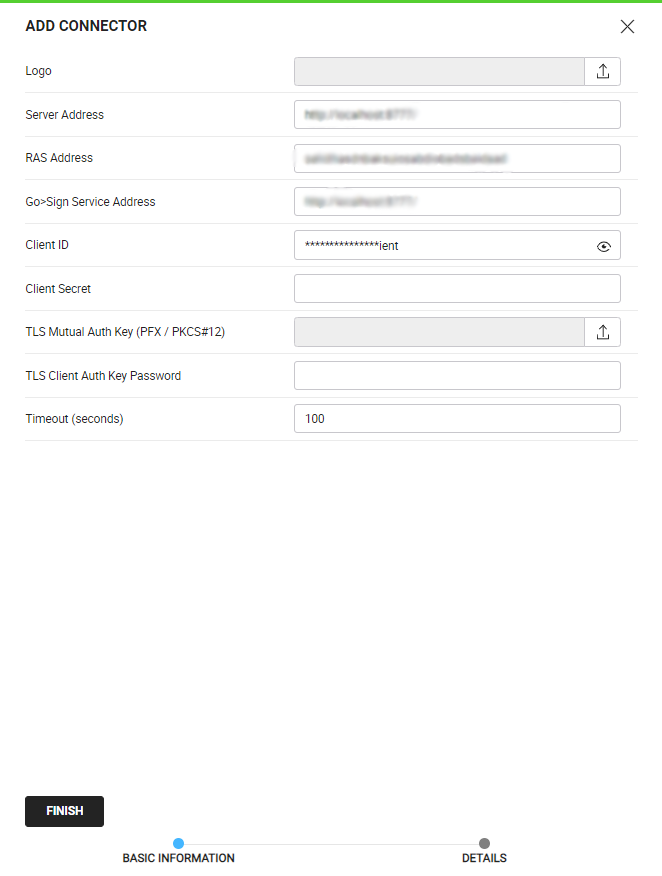
- In the "Details" section, fill in the required fields.
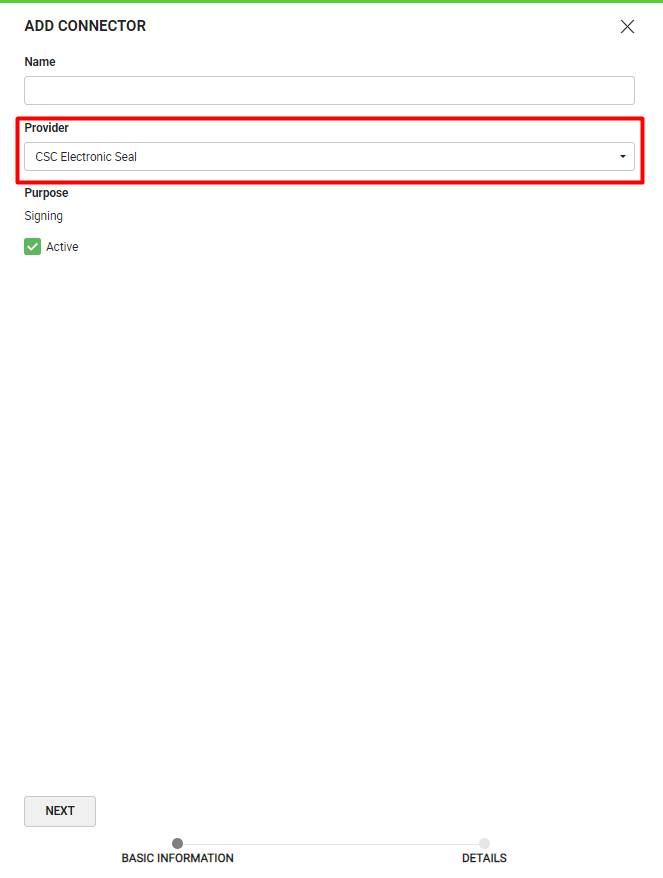
- CSC Electronic Seal Connector
To see in detail, how to create a CSC Electronic Seal connector in SigningHub, click here.
Make the following configurations to a connector in SigningHub Admin:
- In the "Basic Information" section, choose "CSC Electronic Seal" as the "Provider".
- In the "Details" section, fill in the required fields.

|
|
|

Configure an Electronic Seal Profile in SigningHub Admin
Configure an electronic seal profile, as shown below, for ADSS Electronic Seal or CSC Electronic Seal, respectively.
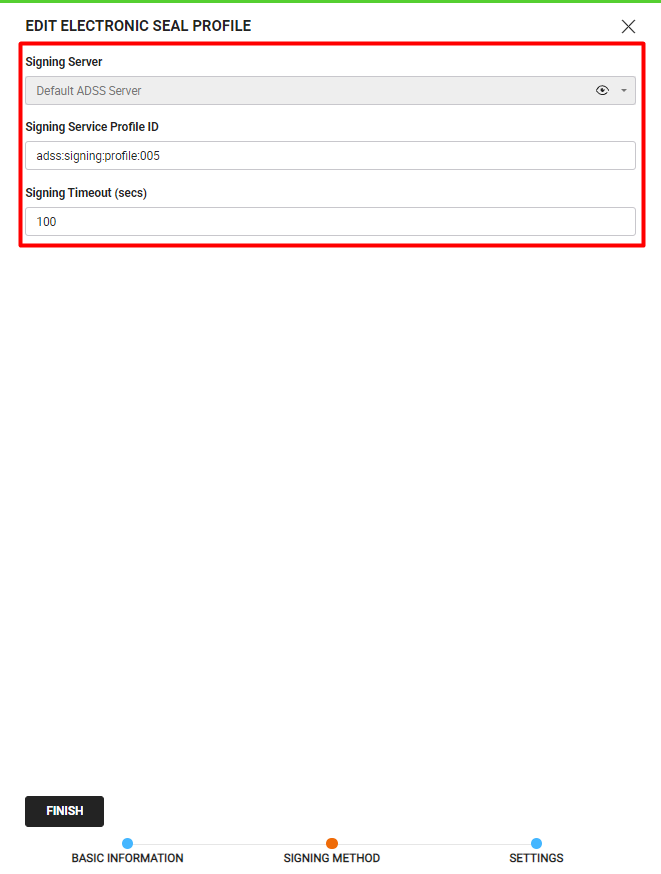
- ADSS Electronic Seal Profile
To see in detail, how to create an electronic seal profile in SigningHub, click here.
Make the following configurations to an electronic seal profile in SigningHub Admin:
- Select the ADSS Server connector created earlier, and fill in the required fields:
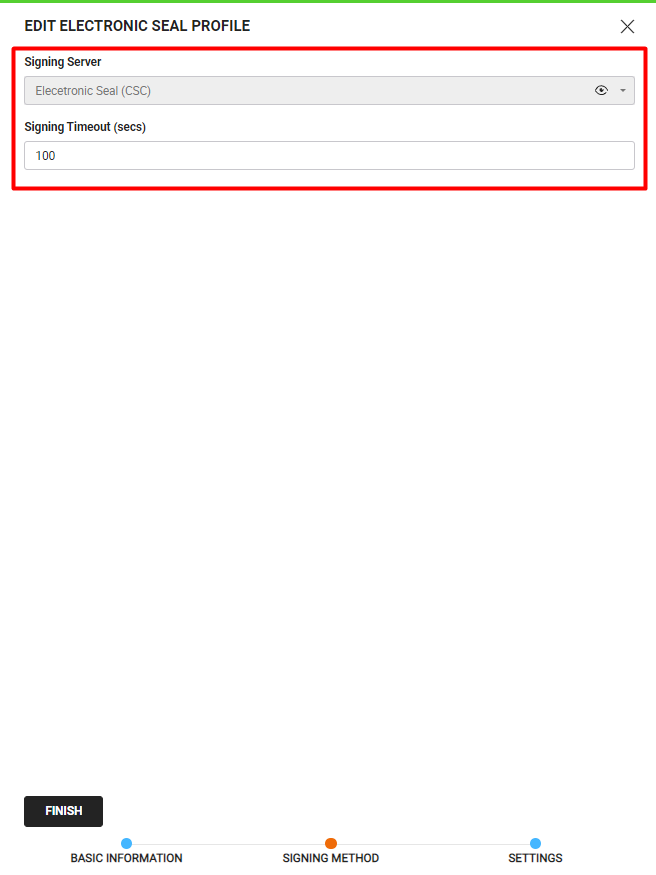
- CSC Electronic Seal Profile
To see in detail, how to create an electronic seal profile in SigningHub, click here.
Make the following configurations to an electronic seal profile in SigningHub Admin:
- Select the CSC Connector created earlier, and fill in the required fields:
Configure an Electronic Seal against your Service Plan in SigningHub Admin
Configure an electronic seal against your service plan, as shown below, for ADSS Electronic Seal or CSC Electronic Seal, respectively.
- ADSS Electronic Seal Signing Server
To see in detail, how to create a service plan in SigningHub, click here.
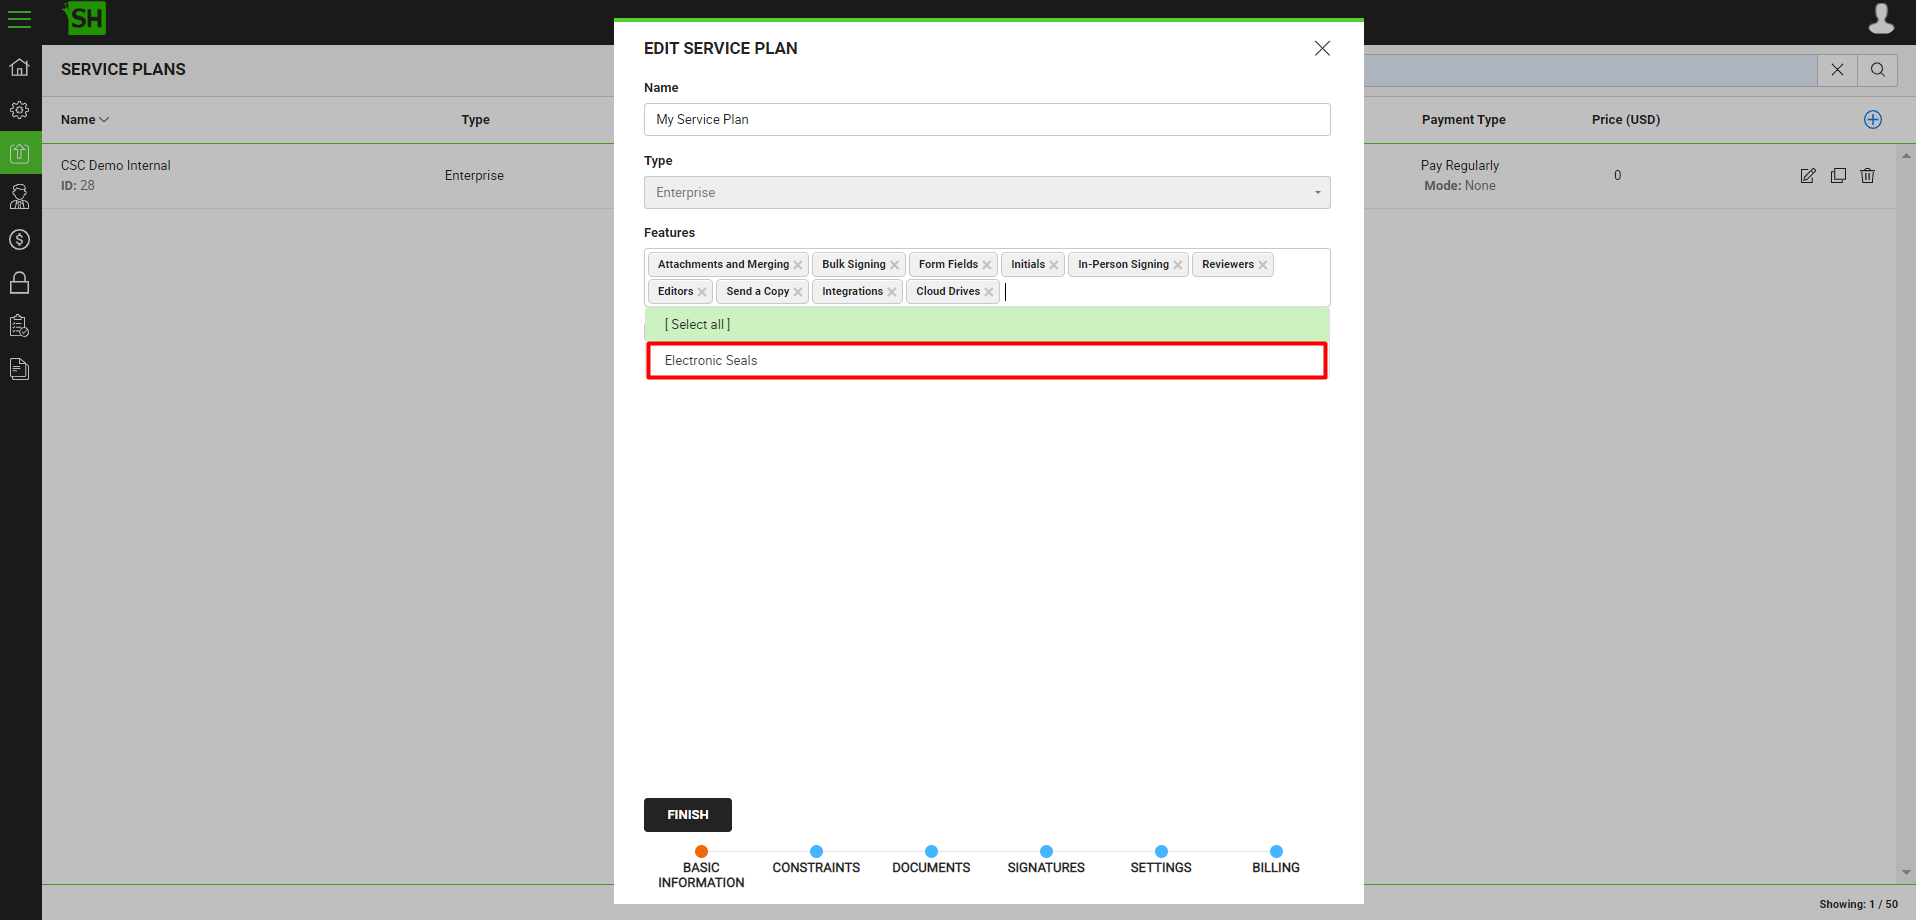
Make the following configurations to a service plan in SigningHub Admin:
- From the "Basic Information" section, select and add the "Electronic Seals" feature to service plan.
|
|
|

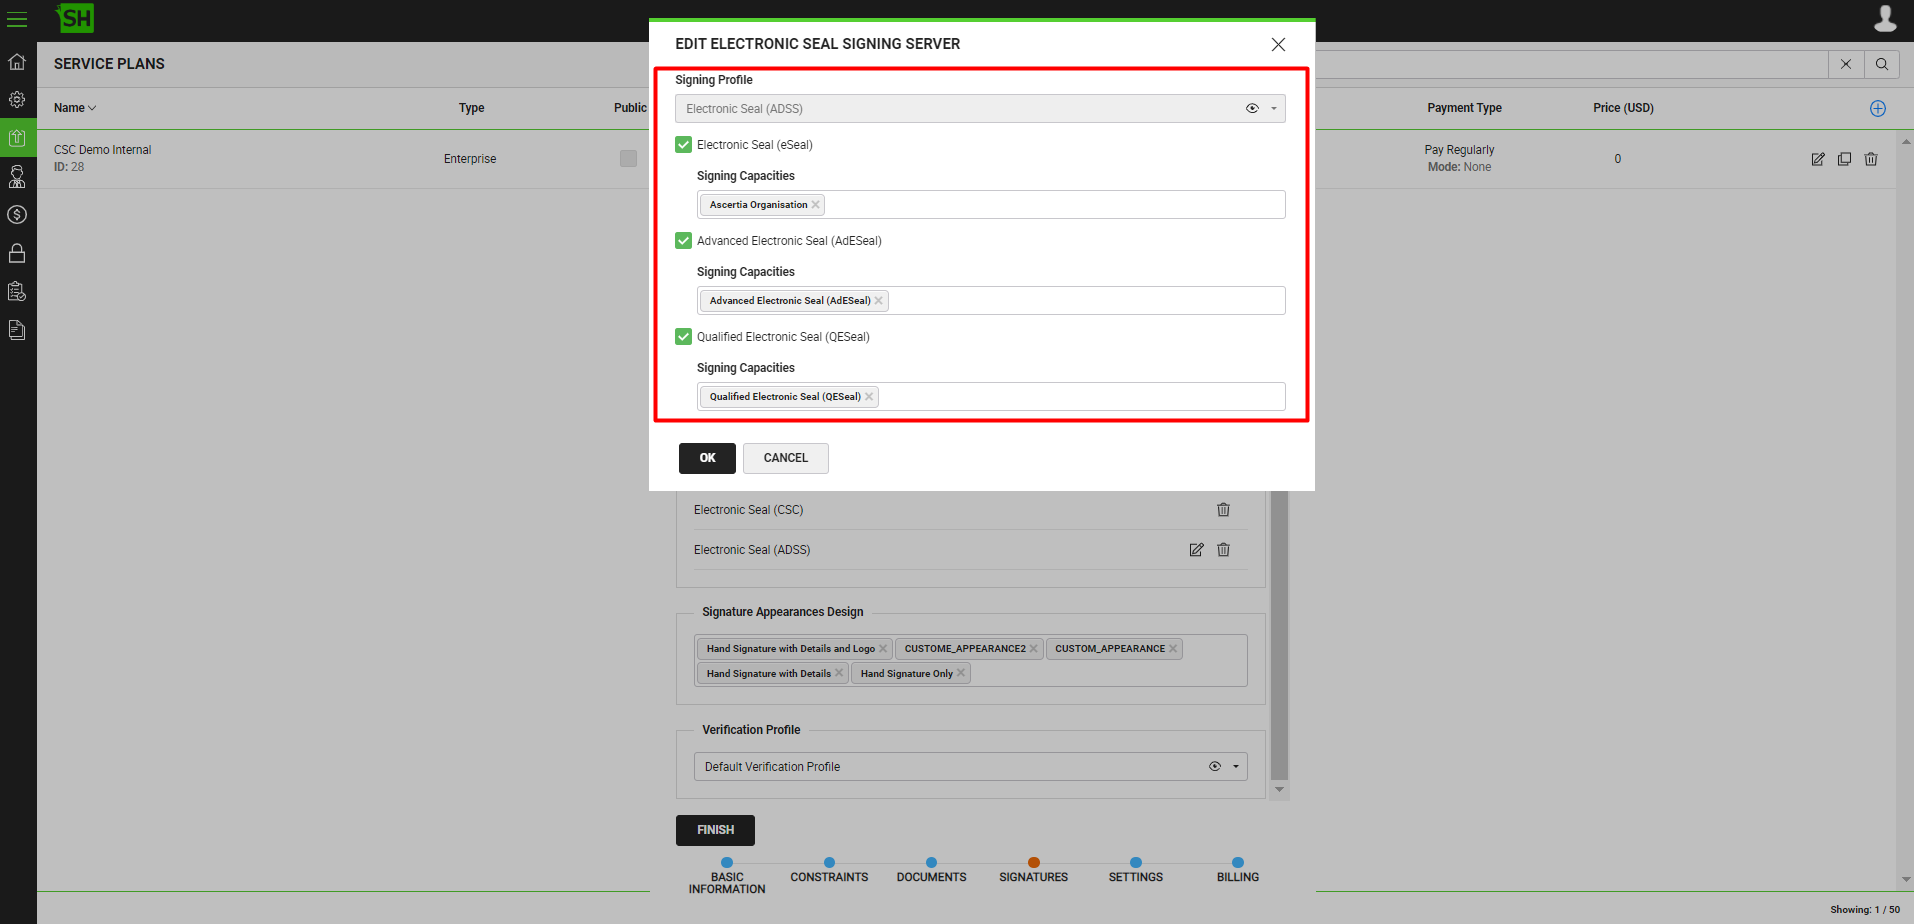
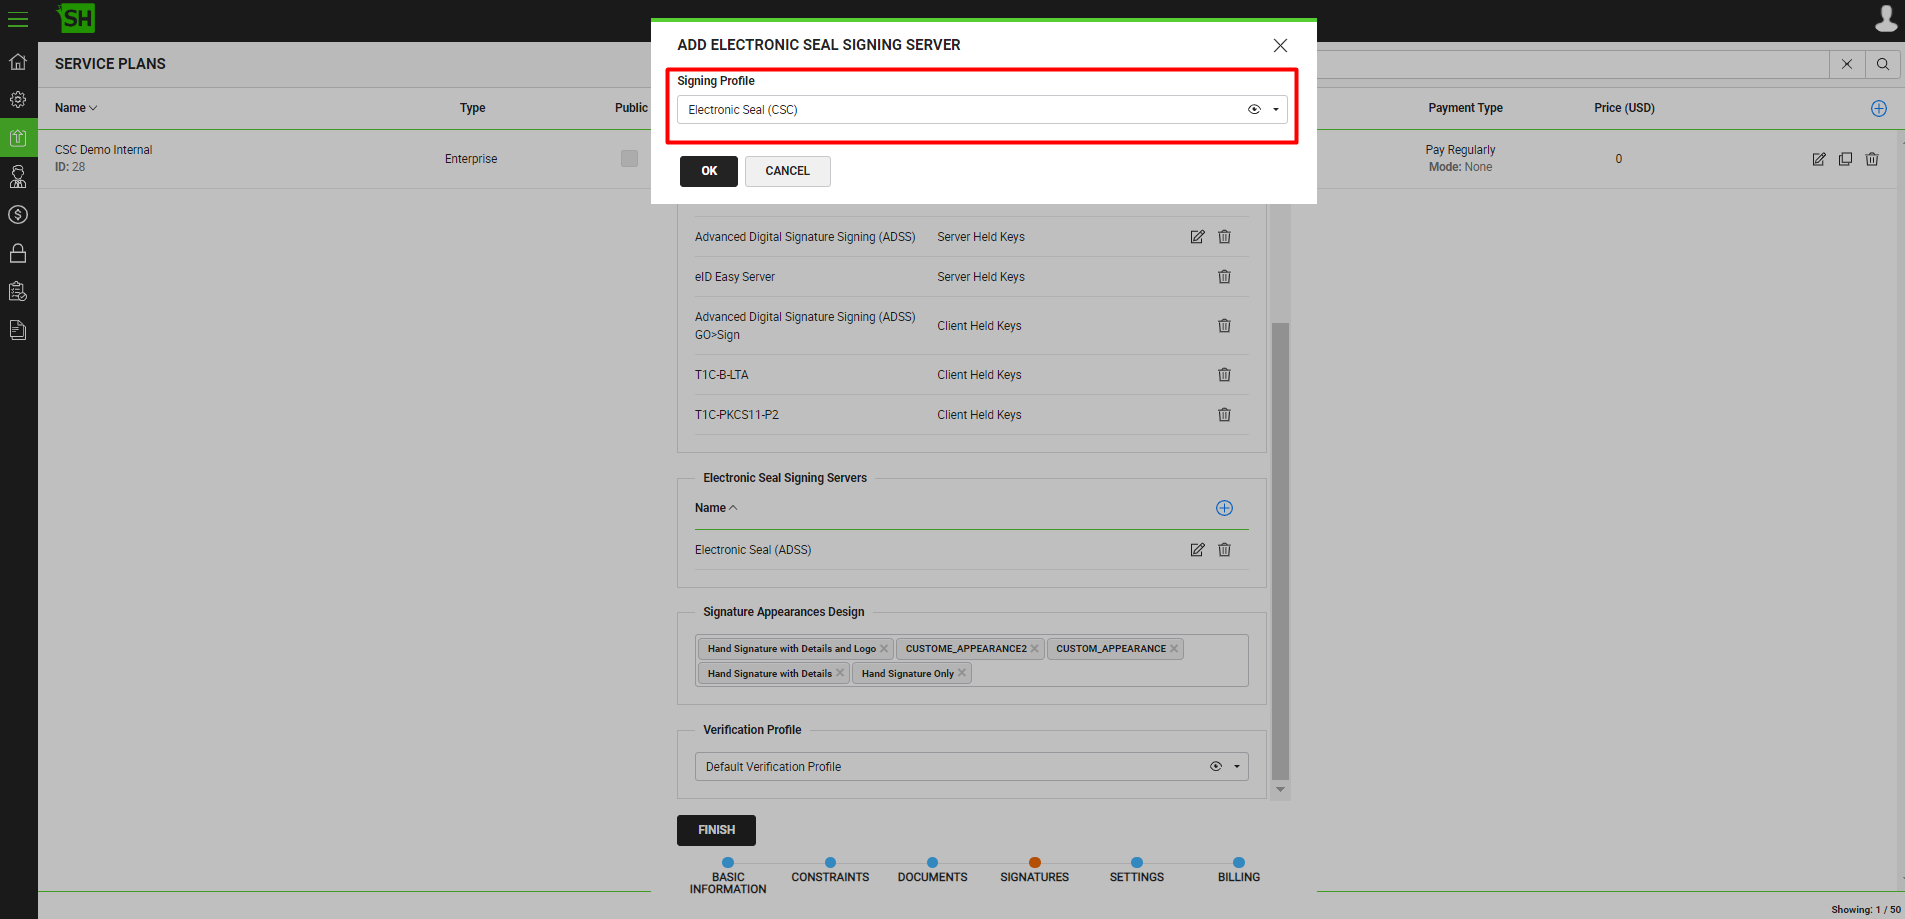
- From the "Signatures" section, add the electronic seal signing server.
- CSC Electronic Seal Signing Server
To see in detail, how to create a service plan in SigningHub, click here.
Make the following configurations to a service plan in SigningHub Admin:
- From the "Basic Information" section, select and add the "Electronic Seals" feature to service plan.
|
|
|
- From the "Signatures" section, add the electronic seal signing server.
Configure the Electronic Seal against an Enterprise Role in SigningHub Web
To see in detail, how to manage user roles in SigningHub Web, click here.
Make the following configurations against an enterprise role:
- From the "Enterprise Settings" section, select and allow the "Electronic Seals" against this user role.
Create an Electronic Seal in SigningHub Web
Configure an electronic seal, as shown below, for ADSS Electronic Seal or CSC Electronic Seal, respectively.
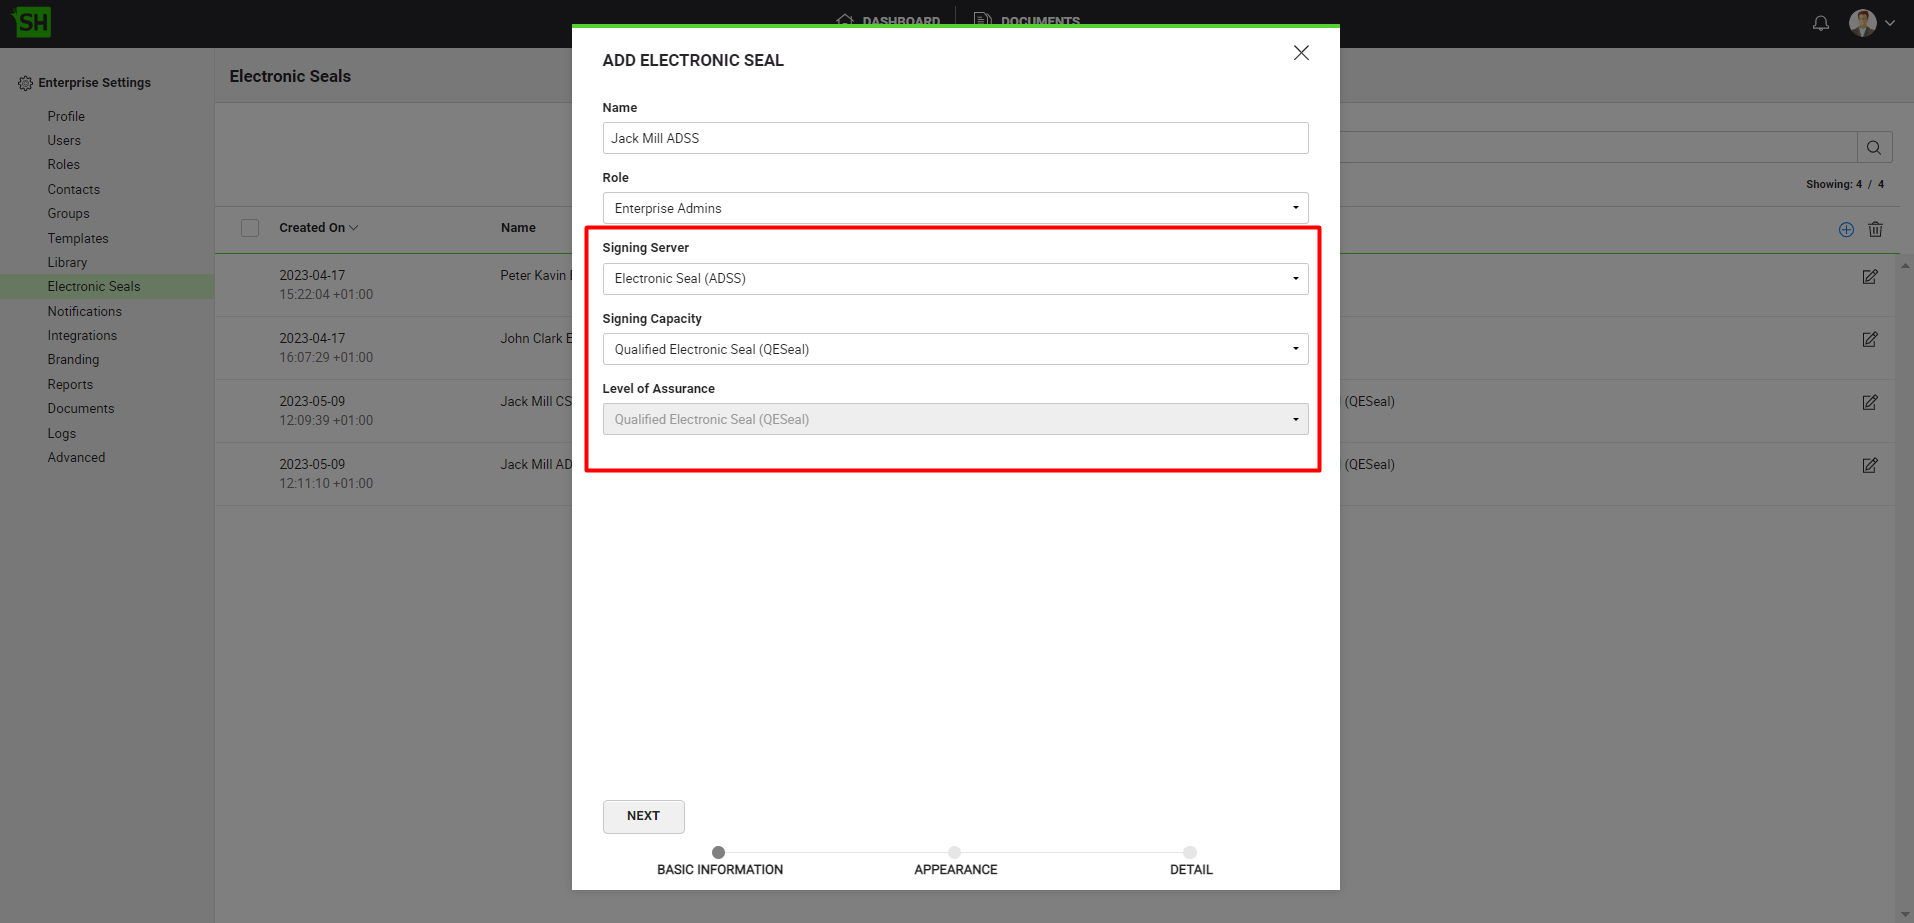
- ADSS Electronic Seal
To see in detail, how to create an electronic seal in SigningHub Web, click here.
Make the following configurations to an electronic seal in SigningHub Web:
- From the "Basic Information" section, select the signing server, and fill in the required fields.
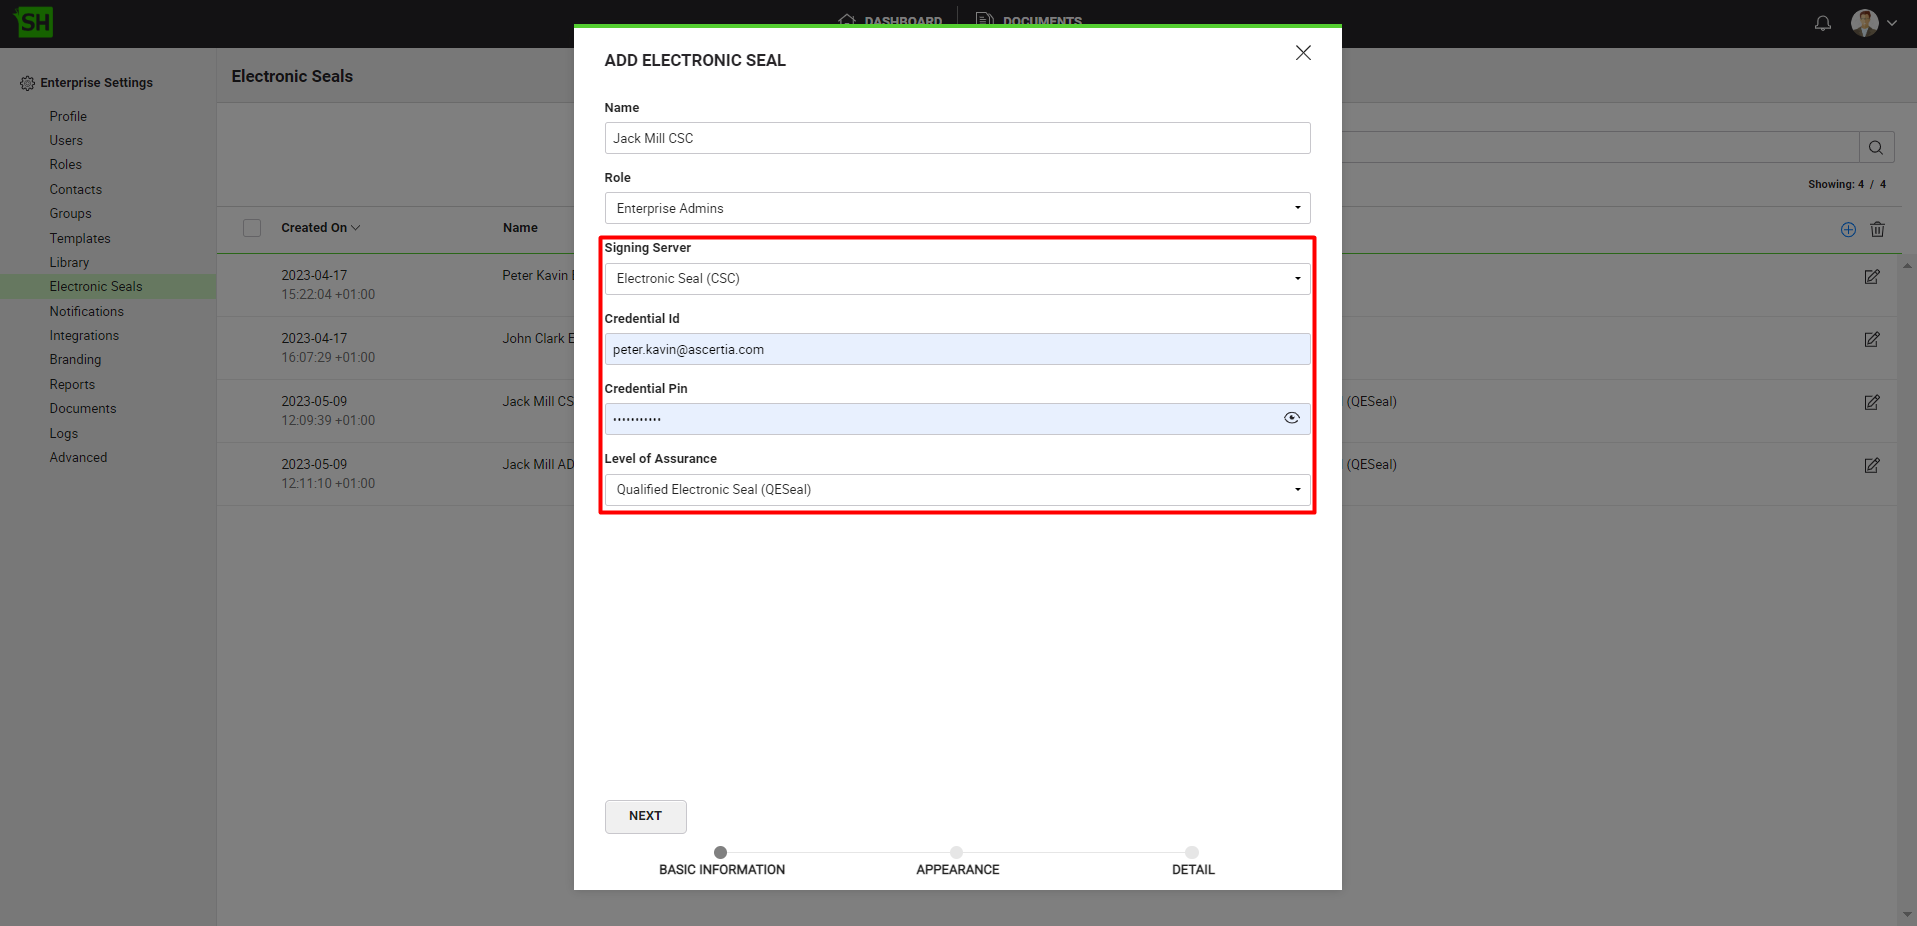
- CSC Electronic Seal
To see in detail, how to create an electronic seal in SigningHub Web, click here.
Make the following configurations to an electronic seal in SigningHub Web:
- From the "Basic Information" section, select the signing server, and fill in the required fields.
|
|
|

Add an Electronic Seal to a Workflow in SigningHub Web
To see in detail, how to create a workflow in SigningHub, click here.
After you have added all the documents in a workflow package, follow the below-mentioned steps to add an electronic seal:
- Click the
 button from the header. and from the "Select Electronic Seal" drop down
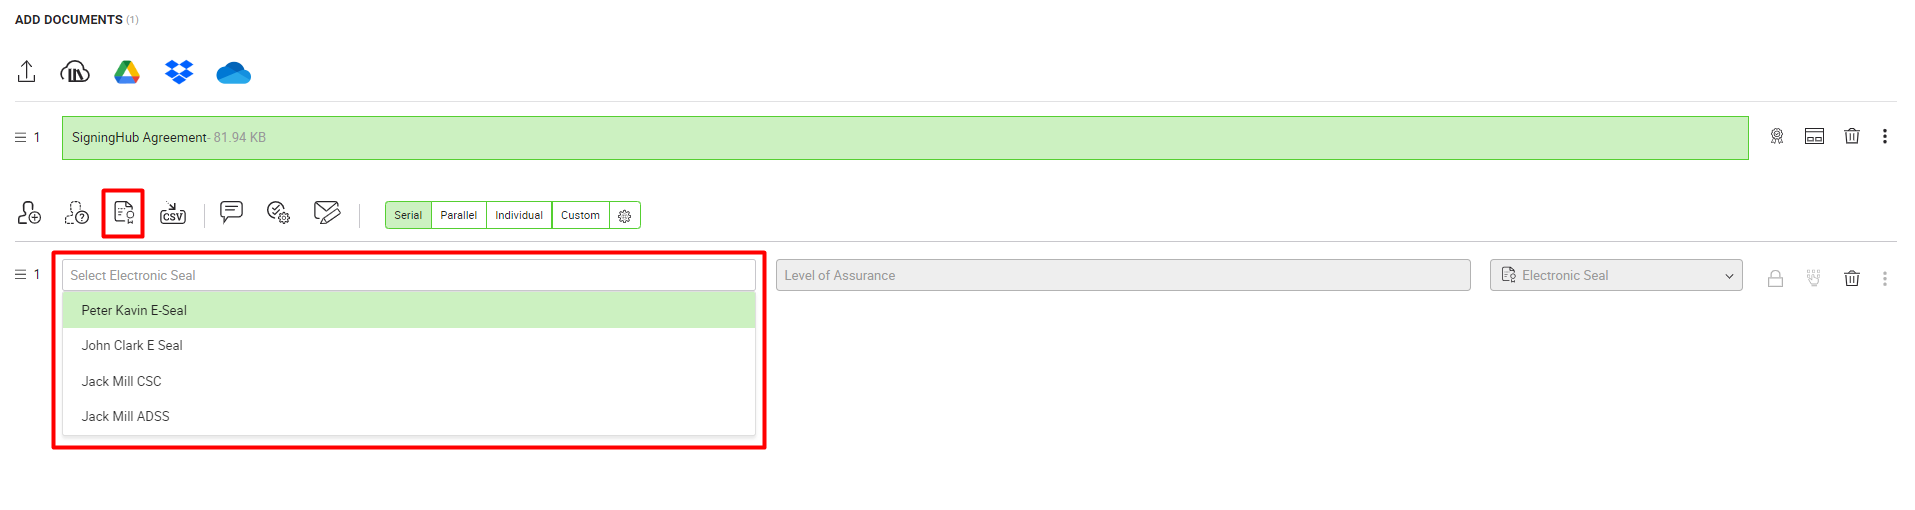
- From the "Select Electronic Seal" drop down, select the electronic seal that you want to add. Only the electronic seals available for use, based on the document owner's user role, will be displayed in this drop down.
Add an Electronic Seal field to a Workflow in SigningHub Web
To see in detail, how to create a workflow in SigningHub, click here.
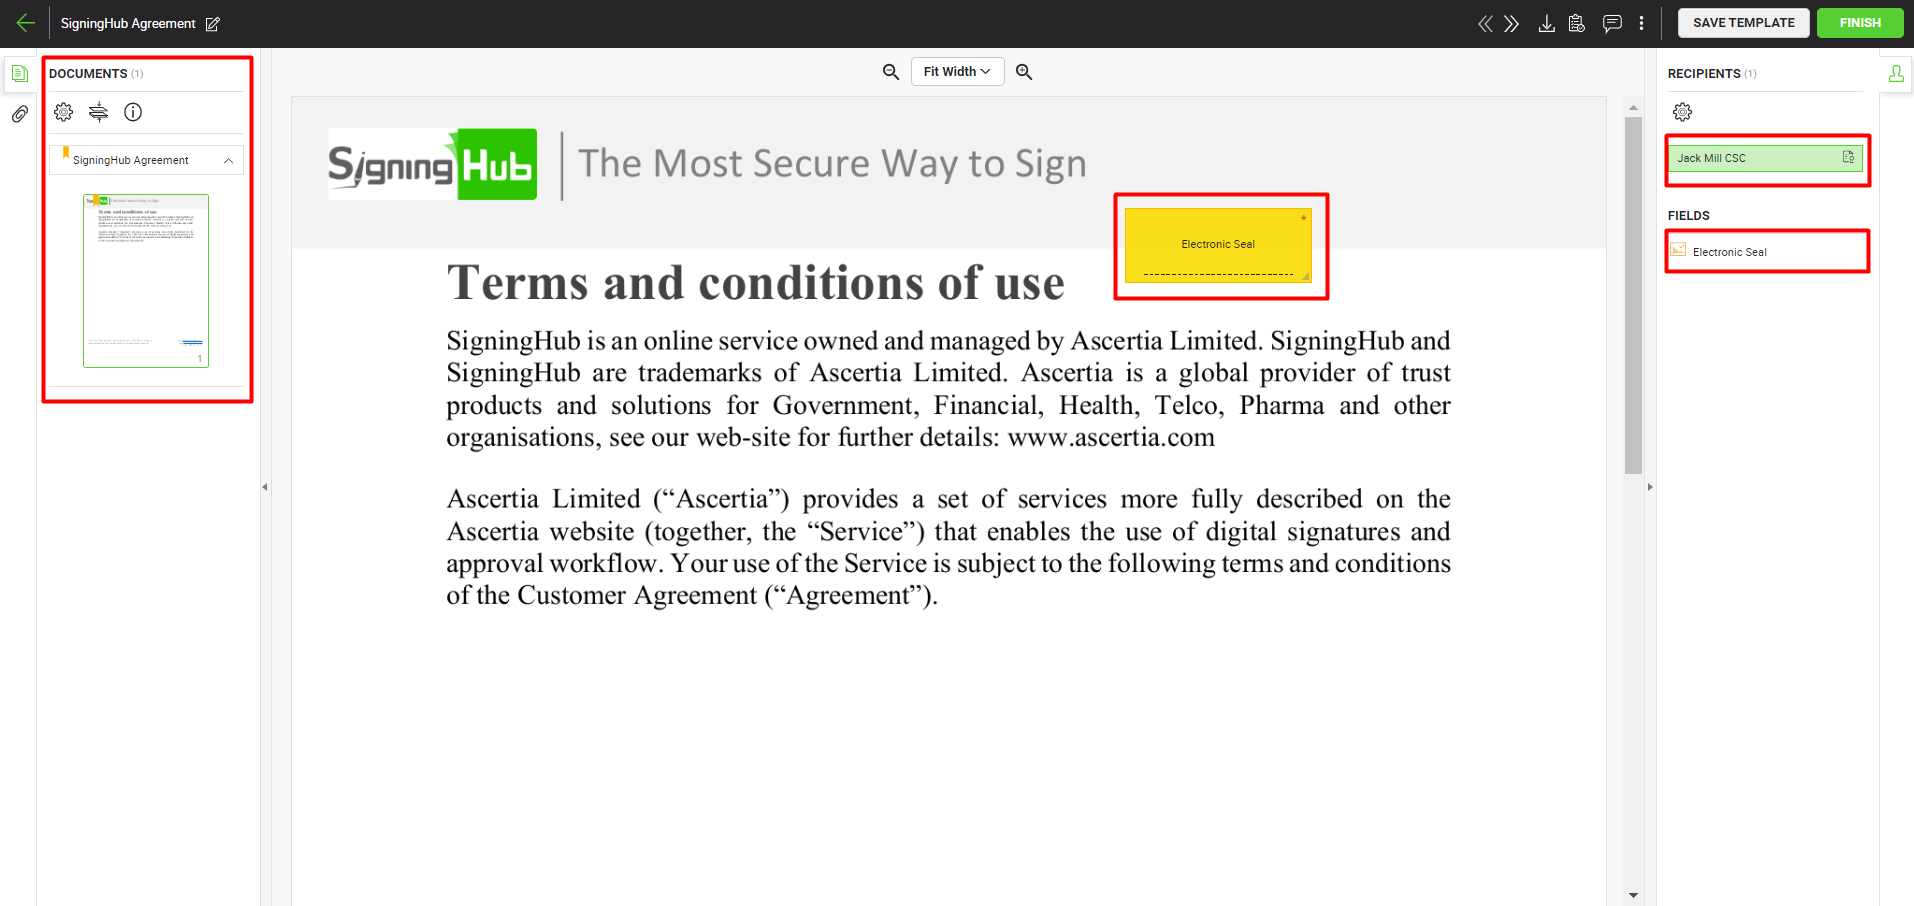
Follow the below-mentioned steps to add an electronic seal field in a workflow:
- Select the document from the left side of document viewer screen, on which electronic seal is required.
- Select the electronic seal from the right side of document viewer screen, for whom you want to add an electronic seal field. Drop the "Electronic Seal" field on the required location on the document.
Electronic Seal Signing in SigningHub Web
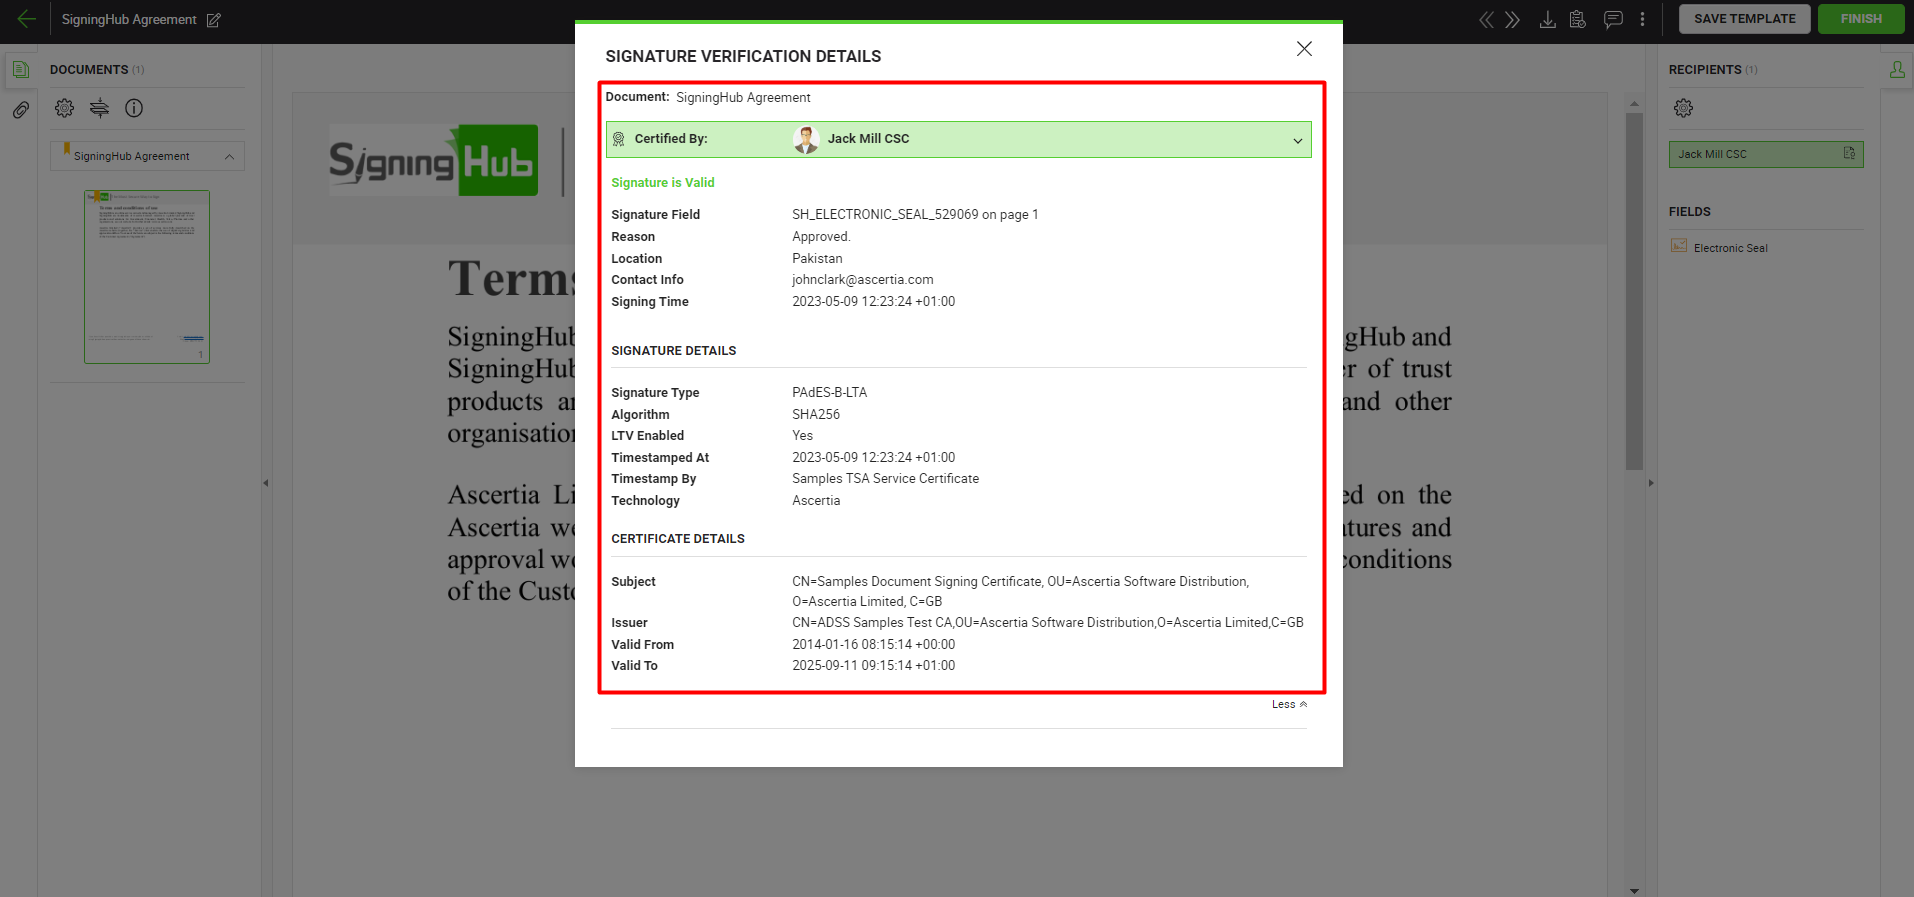
After sharing the document, when it is the turn of the electronic seal for signing, the electronic seal is automatically signed using the configured settings. An electronic seal is signed without any user interaction. When an electronic seal is signed, an on-screen notification is sent to the document owner. If due to any reason the electronic seal signing fails, the system sends an email to the electronic seal owner and the electronic seal will have to be signed manually.
To check the electronic seal signature verification details:
- Click on the electronic seal signatures.
|
|
|
See Also
- XML Signing
- Word Document Signing
- eID Easy Signing
- CSC Signing
- Remote Authorisation Signing (RAS)
- Signing using Policy OID
- Local Side Signing using T1C Server
- Local Side Signing using ADSS Server
- Signing Based on National ID Validation
- Signing via Signature Pad
- Signing Behaviour w.r.t Signature Appearance
- OTP Authentication