eID Easy Signing
- Introduction
- How it works?
- Configure a Connector in SigningHub Admin
- Configure a Signing Profile in SigningHub Admin
- Add Signing Profile to a Service Plan in SigningHub Admin
- Add Signing Server to a User Role in SigningHub Web
- Allow the QES Level of Assurance against a User Role in SigningHub Web
- eID Easy Signing
SigningHub supports performing server-side signing with eID Easy. eID Easy provides a simple API for Qualified Electronic Signature methods as well as for strong customer authentication for Remote Signing Service Providers that do not support the CSC interface.
- To perform eID Easy signing, you must configure an eID Easy connector, in SigningHub Admin.
- Configure the connector in a signing profile, in SigningHub Admin.
- Configure a signing profile using the connector, in SigningHub Admin.
- Add Signing Server to your enterprise user role that you want to use for eID Easy signing.
- Allow the Qualified Electronic Signature (QES) level of assurance against the user role.
- Open a document having a Qualified Electronic Signature field and sign the document using the eID Easy Signing Server.
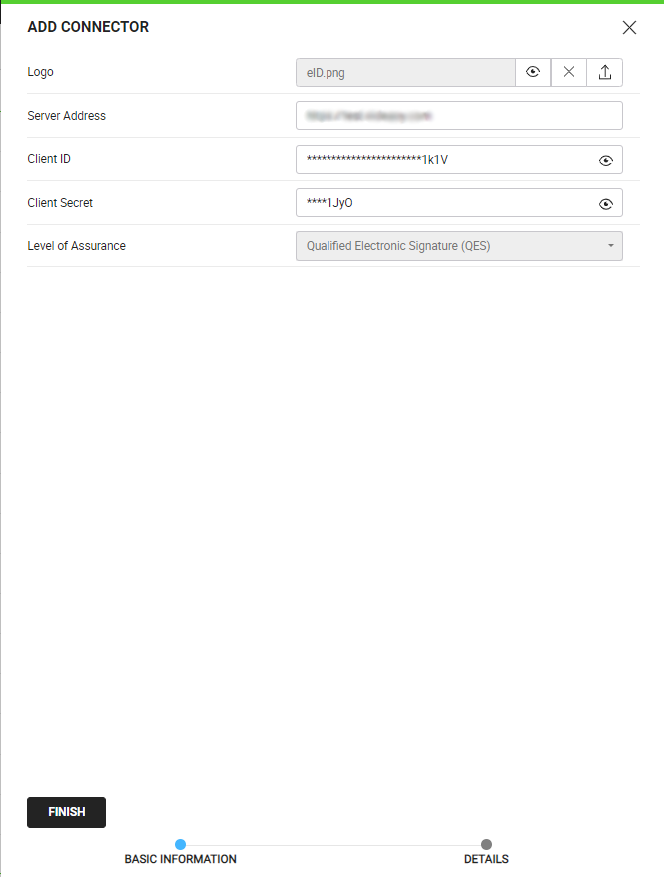
Configure a Connector in SigningHub Admin
To see in detail, how to create an eID Easy Connector in SigningHub, click here.
Make the following configurations to a connector in SigningHub Admin:
- In the "Basic Information" section, choose "eID Easy" as the "Provider".
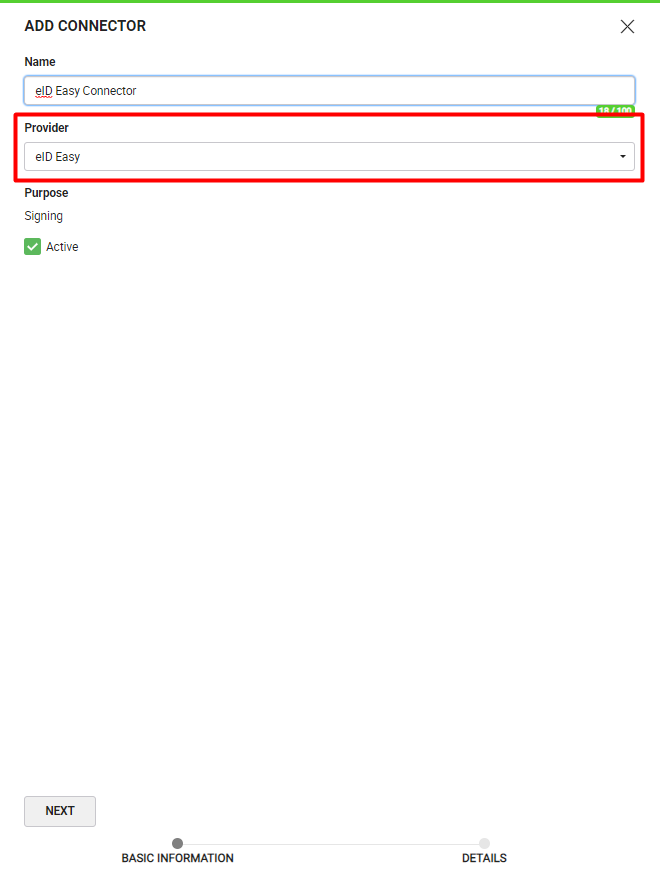
- In the "Details" section, fill in the required fields.
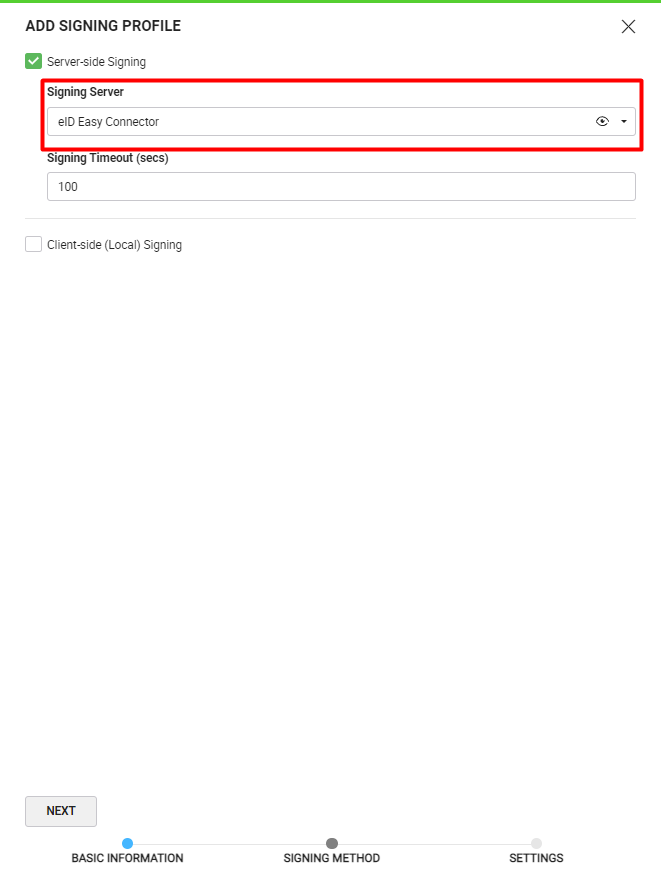
Configure a Signing Profile in SigningHub Admin
To see in detail, how to create a signing profile in SigningHub, click here.
Make the following configurations to a signing profile in SigningHub Admin:
- Select the eID Easy Connector created earlier, in the highlighted field below:
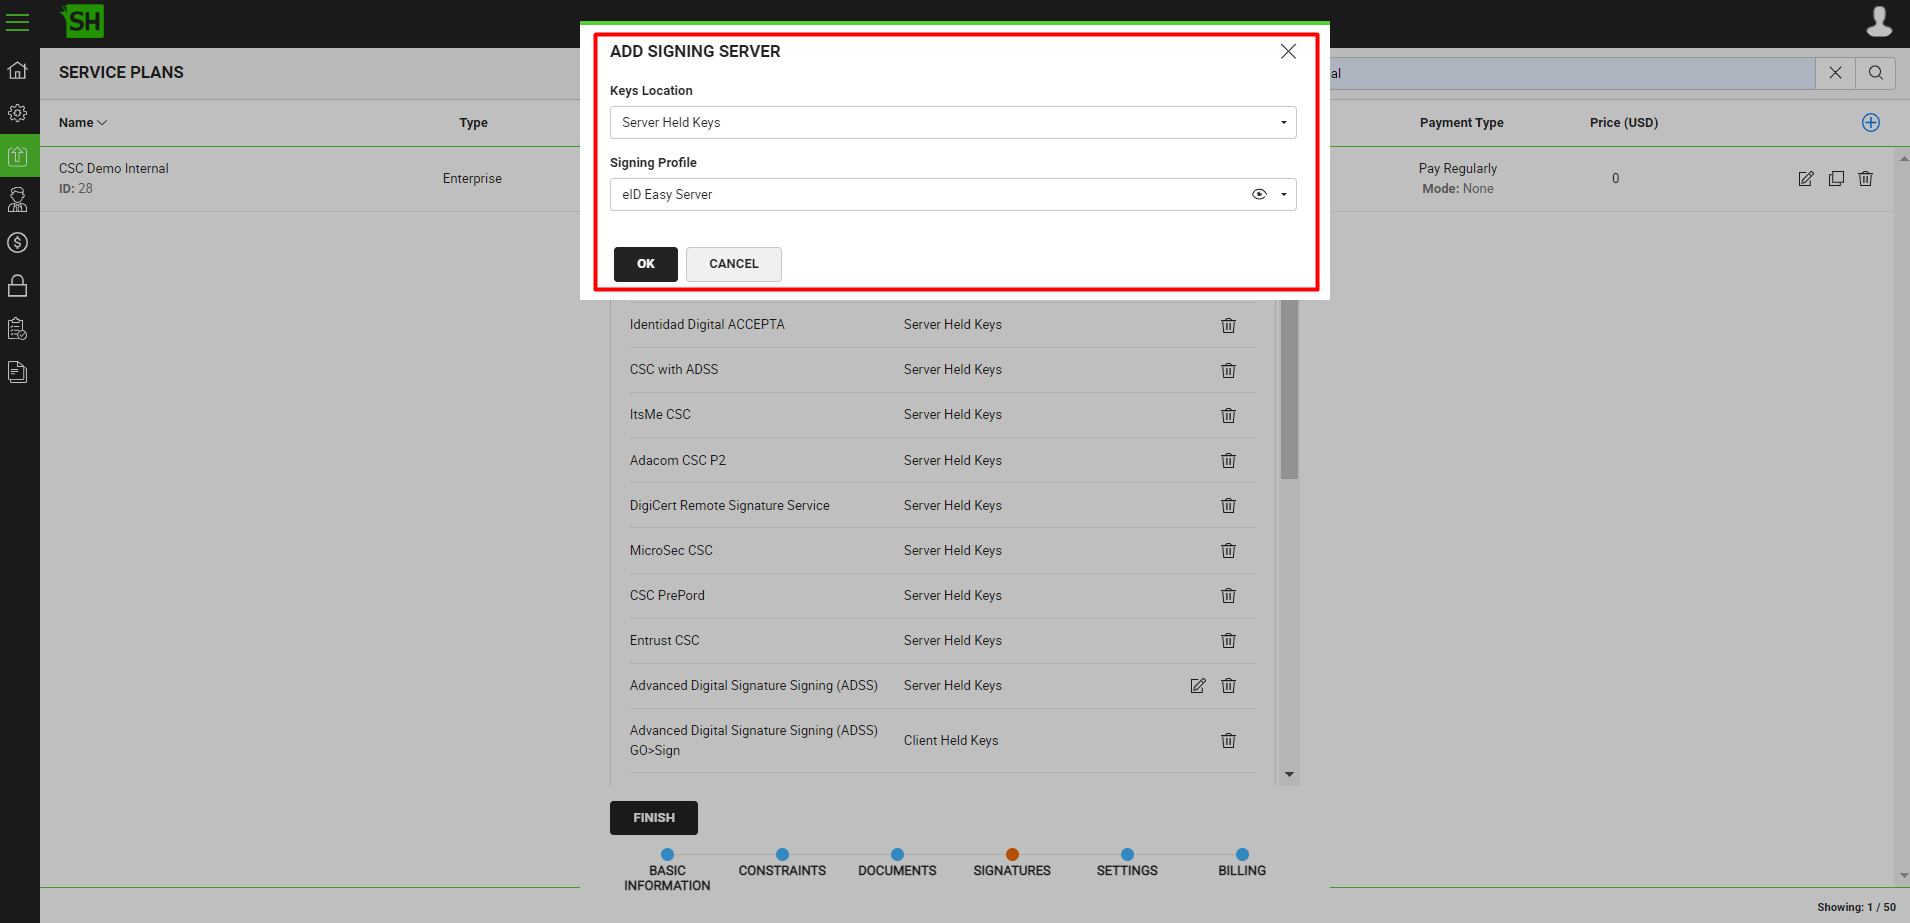
Add Signing Profile to a Service Plan in SigningHub Admin
To see in detail, how to create a service plan in SigningHub, click here.
Make the following configurations to a service plan in SigningHub Admin:
- In the "Signature" section of the service plan, select and add the earlier configured signing profile, as shown below:
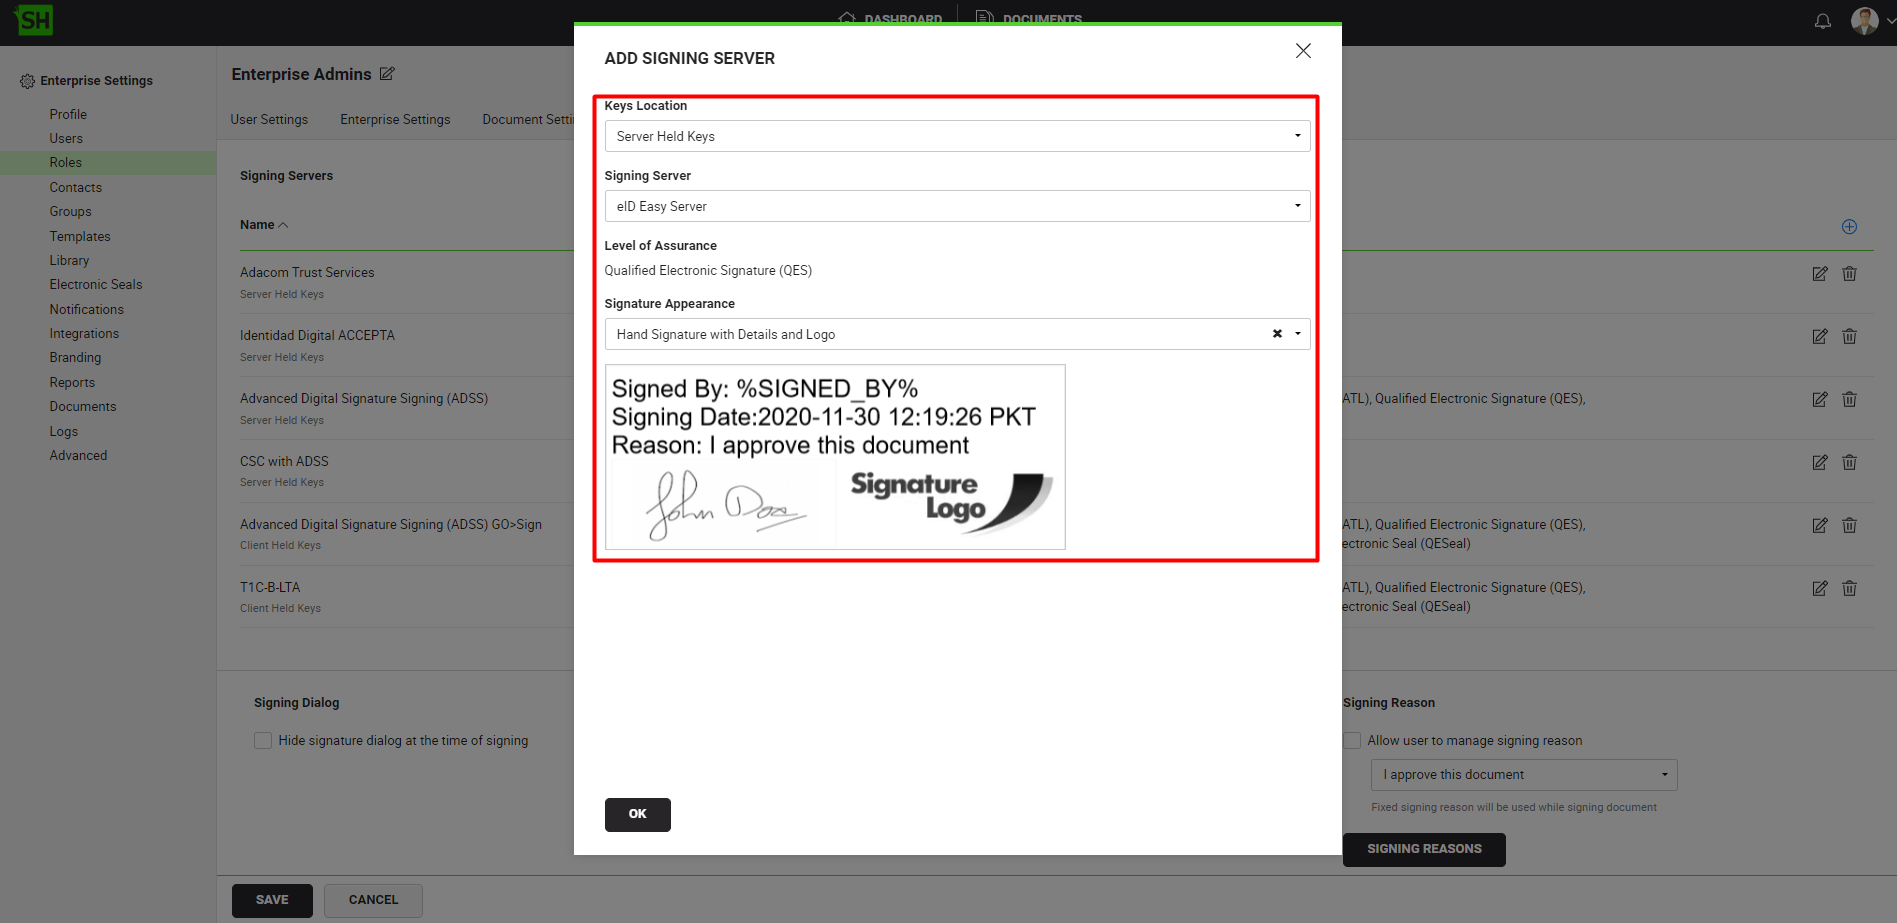
Add Signing Server to a User Role in SigningHub Web
To see in detail, how to manage enterprise user roles in SigningHub, click here.
Make the following configurations to a user role in SigningHub Web:
- Against your user role, in the "Signature Settings" tab, add the signing server.
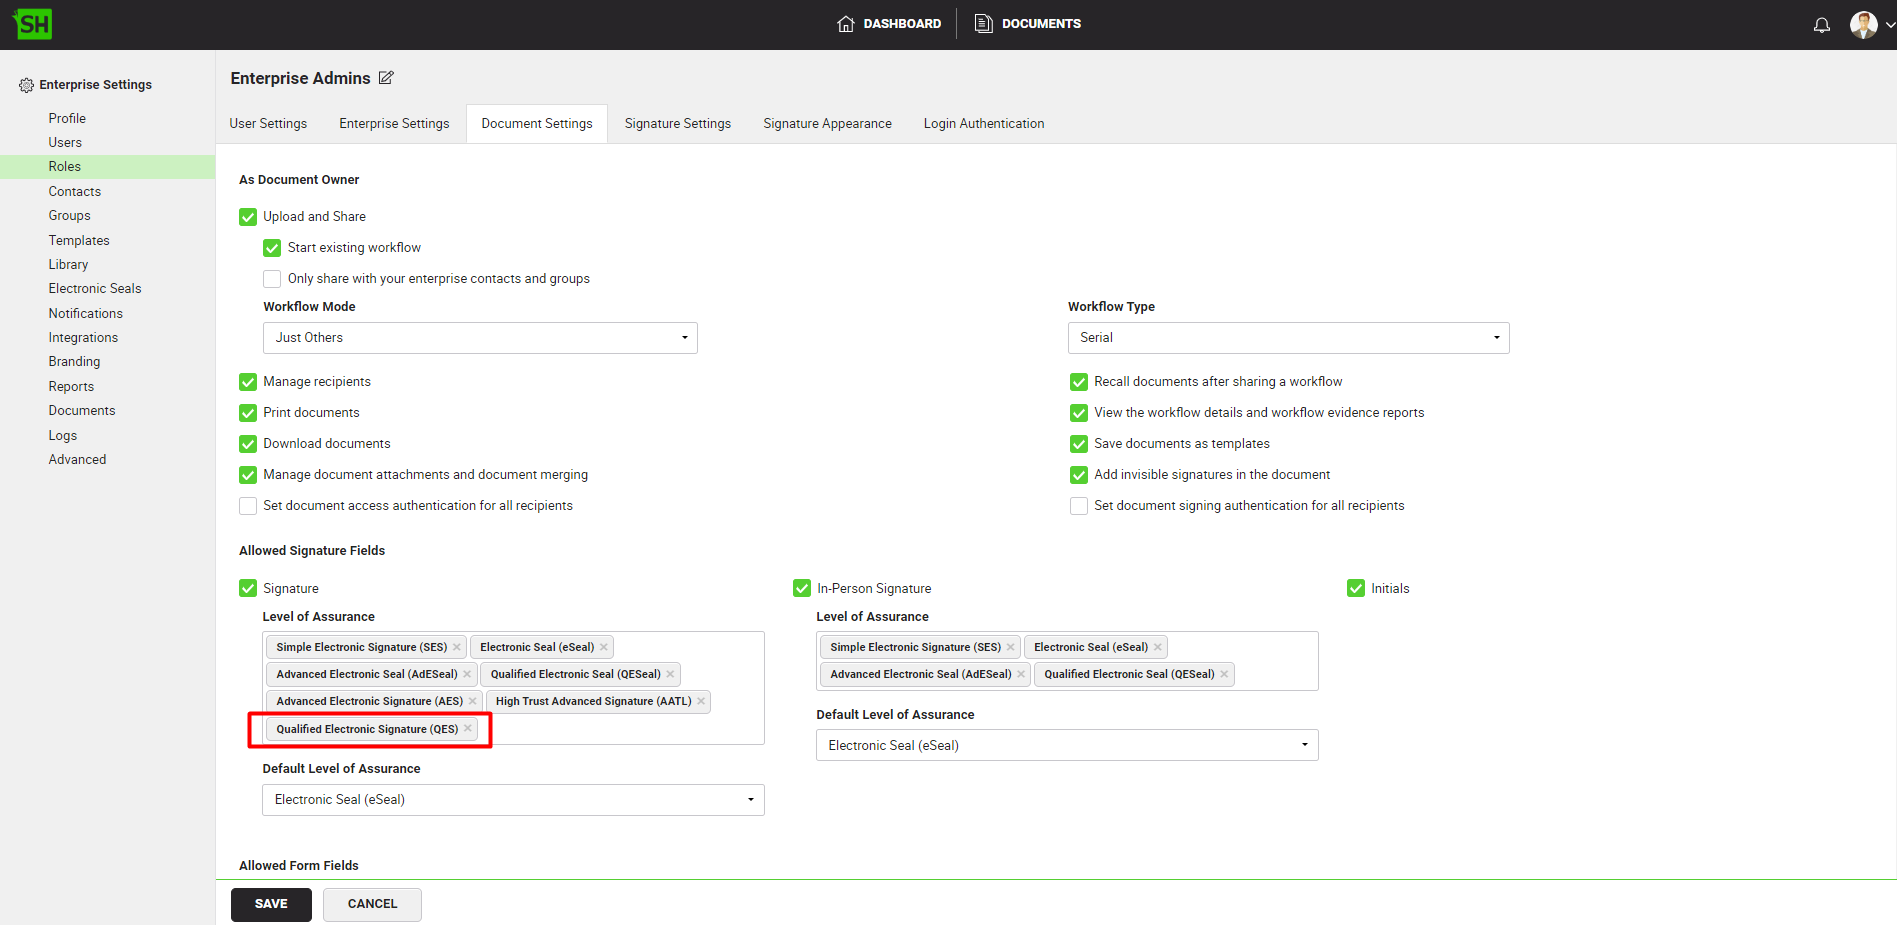
Allow the QES Level of Assurance against a User Role in SigningHub Web
To see in detail, how to manage enterprise user roles in SigningHub, click here.
Make the following configurations to a user role in SigningHub Web:
- Against your user role, in the "Document Settings" tab, add the Qualified Electronic Signature (QES) level of assurance.
To perform eID Easy signatures, follow the below-mentioned steps:
- From the document listing, open a the document having a Qualified Electronic Signature field that you want to sign.
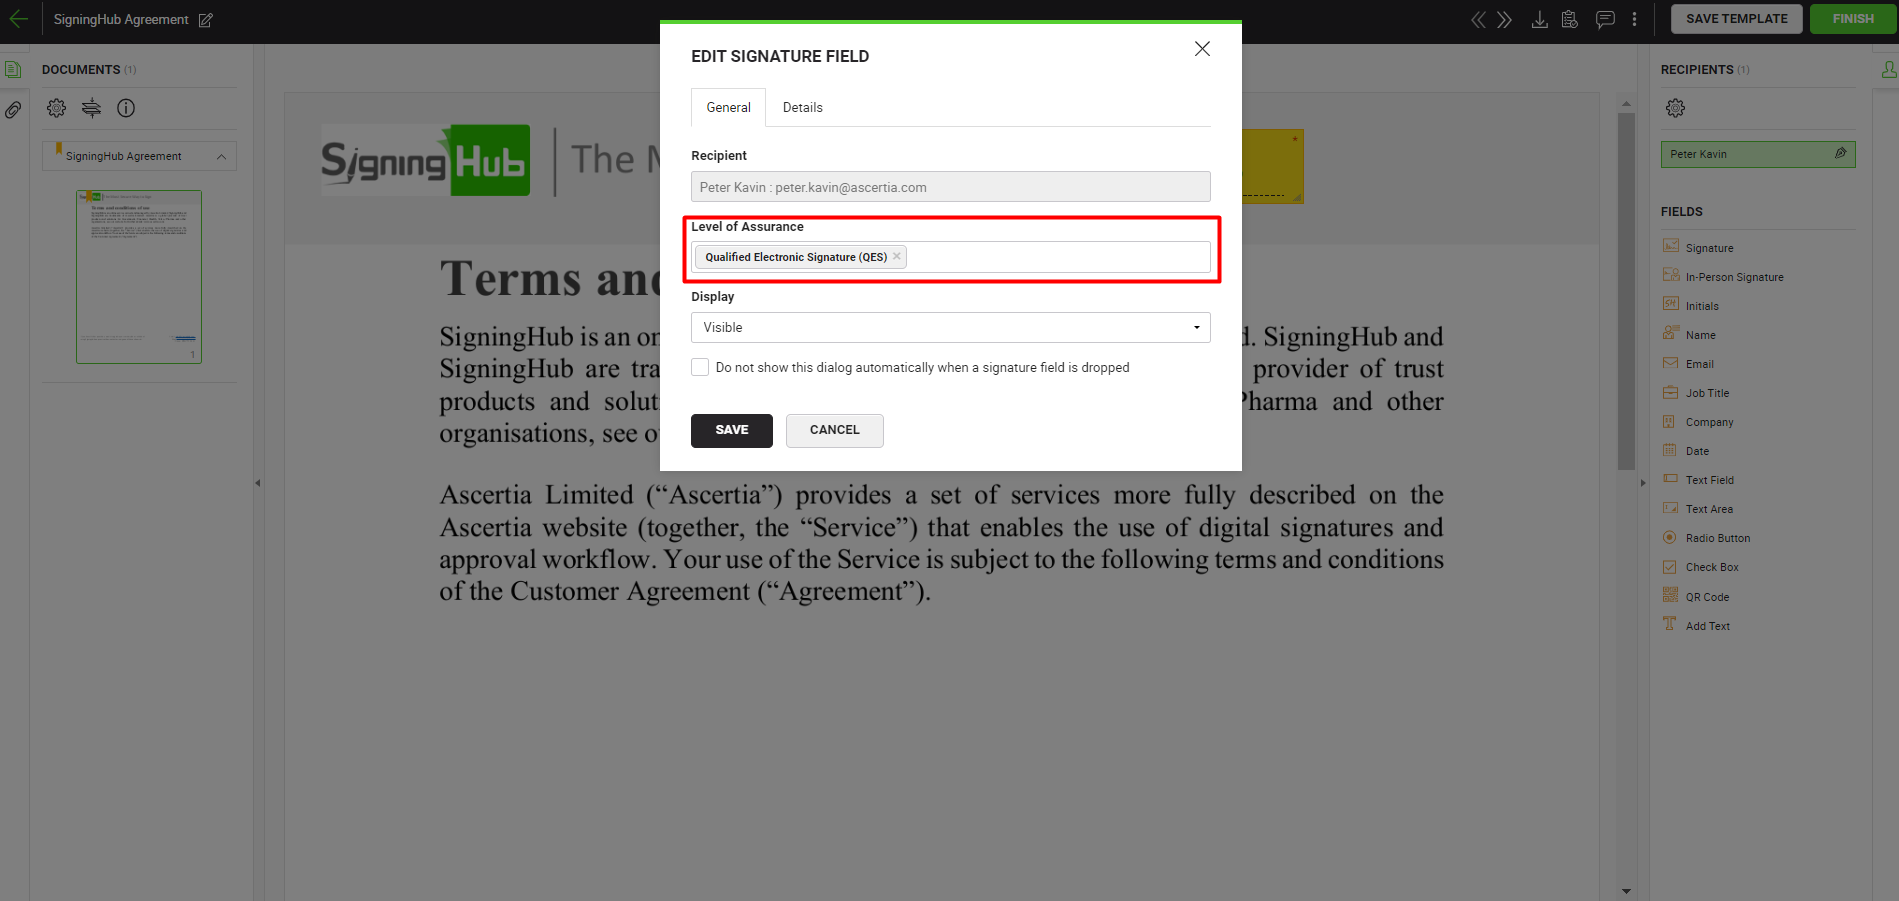
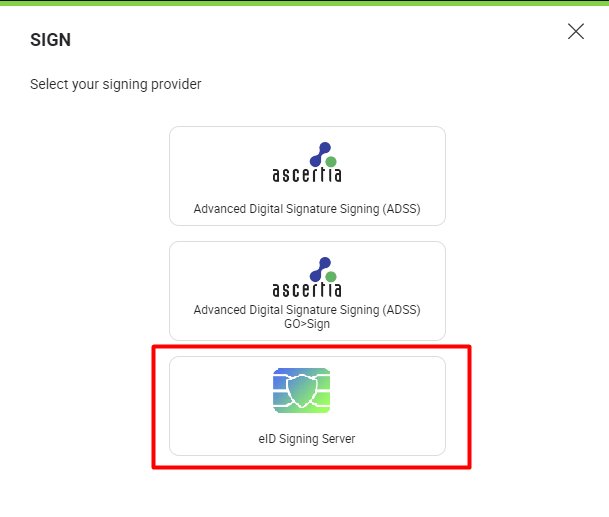
- Click on the signature field, select the eID Easy Signing Server.
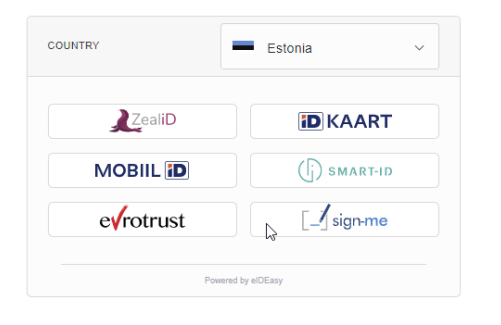
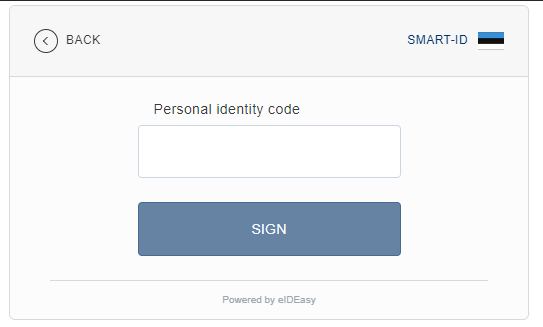
- Upon clicking the "SIGN NOW" button, the eId widget will appear. It will show signing methods based on the country configured in the user's personal settings. Select a signing method to proceed with.
- Based on the selected signing method, complete the authorization process. Once the authorization is complete the document will be signed.
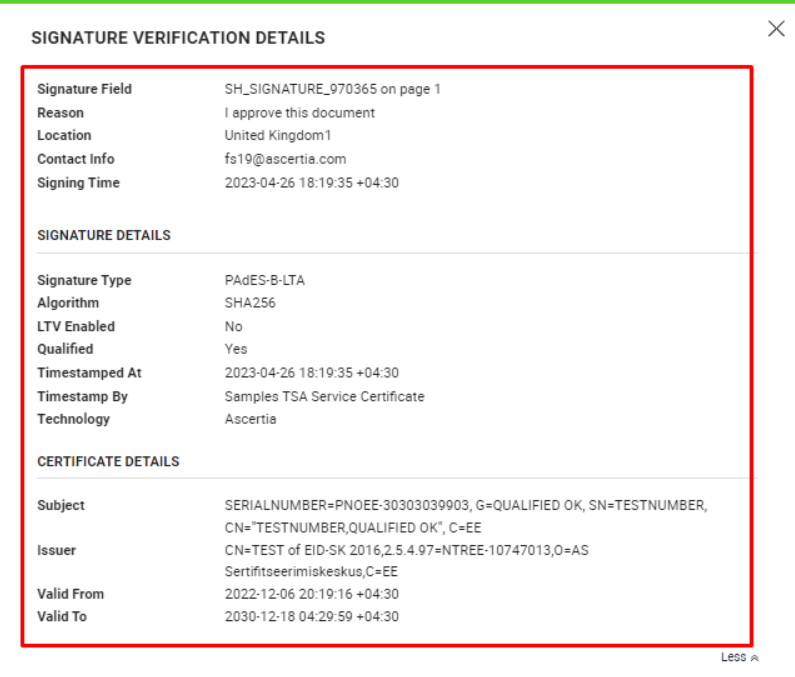
- After the authorization is complete, the eID Easy API uses a webhook to send the signing certificate details to SigningHub that is used to fetch the "Signed by" information. The webhook URL, "[Web_URL]/eid-easy/certificate-detail/webhook", is configured against the "Custom CAdES digest webhook" property in the eID Easy.
- After signing the document, click the three dots menu
 and select "Signature Verification".
|
|
|

See Also
- XML Signing
- Word Document Signing
- Electronic Seal Signing
- CSC Signing
- Remote Authorisation Signing (RAS)
- Signing using Policy OID
- Local Side Signing using T1C Server
- Local Side Signing using ADSS Server
- Signing Based on National ID Validation
- Signing via Signature Pad
- Signing Behaviour w.r.t Signature Appearance
- OTP Authentication