Remote Authorisation Signing (RAS)
- Introduction
- How it works?
- Configure a SAM Profile in ADSS
- Configure a RAS Profile in ADSS
- Configure a Signing Profile in ADSS
- Configure a Certification Profile in ADSS
- Configure a Connector in SigningHub Admin
- Configure a Signing Profile in SigningHub Admin
- Configure a Certification Profile in SigningHub Admin
- Configure a Verification Profile in SigningHub Admin
- Add Signing Profile to a Service Plan in SigningHub Admin
- Add Verification Profile to a Service Plan in SigningHub Admin
- Add Signing Server to a User Role in SigningHub Web
- Allow the Configured Level of Assurance against a User Role in SigningHub Web
- RAS Signing via SigningHub Web
SigningHub provides Remote Authorised Signing (RAS) feature, to allow you to authorise a remote signature (done on server) using your registered mobile device(s), running any of the SigningHub native apps (i.e. Android or iOS). The device will have its user authentication built-in (touchID or PIN), so in a way you can also get two-factor authentication. The feature is available on those Android devices that support fingerprints verification, while in case of iOS devices, it can work with both touch ID or passcode verification. For RAS Signing configurations are required in the ADSS Server, SigningHub Admin, and SigningHub Web. Remote Authorisation Signing (RAS) supports the "Advanced Electronic Signature (AES)", "Qualified Electronic Signature (QES)", and "High Trust Advanced Signature (AATL)" levels of assurance. The availability of Remote Authorised Signing (RAS) feature is subject to your subscribed service plan and assigned role.
- Configure a SAM profile, in ADSS.
- Configure a RAS profile, in ADSS.
- Configure a signing profile, in ADSS.
- Configure a certification profile, in ADSS.
- Configure a connector, in SigningHub Admin.
- Configure a signing profile, in SigningHub Admin.
- Configure a certification profile, in SigningHub Admin.
- Configure a verification profile, in SigningHub Admin.
- Add the signing profile to a service plan, in SigningHub Admin.
- Add the verification profile to a service plan, in SigningHub Admin.
- Add Signing Server to your user role, in SigningHub Web.
- Allow the configured level of assurance against the user role, in SigningHub Web.
- Sign the document via SigningHub Web.
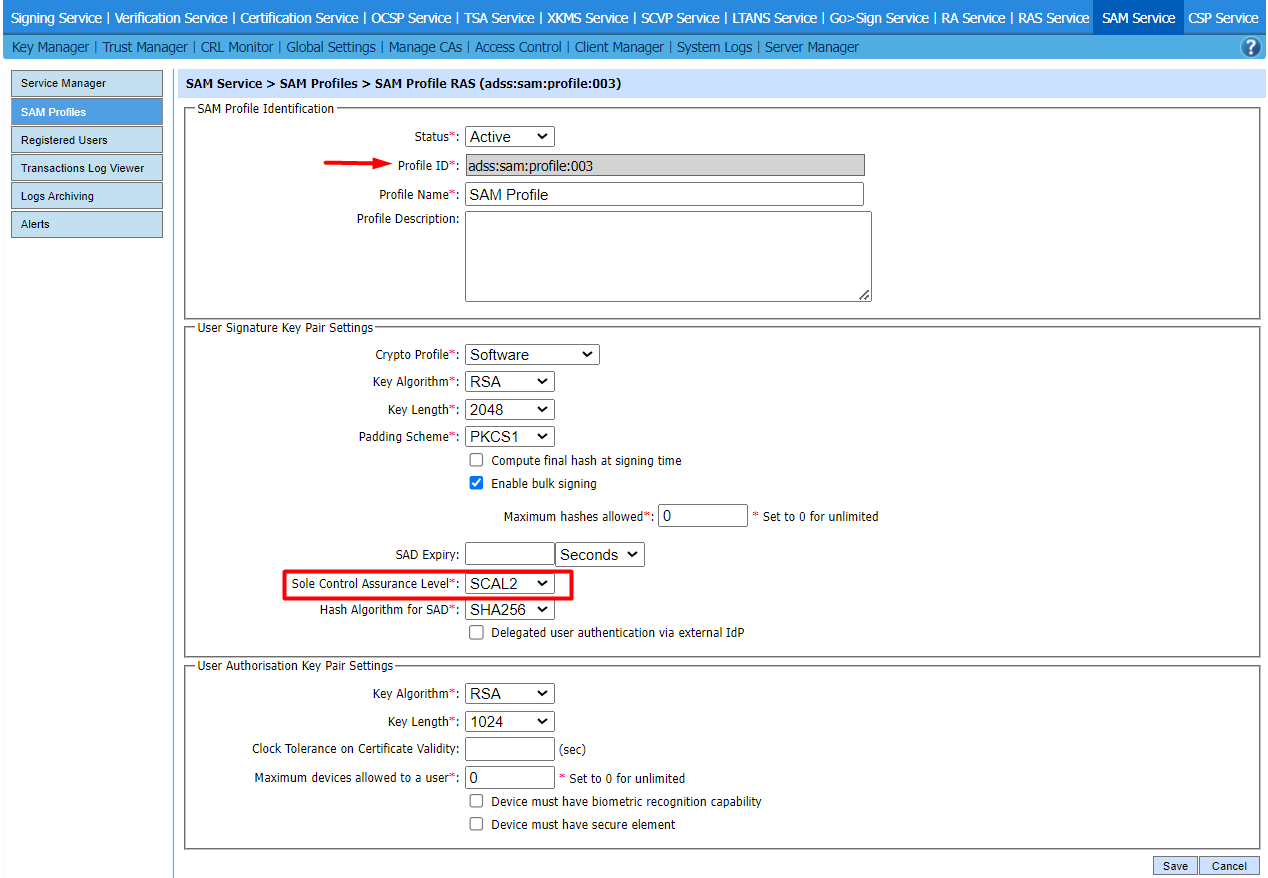
Configure a SAM Profile in ADSS
For remote signing a SAM profile is configured in ADSS SAM Service.
To configure a SAM profile for remote signing, follow these steps:
- Copy the SAM Profile ID because it would be used in the upcoming steps.
- In the "User Signature Key Pair Settings" section, select "SCAL2" option against the "Sole Control Assurance Level". Then click the "Save" button.
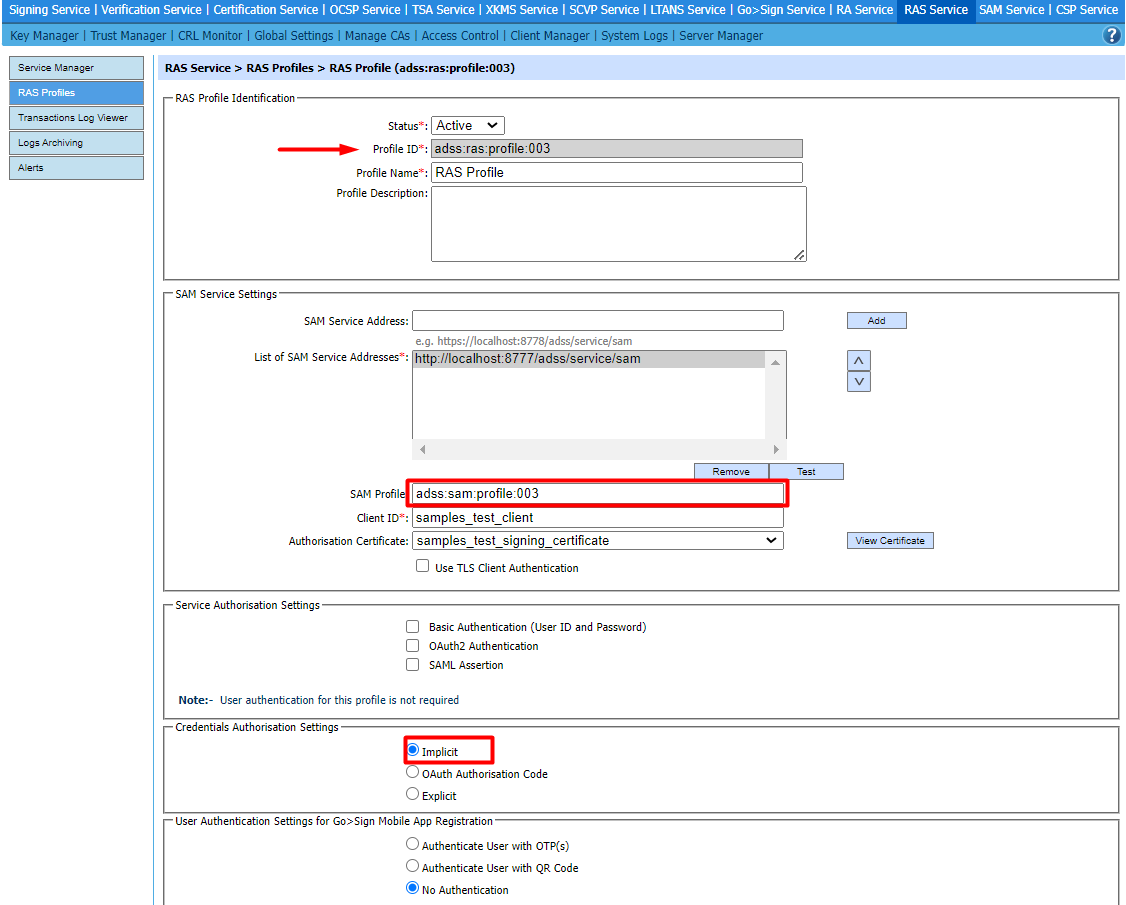
Configure a RAS Profile in ADSS
For remote signing a RAS profile is configured in ADSS RAS Service.
To configure a RAS profile for remote signing, follow these steps:
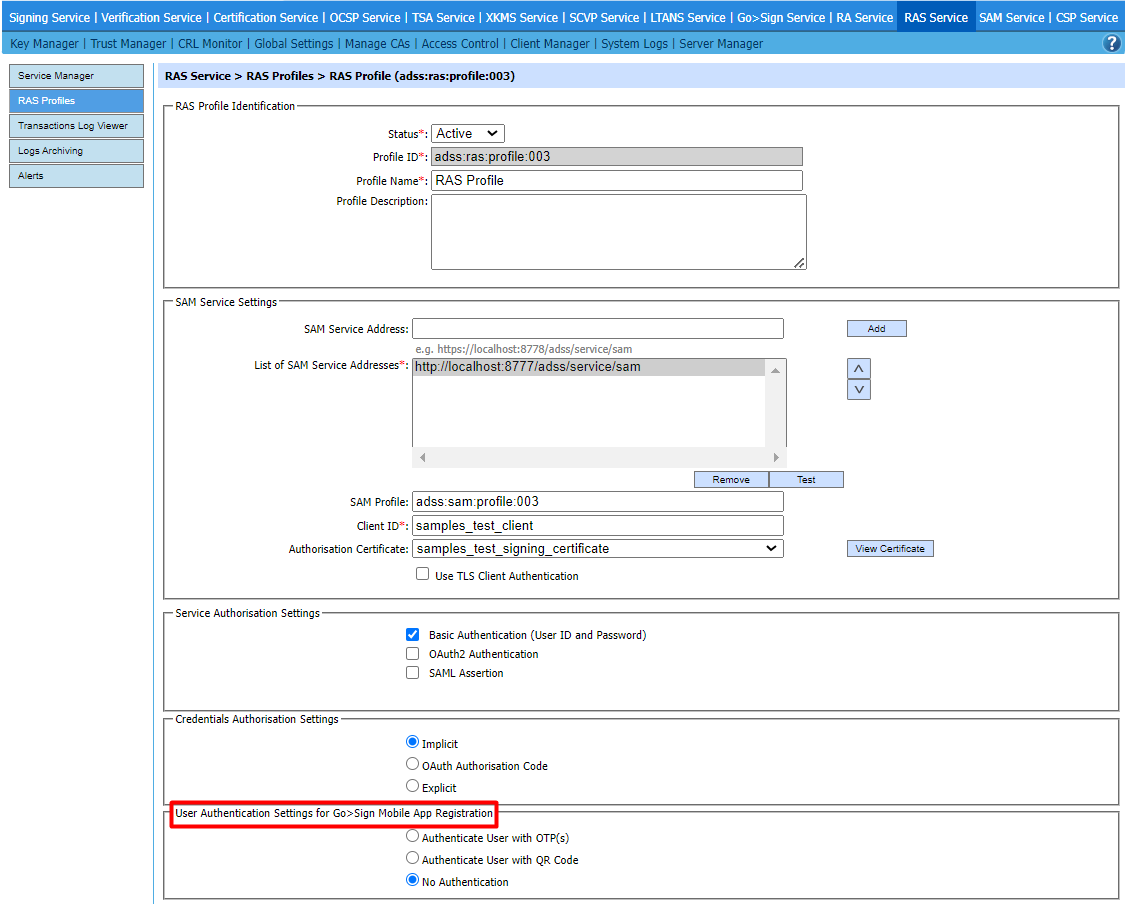
- Copy the RAS Profile ID because it would be used in the upcoming steps.
- In the "SAM Service Settings" section, enter the SAM Profile ID, copied earlier, and provide the required details.
- In the "Credentials Authorisation Settings" section, check the "Implicit" option. Then click the "Save" button.
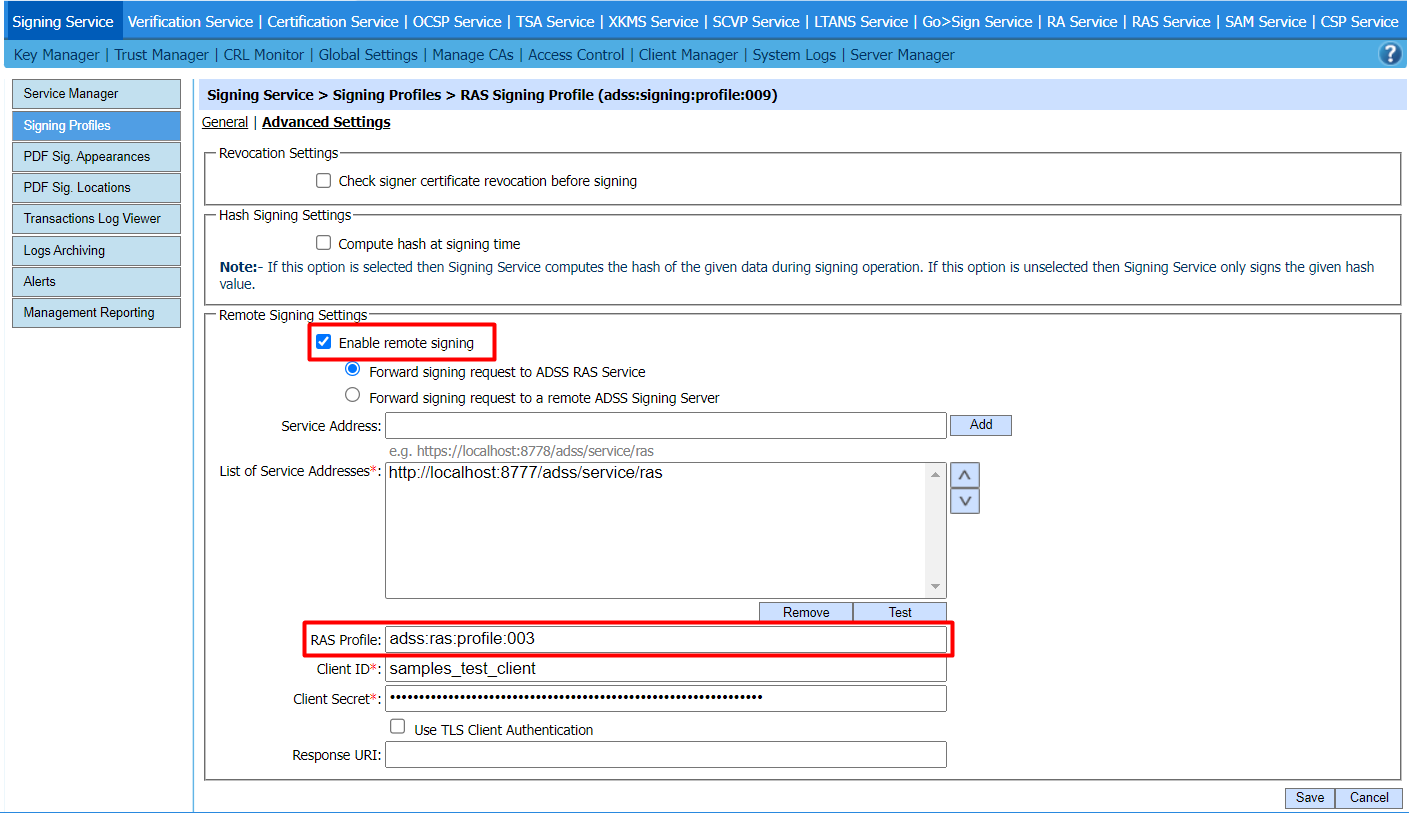
Configure a Signing Profile in ADSS
For remote signing a signing profile is configured in ADSS Signing Service.
To configure a signing profile for remote signing, follow these steps:
- Copy the Signing Profile ID because it would be used in the upcoming steps.
- In the "Select Signature Type" section, check "PKCS#1". Then click the "Next" button.

- In the "Advanced Settings" tab, check the "Enable remote signing" checkbox, enter the RAS Profile ID, copied earlier, and provide the required details. Then click the "Save" button.
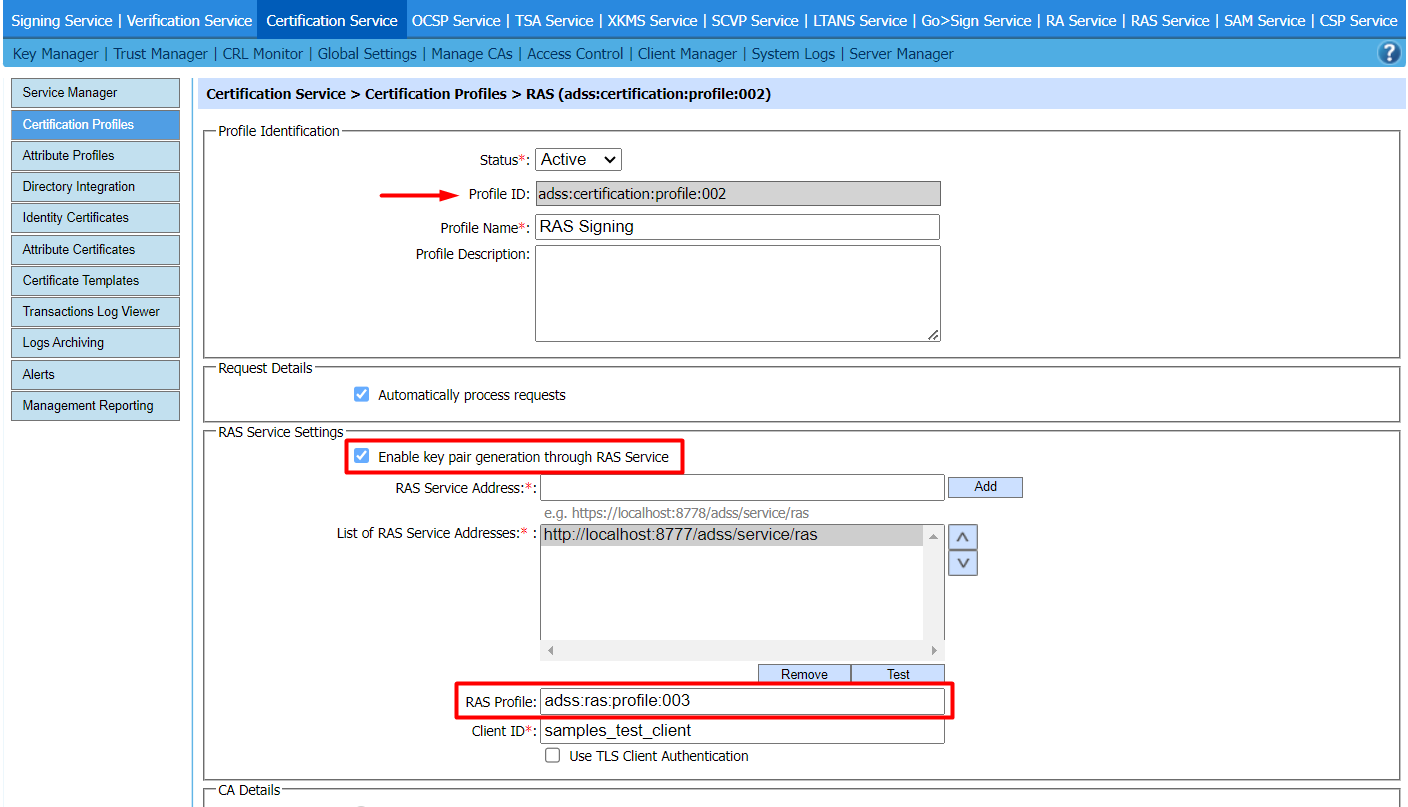
Configure a Certification Profile in ADSS
For remote signing a certification profile is configured in ADSS Certification Service.
To configure a certification profile for remote signing, follow these steps:
- Copy the Certification Profile ID because it would be used in the upcoming steps.
- In the "RAS Service Settings" section, check the "Enable key pair generation through RAS Service" checkbox, enter the RAS Profile ID, copied earlier, and provide the required details. Then click the "Save" button.
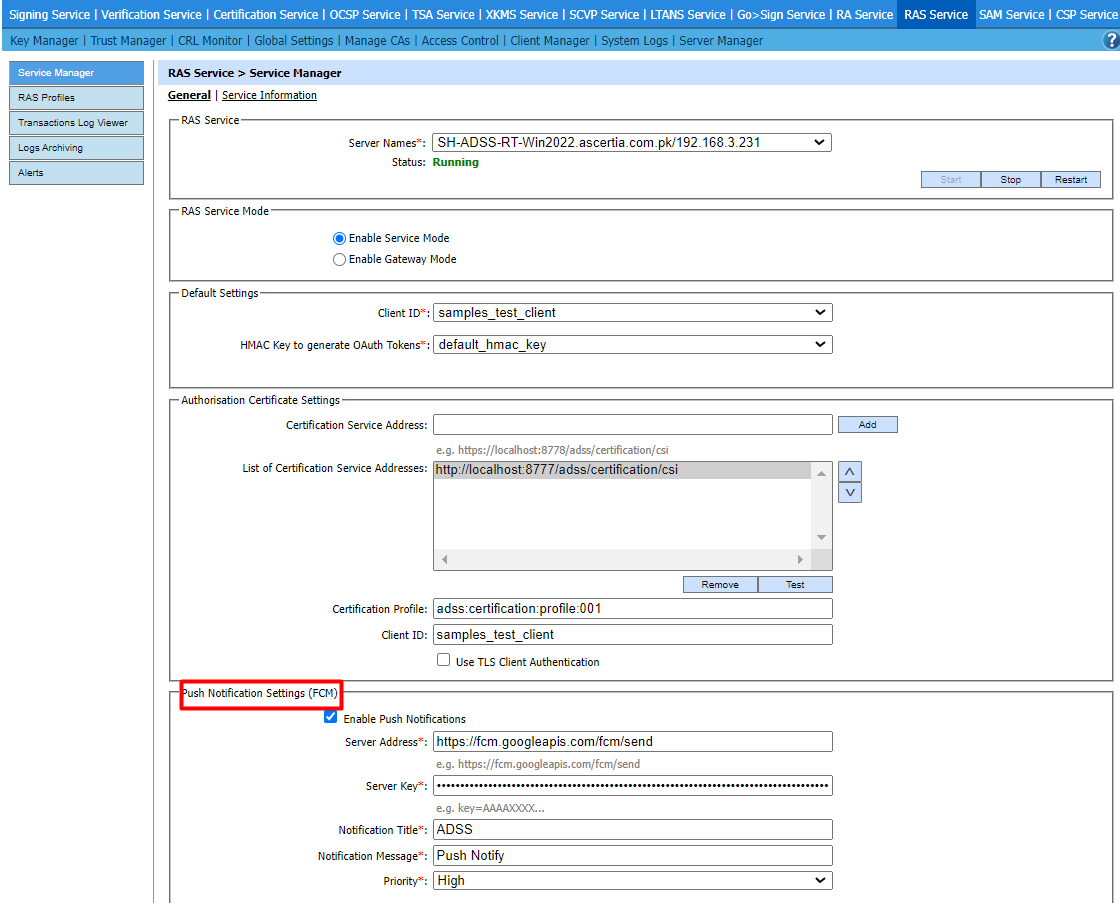
Configure a Connector in SigningHub Admin
To see in detail, how to create an ADSS Server Connector in SigningHub, click here.
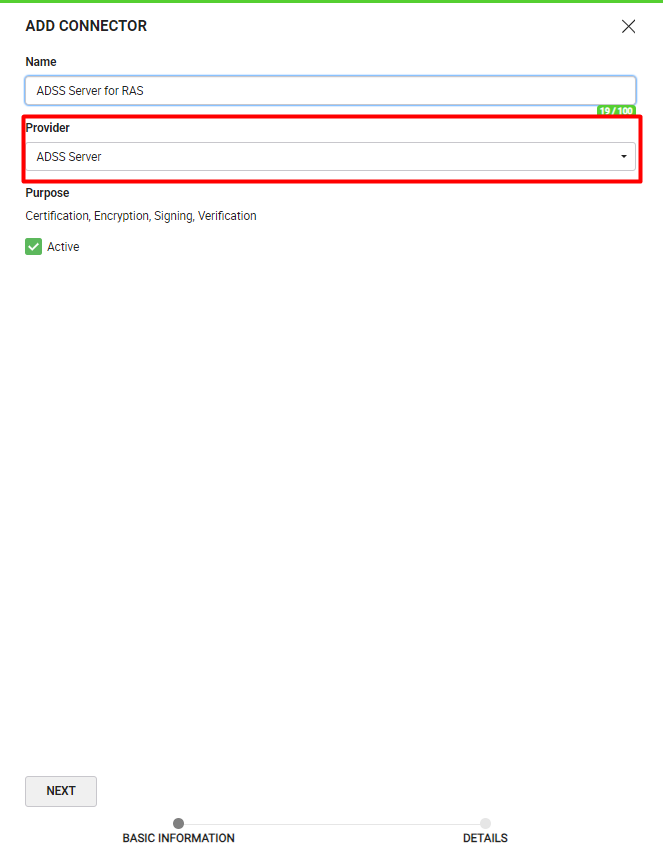
Make the following configurations to a connector in SigningHub Admin:
- In the "Basic Information" section, choose "ADSS Server" as the "Provider".
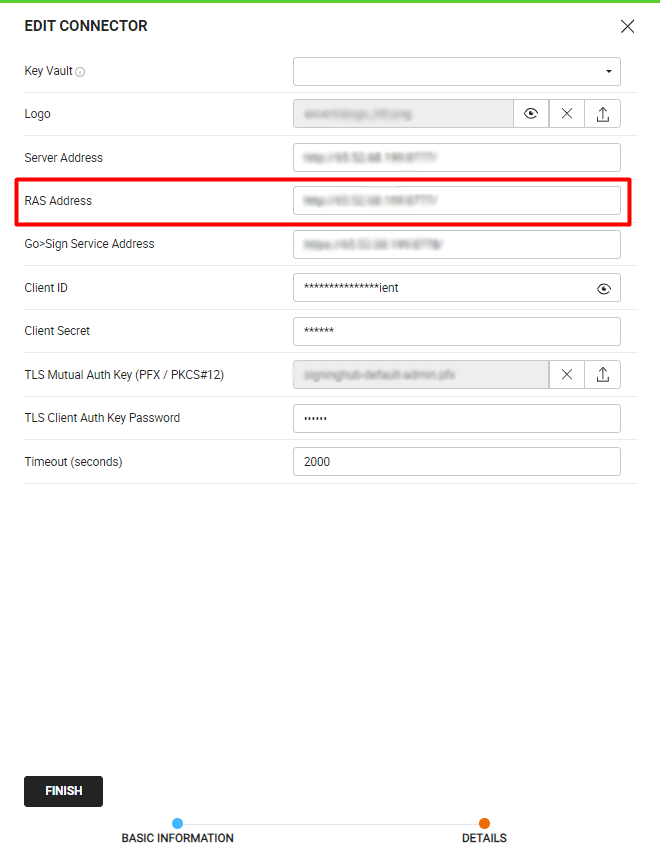
- In the "Details" section, provide the "RAS Address" and fill in the required fields.
Configure a Signing Profile in SigningHub Admin
To see in detail, how to create a signing profile in SigningHub, click here.
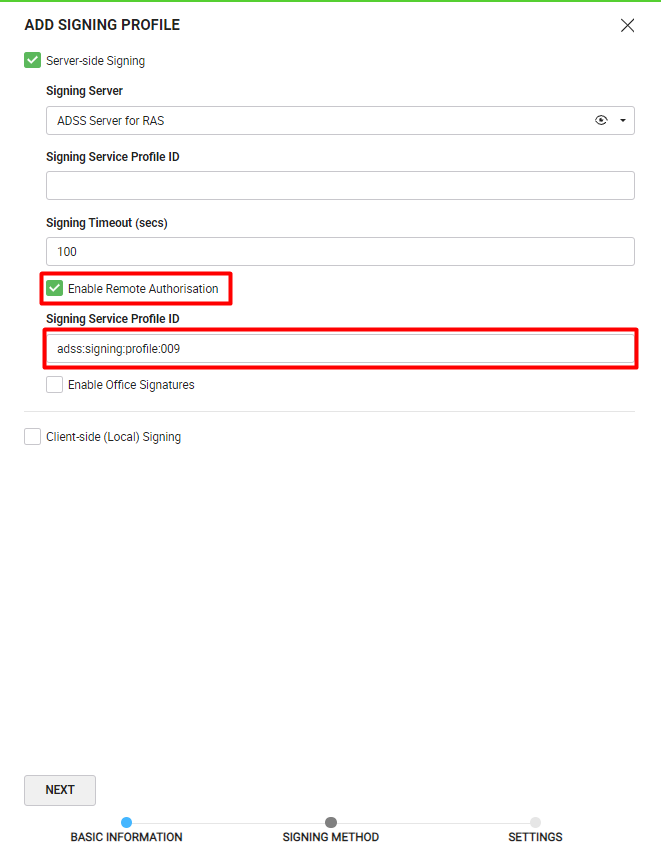
Make the following configurations to a signing profile in SigningHub Admin:
- In the "Signing Method" section, check the "Enable Remote Authorisation" checkbox.
- Enter the Signing Profile ID, copied earlier, in the highlighted field.
Configure a Certification Profile in SigningHub Admin
To see in detail, how to create a certification profile in SigningHub, click here.
Make the following configurations to a certification profile in SigningHub Admin:
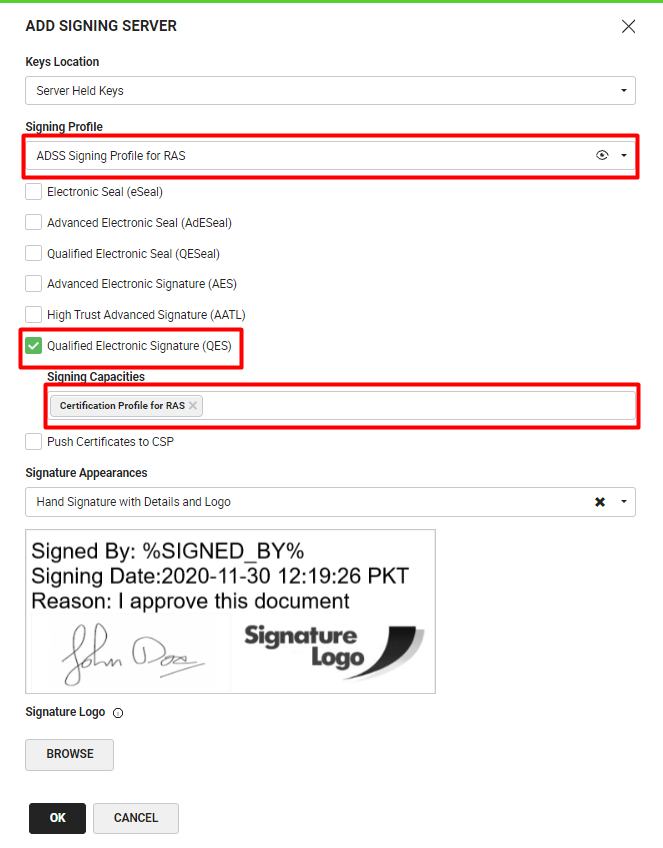
- Select "Qualified Electronic Signature (QES)" as the "Level of Assurance".
- Select "Remote Authorisation" as the "Key Protection Option".
- Select the configured ADSS connector for certification purposes as the "Certification Authority Server".
- Enter the Certification Profile ID, copied earlier, as the "Certification Service Profile ID". Then click "Save".

|
|
|

Configure a Verification Profile in SigningHub Admin
To see in detail, how to create a verification profile in SigningHub, click here.
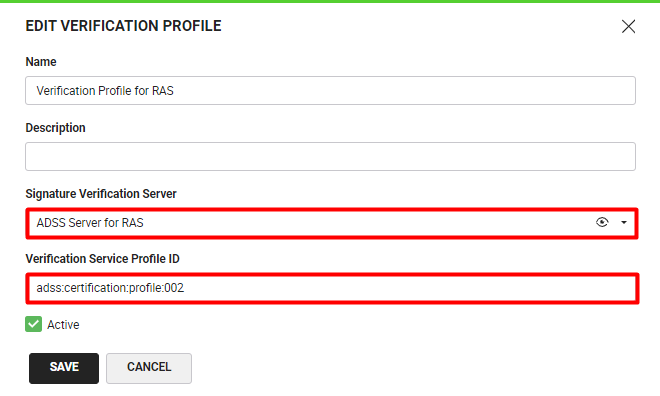
Make the following configurations to a verification profile in SigningHub Admin:
- Select the configured ADSS connector for verification purposes as the "Signature Verification Server".
- Enter the Certification Profile ID, copied earlier, as the "Verification Service Profile ID". Then click "Save".
Add Signing Profile to a Service Plan in SigningHub Admin
To see in detail, how to create a service plan in SigningHub, click here.
Make the following configurations to a service plan in SigningHub Admin:
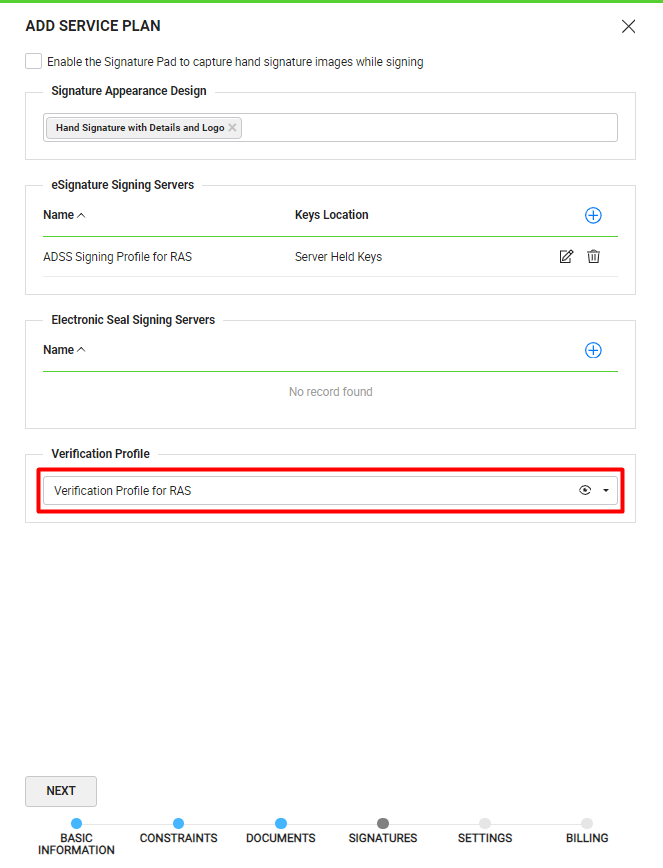
- Select and add the signing profile, configured earlier, in a service plan in SigningHub Admin.
- Select the level of assurance which was selected in the certification profile, configured earlier. (For the purposes of this use case, the level of assurance is Qualified Electronic Signature (QES)).
- In the "Signing Capacities" field, select the certification profile, configured earlier.
Add Verification Profile to a Service Plan in SigningHub Admin
To see in detail, how to create a service plan in SigningHub, click here.
Make the following configurations to a service plan in SigningHub Admin:
- Select and add the verification profile, configured earlier, in a service plan in SigningHub Admin, as shown below:
Add Signing Server to a User Role in SigningHub Web
To see in detail, how to manage enterprise user roles in SigningHub, click here.
Make the following configurations to a user role in SigningHub Web:
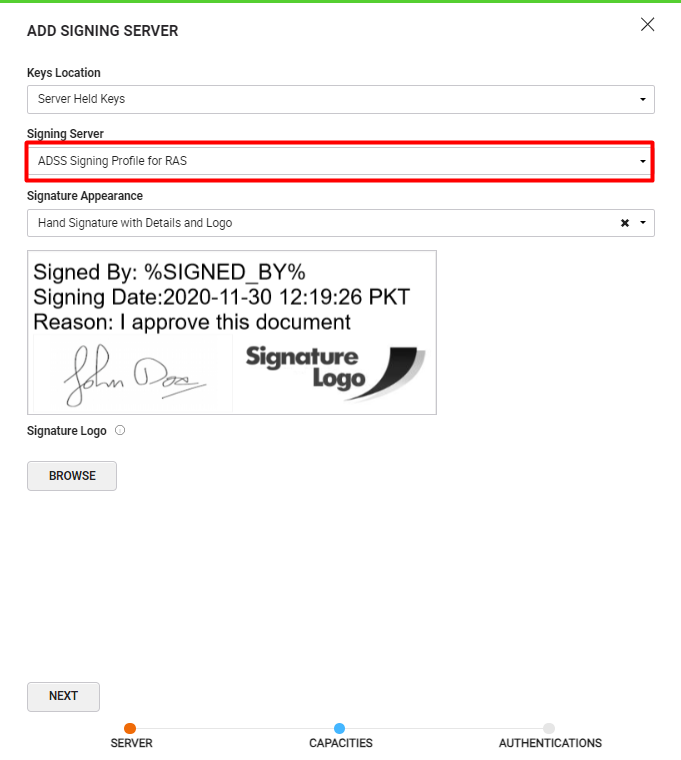
- Against your user role, in the "Signature Settings" tab, add the signing server, configured earlier.
- In the "Server" section, select the signing profile, configured earlier, as the "Signing Server".
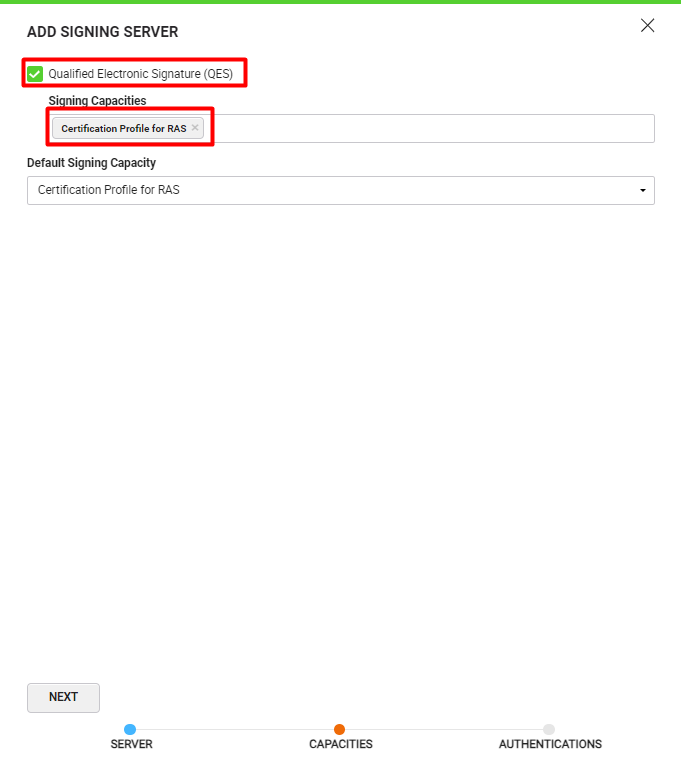
- In the "Capacities" section allow the levels of assurance along with their respective certifications profiles. (For the purposes of this use case, the level of assurance is Qualified Electronic Signature (QES)).
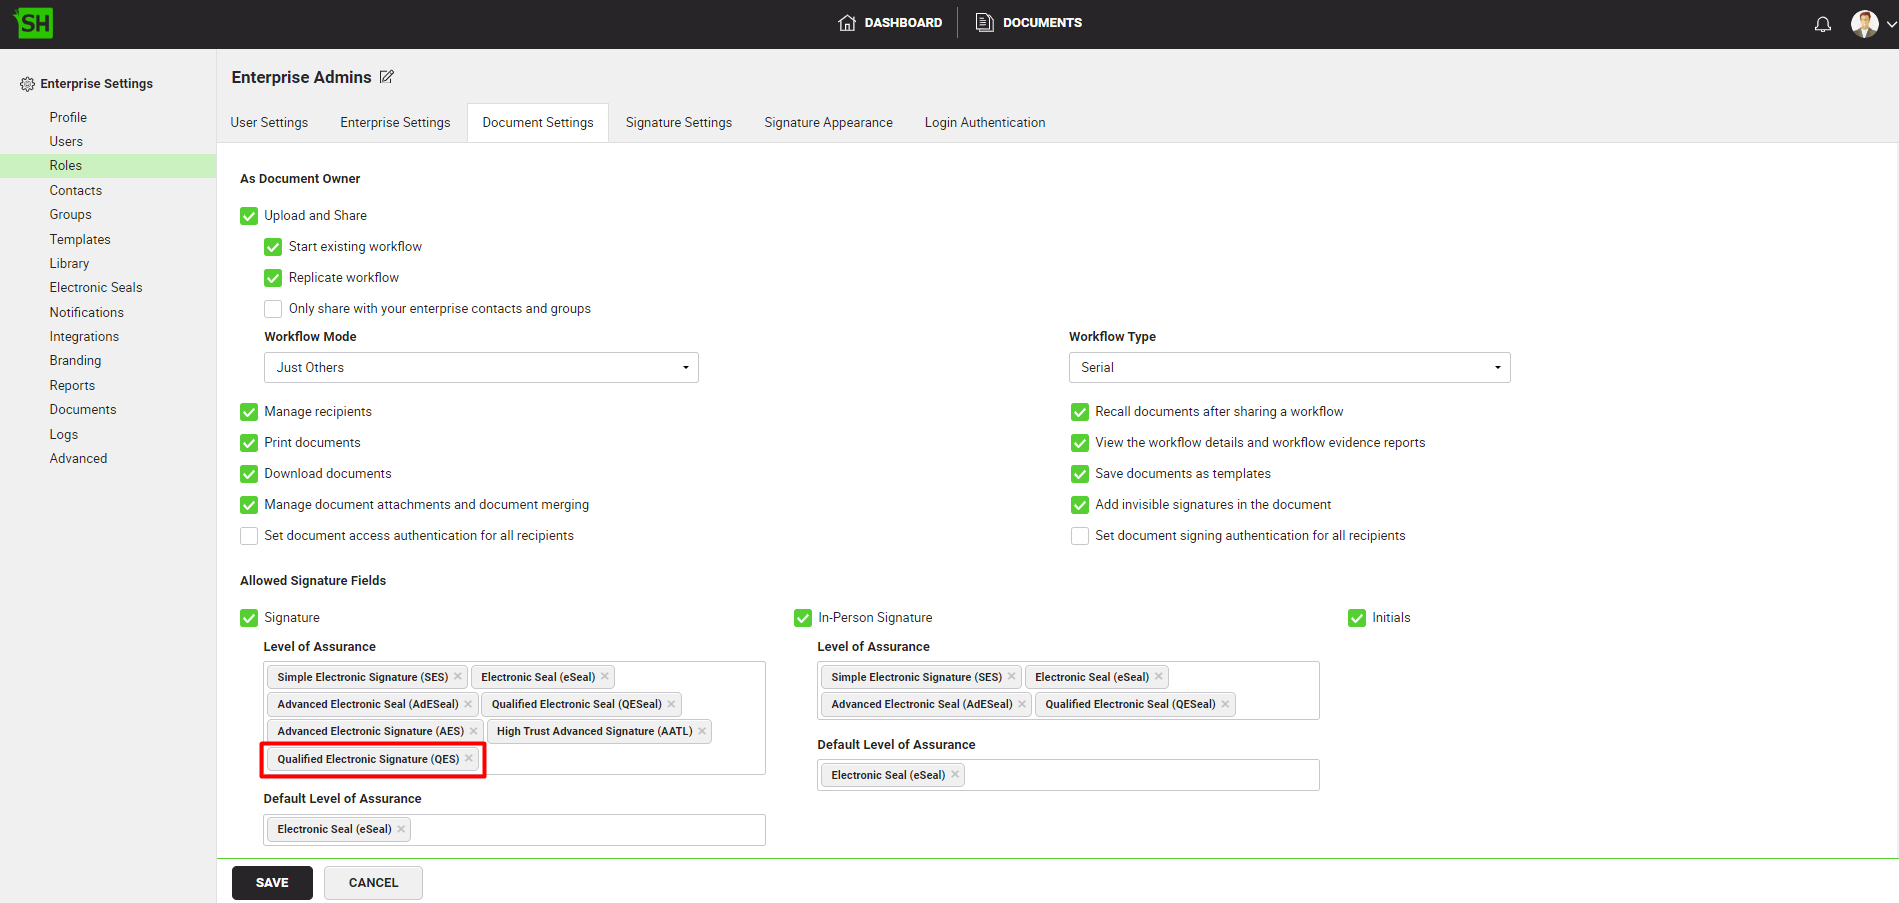
Allow the Configured Level of Assurance against a User Role in SigningHub Web
To see in detail, how to manage enterprise user roles in SigningHub, click here.
Make the following configurations to a user role in SigningHub Web:
- Against your user role, in the "Document Settings" tab, add the configured level of assurance. (For the purposes of this use case, the level of assurance is Qualified Electronic Signature (QES)).
RAS Signing via SigningHub Web
To sign the document via SigningHub Web, follow the below-mentioned steps:
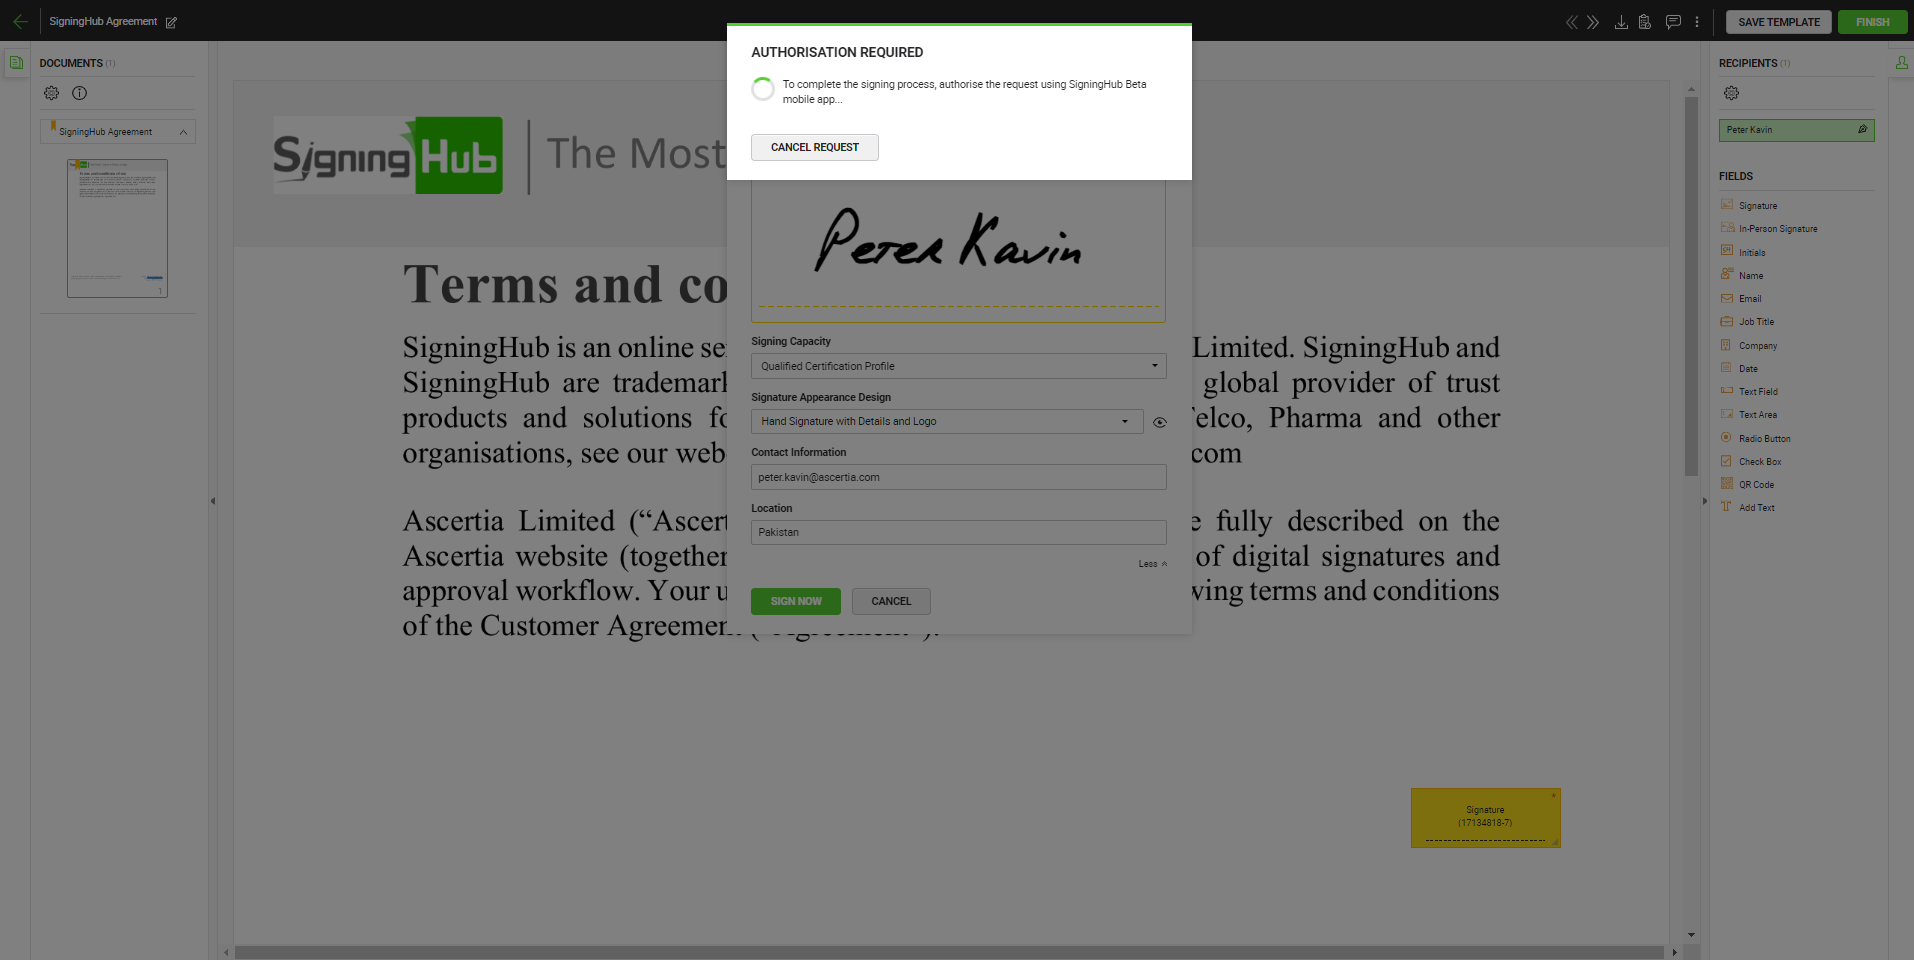
- Open SigningHub Web and open a document the document you want to sign. The level of assurance of the signature field must be the same as configured earlier. (For the purposes of this use case, the level of assurance is Qualified Electronic Signature (QES)).
- Click on the "Signature" field, select the "Signing Capacity", configured earlier, and then click on the "Sign Now" button. An authentication request will be sent to your registered mobile device for remote authorisation. In case you want to withdraw the remote authorisation request, click on the "Cancel Request" button.
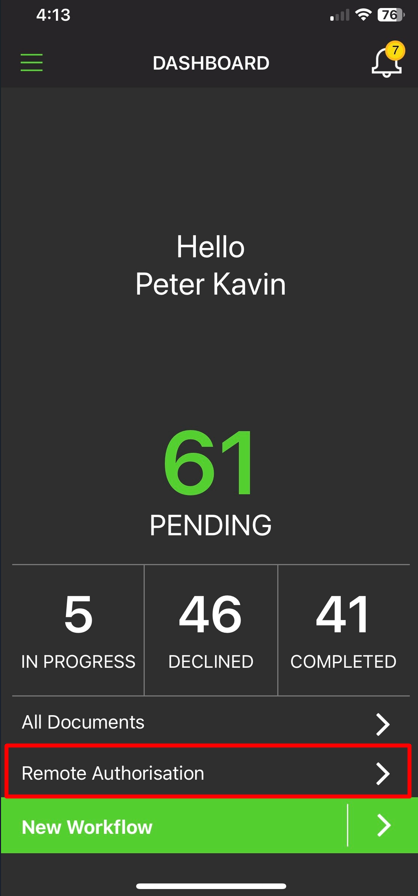
- Run SigningHub app (Android or iOS) on your mobile device and log in using the credentials which you have used on SigningHub Web. Click on "Remote Authorisation" to view the authorisation requests.
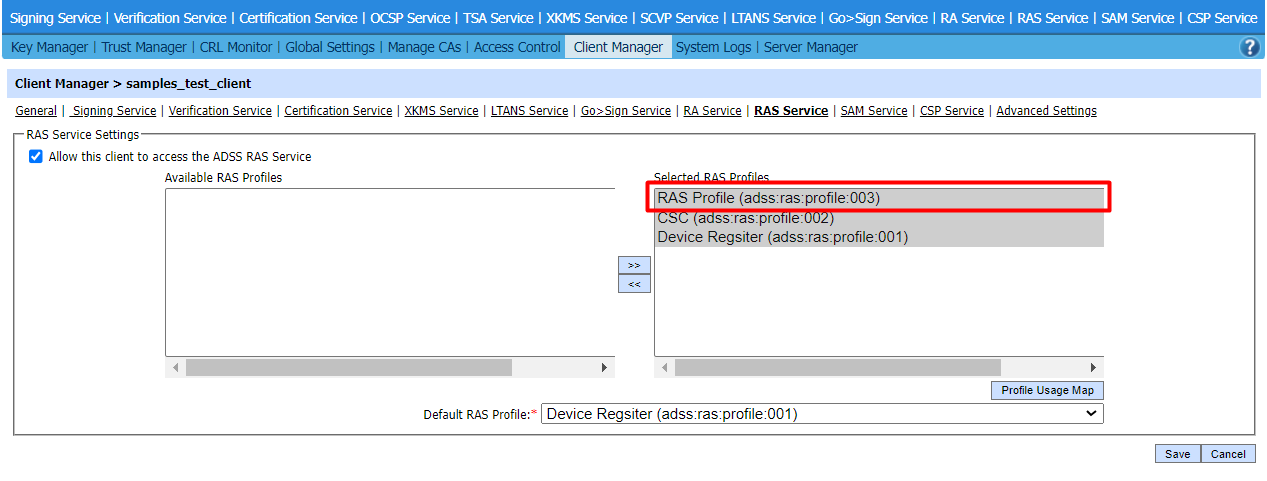
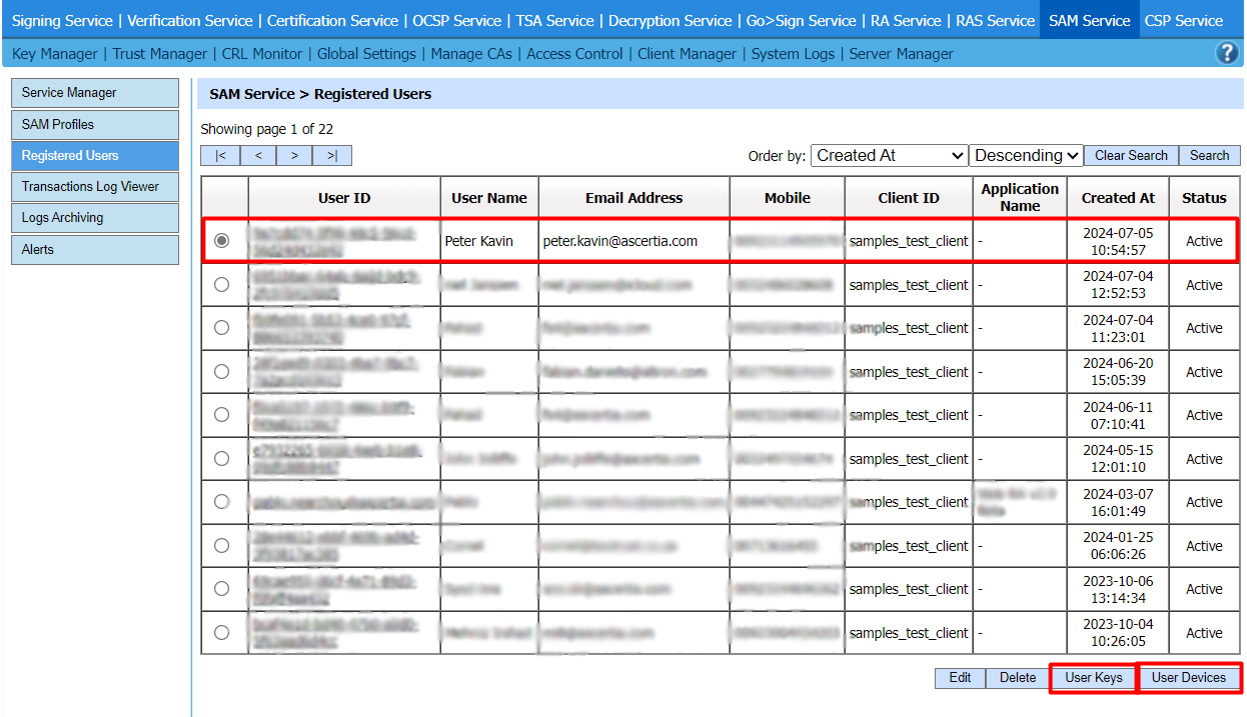
- If your device is not authorised for RAS Signing, follow the below-mentioned configurations for device registration:
- To select the configured RAS profile against a client, in ADSS Client Manager:
- In the "RAS Service Settings" section against a client, select the configured RAS profile.
- Log into the SigningHub app using the credentials against which you want to register the device. Click on "Remote Authorisation" and your device will be registered after biometric or PIN verification
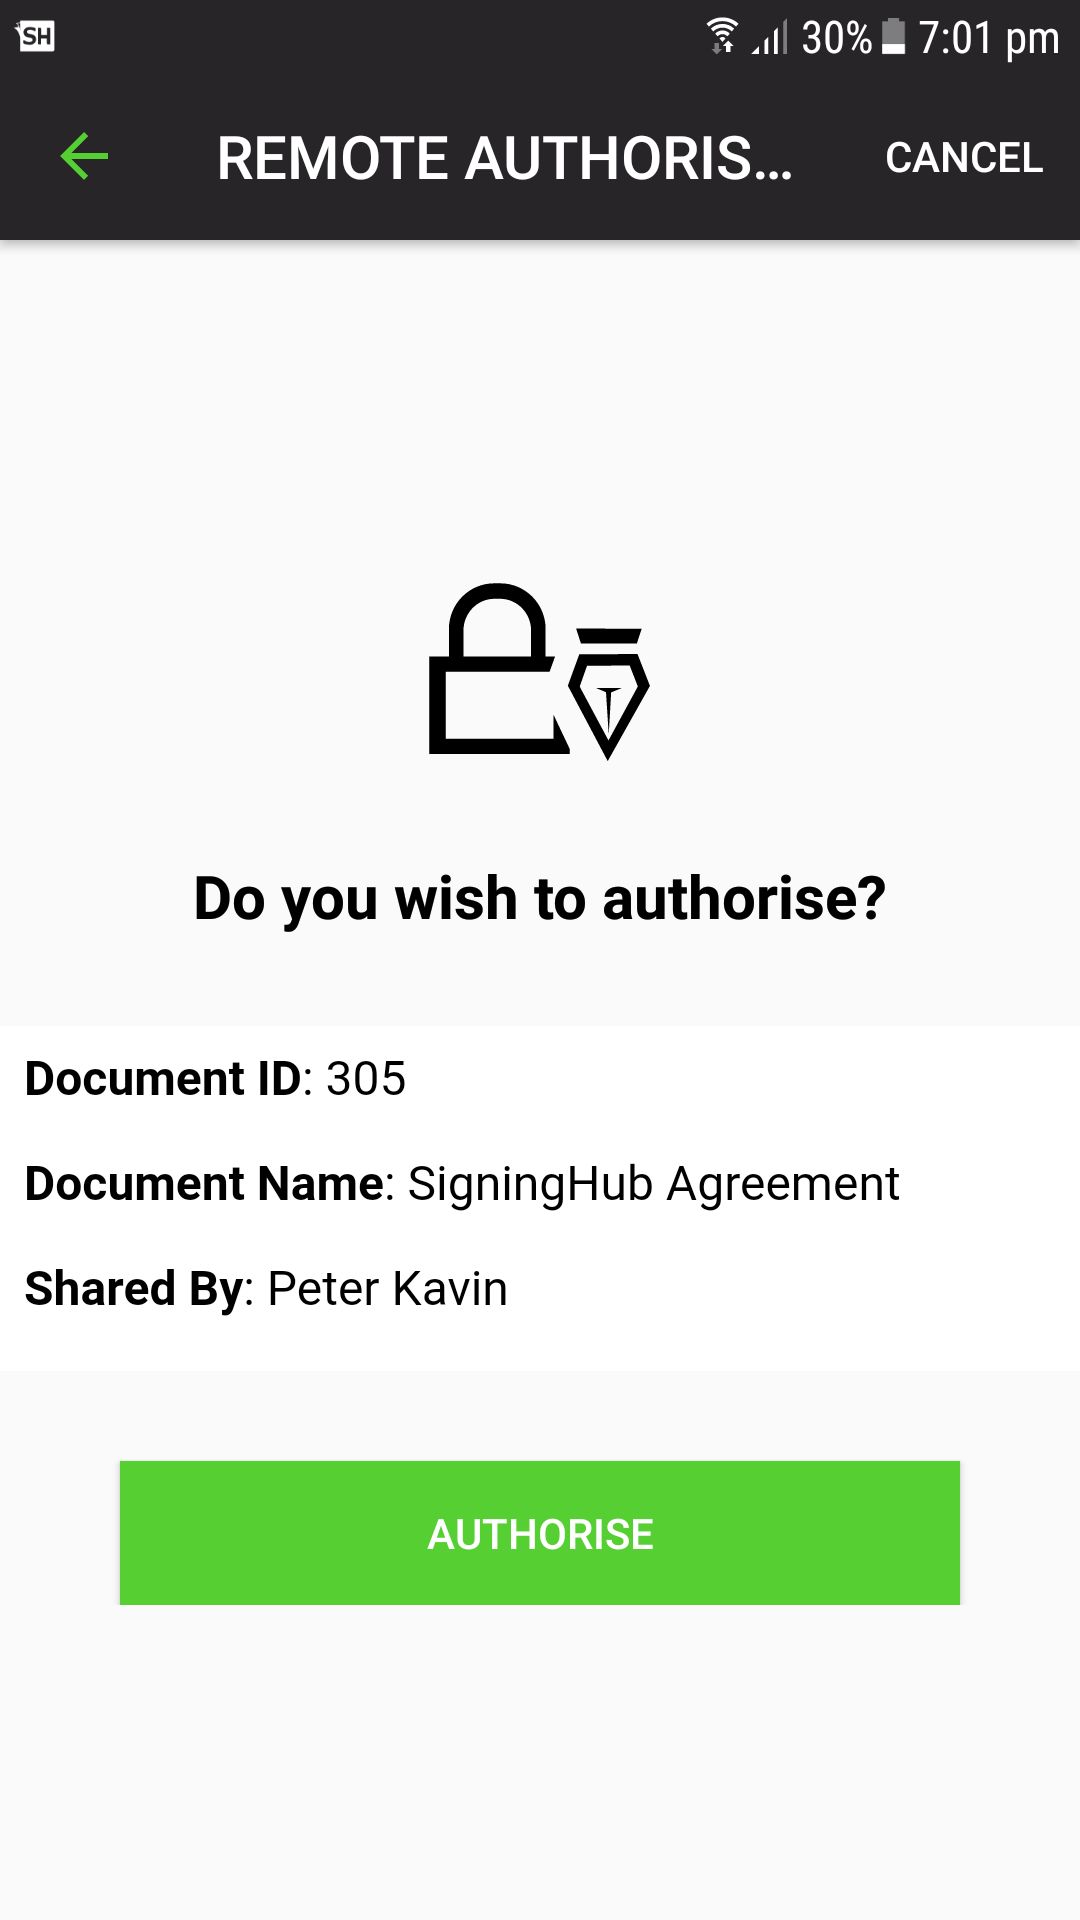
- A pop-up will appear on your mobile device to authorise your signature through touchID or PIN. Upon authorisation, the document is signed.
- After signing the document, click the three dots menu and select "Signature Verification" to view "Signature Verification" details. The signatures are verified through the ADSS verification service.
|
|
|
See Also
- XML Signing
- Word Document Signing
- Electronic Seal Signing
- eID Easy Signing
- CSC Signing
- Signing using Policy OID
- Local Side Signing using T1C Server
- Local Side Signing using ADSS Server
- Signing Based on National ID Validation
- Signing via Signature Pad
- Signing Behaviour w.r.t Signature Appearance
- OTP Authentication