When you are using the SigningHub deployment of app catalog site on your site collection, there will be no top bar on the site collection that contains the options for document transactions, i.e. Sign, Share, Status, etc. Hence the process of initiating these operations is slightly different than those site collections on which SigningHub for SharePoint has been exclusively installed.
Sign your documents through app catalog site deployment- Open your on-premises SharePoint site collection URL and login into your SharePoint account.
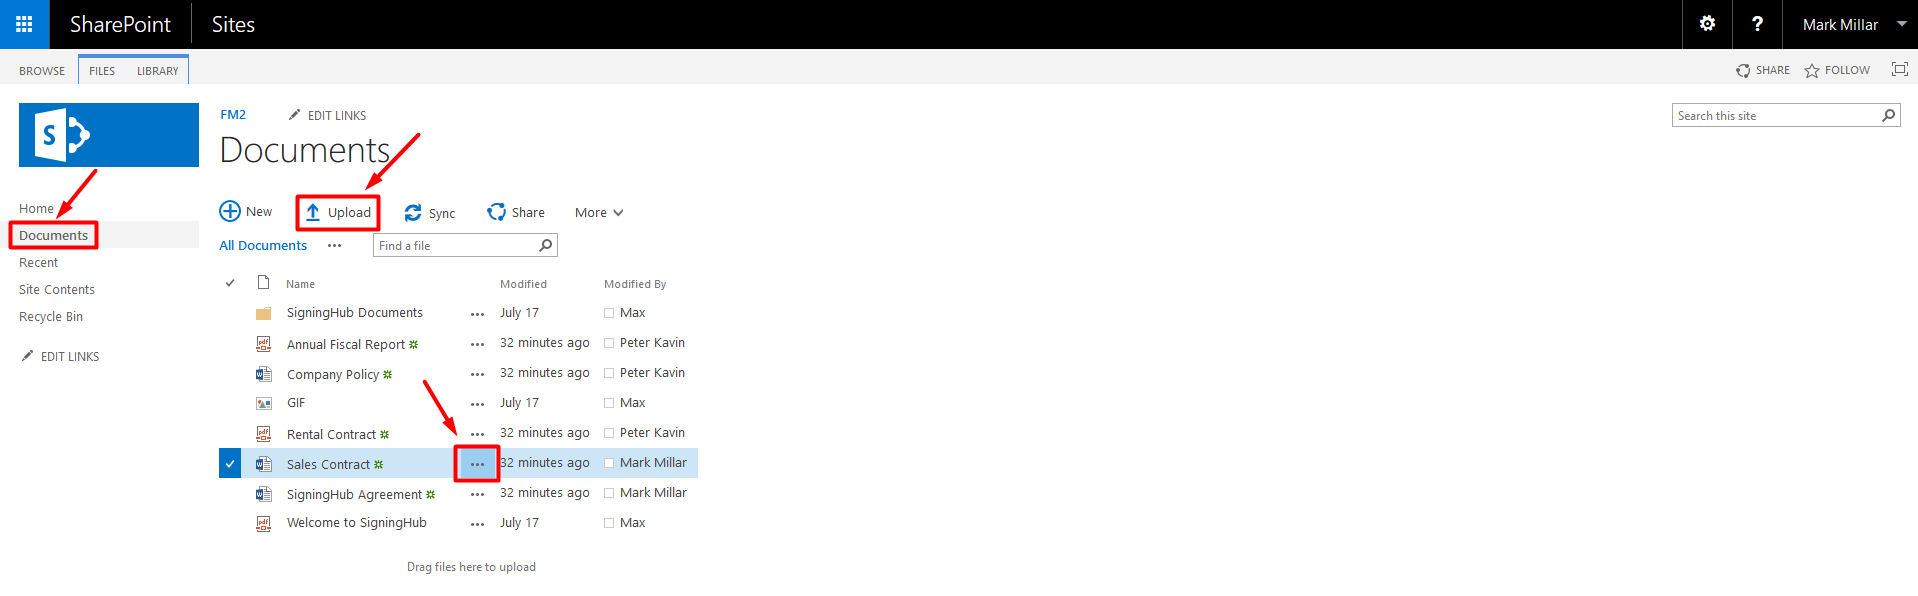
- Click the document library (i.e. default document library, or your custom document library, or a document set) whose document(s) are required to sign.
- Click the "Upload" button to upload new document (to sign) and select them, or select the document (to sign) from your existing documents list.
- Click the adjacent ... as highlighted in the image below.
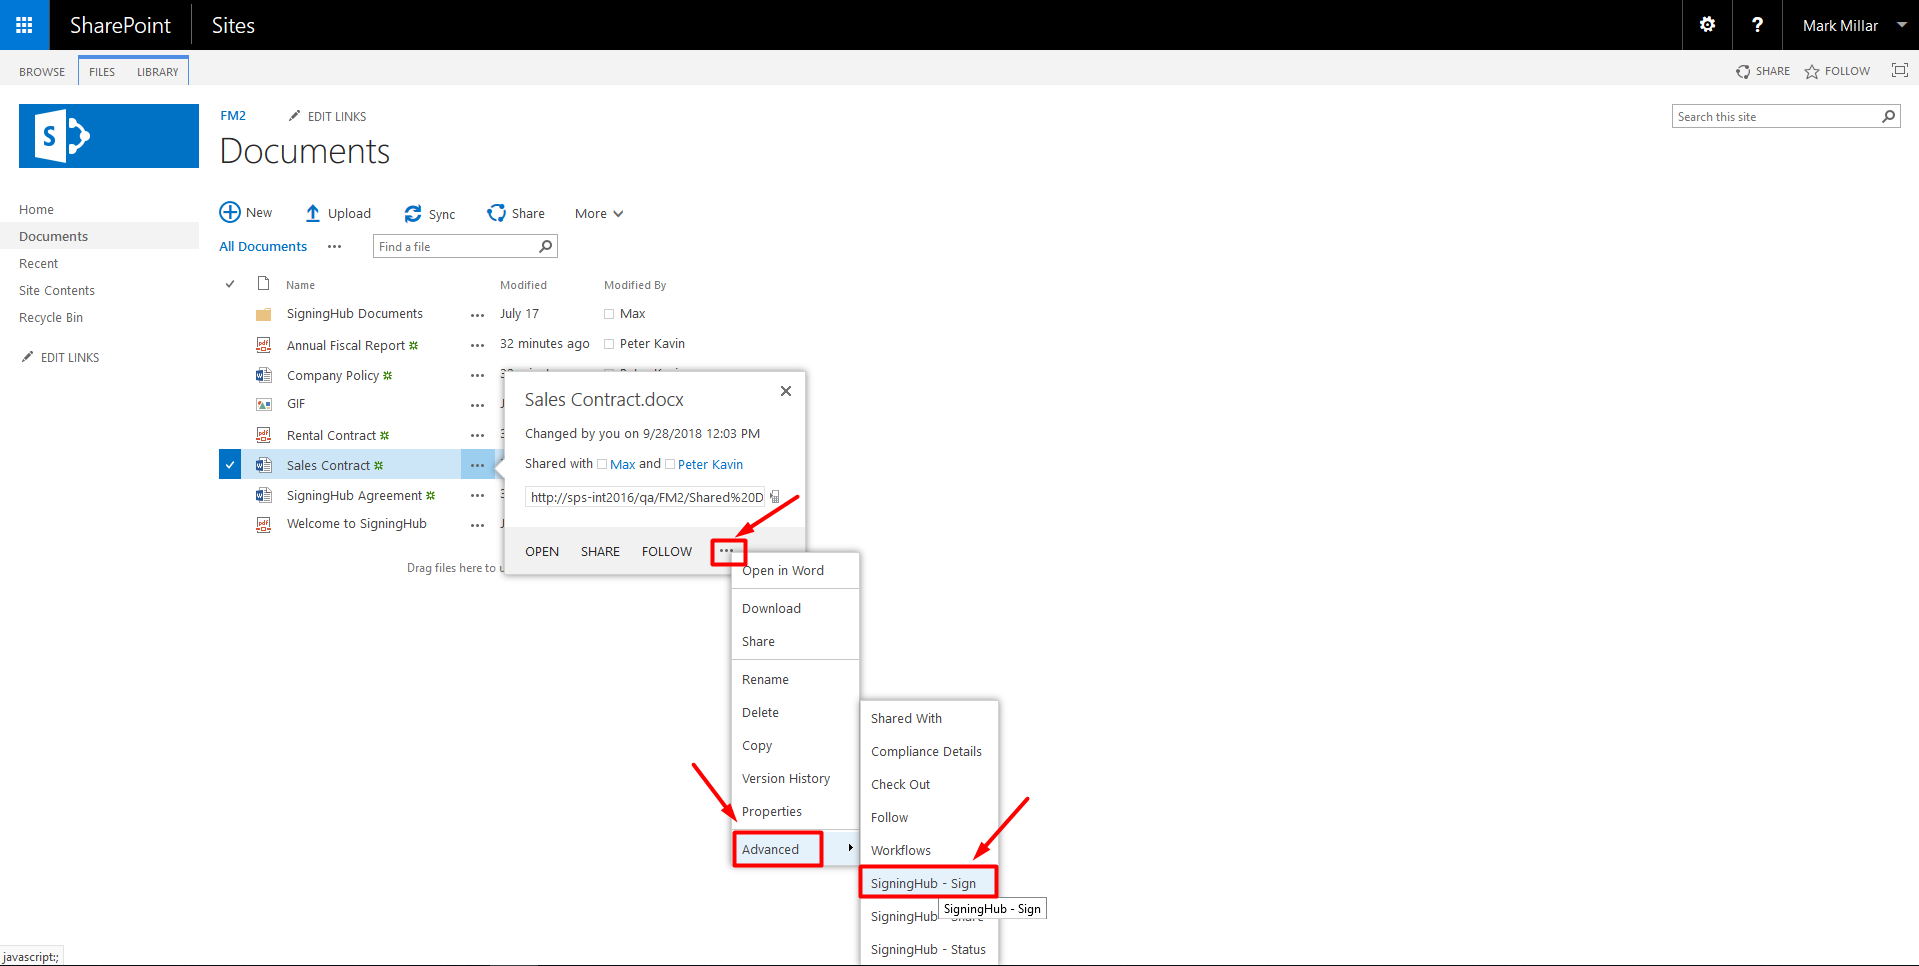
- A menu dialog will appear for the selected document. Click ... then "Advanced" from the next appearing menu, and then click the "SigningHub - Sign" option.
- The authentication screen of SigningHub will appear within SharePoint, specify your credentials to authenticate yourself.
For details, follow the step 5 and onwards of this link.
Share your documents through app catalog site deployment
- Open your on-premises SharePoint site collection URL and login into your SharePoint account.
- Click the document library (i.e. default document library, or your custom document library, or a document set) whose document(s) are required to share.
- Click the "Upload" button to upload new document (to share) and select them, or select the document (to share) from your existing documents list.
- Click the adjacent ... as highlighted in the image below.
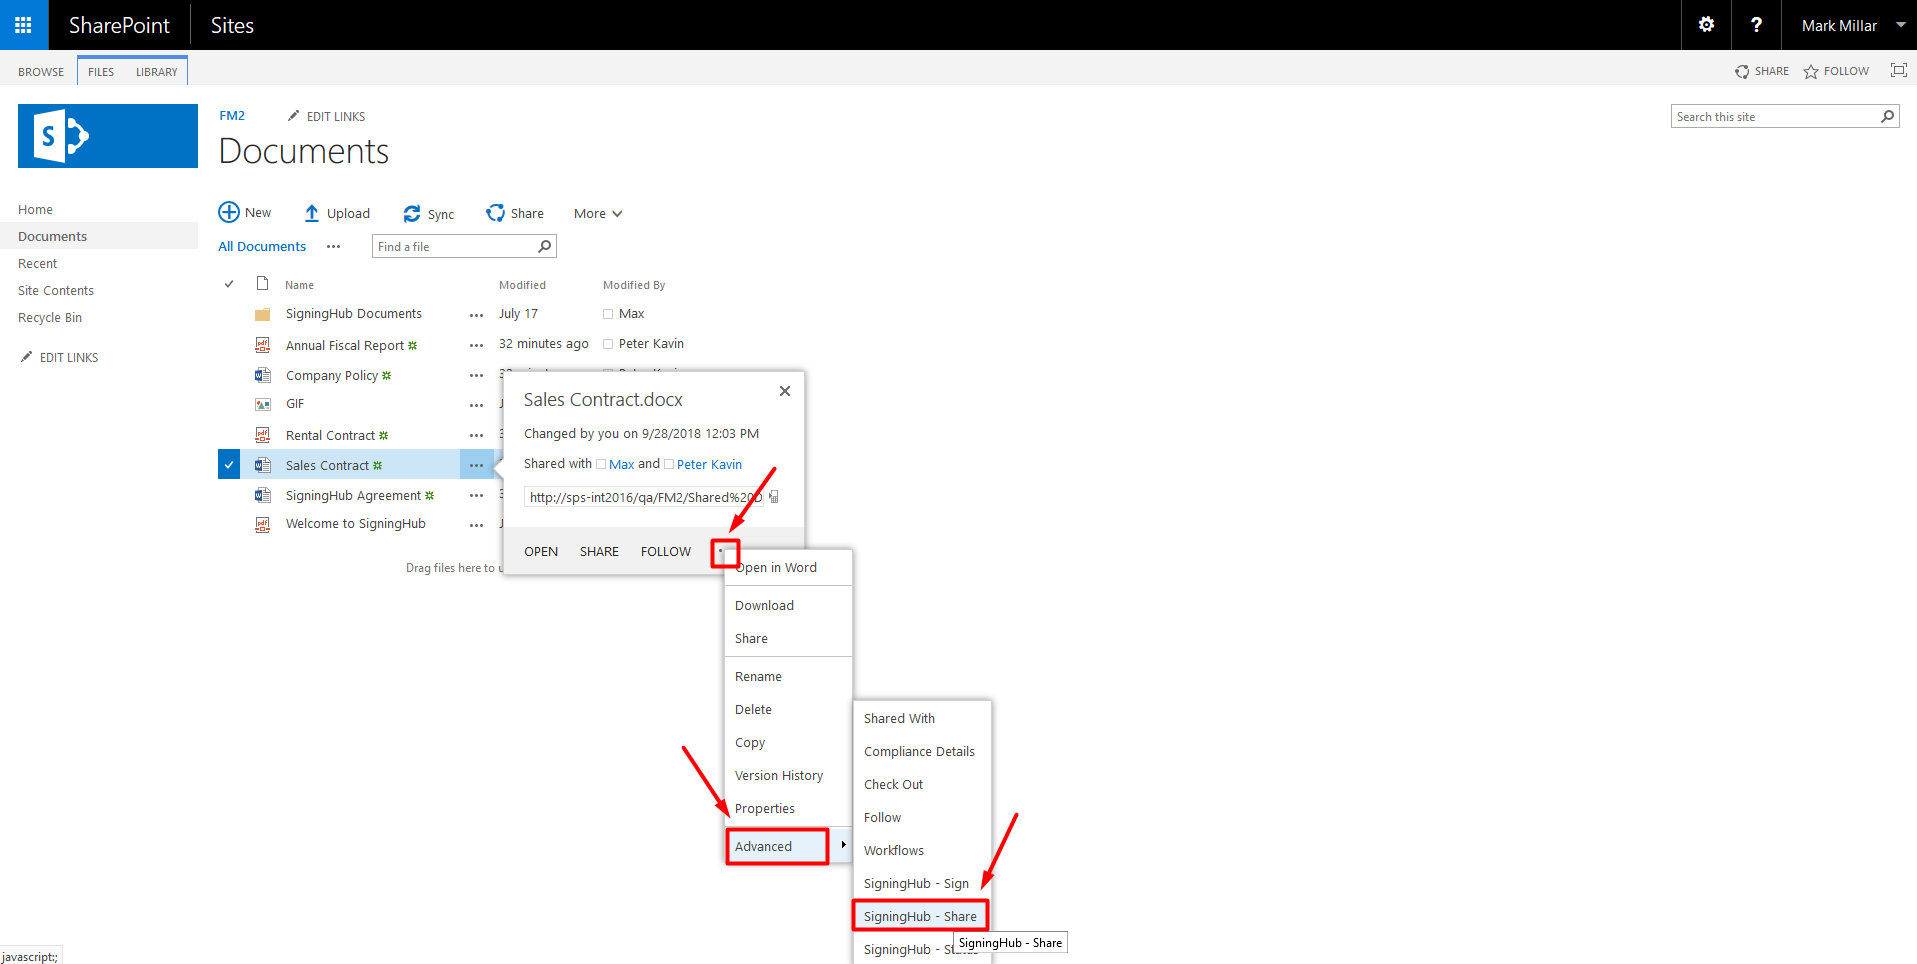
- A menu dialog will appear for the selected document. Click ... then "Advanced" from the next appearing menu, and then click the "SigningHub - Share" option.
- From the next appearing screen, configure the workflow type (i.e. Serial, Parallel, or Individual).
For details, follow the step 5 and onwards of this link.
Check status of your documents through app catalog site deployment
- Open your on-premises SharePoint site collection URL and login into your SharePoint account.
- Click any document library (e.g. Documents) and select a document.
- Click the adjacent ... as highlighted in the image below.
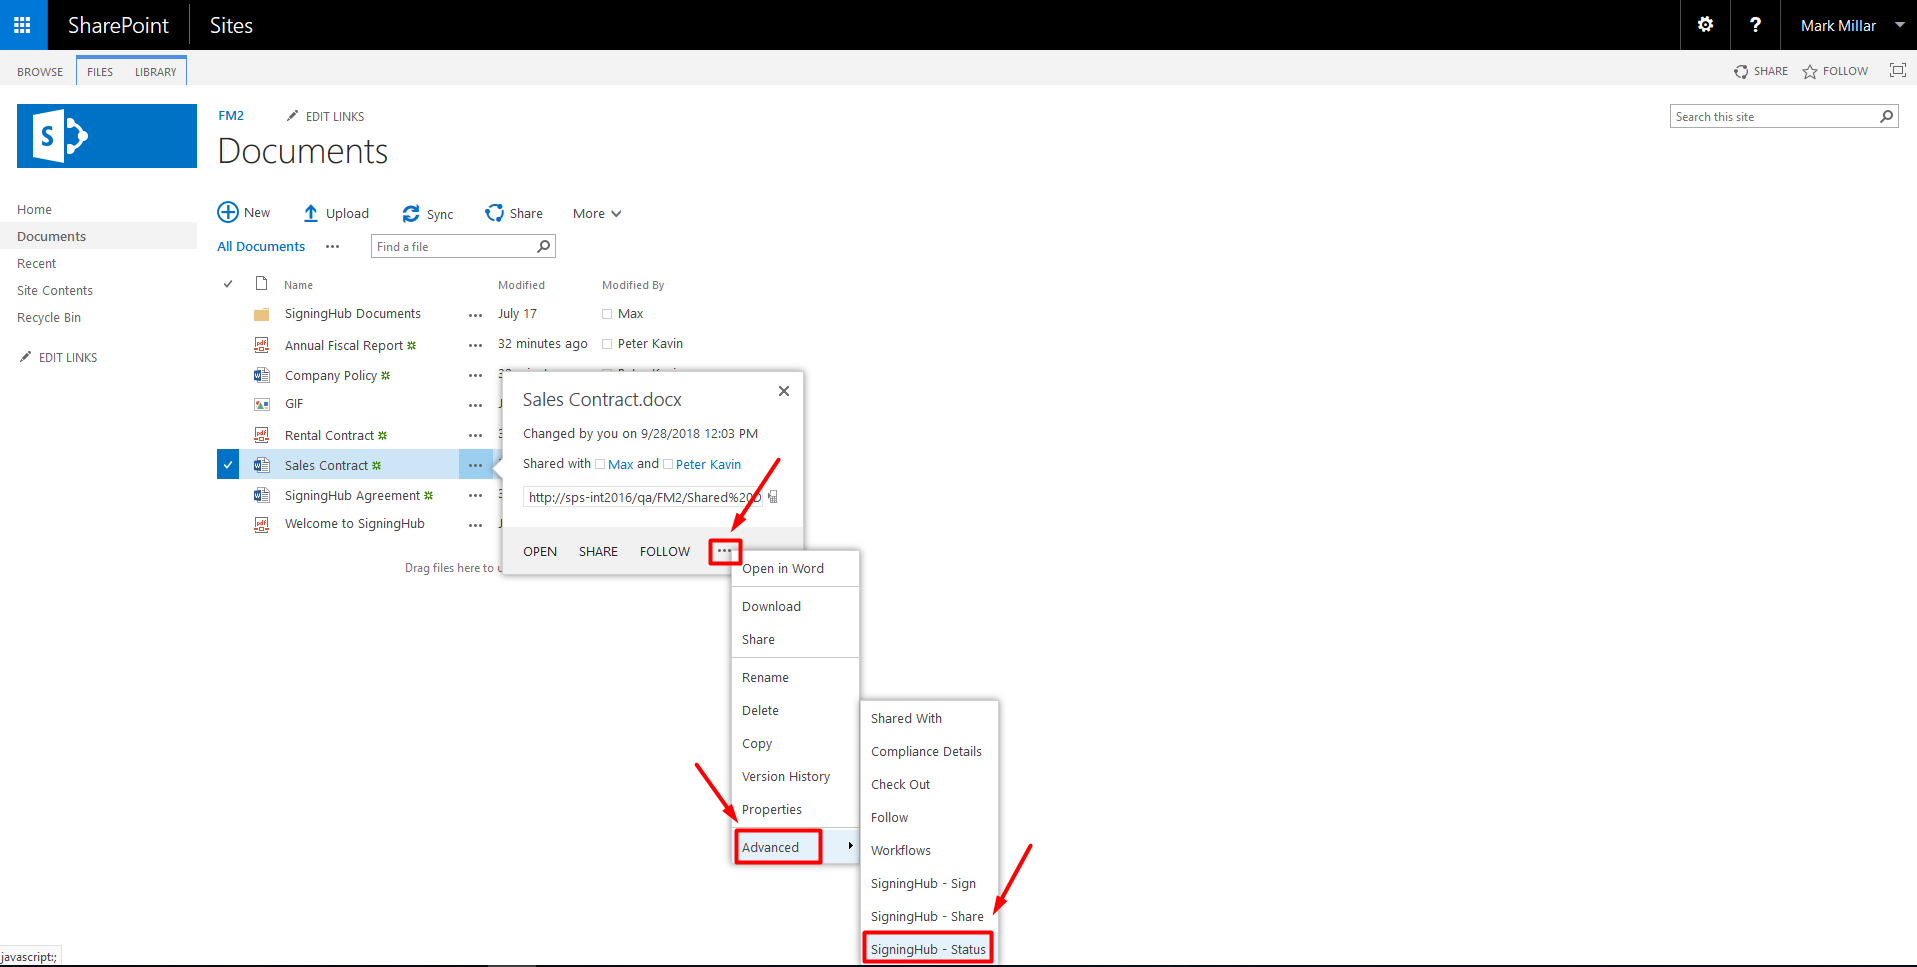
- A menu dialog will appear for the selected document. Click ... then "Advanced" from the next appearing menu, and then click the "SigningHub - Status" option.
- The "Document Status Summary" screen will appear, listing all the shared documents related to you (the logged in user) along with their respective information. For details, follow the step 4 and onwards of this link.
1. You must have the SH-CHECKSTATUS and SH-SHARE permissions in the add-in and required SharePoint permissions to share a document.
2. For a recipient (contact) to view their pending documents within SharePoint, they should have SH-CHECKSTATUS and SH-SIGN permissions in the add-in and required SharePoint permissions to view and sign a document.3. SigningHub for SharePoint also supports multi-factor authentication (i.e. login credentials and SMS OTP), if it is configured in the user role of your SigningHub enterprise account, see details.
4. Whenever a documents package is shared, the workflow quota of respective document owner's account is consumed, and hence the available count is decreased by one.