Add signature fields
SigningHub allows you to add two different types of signatures in a template, i.e. Electronic and Digital. Read more about the electronic and digital signatures. Adding digital signatures for a recipient/ placeholder will consume digital signatures quota of your (document owner's) account, after being signed by the recipient.
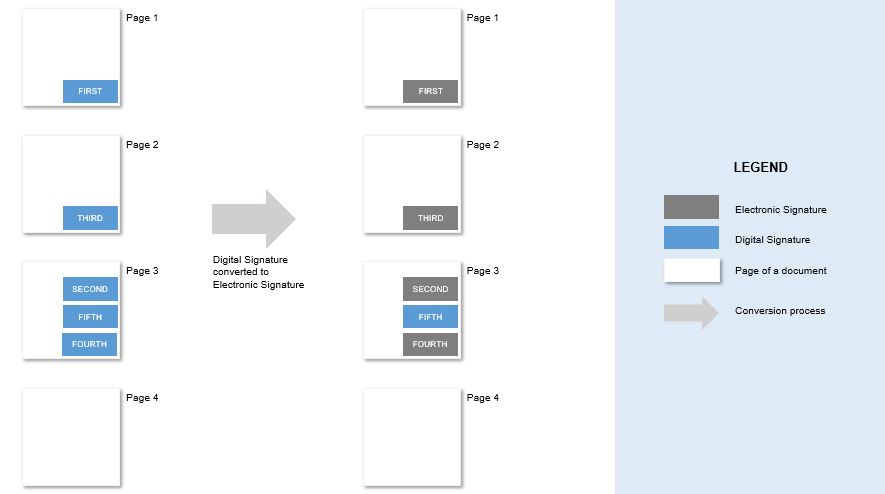
You can also add multiples signature fields against a signer. However, when you add the second signature field, then the first signature field will be converted into a simple hand signature field, and the second field will become the actual digital signature field. Similarly, when you add the third digital signature field, then the previous two fields will become the simple hand signature fields, and the third field will be the actual digital signature field and so on.
After you have:
- Added the document,
- Added all the recipients, electronic seals and placeholders,
- Configured workflow type, and
- Configured special privileges for each recipient/ placeholder as required in your template:
Add a signature field in the template
- Select the recipient (signer/ electronic seal/ placeholder) from the right side of document viewer screen, for whom you want to add a signature field. Click
 (on the right side of the screen) if you want to manage the added recipients.
 - Click the "Signature" option, and drop it on the document.
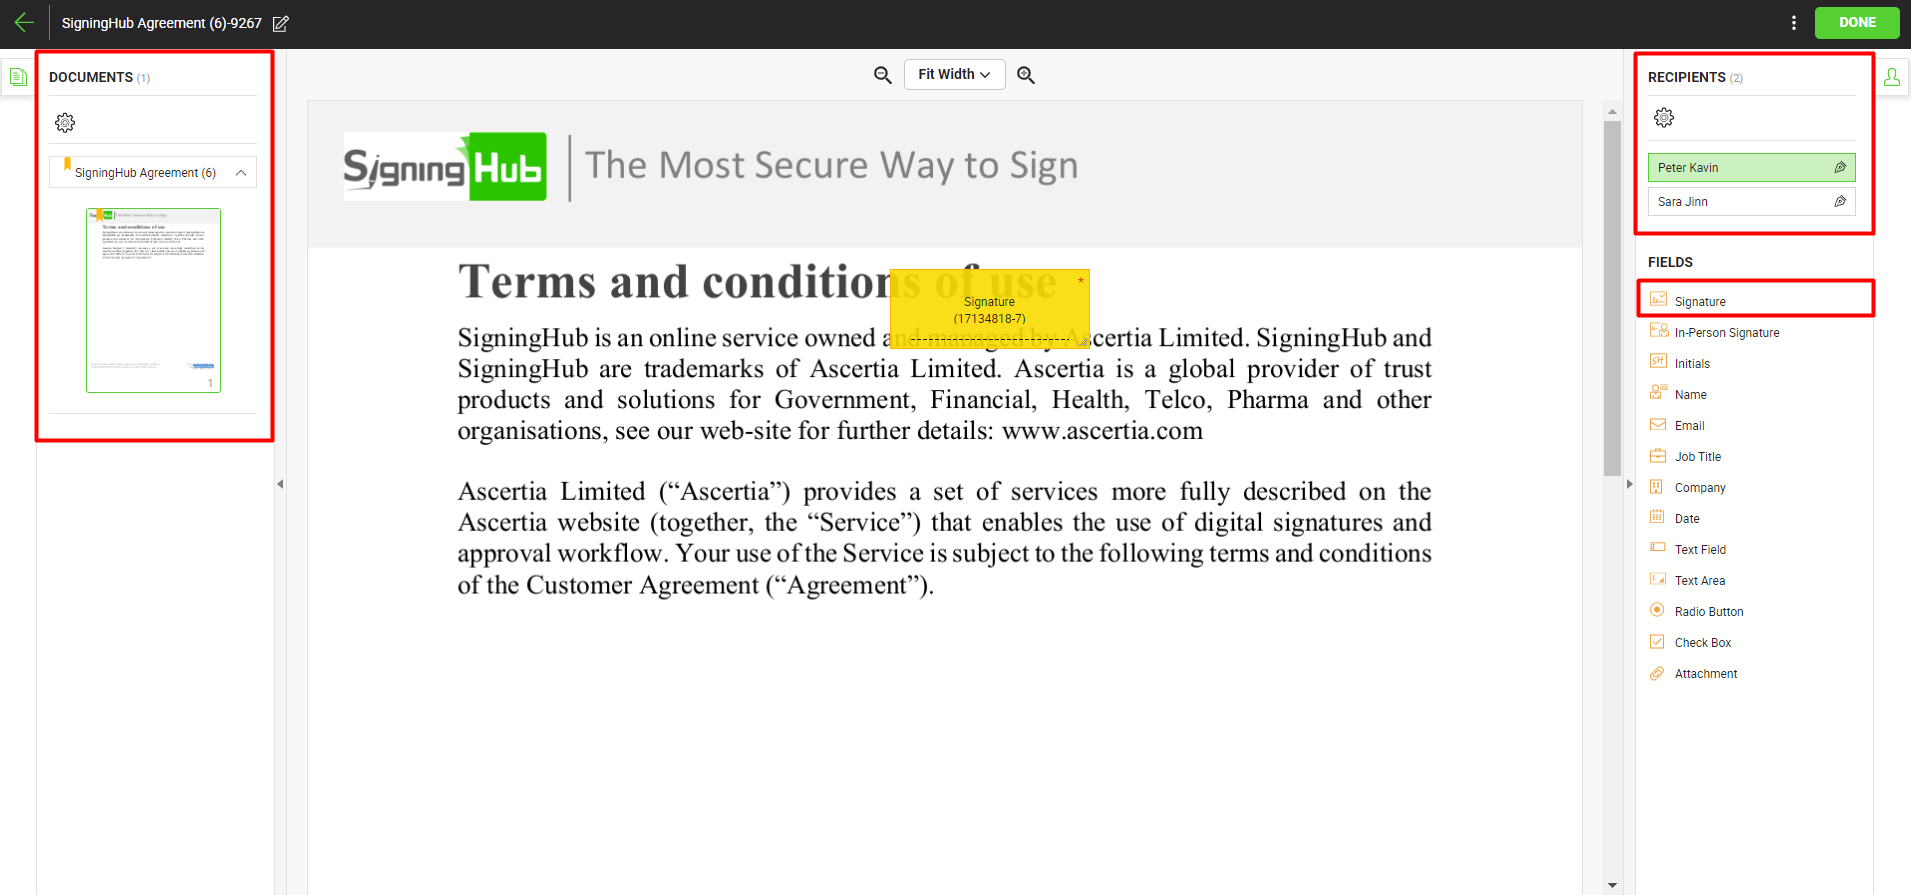
- You can drag and drop the signature field anywhere in the document by using your mouse. The grid lines will assist you in better alignment of fields accordingly. Resize the field with respect to its height and width or use the bottom right corner to resize it diagonally as required. The system will remember the field size for new signature fields.
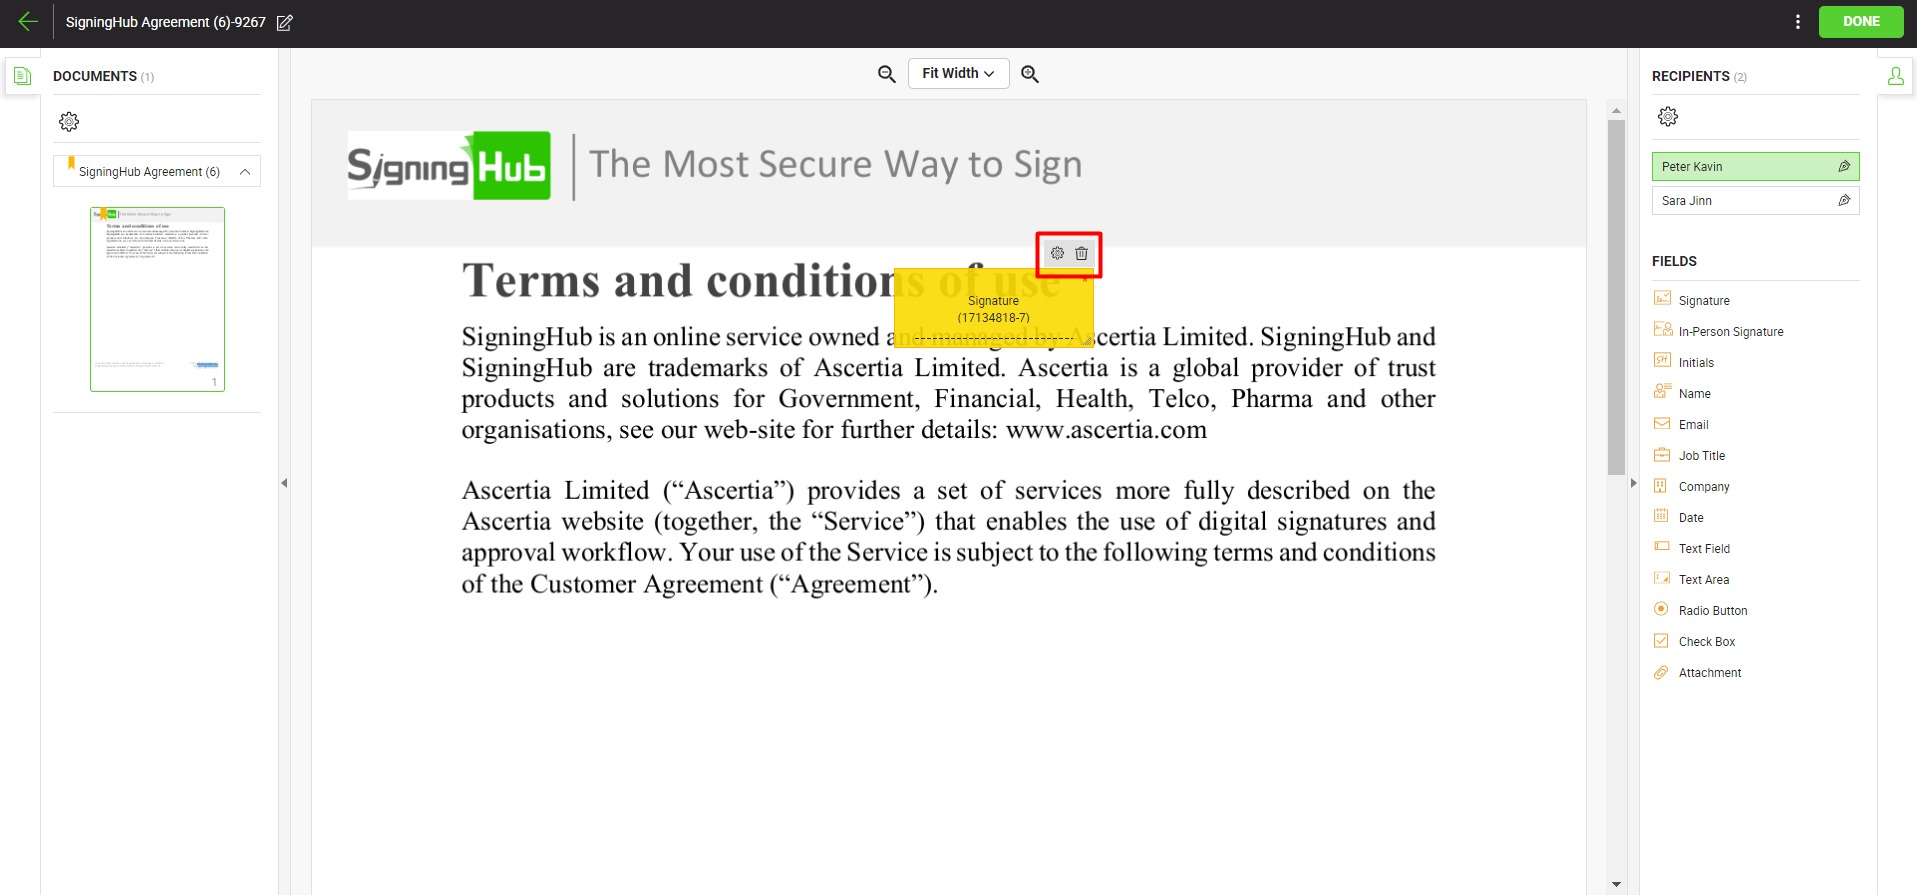
- Now take the cursor to the signature field, and click
 to view and edit its details. See the "Signature Fields" table below for the fields description.
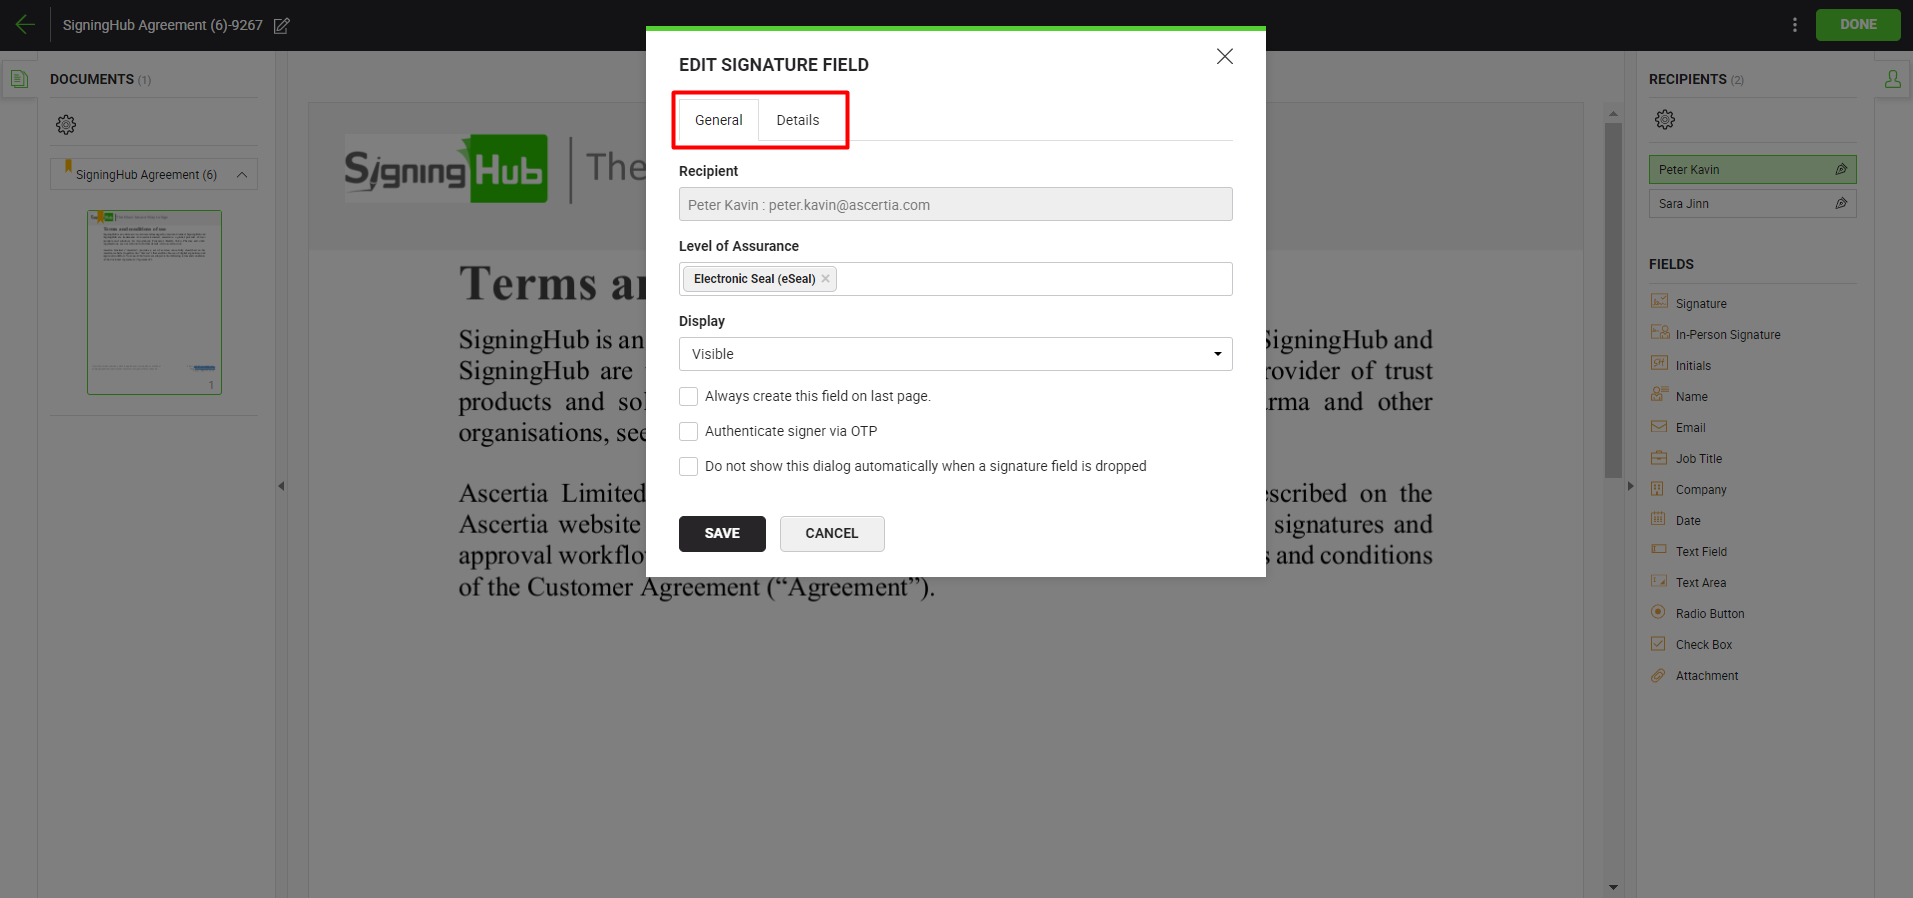
- Repeat the above steps to add multiple digital signature fields.
|
Signature Fields |
|||||||||||||||||||||||||||||||||||||||
|
Fields |
Description |
||||||||||||||||||||||||||||||||||||||
|
General Tab |
|||||||||||||||||||||||||||||||||||||||
|
Recipient |
A read-only field to display the signer's name along with the email and/or the mobile number, based on the selected delivery method, for whom this signature field is being configured. |
||||||||||||||||||||||||||||||||||||||
|
A mandatory field to be selected to perform signing for a user. Levels of assurance will be available as allowed in the role assigned to you.
In case the Document Owner tries to add a higher Level of Assurance in combination with Simple Electronic Signature (SES), then Simple Electronic Signature (SES) will be removed. |
|||||||||||||||||||||||||||||||||||||||
|
Display |
For a signature, this field will be available when you are allowed (in your user role) to add invisible signatures on a document.
This display property is not available in case the Level of Assurance of the Signature field is set to "Electronic Signature". |
||||||||||||||||||||||||||||||||||||||
|
Always create this field on last page |
This check box appears for configuration, only when you drop the signature field on the last page of a template document. Tick it if you want to always place this In-Person signature field on the last page of the document. |
||||||||||||||||||||||||||||||||||||||
|
Authenticate signer via OTP |
Select this check box to enable field level authentication through OTP process when attempting to sign the document. By default, this option is unselected.
This option will let the document owner send an OTP to the recipient that will used for the purpose of signing authentication. Whenever the recipient will try to sign this document an OTP will be sent to the recipient's email, mobile number, or both depending upon the document owner's service plan configuration. When the service plan allows "SMS OTP", a field to specify the mobile number of a recipient to send an OTP will be displayed. The document will be signed only upon providing the correct OTP. By default, the specified number is displayed partially masked to comply with the GDPR policy. Click
This authentication option will let the recipient sign the document after they have entered the Time based One Time Password. Whenever the recipient will try to sign this document they will be prompted to enter the Time based One Time Password from the authenticator app configured on their mobile device. In case the recipient has not configured two factor authentication (2FA), upon trying to sign a document that requires Time based One Time Password, an email will be sent to their email address to configure two factor authentication (2FA). The document will be signed only upon providing the correct Time based One Time Password.
|
||||||||||||||||||||||||||||||||||||||
|
Do not show this dialog automatically when a signature field is dropped |
Select to automatically apply the "Level of Assurance" of the current signature field to the ones that you will drop afterwards. |
||||||||||||||||||||||||||||||||||||||
|
Details Tab |
|||||||||||||||||||||||||||||||||||||||
|
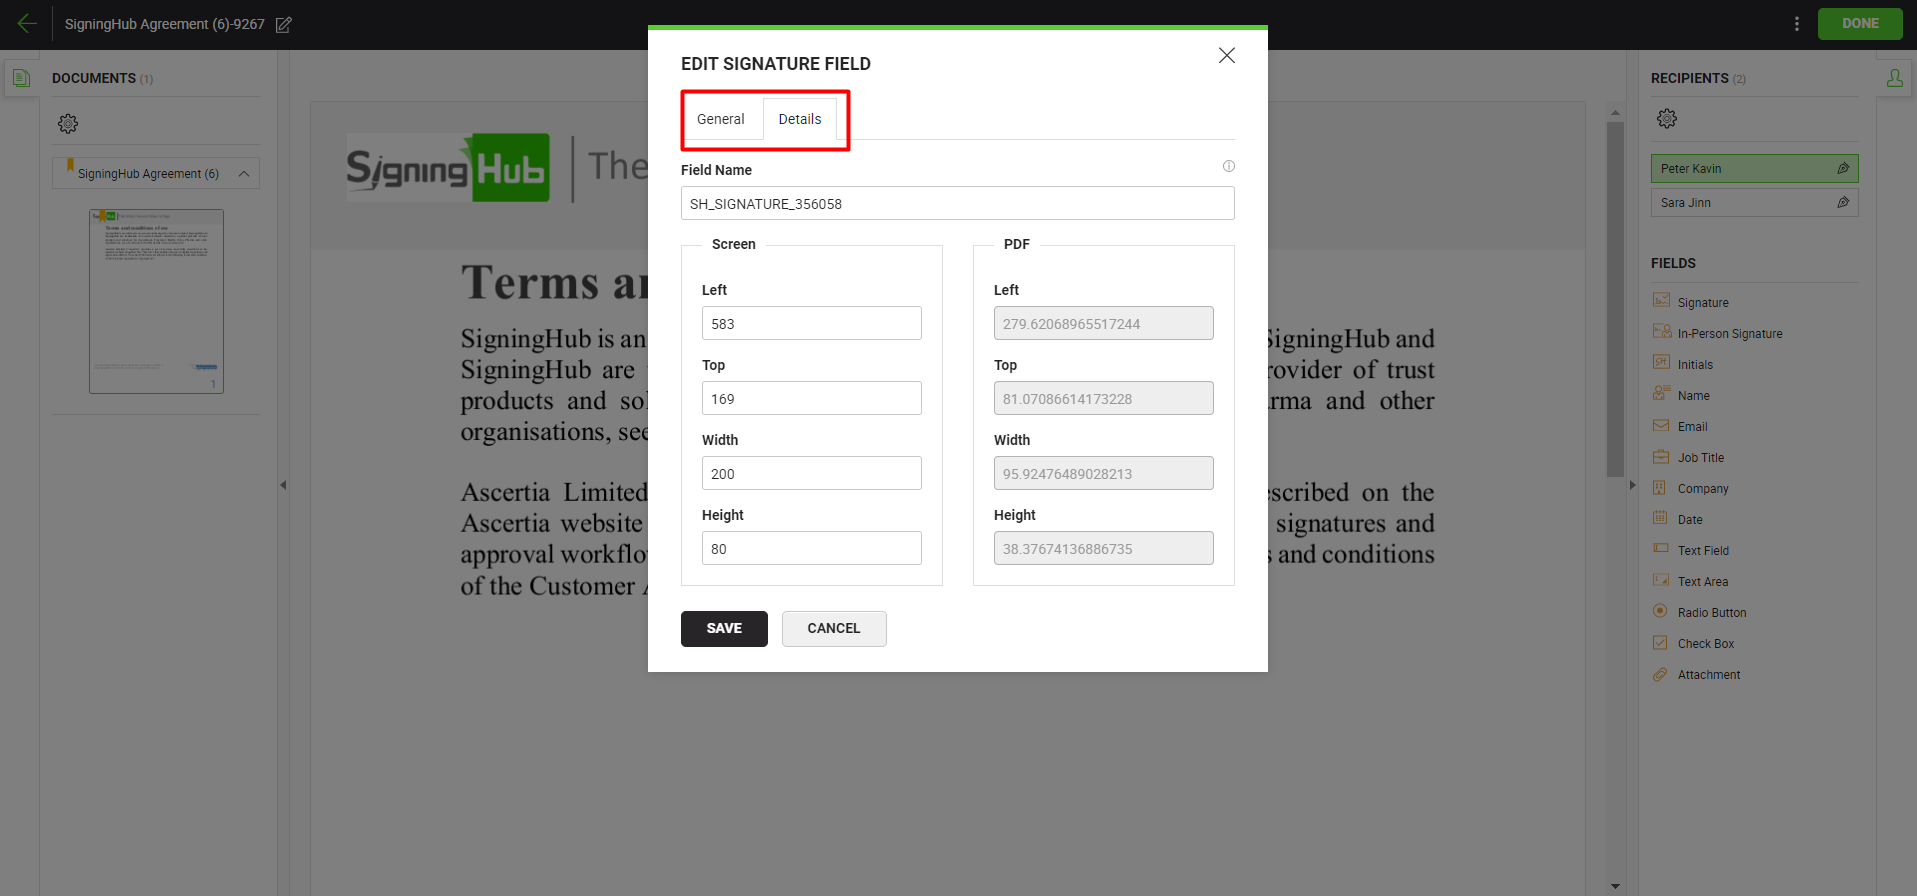
Field Name |
An auto-generated (unique) field name which is used when you need to sign this form field through the API calls. You can change the name as required, but make sure the uniqueness of a field name is not compromised i.e., two or more fields in a document cannot have the same field name. This field is only available when the status of a document is Draft. |
||||||||||||||||||||||||||||||||||||||
|
Dimensions |
Use this section to relatively set the on-screen and PDF coordinates/position (Left, Top, Width and Height) of the signature field. However, you can also manually move the field to the desired position in a document using drag and drop and these coordinates will be updated accordingly. These coordinates are only available when the status of a document is Draft.
|
||||||||||||||||||||||||||||||||||||||
|
Save and Cancel buttons |
Click the "Save" button to save the configurations, or click the "Cancel" button to close this dialog. |
||||||||||||||||||||||||||||||||||||||


|
|
|

Delete a signature field from the template
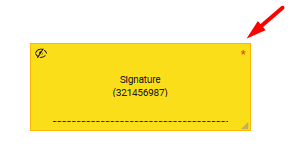
Take the cursor to the signature field in the document to delete, and click  appearing on it.
The signature field will be removed from the document.
|
|
|

See Also
- Add in-person signature fields.
- Add electronic seal fields
- Add initials fields
- Add attachment fields
- Add miscellaneous information fields
- Configure form filling
- Add QR Code