Add QR Code
SigningHub enables you to add a QR Code to documents to help simplify signature verification. The QR code in the document enables users to scan the QR code with the camera on their smartphone. Upon scanning the user is redirected to a page which allows viewing the document in read-only mode and viewing the verification results for the digital signatures, separately.
This field is associated with a specific document and becomes the part of a PDF document when it is shared, signed, reviewed or updated. The availability of a QR Code field is subject to your assigned enterprise user role. If you wish to use this feature, ask your Enterprise Admin to enable the QR Code option in your Role>Document Settings. SigningHub embeds annotations, and other necessary content within a PDF file to make your documents fully compliant with the PDF/A-1a and PDF/A-1b standards. This content embedding is required by ISO 19005-1, and is usually associated with a document's visual appearance.
Add a QR Code to a Template
- Select the document from the left side of document viewer screen, on which QR Code is required. Click
 , if you want to manage the added documents
2. Click the "QR Code" option from the viewer right panel and drop it on the document as required. A default QR code is placed upon dropping which is later replaced with the system generated QR Code. 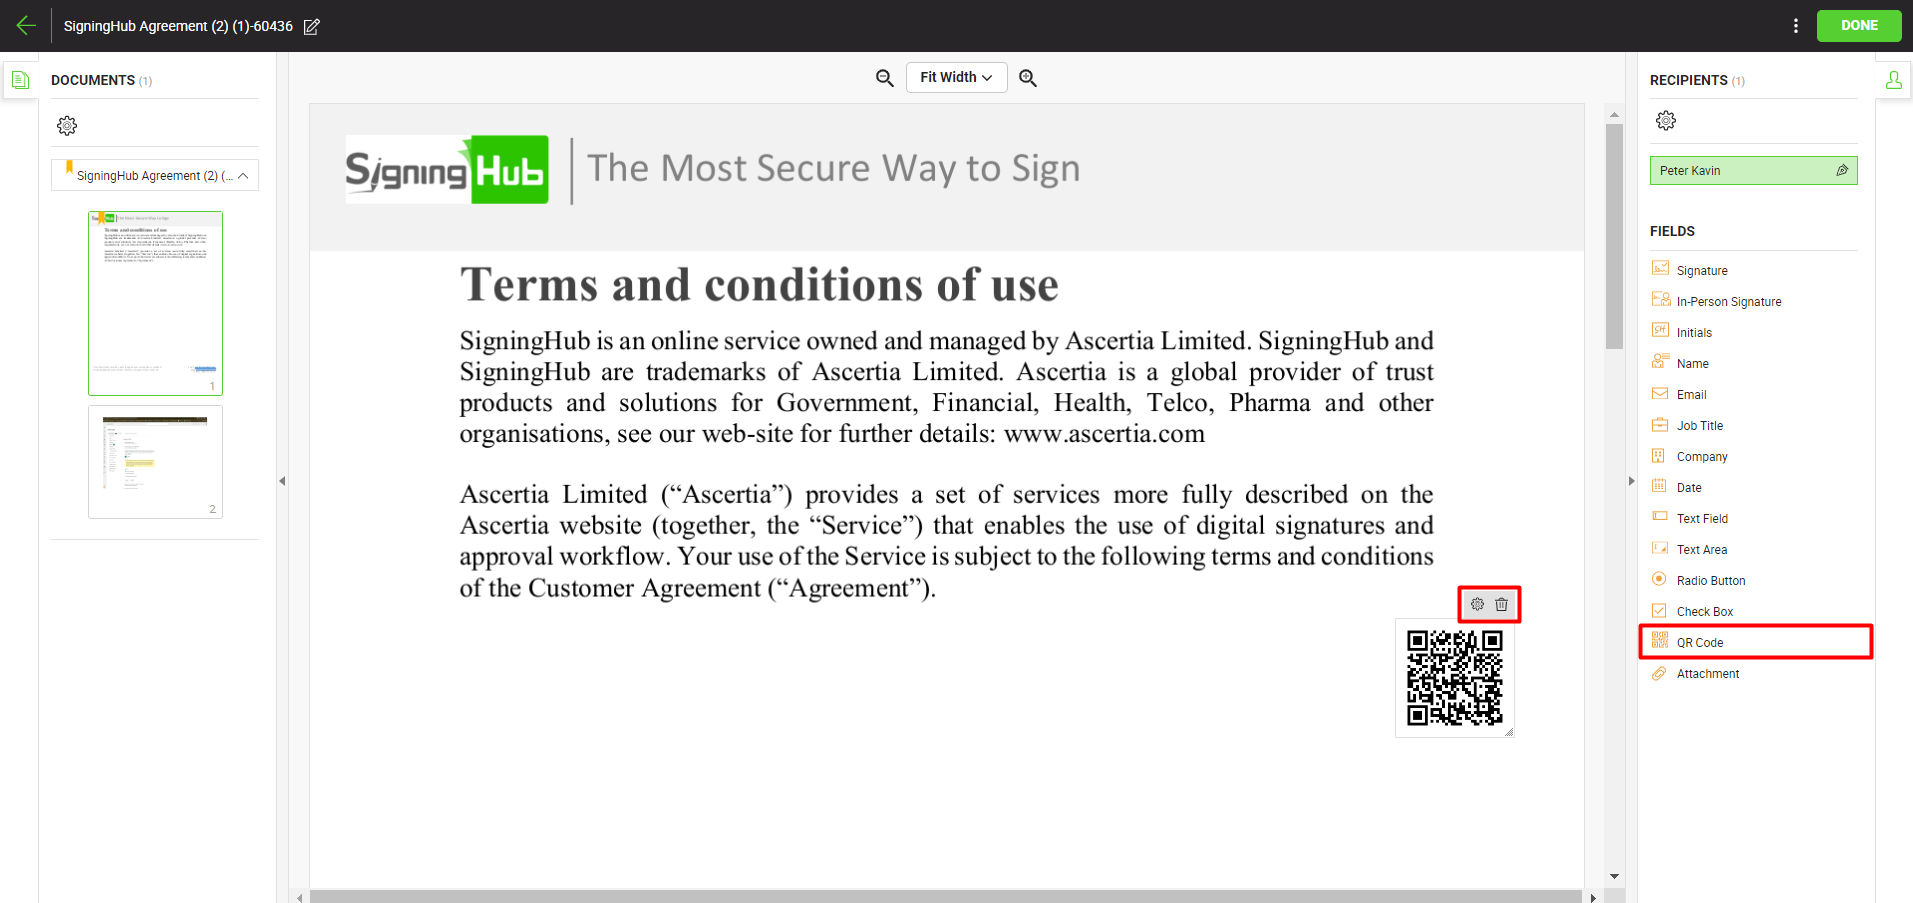
3. You can drag and drop the QR Code anywhere in the document by using your mouse. The grid lines will assist you in better alignment of QR Code accordingly. Resize the QR Code with respect to its height and width or use the bottom right corner to resize it diagonally as required. Now take the cursor to the field, and click  to view and edit its details and configurations. Refer to the below tables for the descriptions of the fields available in the "Edit QR Code" dialog.
- Repeat the above steps to add multiple QR Codes.
Delete a QR Code from a Template
- Take the cursor to the QR Code which you want to delete from the document.
- Click on the
 button appearing on it. The QR Code will be removed from the document.
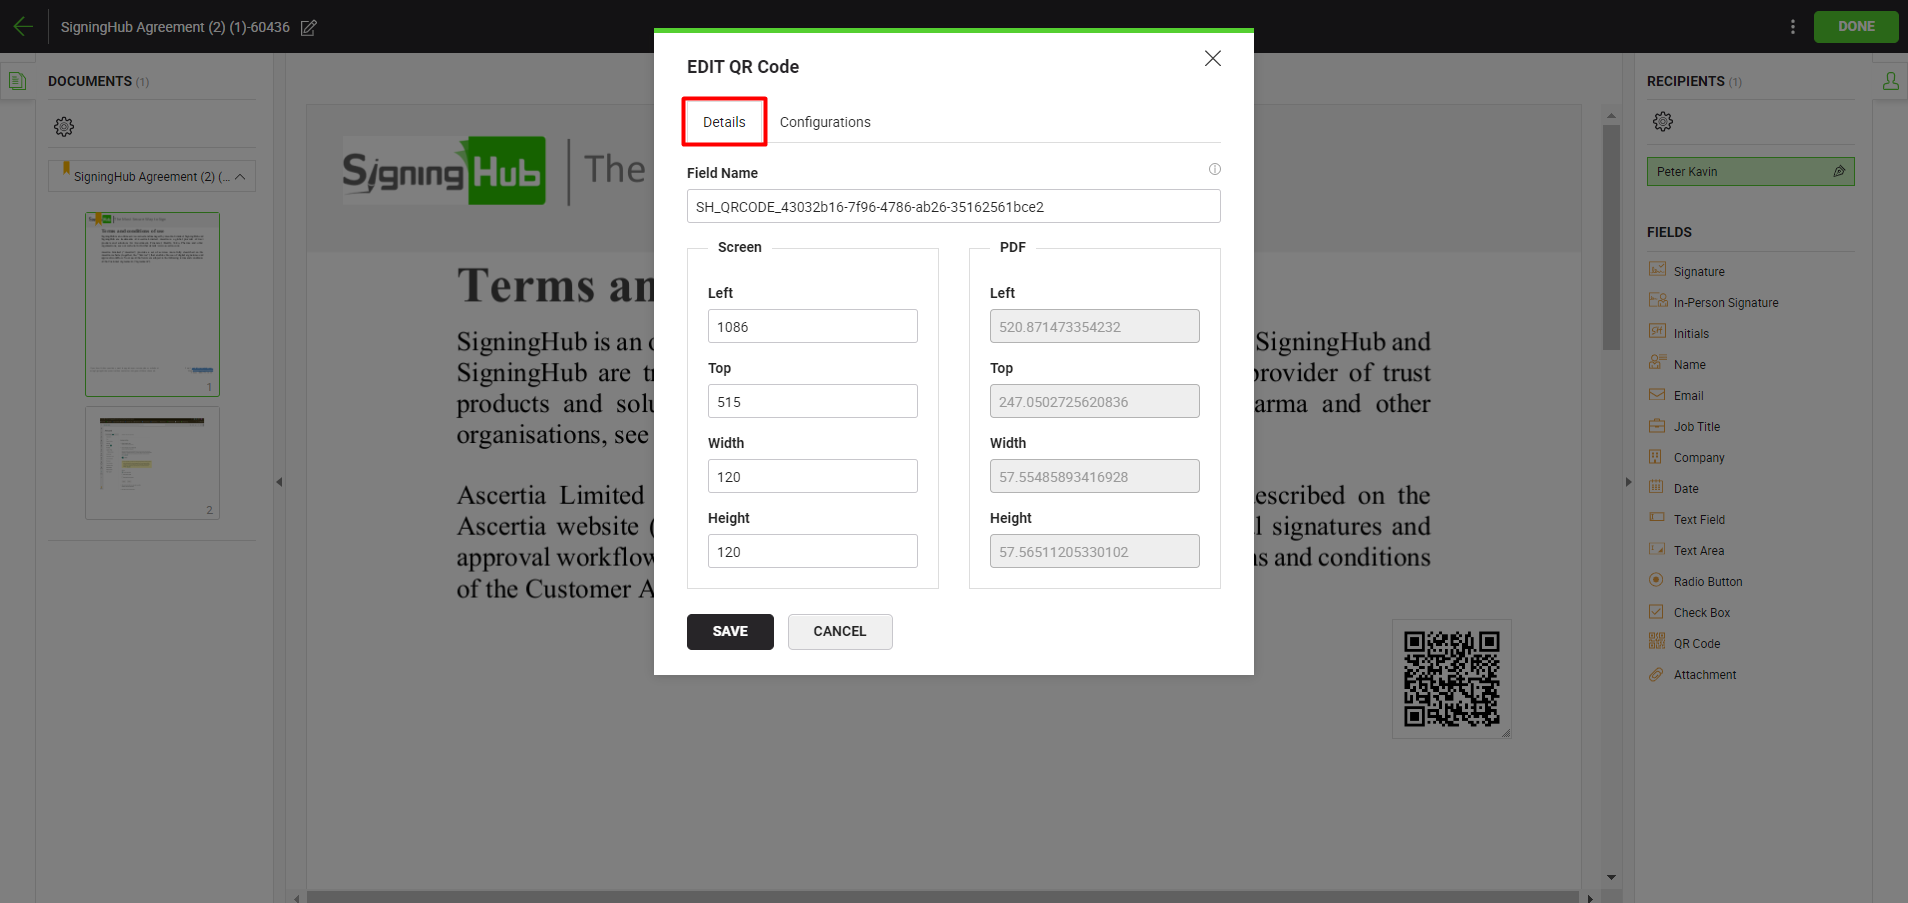
The following table describes the fields available in the "Details" tab of the "Edit QR Code" dialog.
|
Edit QR Code - Details |
|||
|
Properties |
Description |
||
|
Field Name |
It's an auto-generated (unique) field name that is used when you need to update/delete the QR Code through the API calls. You can change the name as required, but make sure the uniqueness of a field name is not compromised, i.e. two or more fields in a document cannot have the same field name. |
||
|
Screen/PDF |
Use this tab to relatively set the on-screen and PDF coordinates/ position (Left, Top, Width & Height) of this form field. However. you can also manually drag the field for moving it to the desired position on the document, and the coordinates will be updated accordingly. These coordinates are only available as far as the status of a document is Draft.
|
||

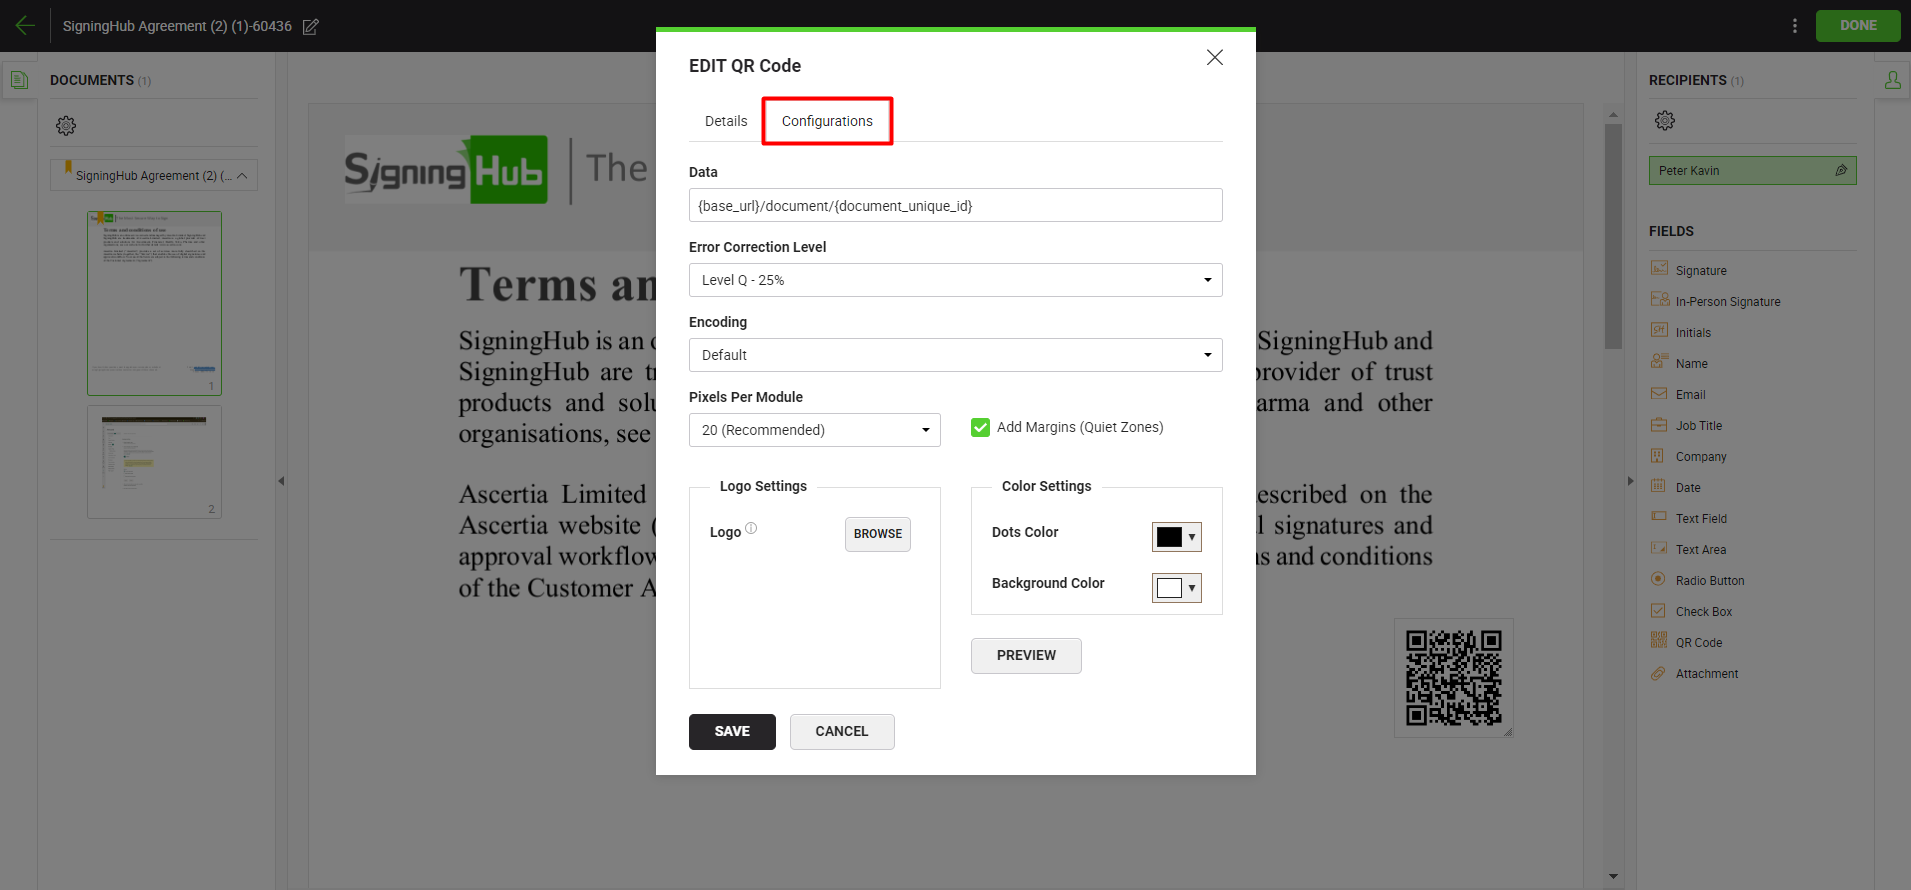
The following table describes the fields available in the "Configurations" tab of the "Edit QR Code" dialog.
|
Edit QR Code - Configurations |
|
|
Properties |
Description |
|
Data |
This field allows the users to input the specific information they wish to encode into the QR code. It supports two types of data:
The maximum length of the data is capped at 500 characters. This limit ensures the QR code remains scannable and the encoded information is accurate. |
|
Error Correction Level |
This drop down allows the user to set the error correction levels which play a critical role in maintaining the integrity of the QR code, especially when it might be partially obscured or damaged. Given below is the list of the available error correction levels:
|
|
Encoding |
This drop down allows the users to choose the character encoding standard for the QR code. Encoding options define the character set used for the QR code’s data. This ensures the data is properly encoded and decoded across different systems and languages. Given below is the list of the available encoding standards:
|
|
Pixels Per Module |
This drop down allows the users to set the size of each individual module (dot) in the QR code. Larger pixel values result in a larger overall QR code, which can improve readability, especially from a distance or when printed on large surfaces. Given below is the list of the available pixels per module options:
|
|
Add Margins (Quiet Zones) |
This checkbox allows the users to enable/disable quiet zones (margins). Quiet zones are the white margins around the QR code. These ensure the scanner can accurately distinguish the code from its surroundings. By default, this checkbox is checked. |
|
Logo Settings |
|
|
Color Settings |
|
|
Preview |
After configuring the QR code settings, this button allows users to generate a preview of the QR code. This preview reflects all customizations, enabling users to verify the appearance and functionality before finalizing. |
|
|
|

See Also
- Add signature fields
- Add in-person signature fields.
- Add electronic seal fields
- Add initials fields
- Add attachment fields
- Add miscellaneous information fields
- Configure form filling