How to Obtain Office 365 Integration Key
- Introduction
- How it works?
- Create an Office 365 App in Azure Active Directory
- Create an Office 365 connector
- Create an Office 365 authentication profile
Microsoft 365 is a comprehensive subscription-based service offered by Microsoft, encompassing a suite of productivity tools and cloud-based services to enhance communication, collaboration, and efficiency. Formerly known as Office 365, it includes familiar desktop applications like Word, Excel, and PowerPoint, continually updated to provide users with the latest features. Microsoft 365 extends beyond traditional office software, offering cloud storage through OneDrive for Business, collaboration with SharePoint Online, and integrated communication and teamwork features with Microsoft Teams. The service also includes advanced security measures, compliance tools, and business intelligence capabilities, making it a versatile solution for individuals, businesses, and enterprises looking to streamline their workflows and adapt to the demands of the modern digital workplace. An Office 365 connector can be configured in SigningHub Admin by providing two integration keys, i.e. Client ID and Client Secret.
- Create an Office 365 App in Azure Active Directory.
- Create an Office 365 connector in SigningHub Admin.
- Create an Office 365 authentication profile in SigningHub Admin.
Create an Office 365 App in Azure Active Directory
- Sign in to the Azure portal using your Azure Active Directory administrator account.

- Select "Azure Active Directory" from the left tab.
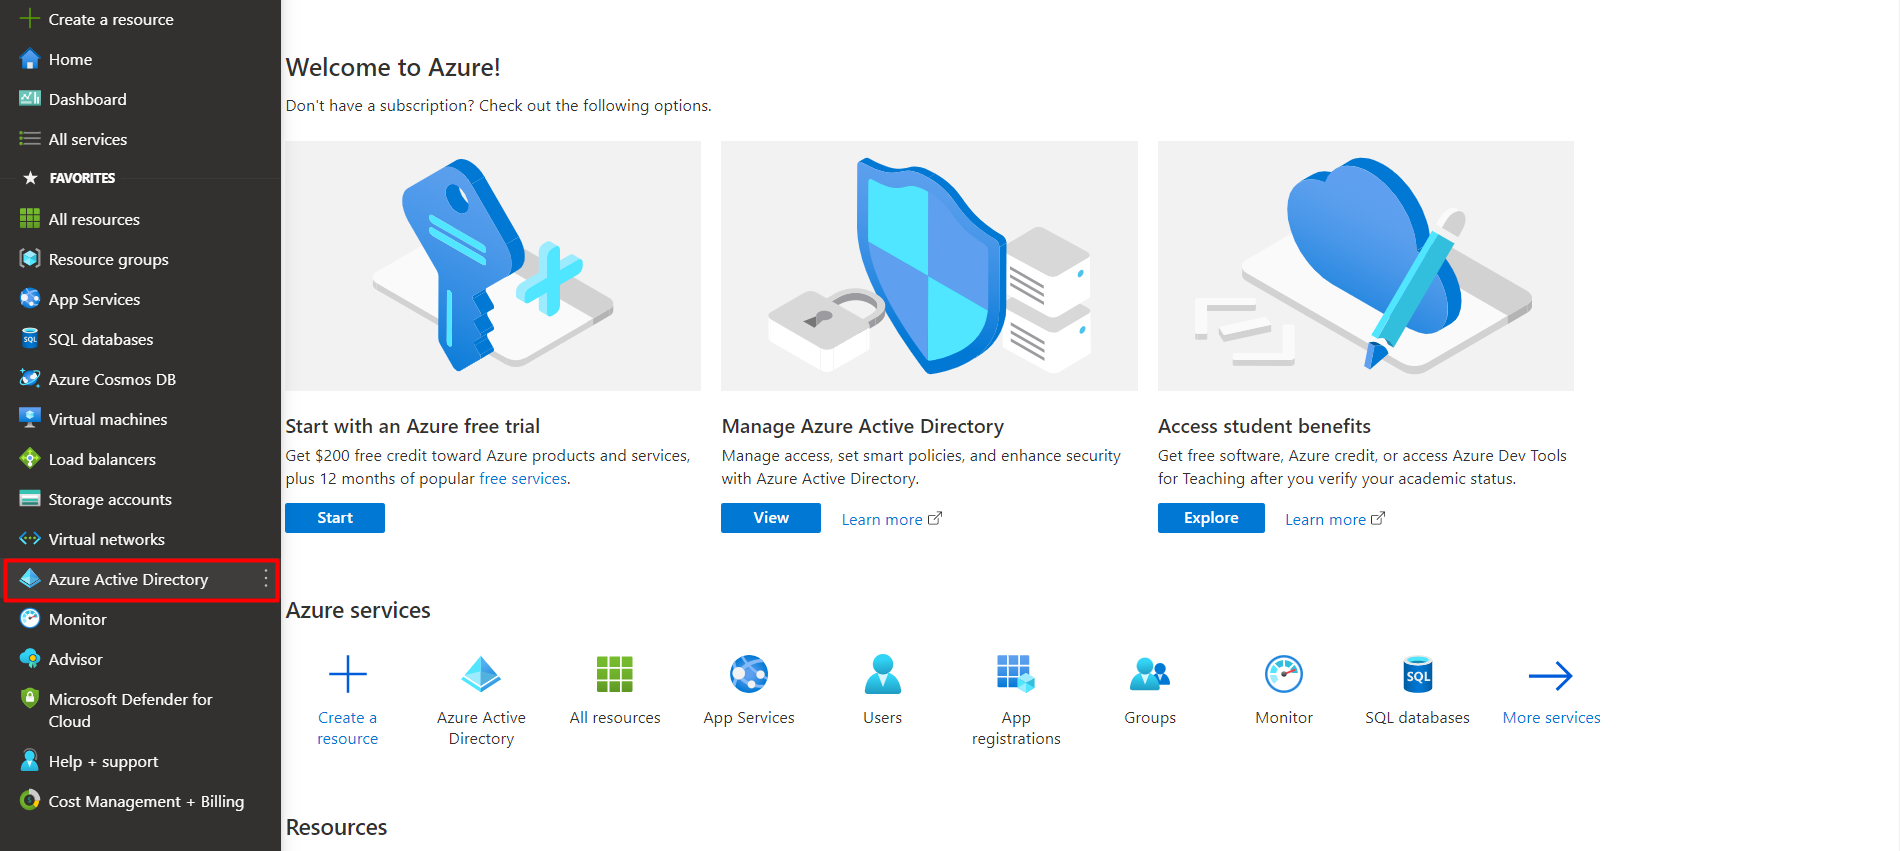
- Click on the "Enterprise Applications" from the left panel.
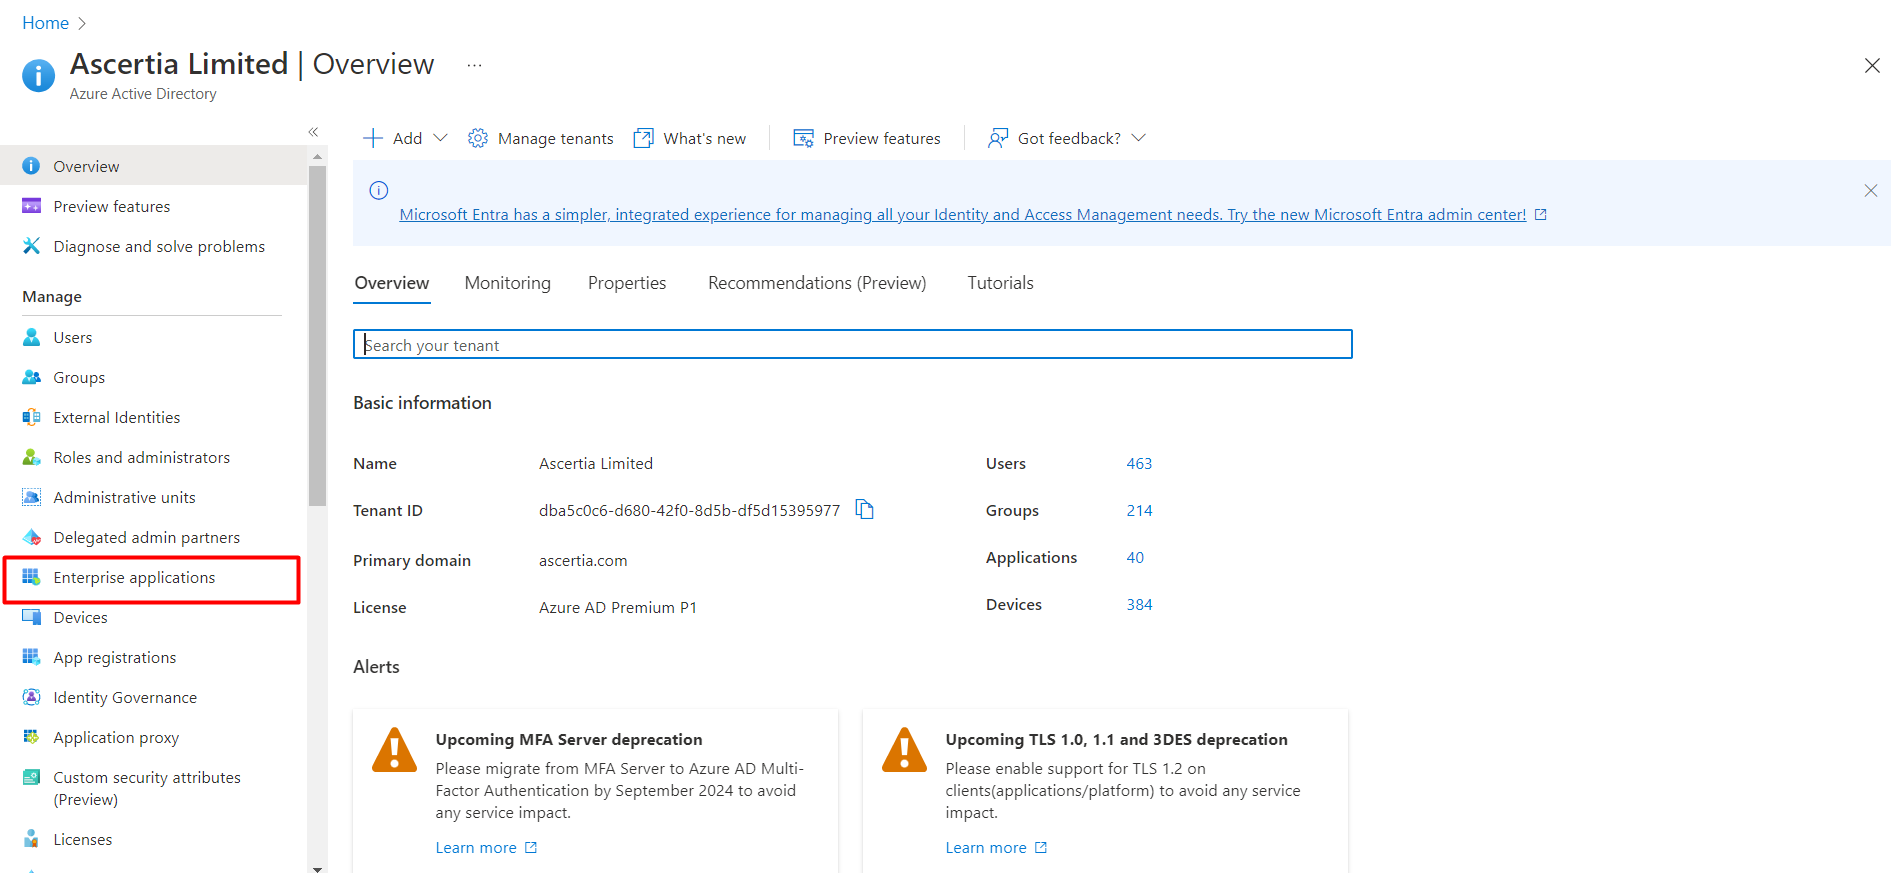
- Click on the "New application" button.

- Click on the "Create your own application" button.
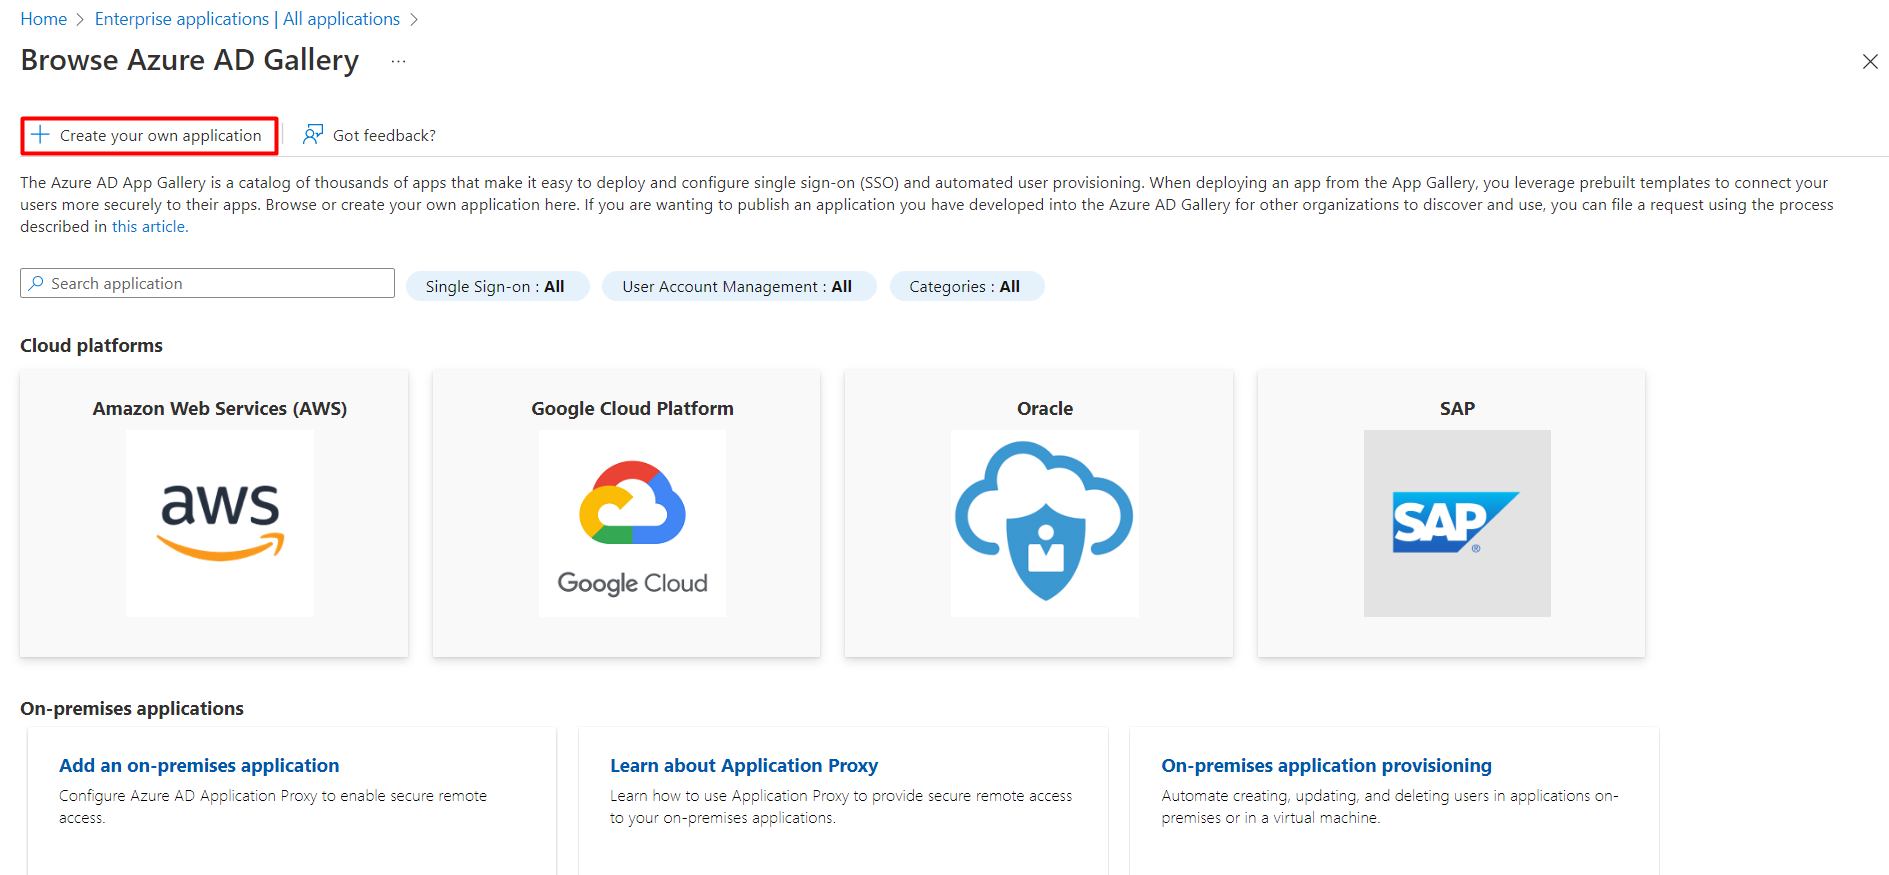
- Enter the name for the app, select an option for your app via the radio button, and click on the "Create" button.
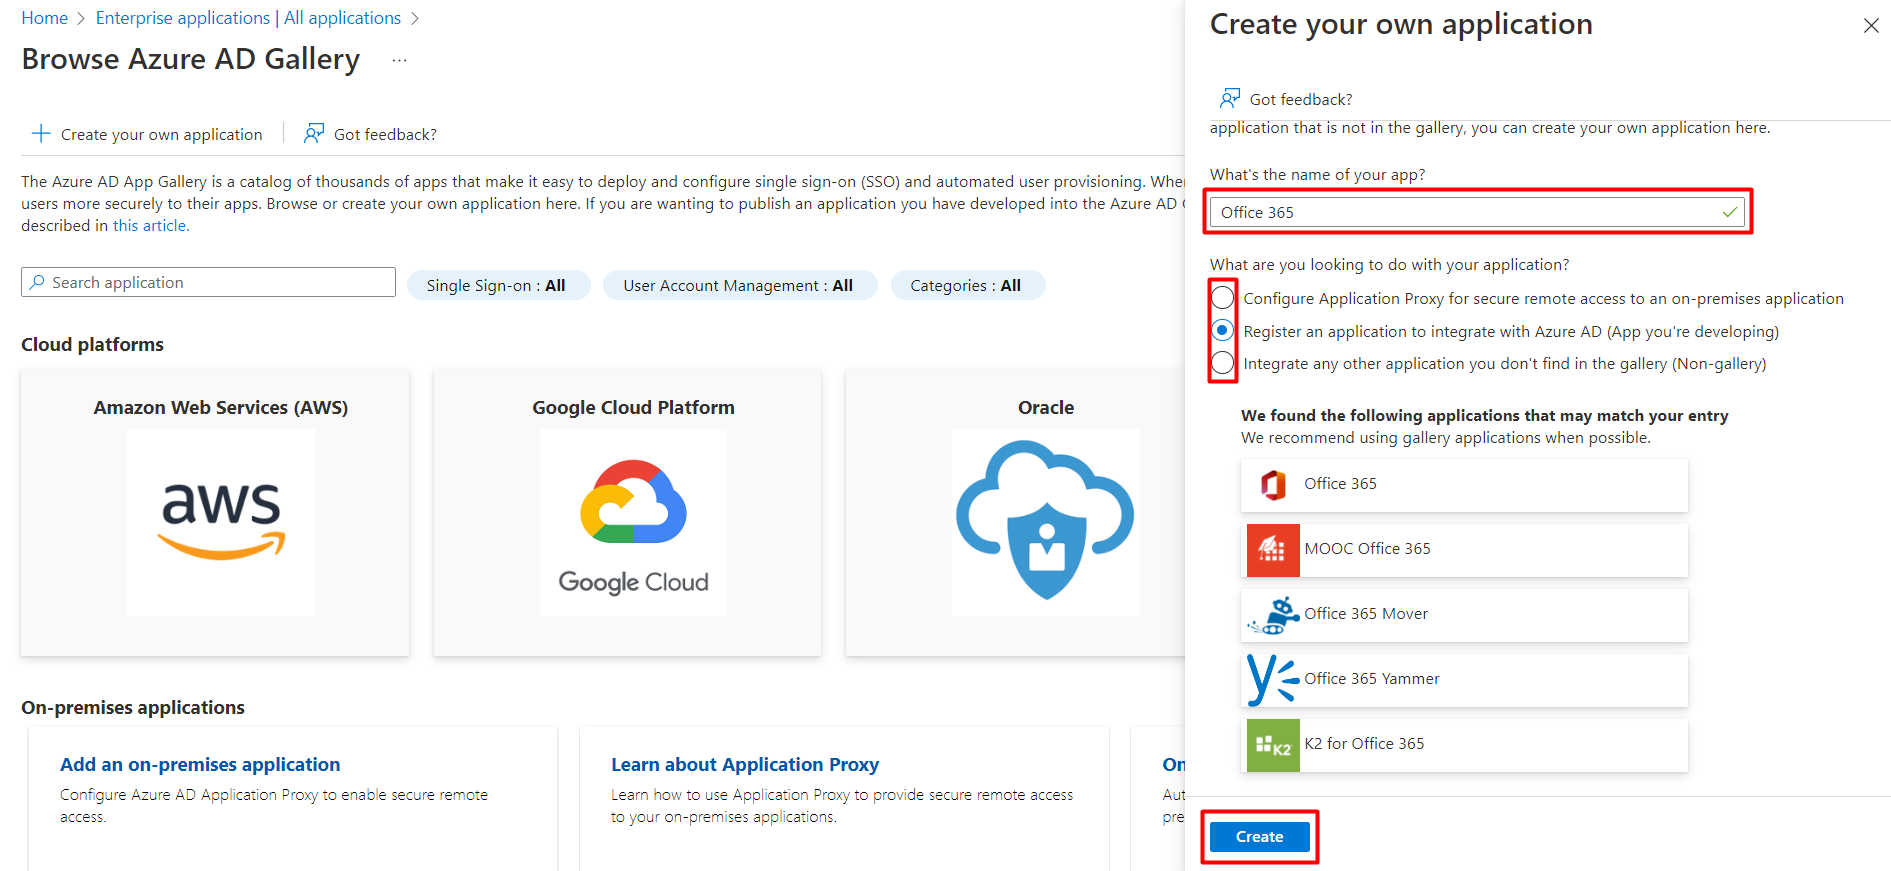
- Select the "Supported account types". Under the "Redirect URl", select "Web" and enter "https://web.signinghub.com/OAuth/Office365CallBack".
Click on the "Register" button.
- Click on the "Enterprise applications | All applications" button.

- Search and open the created app.

- You will be taken to the app overview screen. Select "Properties" from the left tab.
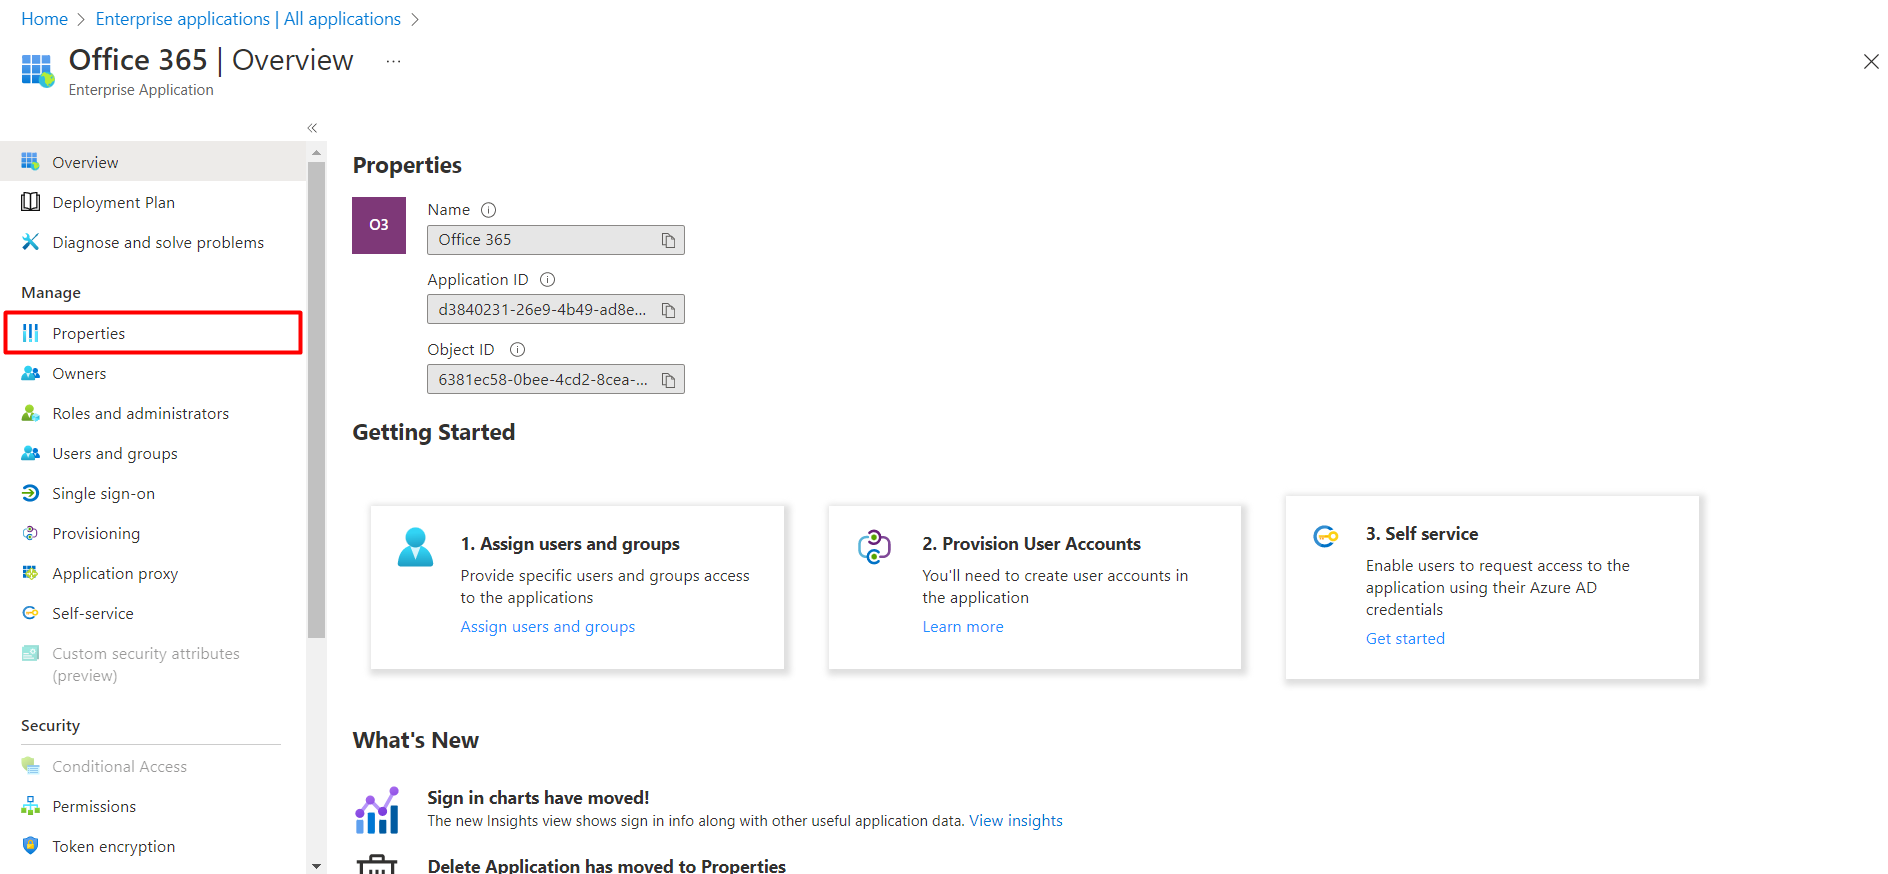
- From the properties screen, click on the "application registration" hyperlink.

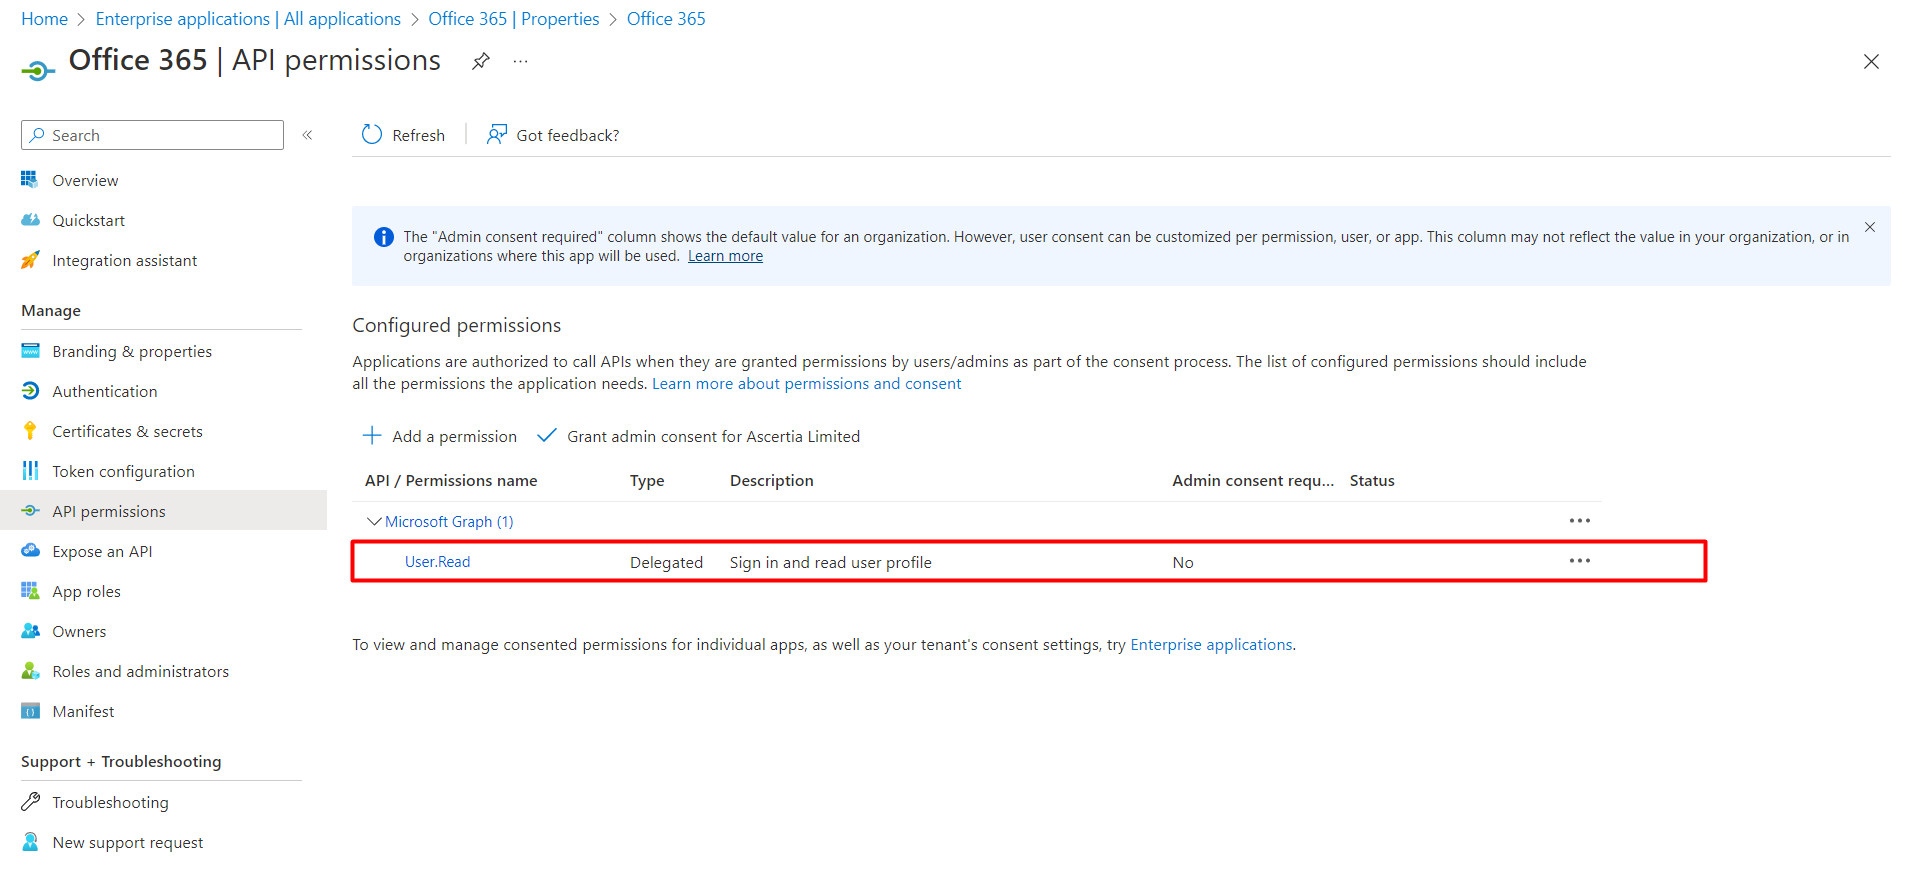
- Select "API permissions" from the left tab.

- From the "API permissions" screen, make sure that “User.Read” permission is configured.
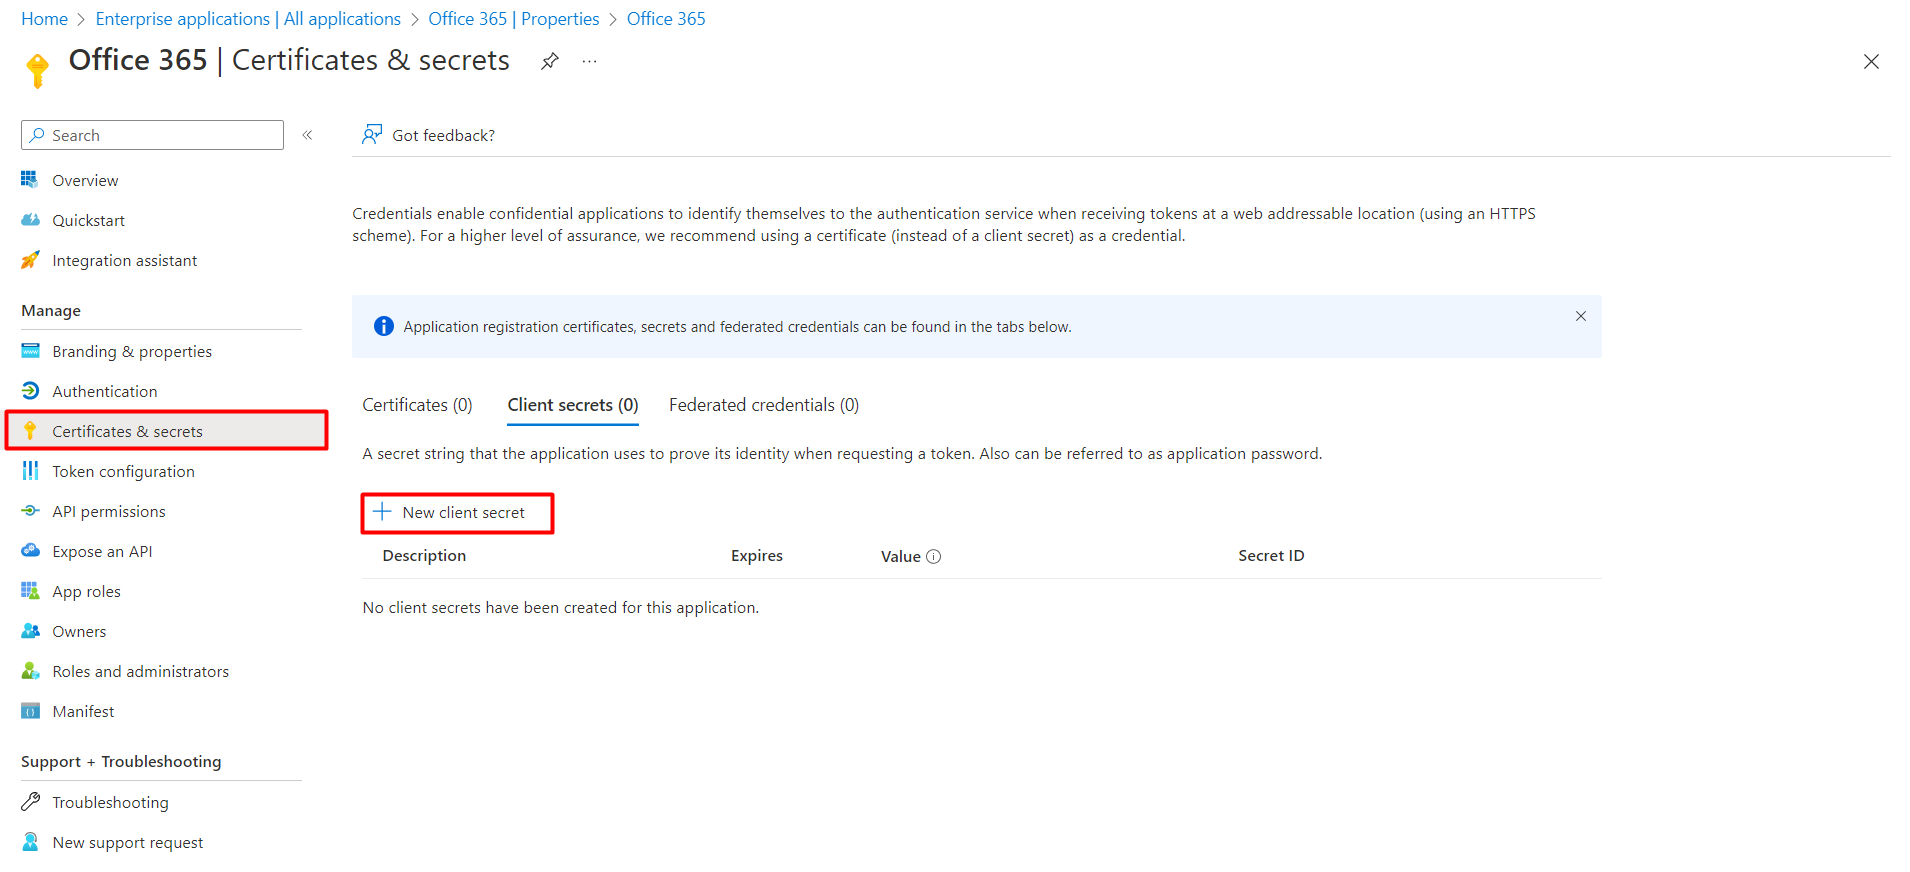
- Select “Certificates & secrets” from the left tab. Create a new client secret by clicking on the “New client secret” button. Save the client secret for use in the SigningHub connector.
- Get the ClientID, directory ID and endpoints from “Overview”.

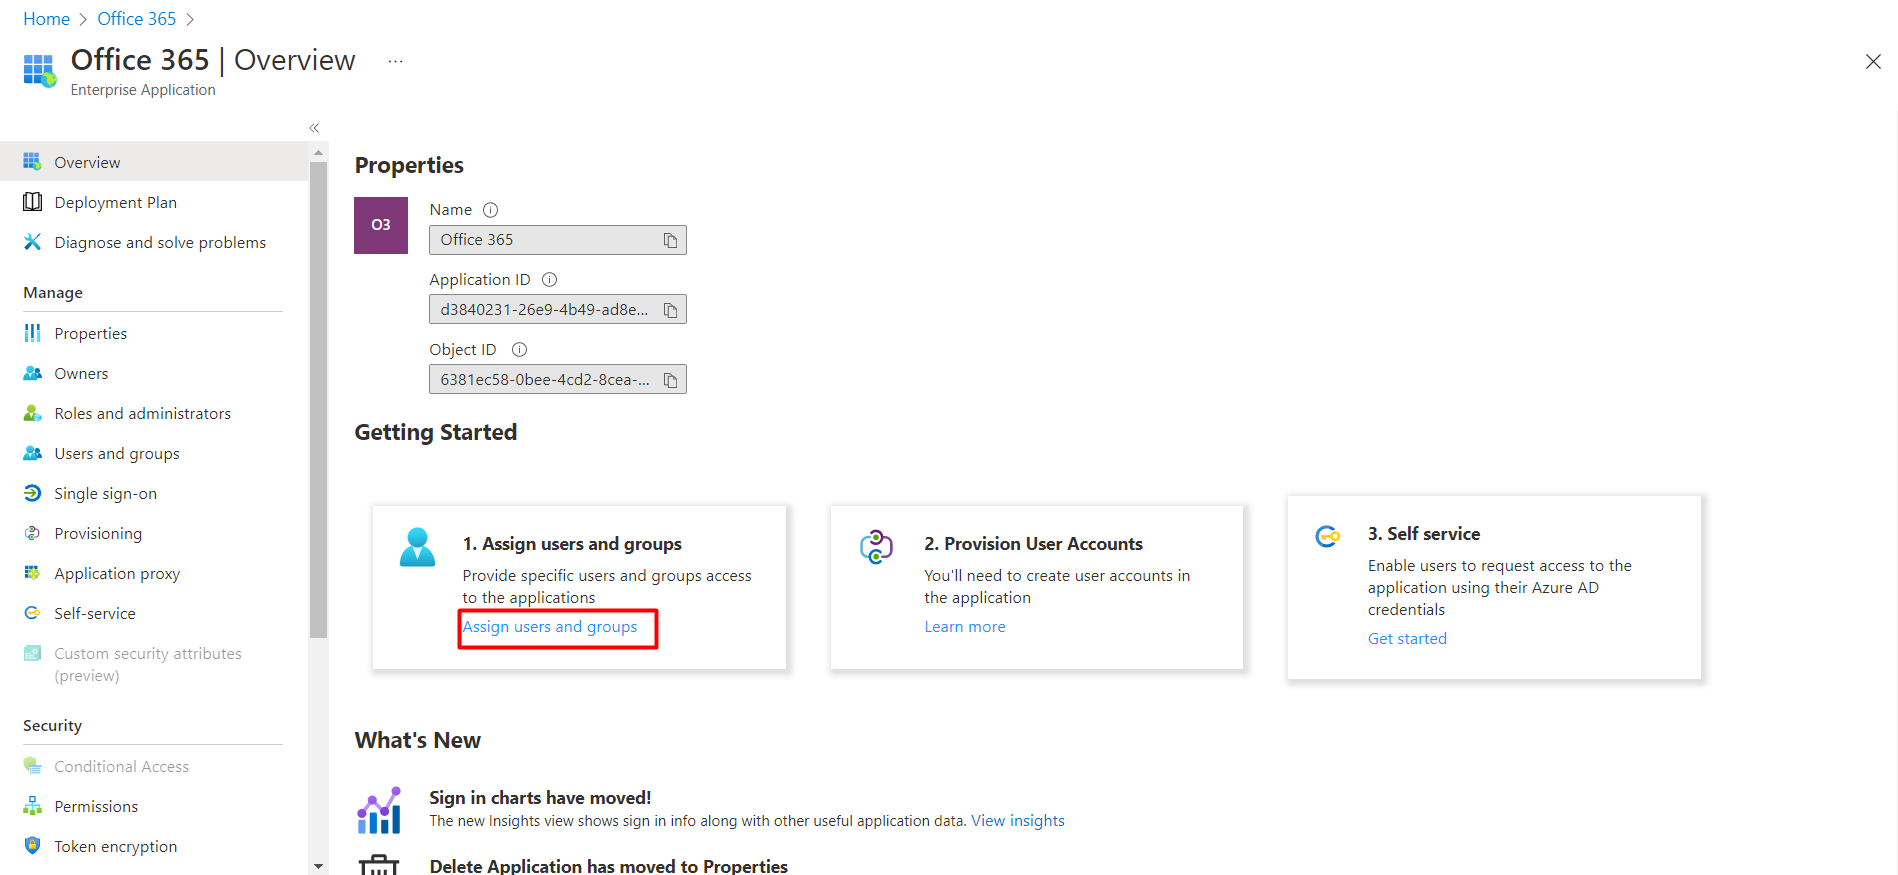
- For adding user, go to “Office 365” from “Overview”.

- Click on the “Assign users and groups” button.
Then click on the “Add user/group” button.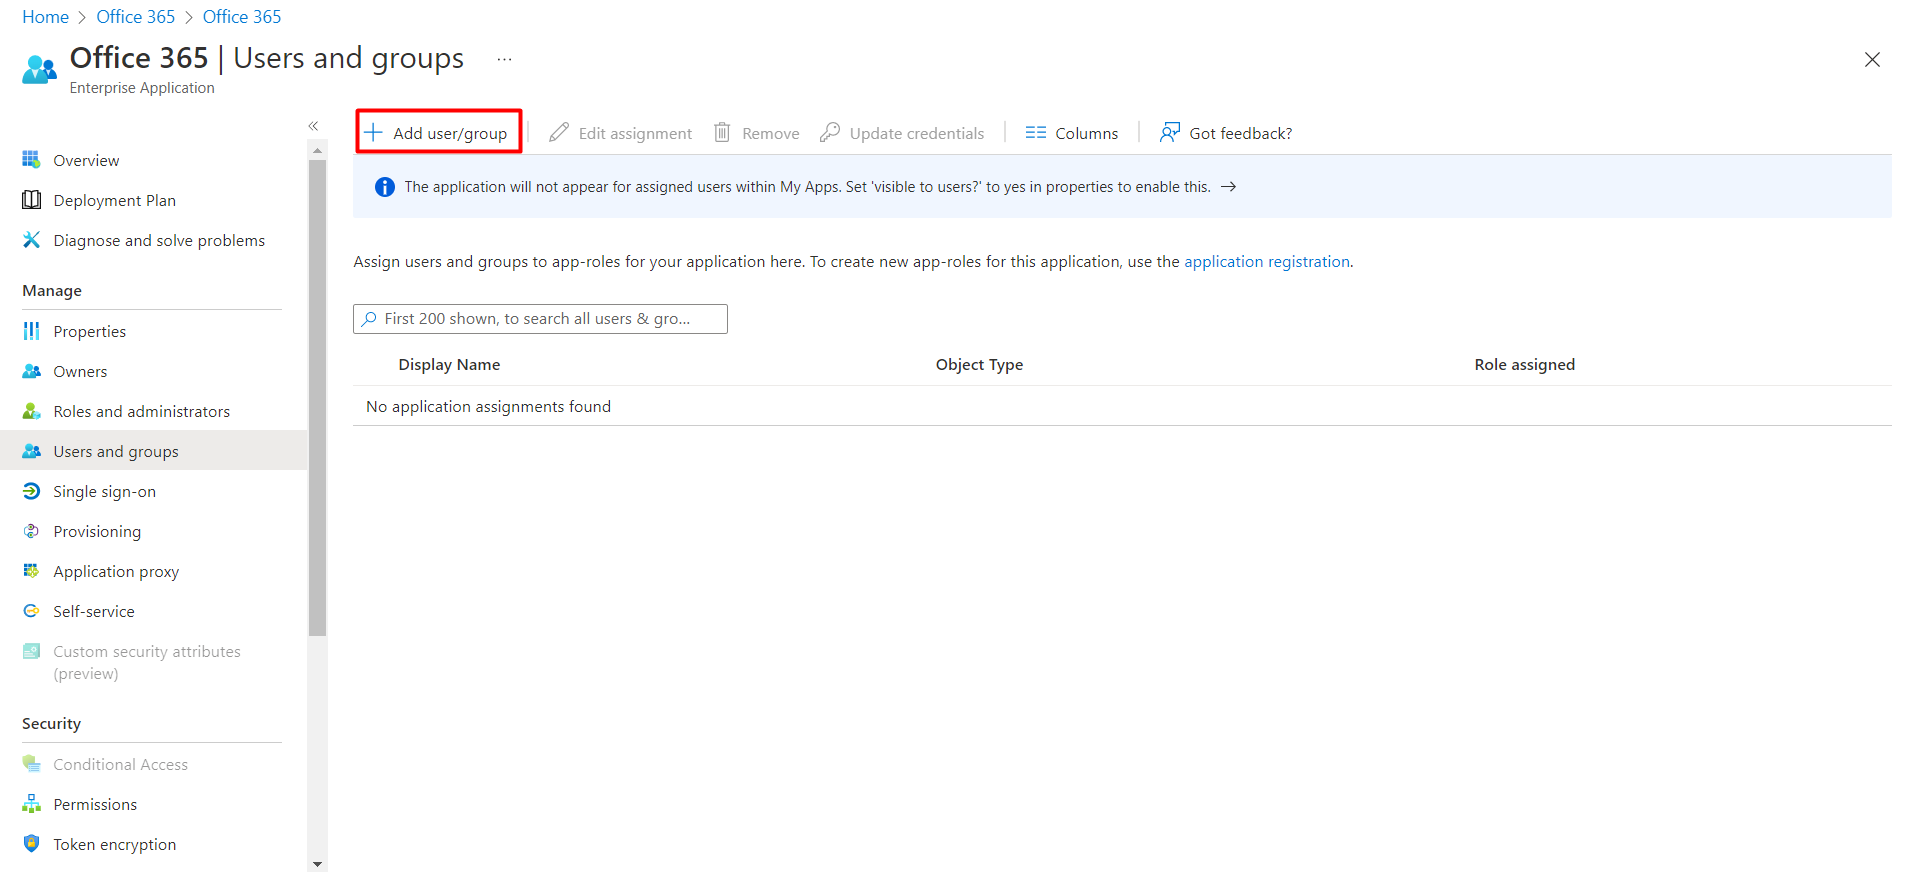
- Create an Office 365 Connector, using information from step 14 and 15.
Create an Office 365 connector
- Access the SigningHub Admin portal.
- Click the "Configurations"section from the left menu.
- Click the "Connectors" tab. The "Connectors" screen will appear.
- Click
 from the grid header.
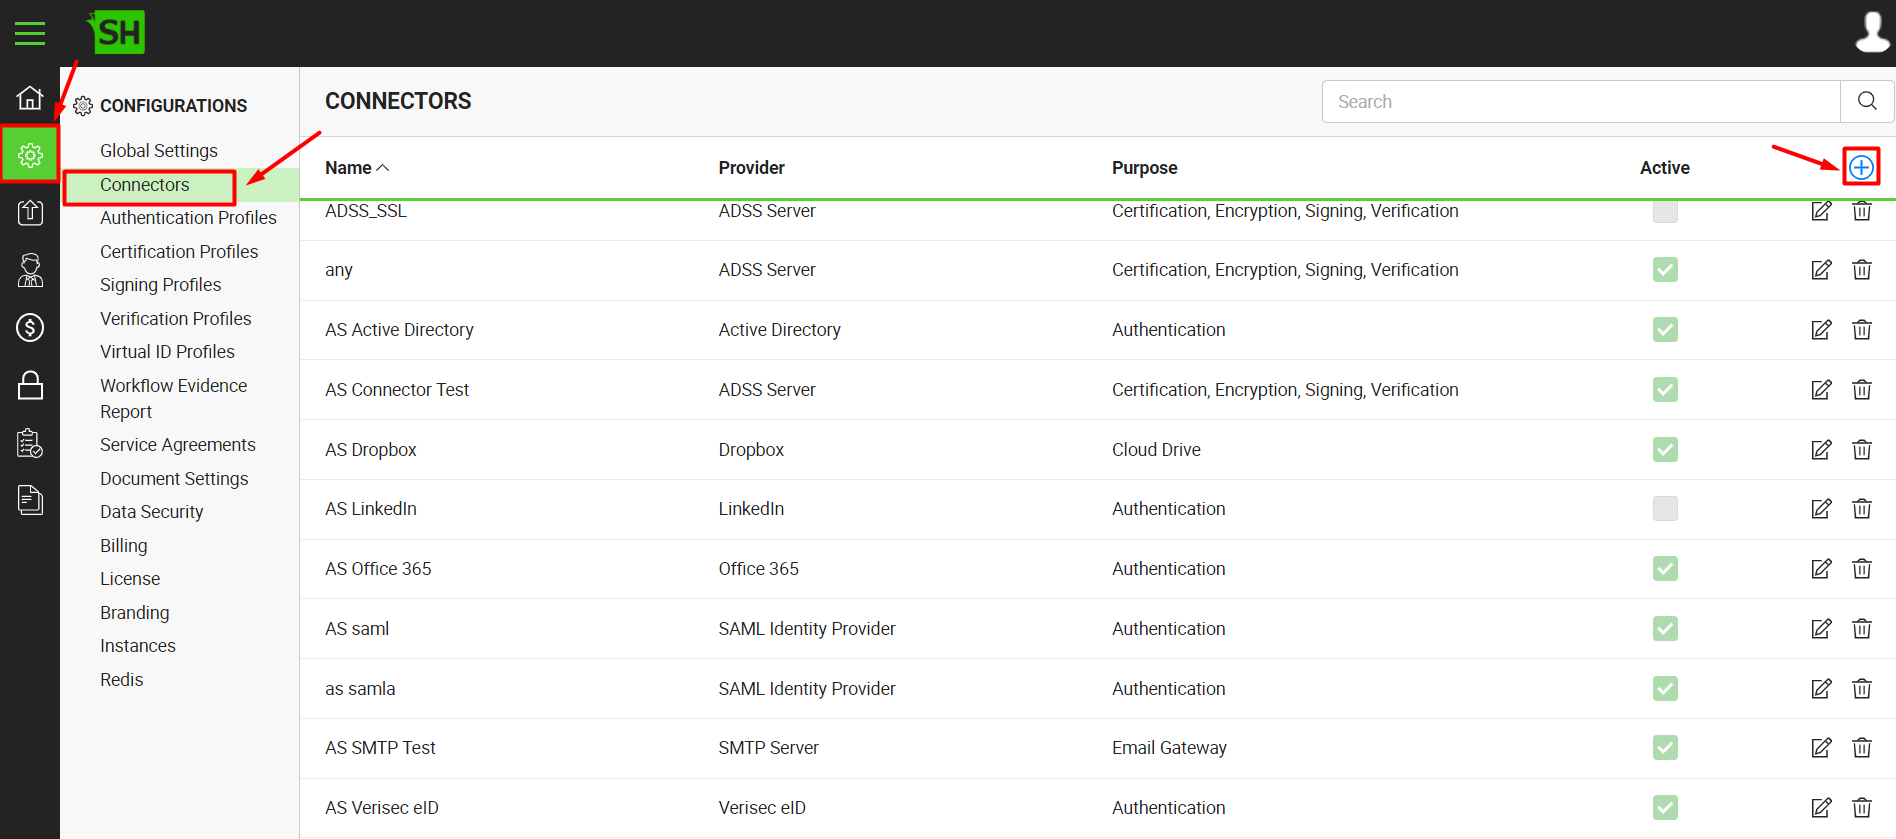
- A dialog will appear to add the connector details. The connector dialog is comprised of two screens, i.e. Basic Information and Details. Specify the basic information and click the "Next" button to provide the respective connector details. See the below table for fields description.


- Click the "Finish" button. A new connector will be saved and displayed in the list.
|
Basic Information |
|
|
Fields |
Description |
|
Name |
Specify a unique name for this connector, i.e. My Office 365. This connector will be used in the configuration of Authentication Profiles. |
|
Provider |
Select the provider for this connector, i.e. "Office 365". |
|
Purpose |
This field will display the purpose of the selected provider above, i.e. the purpose of "Office 365" is "Authentication". |
|
Active |
Tick this check box to make this connector active. Inactive connectors cannot be configured in the Authentication Profiles. |
|
Details |
|
|
Fields |
Description |
|
Logo |
Select an appropriate image in the jpeg, jpg, gif or png format for the connector's logo that will be displayed on the login screen. |
|
Client ID |
Specify the registered client ID that has been provided by Office 365 during account configuration, e.g. |
|
Client Secret |
Specify the client secret that has been provided by Office 365 during account configuration, e.g. |
|
Account Type |
Specify whether the account type is Single Tenant or Multi Tenant. |
|
[Name] Attribute |
Specify the attribute against which you want SigningHub to lookup the "Name" of a user, from Azure AD. |
|
[Email] Attribute |
Specify the attribute against which you want SigningHub to lookup the "Email" of a user, from Azure AD. |
|
|
|
Create an Office 365 authentication profile
- Access the SigningHub Admin portal.
- Click the "Configurations" option from the left menu.
- Click the "Authentication Profiles" option. The "Authentication Profiles" screen will appear.
- Click
 from the grid header.

- A dialog will appear to configure the authentication profile details.
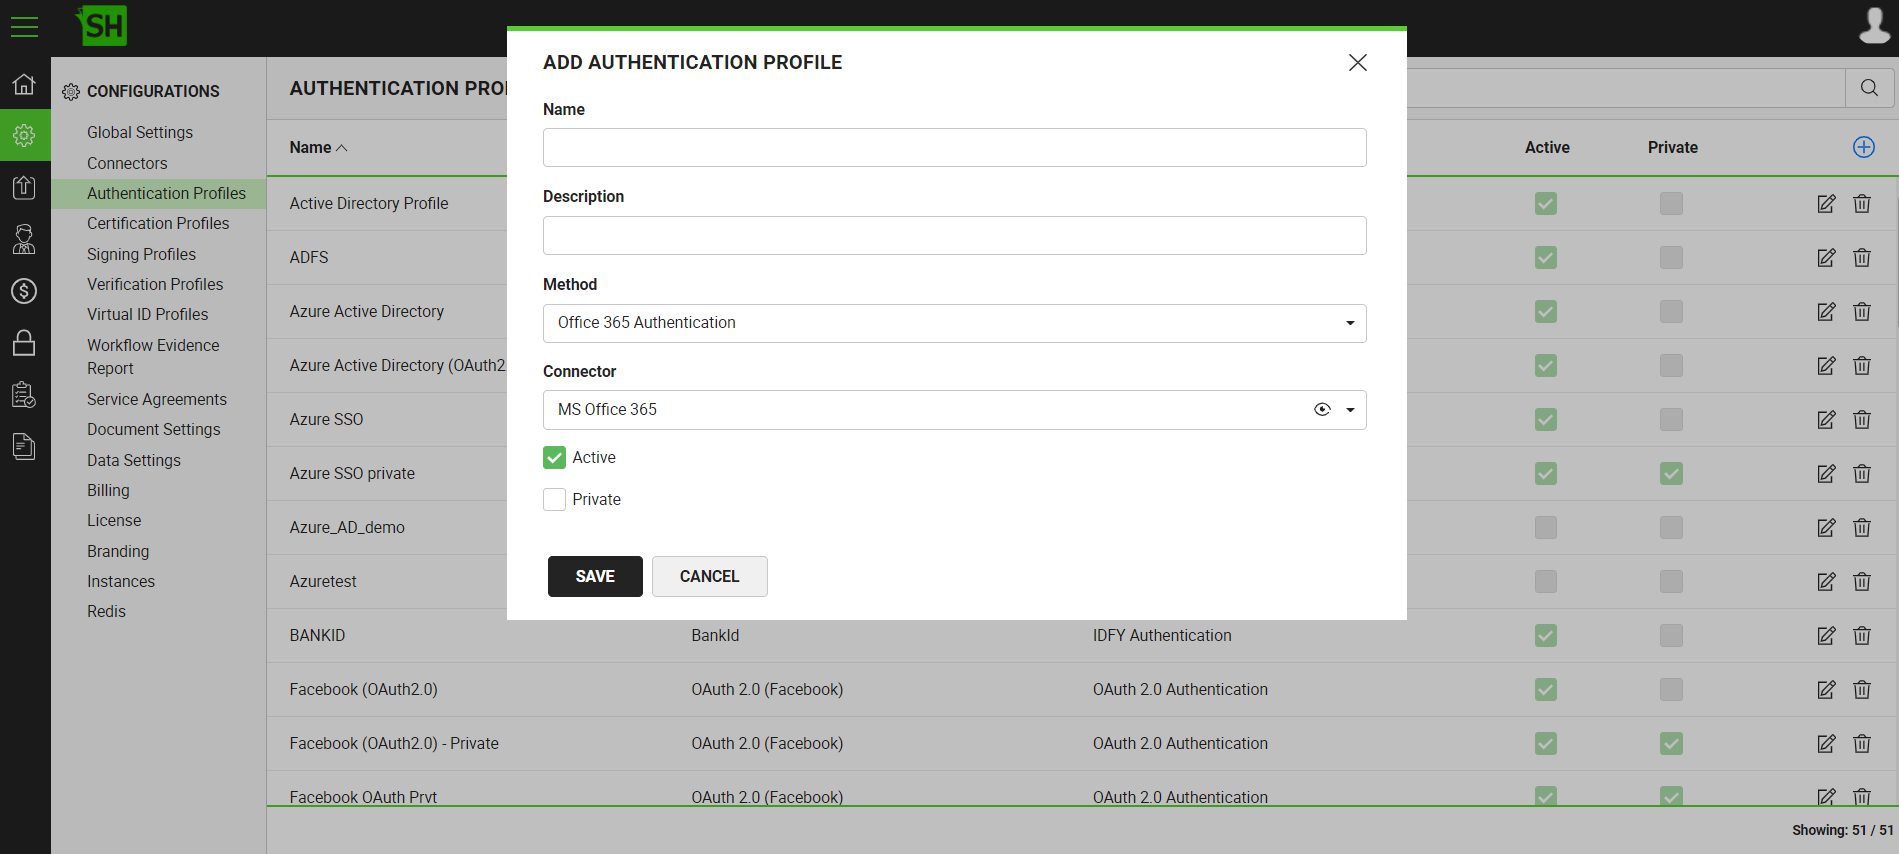
- Specify the details accordingly and click the "Save" button. A new authentication profile will be saved and displayed in the list. See the below table for fields description.
|
Authentication Profile |
|
|
Fields |
Description |
|
Name |
Specify a unique name for this authentication profile, i.e. My Office 365 Authentication. This name will be displayed at the login screen of SigningHub Desktop Web. |
|
Description |
Specify any description related to this authentication profile for your record. |
|
Method |
Select the authentication method (i.e.Office 365 Authentication) for this profile. |
|
Connector |
This field will appear to select the related connector, when you select any third-party authentication method above. Select the Office 365 connector. Click |
|
Active |
Tick this check box to make this authentication profile active. Only the active profiles are available to the end users on their Login screen and Integration screen of SigningHub Desktop Web for authentication. |
|
Tick this check box to mark this authentication profile as private. A private profile will not be available to the (public) end users on their Login screen and Integration screen of SigningHub Desktop Web. |
|
|
|
|
See Also
- How to Integrate Power BI
- How to Obtain Firebase Integration Key
- How to Obtain the Azure AD Integration Key
- How to Obtain a Salesforce Consumer Key
- How to Obtain the Dropbox Integration Key
- How to Obtain the Google Drive Integration Key
- How to Obtain the OneDrive Integration Key
- How to Obtain the HubSpot Integration Key


