How to Obtain Firebase Integration Key
- Introduction
- How it works?
- Obtain the Firebase Integration Key
- Create a Firebase connector
- Configure the Firebase Connector as Default in the SigningHub Global Settings
Firebase is a comprehensive mobile and web application development platform developed by Google, offering a suite of services to streamline the development, enhancement, and growth of applications. At its core, Firebase provides a real-time NoSQL database for seamless data synchronization, coupled with robust authentication services supporting various sign-in methods. The platform extends its capabilities with server-less Cloud Functions, enabling the deployment of custom back-end logic in response to events without the need for server management. Firebase further includes cloud storage for secure content storage, a powerful hosting solution for static and dynamic web applications, and Firestore, a scalable NoSQL database with real-time data synchronization. With Firebase, developers can efficiently manage user authentication, send notifications through Firebase Cloud Messaging, and leverage a range of tools designed to simplify and optimize the development life cycle. A Firebase connector can be configured in SigningHub Admin by providing the Project ID, and the Private Key File (.json).
- Obtain the Firebase Integration Key.
- Create a Firebase connector in SigningHub Admin.
- Configure the Firebase Connector as Default in SigningHub Admin.
Obtain the Firebase Integration Key
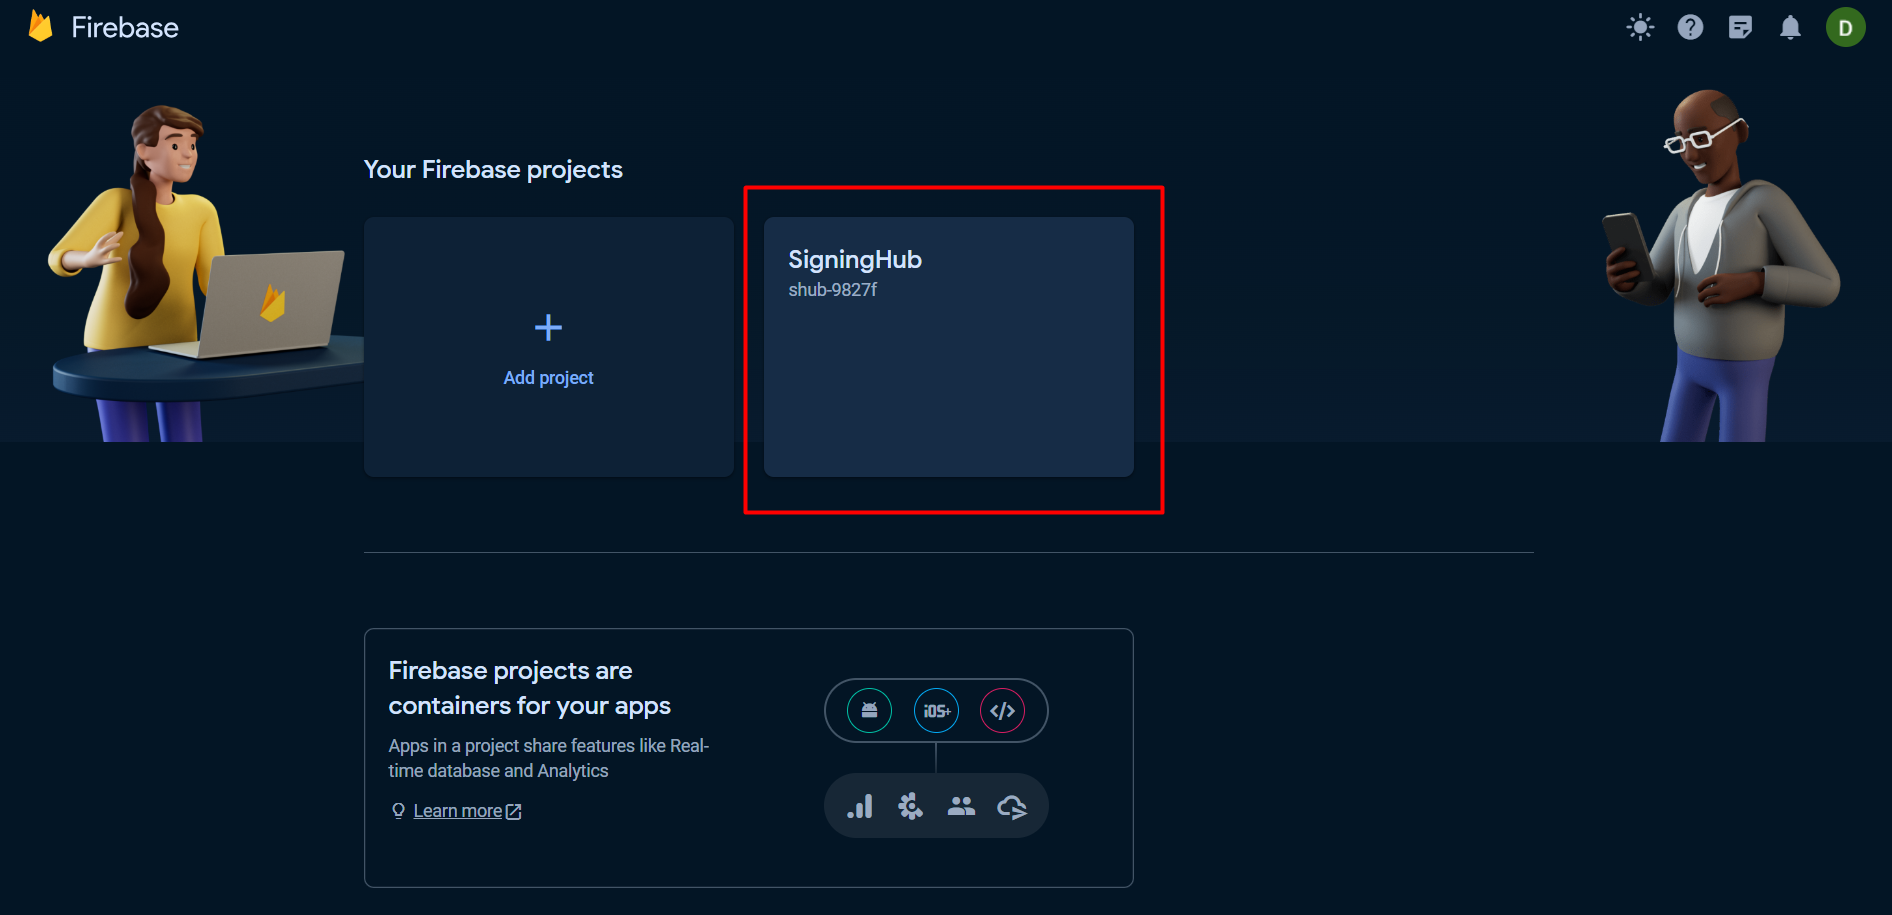
- Sign in to the Firebase console using your google account credentials.

- Select the project from the "Your Firebase Projects" page.
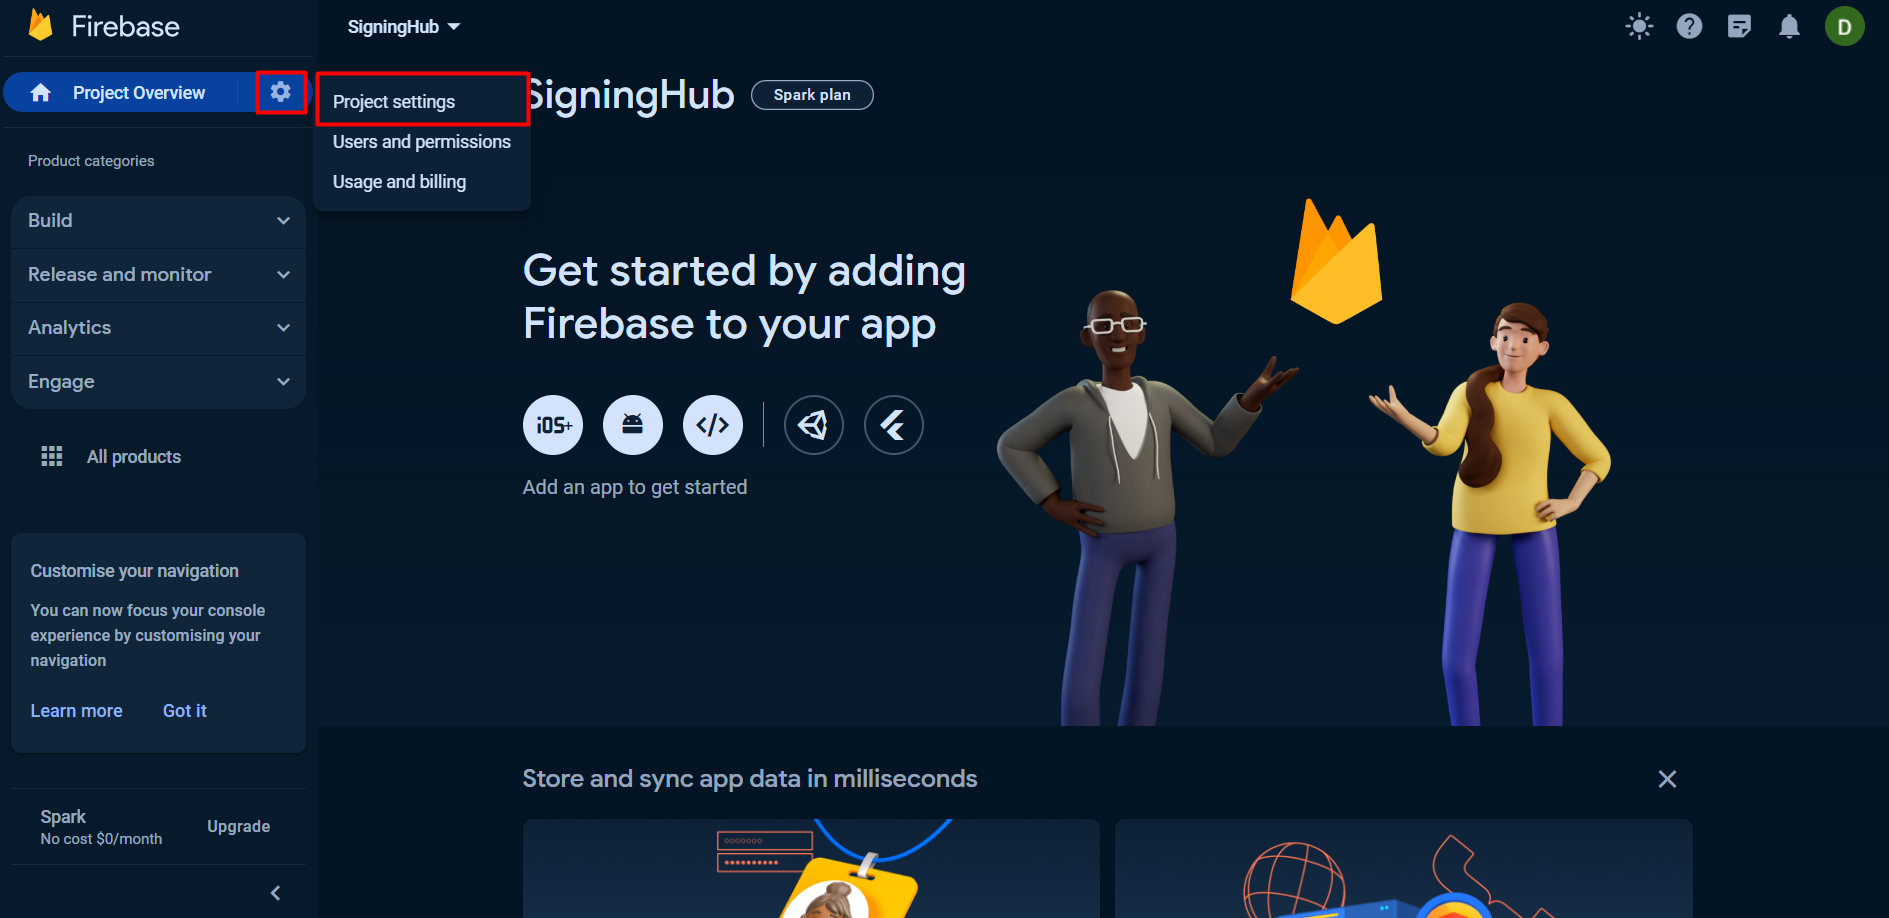
- The "Project Overview" page will appear. Click on the settings icon, and select "Project settings" from the drop down.
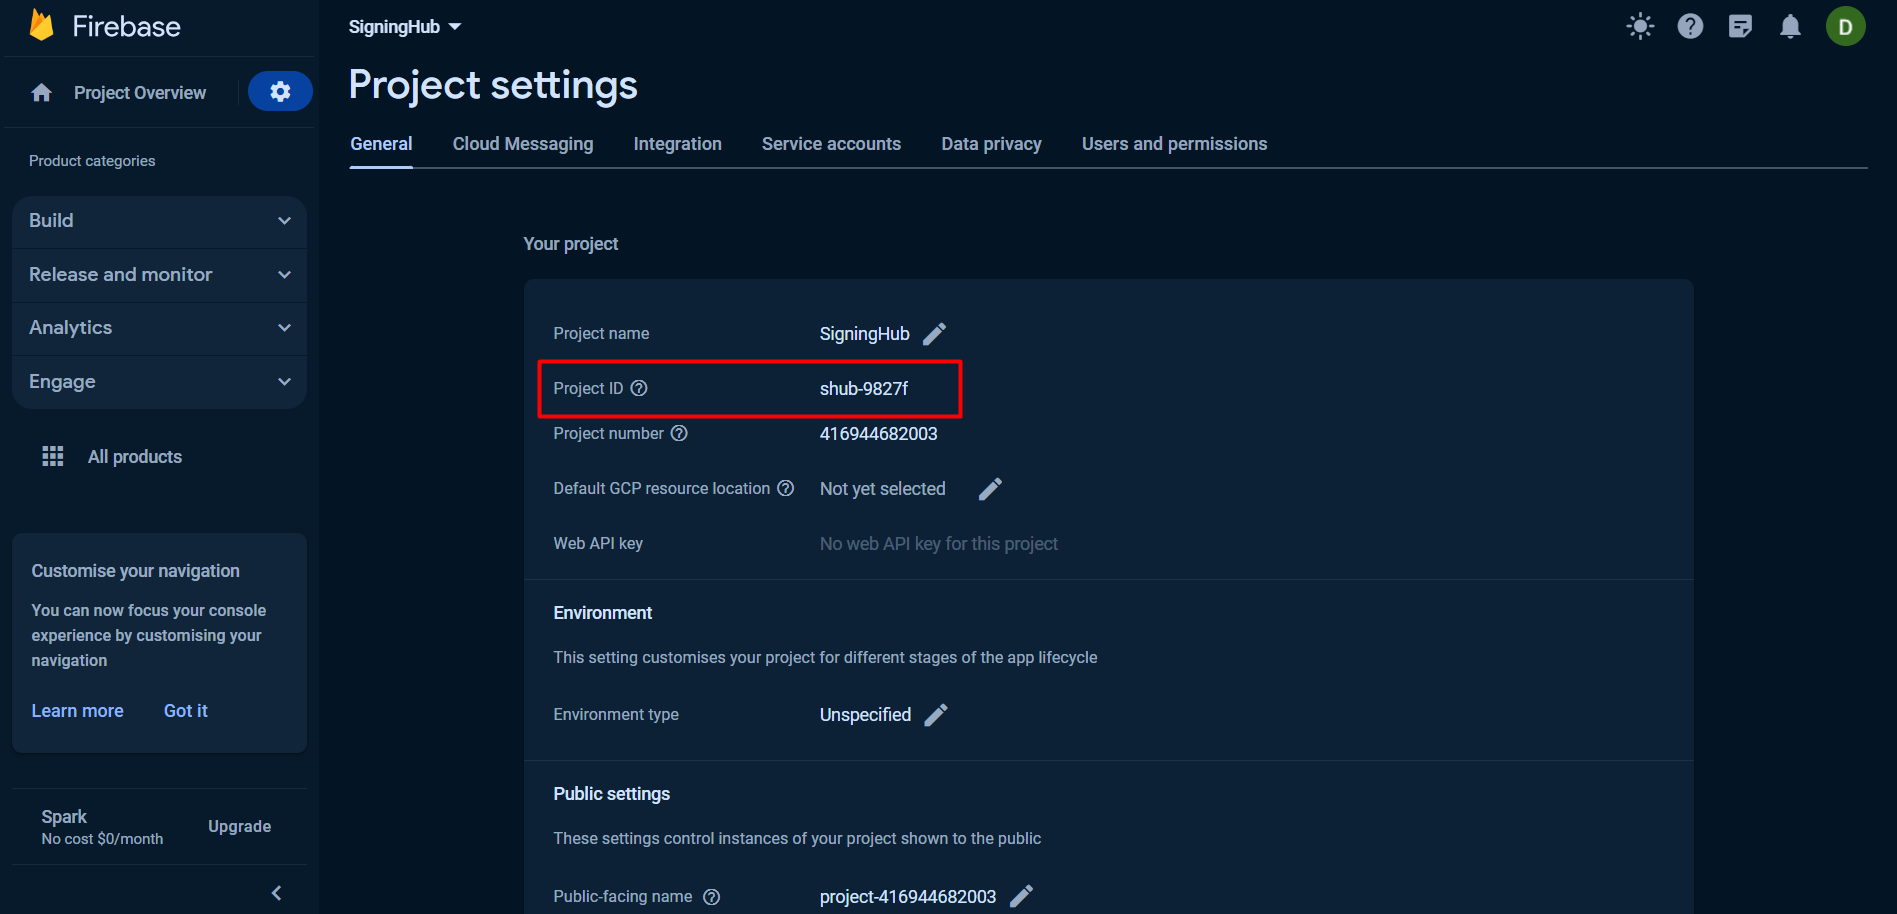
- From the "General" tab, get the "Project ID". (The "Project ID" will be needed while creating a connector.)
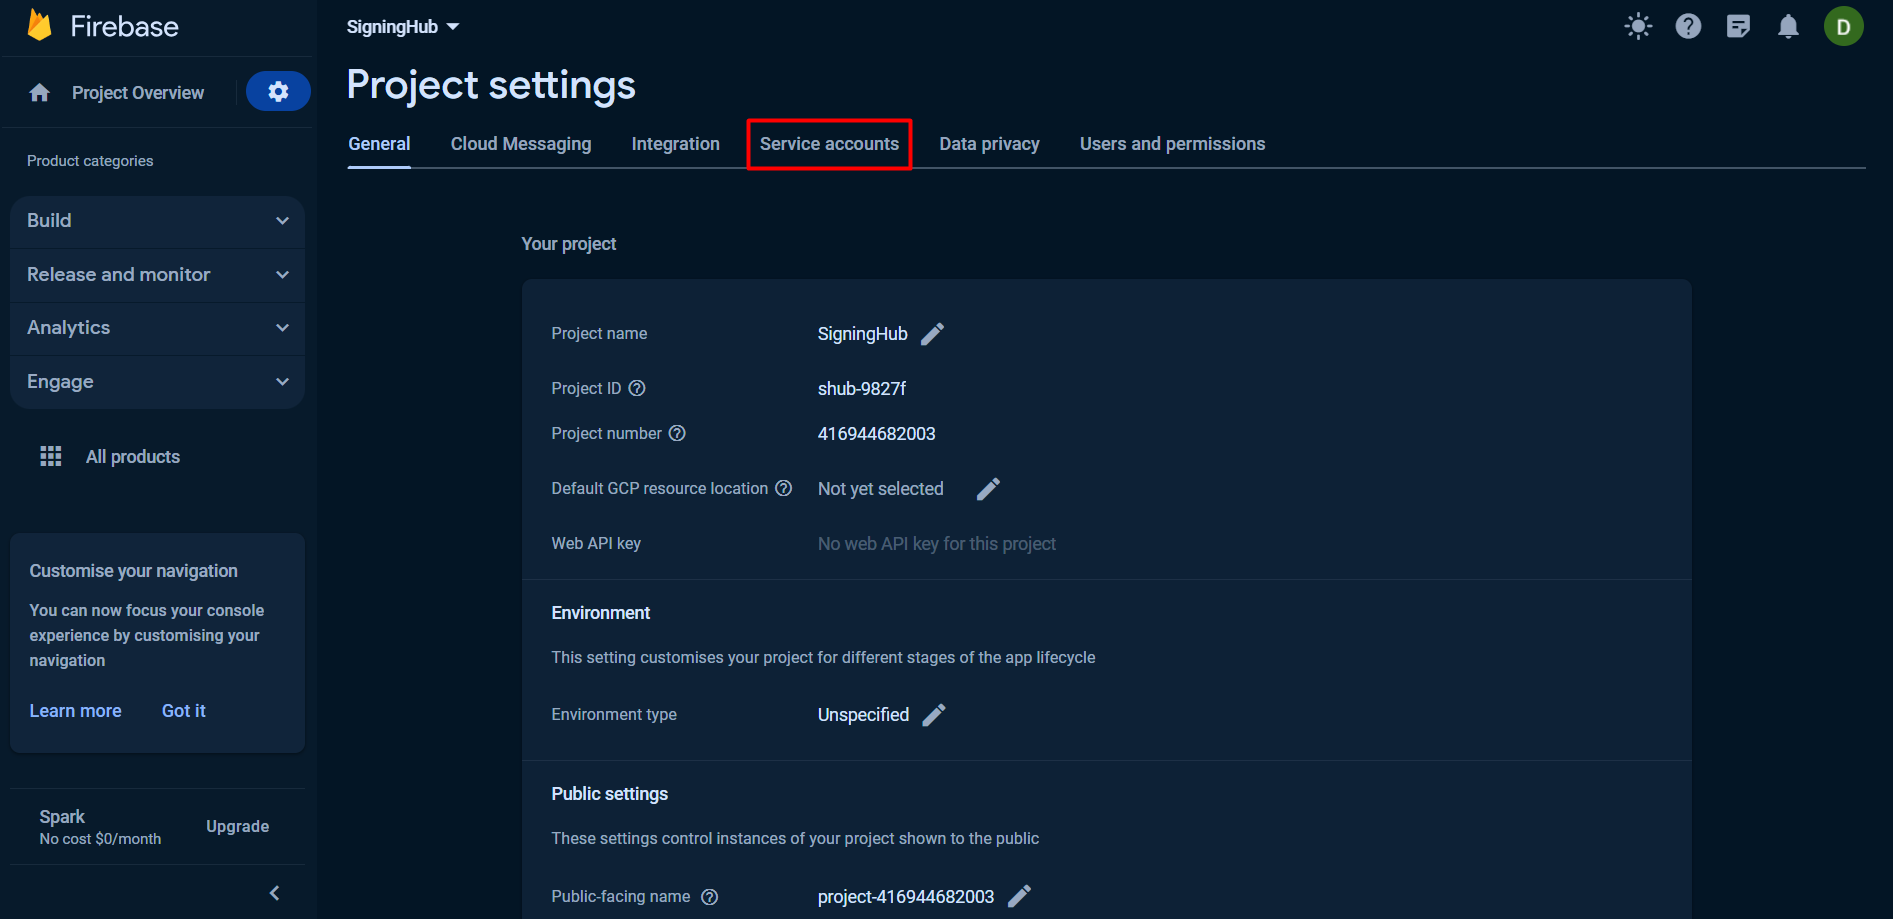
- Click on the "Service accounts" tab.
- Click on the "Generate a new private key" button.

- Click on the "Generate key" button from the pop-up. A .json file will be downloaded. (This "Private Key File" will be needed while creating a connector.)

- Create a Firebase Connector, using the Project ID from step 4, and the Private Key File from step 7.
- Access the SigningHub Admin portal.
- Click the "Configurations"section from the left menu.
- Click the "Connectors" tab. The "Connectors" screen will appear.
- Click
 from the grid header.
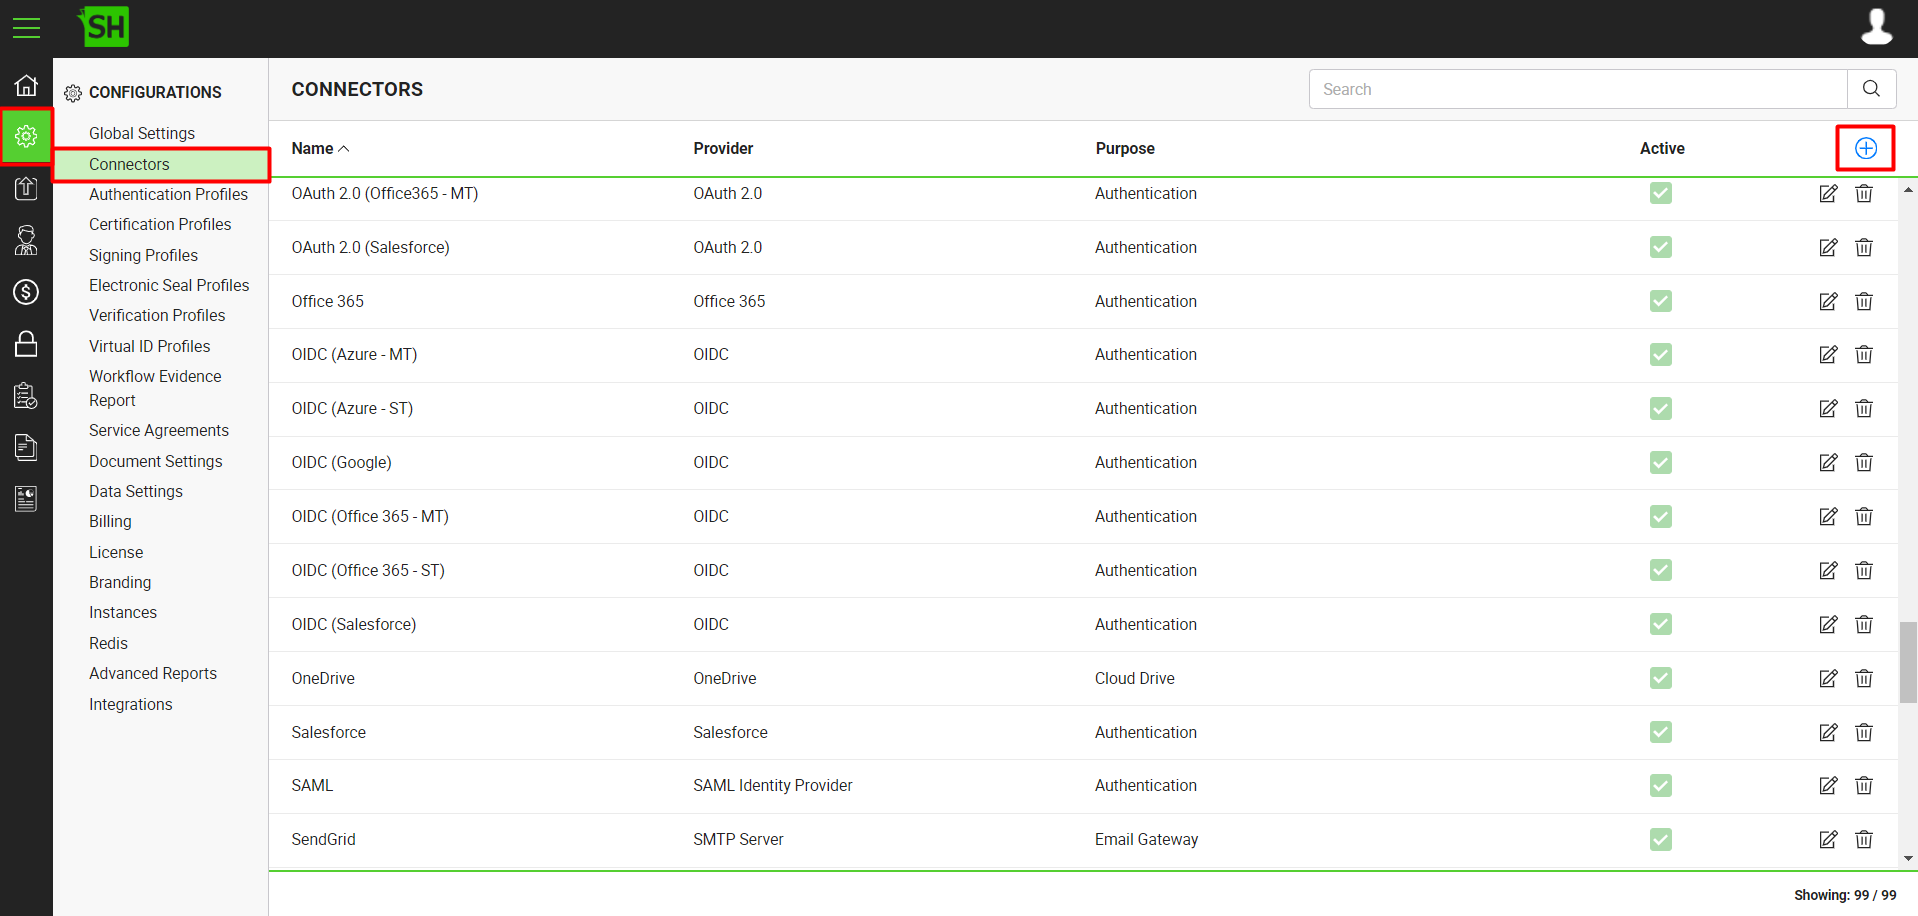
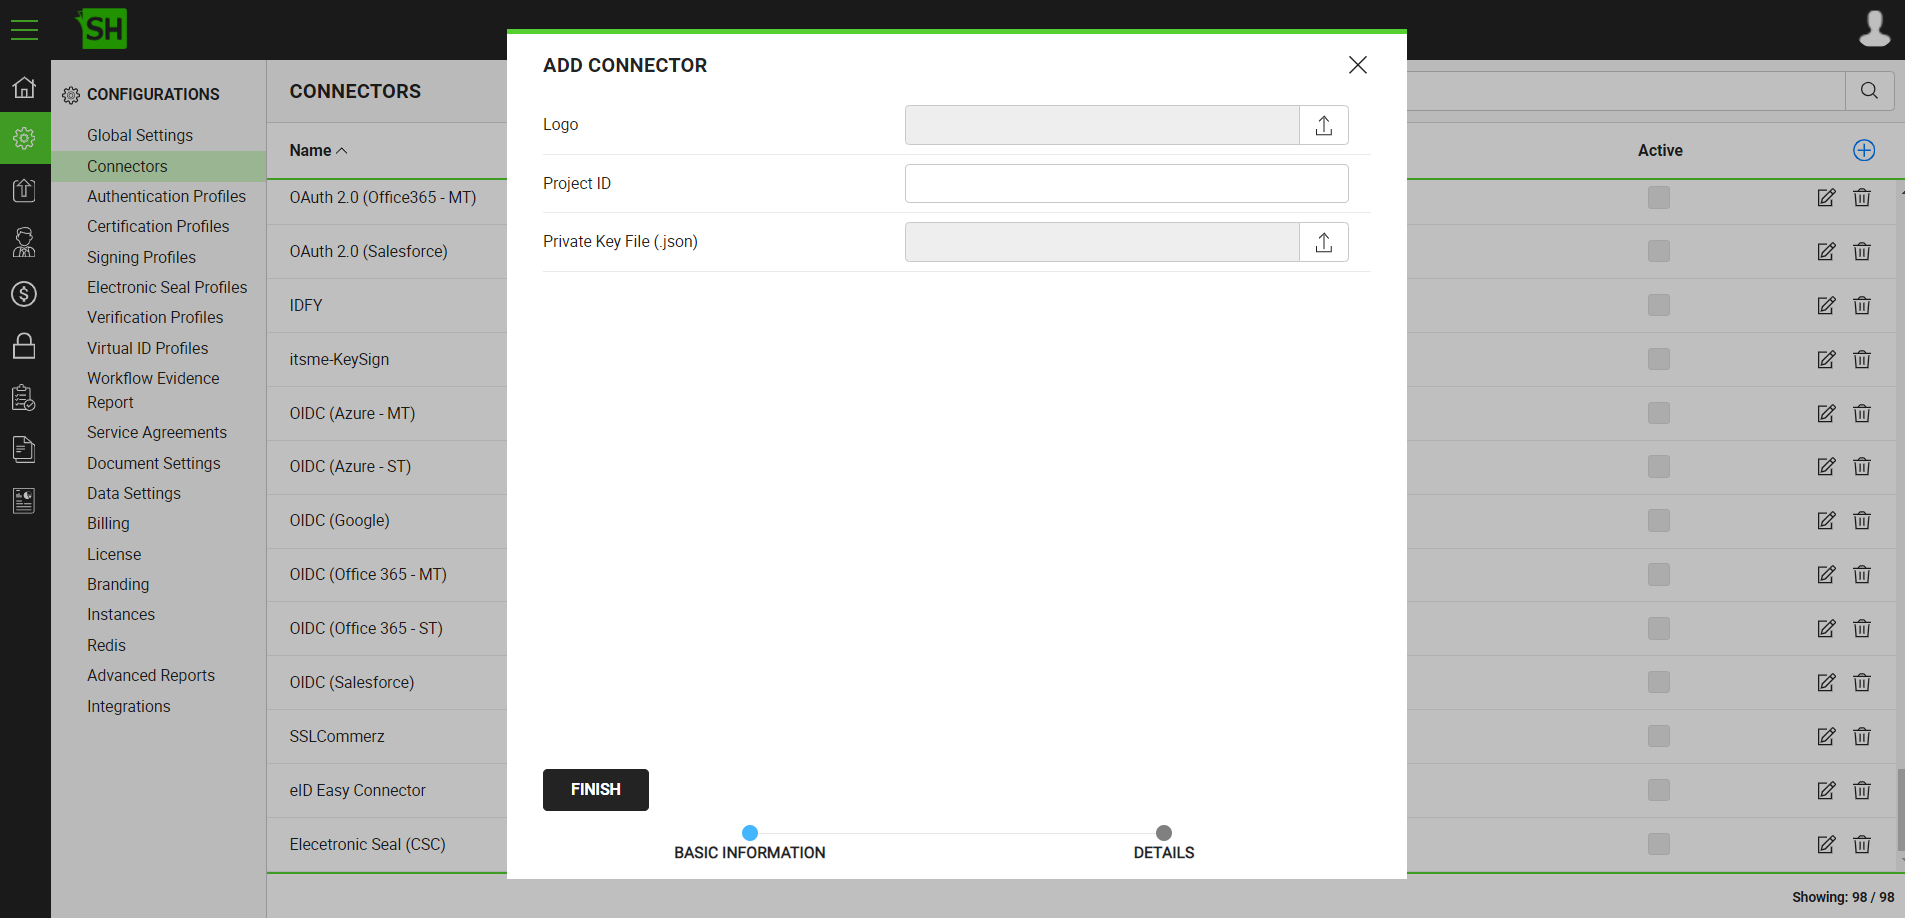
- An "Add Connector" dialog will appear. The connector dialog is comprised of two screens, i.e. Basic Information and Details. Specify the basic information and click the "Next" button to provide the respective connector details. See the below table for fields' description.

- Click the "Finish" button. A new connector will be saved and displayed in the list.
|
Basic Information |
|
|
Fields |
Description |
|
Name |
Specify a unique name for this connector, i.e. My Firebase. This connector will be used in the configuration of Global Settings. |
|
Provider |
Select the provider for this connector, i.e. "Firebase". |
|
Purpose |
This field will display the purpose of the selected provider above, i.e. the purpose of "Firebase" is "Push Notifications". |
|
Active |
Tick this check box to make this connector active. Inactive connectors cannot be configured in the Global Settings. |
|
Details |
|||
|
Fields |
Description |
||
|
Logo |
Select an appropriate image in the jpeg, jpg, gif or png format for the connector's logo. |
||
|
Project ID |
Specify the project ID of your Firebase project. e.g. "signinghub-23c56". This ID is available in the General project settings tab of the Firebase console. |
||
|
Private Key File (.json) |
Upload the private key file for your service account in .json format. This private key file will be used to authenticate a service account and authorize it to access Firebase services.
|
||

Configure the Firebase Connector as Default in the SigningHub Global Settings
- Access the SigningHub Admin portal.
- Click the "Configurations"section from the left menu.
- The "Global Settings" screen will appear.

- Click on the drop down at the top right side of the screen, and select "Default Connectors".

- The "Default Connectors" screen will appear.
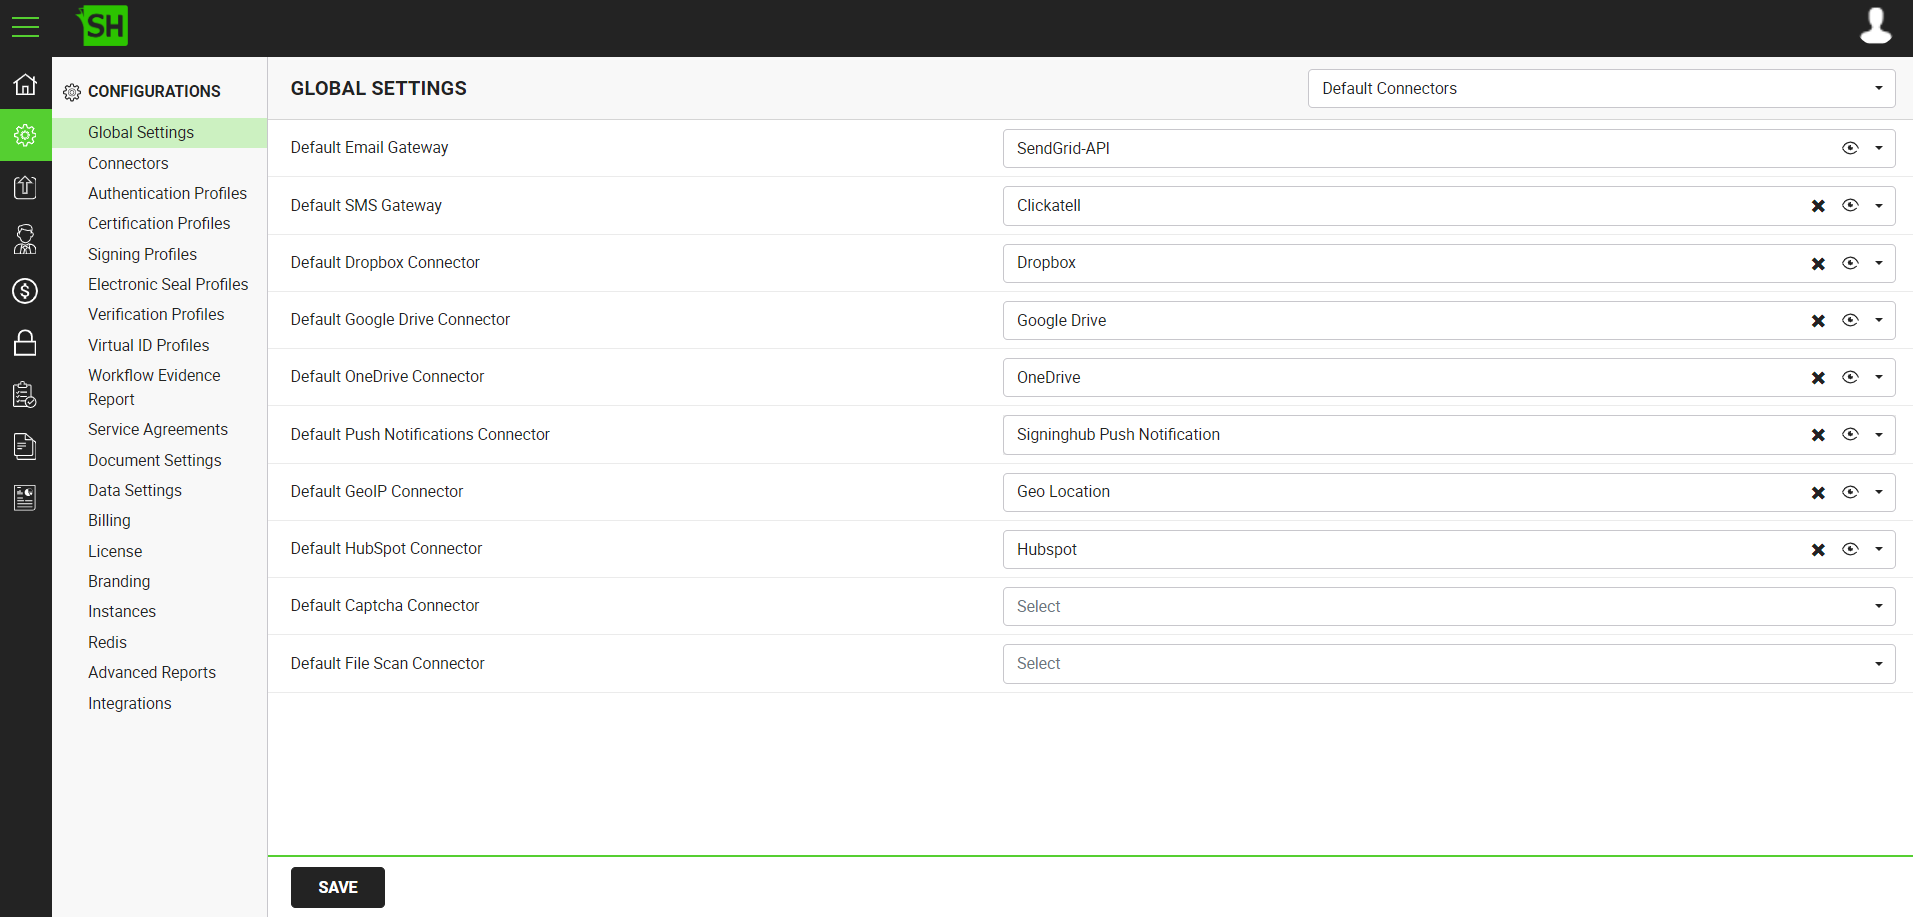
- Click the field adjacent to "Default Push Notifications Connector". A drop down containing all the active push notification connectors will appear. From the drop down select the connector that you want to configure as default. See the below table for the description of the "Default Push Notifications Connector" field.
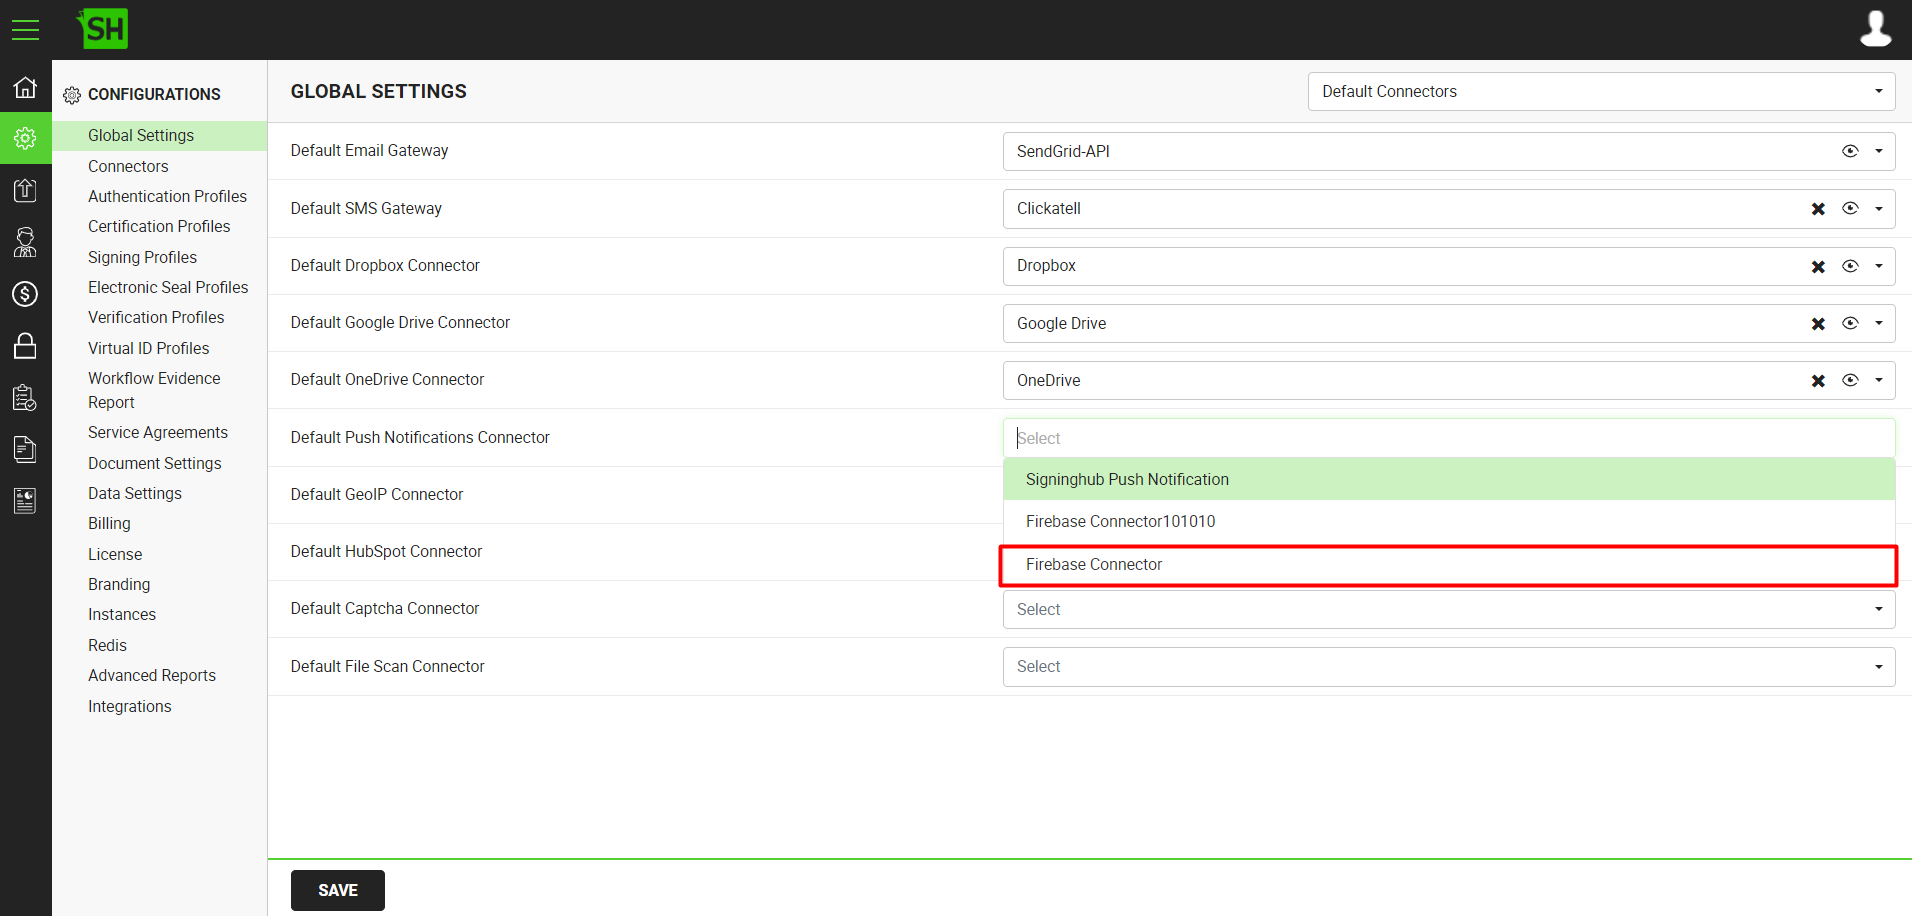
- Click on the "Save" button and the selected connector will be set as default.
|
Global Settings - Default Connectors |
|||
|
Fields |
Description |
||
|
Default Push Notifications Connector |
Select the default push notification connector for your SigningHub Desktop Web. The selected connector will be used to send push notifications to SigningHub native mobile apps. The push notification connectors are managed through the connectors section, see details.
|
||

See Also
- How to Integrate Power BI
- How to Obtain the Azure AD Integration Key
- How to Obtain the Office 365 Integration Key
- How to Obtain a Salesforce Consumer Key
- How to Obtain the Dropbox Integration Key
- How to Obtain the Google Drive Integration Key
- How to Obtain the OneDrive Integration Key
- How to Obtain the HubSpot Integration Key