Configure SigningHub Branding
In case of an on-premises SigningHub deployment, you can customise the default colour scheming of SigningHub web interface according to your company brand. The default scheme (configured from here) can be overruled from the branding option (of SigningHub web), through enterprise admin account.
A SigningHub Admin can configure company logos (i.e. Product Logo and favicon), and colour scheme for Page Header, Dialog Headers, Action Buttons, Scroll bars, Selected Menu option, Right Panels, List Headers, Document Background, Right Panel Headers and Progress Bars. They can even customise the error messages content (i.e. images and text).
Configure a (default) branding for SigningHub web interface

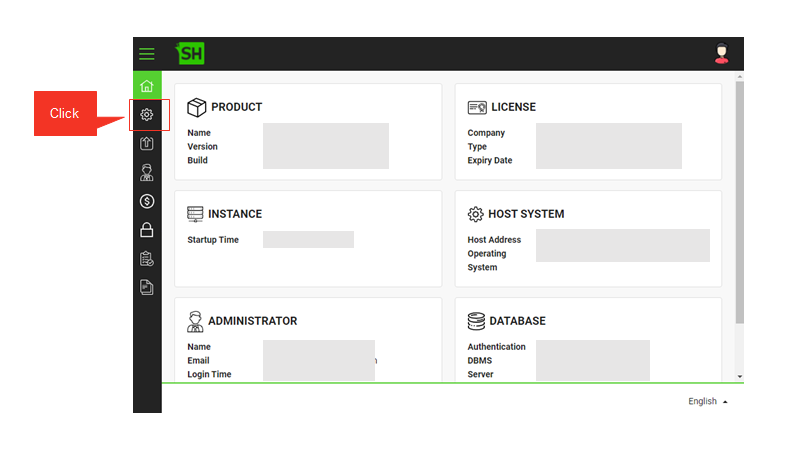
- From the left menu, click
 Configurations.

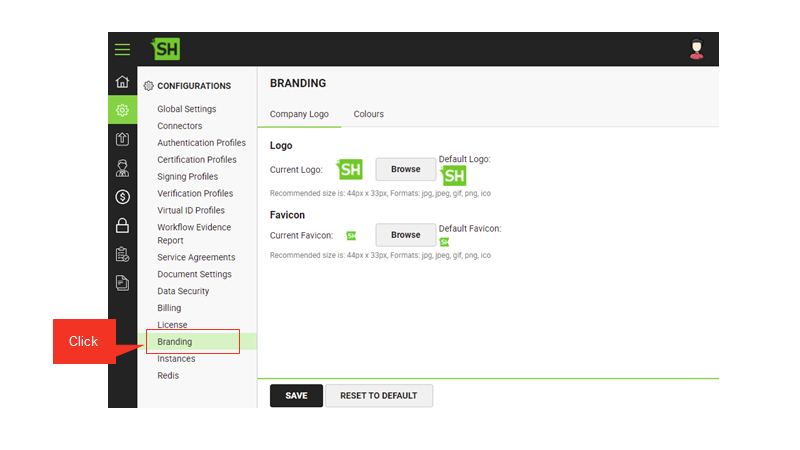
- Click the Branding option.

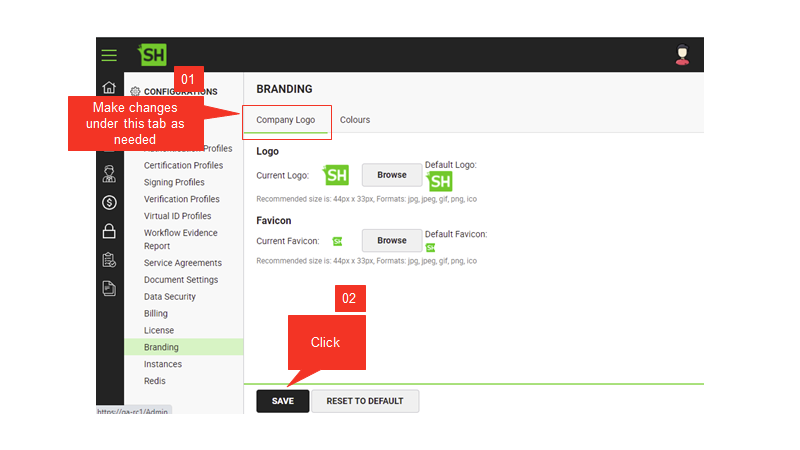
- Click the Company Logo tab, browse the images for your product logo and favicon as required.
- From the bottom of the page, click Save to apply changes.
Product logo will be shown on the login page while favicon will be displayed in the title of browser tab.

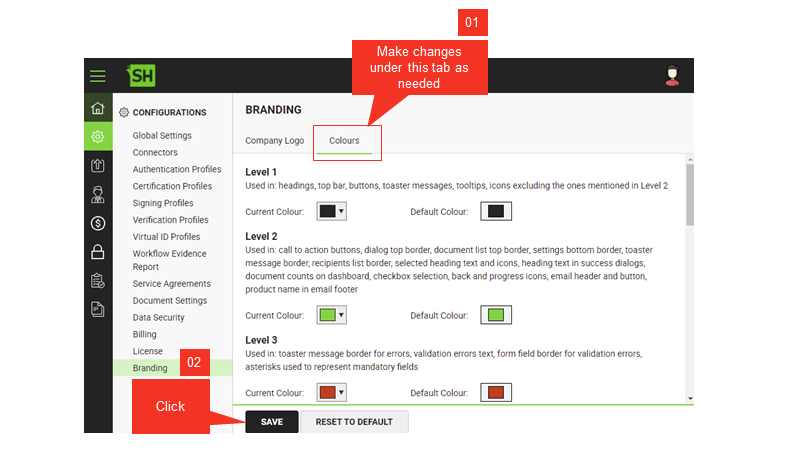
- Click the Colours tab, and customise the colour schemes of required levels.
There are 13 levels of colours customisation you can do to brand SigningHub for your enterprise.
Do you know? You can also use hex colouring codes to specify your choice colour. - From the bottom of the page, click Save.
This will apply the changes on the Enterprise accounts.
|
|
|
See Also
- Configure Global Settings
- Manage Connectors
- Manage Authentication Profiles
- Manage Certification Profiles
- Manage Signing Profiles
- Manage Electronic Seal Profiles
- Manage Verification Profiles
- Manage Virtual ID Profiles
- Configure Service Agreements
- Configure Auto Signing of Workflow Evidence Report
- Configure Document Settings
- Configure Data Settings
- Configure Billing Facility
- Configure SigningHub License
- Configure SigningHub Instances
- Update Redis Configurations
- Configure Advanced Reports
- Configure Integrations

