After you have opted an existing site collection, or have created a new site collection in your SharePoint environment, to install SigningHub for SharePoint you need to:
- Create four (4) different permission levels in the site collection on which the add-in is required to install, and
- Assign the permission levels to SharePoint site groups as required.
To comply with the SigningHub standards, the permissions' names should be:
- SH-SETTINGS - It is used to allow your end users to access the admin related configurations option within the add-in.
- SH-CHECKSTATUS - It is used to allow your end users to access the check documents status option within the add-in.
- SH-SHARE - It is used to allow your end users to access the share documents option within the add-in.
- SH-SIGN - It is used to allow your end users to access the sign documents option within the add-in.
Please note that permission names are case-sensitive, and any deviation in them or skipping any permission may possibly lead to SigningHub for SharePoint malfunction. Consider an example of creating the "SH-SETTINGS" permission, the same process can be followed to create other three as well. Once you are done, you need to assign these permission levels to your SharePoint users groups as required.
Create a permission level
- Browse the SharePoint site link (on which SigningHub add-in is required to install) and log into your Office 365 account with SharePoint administrator credentials.
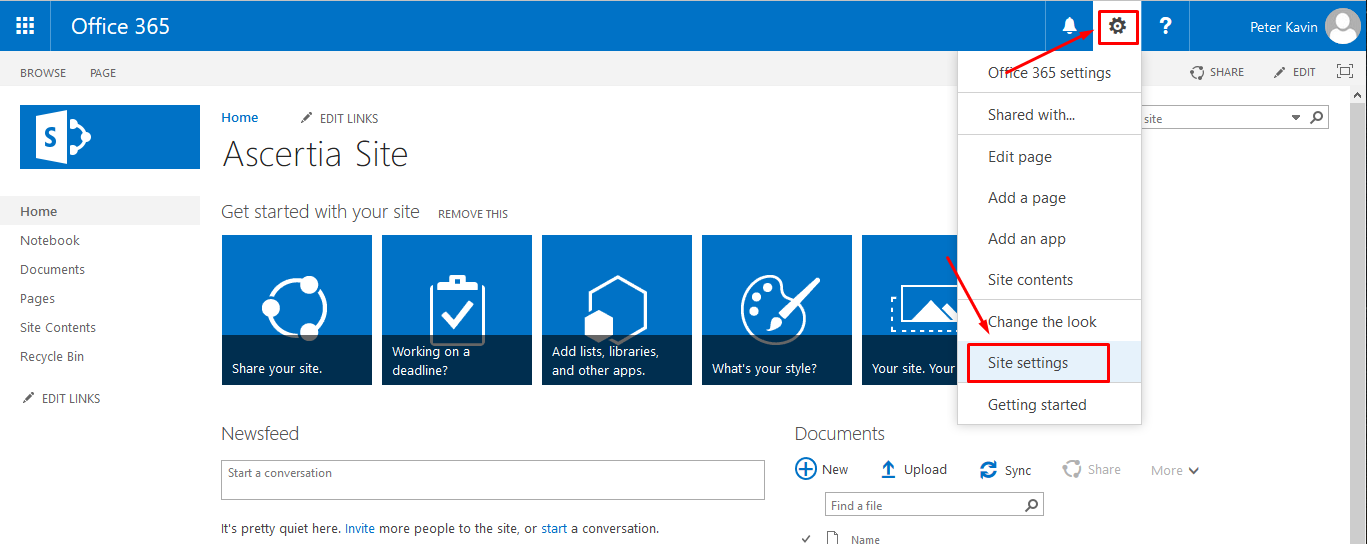
- Click
 and select the "Site settings" option.
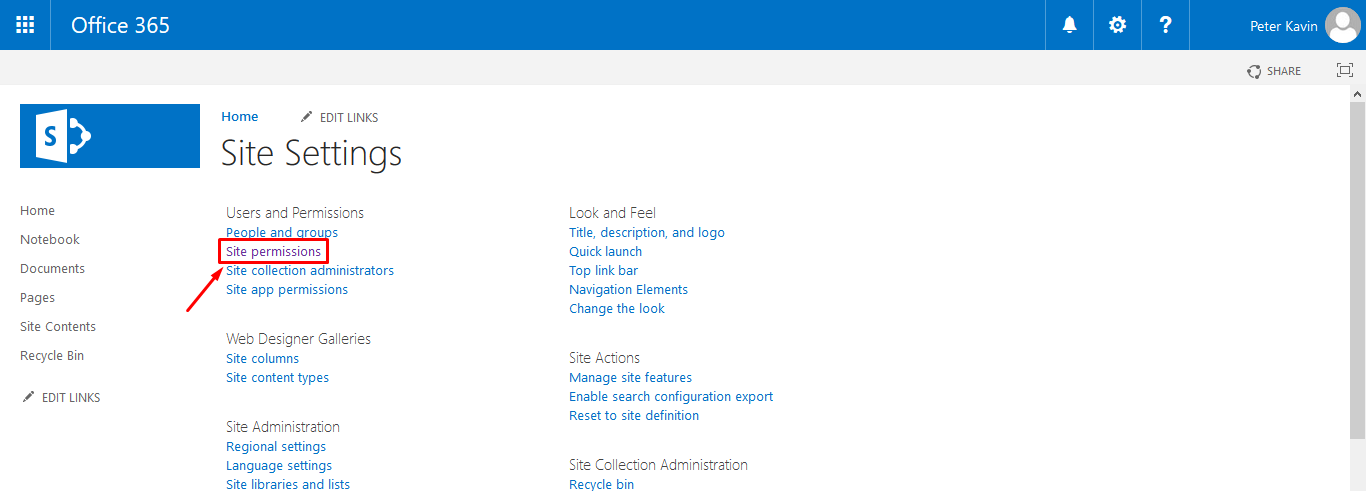
- Click the "Site permissions" option.
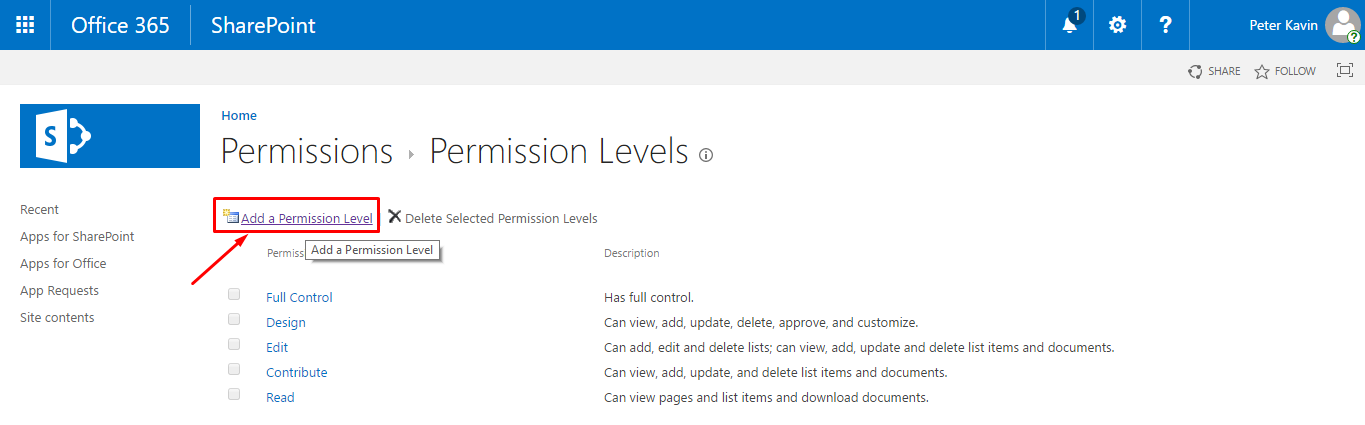
- Click the "Permission Levels" option.

- Click the "Add a Permission Level" option.
- The "Add a Permission Level" page will appear. Specify the permission name as "SH-SETTINGS" and its description in the provided fields.
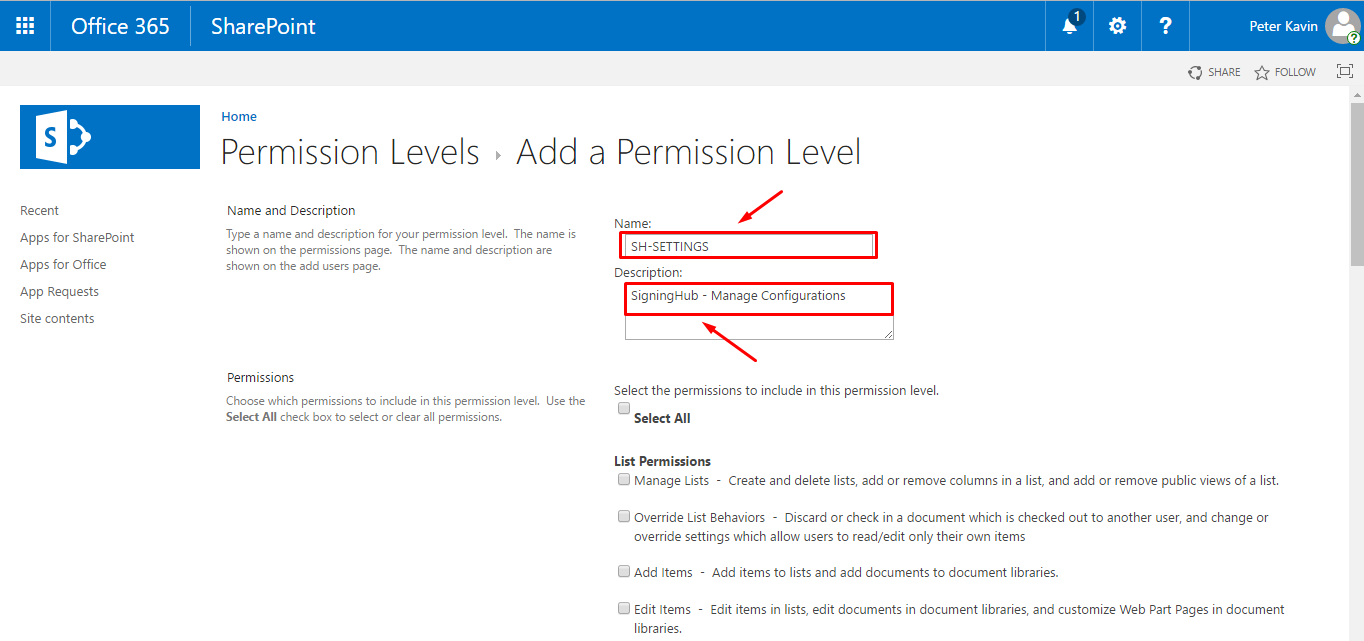
Now scroll down the "Add a Permission Level" page and select the "Enumerate Permissions" check box, as marked with the red arrow.
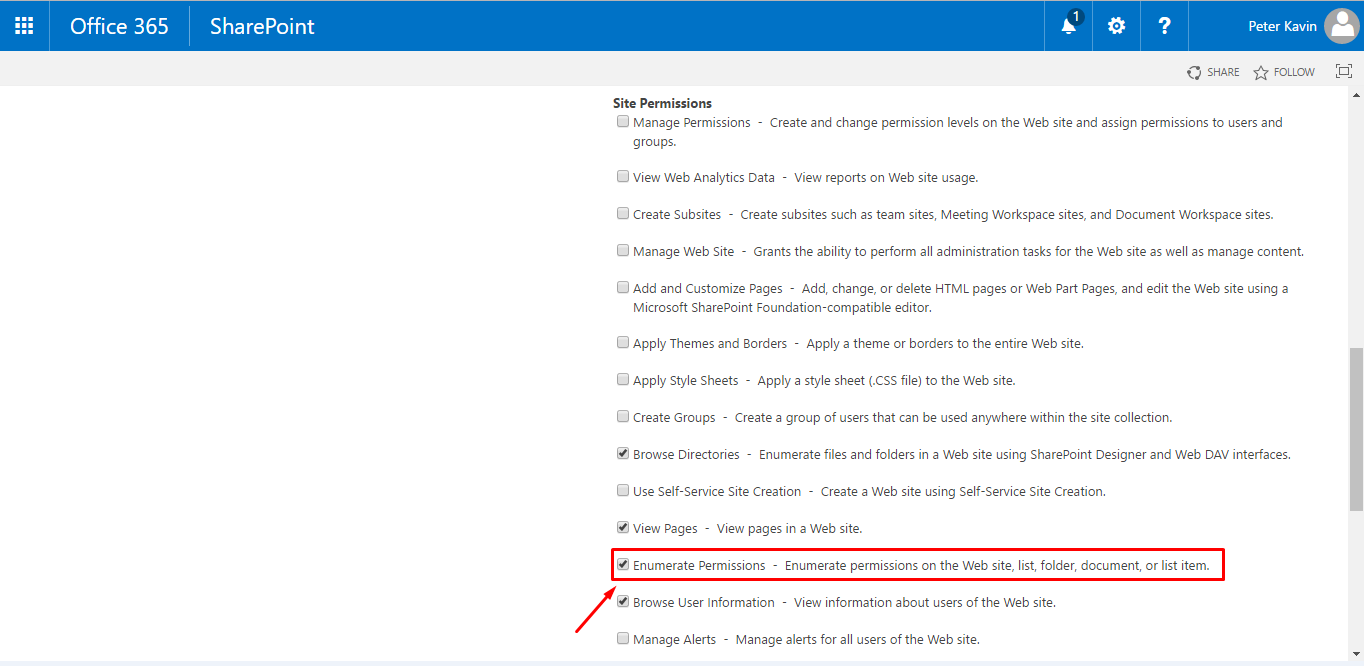
- Click the "Create" button, available at the end of the page. A new permission level will be created and shown on the screen.

Repeat the steps 5, 6 and 7 to create other three permissions as well in the same way.
After creating all four permissions, wait for 15-30 minutes to make these changes effective in your SharePoint account. It is also recommended to logout from your browser and re-login.
Assign permission levels to SharePoint site groups
- Browse the SharePoint site link (on which SigningHub add-in is required to install) and log into your Office 365 account with SharePoint administrator credentials.
- Click and select the "Site settings" option.
- Click the "Site permissions" option.
- Select a SharePoint group (i.e. Site Owners, Site Members, Site Visitors, etc.) and click the "Edit User Permissions" option.
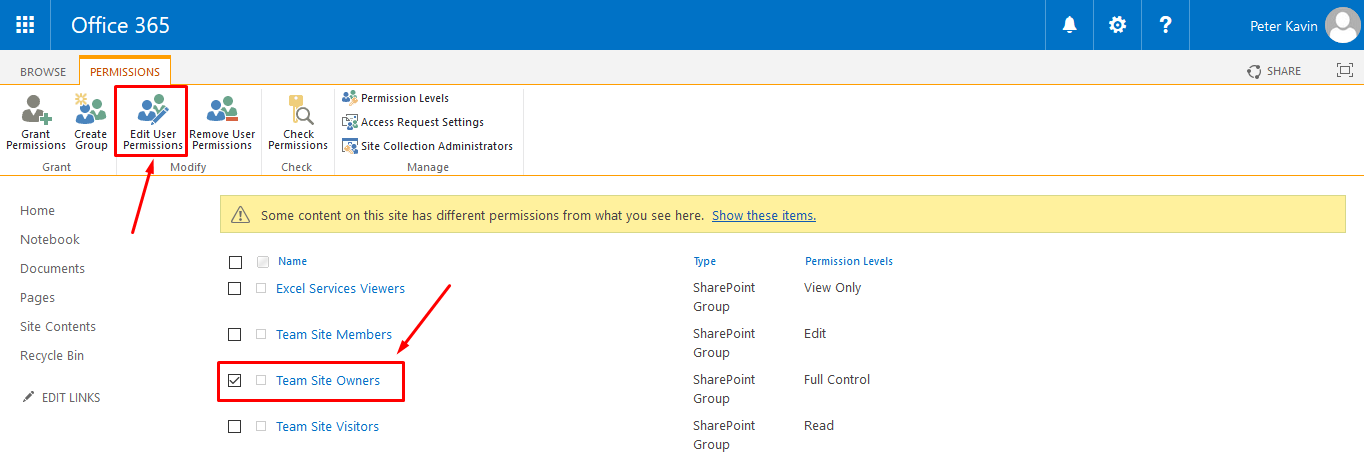
- From the next appearing screen, select all four SH permission levels and click "OK".

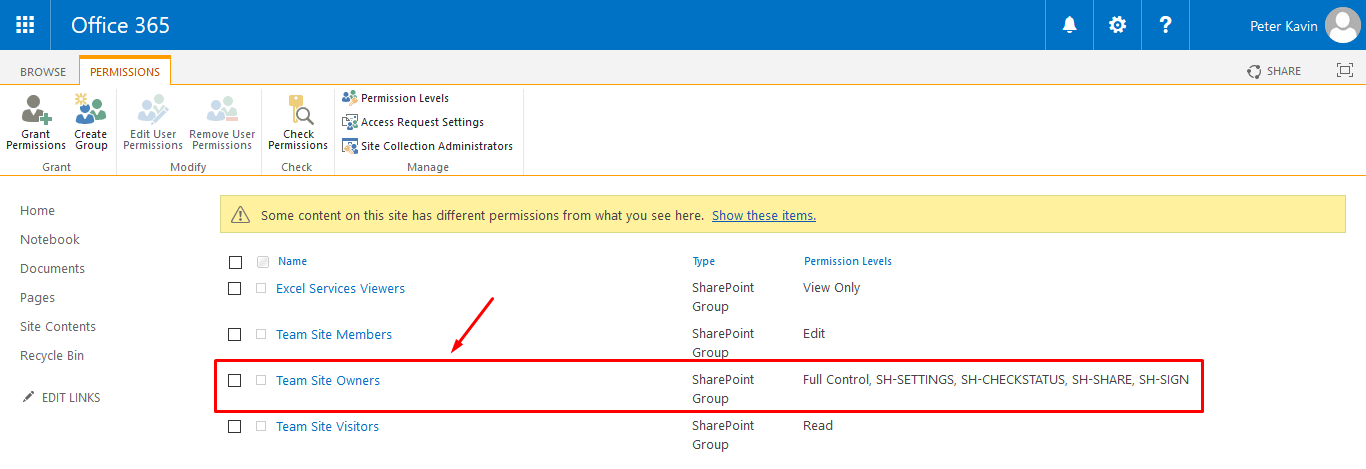
The permission levels will be assigned to the group and shown on the SharePoint groups screen. Similarly assign these permissions to other groups also as required.
1. Ensure that the SharePoint users belonging to your Enterprise are part of the site group to which you have assigned the SigningHub permission levels, see details.
2. After creating these permissions, wait for 15-30 minutes to make these changes effective in your SharePoint account. It is also recommended to logout from your browser and re-login.