This is an optional step and is used when the direct access to the SharePoint store is disabled for the end users. You can create an app catalog site to upload the uninstalled SigningHub for SharePoint package on it. The site collection users can then browse this catalog site to install SigningHub for SharePoint on their sites.
Create an app catalog site
Create an app catalog site
- Log into your Office 365 account with SharePoint administrator credentials.
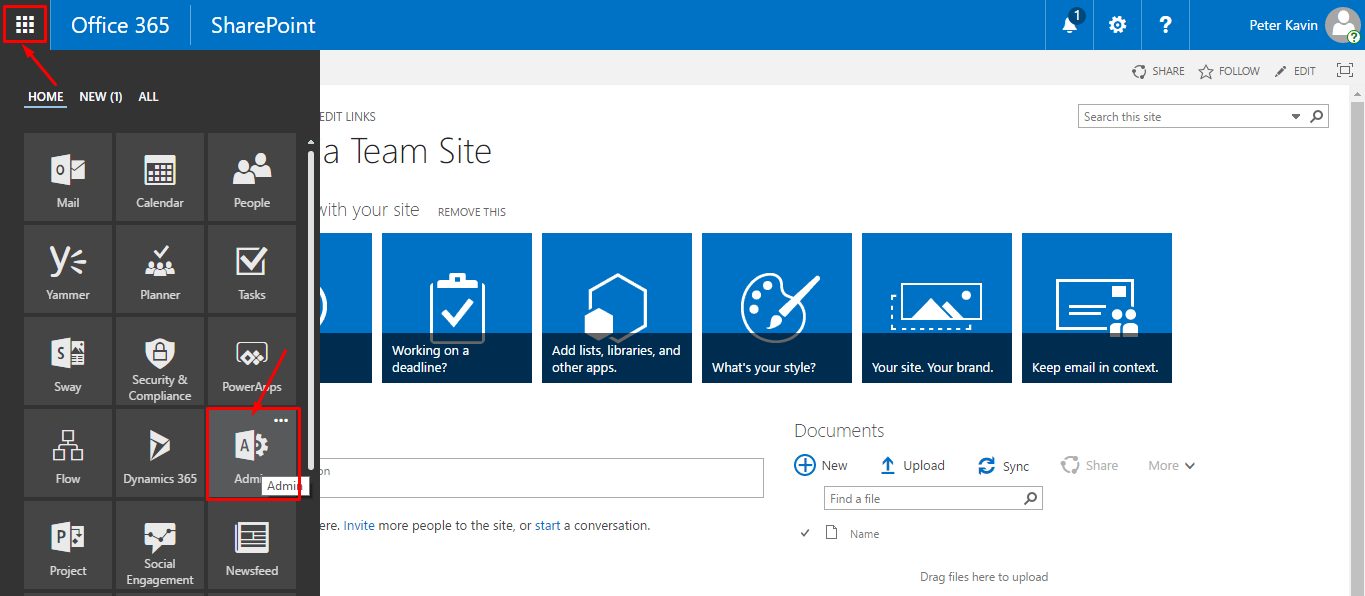
- Click the app launcher icon in the upper left and select the "Admin" option, as marked with red arrows on the below screen.
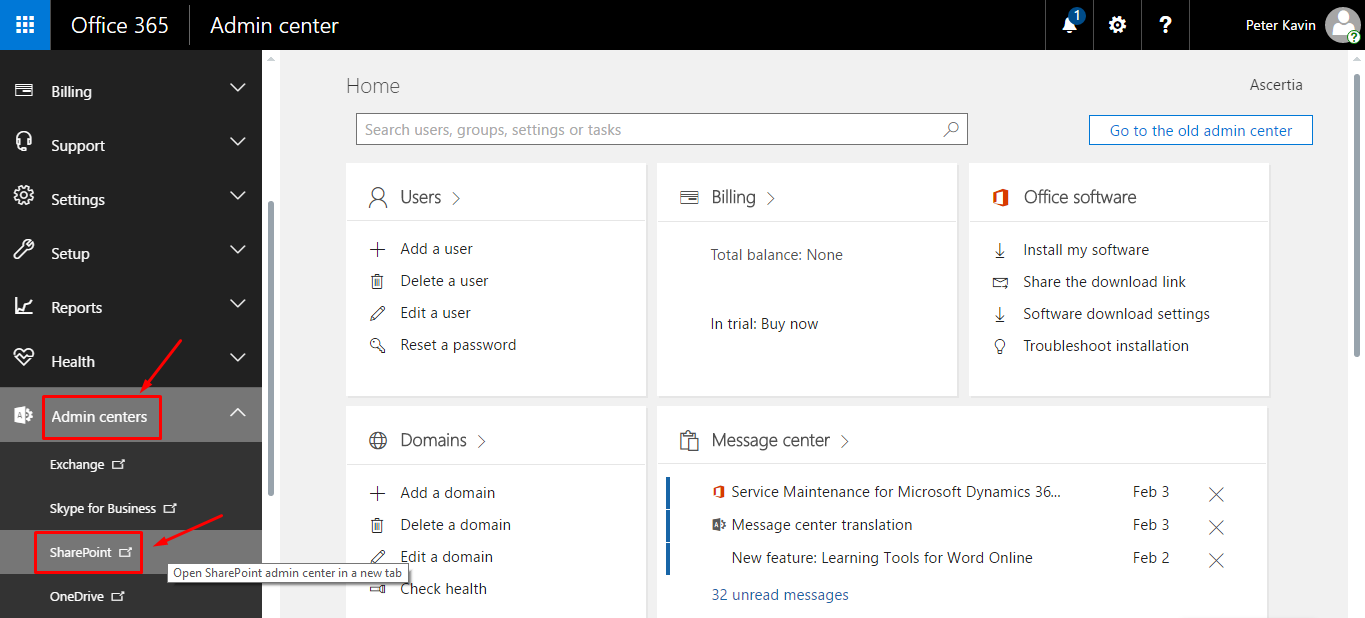
- The Office 365 admin menu will appear in the left panel. Click the "Admin Centers" option and select the "SharePoint" option.
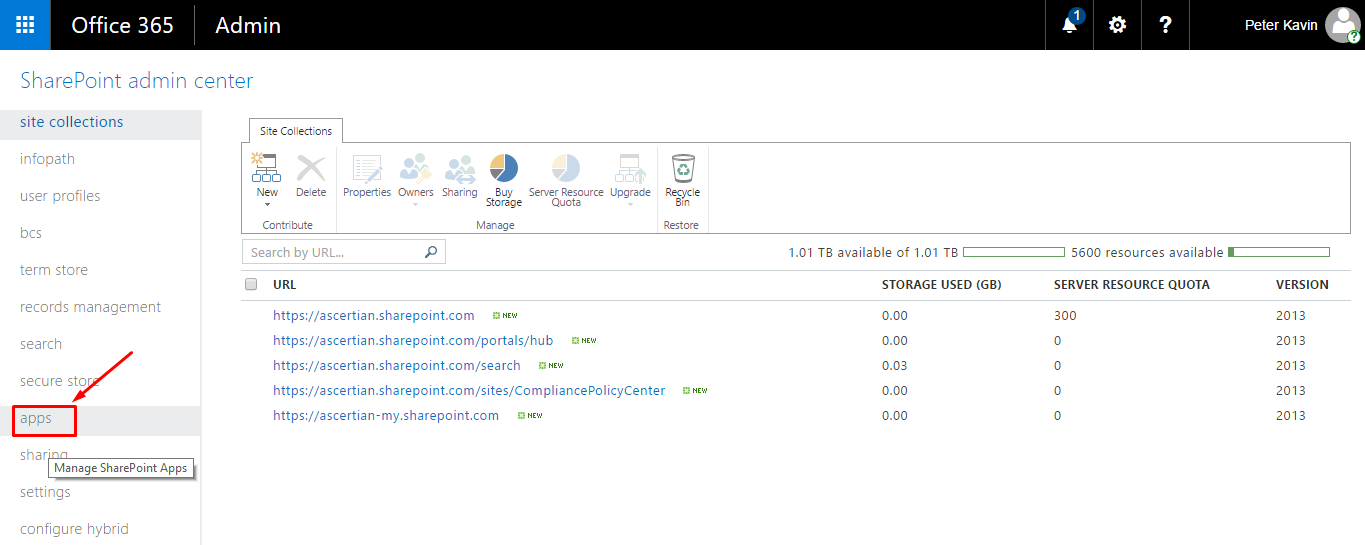
- Click the "apps" option from left panel.
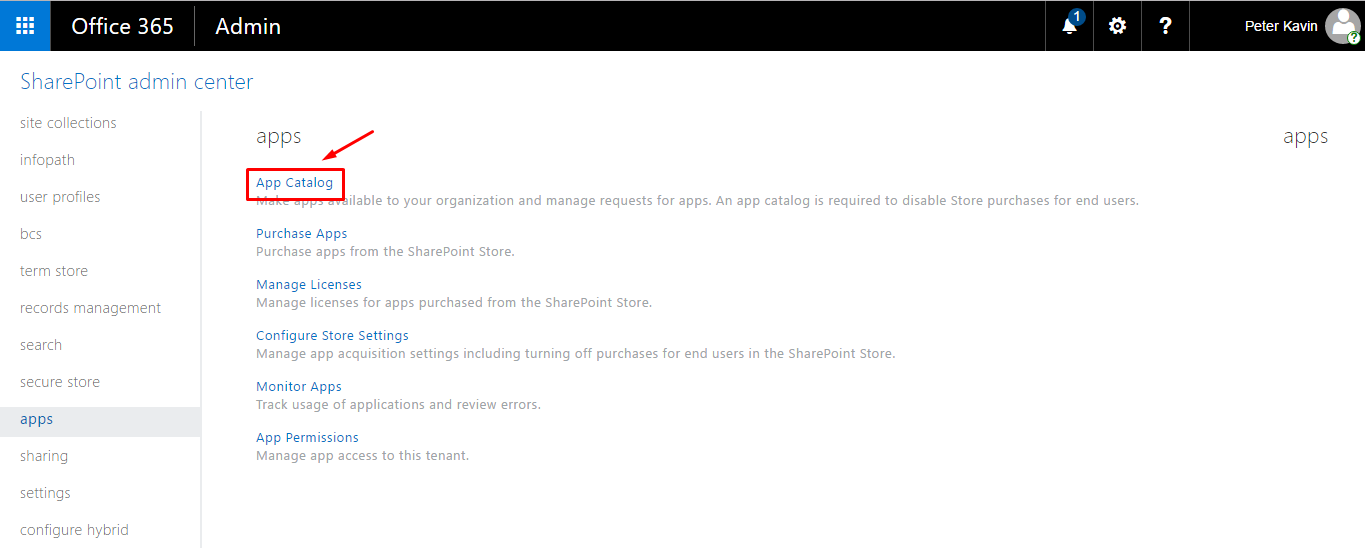
- From the next appearing screen, click the "App Catalog" option to create a catalog site for your add-in.
- In case if you have already got an app catalog site, choose the "Enter a URL for an existing app catalog site" option and specify the URL in the provided field. Alternatively, choose the "Create a new app catalog site" option and click OK.

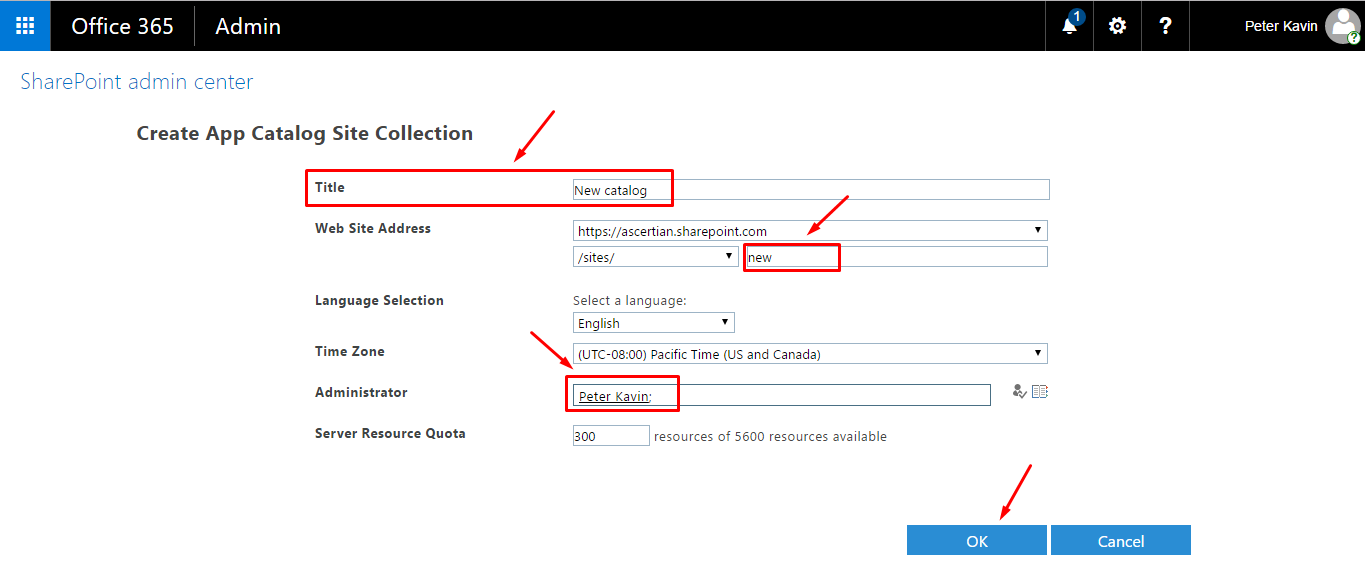
- In case of selecting new catalog site option above, the "Create App Catalog Site Collection" screen will appear. Specify your catalog site information as required. Add your SharePoint Admin name in the "Administrator" field and click OK.
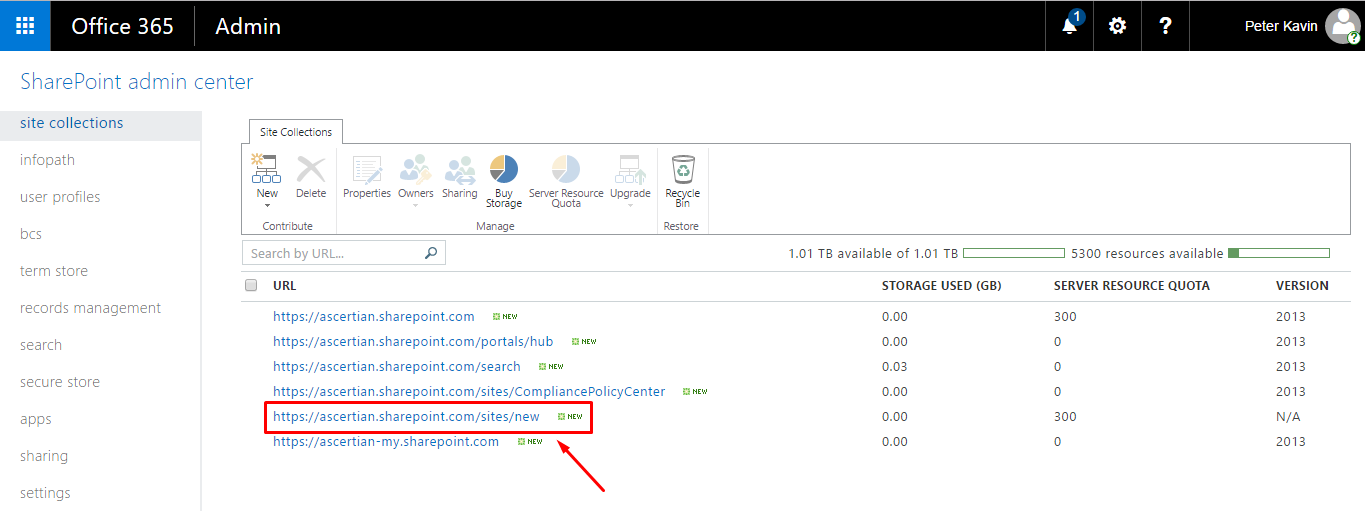
- A new catalog will be created and displayed in the SharePoint admin center, as marked on the below image.
