This is an optional step and is used when the direct access to the SharePoint store is disabled for your end users. You can create an app catalog site to upload the uninstalled SigningHub for SharePoint package on it. The site collection users can then browse this catalog site to install SigningHub for SharePoint on their sites.
Create an app catalog site
Create an app catalog site
-
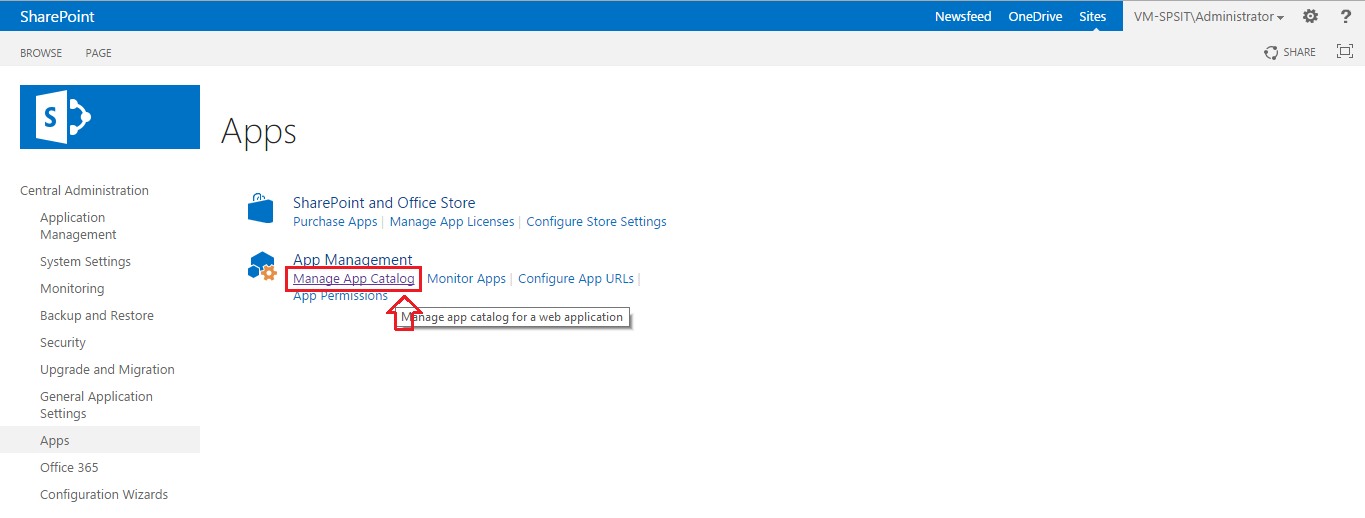
Browse your on-premises SharePoint Admin URL and click the "Apps" option, as marked with an arrow on the image below.

-
Click the "Manage App Catalog" option, as marked with an arrow on the image below.
-
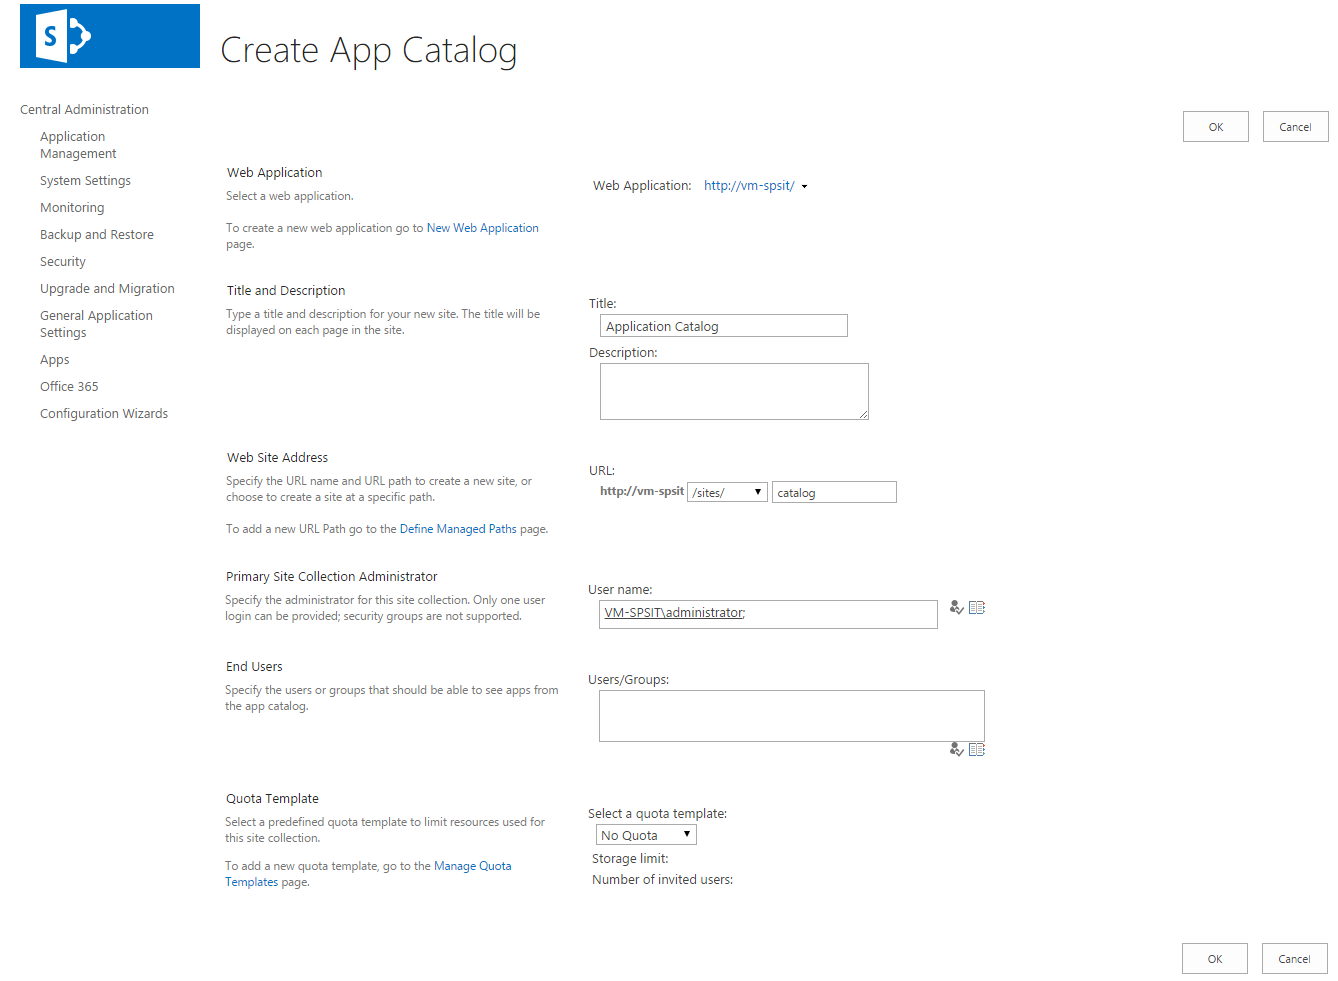
Choose the "Create a new app catalog site" option and click OK, as marked with an arrow on the below image. Alternatively, if you have already got an app catalog site, choose the "Enter a URL for an existing app catalog site" option and specify the URL in the provided field.

-
In case of selecting new catalog site option above, the Create App Catalog Site Collection screen will appear. Specify the catalog site information accordingly. Add your SharePoint Admin name in the "Administrator" field and click OK.
-
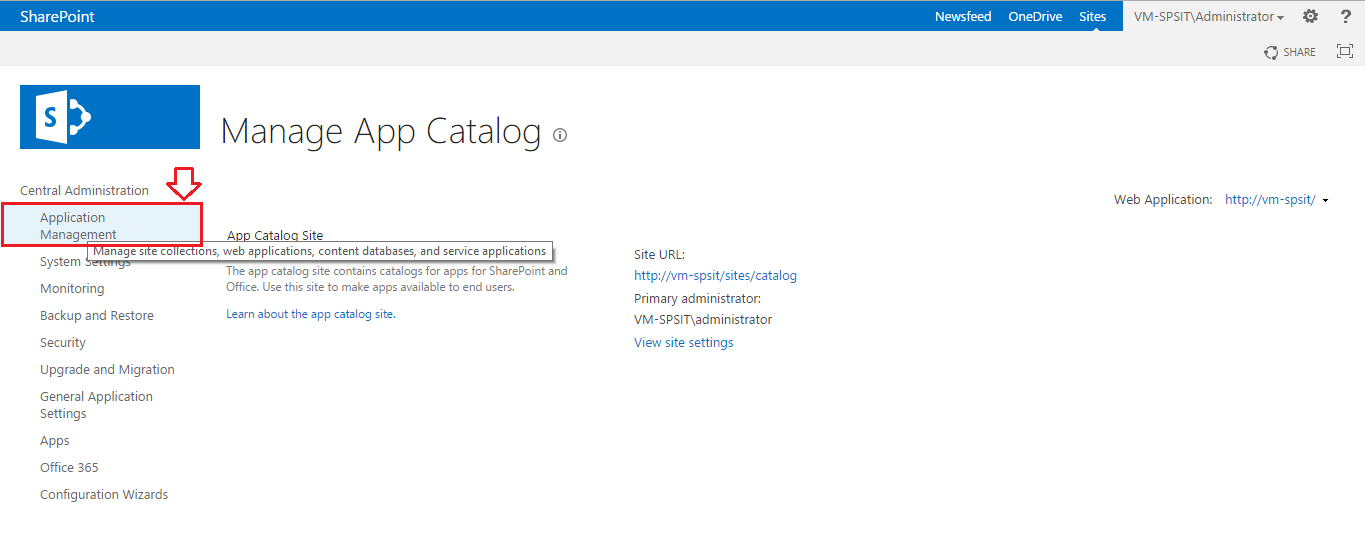
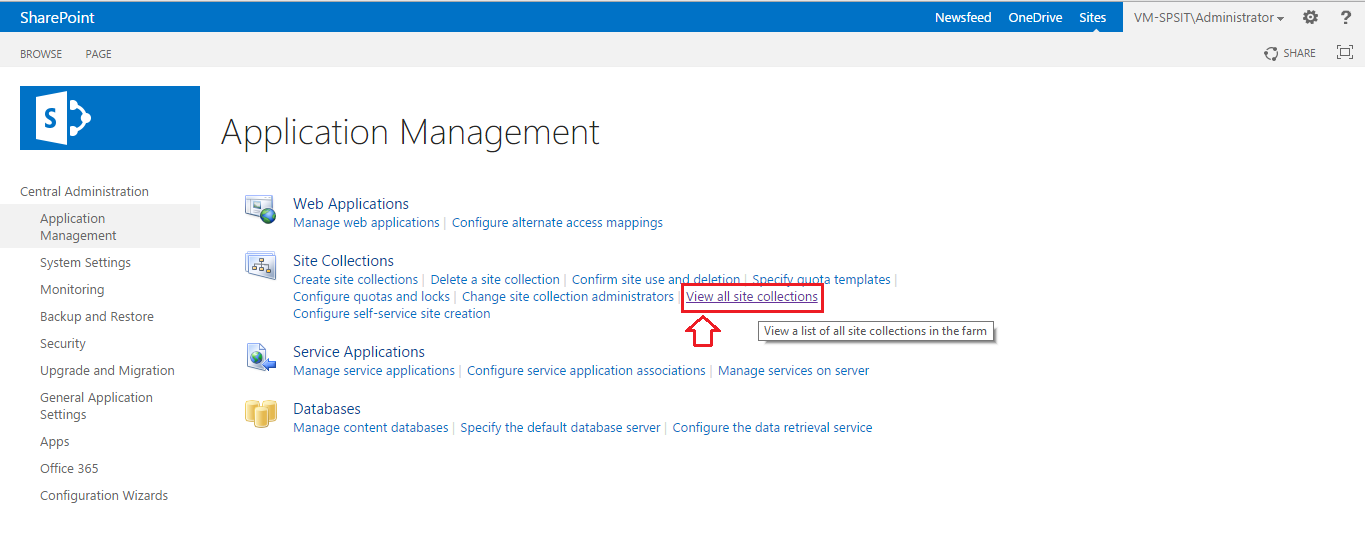
A new catalog will be created in your SharePoint deployment. To view it, click the "Application Management" option.
-
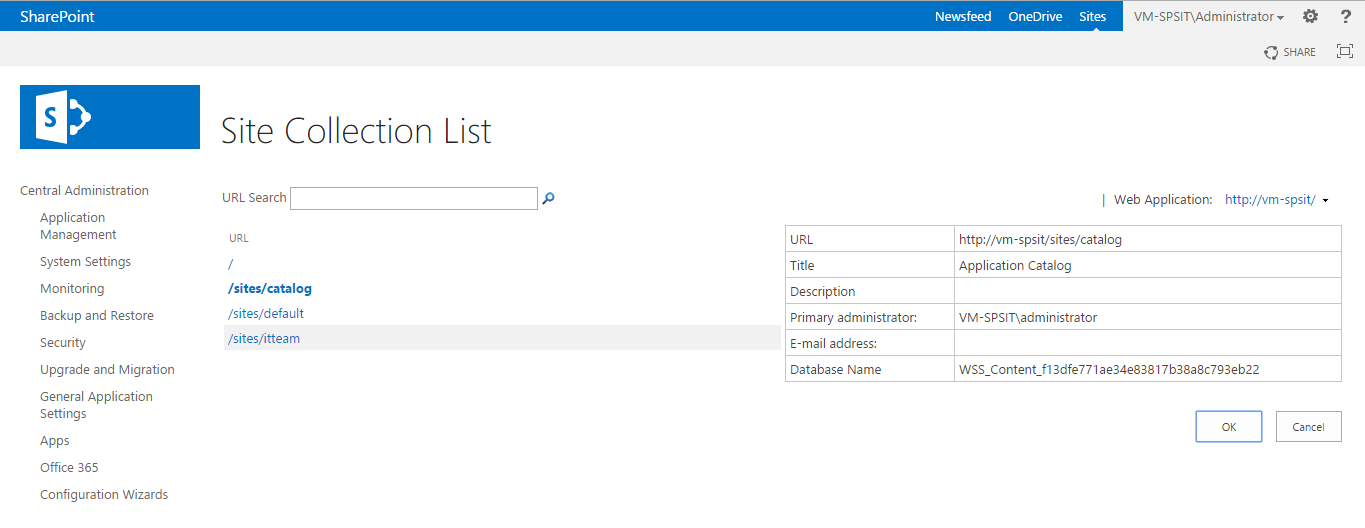
From the next appearing screen, click the "View all site collections" option, as marked with an arrow on the image below.
-
Now click the catalog site name.

-
The details of the catalog site will be displayed in the right table.