SigningHub enables you to reuse the predefined workflow configurations on the same documents in the form of a workflow template.
When used, the template applies all the workflow related settings (i.e.
signers, reviewers, editors, meeting hosts, placeholders, signing
sequence, signatures fields and their positions, reminders, form fields,
permissions, etc.) on a document, making the workflow configuration
process efficient and robust.
You can use your personal templates, as well as the enterprise templates (as maintained by your enterprise admin). Consider an example of sharing the "Opportunities" documents package by using a template, the same process can be followed to share documents of other CRM entities.
You can use your personal templates, as well as the enterprise templates (as maintained by your enterprise admin). Consider an example of sharing the "Opportunities" documents package by using a template, the same process can be followed to share documents of other CRM entities.
Share your documents by using a template
- In case of an on-premises deployment, log into your locally deployed Dynamics CRM instance through your domain user and password (active directory credentials).
OR
In case of an Office 365 installation, log into your Office 365 account. - From the "Sales" menu, click the "Opportunities" option.
- Search and open the "Opportunities" object from the list, whose document(s) package is required to share.
Or
Create a new opportunity object as required and open it.

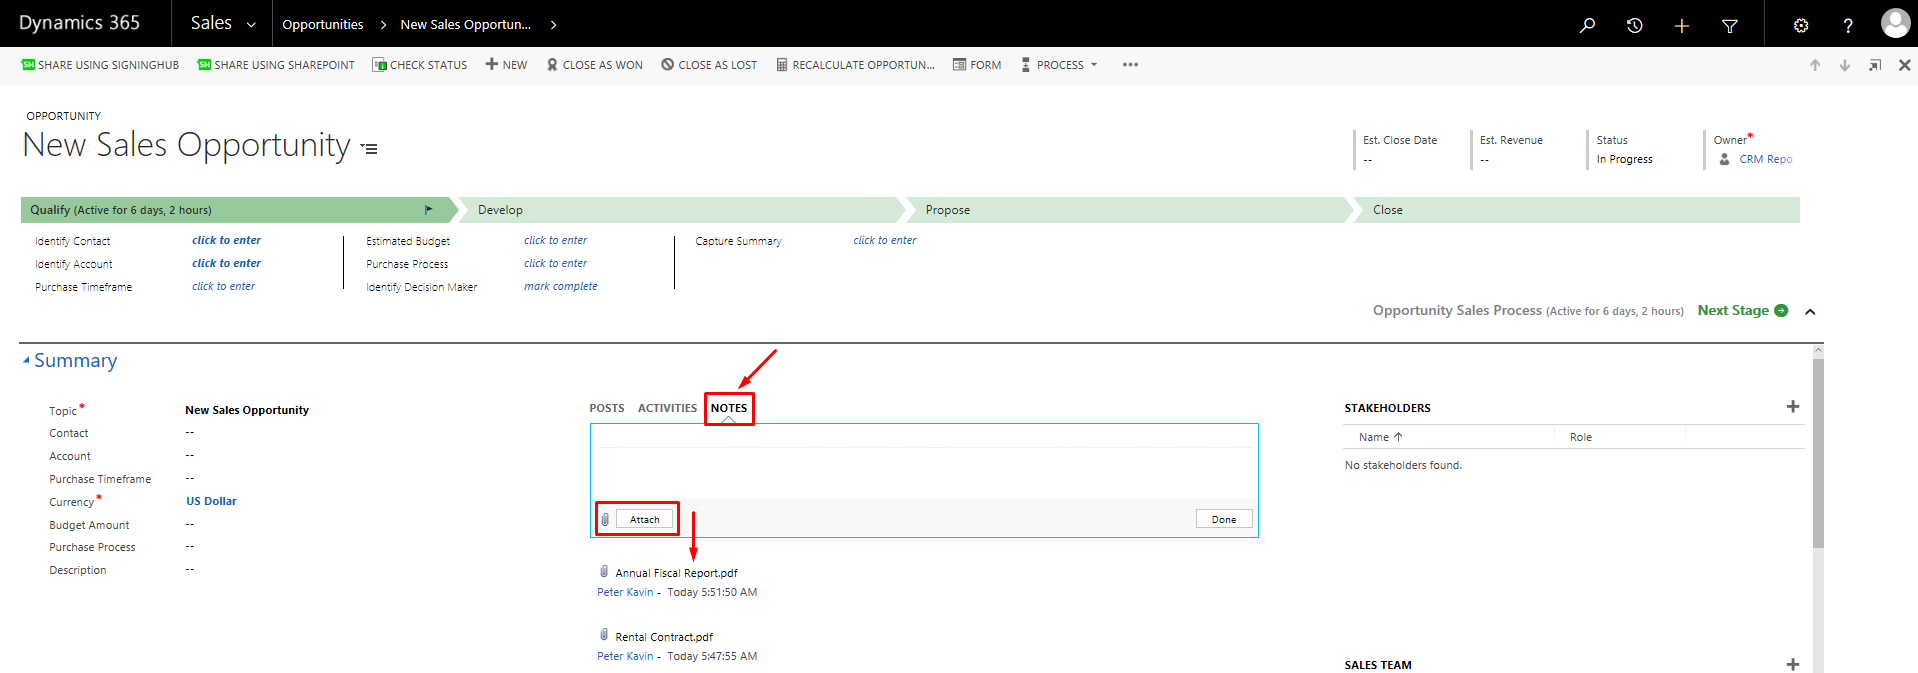
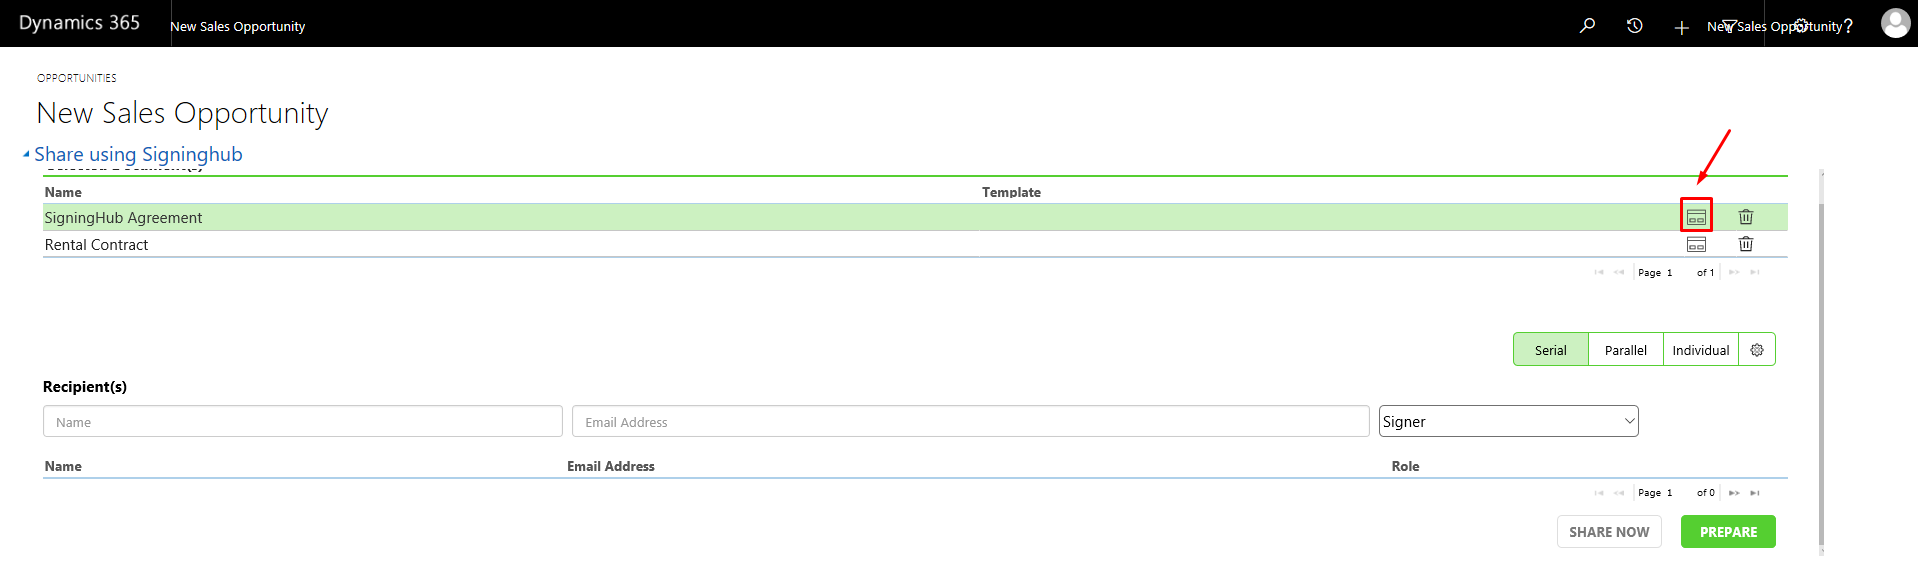
- Click the "Notes" tab from the opened opportunity. Click the "Attach" button to browse and attach the document(s) to share. The attached document(s) will be shown under the notes section, as marked with an arrow on the image below.
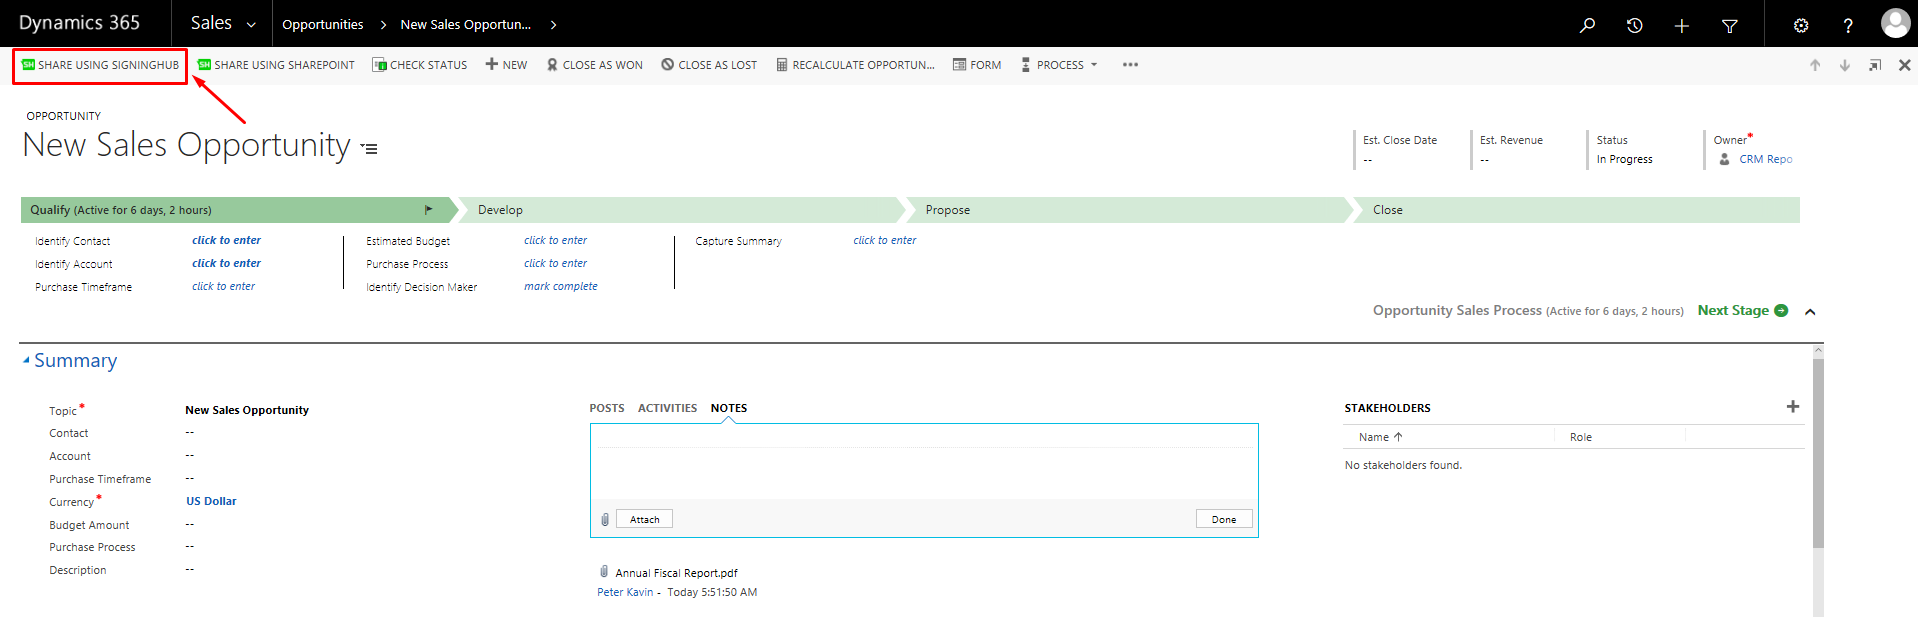
- Click the "Share Using SigningHub" option.
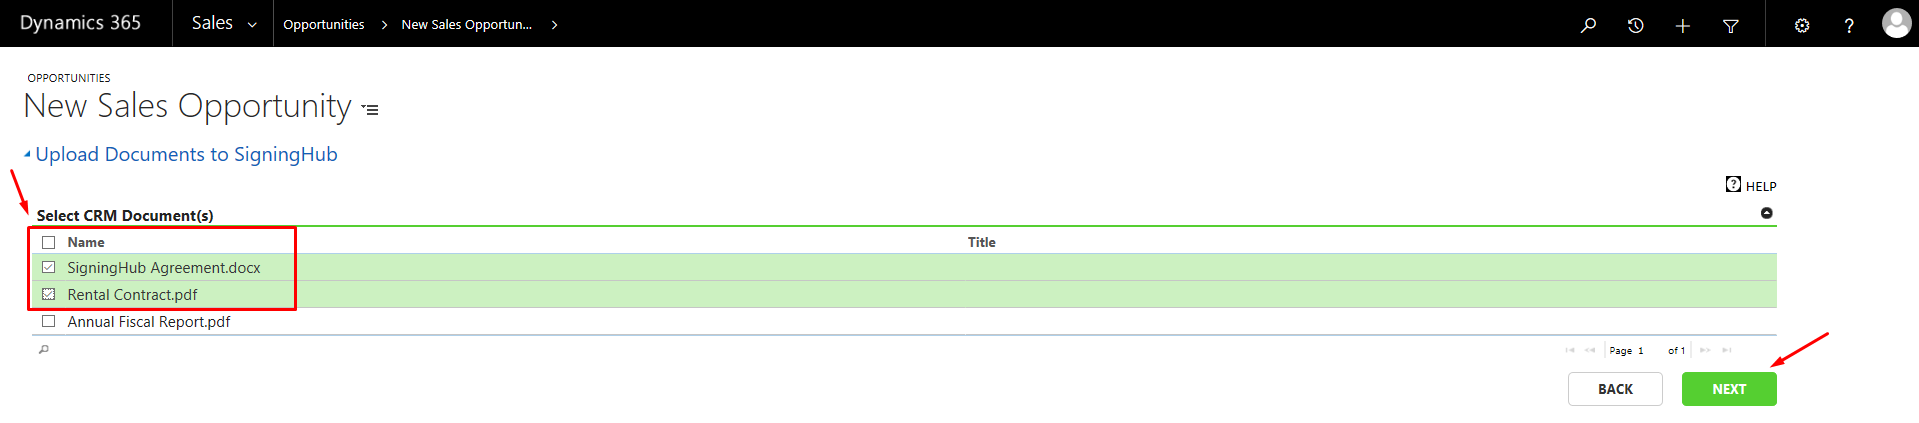
- All the attached documents of the opened opportunity object will be listed for sharing.
Select the document(s) to share, and click the "Next" button. The selected document(s) will be shared as a package through a single workflow.
- Click
 against the document in a workflow package, on which you want to apply a template.
- A dialog will appear showing a provision to list your personal and enterprise templates. Select the required provision (i.e. Personal or Enterprise) to list the templates accordingly.
Select a template from the list. The templates that are marked
as locked, are the Locked templates. The configurations of a locked template are ready-only and hence you cannot modify them.
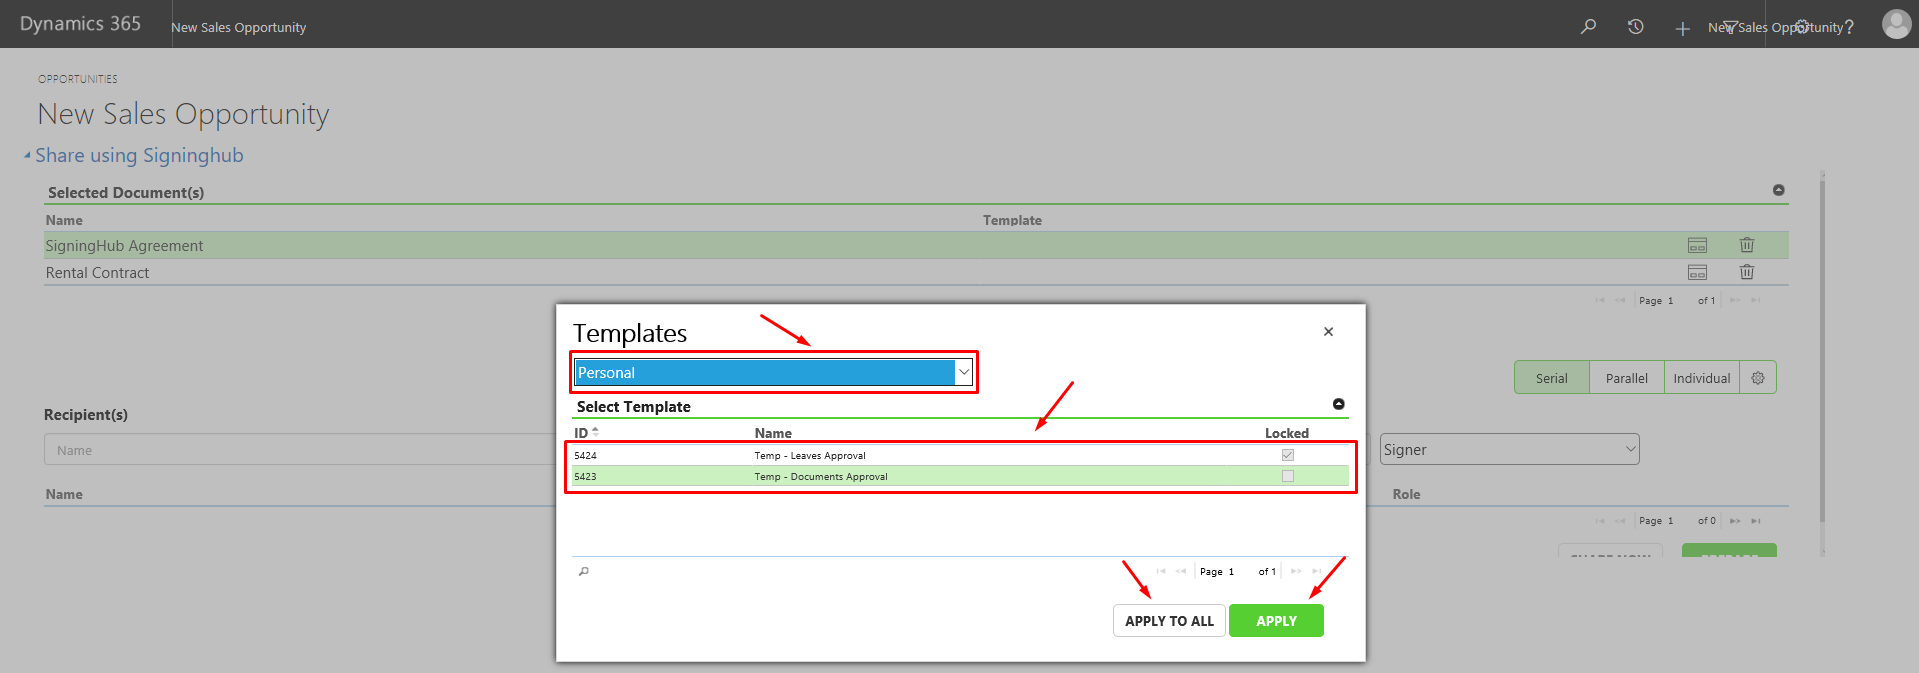
- Click the "Apply" button.
In case you want to apply this template on all the documents of the package, click the "Apply to All" button.
All the configurations saved in the (selected) template will be applied on the document(s) and displayed in editable mode (if you didn't select a locked template) under the "Recipients" section. Change any configuration as required.
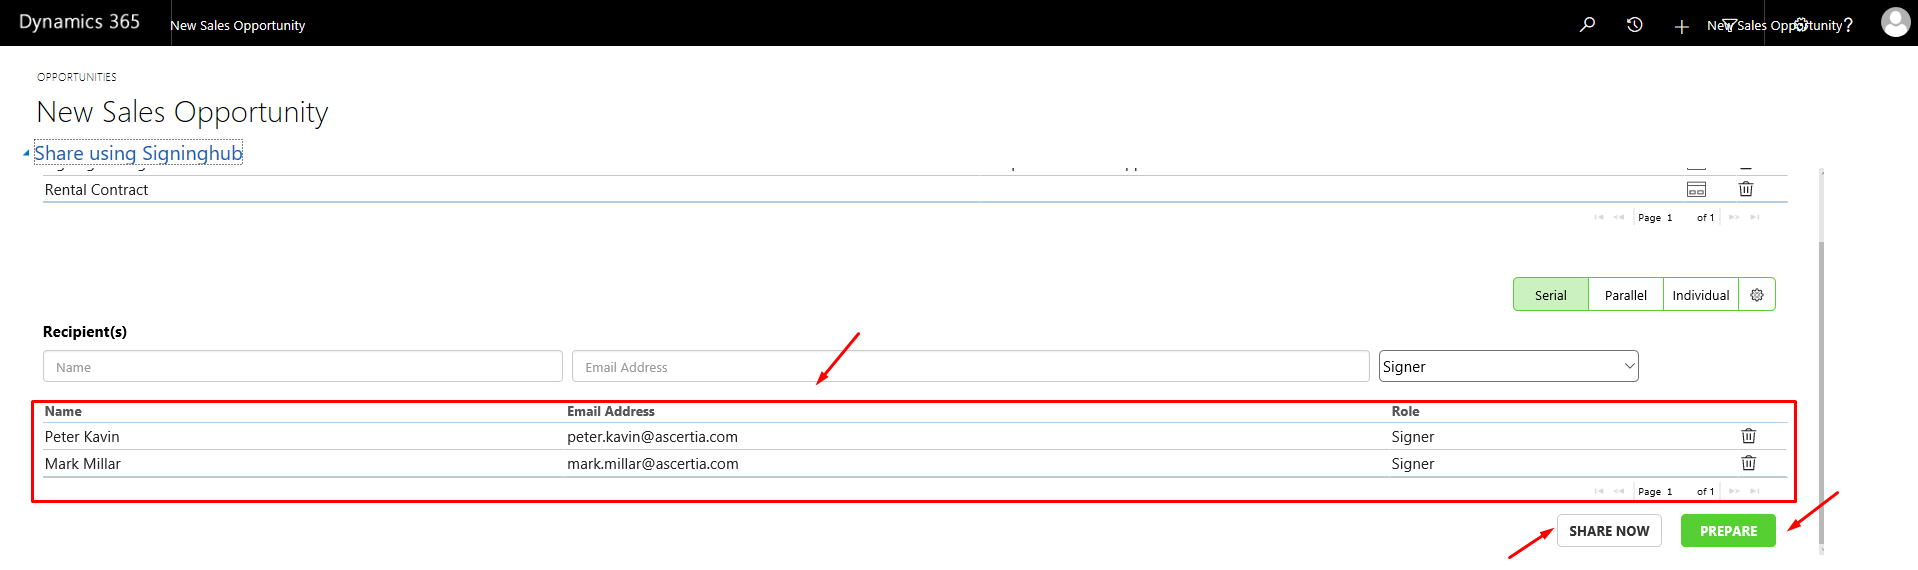
- Click the "Share Now" button to send off the documents package without going to the SigningHub interface. The shared document(s) package can be seen with the "In-Progress" status, inside your "Check Status " screen.
Click the "Prepare" button to go to the SigningHub interface and manually alter the template configurations before sharing the package. The authentication screen of SigningHub will appear within Dynamics CRM, before you are moved to SigningHub interface, see details.
1. To experience the exact settings, it is recommended to apply a workflow template on the same documents (for which it was created). The actual positions of configured signature/ initials/ in-person fields may alter, if a template is applied on different type or size of documents.
2. When a locked template is applied on a document, SigningHub wont allow to change any predefined configurations. For more details, see template locking.
3. Whenever a documents package is shared, the workflow quota of respective document owner's account is consumed, and hence the available count is decreased by one.