External Script Linters
The ADSS Server is responsible for issuing digital certificates through Key Manager, Manual Certification, and Certification Service. To ensure that certificates meet the quality standards and comply with CA/B Forum and RFC 5280 guidelines, pre-issuance linting is necessary. This linting process checks the compliance of generated certificates, and if any non-compliance is detected, the issuance of the certificate can be blocked.
To lint X.509 certificates, CRLs, and OCSP responses according to RFCs and CA/B Forum requirements, the ADSS Server can integrate many linting tools. However, it is recommended to configure PKI Lint and ZLint tools within the External Script Linter module in ADSS Server. These linting tools can be configured in Certificate Templates to validate generated certificates, in Local CAs to validate generated CRLs, and in OCSP Profiles to validate responses.
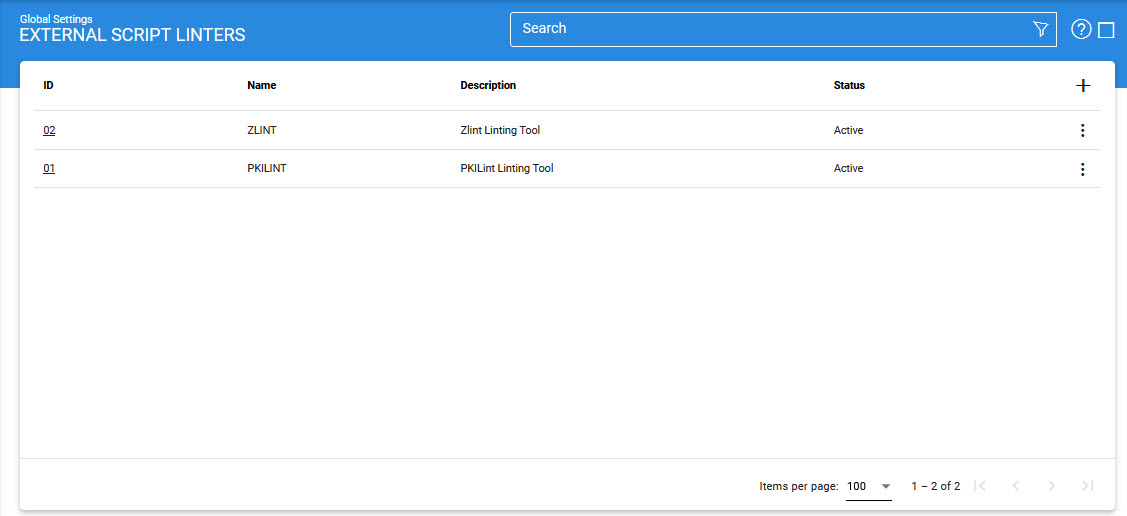
Clicking on Global Settings > External Script Linter displays the list of configured linting tools in ADSS Server, as shown in the screen below:

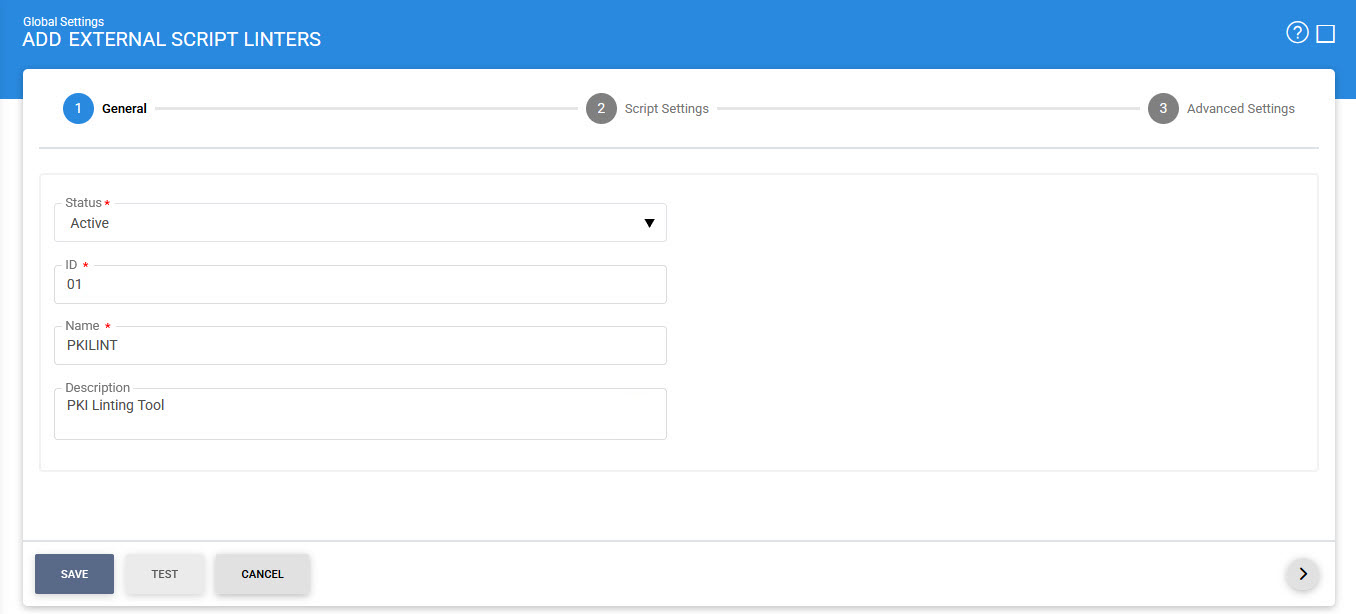
Clicking on the '+' button will lead you to the screen where the required information against the new external script linter can be filled. Following screen will be shown:
General
Here, the user can set the current status and basic information regarding the external script linter:

The configuration items are as follows:
|
Items |
Description |
|
Status |
This field shows the current status of the linting tool. The linting tool should be executed only when the current status is Active. Possible values: ACTIVE & INACTIVE. |
|
ID |
This field displays a user-defined unique identifier for easier recognition within the ADSS User Console. The ID can include only letters, numbers, dashes, and underscores; it should not contain spaces or special characters. |
|
Name |
This field allows you to enter a unique, user-defined name for the linting tool, making it easier to identify within the ADSS User Console. It is recommended to choose a name that closely reflects the tool being used. For example, if you are using a PKI linting tool, a name like "PKI-LINT" or something similar would be appropriate. |
|
Description |
This can be used to describe the external script linter in more detail. This is for information purposes only. |
Script Settings
After setting the information in the General tab, the user can proceed to the Script Settings by clicking the next icon. In this section, the user can integrate the installed linting tool with the ADSS Server by configuring the necessary settings. Upon clicking the next icon, the following screen will be displayed:

The configuration items are as follows:
|
Items |
Description |
||
|
Linting Tool |
This drop-down allows the user to select the Linting Tool supported by the ADSS Server. |
||
|
Working Directory |
This field specifies the directory path where the executable script is located. It is optional if the script's absolute path is provided in the command. If included, the path must be valid and the directory must exist. |
||
|
Script Command |
This field contains the command text that is executed during validation. The user must include %INPUT% in the command, which serves as a placeholder for the input provided by the ADSS Server to the external script. The input will be a temporary file where a certificate, CRL, or OCSP response is saved for validation. It is essential to ensure that the command text includes the %INPUT% placeholder. |
||
|
Set %INPUT% as file path |
This checkbox allows the user to specify whether the input provided by the ADSS Server to the script will be a file path. If selected, ADSS Server will write the input data to a temporary file and pass the file path to the script command using the specified Input Encoding. The temporary file will be deleted after the script execution is complete. |
||
|
Input Encoding |
This field specifies the type of encoding used for the input. Different tools may require different encodings. The possible options are Base64, PEM and DER.
|
||
|
Fail if Output Contains |
This field allows users to select or enter keywords that will be used to determine whether the script execution fails or succeeds. It includes a multi-select input where predefined keywords, such as "Error," "Warn," "Fail," and "Fatal," can be chosen, or custom keywords can be entered. This field is mandatory if the script is set to fail with an exit code of 1. |
||
|
Custom Keywords |
Clicking this button allows the user to define custom keywords. Once added, these keywords will appear in the "Fail if Output Contains" drop-down menu.
|
||
|
Fail script of exit code 1 |
If this checkbox is enabled, if the External Script returns an exit code of 1, the entire process will fail.
|
||
|
Enable script standard logging |
If this checkbox is enabled, the script's standard output (STDOUT) will be recorded in the log files. |
||
|
Enable script error logging |
If this checkbox is enabled, the script's error output (STDERR) will be recorded in the log files. |
Advanced Settings
The Advanced Settings option enables the operator to select a dummy signing key that serves as a pre-signing key for validating the To-Be-Signed (TBS) Certificate. This validation process, known as pre-linting, is performed when a pre-issuance certificate is configured. Pre-linting helps identify potential issues in the certificate before it is officially issued, ensuring compliance with standards and reducing the risk of errors.

The configuration items are as follows:
|
Items |
Description |
||
|
Pre-Issuance Certificate Linting |
Enabling this checkbox activates the linting process, which first signs the certificate using the pre-issuance CA certificate. If the linting process is successful, the To-Be-Signed (TBS) Certificate is then signed with the actual CA key. This process ensures the certificate meets compliance standards before final issuance. |
||
|
Pre-Issuance CA Certificate |
This drop-down field is available when the 'Pre-Issuance Certificate Linting' checkbox is enabled. It displays a list of certificates from the Key Manager that are designated for Certificate and CRL Signing purposes. Certificates already configured as a Local CA are excluded from this list.
|
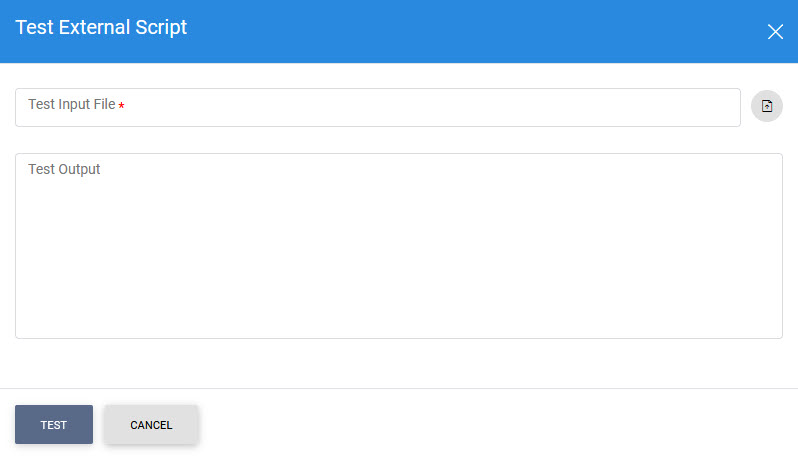
Clicking on the Test button displays the following screen:

If the 'Set %INPUT% as file path' checkbox is unchecked, users must enter the input as raw text in either BASE64 or PEM format, provided that the configured linting tool supports raw text inputs.
If an input file path is entered as text while the checkbox is unchecked, a double backslash '\\' should be used instead of a single backslash '\' in the file path. However, it is recommended to keep the 'Set %INPUT% as file path' checkbox checked and use the file picker to select the file. This helps avoid inconsistencies when providing the input file path manually.
Clicking on the Advance Search icon on the main page displays the following screen:

As mentioned in the screen above, an external script linter can be searched based upon ID and Status. The user can search the required linting tool based on the desired configurations.
See also
System Certificates
Certificate Purposes
Certificate Templates
CV Certificate Templates
PDF Signature Appearances
PDF Signature Locations
External Script Linters
System Alerts
High Availability
System Security


