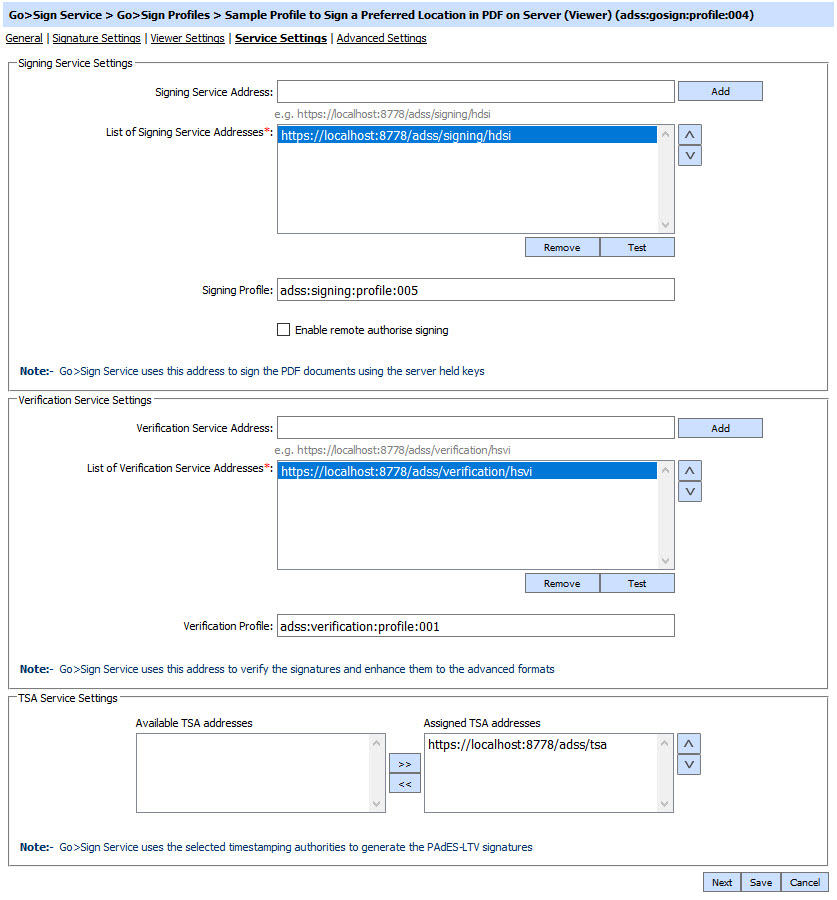
Service Settings
This page is used to configure the services that are involved in signature computation/enhancement and/or timestamping the signatures.
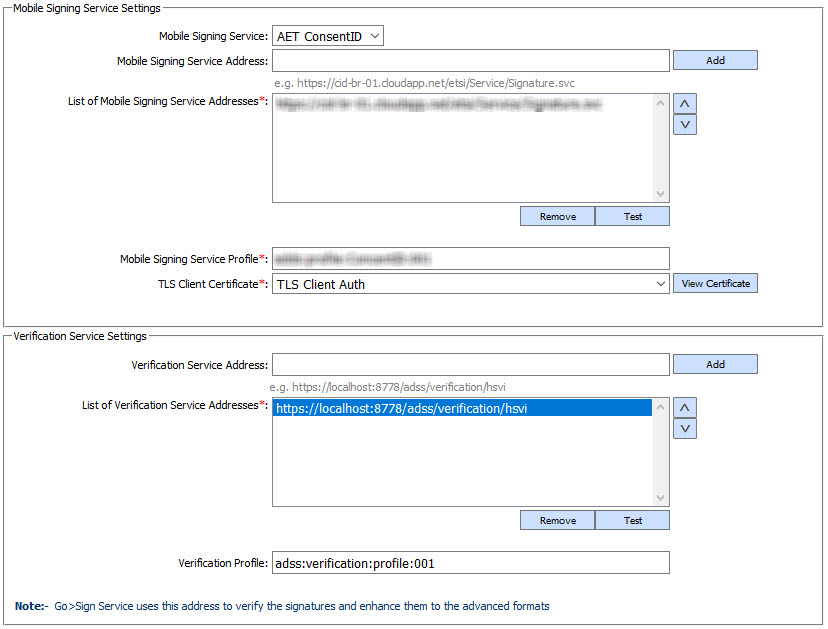
For mobile signing following option will be shown:
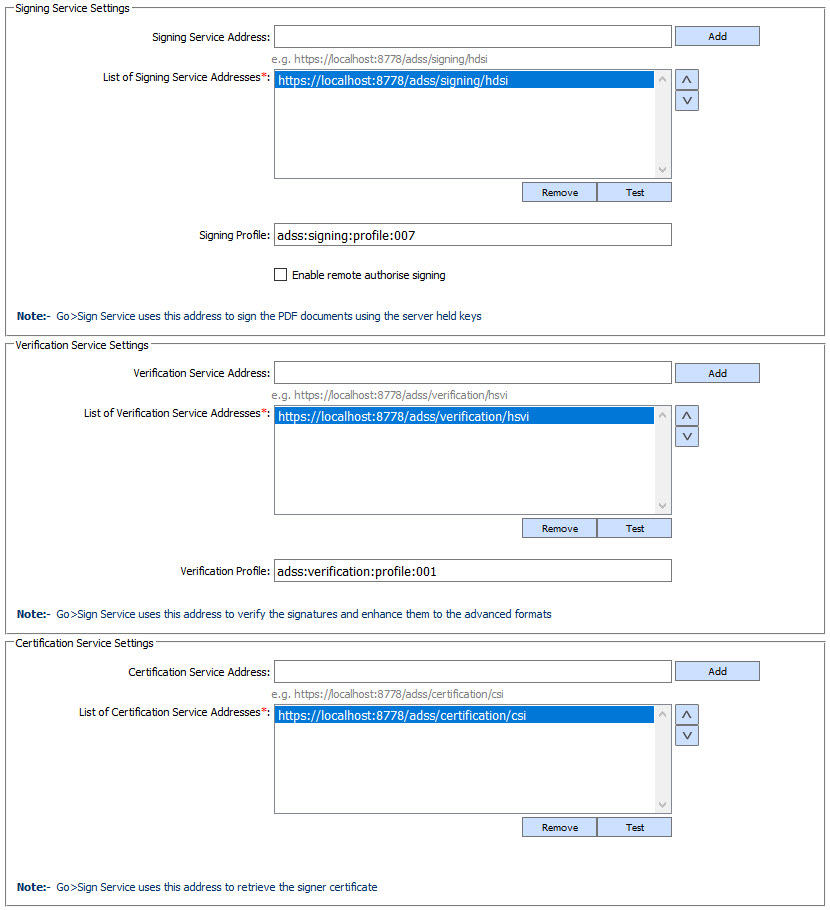
For MS Word signing following option will be shown:
The configuration items are as follows:
| Item | Description |
| Signing Service Address | Use this field to add Signing Service address(es). This is needed when using Go>Sign Viewer to display a document and the user wishes to sign using their signing key and certificate held centrally on ADSS Server. The business application must pass the user details or certificate alias via the API. |
| List of Signing Service Addresses | This field shows the available Signing Service addresses that can be used to create the end user signatures. Multiple service addresses can be added to handle primary and secondary service addresses. The Test button checks that the ADSS Server is available. The Remove button deletes a configured Signing Service address. |
| Signing Profile | Specifies the Signing profile to be used for this Go>Sign profile. |
| Enable Remote Authorise Signing | This option allow user to configure the Remote Authorise Signing. In Remote Authorise Signing, the private keys of the users are held at server side. To access these keys, the user must authorise the signing request on his/her mobile device with an authorisation key. The SAM Service validates this signed authorisation request to access the document signing key and proceeds with signing the document. In case of MS Office native signing, same Client ID should be used for RA and Go>Sign Service. |
| Verification Service Addresses | Use this field to add verification service address(es). Go>Sign always creates a PKCS#1 signature and this must be verified and extended to the appropriate signature format. |
| List of Verification Service Addresses | This field shows the configured Verification Service addresses used to verify and optionally enhance the signatures. Multiple service addresses can be added. The Test button checks that the ADSS Server is available. The Remove button deletes a configured Verification Service address. |
| Verification Profile | Specifies the Verification profile to be used with this Go>Sign profile. |
| Certification Service Addresses | Use this field to add certification service address(es). |
| List of Certification Service Addresses | This field shows the Certification Service addresses that can be used to obtain roaming certificates for keys generated within Go>Sign Applet and typically used for client side document signing. Multiple service addresses can be added. The Test button checks that the ADSS Server is available. The Remove button deletes a configured Certification Service address. |
| Certification Profile | Specifies the certification profile to be used with this Go>Sign Profile. |
| TSA Service Settings | This option should only be used for creating PDF document timestamps as part of a PAdES-LTV (Part 4) signature. This field defines the TSAs to be used to obtain a timestamp for the archive signature. The configuration of TSA address(es) is described in this section: Configuring Time Stamp Authorities (TSA). |
| Mobile Signing Service | Go>Sign Service also supports signing on a mobile phone using the AET Mobile's ConsentID solution. |
| Mobile Signing Service Addresses | Use this field to add Mobile Service address(es). |
| List of Mobile Signing Service Addresses | This field shows the configured Mobile Service addresses used to compute the signatures. Multiple service addresses can be added. The Test button checks that the Mobile Service is available. The Remove button deletes a configured Mobile Service address. |
| Mobile Signing Service Profile | This field defines the Mobile Service profile that will be used with this Go>Sign profile. |
| TLS Client Certificate |
Select the TLS Client Certificate which pre-exists in the Key Manager. TLS Client Certificate is required for authenticate the mobile user. |
Click the Next button to display the Advance Settings page.
See also