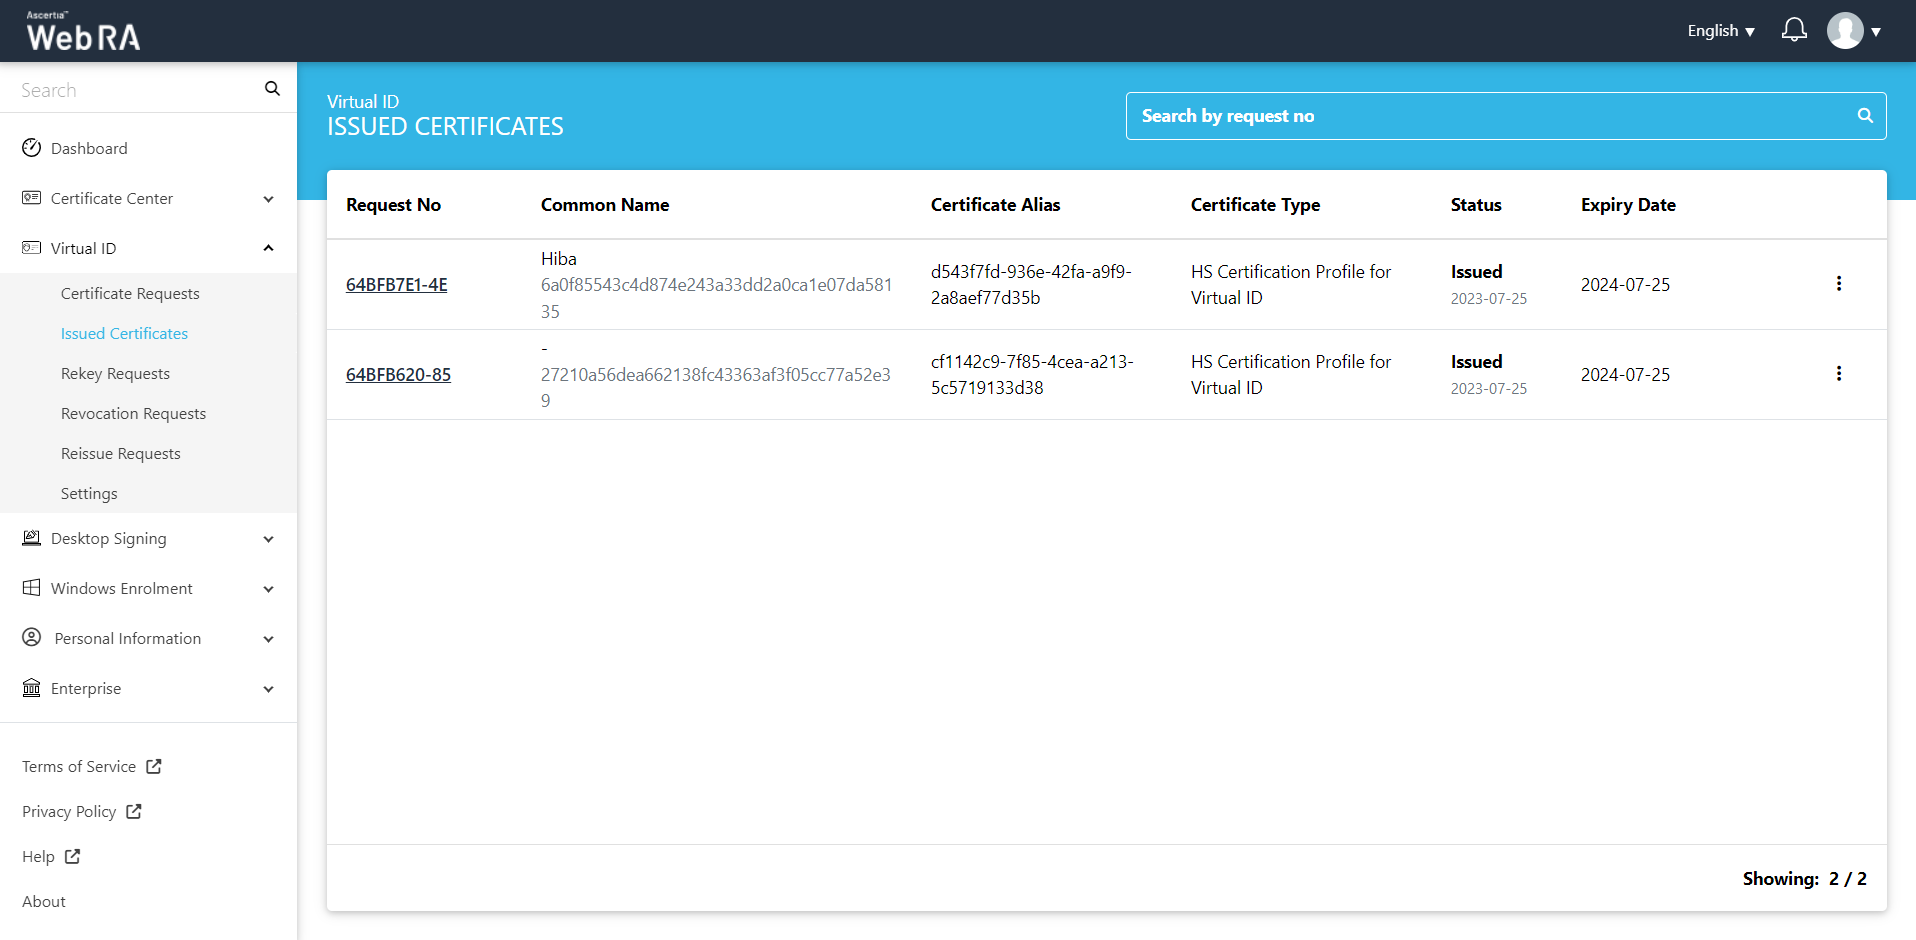
Issued Certificates
This section lists down all certificates issued to a Virtual ID user.
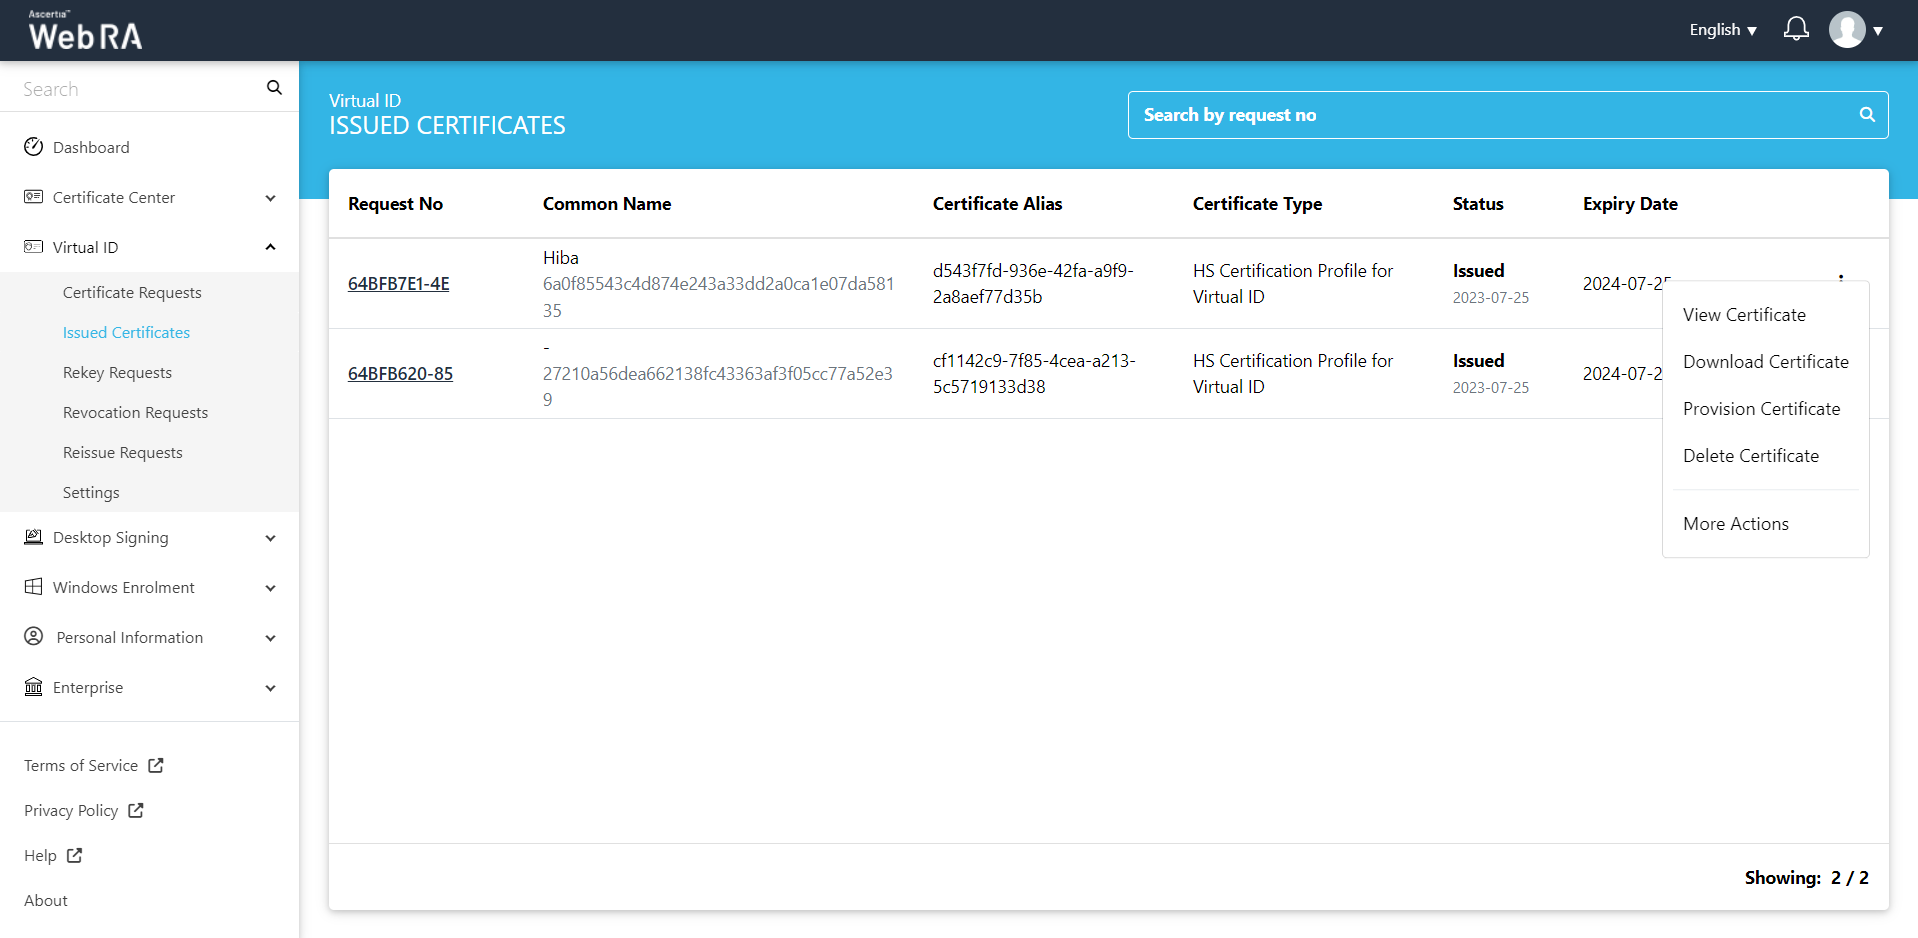
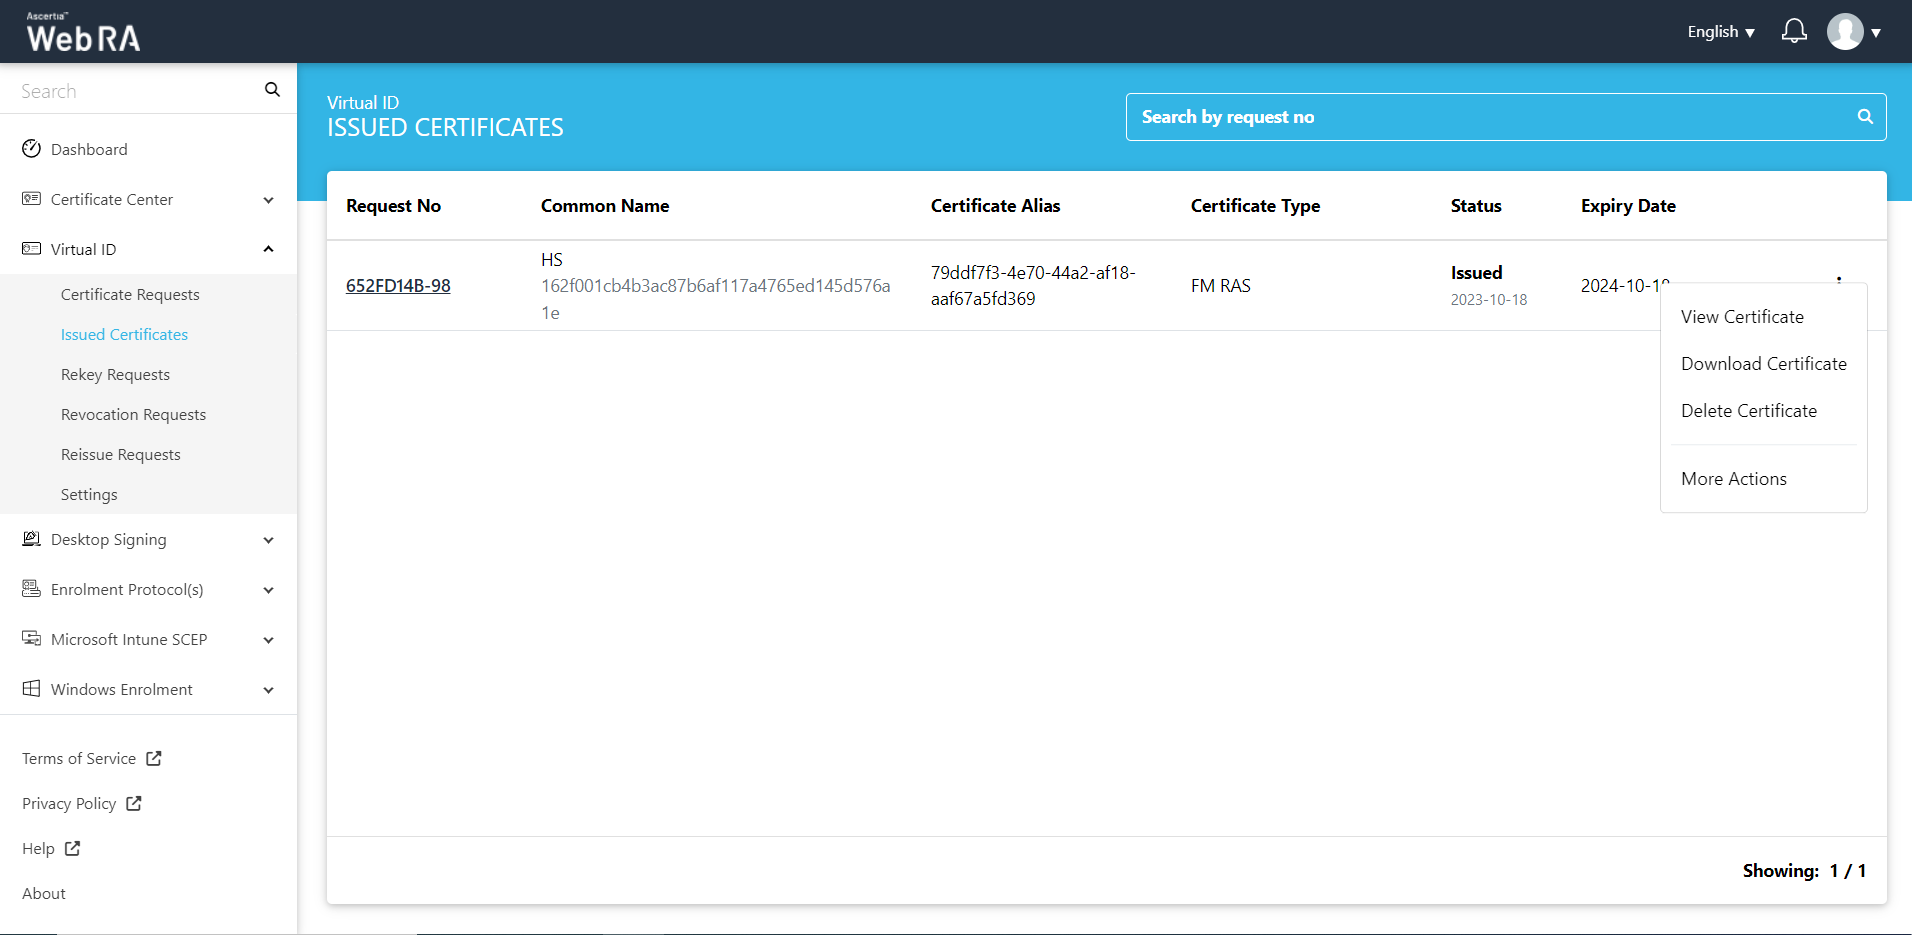
- View Certificate
- Download Certificate
- Provision Certificate
- Delete Certificate
- History
- More Actions
- Virtual ID in case of User Registration - Citizen ID.
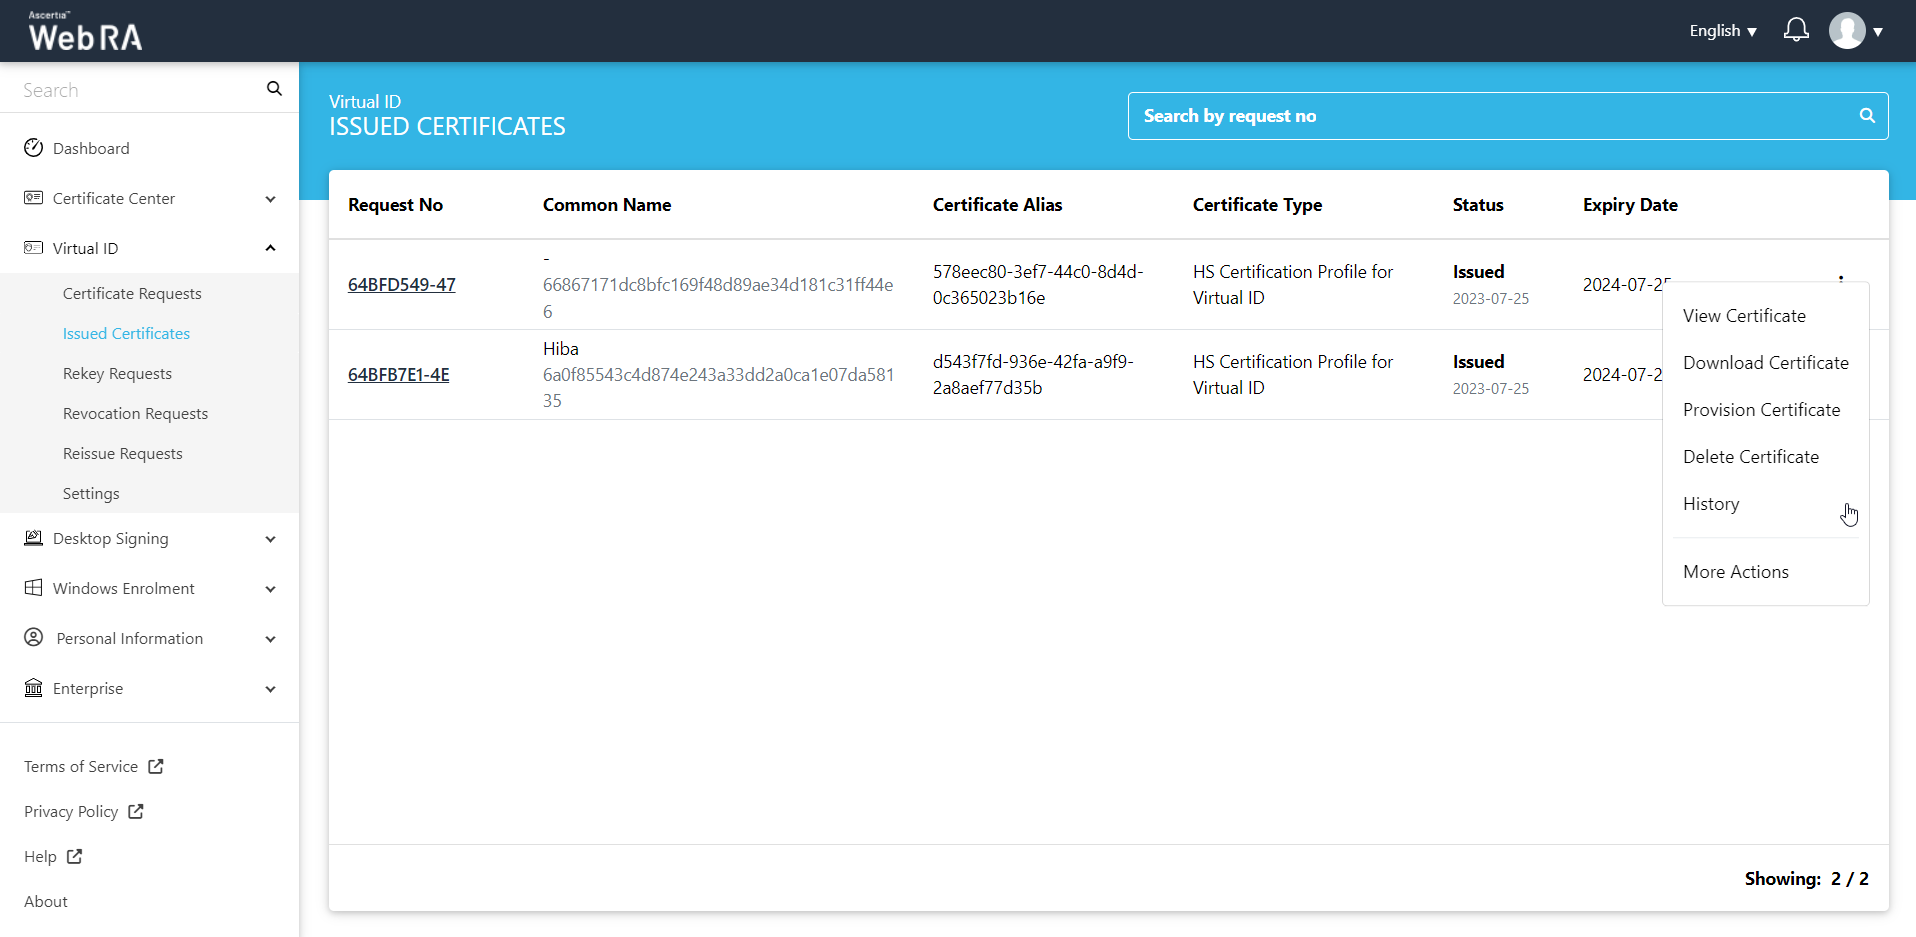
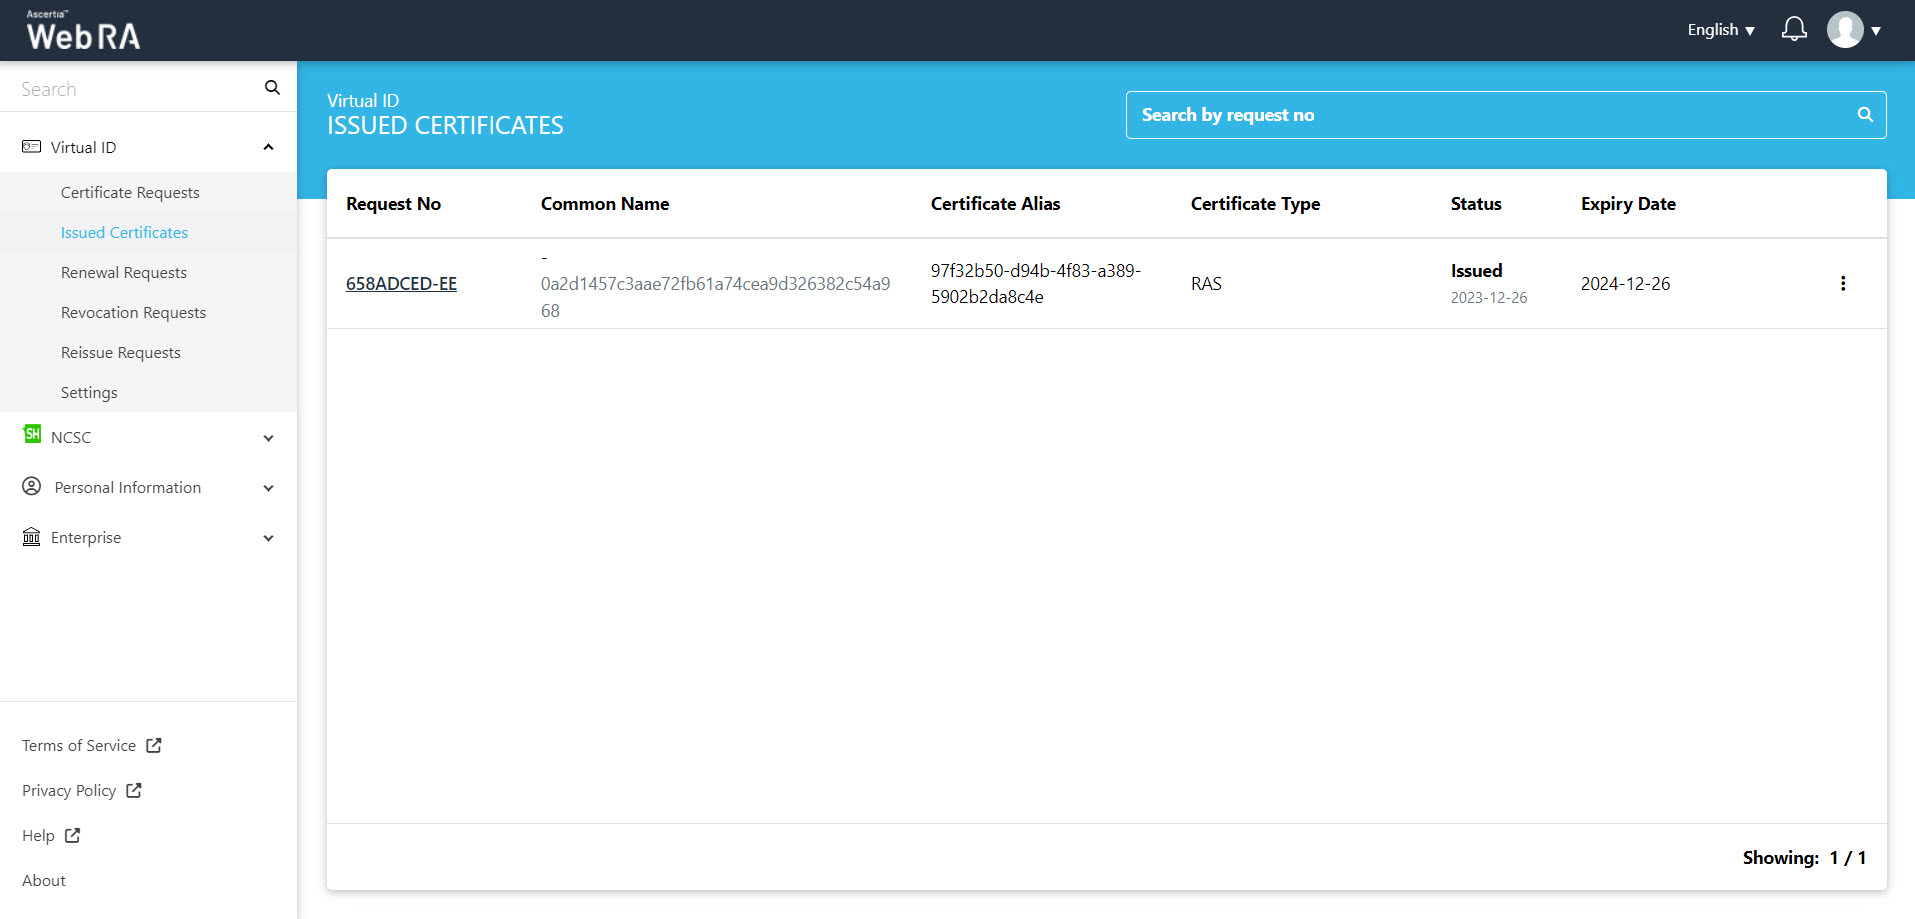
On the web portal, navigate to "Virtual ID" from the left menu pane.
Click "Issued Certificates" from the sub-menu. The following screen will be displayed:
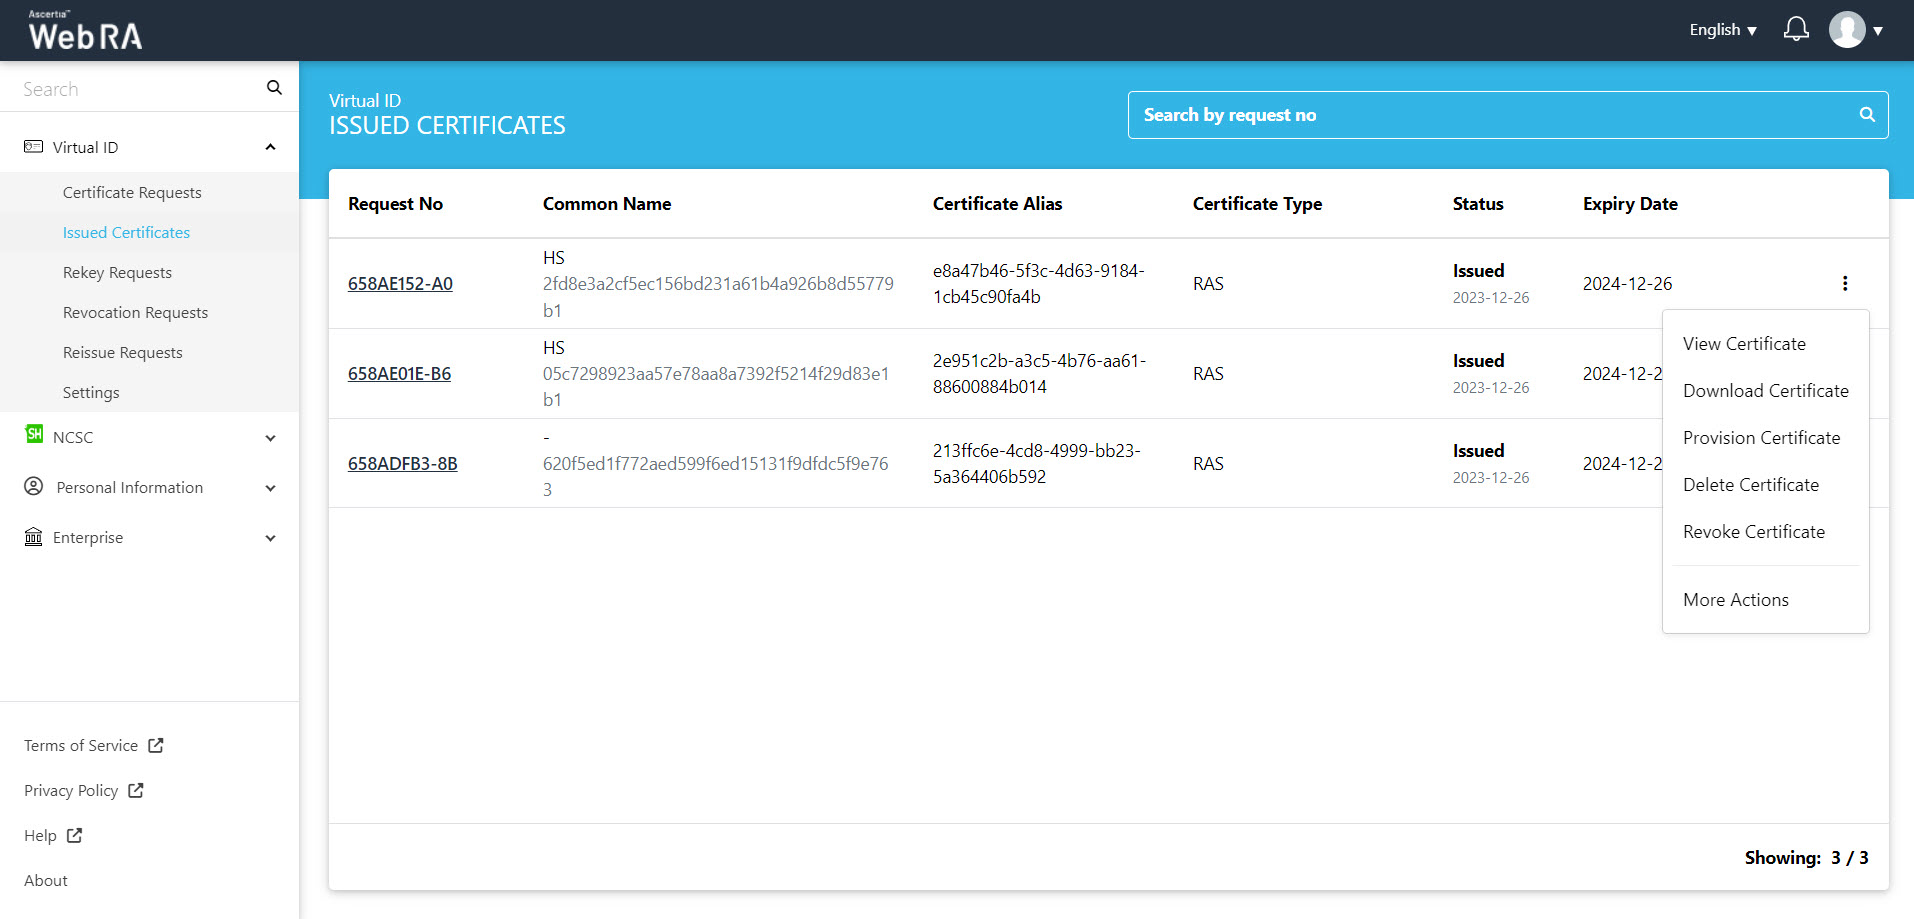
Click  button and you can perform a number of actions as displayed below:
Click "View Certificate" against the certificate you want to view. The certificate information will be displayed. Then click "Close".

Click "Download Certificate" and the certificate will be downloaded on your machine.
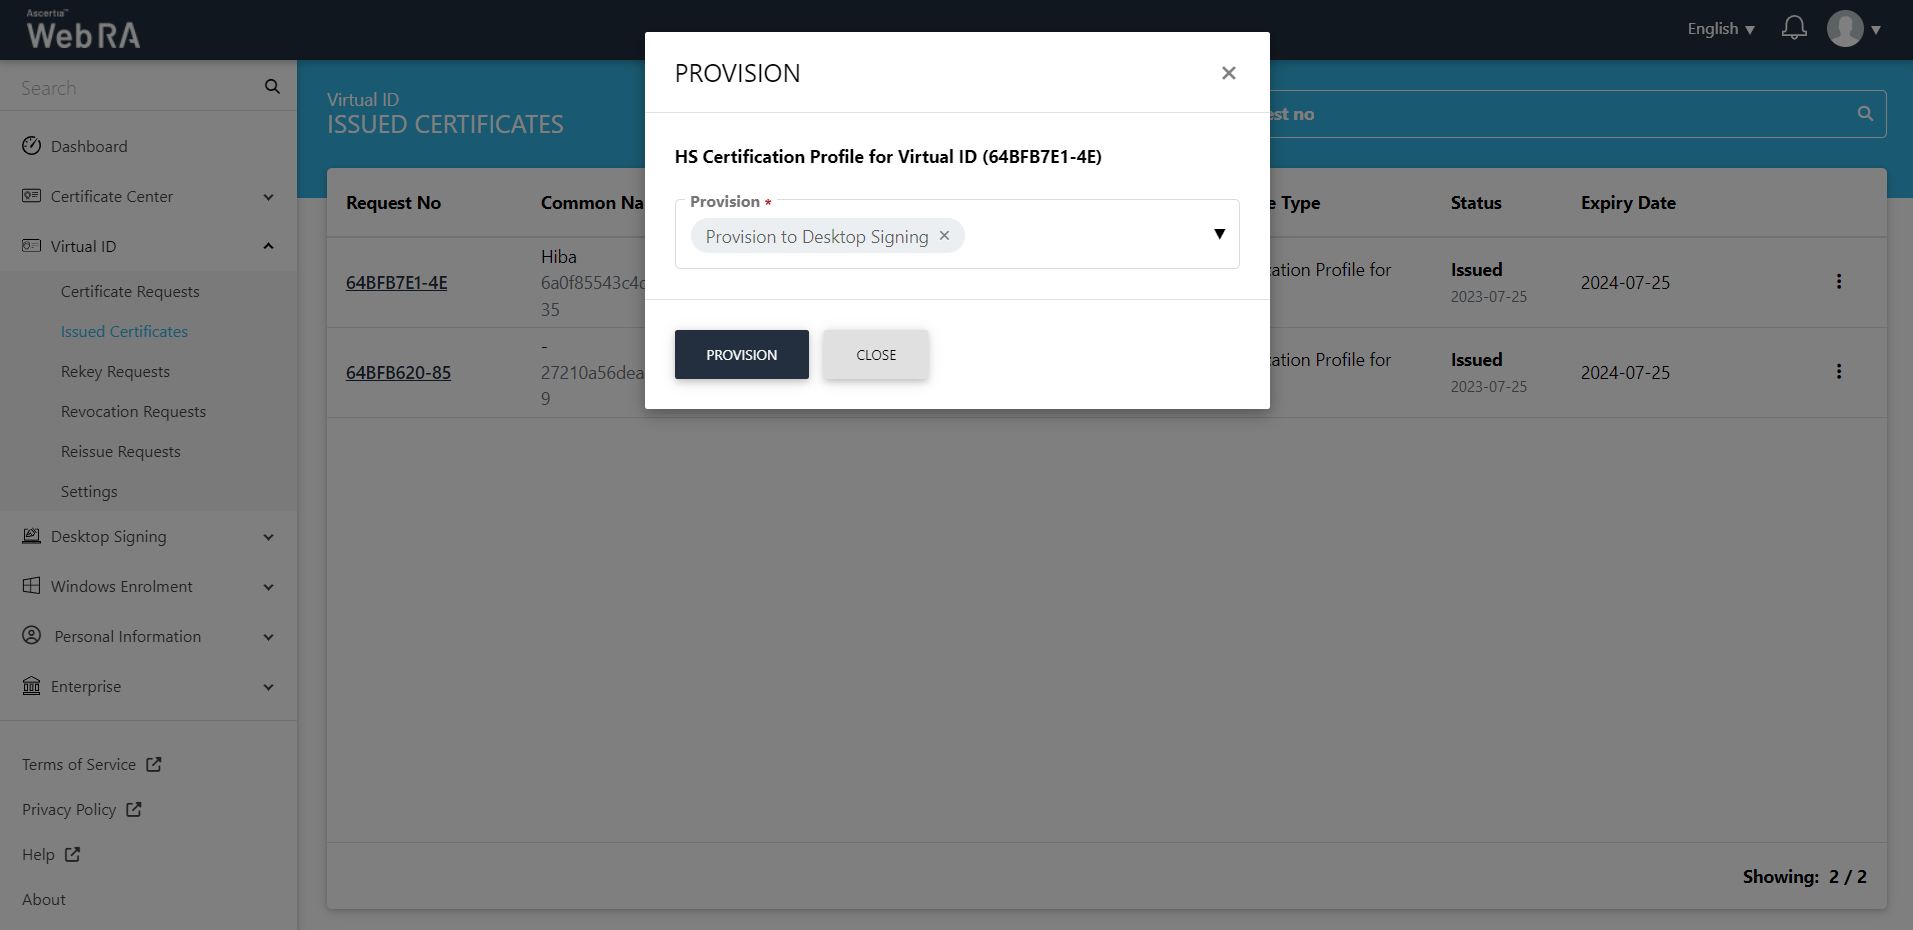
Click "Provision Certificate" and the certificate will be provisioned to your Desktop Signing account.
- Expand Requests > Issued Certificates.
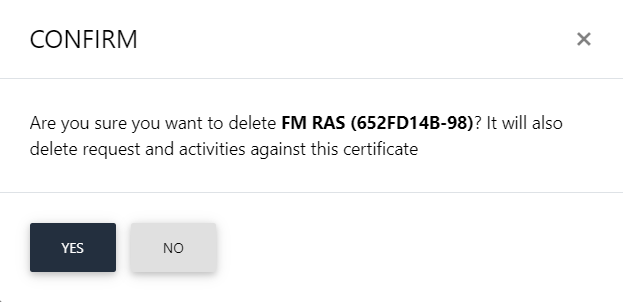
- Click against the certificate you want to delete and then click Delete Certificate.
- A confirmation dialog will appear as displayed below. It will also delete certificate (s) against this request,
This section appears according to the configurations in the Policy section in the Admin portal.
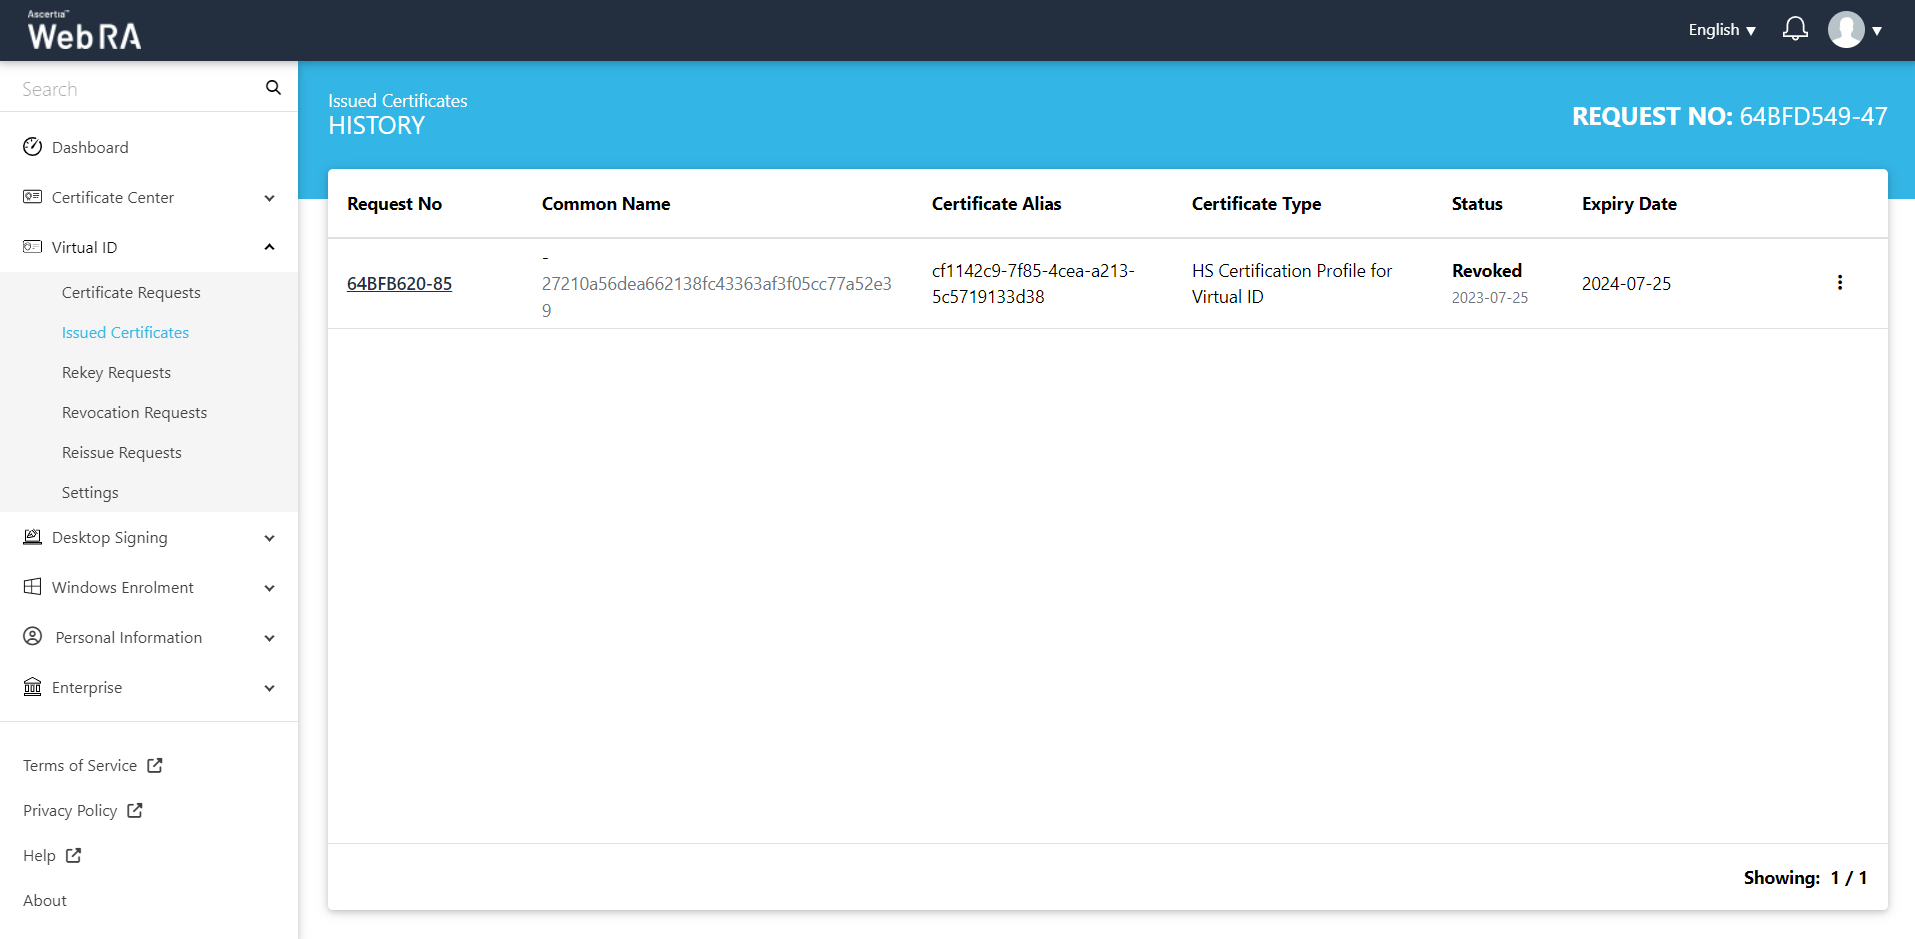
History
If you have revoked a certificate, or reinstated a revoked certificate, you can also view the history by clicking against a specific certificate. Then click "History".
You can see what action was performed on a certificate previously.
Click "More Actions" to revoke, rekey, reinstate or renew a certificate as per configured in the admin portal.
Virtual ID in case of User Registration - Citizen ID.
When a user registers ADSS Web RA Server with citizen ID, which is configured in the Configurations > Default Settings, he is redirected to the Virtual ID issued certificates listing. The Virtual ID and SigningHub accounts are created. Once complete, the Virtual ID certificate is created and provisioned in SigningHub.
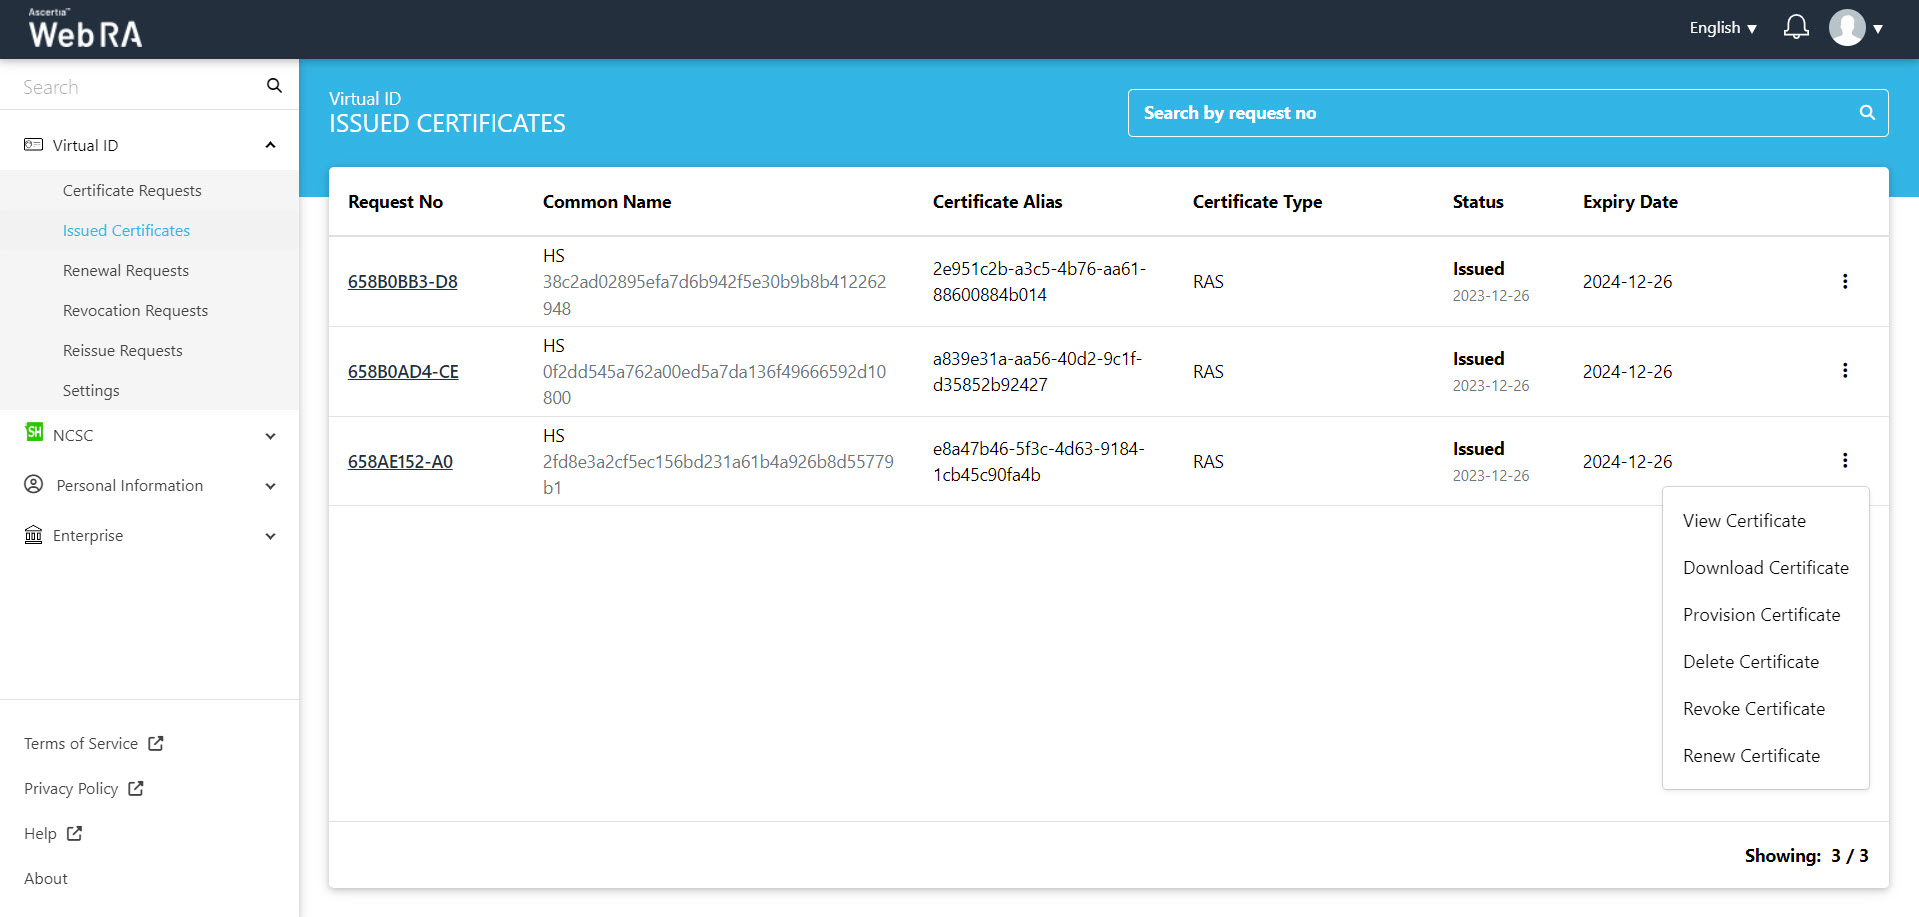
You can perform a number of actions from the issued certificates listing. Click against a certificate and you can see the actions as follows:
- View Certificate
- Download Certificate
- Provision Certificate
- Delete Certificate
- Revoke Certificate
- Renew Certificate
- More Actions
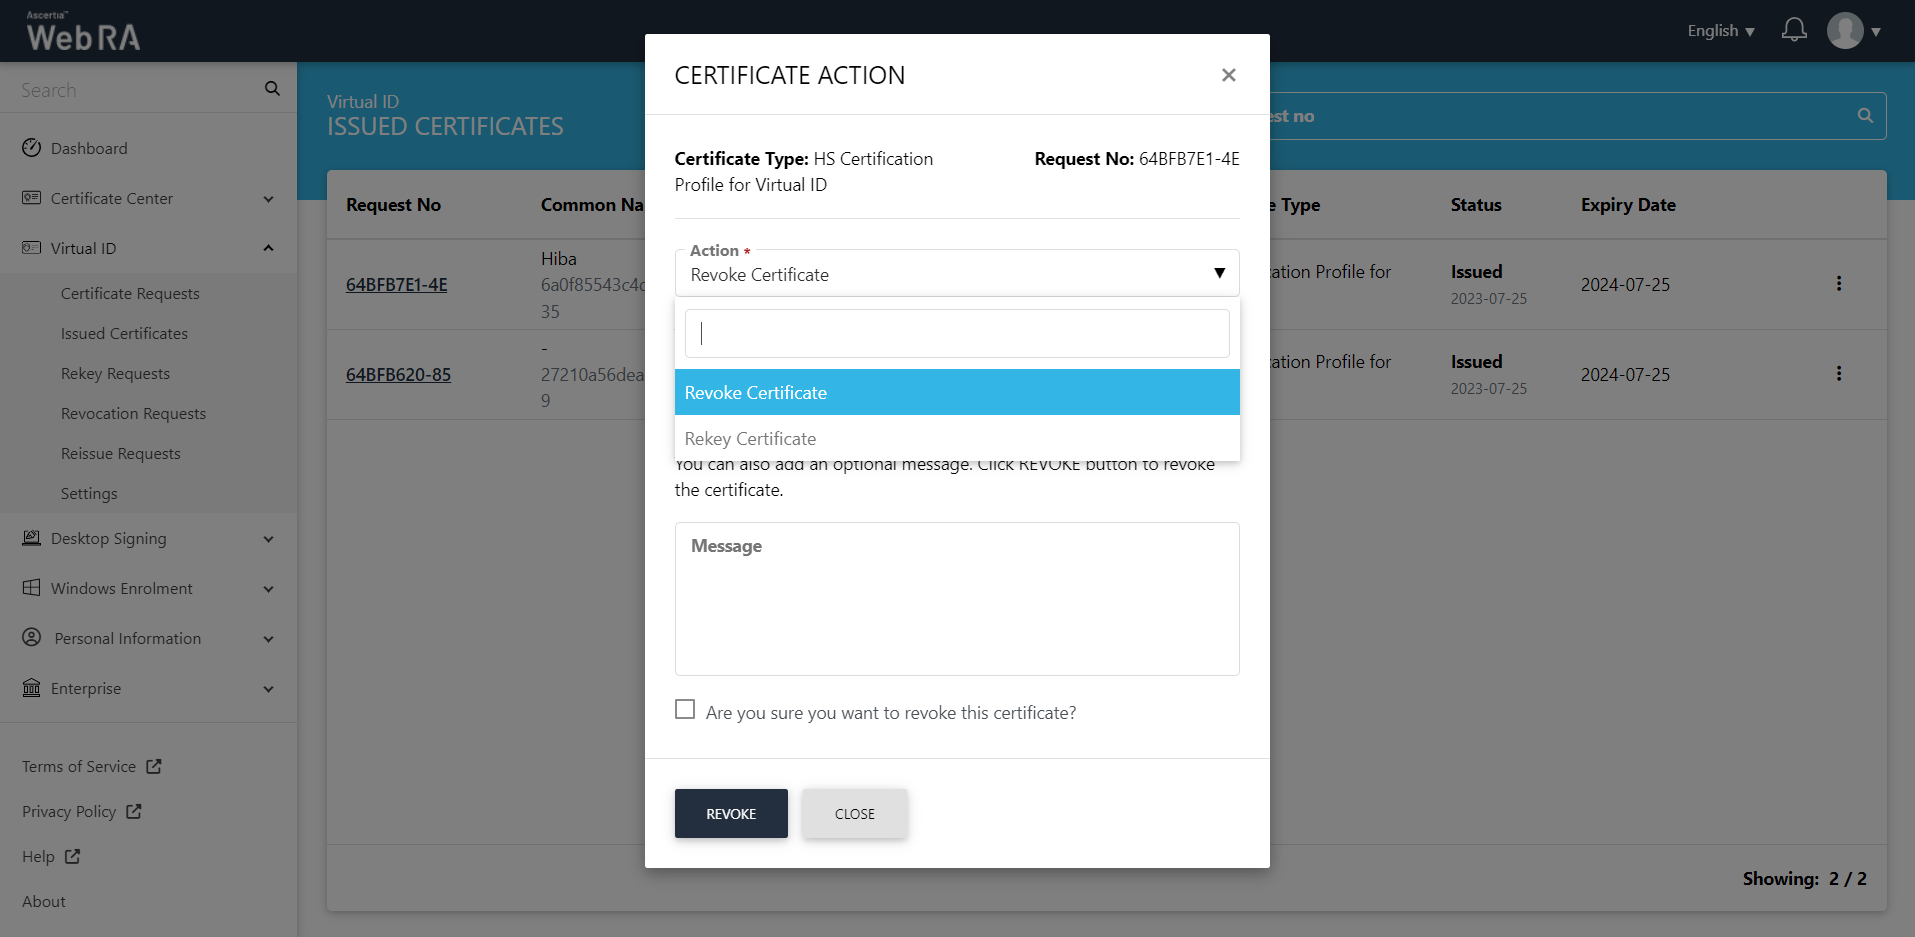
Revoke Certificate
Click Revoke Certificate and the following screen will appear. You can add an optional message and select the confirmation check box, then click Revoke.
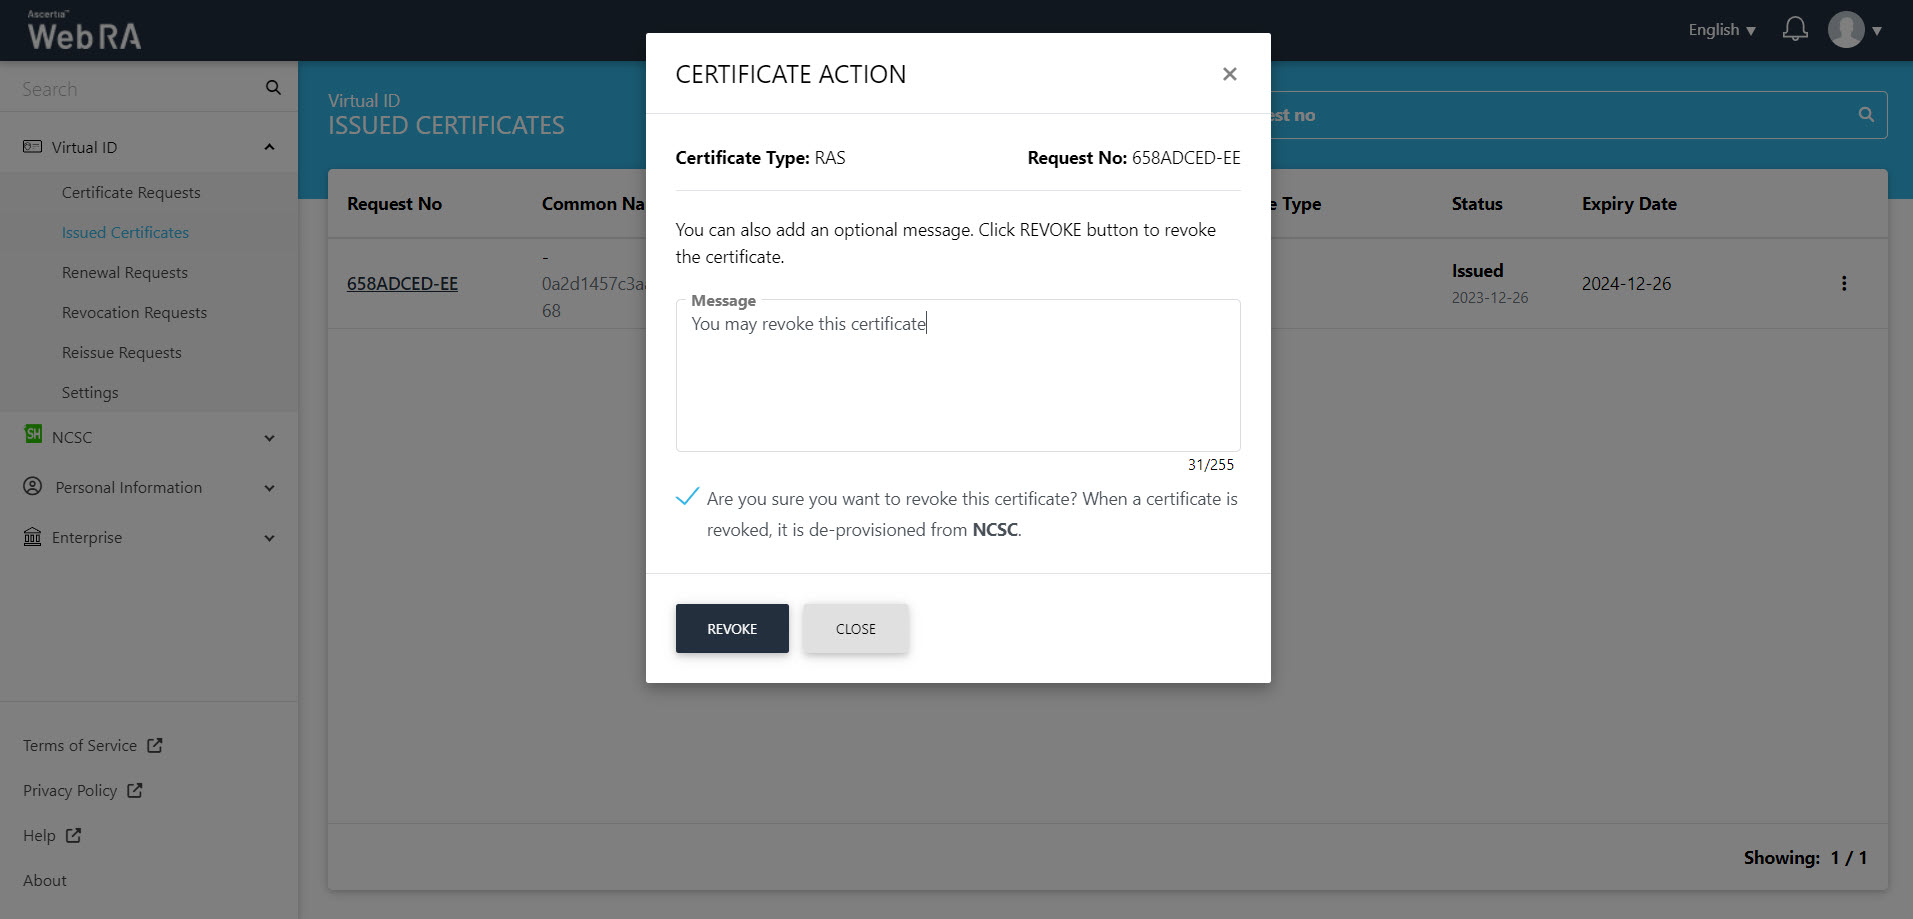
The certificate will appear in the revocation requests.
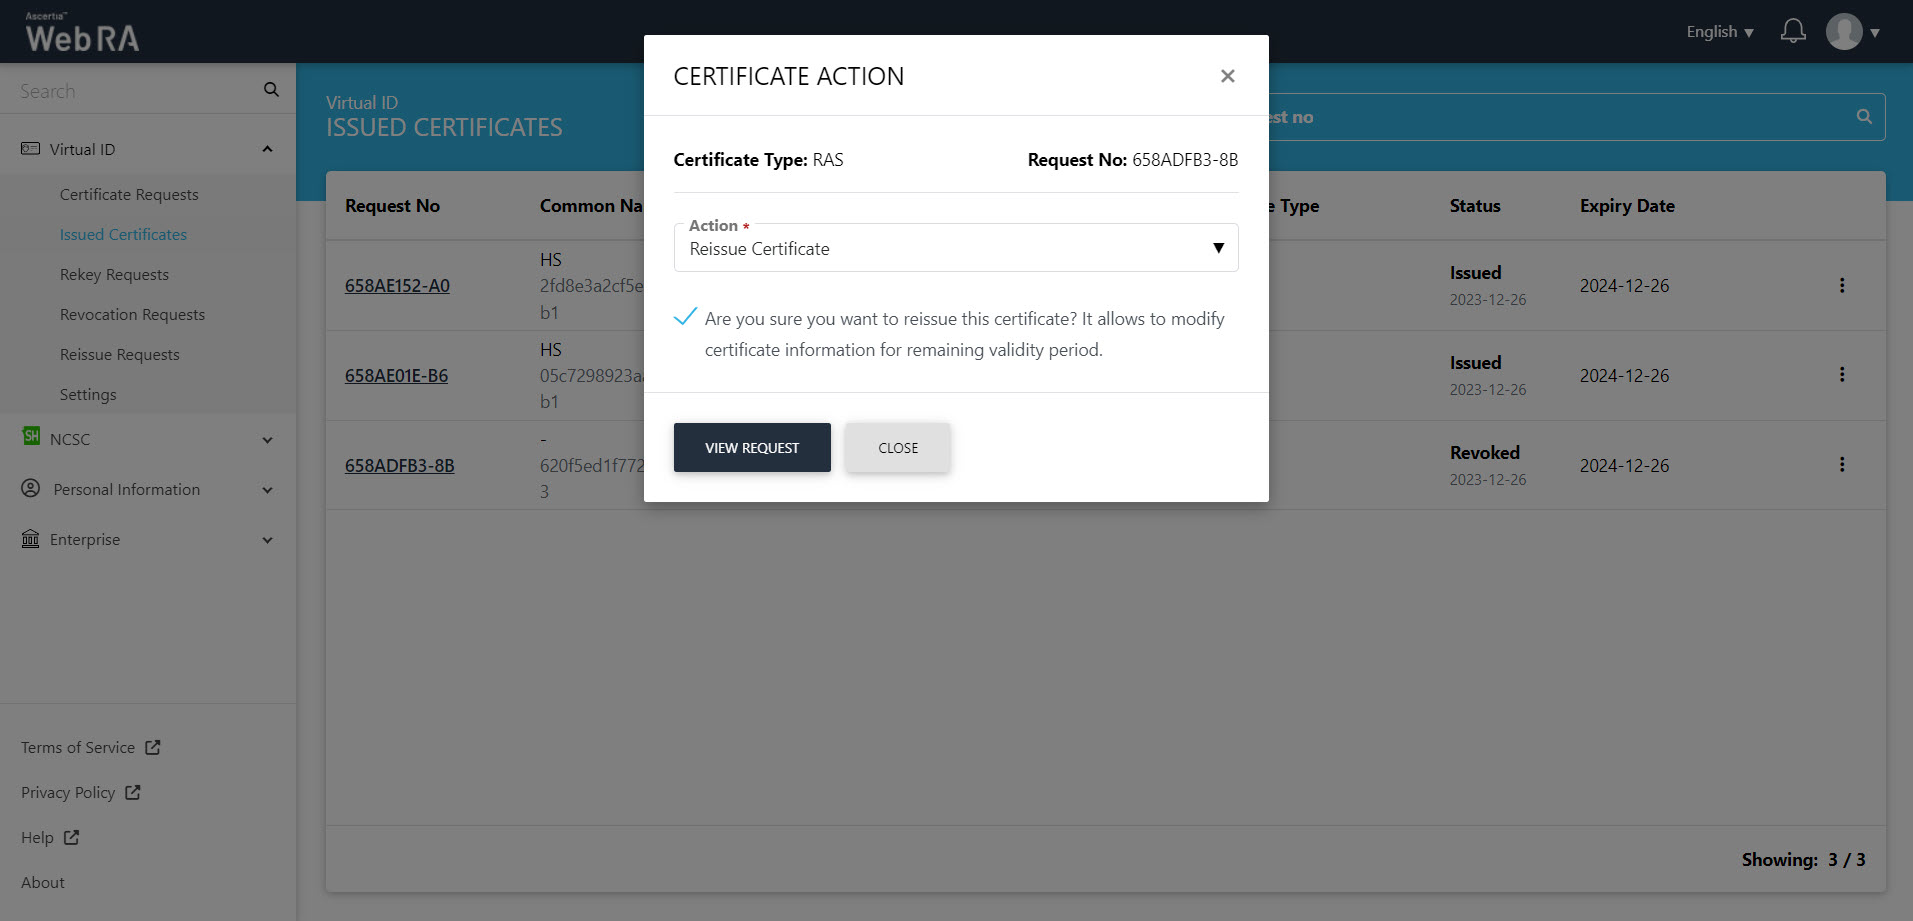
More Actions
Click More Actions against a revoked certificate and the following screen will appear. Select Reissue Certificate from drop down and select the confirmation message. Then click View Request.
The SDN screen will appear. Enter the SDN and click Reissue.

The Subscriber Agreement will appear, click I Agree to proceed.
On the Certificate Reissue screen, you can add an optional message, then click Reissue.

The certificate will appear in the Reissue Requests listing.
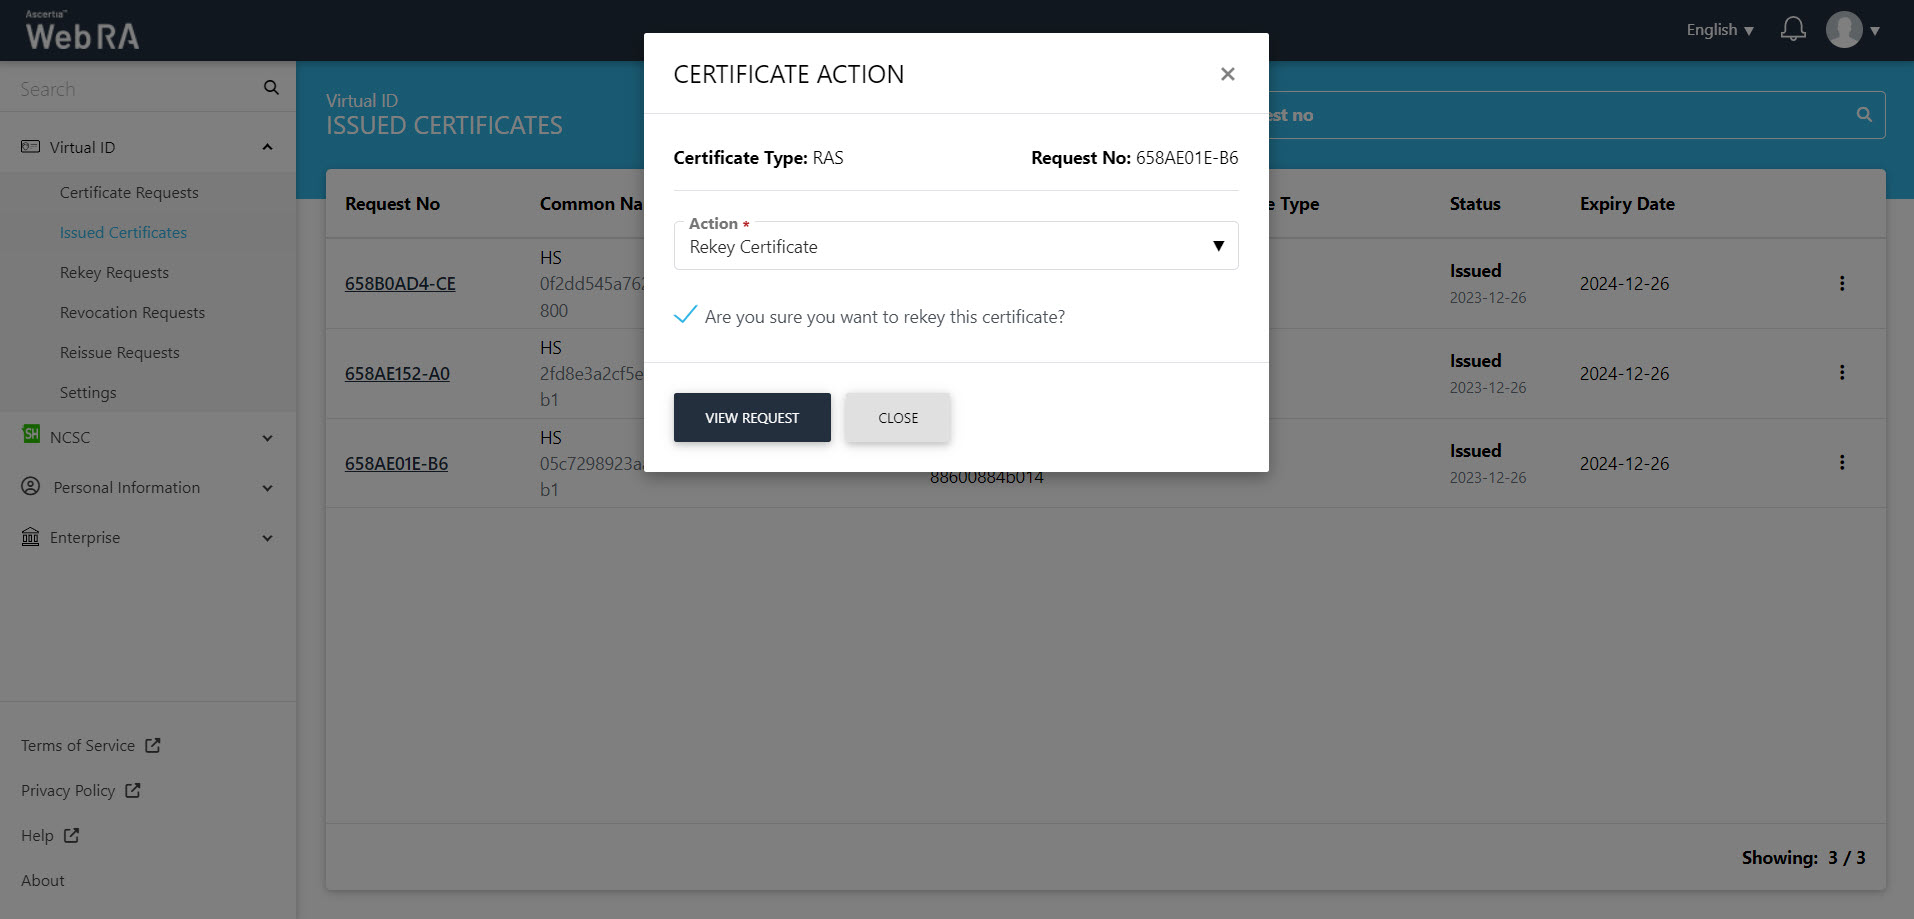
Rekey Certificate
Click More Actions against a certificate and the following screen will appear. Select Rekey Certificate from drop down and select the confirmation message. Then click View Request.
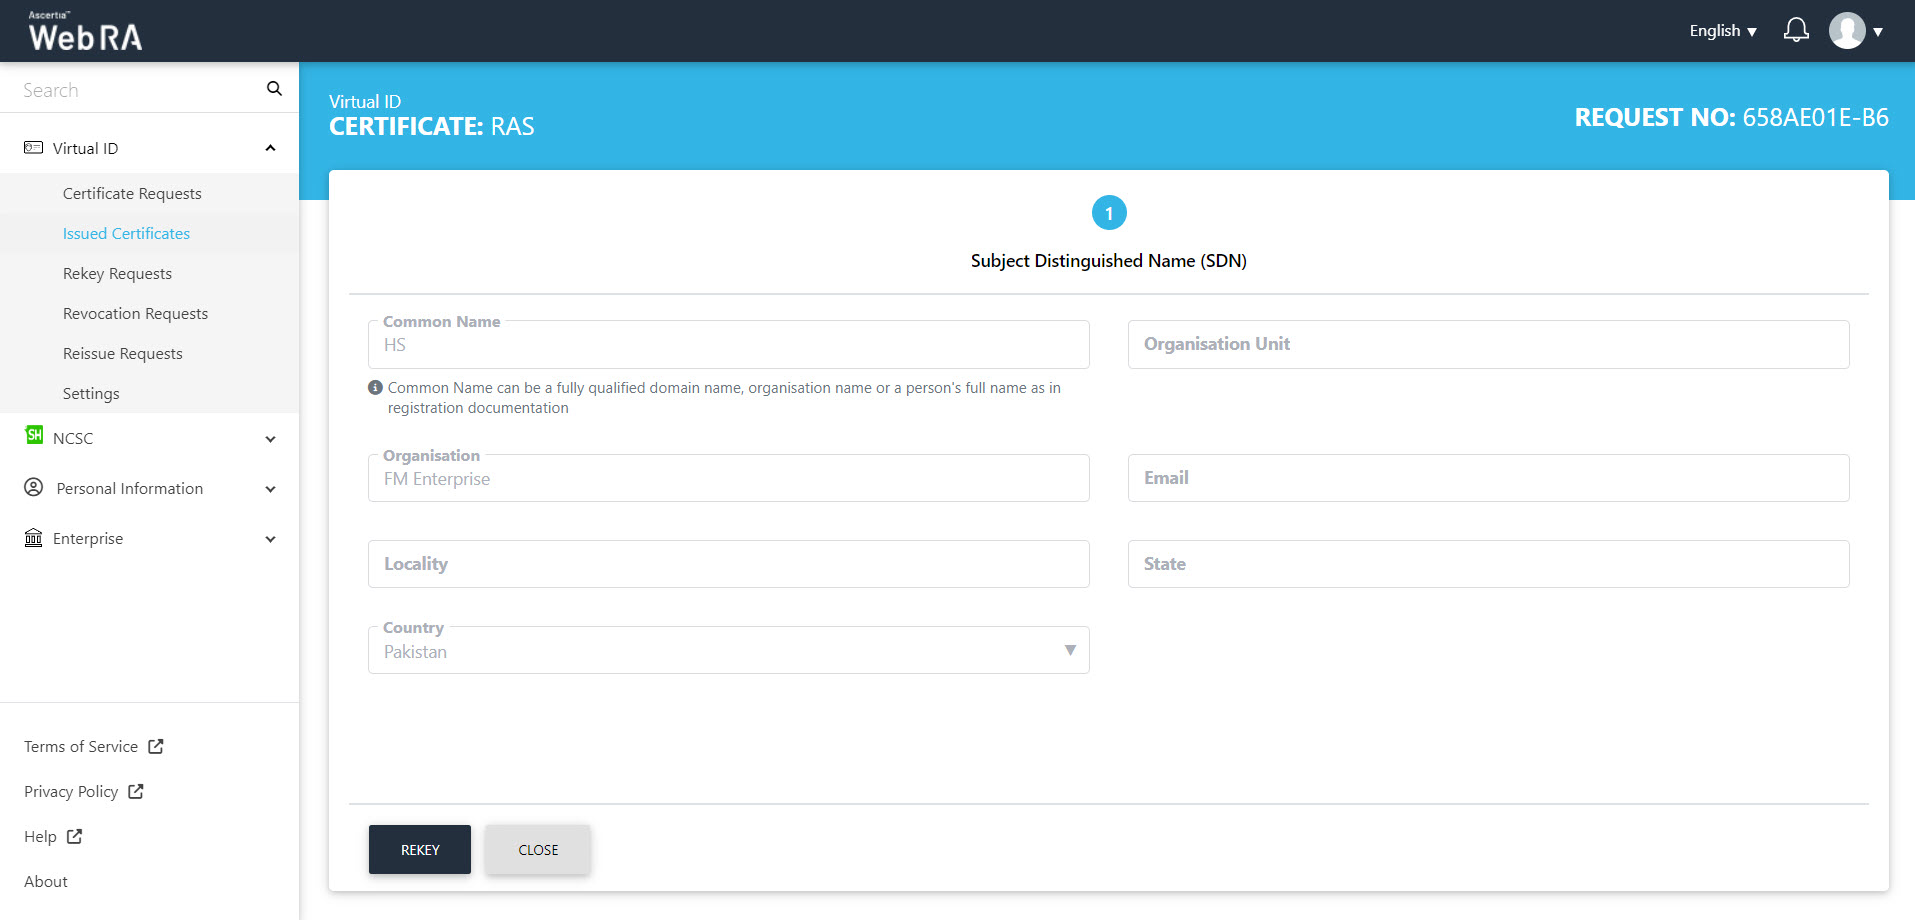
The SDN screen will appear. Enter the SDN and click Rekey.
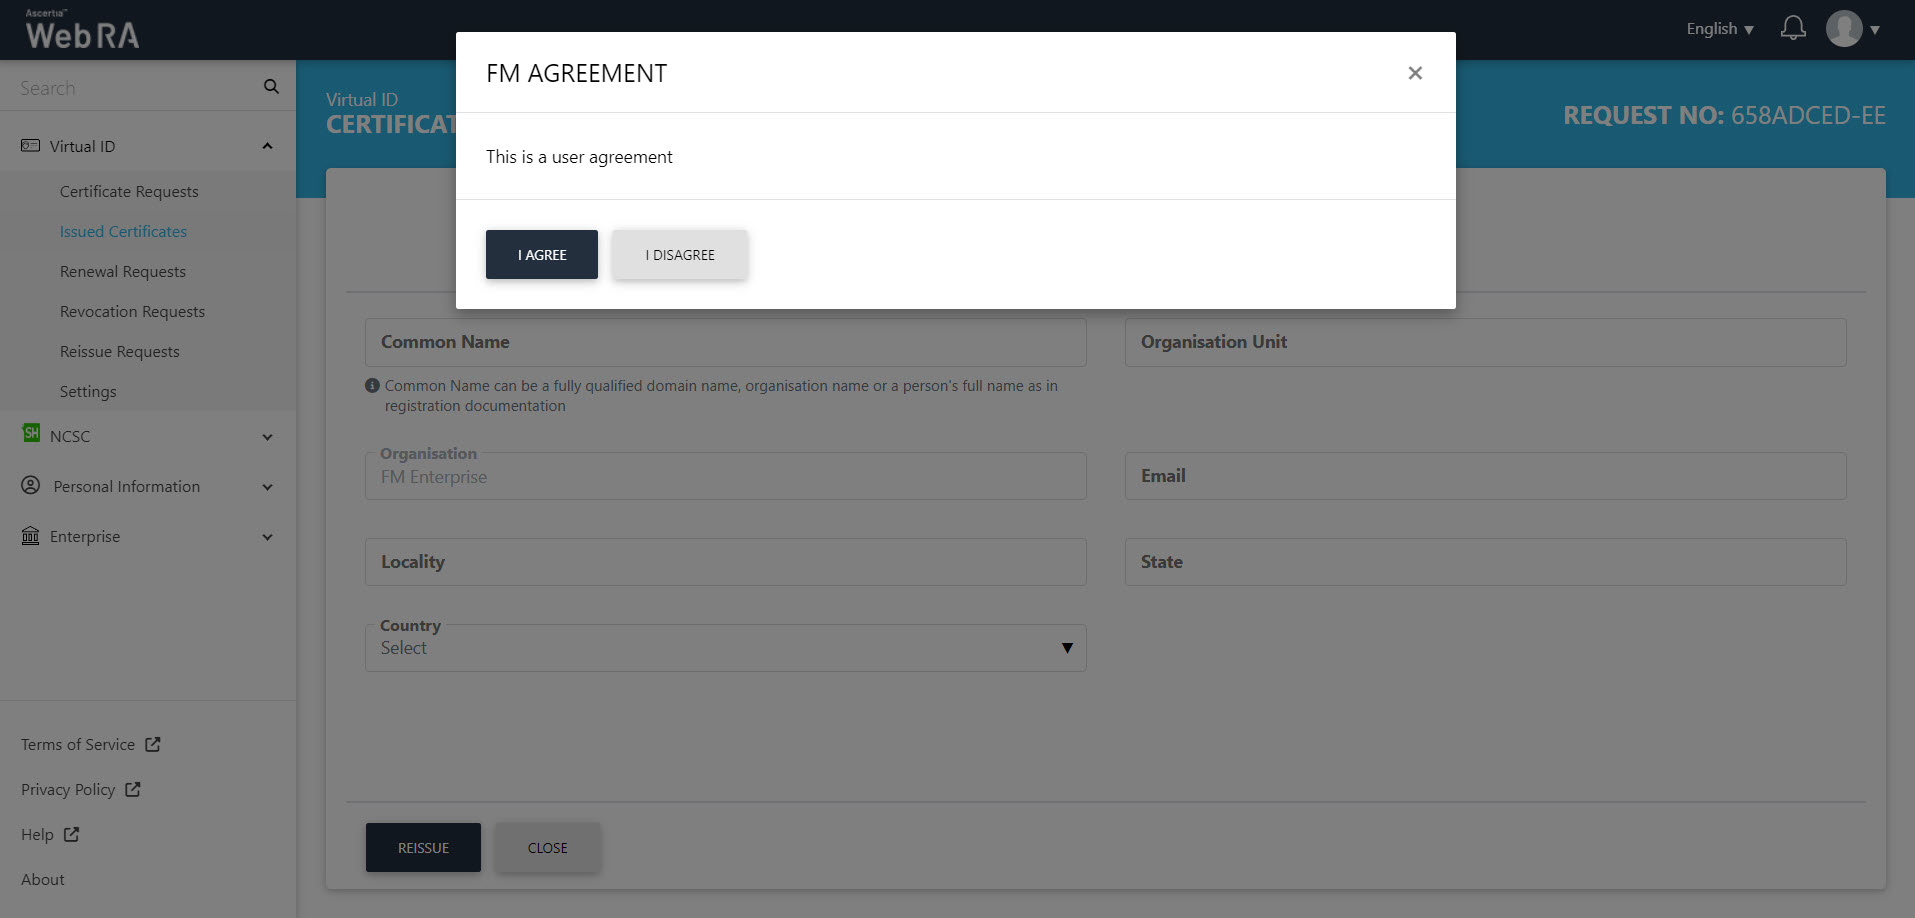
The Subscriber Agreement will appear, click I Agree to proceed.
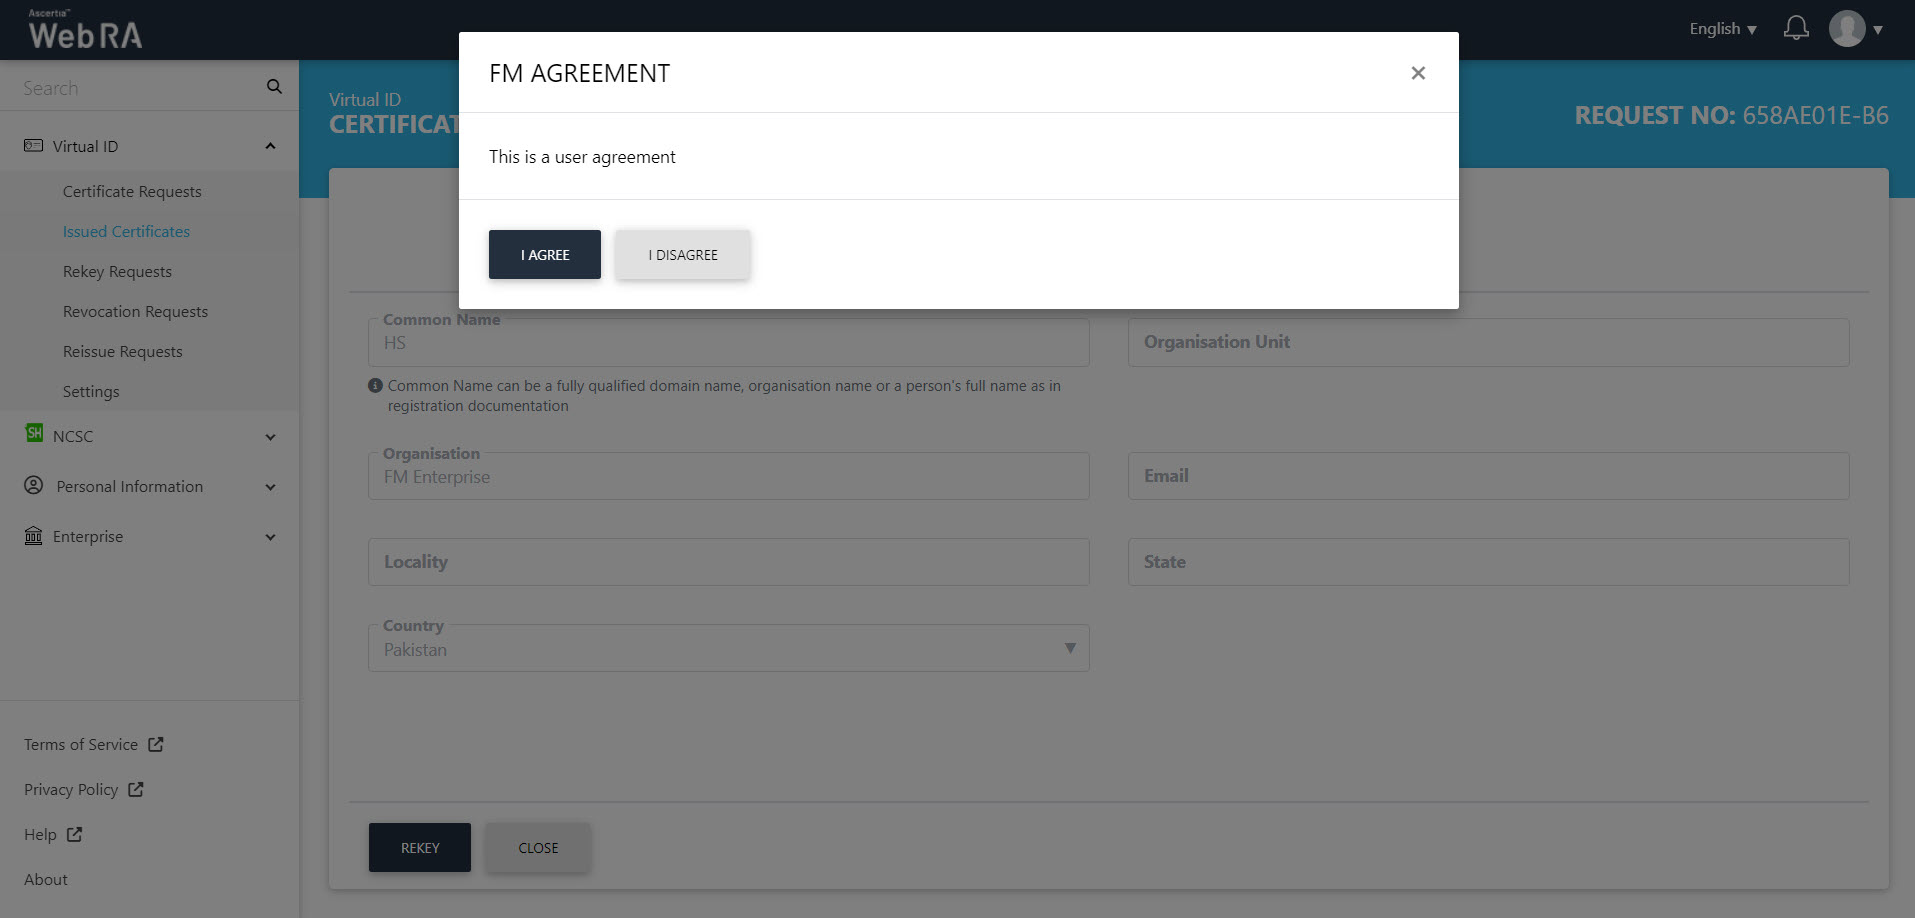
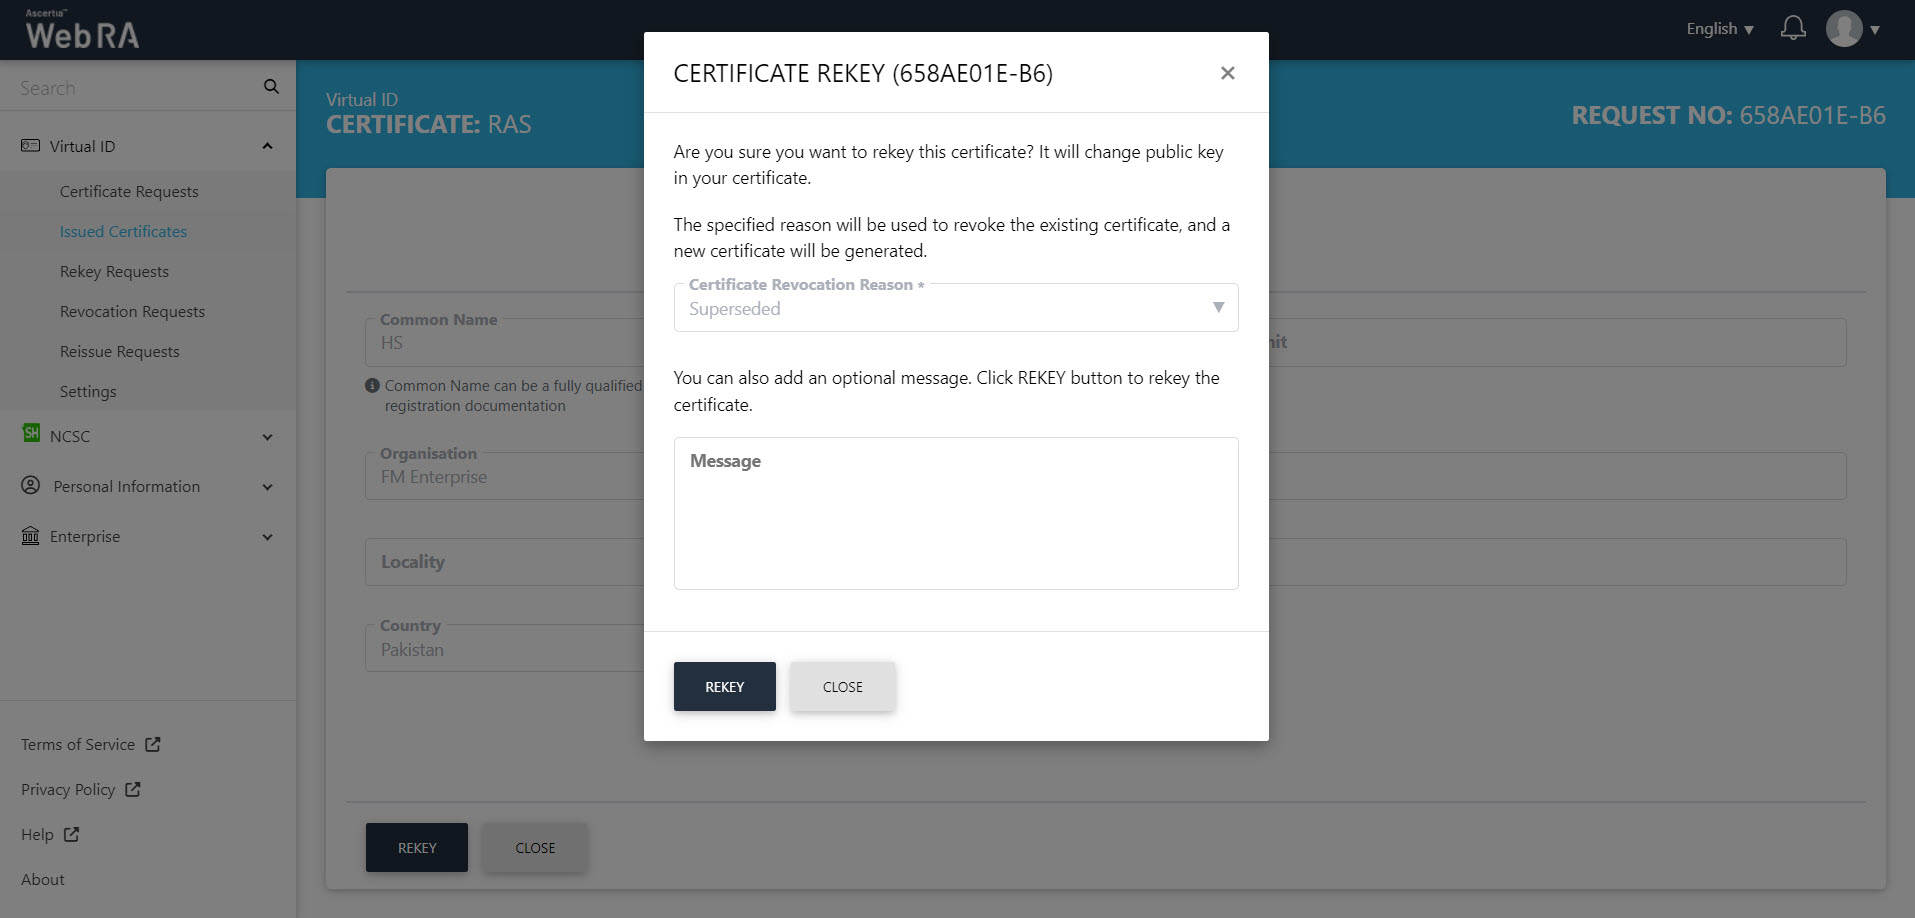
On the Certificate Rekey screen, you can add an optional message, then click Rekey.
The certificate will appear in the Reissue Requests listing.
Renew Certificate
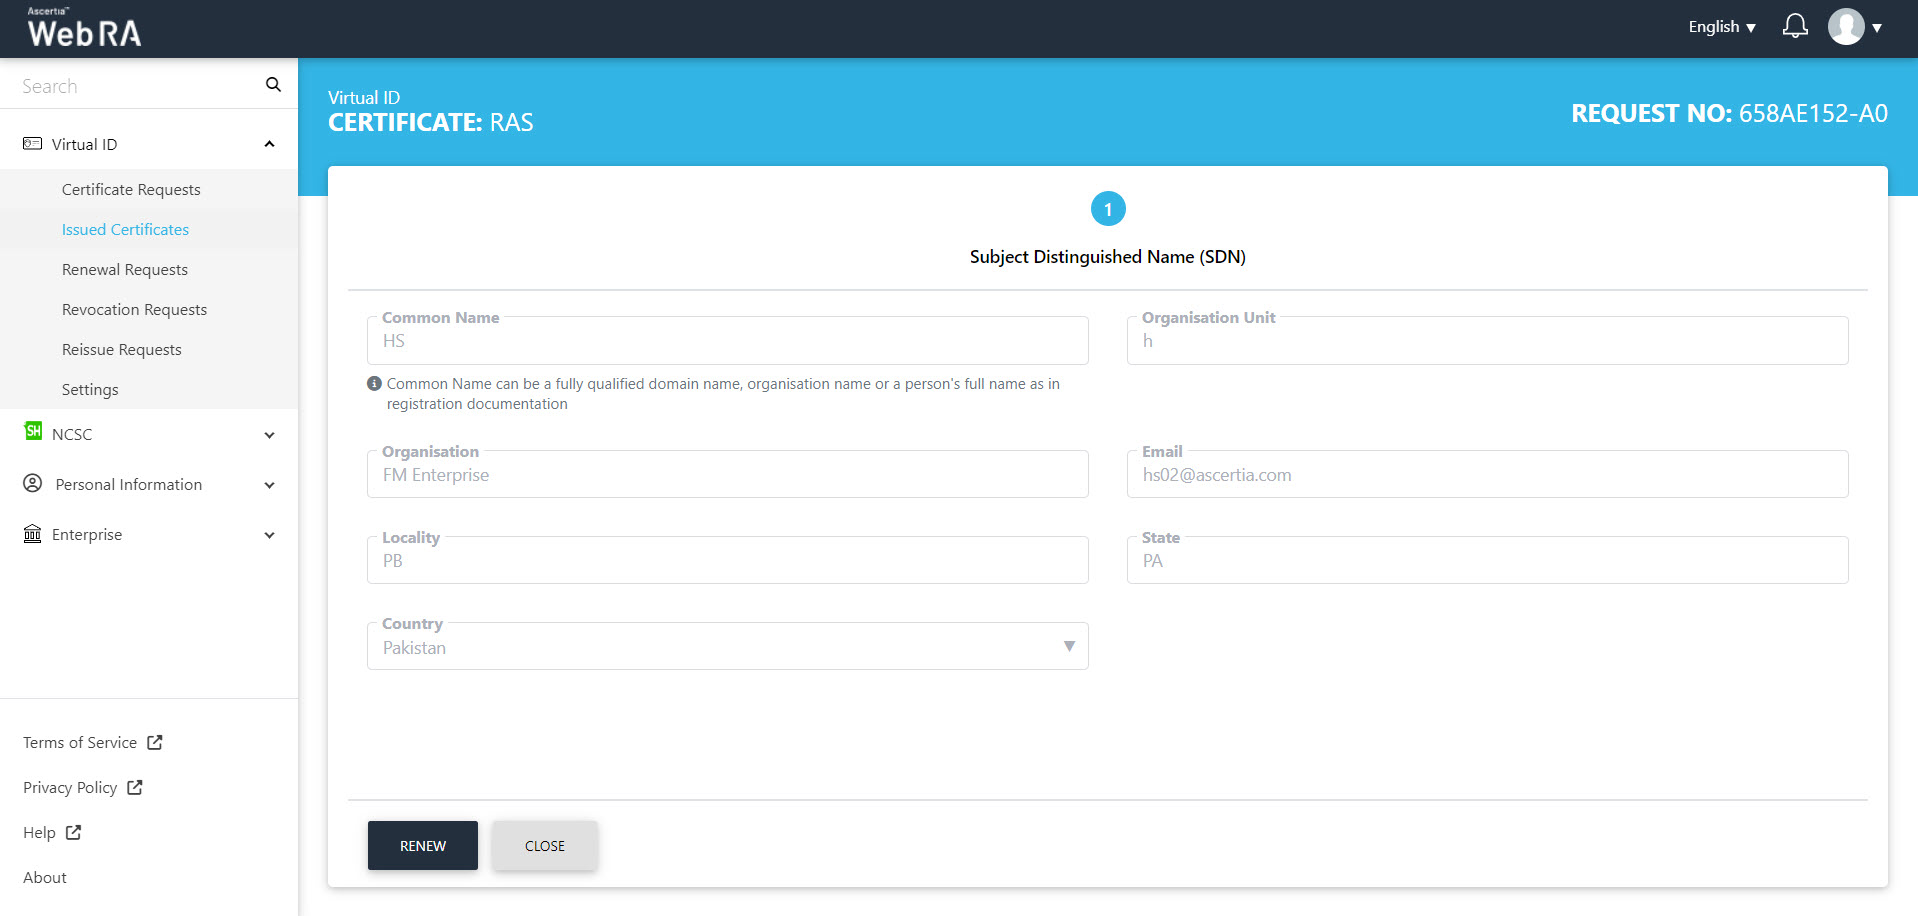
Click against a certificate and the following screen will appear. Select Renew Certificate from drop down and select the confirmation message. Then click View Request.
The SDN screen will appear. Enter the SDN and click Renew.
The Subscriber Agreement will appear, click I Agree to proceed.

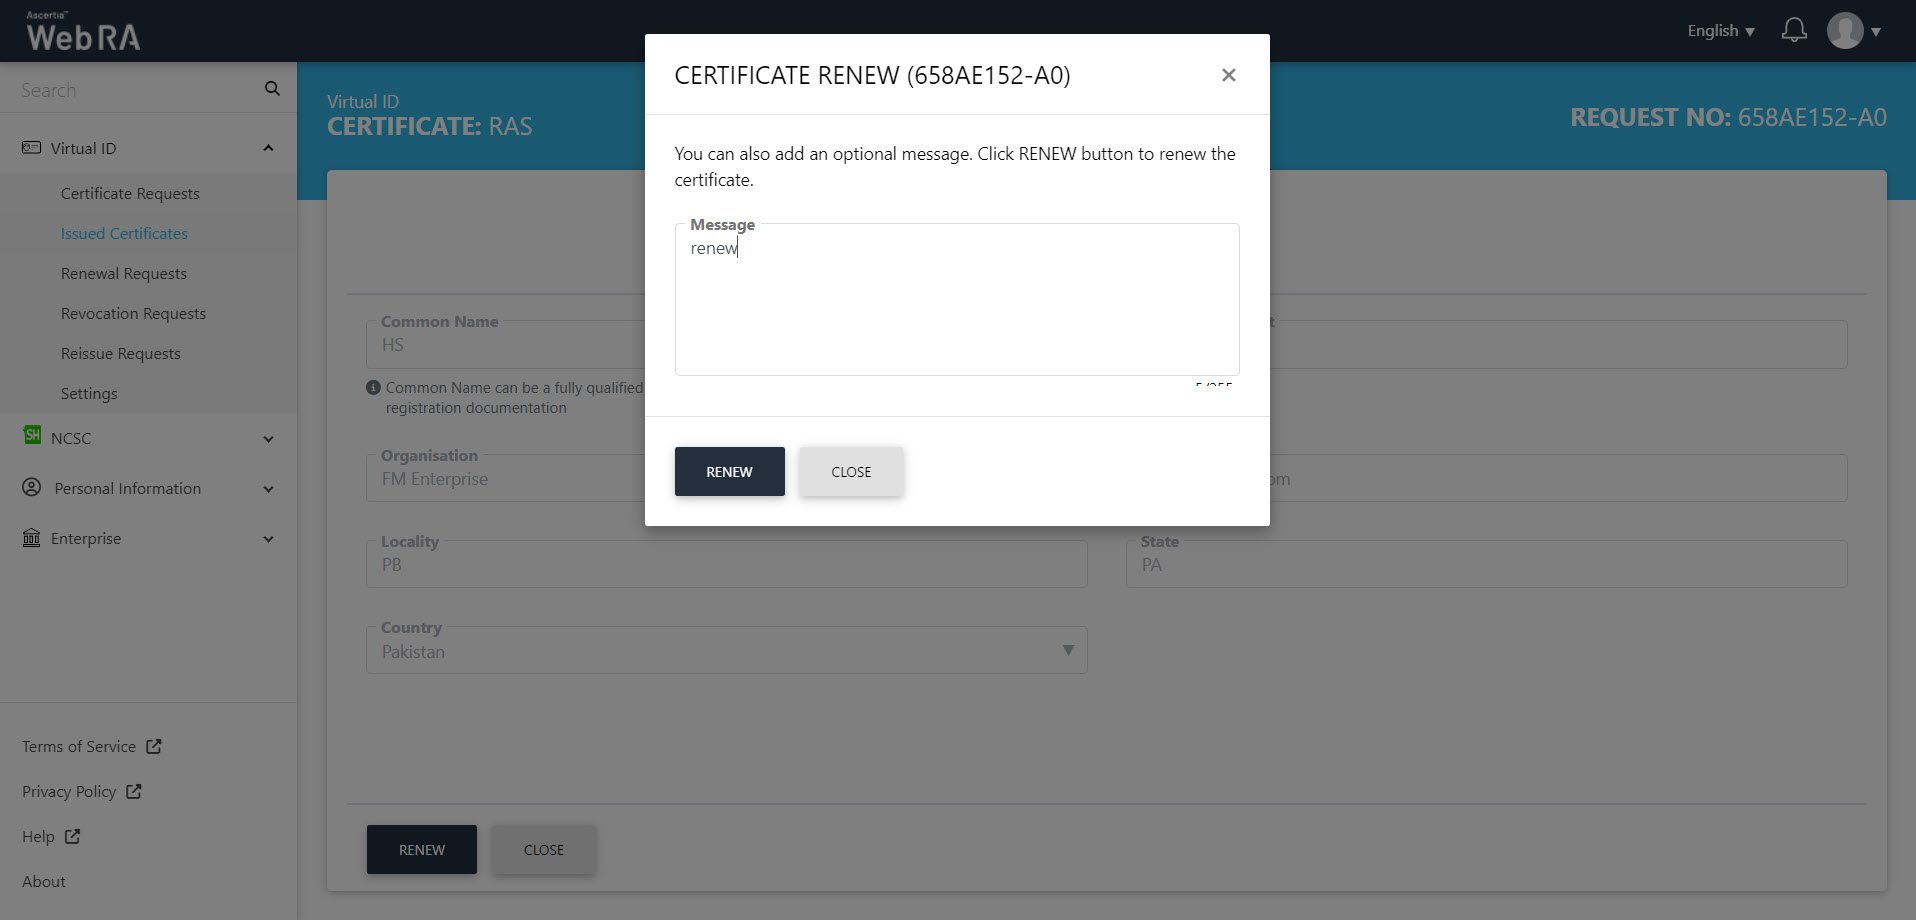
On the Certificate Renew screen, you can add an optional message, then click Renew.
The certificate will appear in the Renew Requests listing.