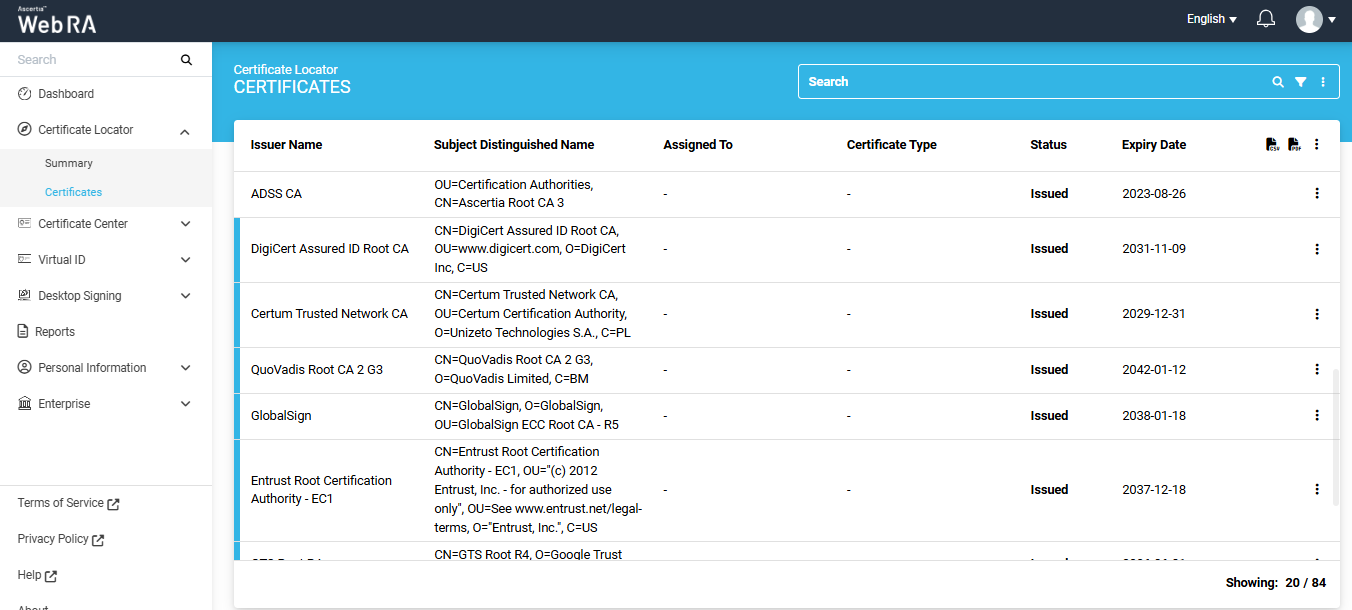
Certificates
In this section, you can view the list of certificates imported from network hosts, local CAPI, and Java key stores.
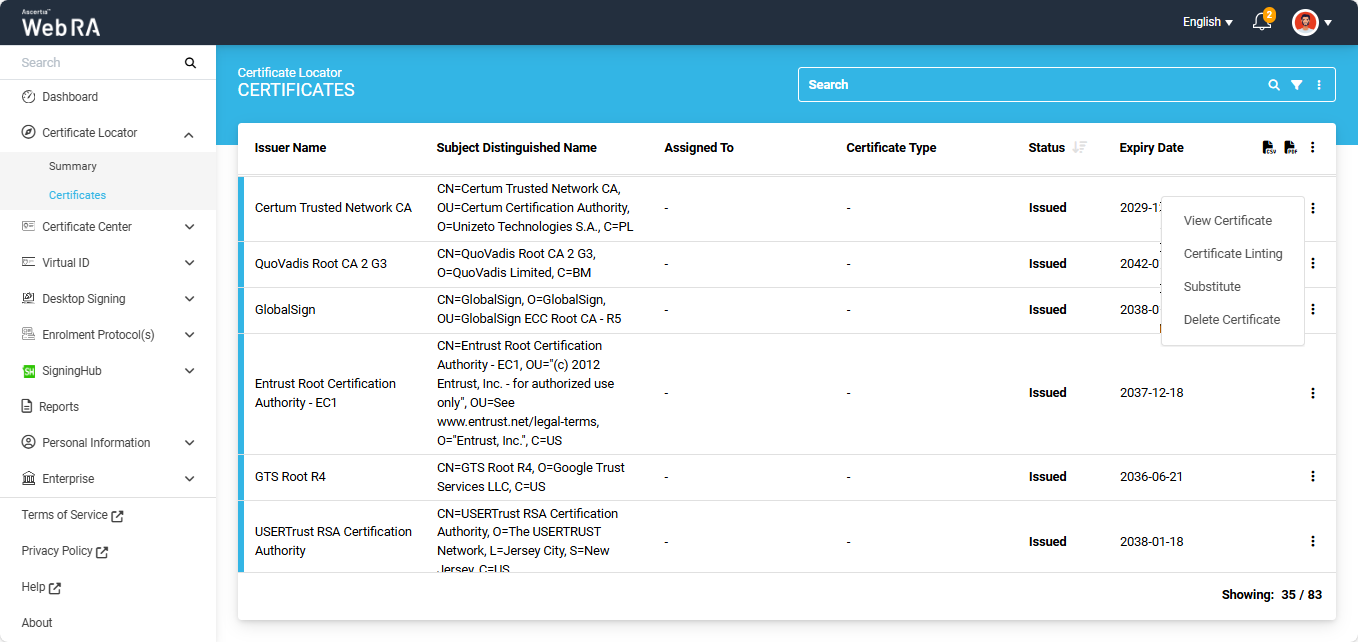
You can perform the following operations on the certificates imported in this section:
- View Certificate Information
- Perform Certificate Linting
- Manage Certificate
- Substitute Certificate
- Delete Certificate
- Revoke a Certificate
Note: The 'Substitute' option will only appear for certificates imported using the Certificate Substitution configuration. To learn more, go to the 'Import Certificates' section in the Admin portal.
To perform any of the above mentioned operation, click the three-dot  icon next to a certificate.
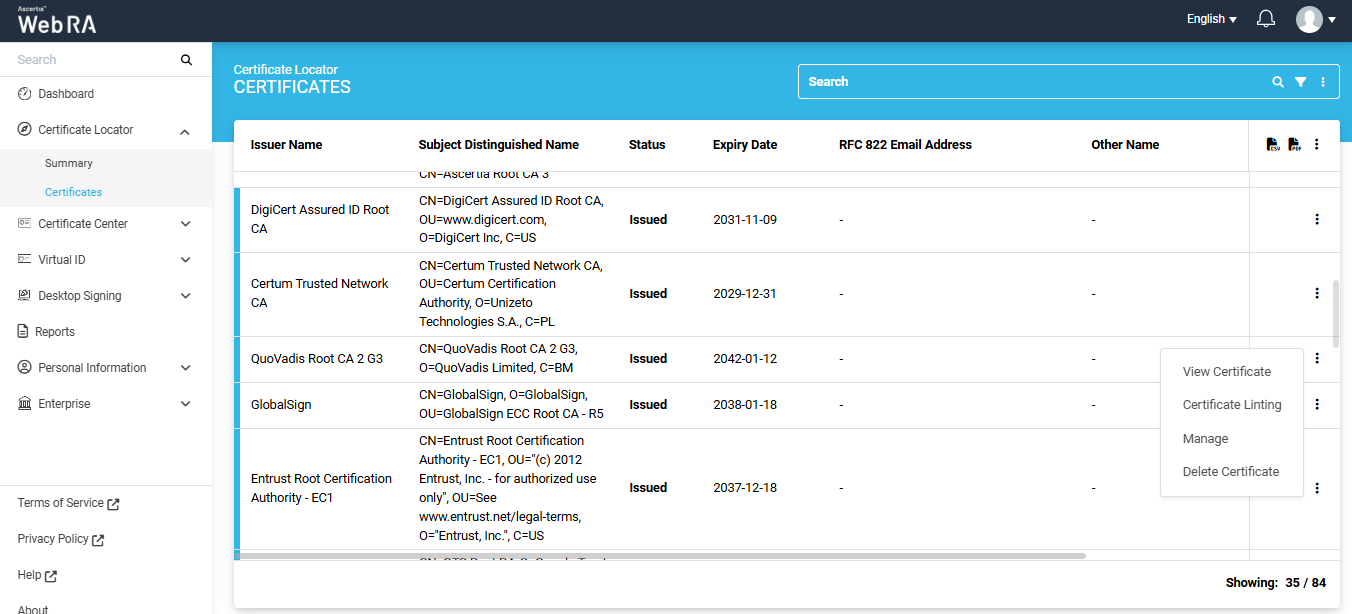
Users can click on the ‘View Certificate’ option to see the complete details of a specific certificate.
Clicking on ‘View Certificate’ opens a ‘Certificate’ dialog on the screen.
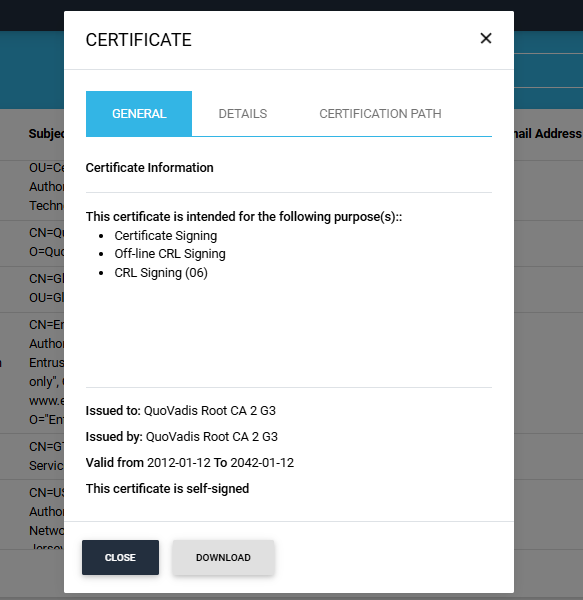
The certificate dialog contains three tabs: General, Details, and Certification Path.
|
Tabs |
Description |
|
General |
This tab displays general information about the certificate, including its purpose, the issuer's name, the entity to whom the certificate is issued, the certificate's validity period, and whether the certificate is self-signed. |
|
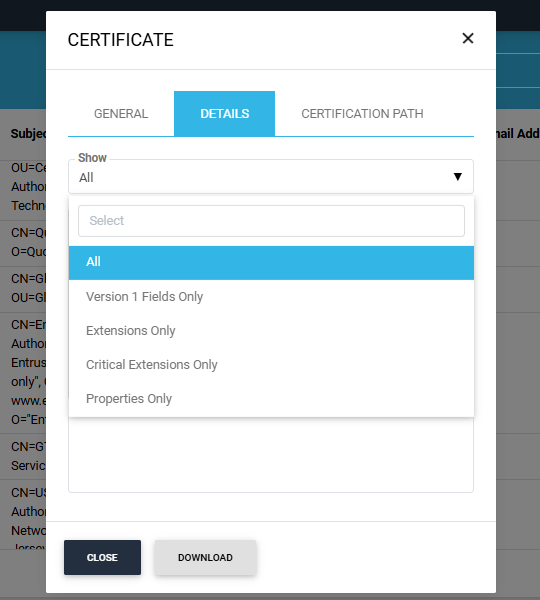
Details |
A "Show" dropdown appears in the Details tab. Users can choose to view either all details of the certificate or specific details based on the selected dropdown options. |
|
Certification Path |
This tab shows the certification path and the certificate's certification status. |

To download the certificate, click the ‘Download’ button at the bottom of the ‘Certificate’ popup box.
The Certificate Linting feature allows users to validate a certificate against selected linting sources to ensure it adheres to established standards and best practices. This helps in identifying potential issues, such as expired certificates, misconfigurations, or non-compliance with security requirements.
From the certificate listing table, click on the Certificate Linting option for the certificate you wish to analyse.
A dialog titled ‘Certificate Linting’ will appear, allowing you to select one or more linting sources.
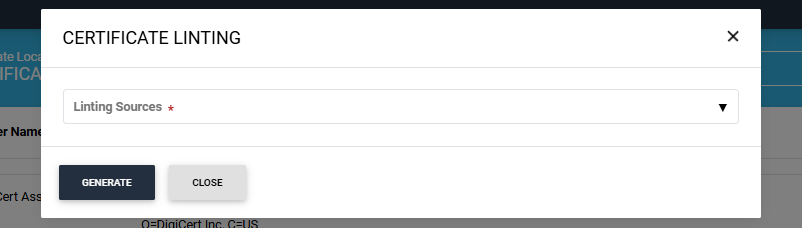
Click on the ‘Linting Sources’ dropdown to select one or more linting sources.
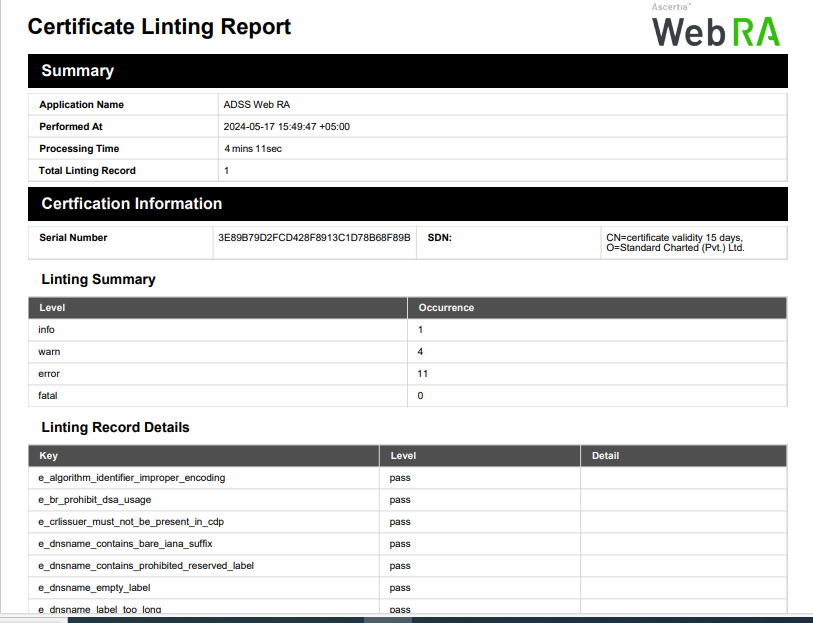
After selecting the desired linting sources, click the ‘Generate’ button to create the Certificate Linting Report.
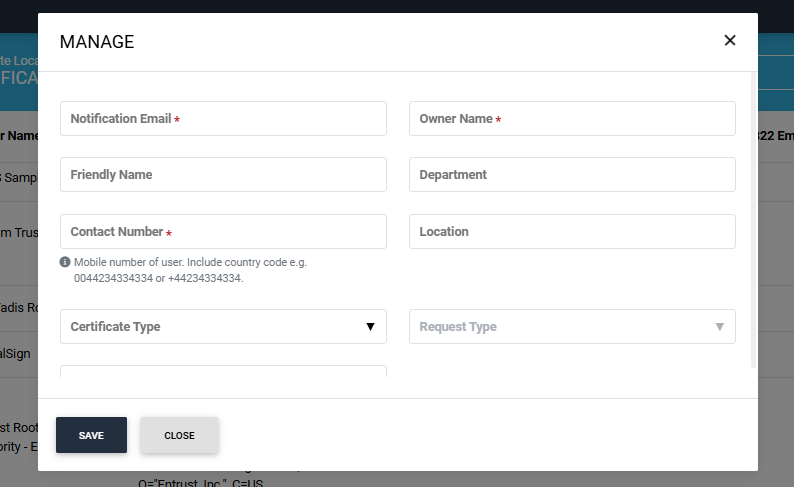
A certificate can be assigned to enterprise users through the ‘Manage’ tab.
Clicking the ‘Manage’ tab will open a ‘Manage’ dialog.
|
Field |
Description |
|
Notification Email |
Enter the email address of the person to whom certificate is being assigned to. (This is a mandatory field) |
|
Owner Name |
Add the owner name. (This is a mandatory field) |
|
Friendly Name |
Add a friendly name in this field if you want to. (Optional field) |
|
Department |
Add the department name. (Optional field) |
|
Contact Number |
Add the contact number of the person to whom the certificate is being assigned to. (This is mandatory field). |
|
Location |
Add location details in this field. (Optional field). |
|
Certificate Type |
It will fetch all profiles of same CA added in role allowed to user.(Optional field) |
|
Request Type |
It will Fetch request type from the added profile in certificate type. |
|
Additional Notification Email |
Add any additional email addresses to receive notifications. (Optional field) |
These steps can be followed if the user – to whom the certificate is being assigned to - is part of the enterprise.
If a user is not part of the enterprise, they will receive an invitation from the enterprise to which the certificate is assigned. After switching to the enterprise, the user can view, lint, or revoke the certificate from the certificate center.
If a user is not part of the ADSS Web RA system, they will receive an activation email. Upon activation, the user will be able to view, lint, or revoke the certificate from the certificate center.
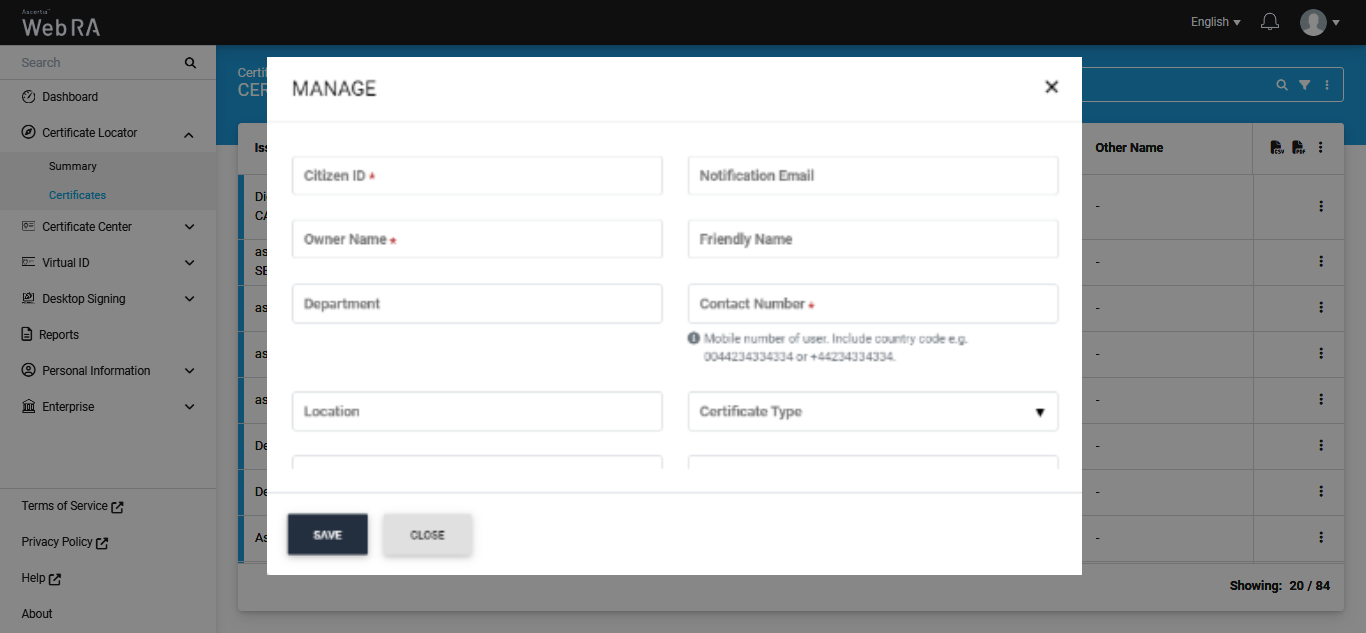
If the user is registered with a citizen ID, the ‘Manage’ dialog will display the ‘Citizen ID’ field, and it will be mandatory. The ‘Notification’ field, on the other hand, will be optional.
All certificates imported with the configuration of ‘Certificate Substitution’ can be substituted from this listing screen.
Note: After the background job is completed, only those certificates that do not have an email address in their SAN will appear in the 'Certificates' listing. All other certificates will be automatically substituted, and their draft requests will be created in the 'Certificate Requests' section.
To substitute a certificate, click on the three-dot  icon next to the certificate and click on the ‘Substitute’ tab.
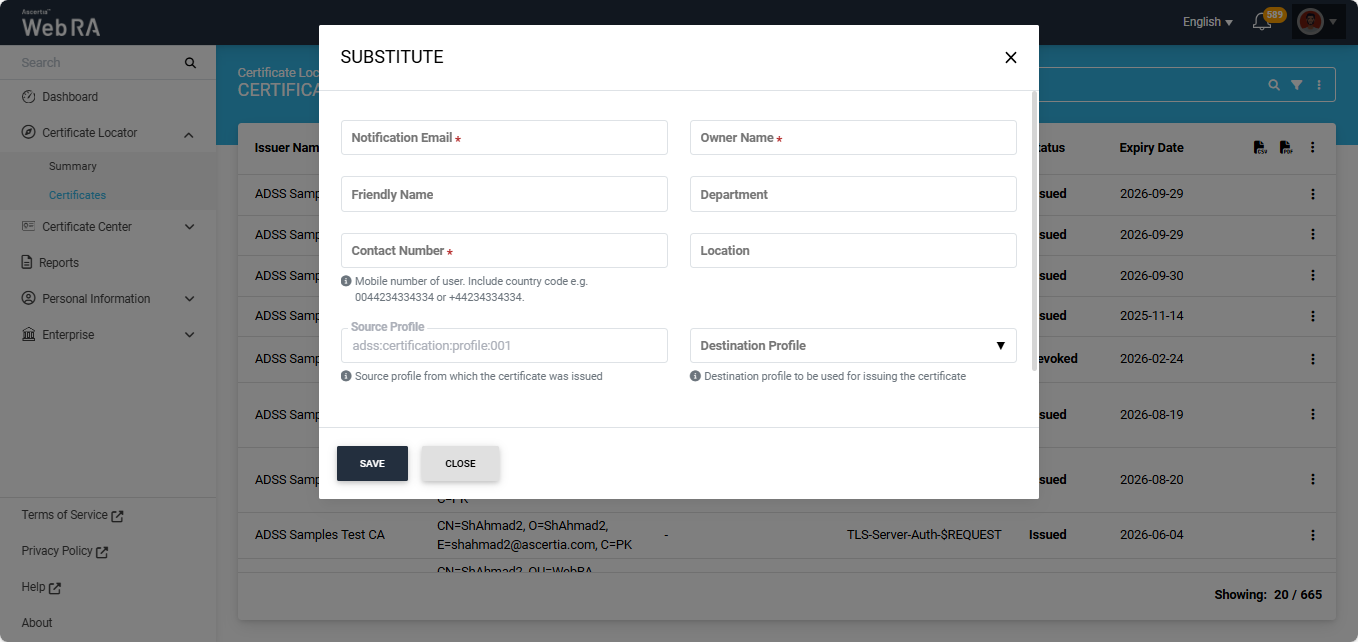
The system will display the ‘Substitute’ dialog on the screen.
|
Field |
Description |
|
Notification Email |
Enter the email address of the person to whom certificate is being assigned to. (This is a mandatory field) |
|
Owner Name |
Enter the owner name. (This is a mandatory field) |
|
Friendly Name |
Enter a friendly name of the user in this field. (Optional field) |
|
Department |
Enter the name of the department. (Optional field) |
|
Contact Number |
Enter the contact number of the user to whom the certificate is being assigned to. (This is a mandatory field). |
|
Location |
Enter the location details of the user. (Optional field). |
|
Source Profile |
This is the ADSS certification profile entered during the configuration of the import certificates background job. It will be displayed in a disabled state. |
|
Destination Profile |
This dropdown lists all Web RA certification profiles that were selected during the configuration of the import certificates background job. |
If a user is not yet part of the ADSS Web RA system, they will receive an activation email. Upon activation, the user can log in to the user portal to view their draft certificate request(s) and substituted certificate(s).
After selecting the ‘Destination Profile’ from the dropdown, the system displays two additional fields in the ‘Substitute’ dialog:
Request Type: Shows the request type of the new certificate being created based on the selected destination profile. This field appears in a disabled state.
Enter Additional Notification Email: Allows you to enter an additional notification email. This is an optional field.
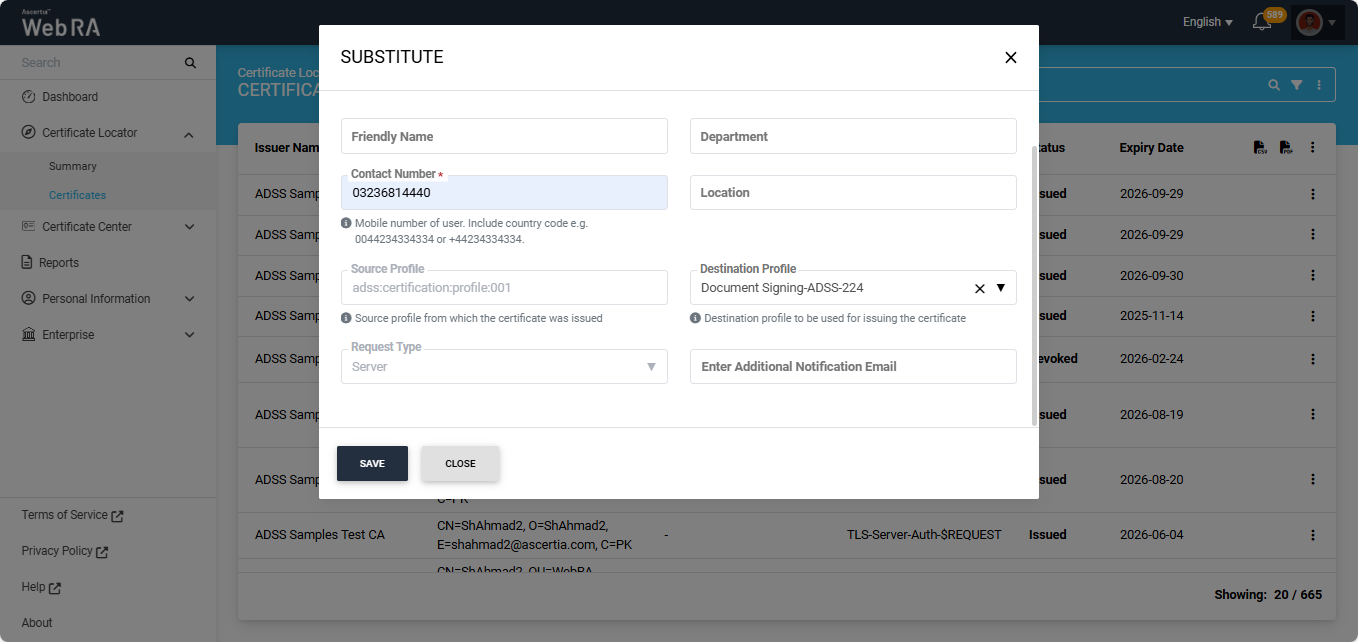
Once all the required fields have been filled, click Save. The certificate will be substituted, and the system will display a success notification at the bottom right of the screen.
The success notification text will show the email of the user to whom the certificate is assigned to.
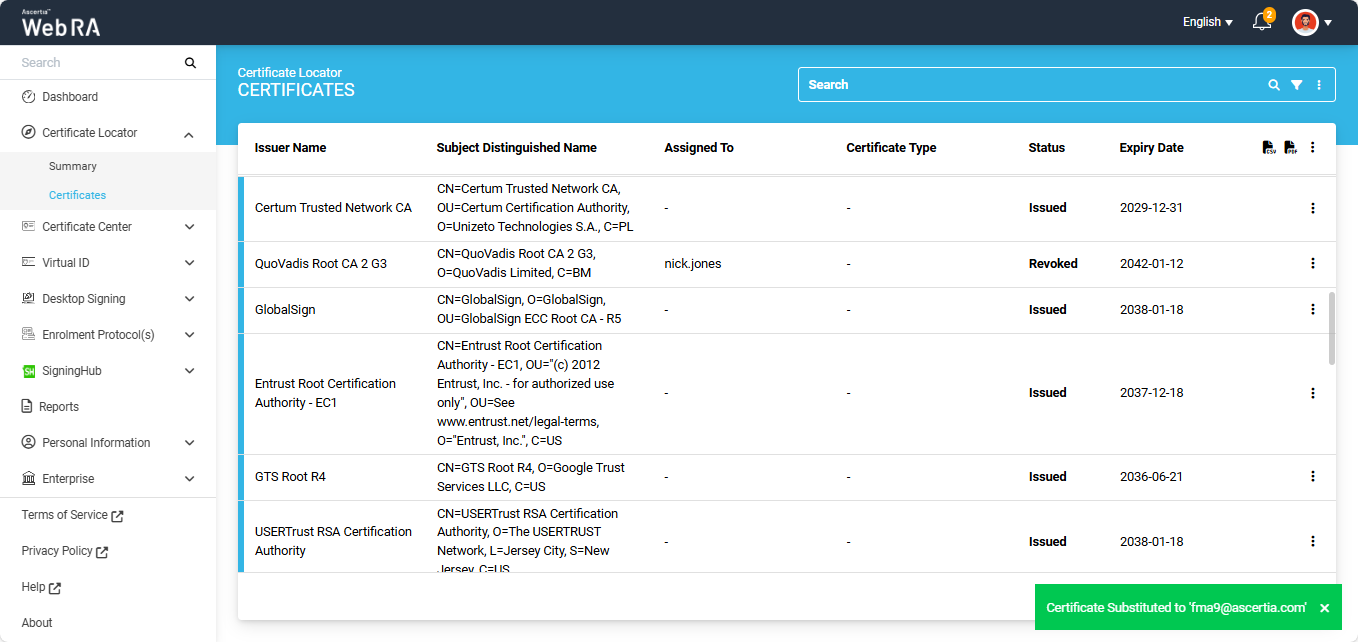
The status of the substituted certificate will appear as ‘Revoked’ in the ‘Certificates’ listing.
The system will also create a draft certificate request for the substituted certificate in the 'Certificate Request' listing, which will include a Substituted Serial Number, as shown in the screenshot below.
Note: The substituted serial number can be used to check the status of the substituted certificate from the ADSS Server.

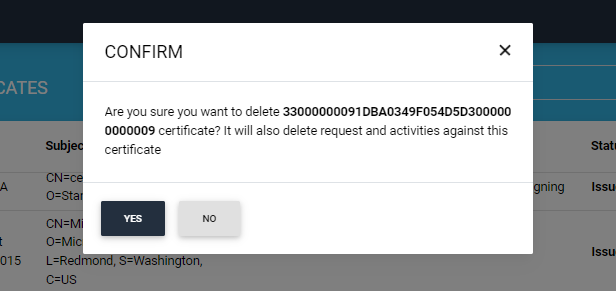
Users can delete a certificate by selecting the ‘Delete Certificate’ option, which appears when they click the icon next to a certificate.
Clicking on the ‘Delete Certificate’ option displays a confirmation box.
The user will be able to revoke an assigned certificate if the same CA profile is allowed in the enterprise role.
However, if the same CA profile is not allowed in the enterprise role, the user will not be able to revoke the assigned certificate.
Advanced Search
The Advanced Search feature allows users to perform detailed and refined searches within the certificate section. By applying specific filters and criteria, users can quickly locate the information or items they want to view.
To access the advanced search, click on the ‘Advanced Search’ icon next to the search box. This will open the ‘Search’ dialog, which contains more than a dozen filters that allow users to refine their search results based on specific criteria.


After applying your required filters, click ‘Search’.
The system will display the certificates as per your search criteria.
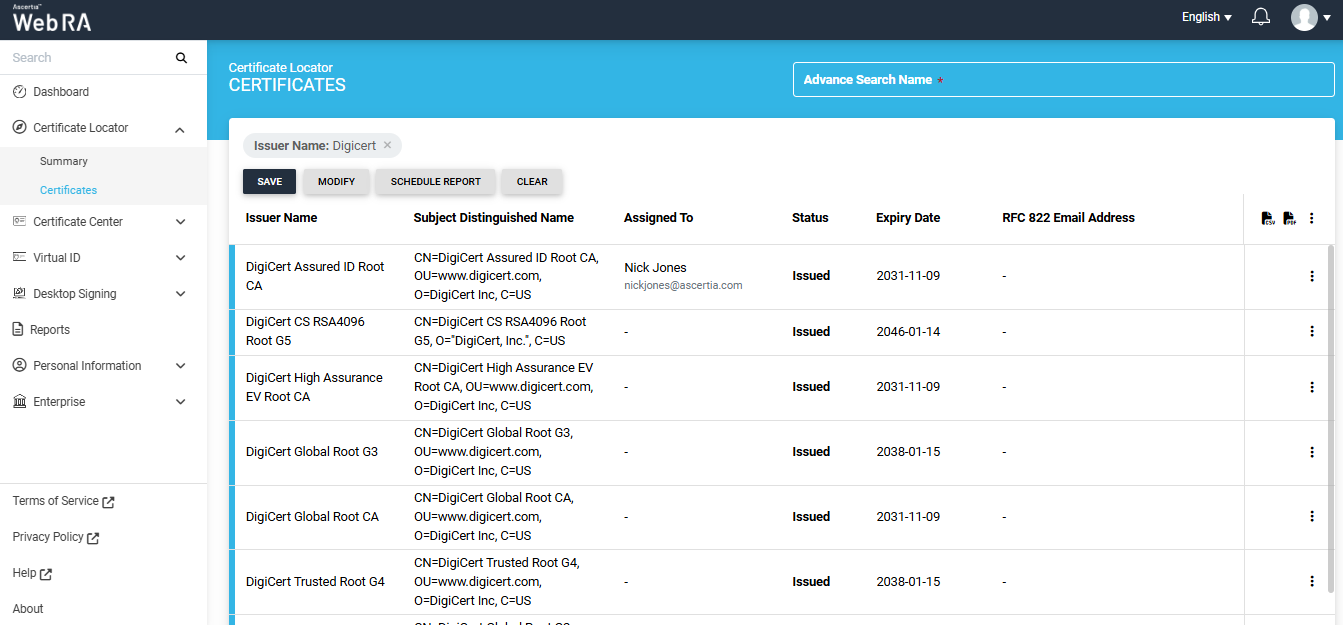
On this screen, users have the option to save the search criteria, modify it, or clear the criteria to view all certificates in the listing again.
Furthermore, users can also generate a report based on their advanced search.
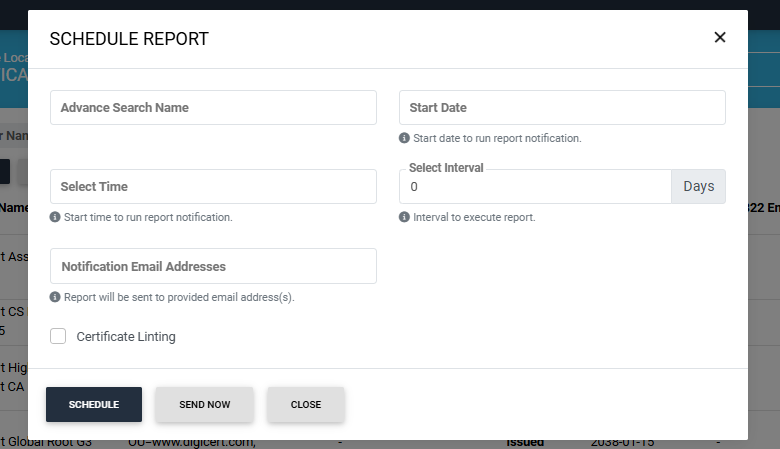
If a user has applied an advanced search filter and wants to create a report of all the certificates that appear based on that search, they can use the ‘Schedule Report’ option.
Clicking on the ‘Schedule Report’ button displays a dialog titled ‘Schedule Report’.
On this screen, users will be required to enter:
|
Field |
Description |
|
Advanced Search Name |
Add the search criteria applied from the advanced search tab. |
|
Start Date |
Specify the start date if you want to schedule the report for a future date. |
|
Select Time |
Specify the time at which you want the report to be generated. |
|
Select Interval |
Choose how many days should pass between each time the report is generated. |
|
Notification Email Addresses |
Mention the email address(s) on which you want to receive the report. |
|
Certificate Linting |
Check this box to enable certificate linting. Once enabled, you can select the sources you want to use for linting the certificate. |
Click on the ‘Schedule’ button to schedule the report based on the selected date and time. To generate the report immediately, click ‘Send Now’.
Once the report is generated, it will be sent to the provided email address(es).
Listing Columns
By default, the listing table will display the following columns:
- Issuer Name
- Subject Distinguished Name
- Assigned To
- Certificate Type
- Status
- Expiry Date
Users have the option to modify the columns in the table. To do that, click the three dots  icon on the top right corner of the table header.

A short menu will appear on the screen that will display two tabs, which include:
- Import
- Modify Columns
Import
To import certificates into the Web RA system, click the icon on the extreme right of the table header, then select the 'Import' option.
This will open an ‘Import Certificate’ dialog.
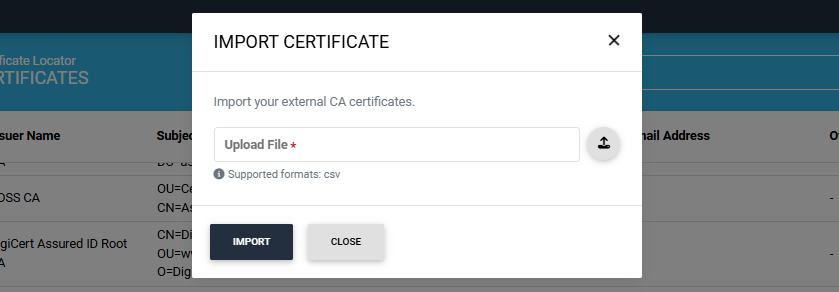
To import external CA certificates into the system, upload the CSV file by clicking on the upload button. Then click ‘Import’.
Modify Columns
Click on the ‘Modify Columns’ option to edit the table column entries. This will open a ‘Modify Columns’ dialog.
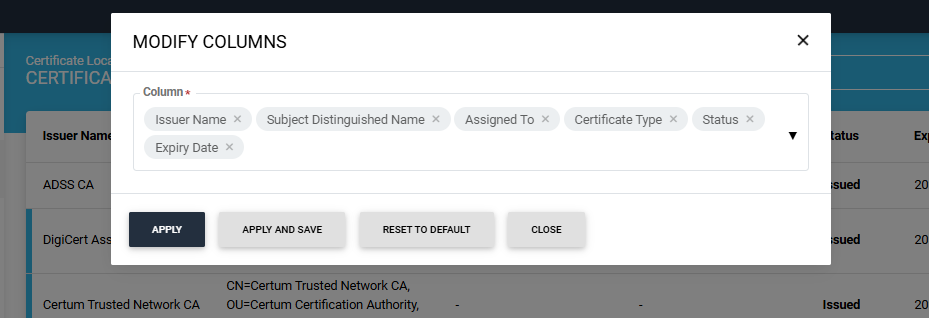
Click on the ‘Column’ dropdown to add more columns in the table listing.

Scroll down the list to view the available options. Check the boxes for the options you want to view in the table. The selected options will then appear in the ‘Column’ box.
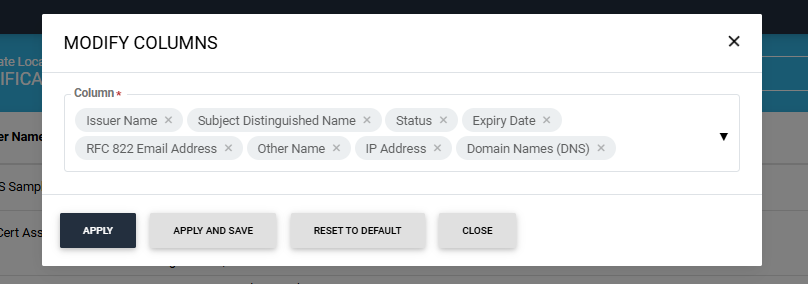
To remove any selected option, click on the cross present next to the column entry.
After selecting the required options, click the ‘Apply’ button to view the changes in the table listing. Click the ‘Apply and Save’ button to permanently save the changes in the table.
The 'Reset to Default' button will revert the column entries to their default settings.