Configure Signature Settings
SigningHub gives you complete control over your signature configurations. You can customise the physical appearance of your signature, hand signature methods (i.e., draw, text and upload), and other important details that needs to be appended to your signatures. There are separate configurations available for web browsers and mobile apps. Customise these provisions as required and use a set of configurations to produce your signatures.
Customised appearances can also be defined as per your business/ organizational preferences.
It is important to understand:
- In Server-Side Signing, the signing keys (crypto keys required for digital signature creation) are held at server end. These keys can be used through any modern browser of Windows, Mac OS X, iOS, Android or other devices/ tablets for signing at server end. For this, SMS OTP authentication can also be enabled, by which the authentication password will be sent directly to your mobile device at the time of signing for confirmation.
- In Local (client-side) Signing, the signing keys (crypto keys required for digital signature creation) are held in local keystore or in smartcards or in USB-crypto tokens. For this, Go>Sign Desktop application is required on the system along with correct drivers of the installed devices.
- In Mobile Signing, the signing keys (crypto keys required for digital signature creation) are held on the user's mobile device. For this, a supported mobile signing app is required to utilise this feature.
Configure your Signature Appearance
- Click your profile drop down menu (available at the top right corner).
- Choose the "My Settings" option.
- Choose the "Signatures" option from the left menu. The first tab i.e. "Signature Appearance" will be displayed by default.
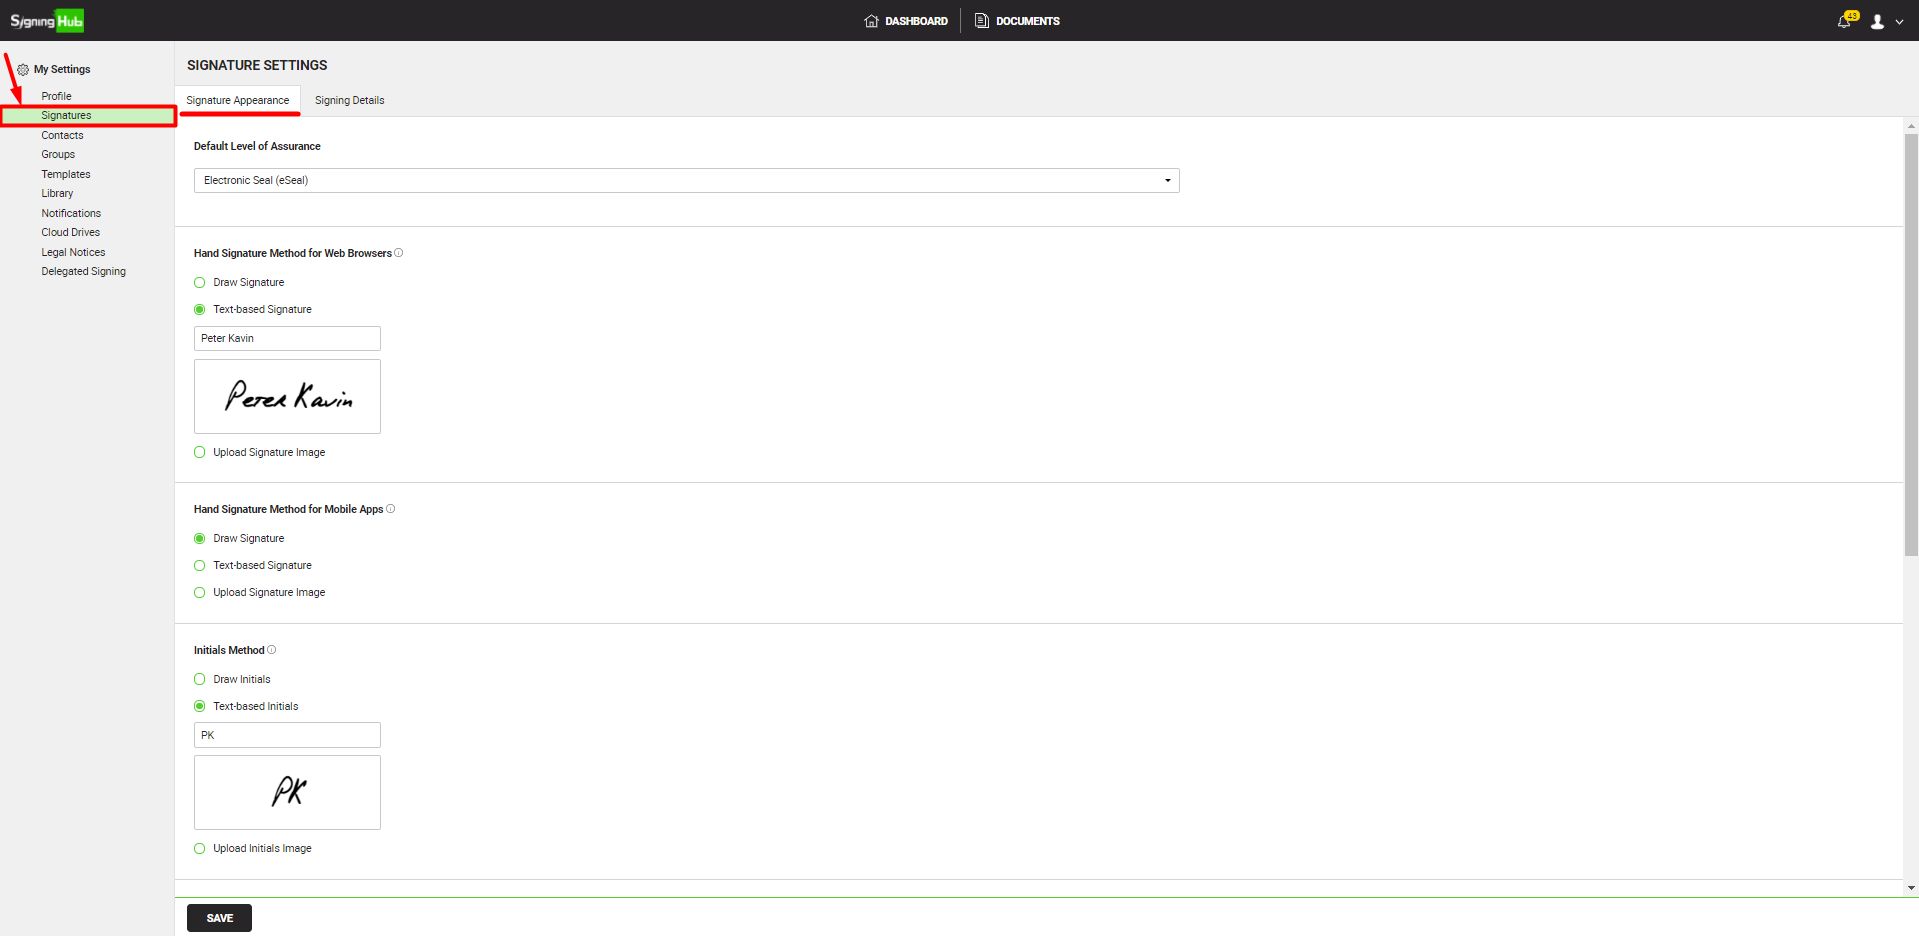
- Configure your preferences in the related fields (see the "Signature Appearance" table below for fields description).
- Click the "Save" button to apply changes.
|
Signature Appearance |
|||
|
Fields |
Description |
||
|
Default Level of Assurance |
You can set your default level of assurance in your signature settings. The selected level of assurance will be set by default on add a signature field in the draft mode. |
||
|
Hand signature method for web browsers |
The listed signature methods are those which are allowed in your enterprise role. From here you can configure the default signature method that should be displayed to you on the signing screen, when you sign through Web Browsers.
|
||
|
Hand signature method for mobile apps |
The listed signature methods are those which are allowed in your enterprise role. From here you can configure the default signature method that should be displayed to you on the signing screen, when you sign through Mobile Apps.
|
||
|
Initials method |
The listed signature methods are those which are allowed in your enterprise role. From here you can configure the default initials method that could be shown to you while filling in the initials.
|
||
|
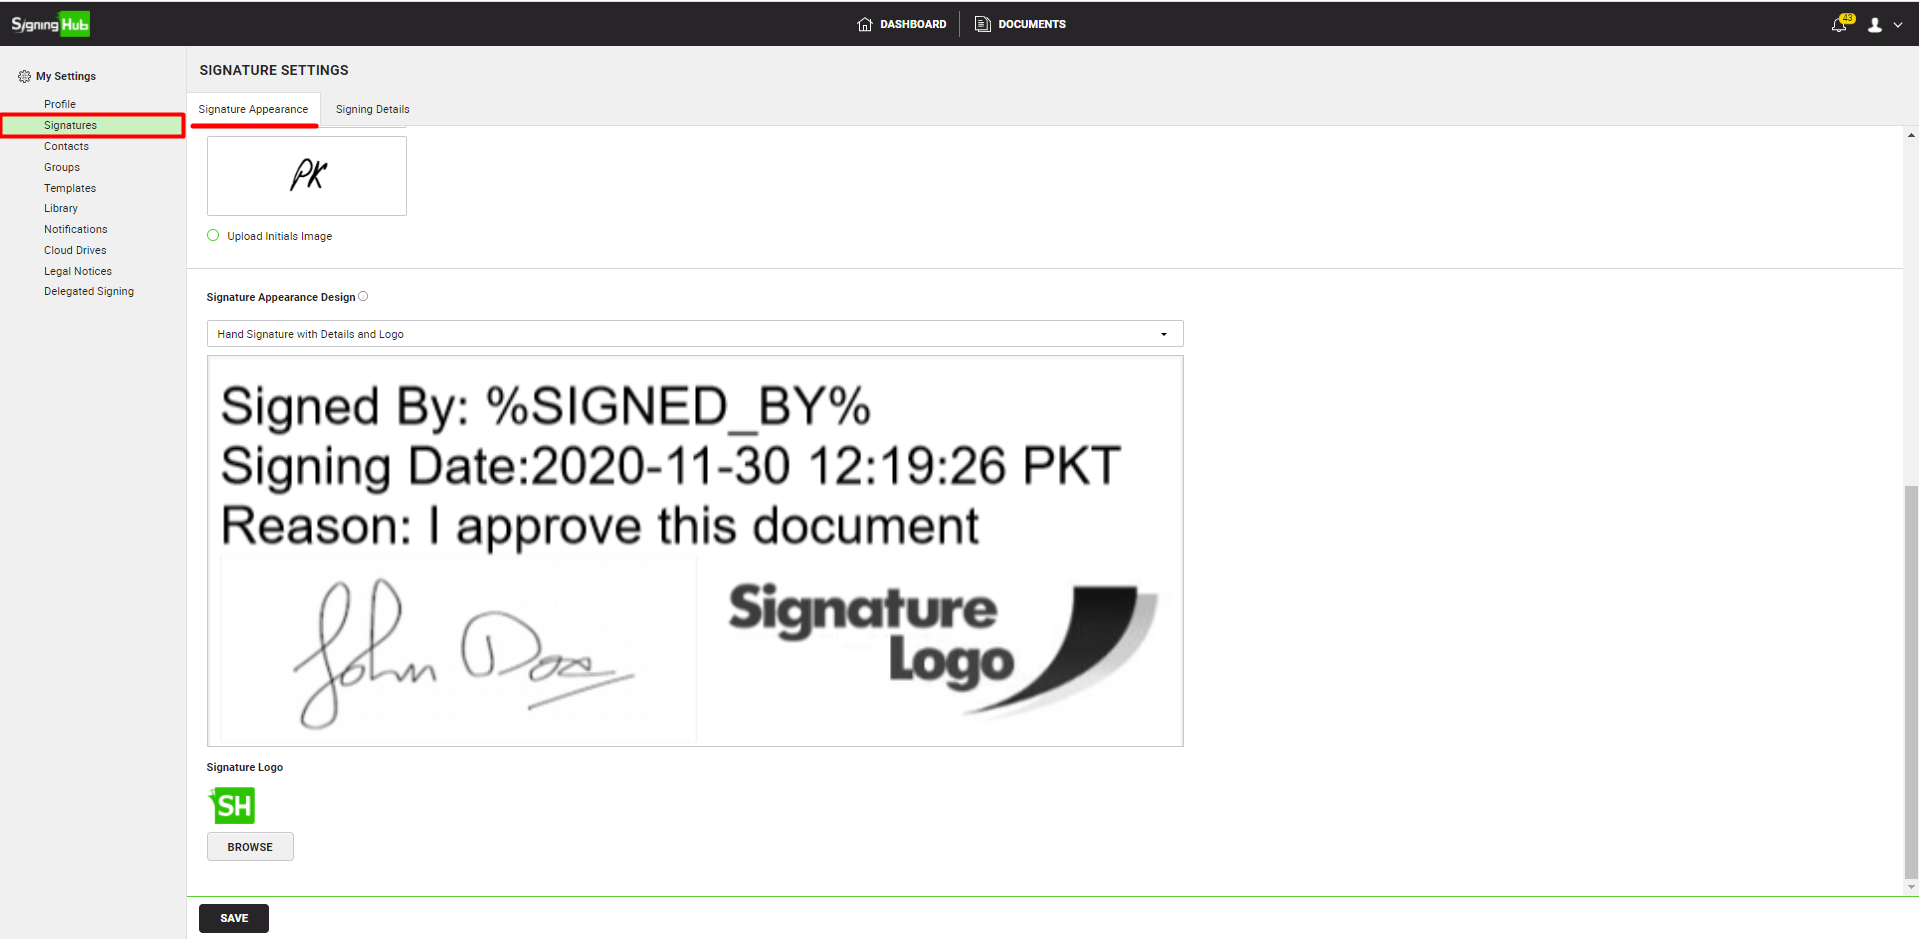
Signature appearance design |
This field is used to configure the signature appearance design (i.e., Hand Signatures Only, Hand Signature with Details and Logo, or Hand Signature with Details) for your digital signature.
|
||
|
Signature Logo |
Selected signature logo will appear at the place of Signature Logo image as shown in above screenshot, if 'Allow users to manage signature logo' is enabled under Enterprise Roles > Signature Appearance, then enterprise users can upload their own signature logo image to be shown in signature appearance. |
||

Configure your Signing Reason, Location and Contact Information
- Click your profile drop down menu (available at the top right corner).
- Choose the "My Settings" option.
- Choose the "Signatures" option from the left menu. The first tab i.e. "Signature Appearance" will be opened by default.
- Click the "Signing Details" tab.
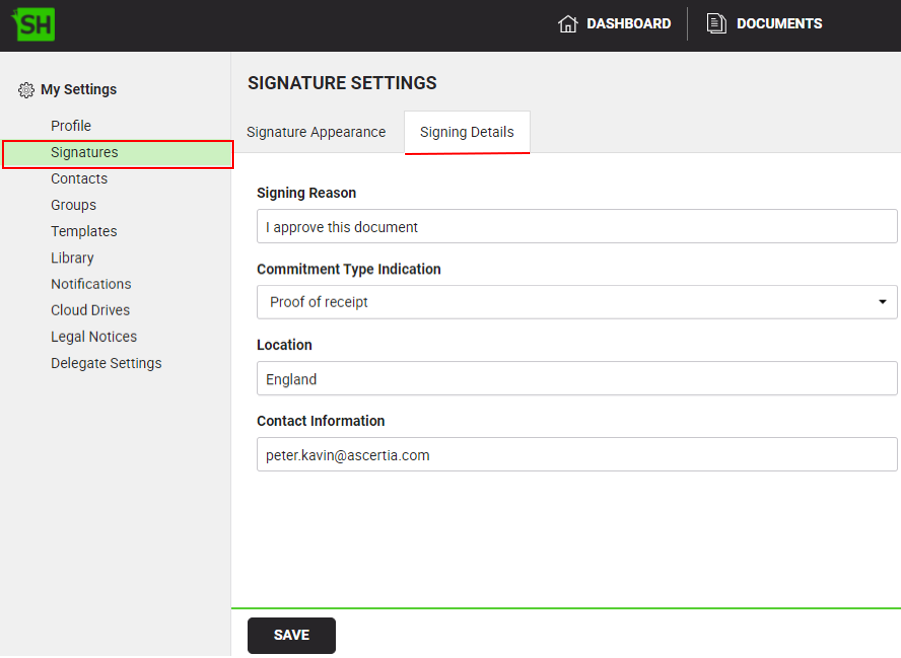
- Configure your preferences in the related fields (see the "Signature Settings" table below for the description of the fields).
- Click the "Save" button to apply changes.
|
Signature Settings |
|
|
Fields |
Description |
|
Signing Reason, Commitment Type Indication, Location and Contact Information (Optional) |
Fill up the "Signing Reason", "Location", "Commitment Type Indication" and "Contact Information" fields accordingly. The specified information will become a permanent part of your PDF signature, and can optionally be displayed in the signed PDF document, if the signature appearance being used contains these variables (i.e., Signing reason, Location and Contact Information). However while signing of XML document the "Commitment Type Indications" options will be displayed. |
Local Signing using Microsoft Edge browser
If you intend to use Microsoft Edge browser for local signing, then additional configuration is required on your machine to run Go>Sign Desktop:
- Close the Microsoft Edge browser if already running.
- Launch the command prompt choosing "Run as administrator".
- Run the following command: CheckNetIsolation.exe LoopbackExempt -a -n=Microsoft.MicrosoftEdge_8wekyb3d8bbwe
- Now launch the Microsoft Edge browser and run your application again to test Go>Sign Desktop.
Local Signing with RUT
SigningHub supports local signing through unique RUT values that are exclusively assigned to each user. The RUT can be added in the SigningHub database by using the respective API, visit Ascertia's Partner Portal for accessing the SigningHub's API Guide. For the enterprises who wish to enforce their users to use the RUT values for signing, need to amend their web.config files. This change can be made by the Enterprise Admin who has the rights to access the SigningHub installation directory. For this:
- Go to the SigningHub installation directory.
- Open the "Web.config" file.
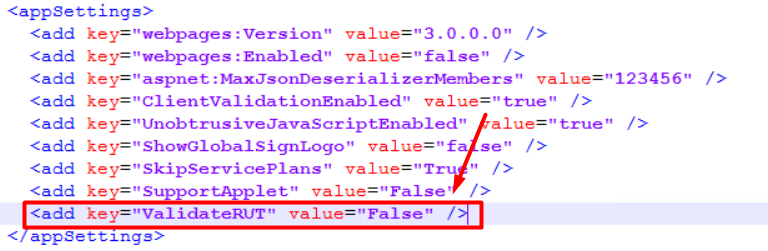
- Change the value of "ValidateRUT" tag to "True".
- Save the changes and close the "Web.config" file.
RUT validation will be enabled for local signing.
Local Signing through Java Applet
Since the Java Applet is being deprecated from all web browsers, therefore applet support for local signing is closed by default. However, a Java applet can still be used by amending the web.config file. This change can be made by your Enterprise Admin who has the rights to access the SigningHub installation directory. For this:
- Go to the SigningHub installation directory.
- Open the "Web.config" file.
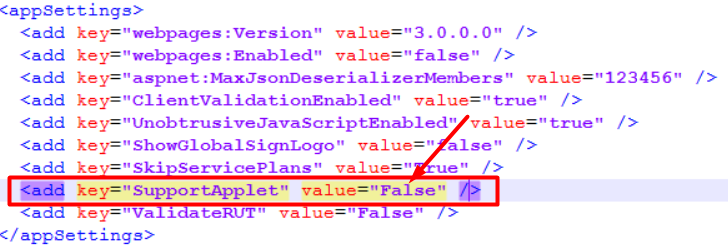
- Change the value of "SupportApplet" tag to "True".
- Save the changes and close the "Web.config" file.
Applet support will be enabled for local signing.
|
|
If you have an on-premises deployment of SigningHub, you can use the SigningHub Admin interface to define customized appearances based on your business/ organizational preferences. |
