Verification Service
The following configurations relating to the Verification Service can be made within Client Manager:
- Allow the client to access the ADSS Signature Verification Service
- Allow the client to access the ADSS Certificate Validation Service
- Assign which Verification Service profiles can be used by this client
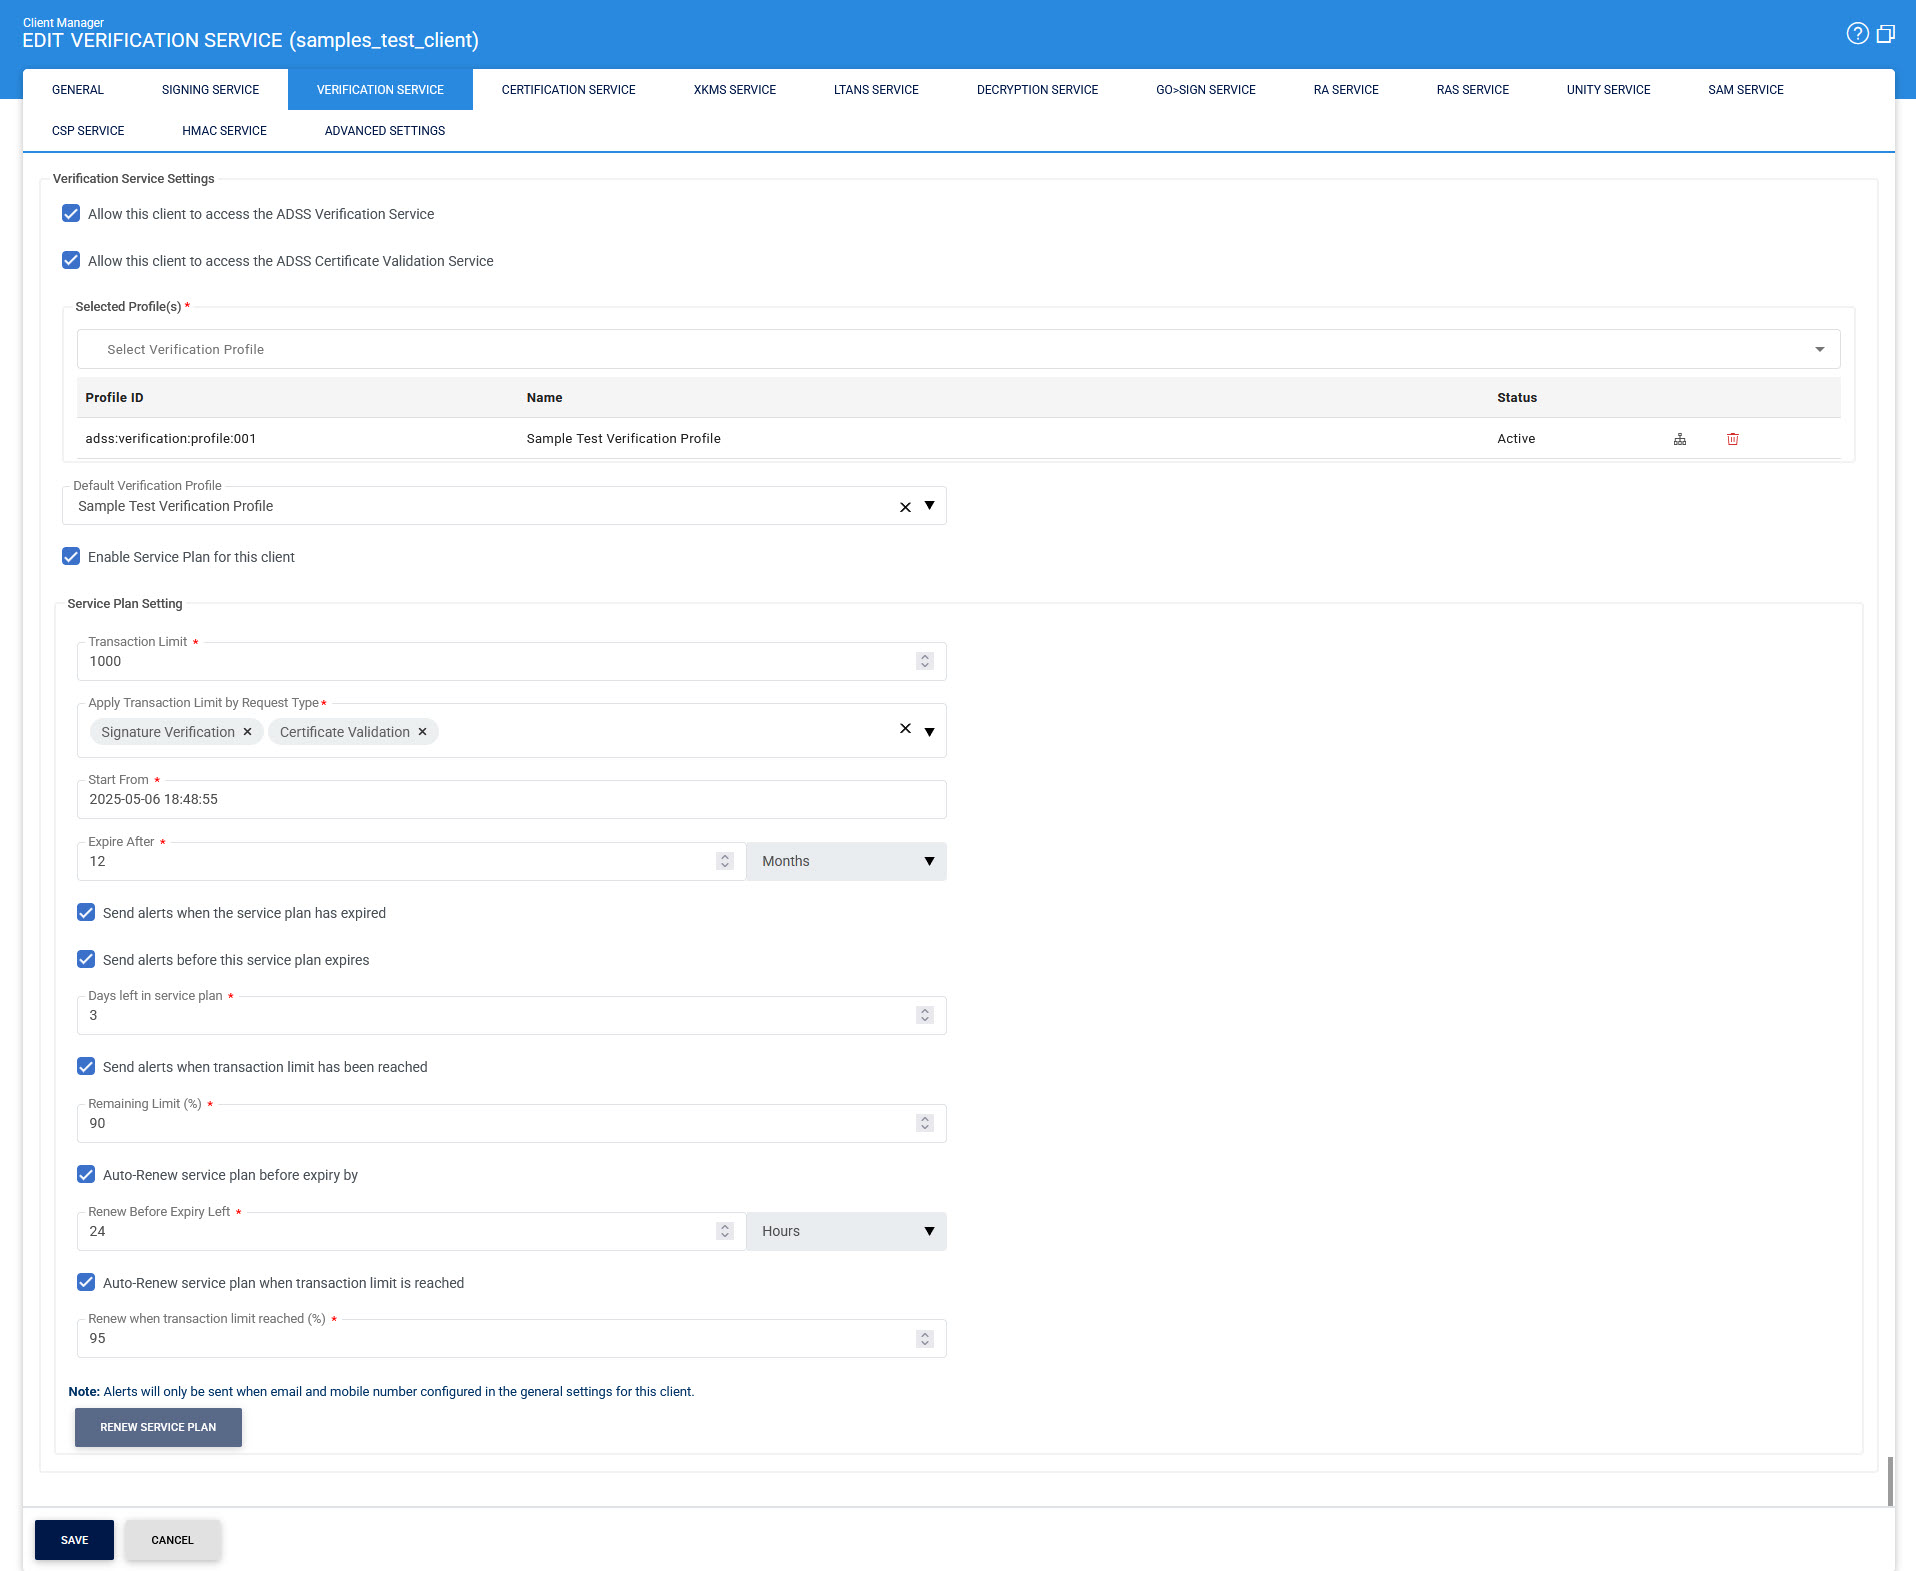
Once a client is registered, permissions to access the Verification Service can be granted by editing this client. On the edit screen, clicking on the Verification Service link at the top of the page shows the following screen:
The configuration items are as follows:
|
Items |
Description |
||
|
Verification Service Settings |
An essential configuration step involves determining whether the client can access the ADSS Signature Verification Service and/or Certificate Validation Service by selecting the corresponding checkbox at the top of the screen. Note that the Verification Service can be used to perform both signature verification and certificate validation. The distinction between the two is as follows:
The client application must specify whether it requires full signature verification or only certificate validation, depending on its capabilities and business needs. It is crucial to configure the client application for the appropriate service in the Client Manager. The XML schema for both services is fundamentally similar and is detailed further in the ADSS Server Developer Guide. |
||
|
Select Verification Profile |
The next step is to specify which verification profiles, configured within the ADSS Verification Service, should be accessible to this client. Different clients may require access to distinct verification profiles based on their needs. By default, all existing verification profiles configured in the ADSS Verification Service are made available to each newly registered client. To grant access to a specific verification profile, move the profile from the left-hand group box labelled Available Verification Profiles to the right-hand group box labelled Selected Verification Profiles using the >> button. Clients can only use the verification profiles listed in the Selected Verification Profiles box. To revoke access to a profile, use the << button to move it back to the Available Verification Profiles box. |
||
|
Profile Usage Map |
The Profile Usage Map button provides an overview of which profiles are being used by which clients. |
||
|
Default Verification Profile |
The Default Verification Profile defines which profile to use in case the request message from this client does not reference any specific verification profile. |
||
|
Enable Service Plan for this Client |
Enabling this option allows the client to access service plan configuration settings. |
||
|
Transaction Limit |
This field lets the operator define the maximum number of transactions the client can perform.
|
||
|
Apply Transaction Limit by Request Type |
This option allows the operator to set transaction limits based on specific request types. For the Verification Service, the available request types include:
|
||
|
Start From |
Select the starting date when the service plan will be started. |
||
|
Expire After |
Define the duration after which the service plan will expire. Users can specify the expiry period by selecting a number of days, months, or years. |
||
|
Send alerts when the service plan has expired |
By enabling this checkbox, an alert will be sent to the client when the plan has expired. |
||
|
Send alerts before this service plan expires |
When enabled, this checkbox activates a field where the user can specify the number of days before the plan’s expiry to send an alert to the client. |
||
|
Send alerts when transaction limit has been reached |
Enabling this option sends an alert to the client when the transaction limit reaches a specified percentage, as defined by the user. |
||
|
Auto-Renew service plan before expiry by |
This option allows the user to configure automatic renewal of the service plan before its expiry by specifying a time frame in hours, days, or months. |
||
|
Auto-Renew service plan when transaction limit is reached |
Enabling this option sets the service plan to renew automatically once the transaction limit reaches the defined percentage. |
||
|
Renew Service Plan |
This button allows the user to manually renew the service plan. Note that this button is disabled if auto-renewal options are selected. |

|
|
The alert checkboxes will trigger alerts only if the client has configured both an email address and a mobile number in general settings for the client. |
Click the Save button when the list is updated to store the changes.
|
|
Whenever configurations are updated on this page remember to restart the Verification Service and have the changes take effect. |
See also
Signing Service
Certification Service
Verification Service
Go-Sign Service
SAM Service
RAS Service
CSP Service
Unity Service
Advanced Settings