Set up CAA Record for Domain
In this section, learn about end to end user flow of getting domain validation through CAA.
CAA Record
There are organizations known as certificate authorities (CAs) responsible for issuing identify-confirmation certificates for websites, digital IDs, etc. To restrict which CAs can issue certificates for your website, you can incorporate a CAA record into your domain name's DNS settings.
A Certification Authority Authorization (CAA) is a specific DNS record type that enables domain owners to indicate their preferred CAs for certificate issuance. By specifying these preferences, other CAs are then prevented from issuing certificates for the same domain.
CAA records can prove valuable in several situations:
- You aim to lower the chances of relying on untrustworthy Certificate Authorities.
- You want to prevent your employees from obtaining certificates from unauthorized certificate vendors.
- You want to prevent fraudulent certificate mis-issuances.
Add CAA record on Windows Server 2016
Currently, the DNS server part of Windows Server 2016 does not support adding CAA records using the graphic interface. The only way to add a CAA record if your domain name nameservers are managed on a Windows Server is to use PowerShell cmdlets.
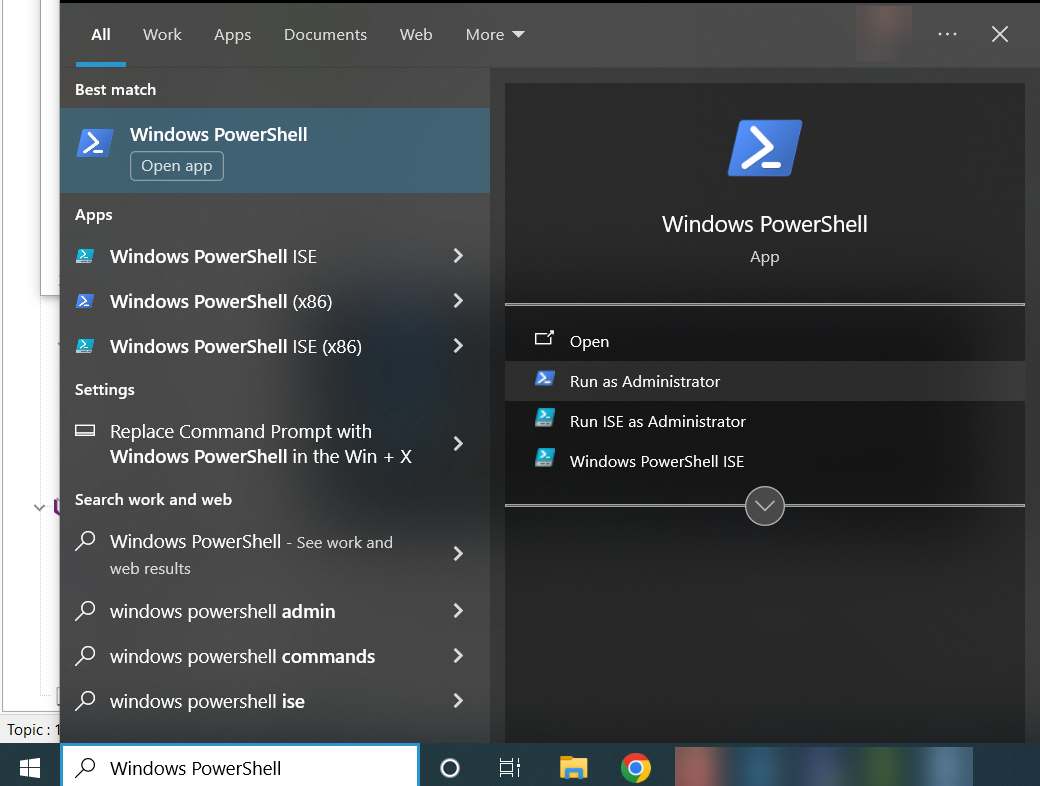
- Log in to the Windows Server as an administrator.
- From the Search Bar next to the Windows button, search for Windows PowerShell and click Run as Administrator.
- Enter the following command to add a new record:
|
Add-DnsServerResourceRecord -name ascertia.local -RecordData 000569737375657365637469676F2E636F6D -Type 257 -ZoneName ascertia.local |
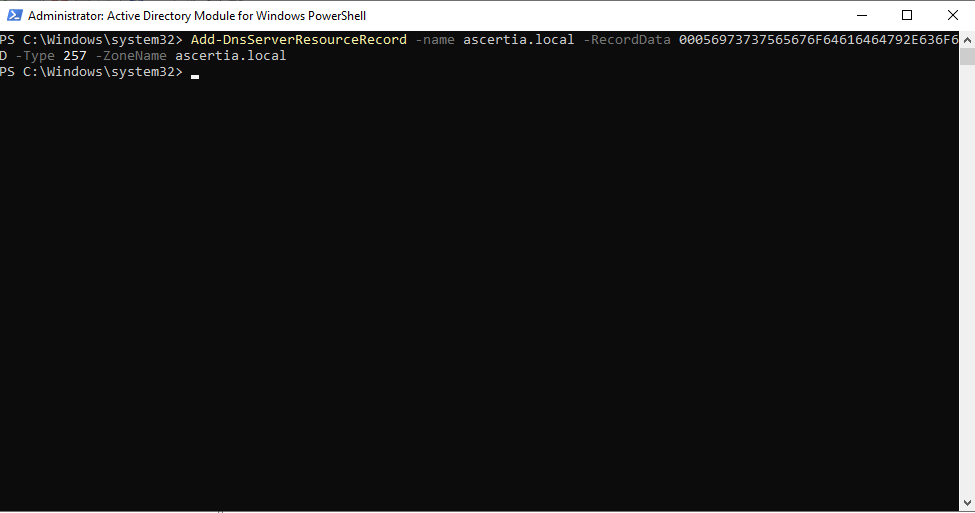
Here:
neededdomain.com - It is the main domain or sub domain that you require for a CAA record, e.g. ascertia.local
domain.com - It is the required main domain name, e.g. ascertia.local
000569737375657365637469676F2E636F6D - Hexadecimal code of Sectigo certificate authority 257 — a number representing CAA type of DNS record.
Copy and paste the hexadecimal code into the command.
To obtain hexadecimal code for Sectigo:
Click https://sslmate.com/caa/
- Enter your Domain Name e.g. ascertia.local.
- Choose an Initial Policy, e.g. SSL Mate Policy.
- Select Authorized Certificate Authorities.
Here, enter the Filter by CA name, e.g. Sectigo.
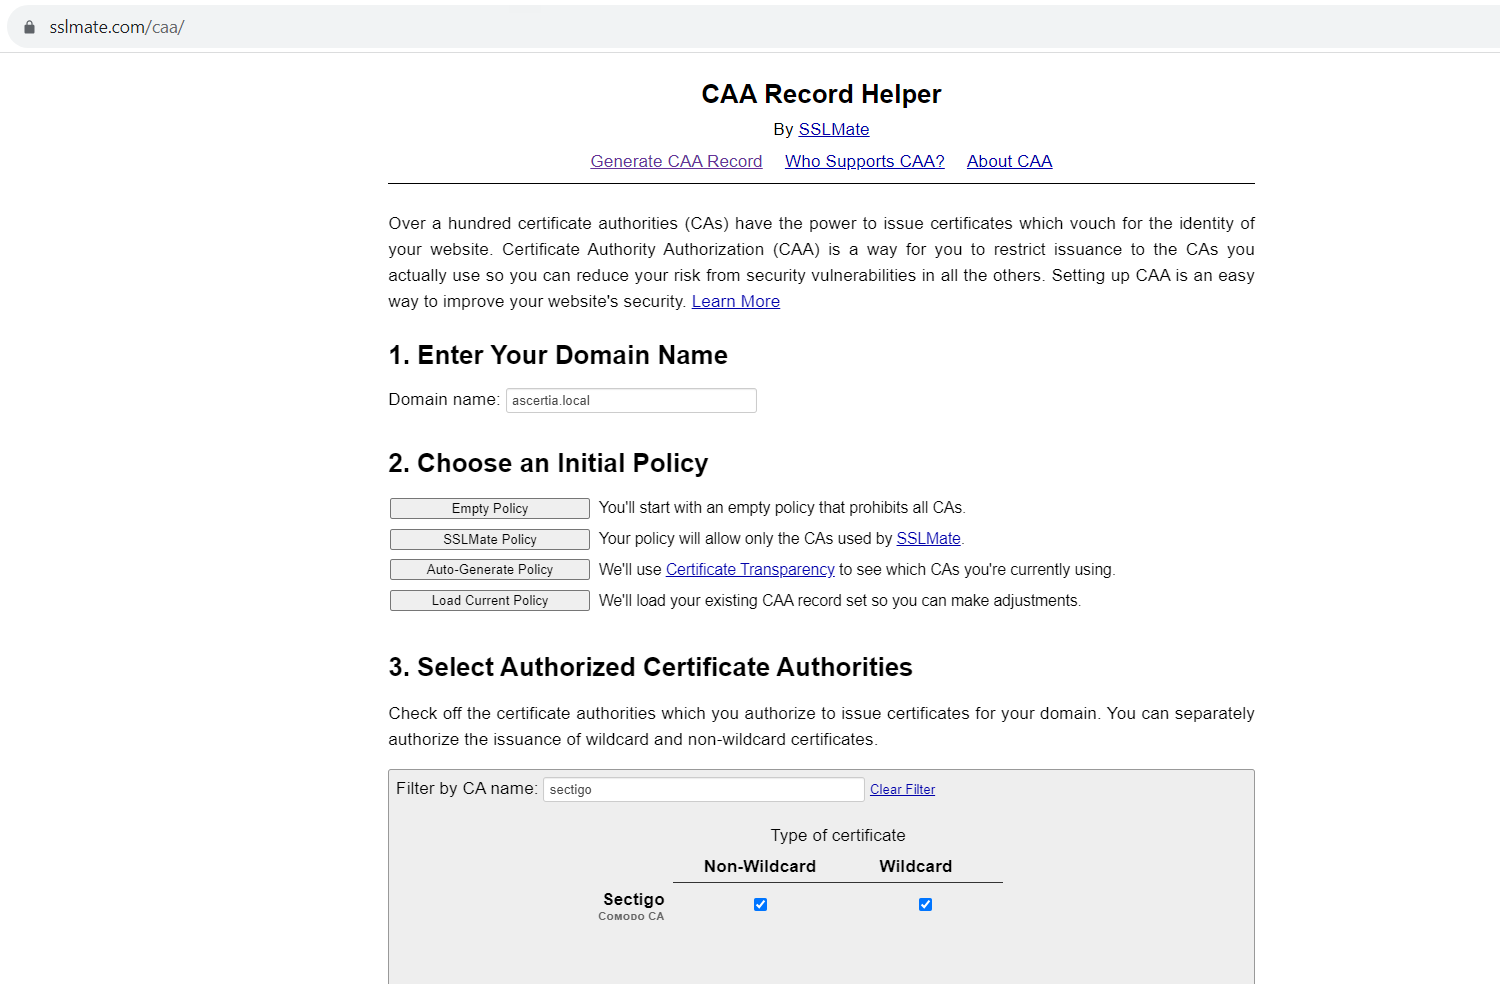
- Publish Your CAA Policy.
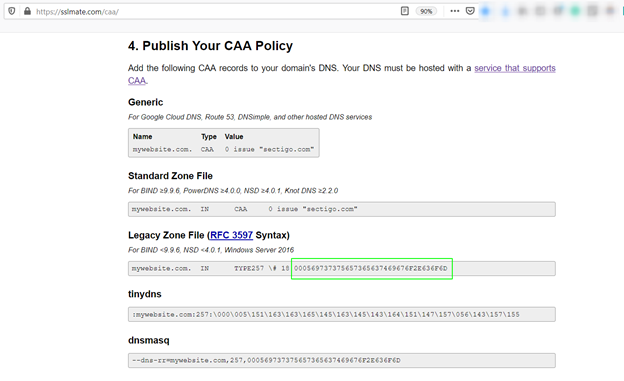
- Pick your hexadecimal code from the Legacy Zone File as highlighted and paste it in the PowerShell command.The CAA Record has now been added.
You can also check it through the graphic interface of the DNS manager of your Windows Server as a record with ‘Unknown’ type and code 257 in its properties.
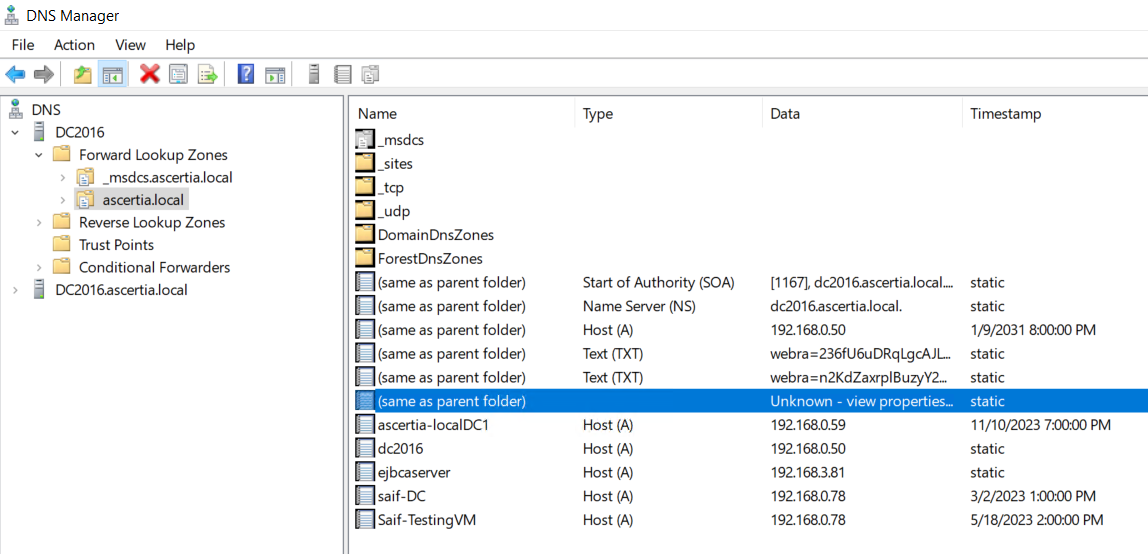
- Right-click on the CAA record and click Properties.
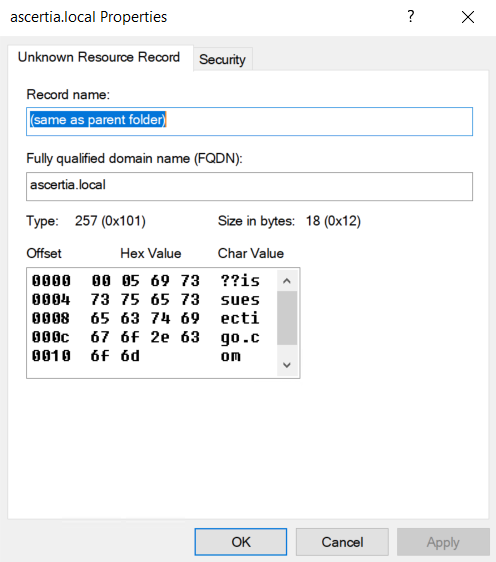
- Click OK.
ADSS Web RA Configurations
Once you have added the CAA record on Windows Server 2016, perform the following configurations.
- Assign Domain Configurations to respective roles.
- Create a Connector.
- Create an Authentication Profile.
- Create a Certification Profile.
- Configure the connector and profiles in a Service Plan.
- Create an Enterprise and assign the Service Plan.
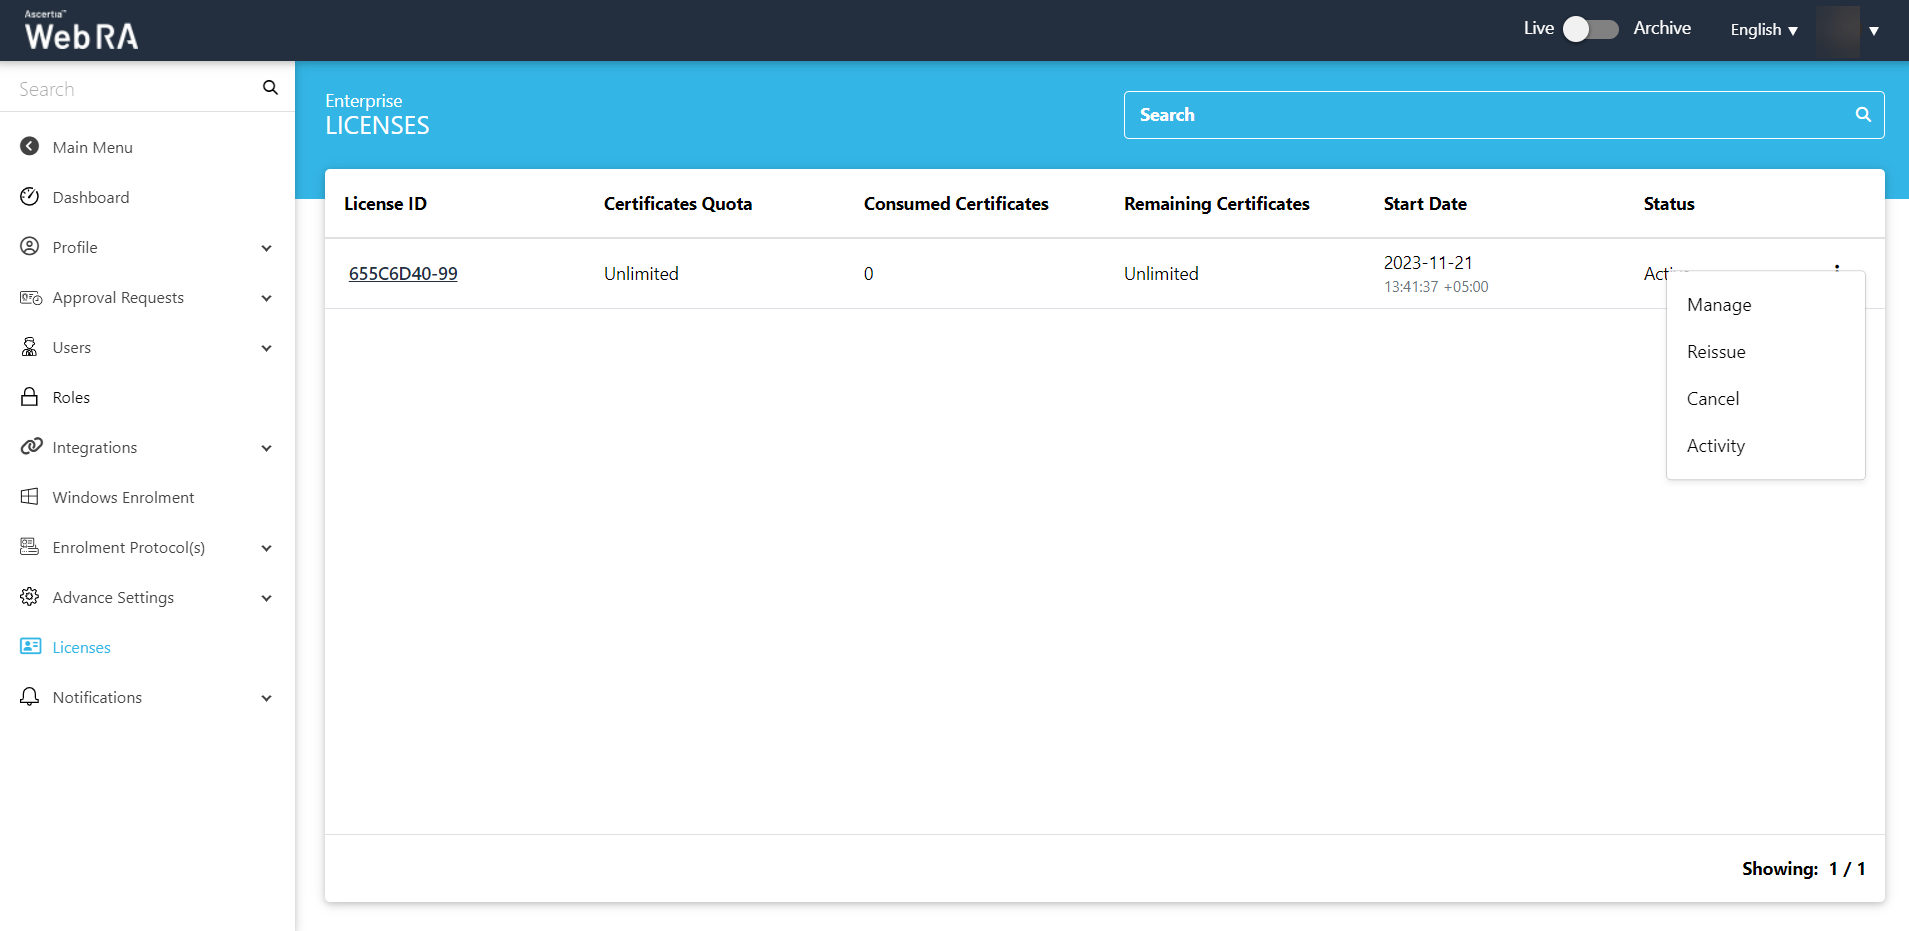
- Enterprise Management - Role
- Assign License to an Enterprise.
- Configure Domain Names and Certification Authority Authorization CAA Records within an Enterprise.
- Invite a User to join an Enterprise.
Once you have performed the above configurations, now you can perform the following actions from the ADSS Web RA web portal:
- Create a Certificate Request for TLS server authentication with verification type as none (CAA Records). Click here to see details.
- Rekey a Certificate Request for TLS server authentication with verification type as none (CAA Records). Click here to see details.
- Renew a Certificate Request for TLS server authentication with verification type as none (CAA Records). Click here to see details.
- Revoke a Certificate Request for TLS server authentication with verification type as none (CAA Records). Click here to see details.
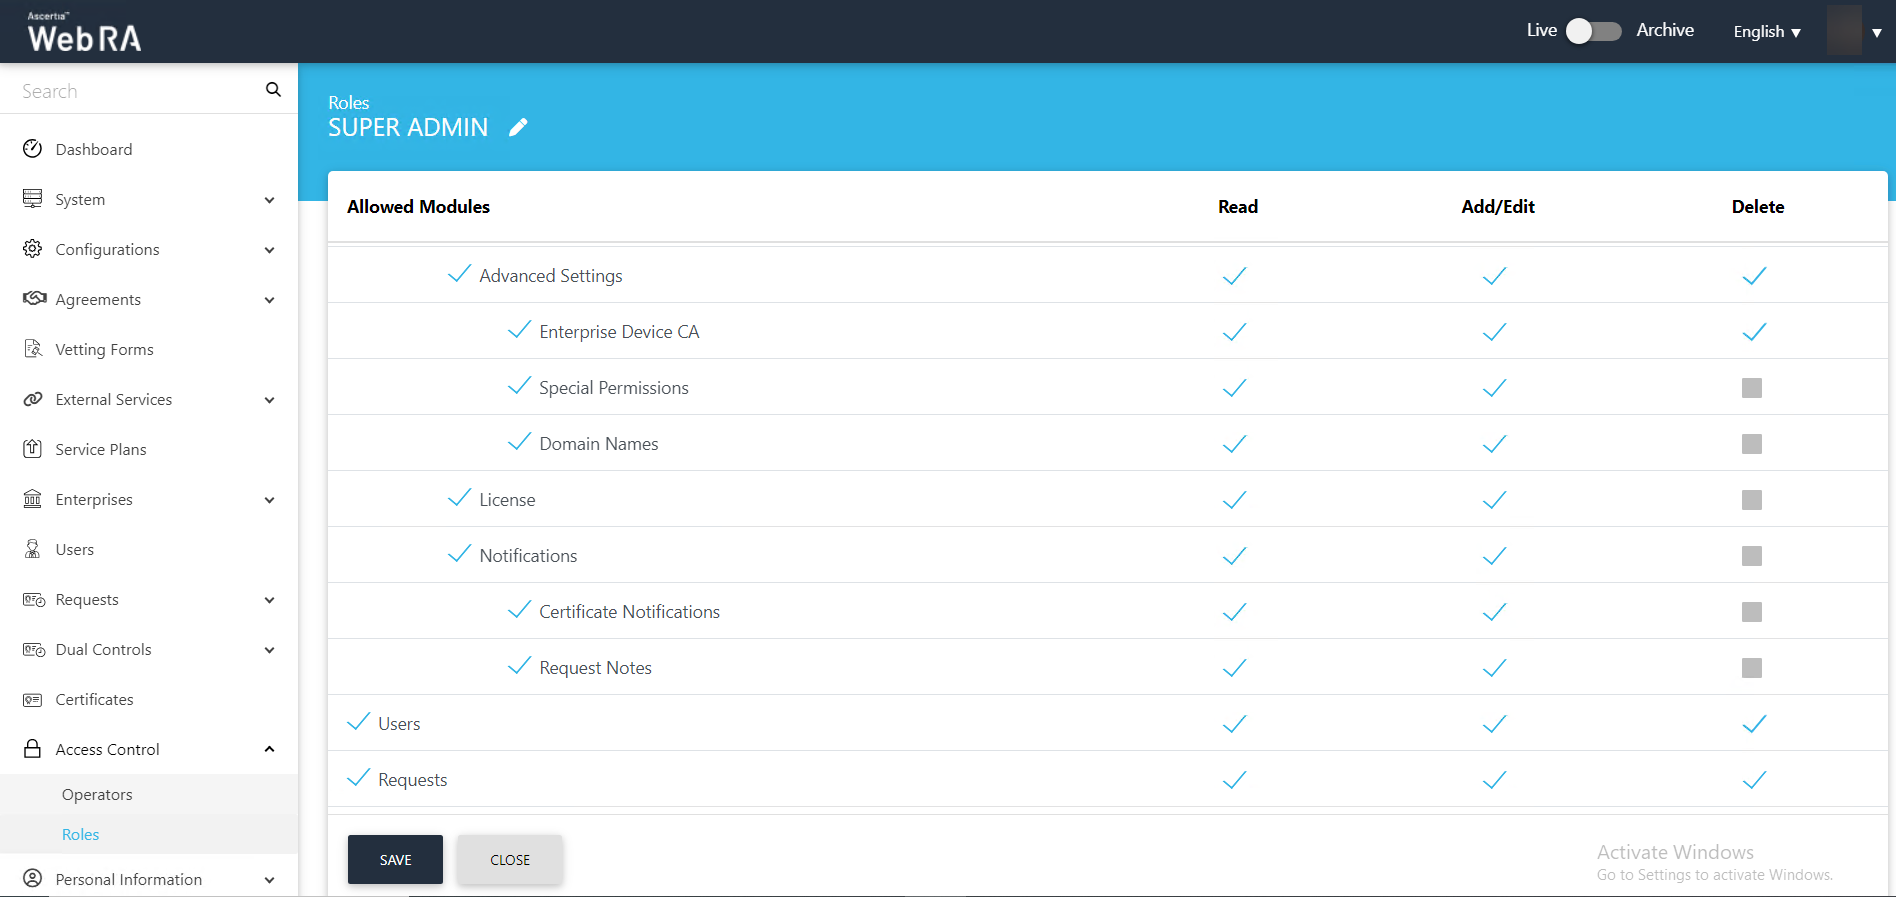
Assign Domain Configurations to respective roles
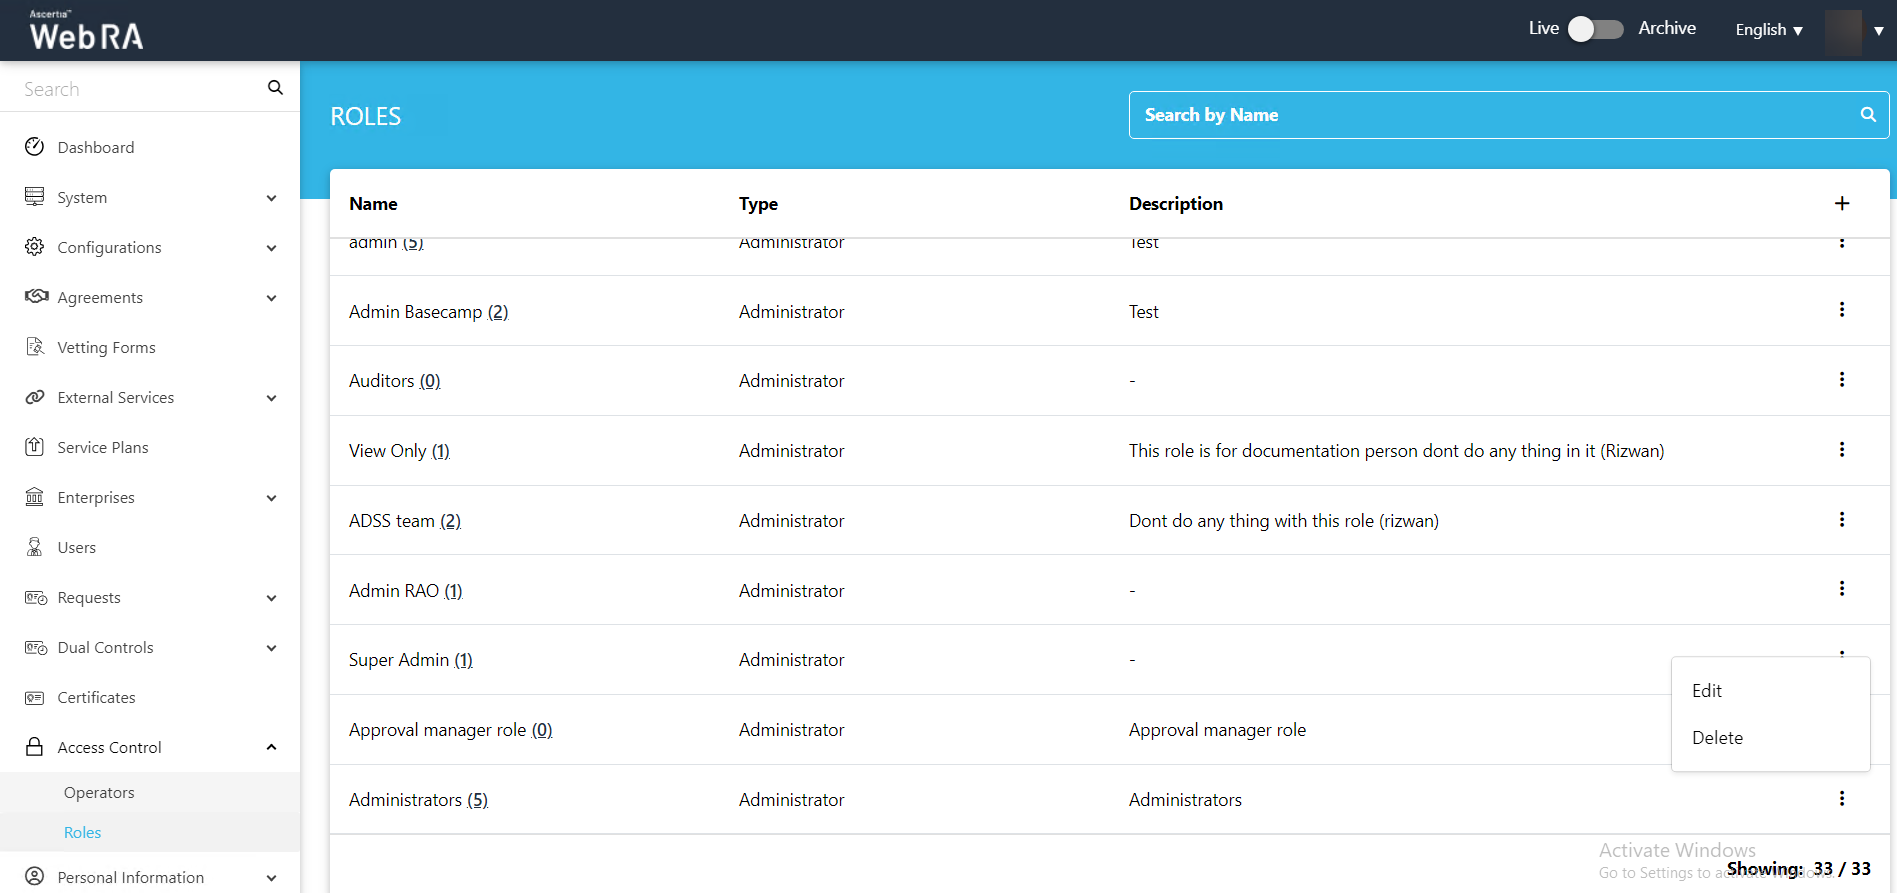
- Log in to the ADSS Web RA admin portal. Expand Access Control > click Roles. An administrator will assign the Domain Configurations settings to respective roles. Navigate to Access Control > Roles >
 > Edit.
|
|
If these settings are configured in the Allowed modules, only then the Domain Configurations section under Enterprise will appear. |

- From the Allowed Modules, scroll and select Advanced Settings>Domain Names. And click Save.
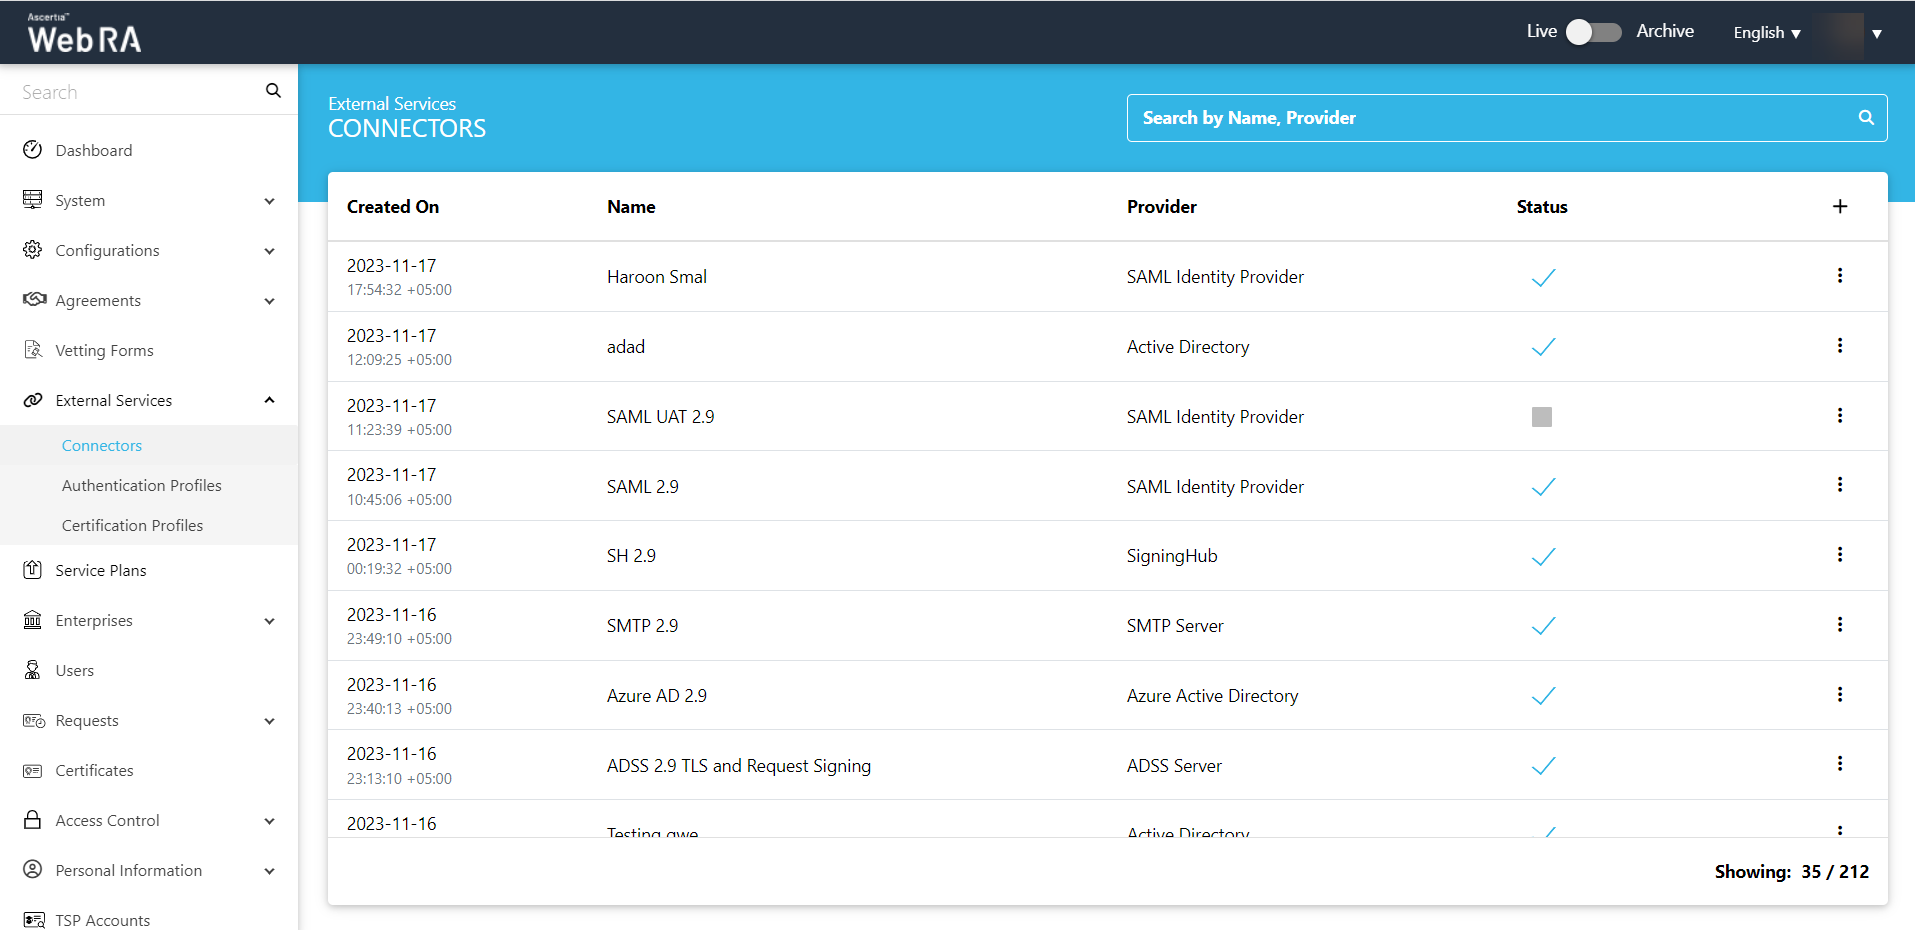
Create a Connector
- To add a connector, expand External Services > Connectors.
- Click
 from the grid header.
- On the Basic Information screen, enter a name and choose a provider for which you wish to create a connector. Select the Active check box to activate the connector. Then click >.
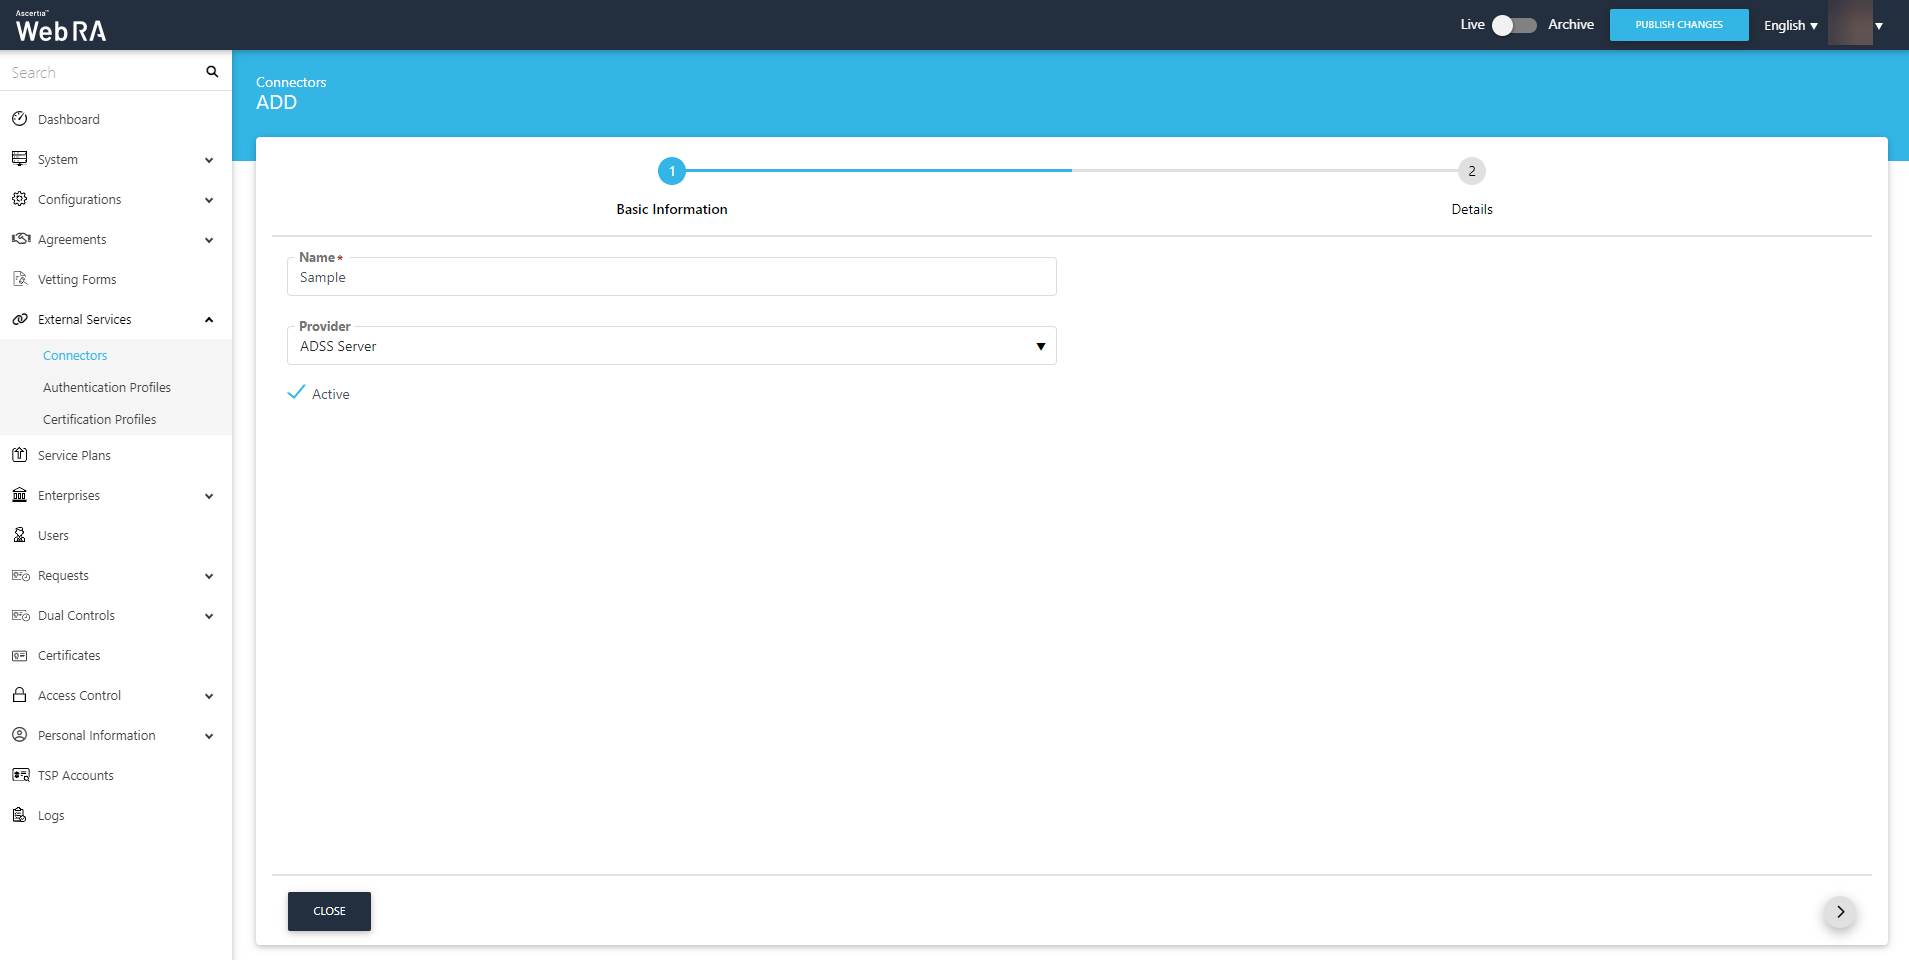
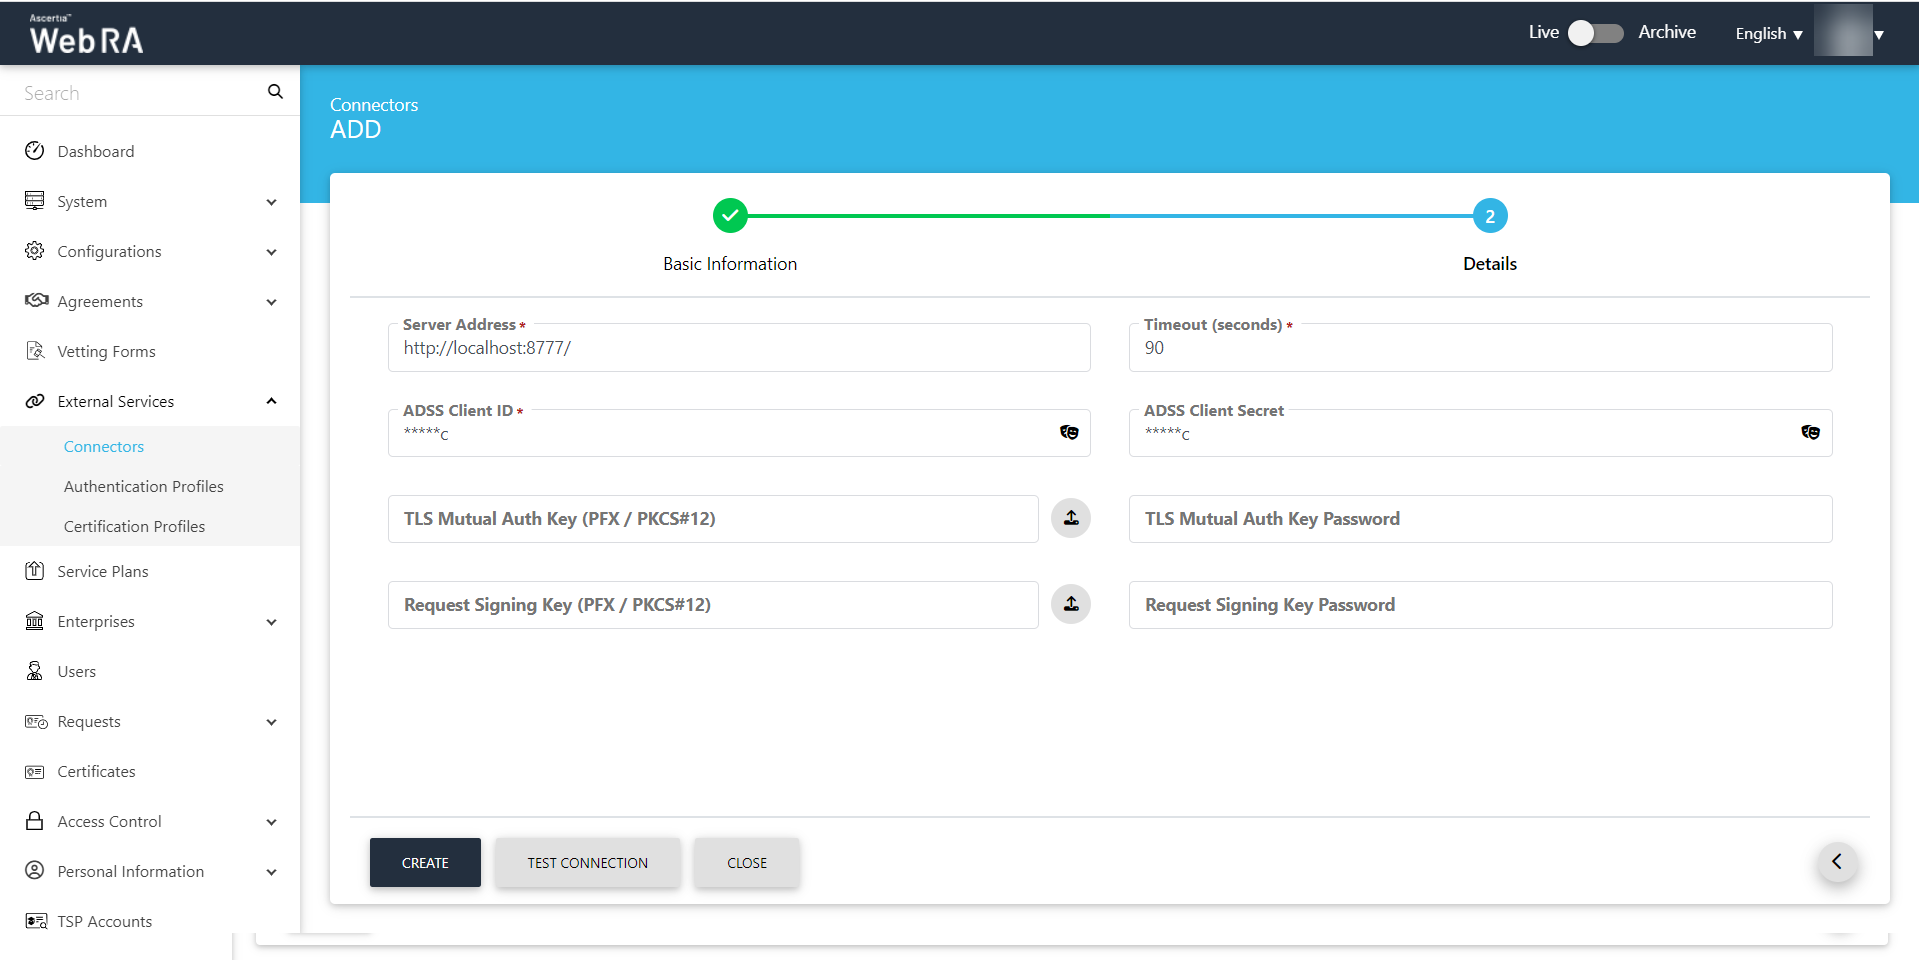
- The Details screen will appear.
Enter the mandatory fields as explained below:
- Server Address
Specify the address and port number of ADSS Server.
- Client ID
Specify the Client ID configured in the Client Manager module of the ADSS Server for this connector.
- Client Secret (optional)
Specify the client secret generated in the ADSS Server against this Client ID.
- Then click Create.
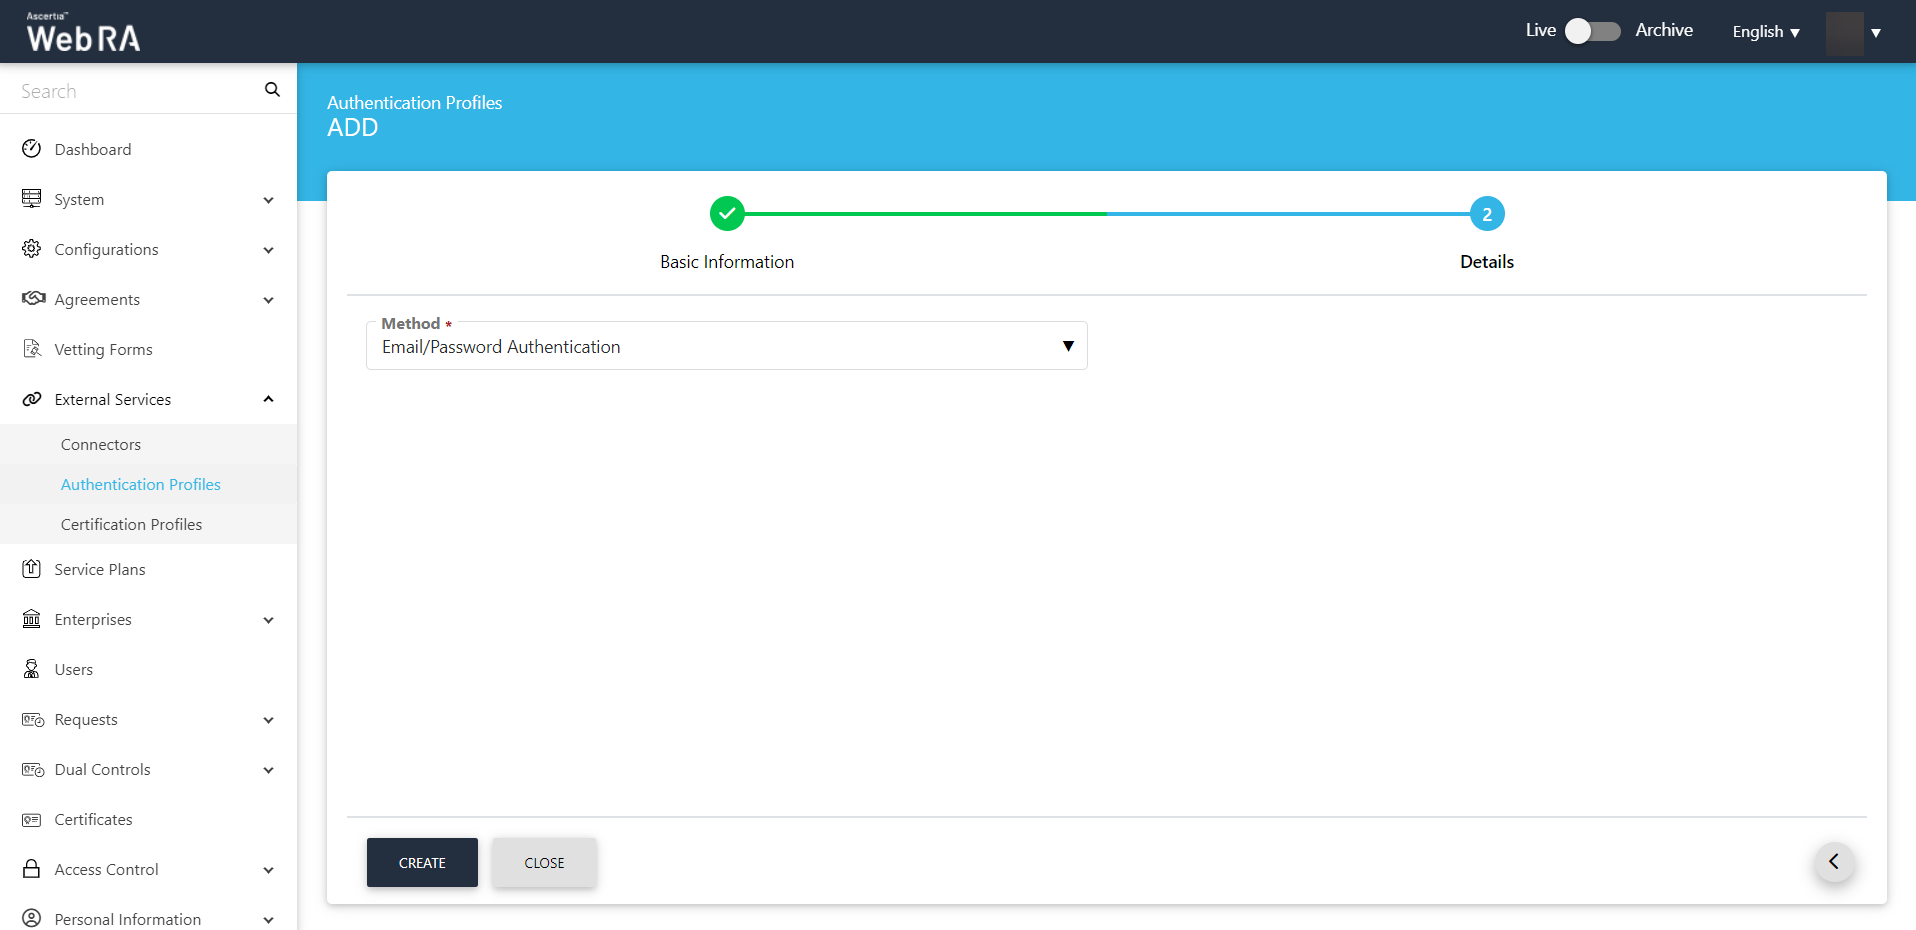
Create an Authentication Profile
- Navigate to External Services > Authentication Profiles, click
 to configure a new profile. Specify a name, description and select Active. Then click >.
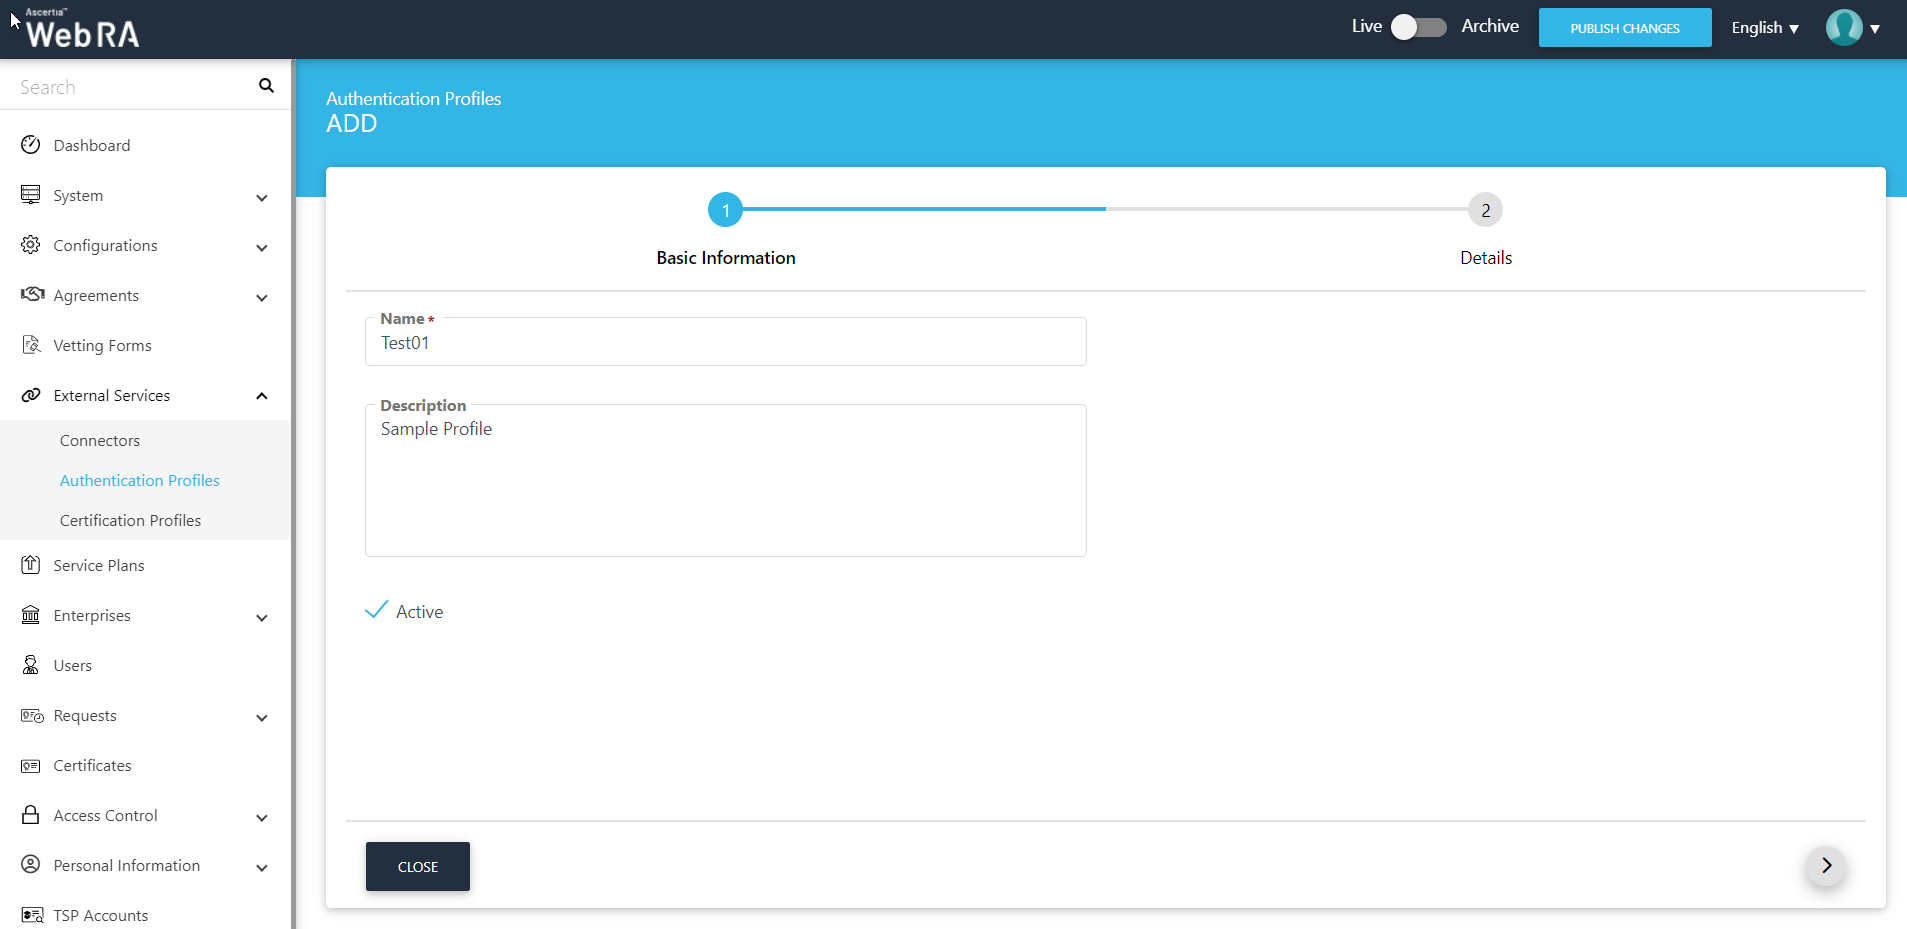
- The Details tab will appear. Choose Email/Password as authentication method and click Create.
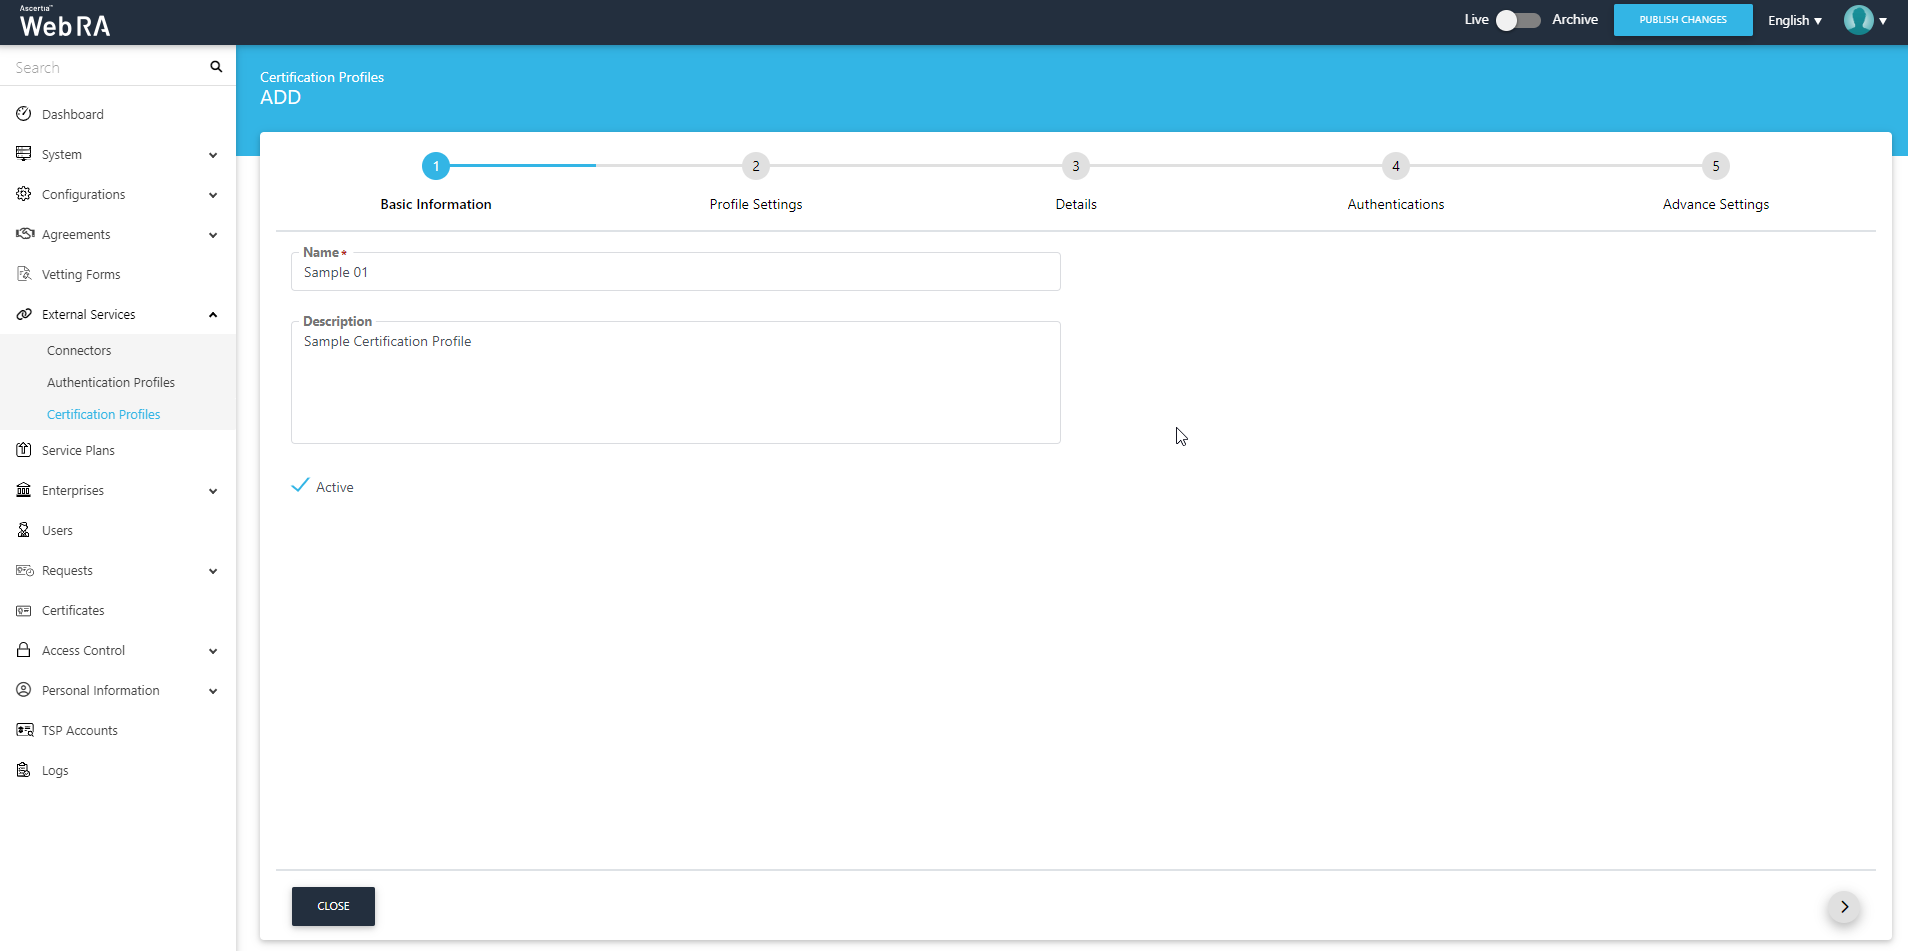
Create a Certification Profile
After creating an authentication profile, create a certification profile.
- Navigate to External Services > Certification Profiles, click
 . Specify a name, description and select Active. Then click Next.
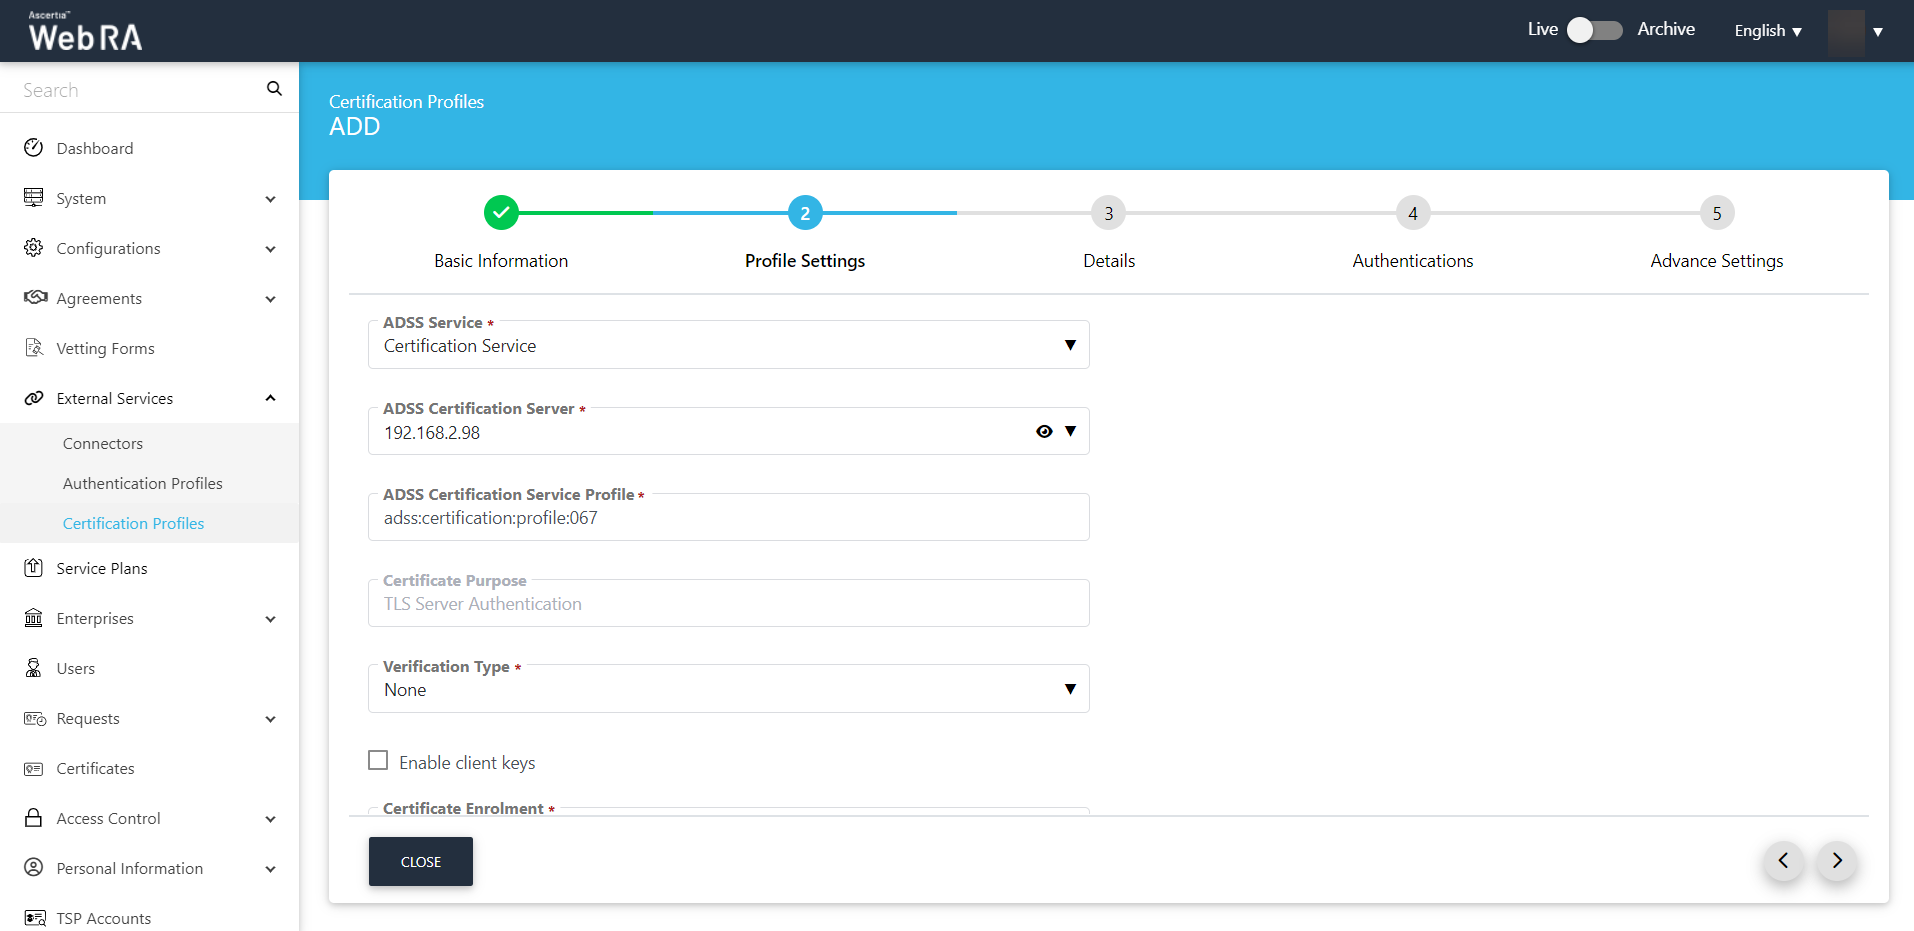
- The Profile Settings tab will appear. Configure the fields according to the following description:
- ADSS Service
This field will display the ADSS Services (i.e. Certification Service and CSP Service) that are available for ADSS Web RA. Select the one for which this service profile is being created, i.e. Certification Service.
- ADSS Certification Server
This field will display the list of active ADSS connectors in ADSS Web RA. Select the one to use for this certification service profile, e.g. 192.168.2.98.
- ADSS Certification/CSP Profile
Specify the ID or name of the profile that has been created in the ADSS Certification/CSP Service for ADSS Web RA, e.g.: adss:certification:profile:67. (TLS Server Authentication)
- Certificate Purpose
It contains a list of standard certificate purposes, which actually comes from ADSS, based on the selected certification profile. A certificate will be generated based on the provided certification profile ID, and it will appear in a disabled form as it is configured under that ADSS Certification Service Profile. Possible certificate purposes could be Document Signing, TLS Server Authentication, and Code Signing, etc.
- Verification Type
It contains a list of the following verification types:
- DV SSL
- EV SSL
- OV SSL
- None
We have selected the verification types as None in this document.
Then click >.
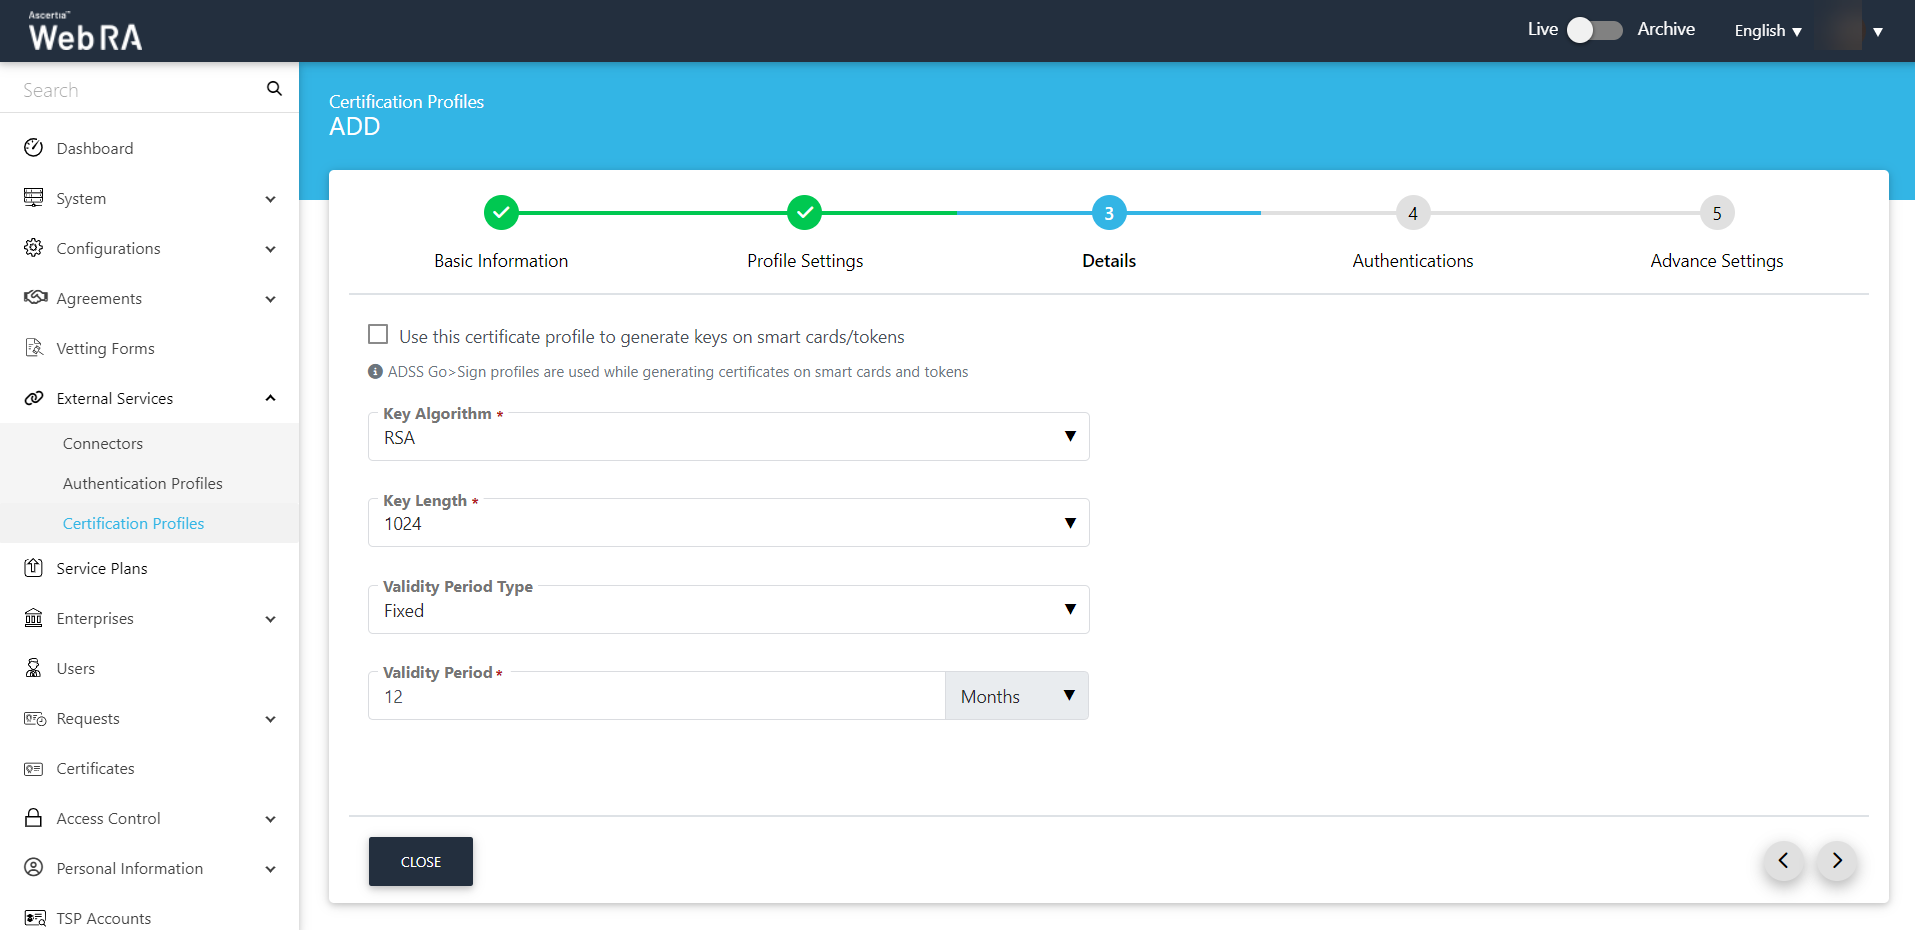
- The Details tab will appear.
- Key Algorithm
Key Algorithm that will be used to generate the key pair in the smart card/token. This configuration is coming from the ADSS Server so it cannot be changed.
- Key Length
Key Length that will be used to generate the key pair in the smart card/token. This configuration is coming from the ADSS Server so it cannot be changed.
- Validity Period Type
Validity period type can be configured as Fixed to restrict the enterprise user to change the certificate validity or it can be set as Custom if enterprise RAO allows an enterprise user to set validity period while creating a certificate request.
These Fixed and Custom values can only be used on ADSS Web RA admin, if the selected ADSS Certification profile is set over ridable in certification profile configurations. Otherwise, it will be shown as fixed validity period type.
- Validity Period
Set the certificate validity period.
Click >.
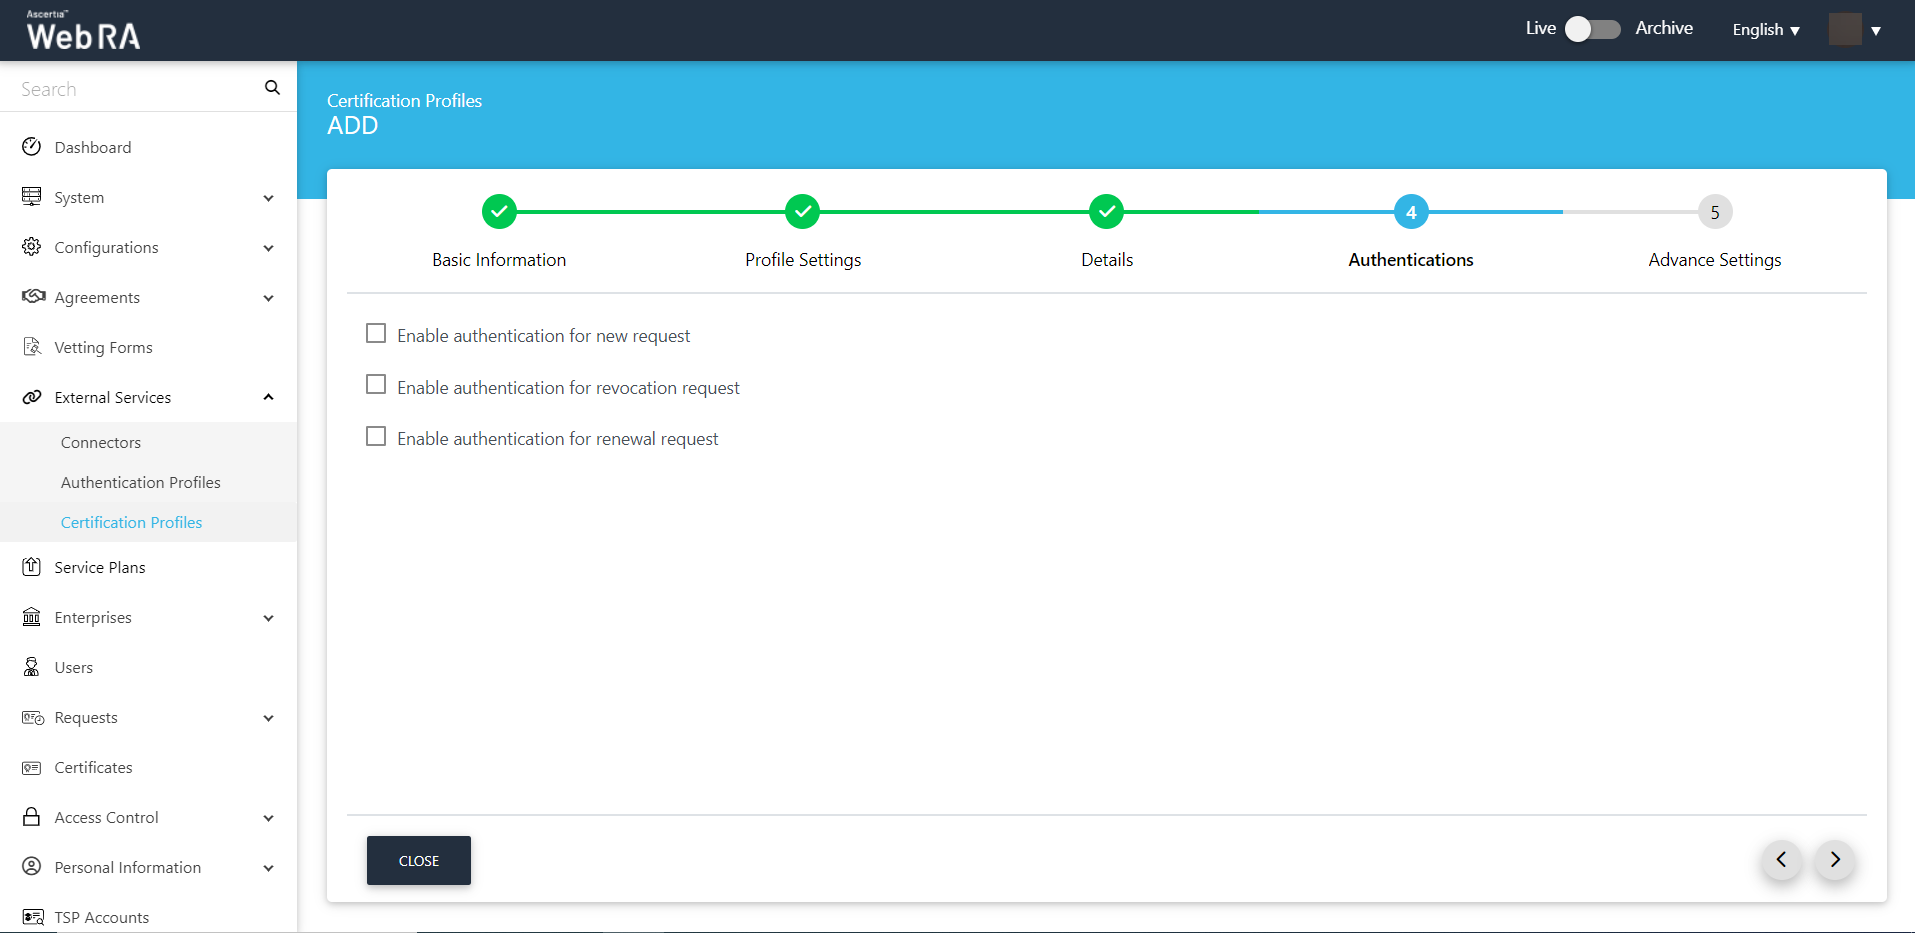
- Then configure the Authentications tab. You can select the type of authentication you would like to set for new, revocation and rekey requests. Click >.
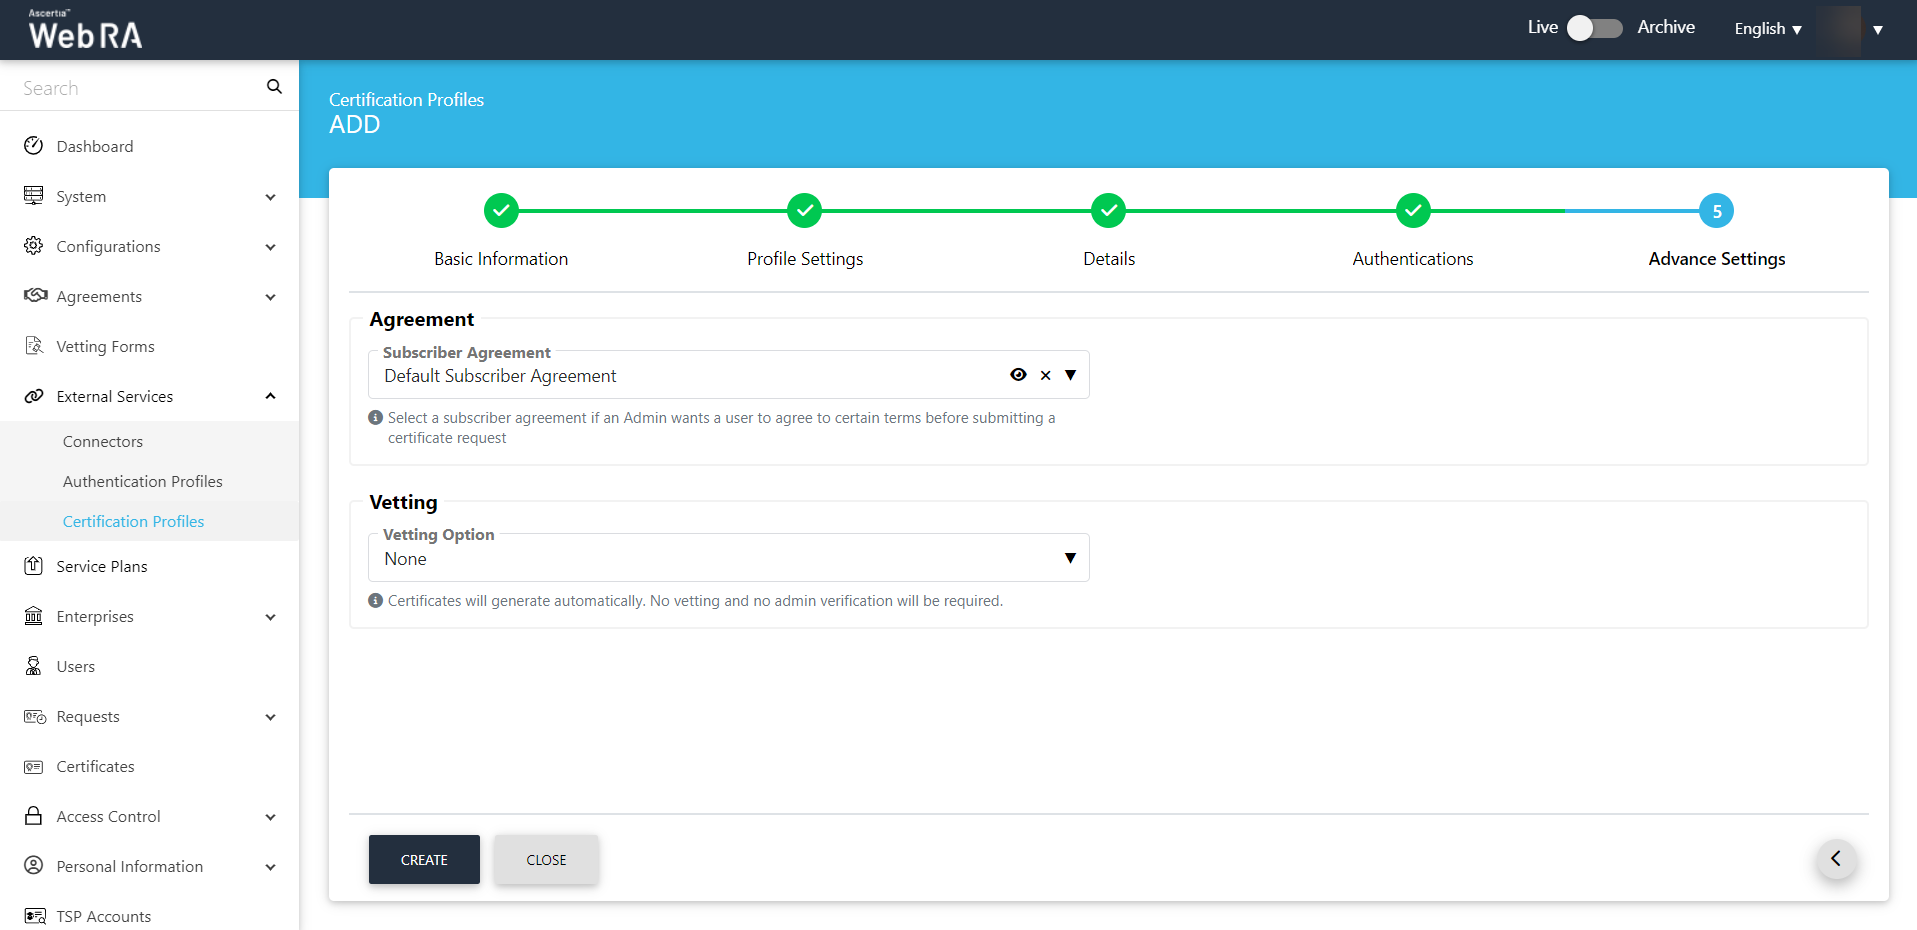
- Configure the Advance Settings.
Subscriber Agreement
Select a subscriber agreement from the drop down.
Vetting
Select manual vetting or none from the vetting option as per your requirement. We have selected None in this document.
Then click Create.
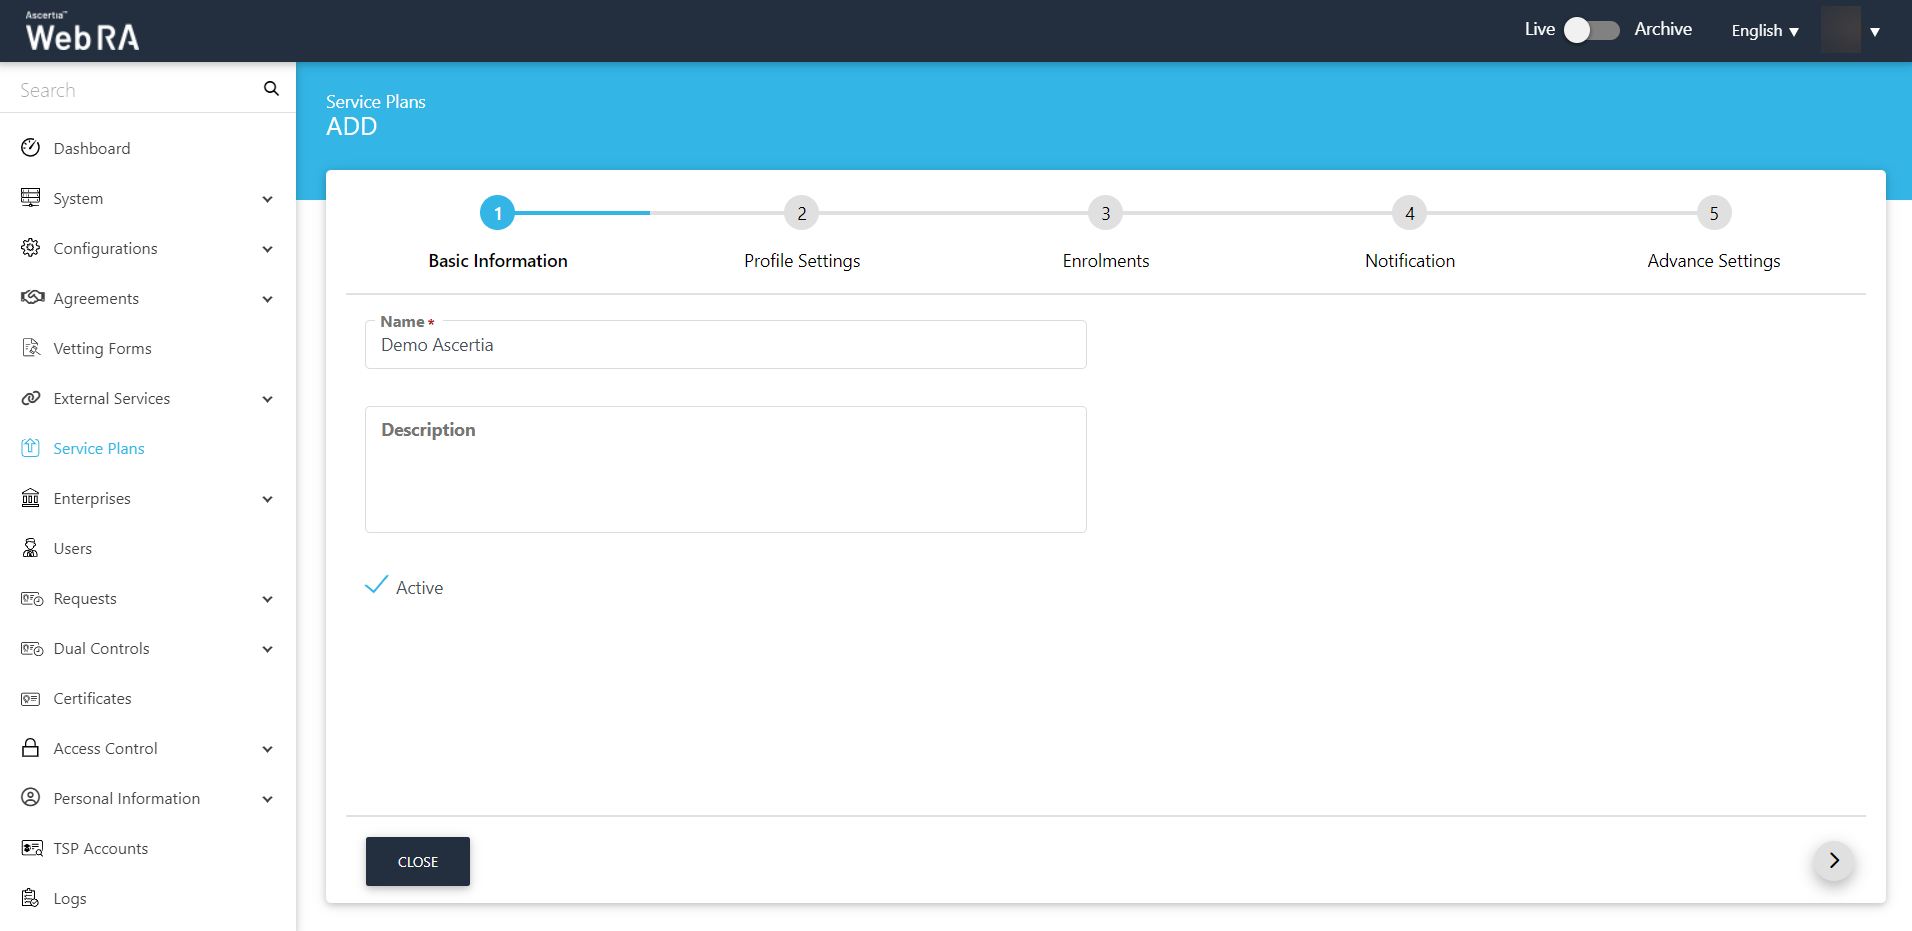
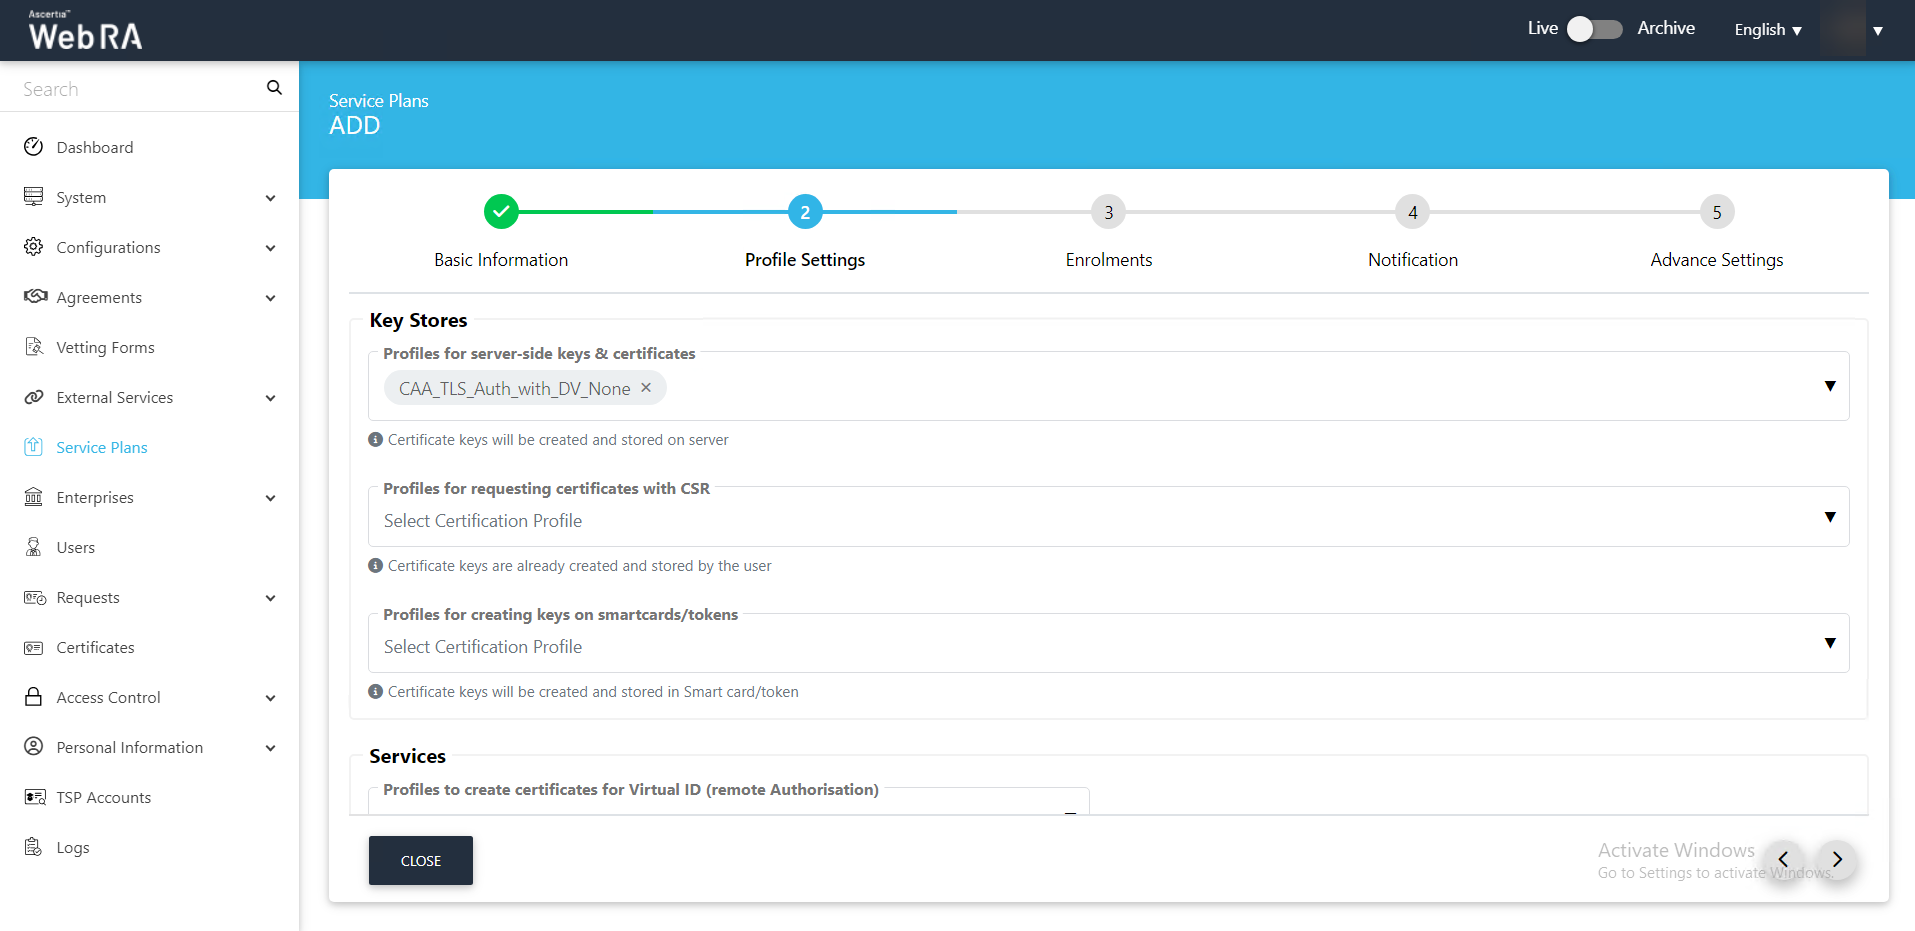
Configure a Service Plan
- Expand Service Plans >
 . Enter basic information, click >.
- On the Profile Settings screen, configure the Key Store.
Key Stores
Profiles for server-side keys & certificates
Configure a profile or multiple profiles to issue remote/server-side signing keys and certificates. These are the ADSS certification service profiles created for this purpose.
Profiles for requesting certificates with CSR
Configure a profile or multiple profiles to issue certificates by submitting users' CSRs. These are the ADSS certification service profiles created for this purpose.
Profiles for creating keys on smart cards/tokens
Configure a profile or multiple profiles to issue signing keys and certificates on smart cards and tokens. These are the ADSS certification service profiles created for this purpose.
Then click >.
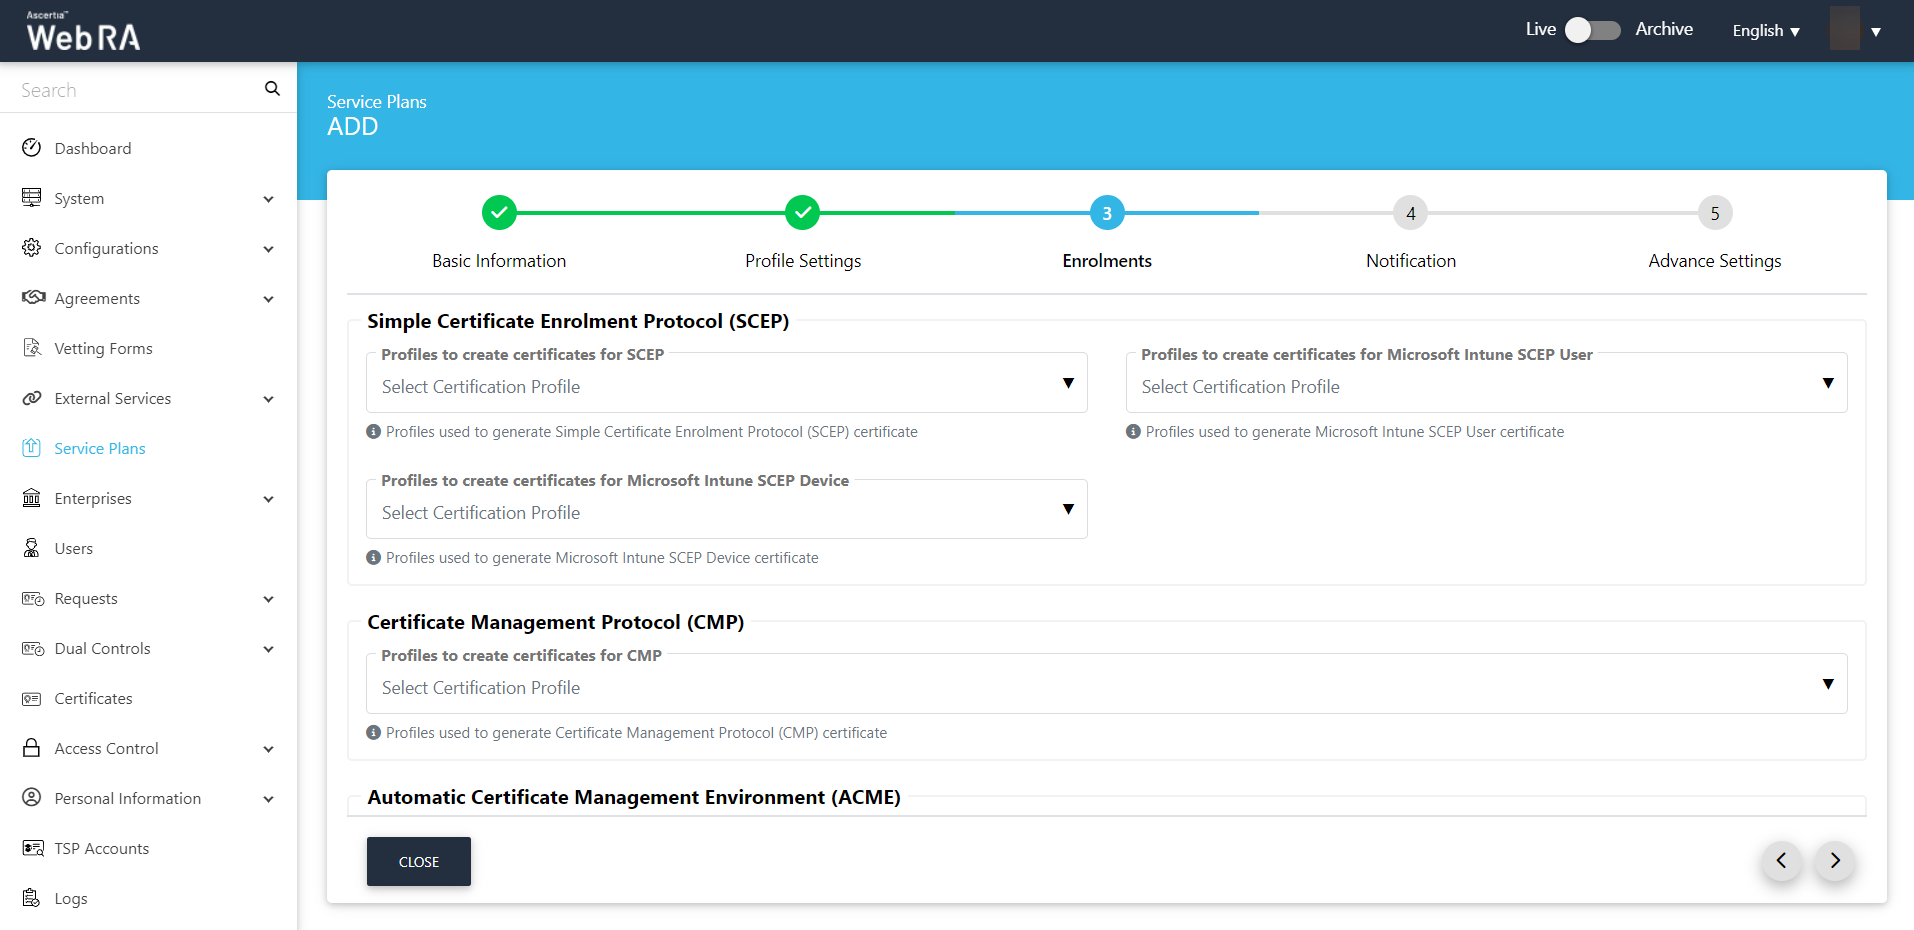
- On the Enrolments tab, you can configure the profiles for device protocols like SCEP, CMP, ACME and EST. It is not required to set a protocol in this use case, hence an operator may also leave these fields empty. Click >.
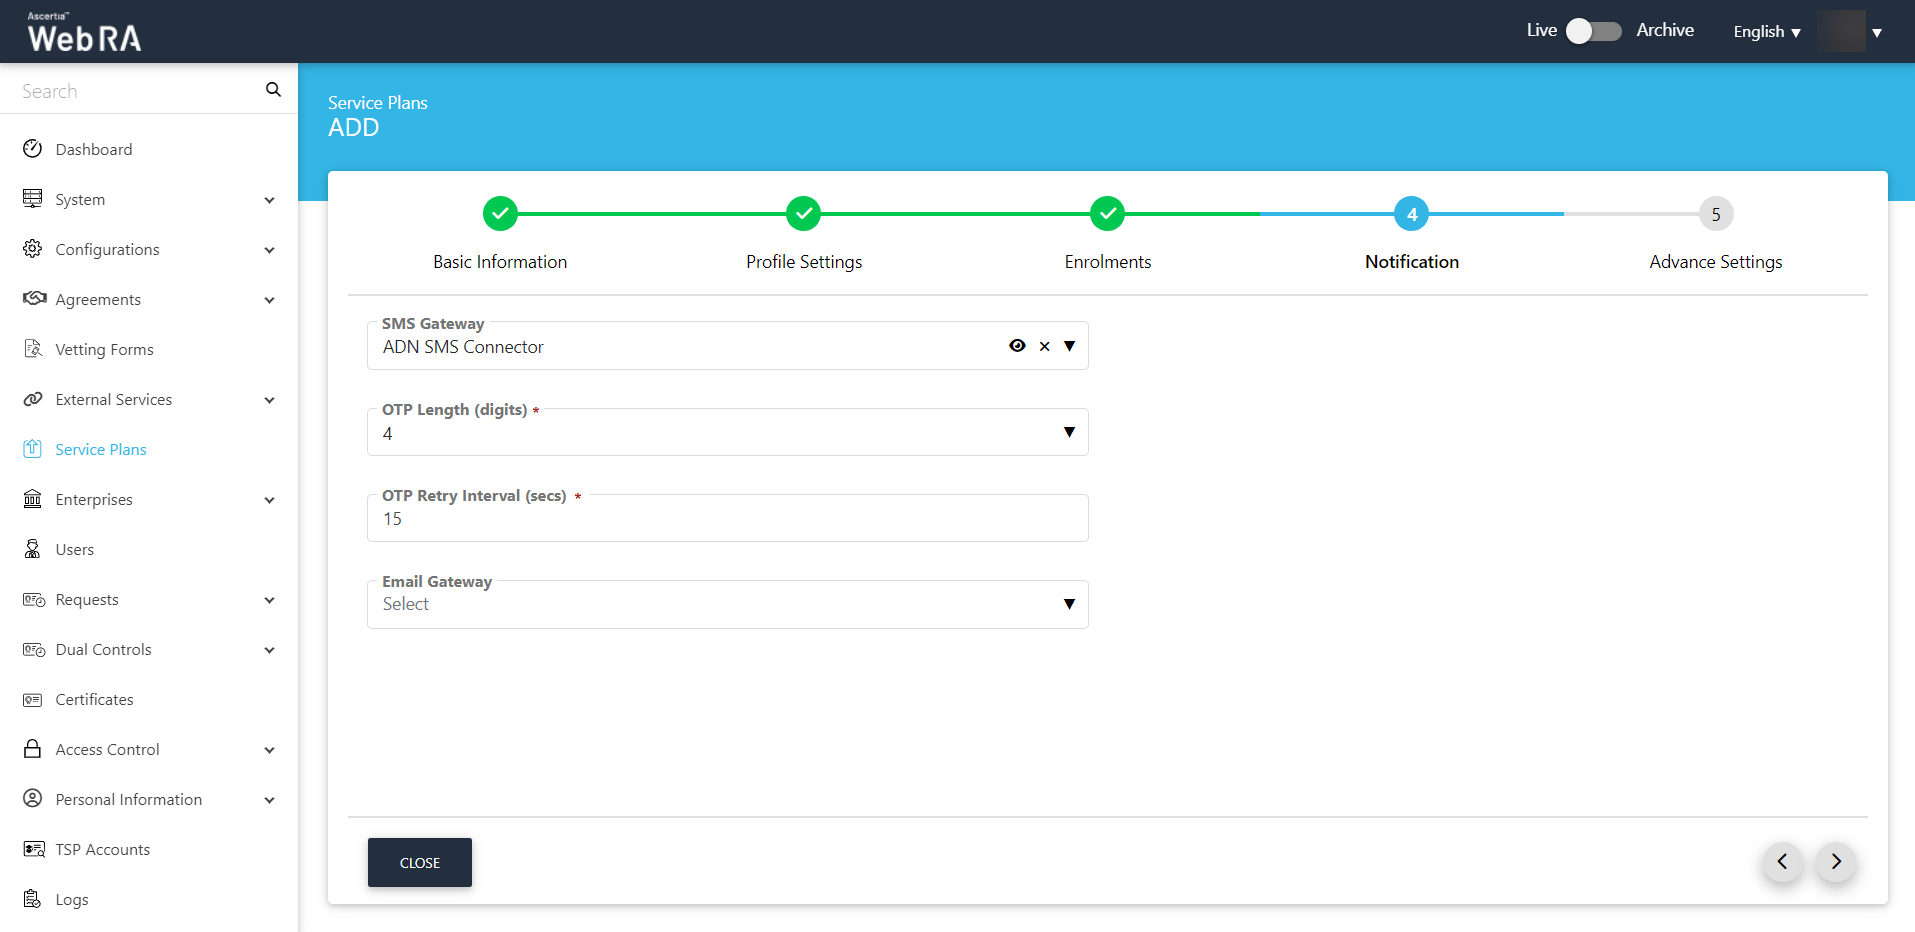
- Configure the Notification tab.
- SMS Gateway
Set an SMS gateway connector to receive OTP via SMS.
- OTP Length (digits)
Set the length of OTP.
- OTP Retry Interval (secs)
Set the number of retry for OTP.
- Email Gateway
Select an SMTP connector to receive email notifications.
Click >.
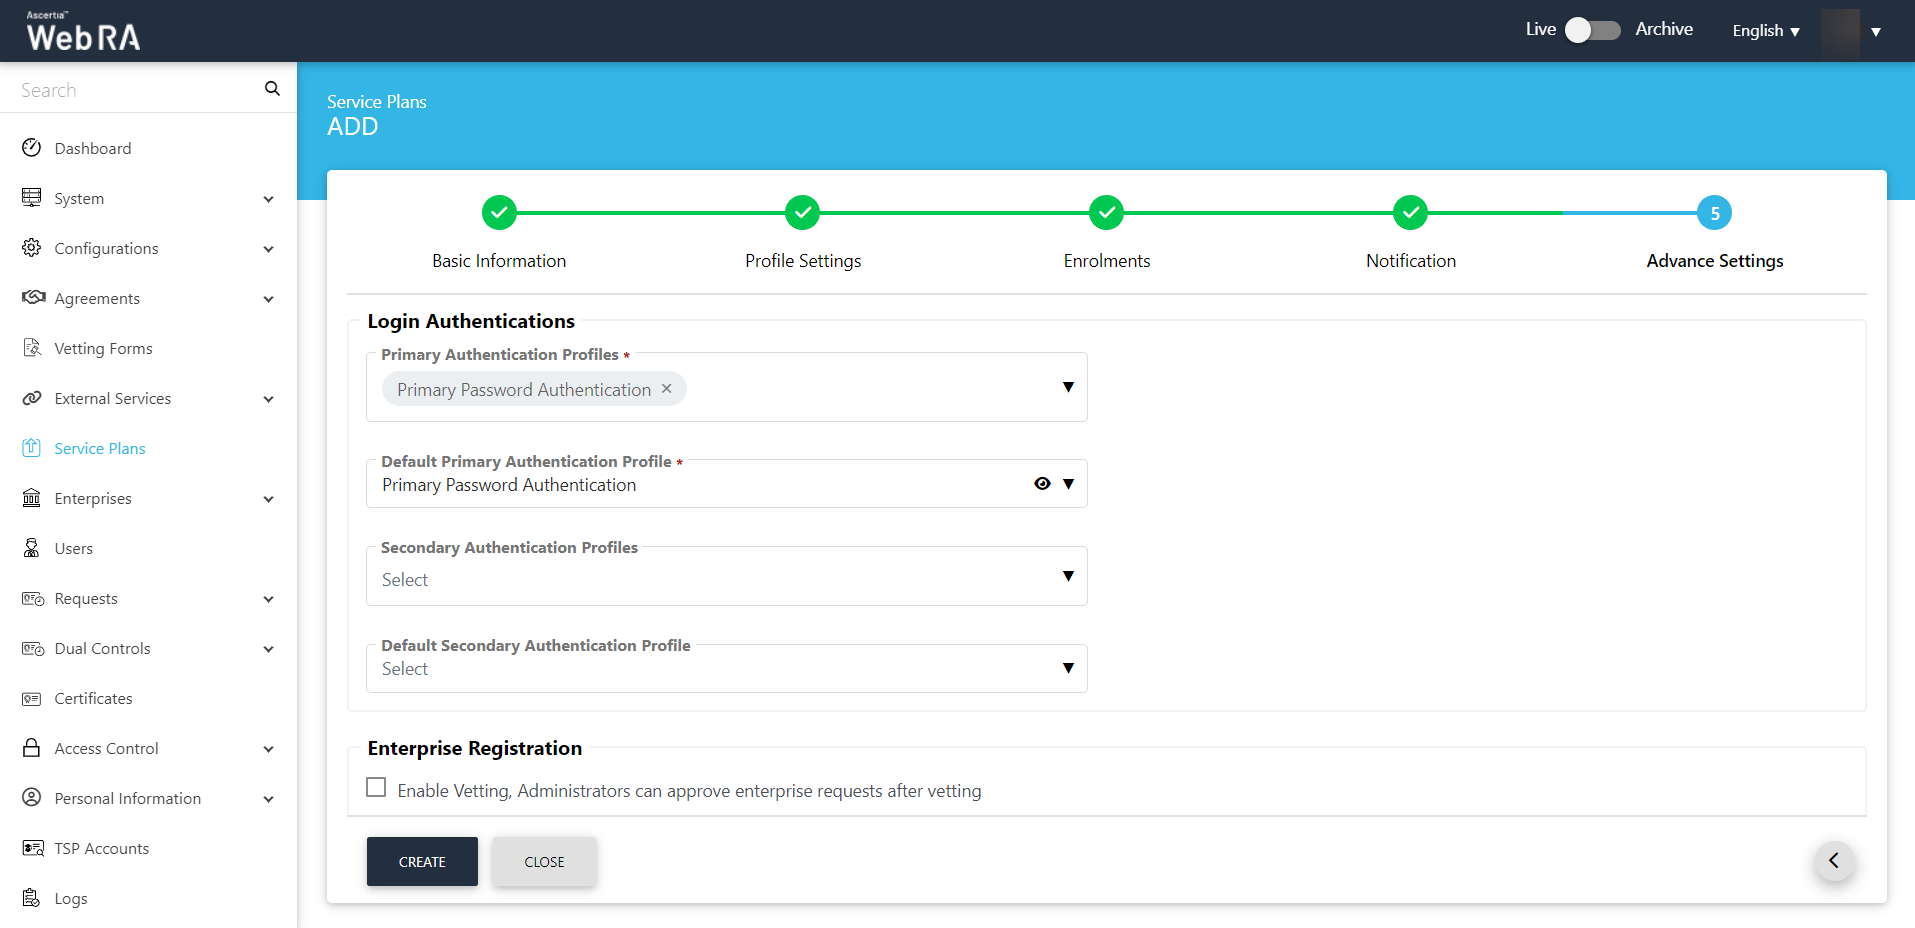
- Configure the login authentications in the Advance Settings tab.
- Primary Authentication Profiles
Primary authentication configured as login authentication allows an enterprise RAO to login on ADSS Web RA User Portal. An operator can set multiple primary authentication profiles for users in an enterprise.
- Default Primary Authentication Profile
A Primary Authentication profile is set by default for a new service plan.
- Secondary Authentication Profiles
Secondary authentication configured as login authentication allows an Enterprise RAO to login to ADSS Web RA web portal.
- Default Secondary Authentication Profile
One of the available Secondary Authentication profiles must be selected by default for a new service plan.
- Enterprise Registration > Enable vetting to approve enterprise registration.
Click Create.
Create an Enterprise and assign Service Plan to a Registered Enterprise.
- Expand Enterprises > Registered.
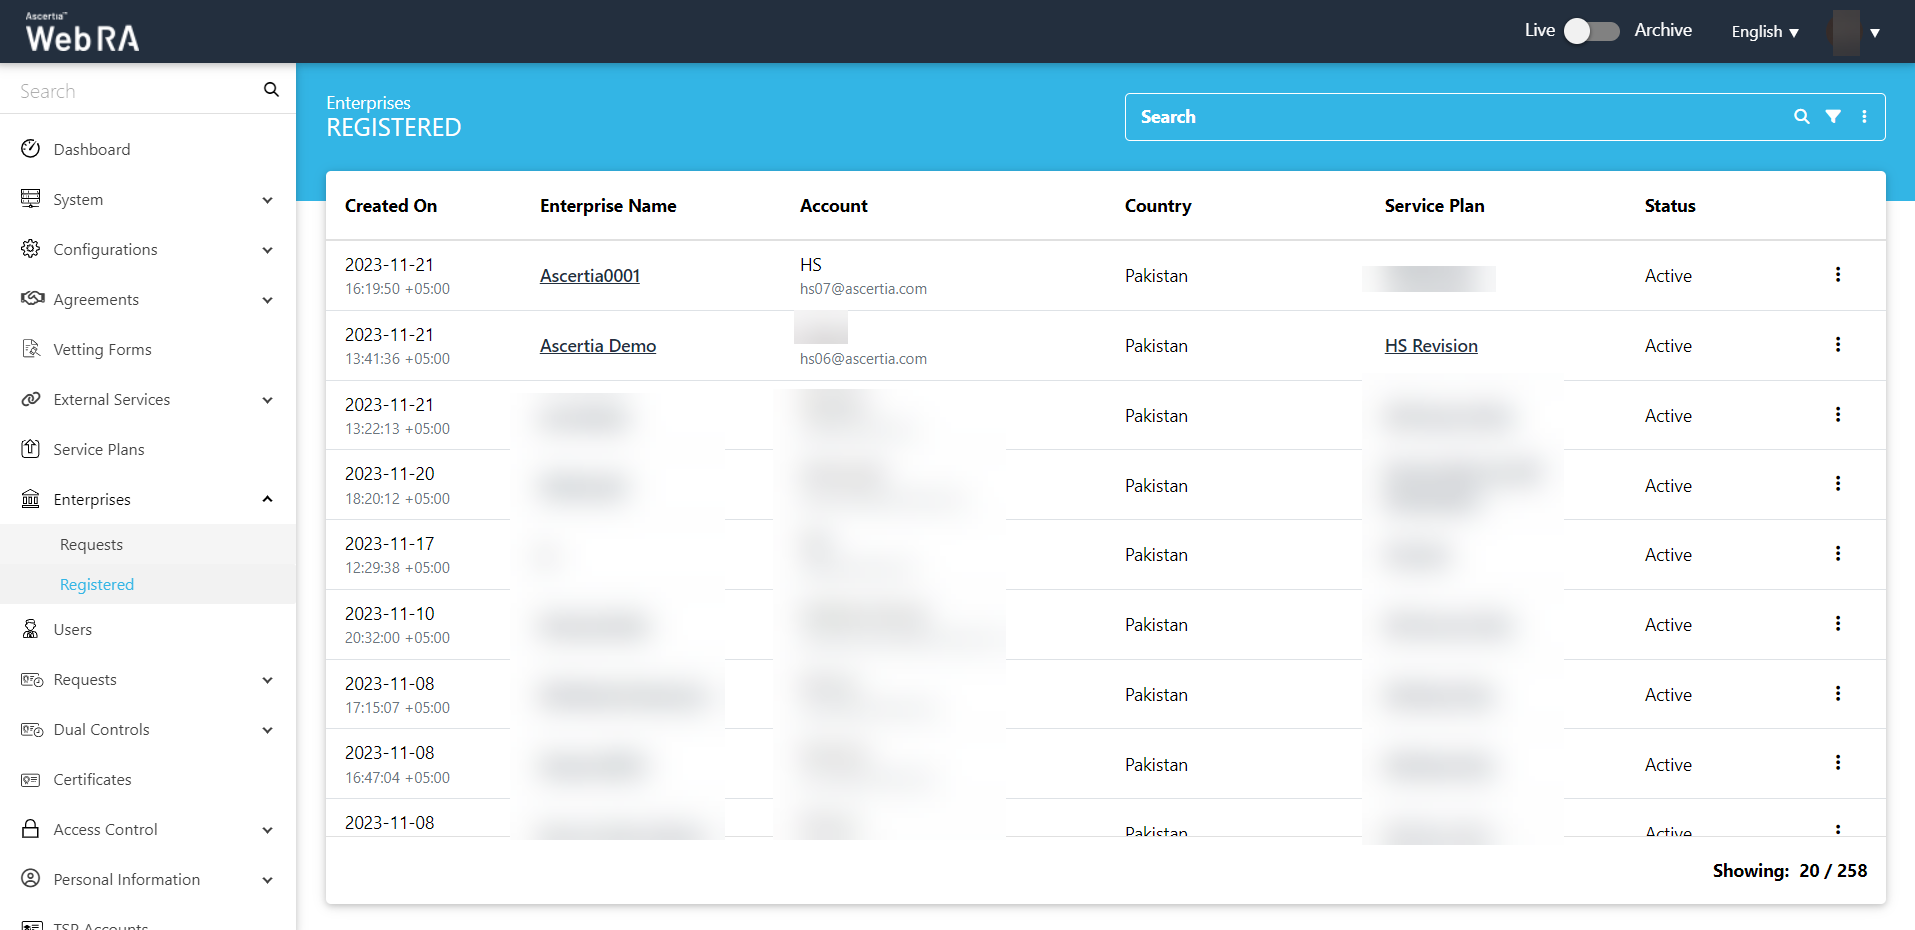
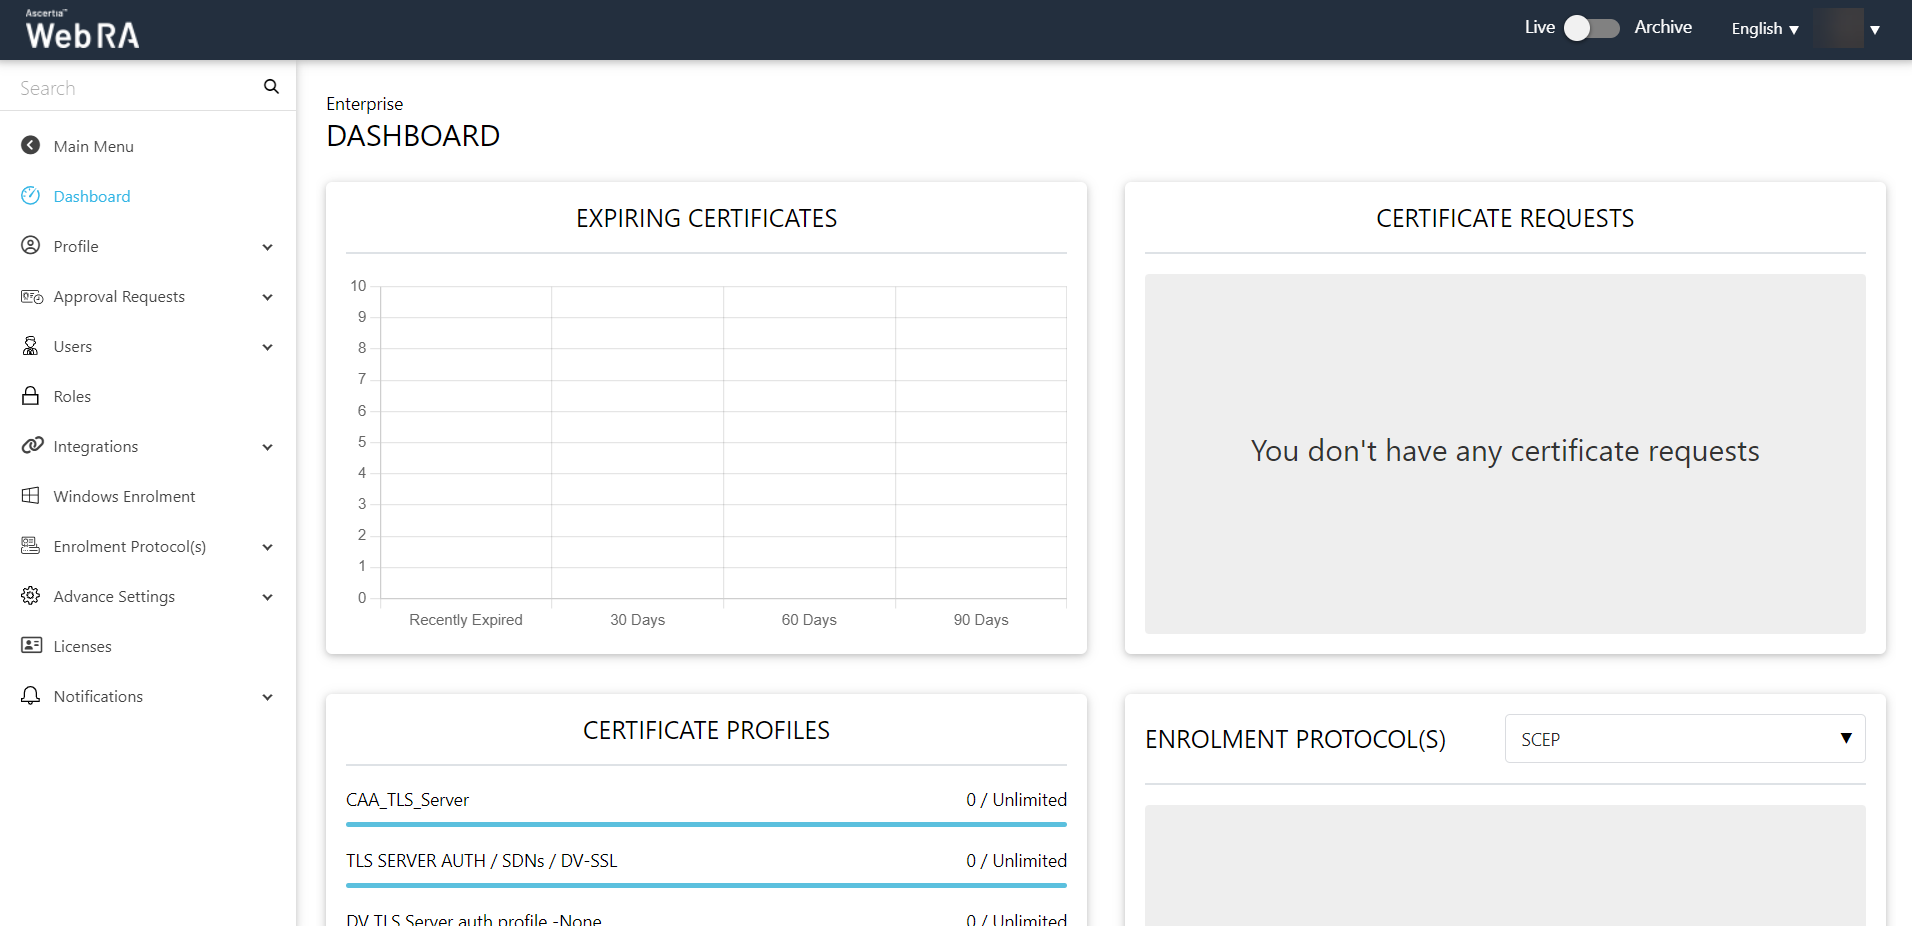
- Click on your Enterprise Name, e.g. Ascertia Demo. The Enterprise Dashboard will appear.
- Click on Roles. Then click
 button against the role and click Edit.
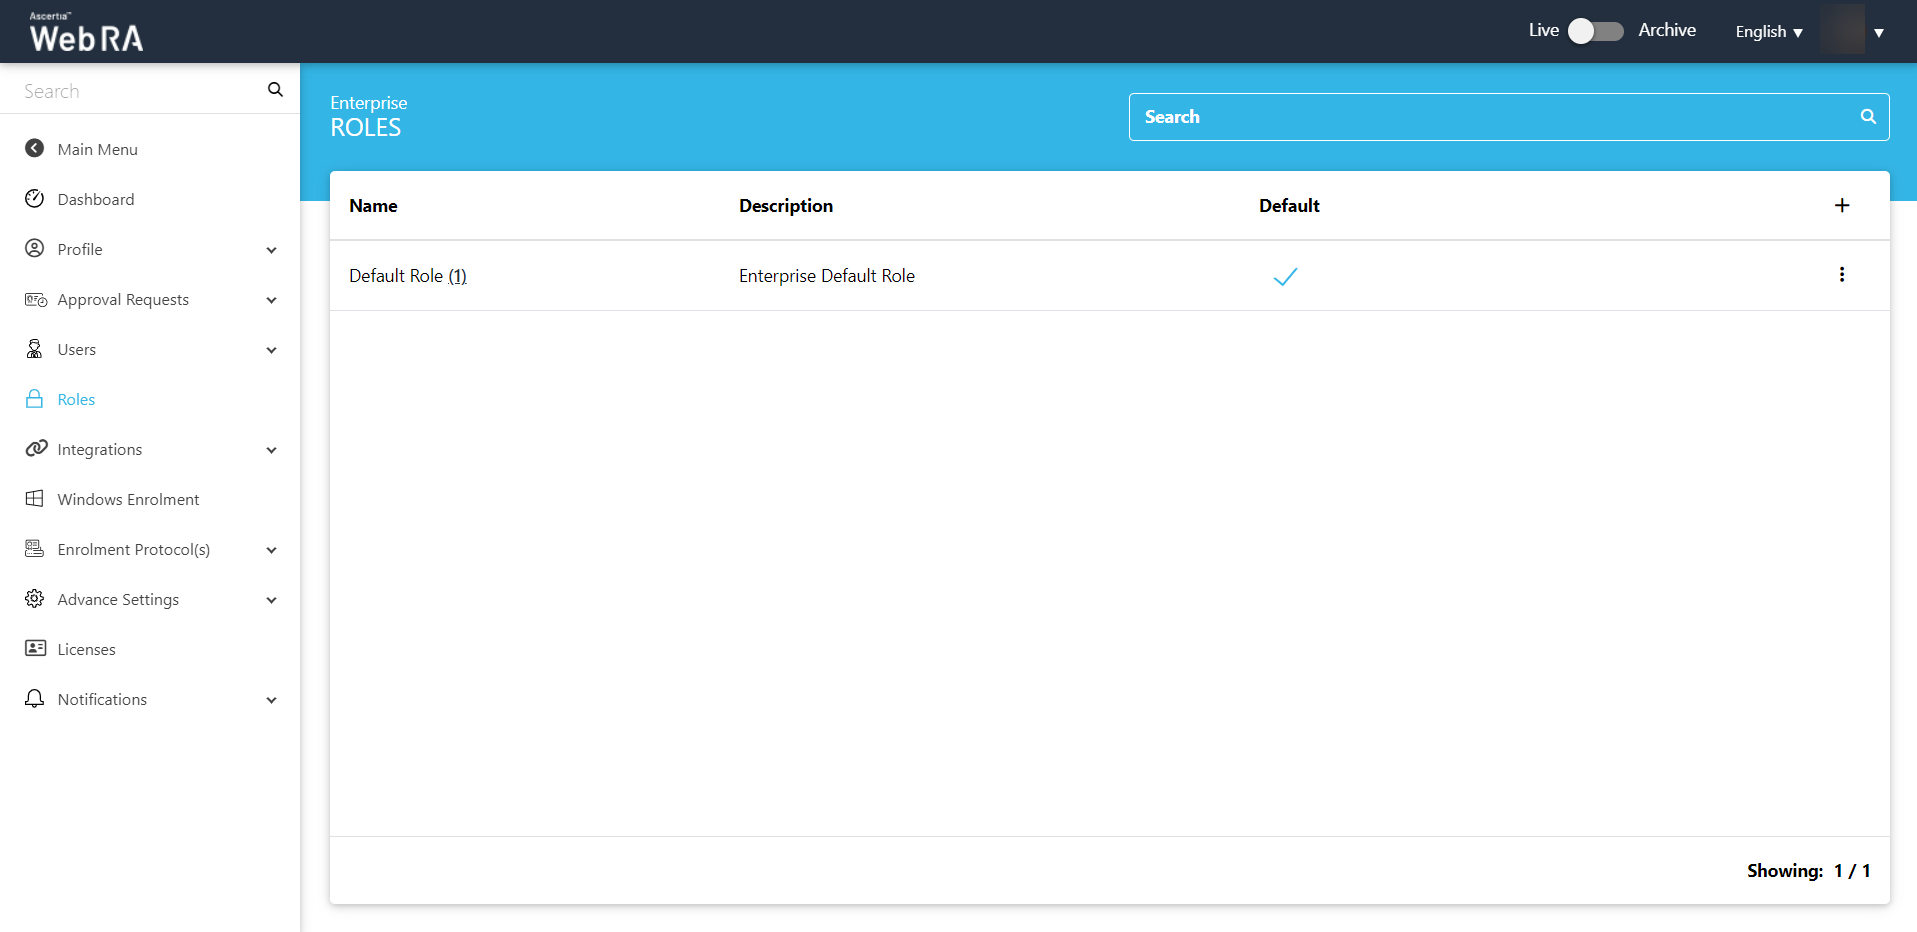
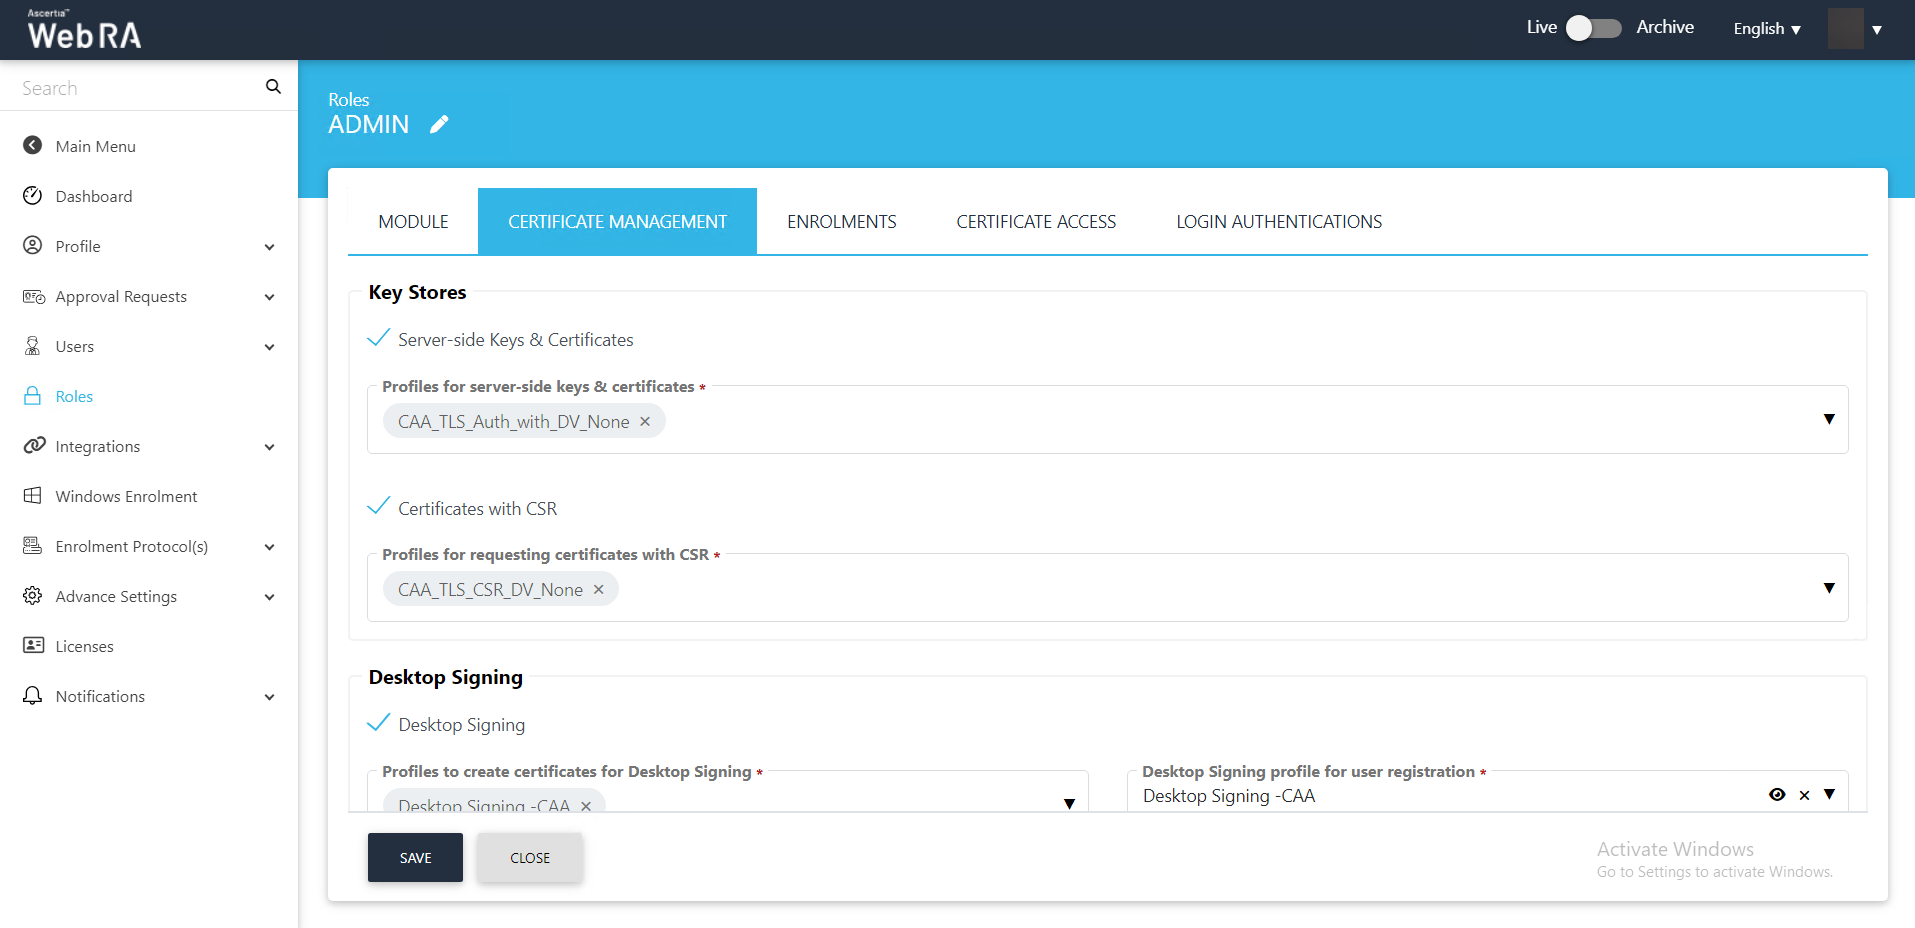
- The Enterprise Role settings will appear with 5 different tabs. Click Certificate Management and configure Key store for the specific role.
Key Store
- Profiles for server-side keys & certificates
Configure the same profile here that you configured while creating a service plan to allow a role to generate certificates based on that profile.
Click Save.
- Set the following configurations against the certification profile that you created and assigned to your specific role:
- Unlimited
Select this check box if you want to allow an unlimited quota to create certificates using the certificate profile you configured in the role settings.
- Certificates Quota
Set the quota you want to allow to create certificates using the certificate profile that you configured in the role settings.
- Consumed Certificates
The number of certificates pertaining to an enterprise that have been consumed.
- Remaining Certificates
The number of remaining certificates pertaining to an enterprise.
- Expiry
Set the expiry of the certificate profiles by adding a number in the expiry section and selecting the duration between days, months and years from the drop down.
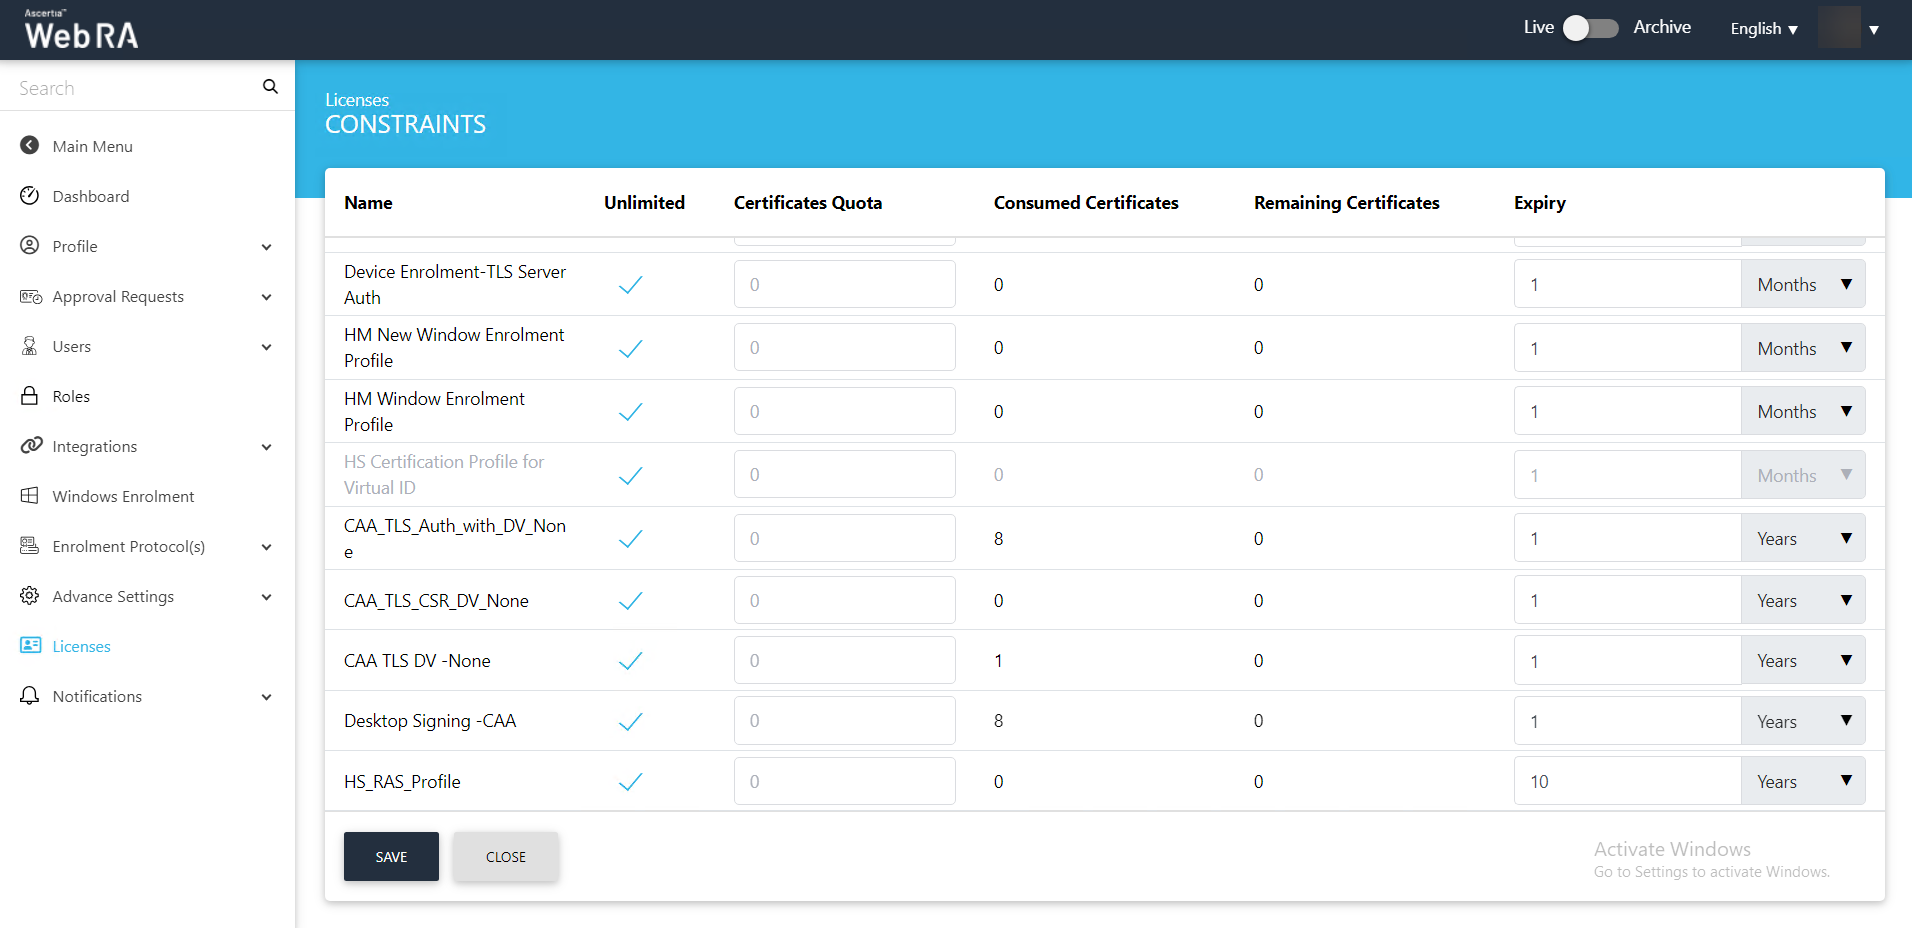
Click Save.
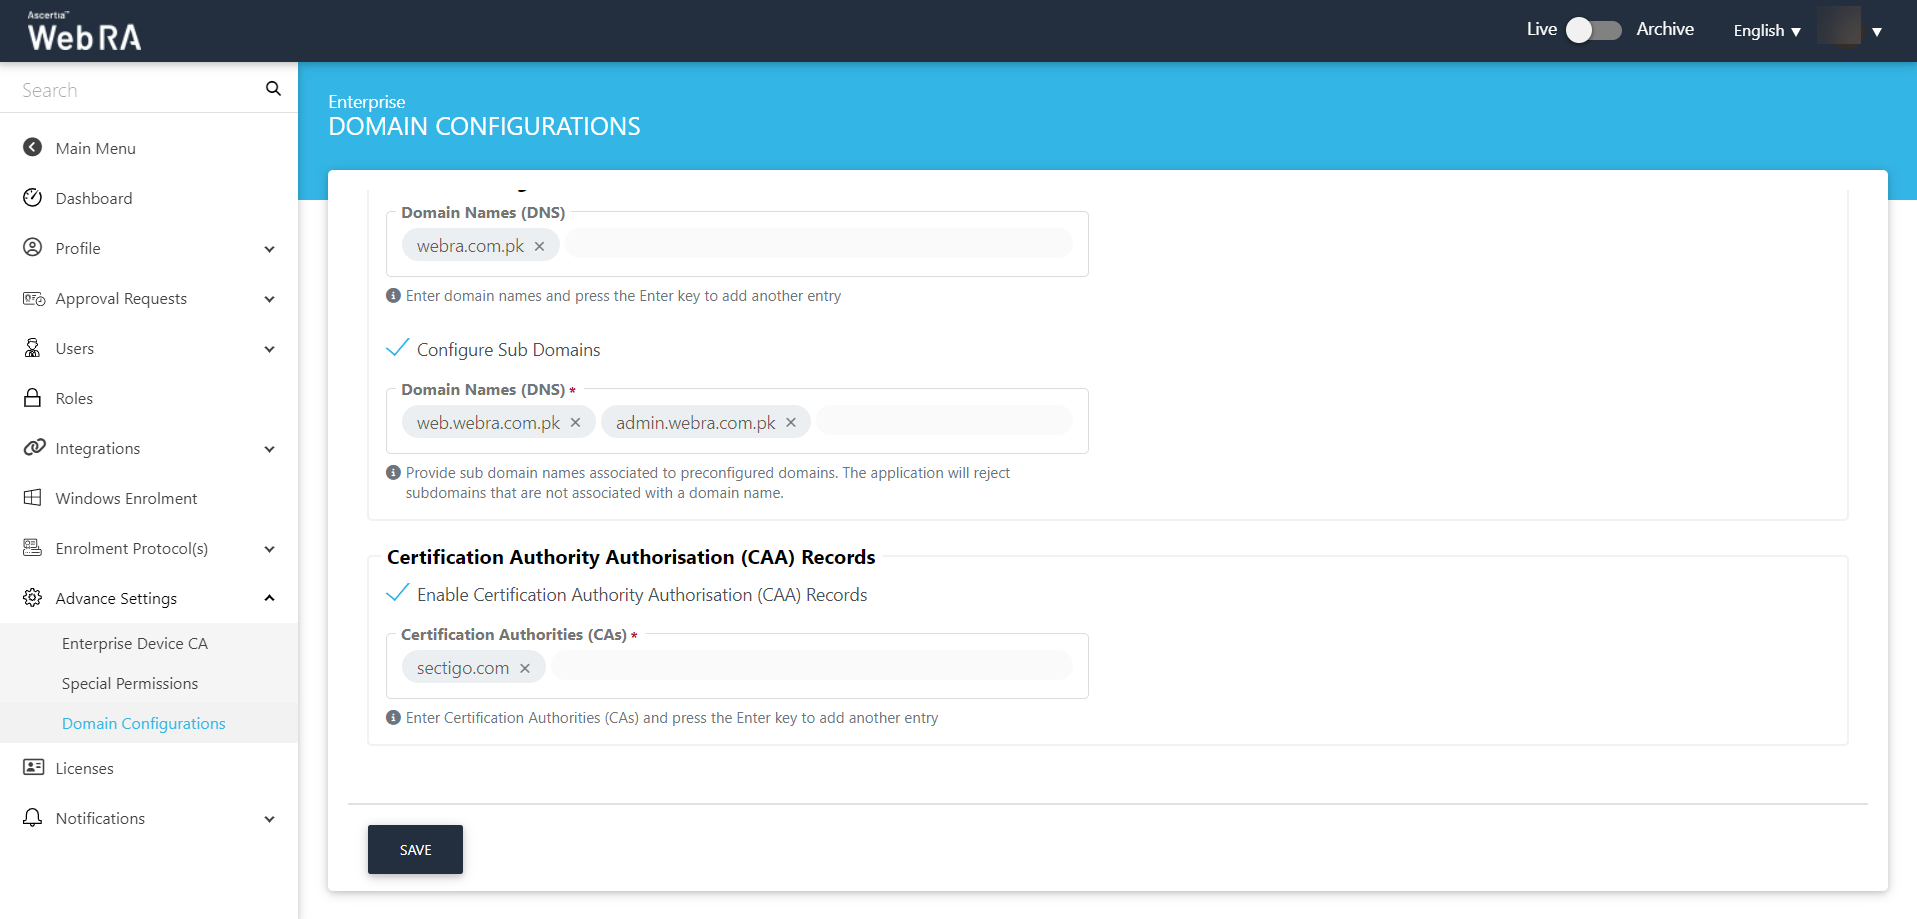
- Expand Advance Settings > Domain Configurations to configure Domain Names and Certification Authority Authorisation (CAA) Records.
|
|
An operator can configure Certification Authority Authorisation (CAA) records for TLS certificates only. |
Domain Configurations
- Domain Names (DNS)
Enter the domain name to configure it in your enterprise. Preconfigured domain names restrict enterprise users to generate certificates from these domains only.
Configure Sub Domains
- Domain Names (DNS)
Enter the domain name associated to the preconfigured domains. A domain name (DNS) can have multiple sub domains.
Certification Authority Authorisation (CAA) Records
- Enable Certification Authority Authorisation (CAA) Records
Select this check box to enable the CAA records, so you can configure the CAs below.
- Certification Authorities (CAs)
Enter the Certification Authorities (CAs) you configured in the DNS record at the first step in this section of the document.
If you configure a CAA record in this drop down and its entry also exists in the DNS record against the provided domain, then the application will confirm the CAA validation and generate a certificate.
Click Save.
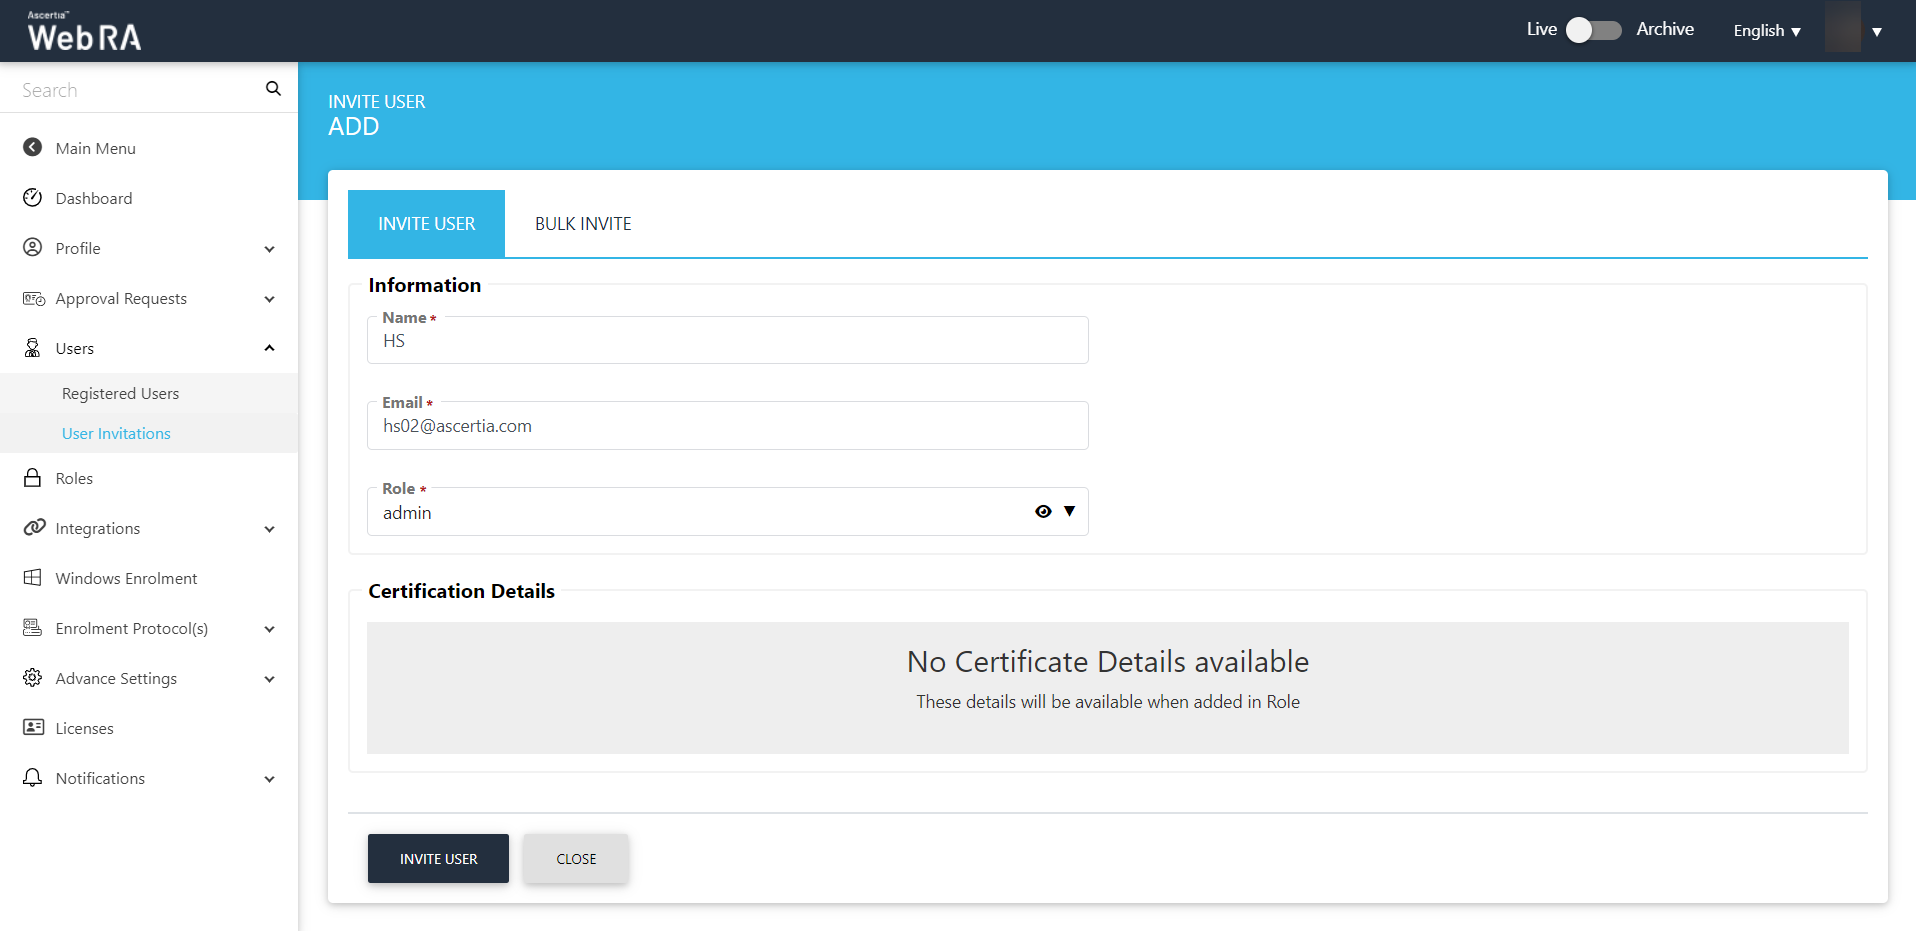
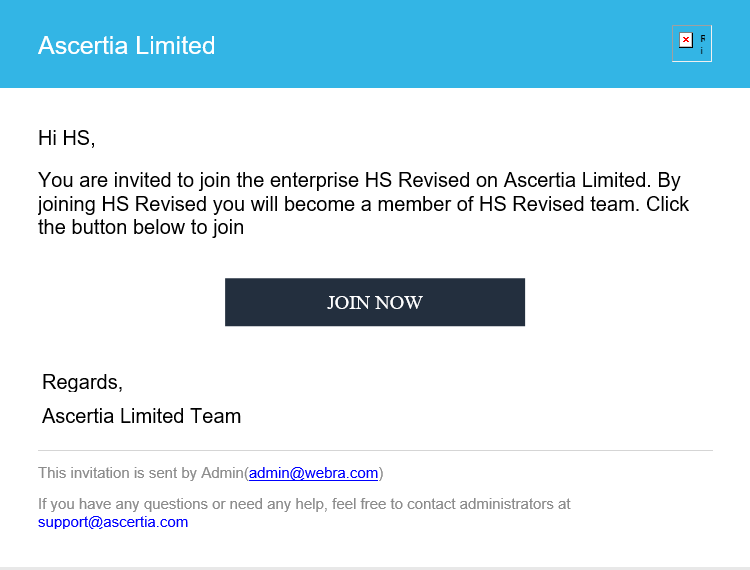
- Expand Users > User Invitations to invite a user to join an enterprise. Enter the following details:
- Name
Enter name of the user you want to invite to your enterprise.
Enter email address of the user you want to send an email to invite to your enterprise.
- Role
Select the role you would like to assign to this role from the drop down.
Click Invite User.
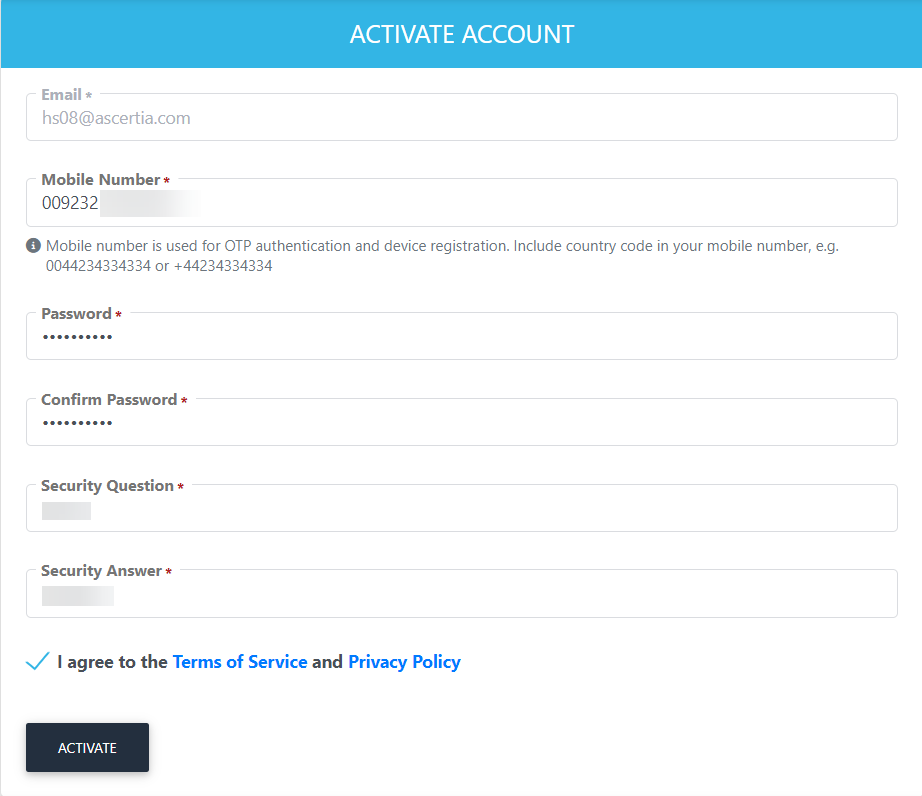
- An email will be sent to the user's email address that you configured in the previous step. Access the email and click Join Now.
- You will be directed to the account activation screen.
Enter the following details:
Email of the user to register on the Web portal.
- Mobile Number
Mobile number of the user.
- Password
Set a password for the login email.
- Confirm Password
Confirm password for the login email.
- Security Question
Set a security question for password recovery
- Security Answer
Set a security answer for password recovery
- Select I agree to the Terms of Service and Privacy Policy.
Click Activate.
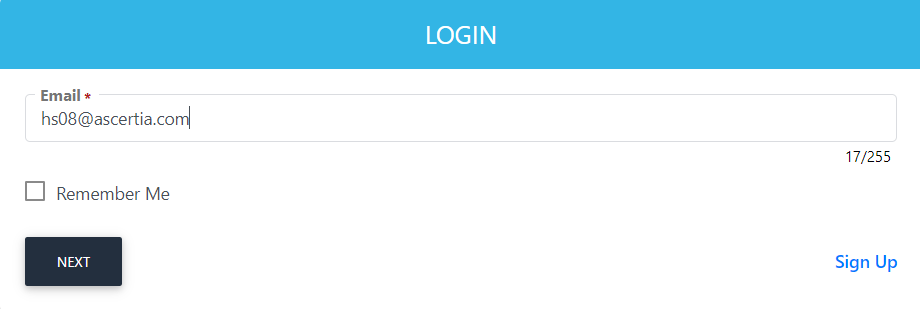
- The user will now be directed to the Login screen, enter the user email and click Next.
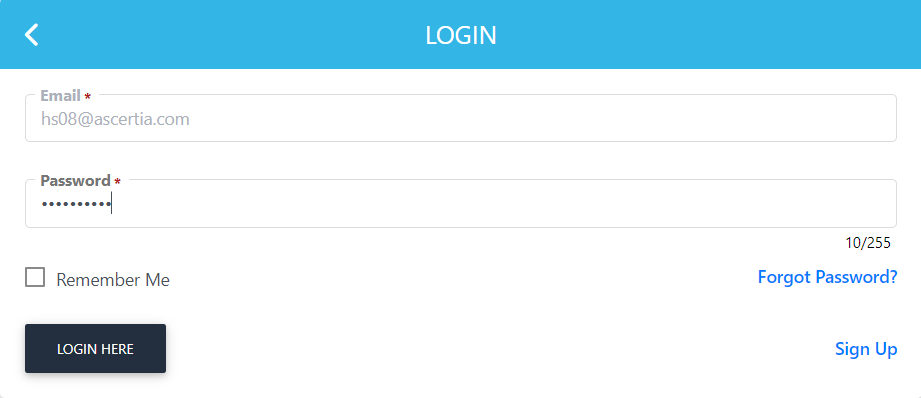
- Enter the password and click Login Here.
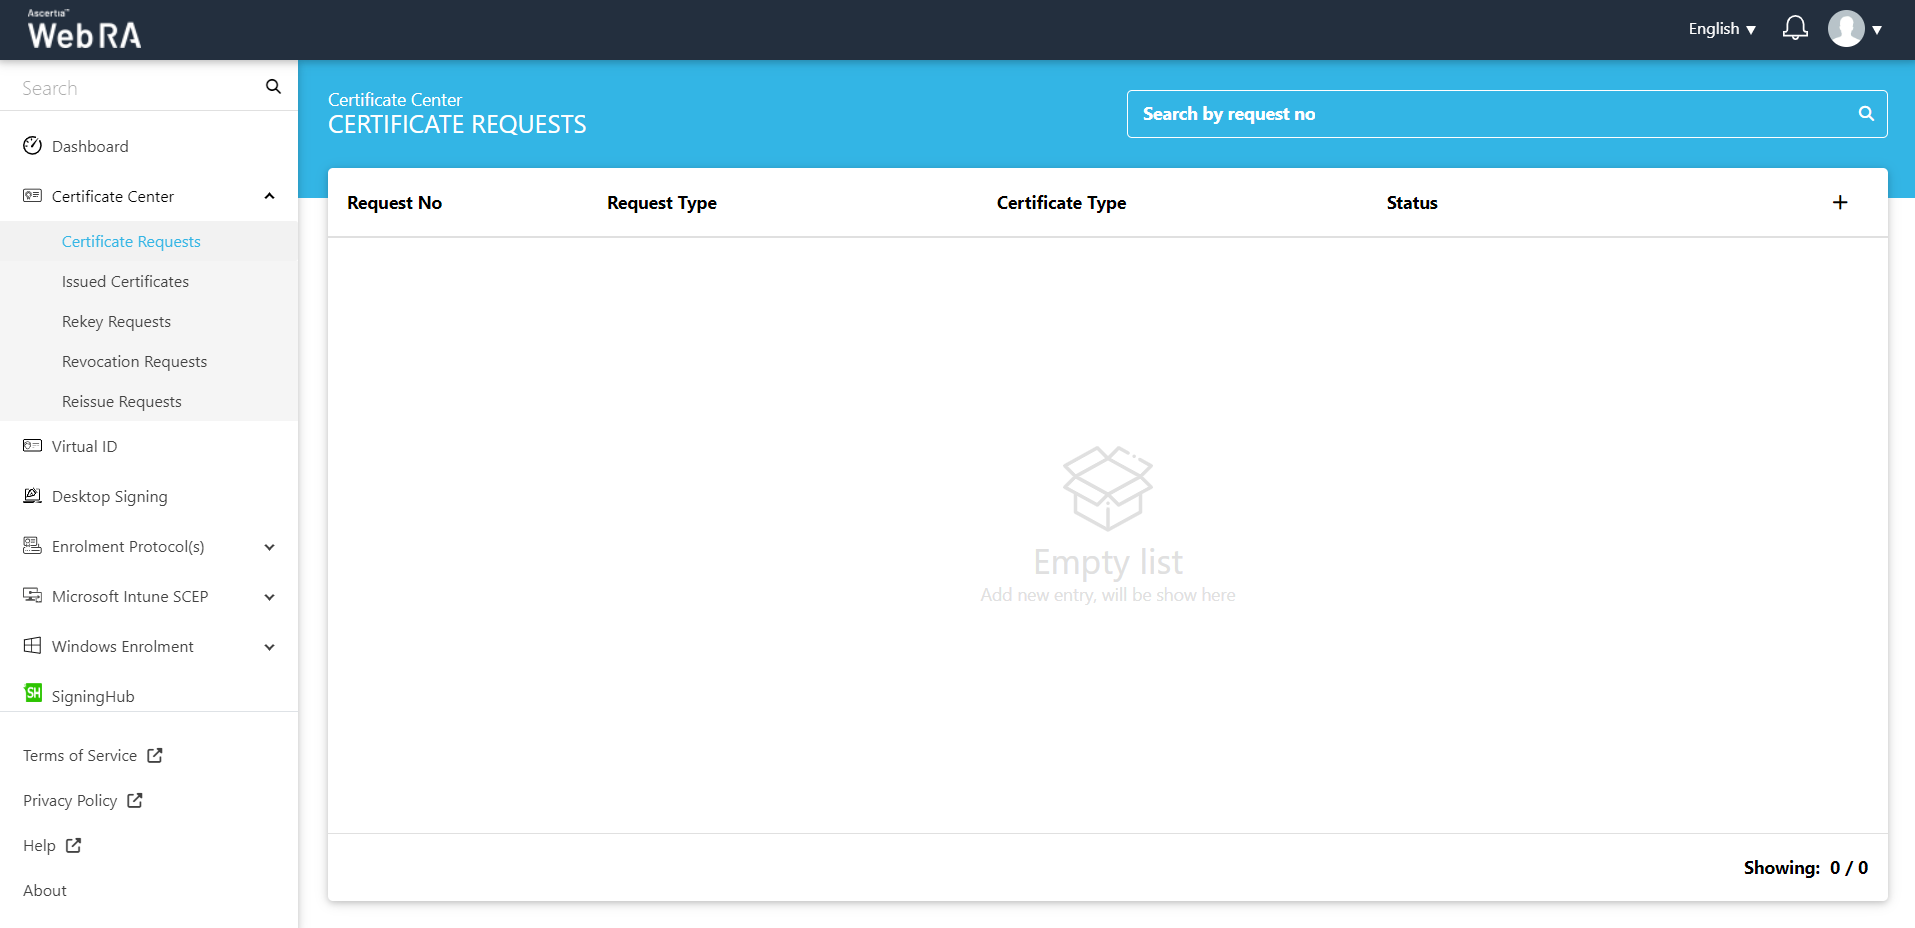
Create a Certificate Request for TLS server authentication with verification type as none (CAA Records)
- The ADSS Web RA web Dashboard will appear. Expand Certificate Center > Certificate Requests. Then click
 to create a new certificate request.
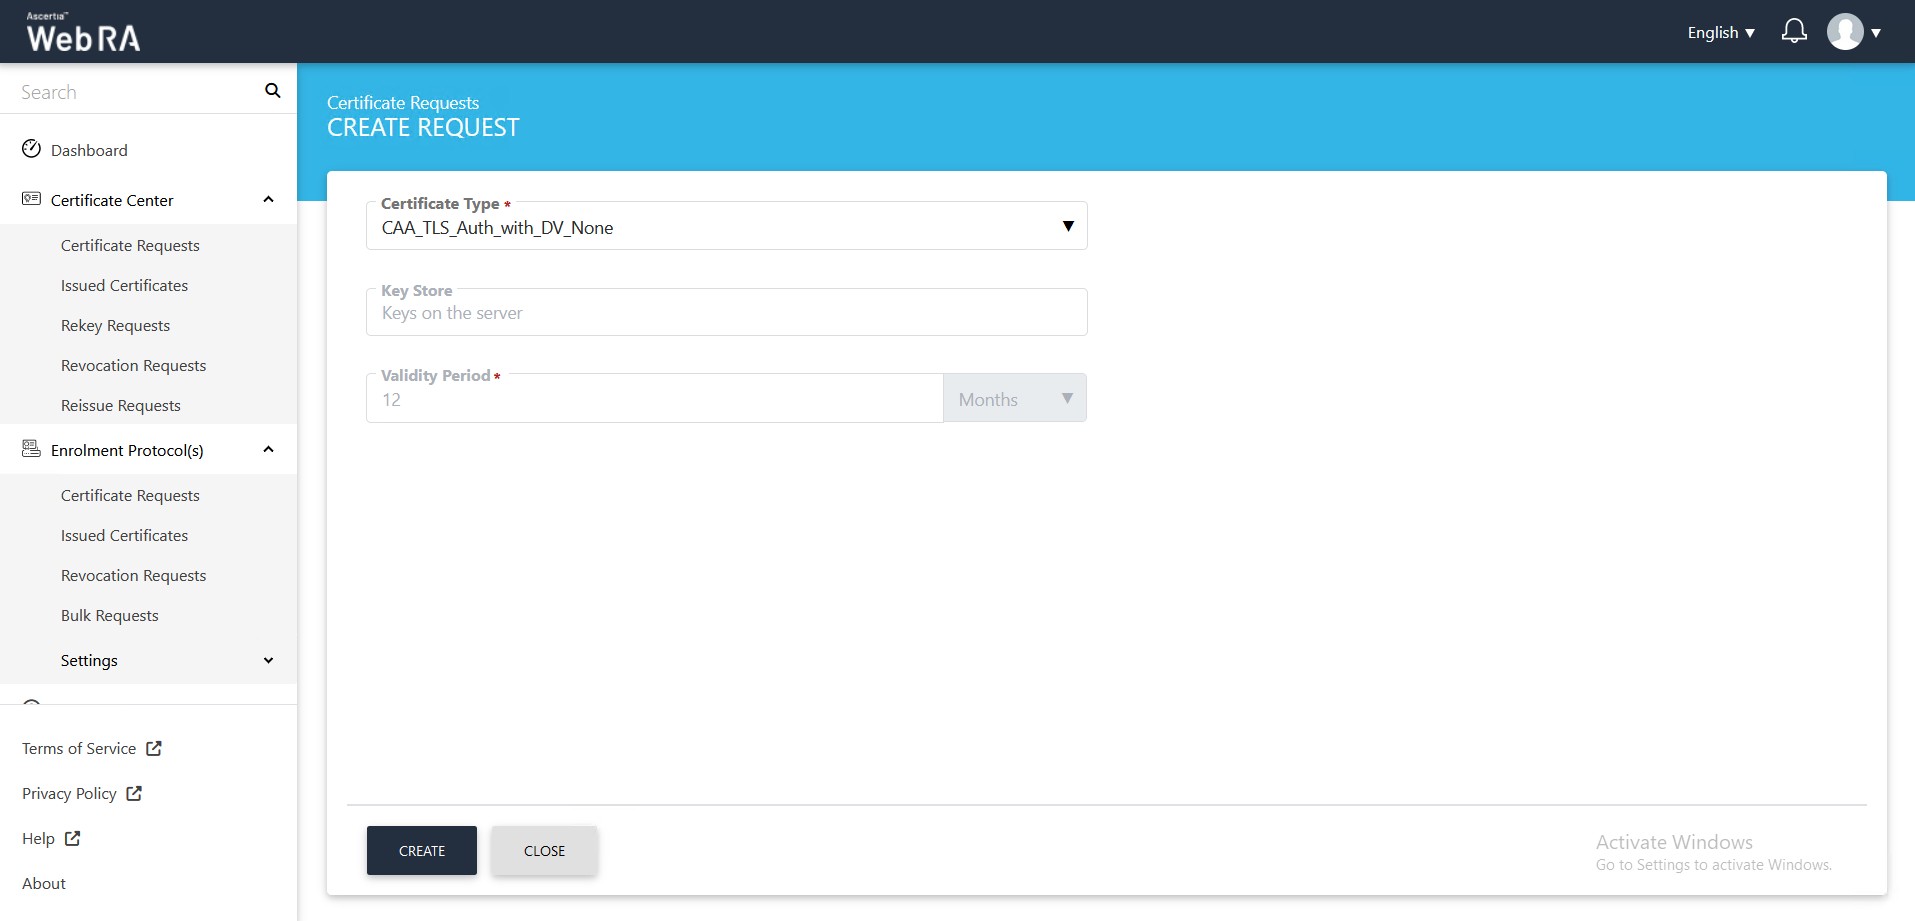
- After selecting the Certificate Type from the drop down, click Create.
- Click next, the Subject Distinguished Name (SDN) screen will appear.
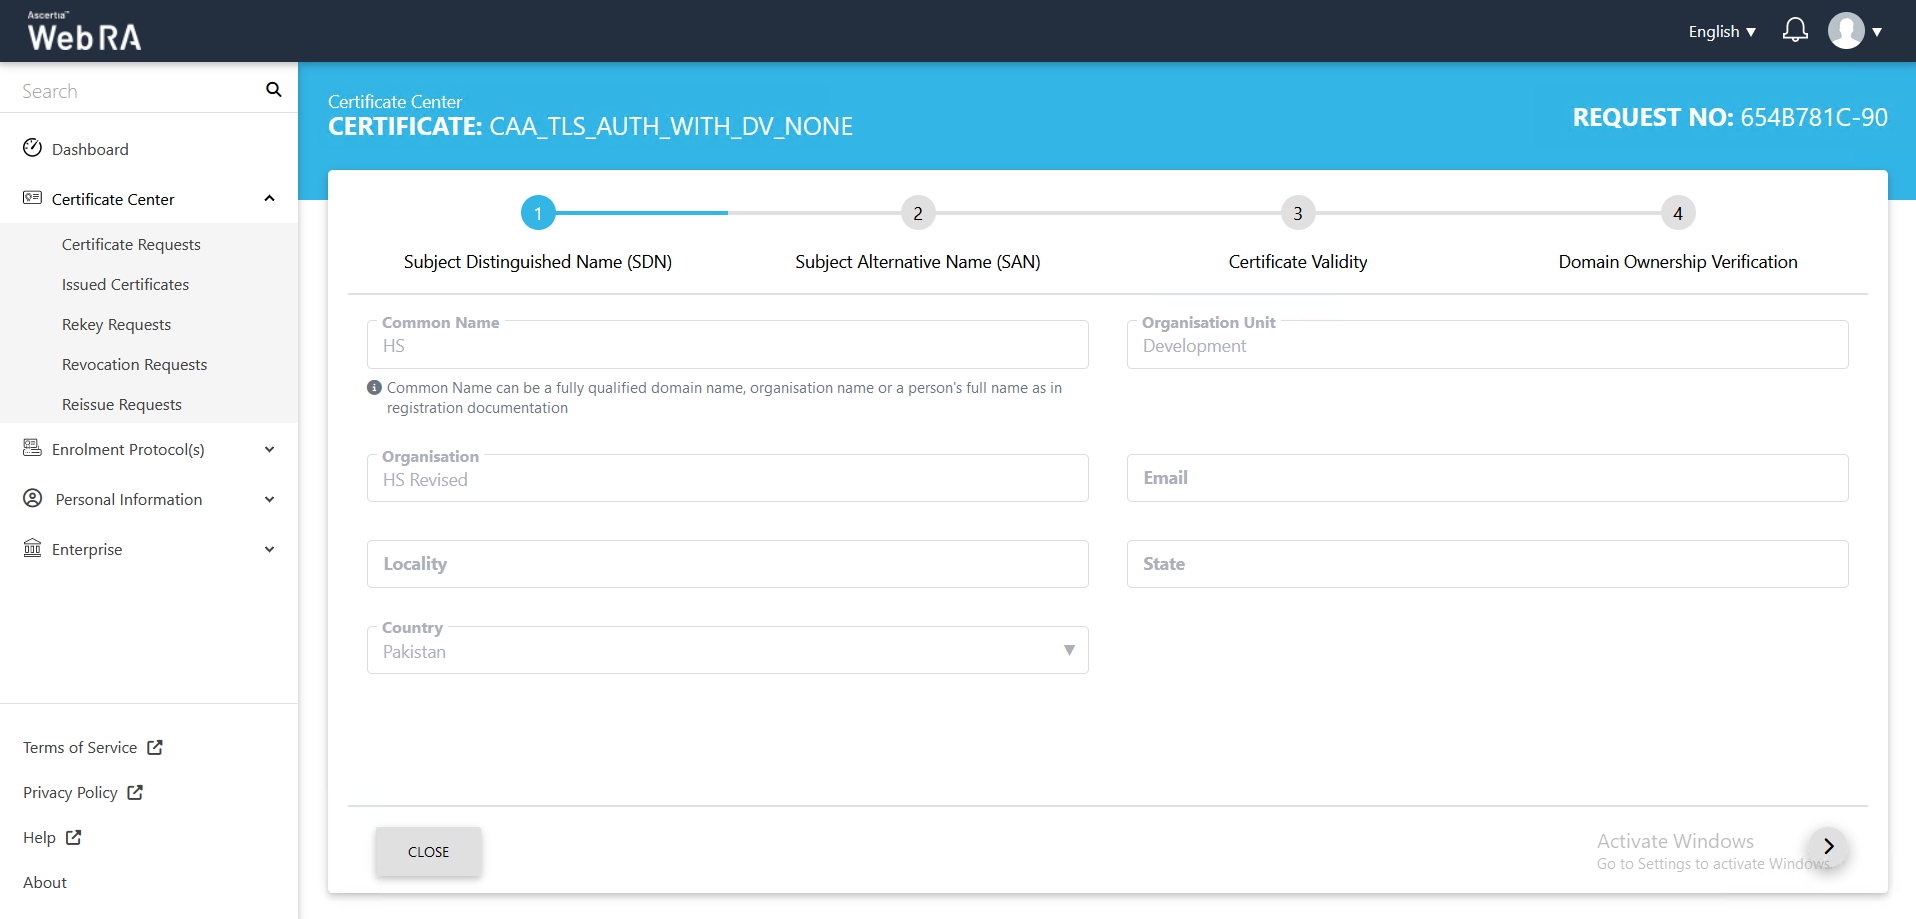
- Common Name
Enter a common name of a person or an organisation.
Enter an email address.
- Locality
Enter local area name.
- State
Enter the state.
- Country
Select a country from the drop down.
Click >.

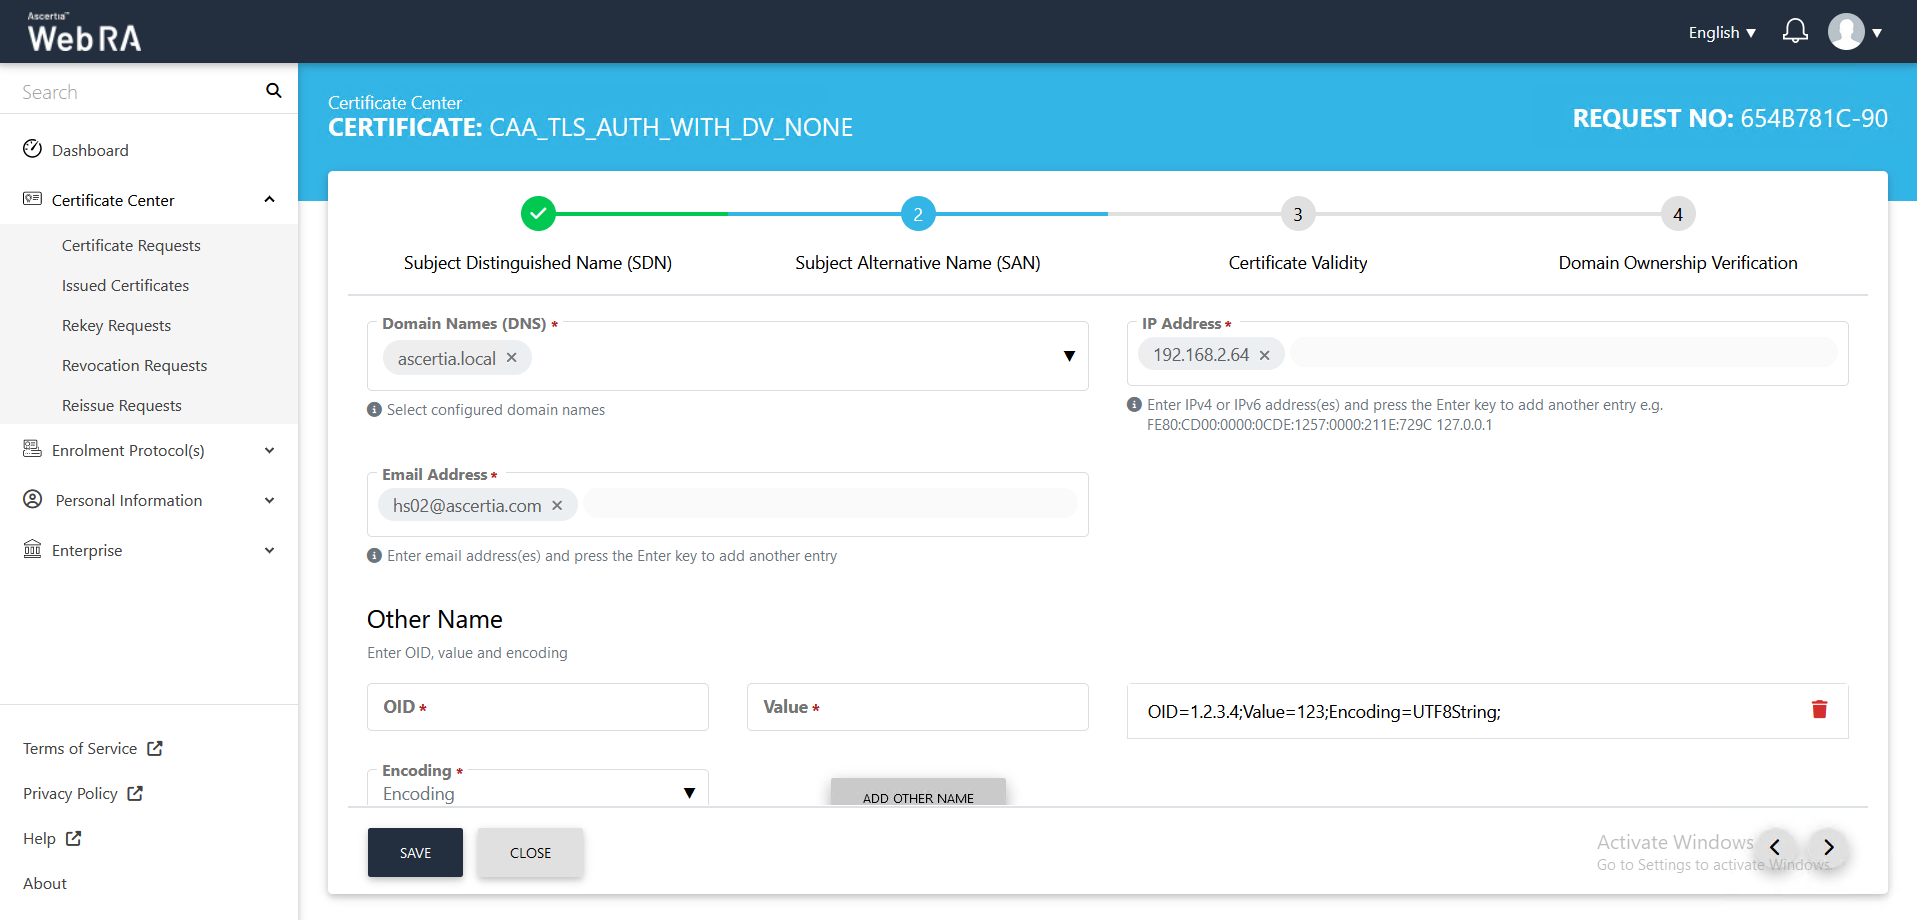
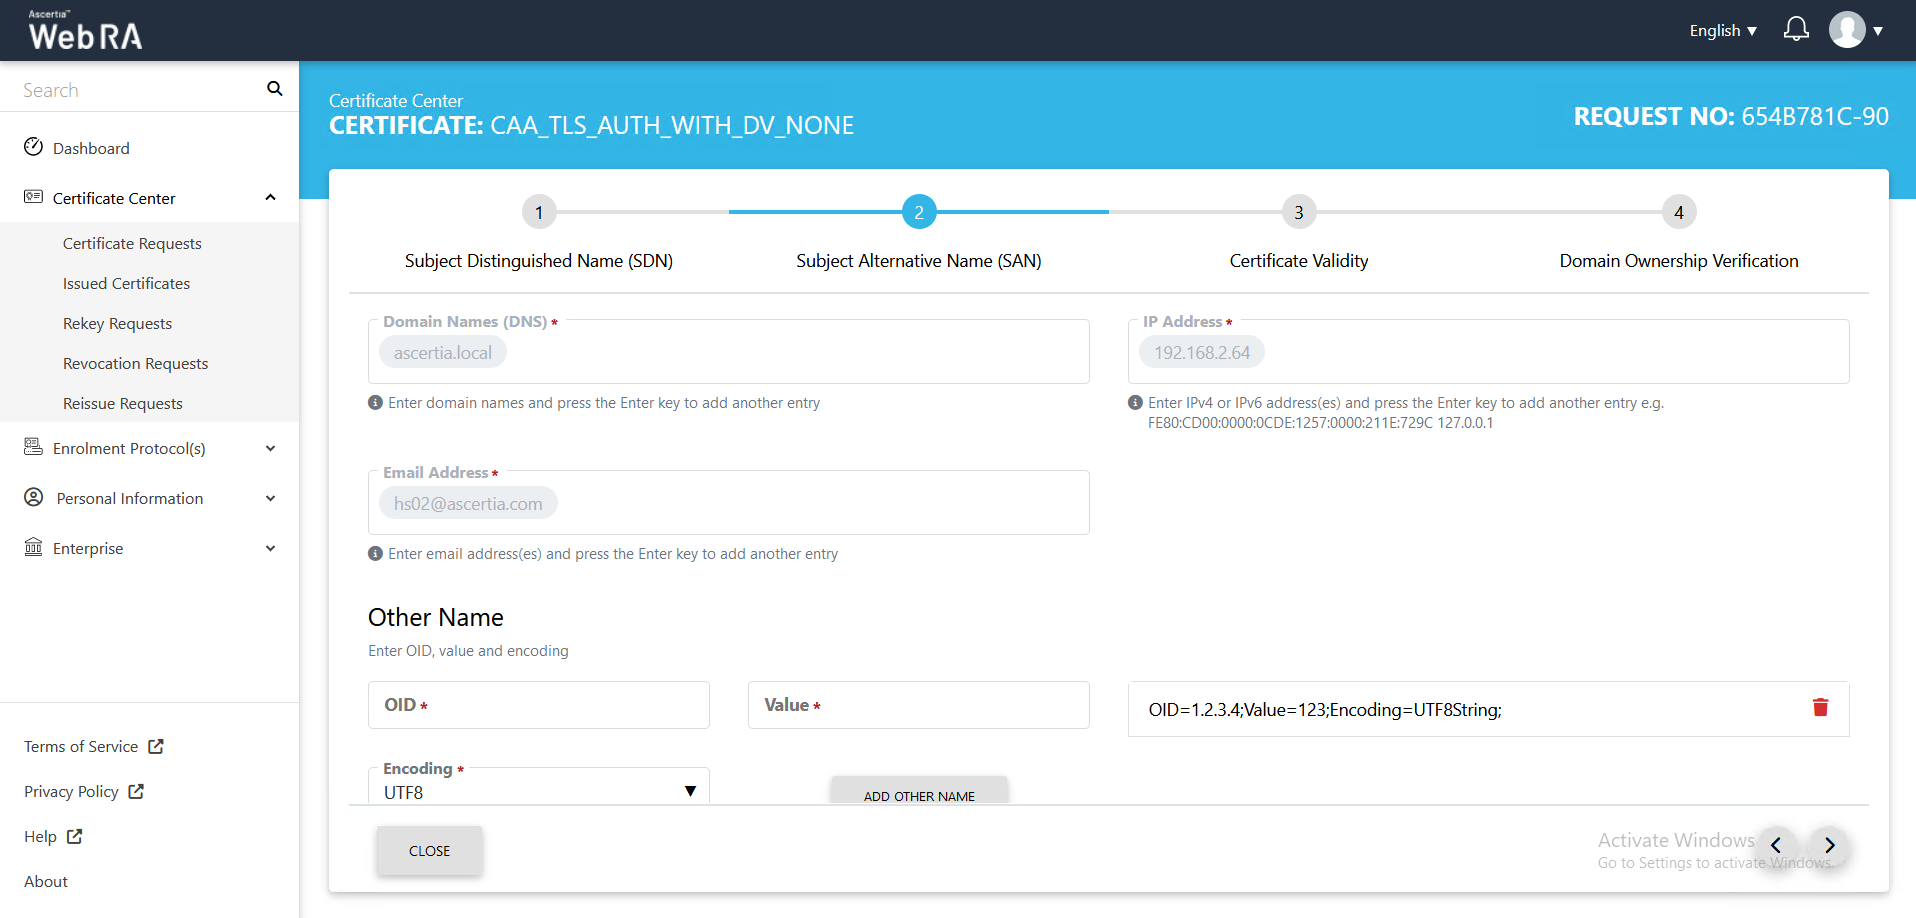
- The Subject Alternative Name (SAN) screen will appear. Enter the following details:
Domain Names (DNS).
Select the domain names (DNS) from the drop down.
IP Address
Enter an IP address.
Email Address
Enter an email address.
Other name
OID
Enter the OID.
Value
Enter a value and click Add Other Name.
Then click >.
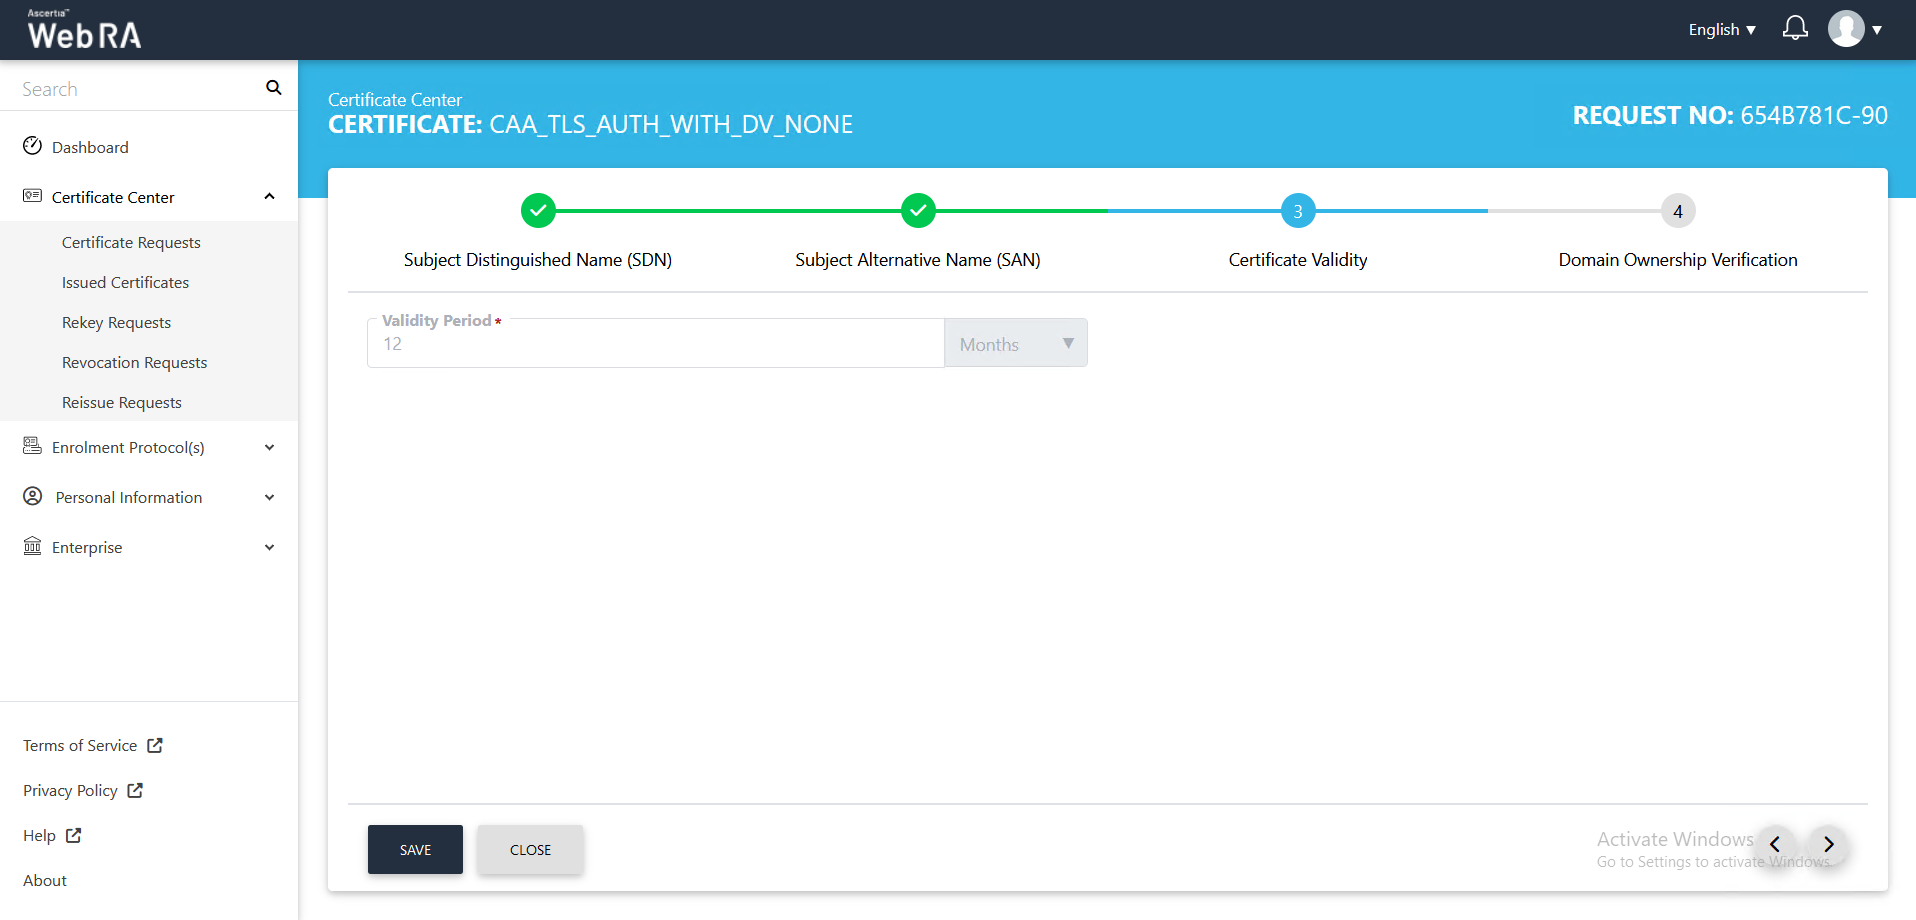
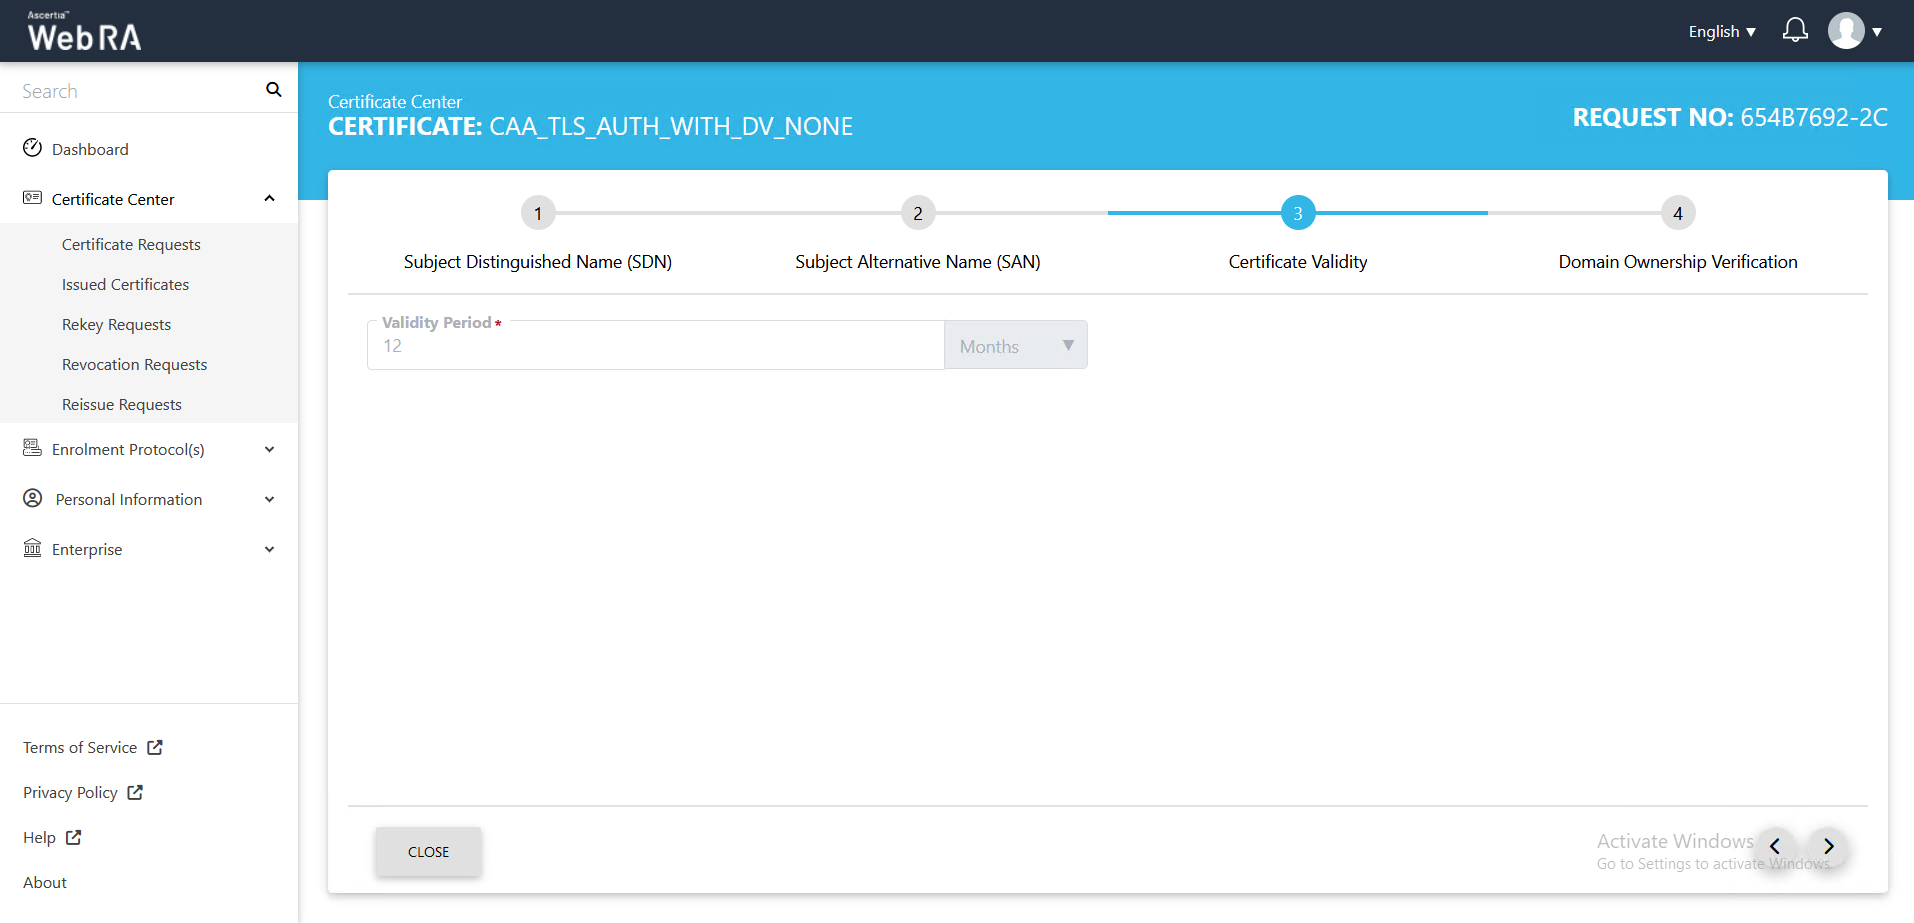
- The Certificate Validity screen will appear.
The validity period will be displayed in a disabled form. Click >.
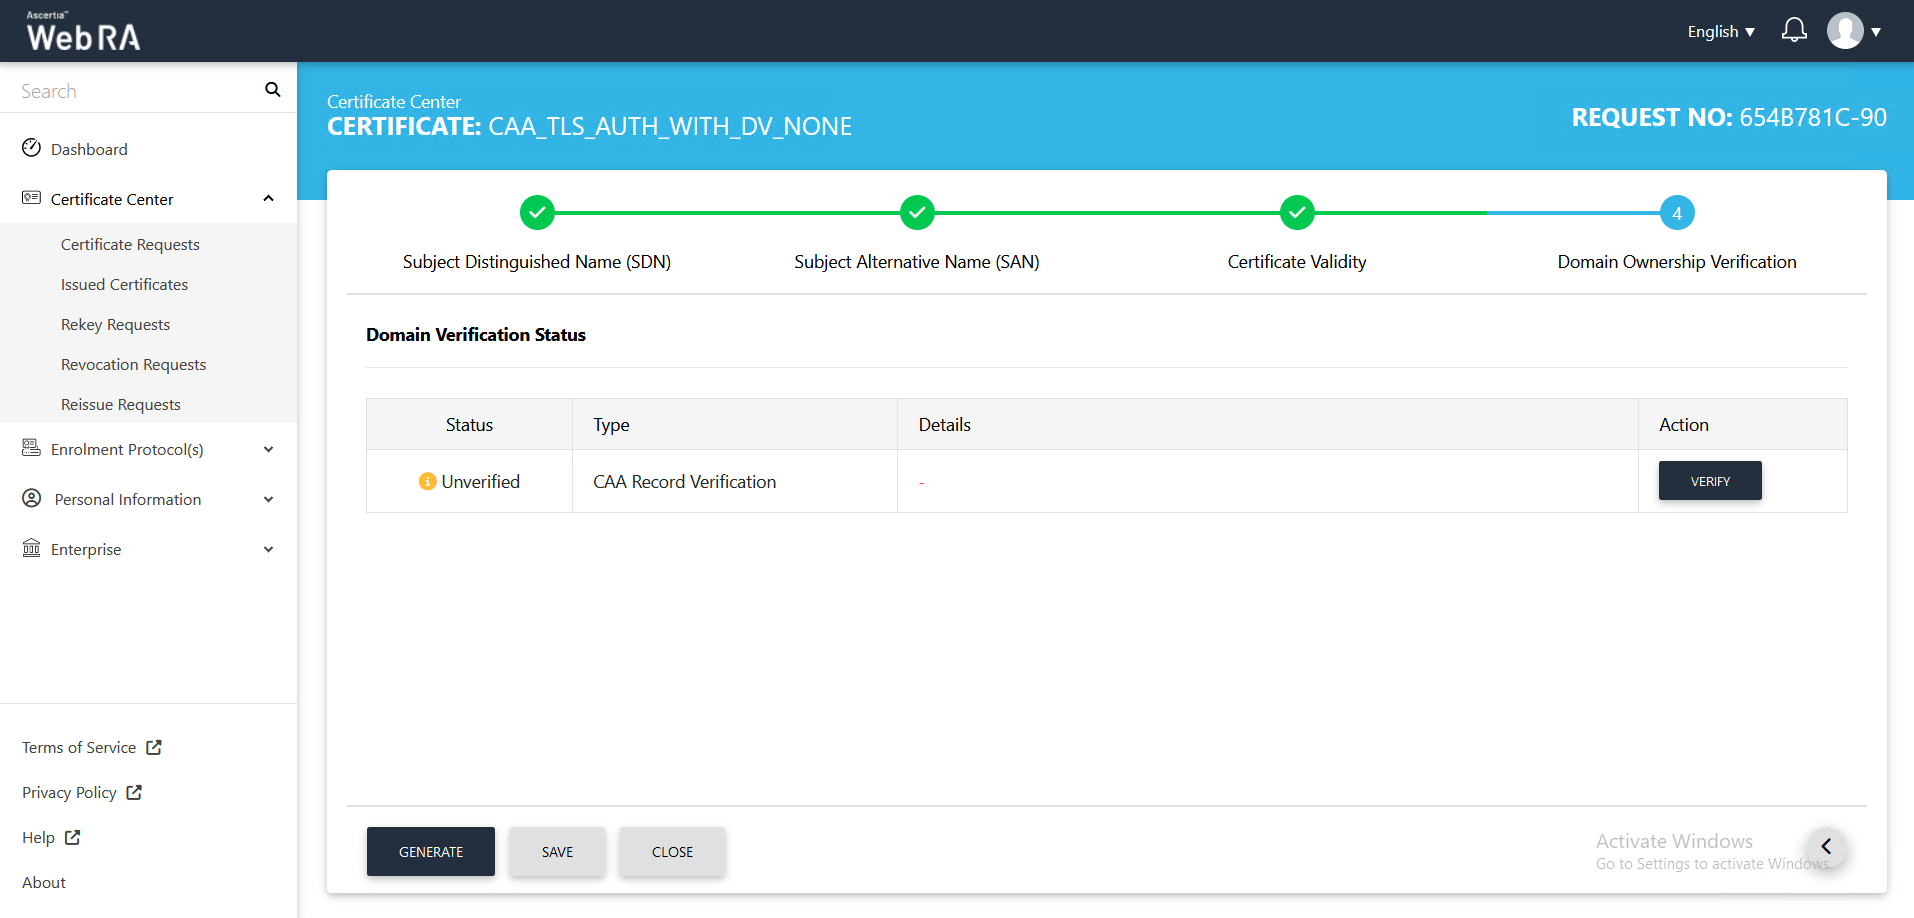
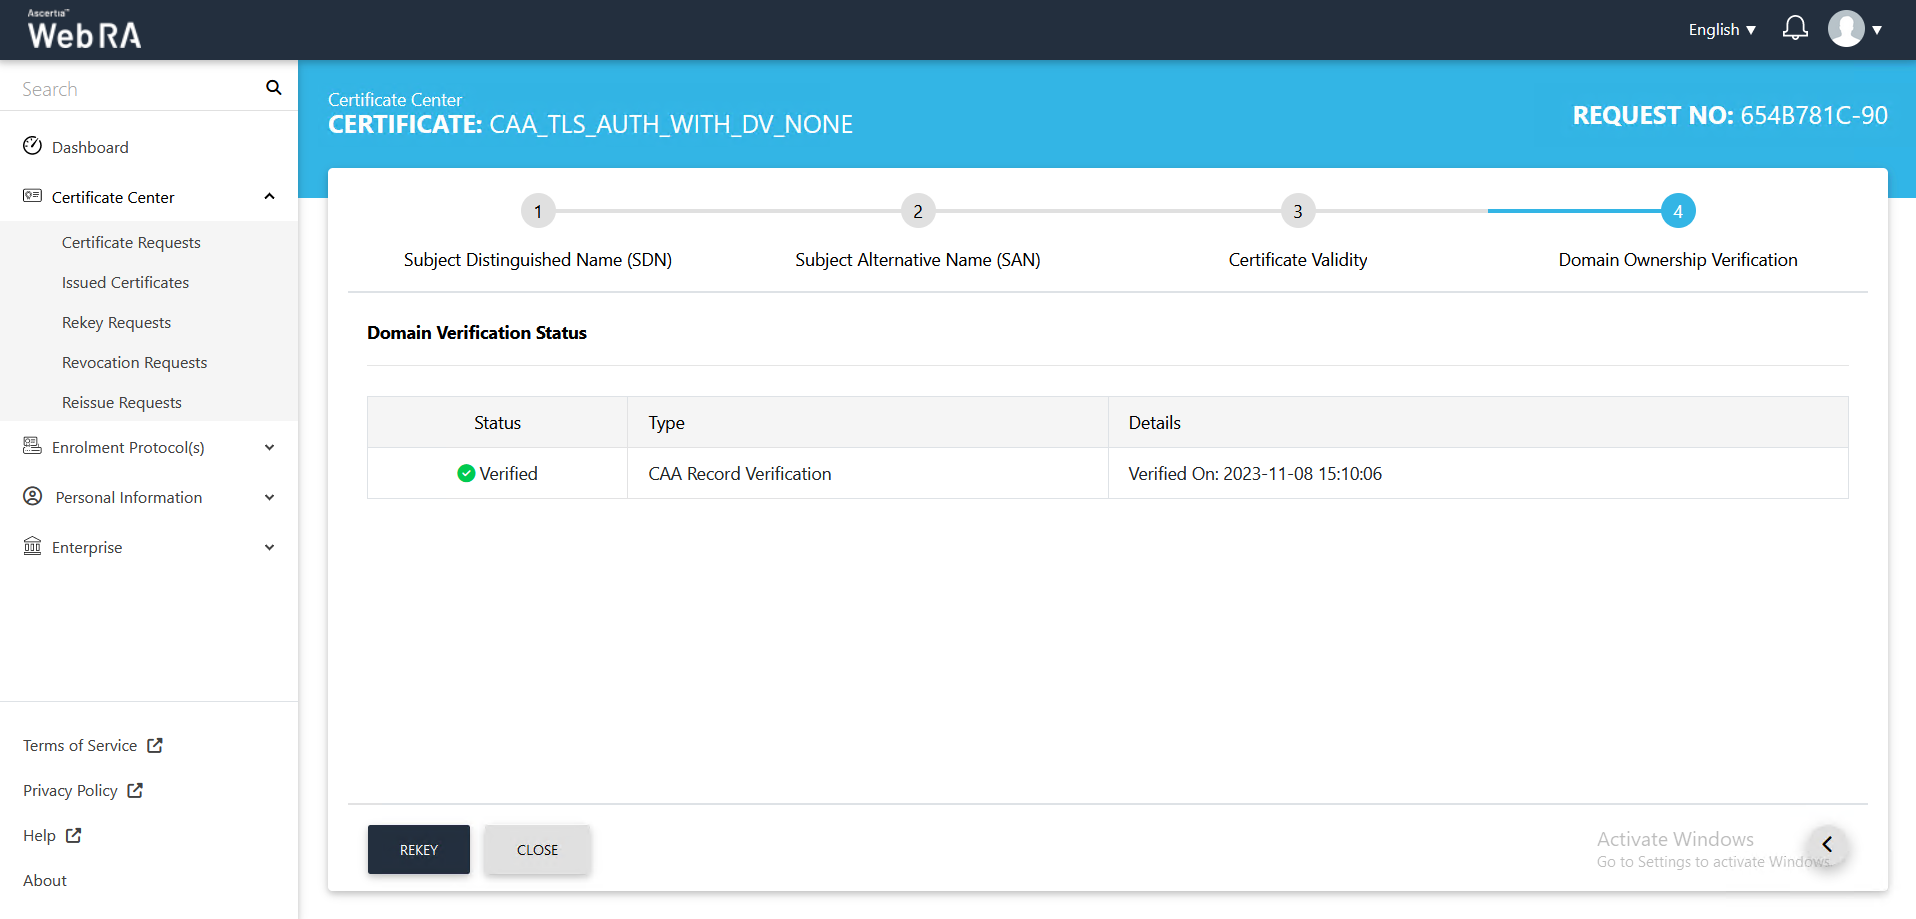
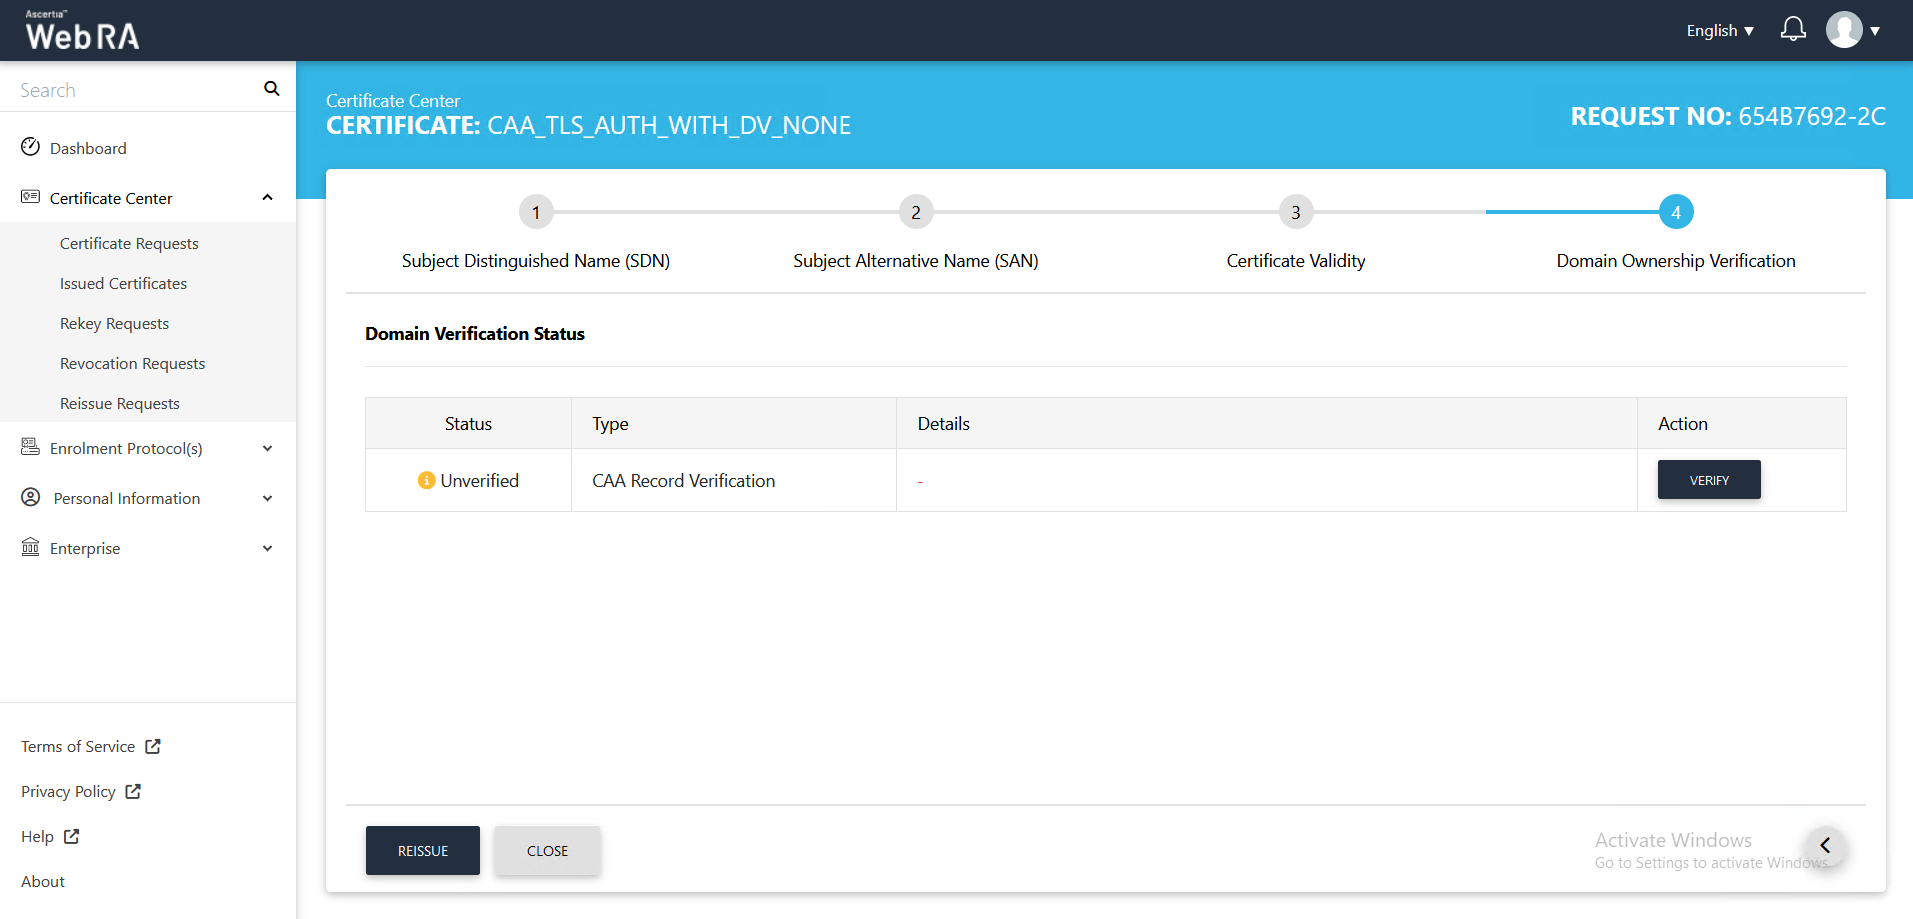
- The Domain Ownership Verification screen will appear.
The Domain Verification Status will appear Unverified. Click Verify to proceed.
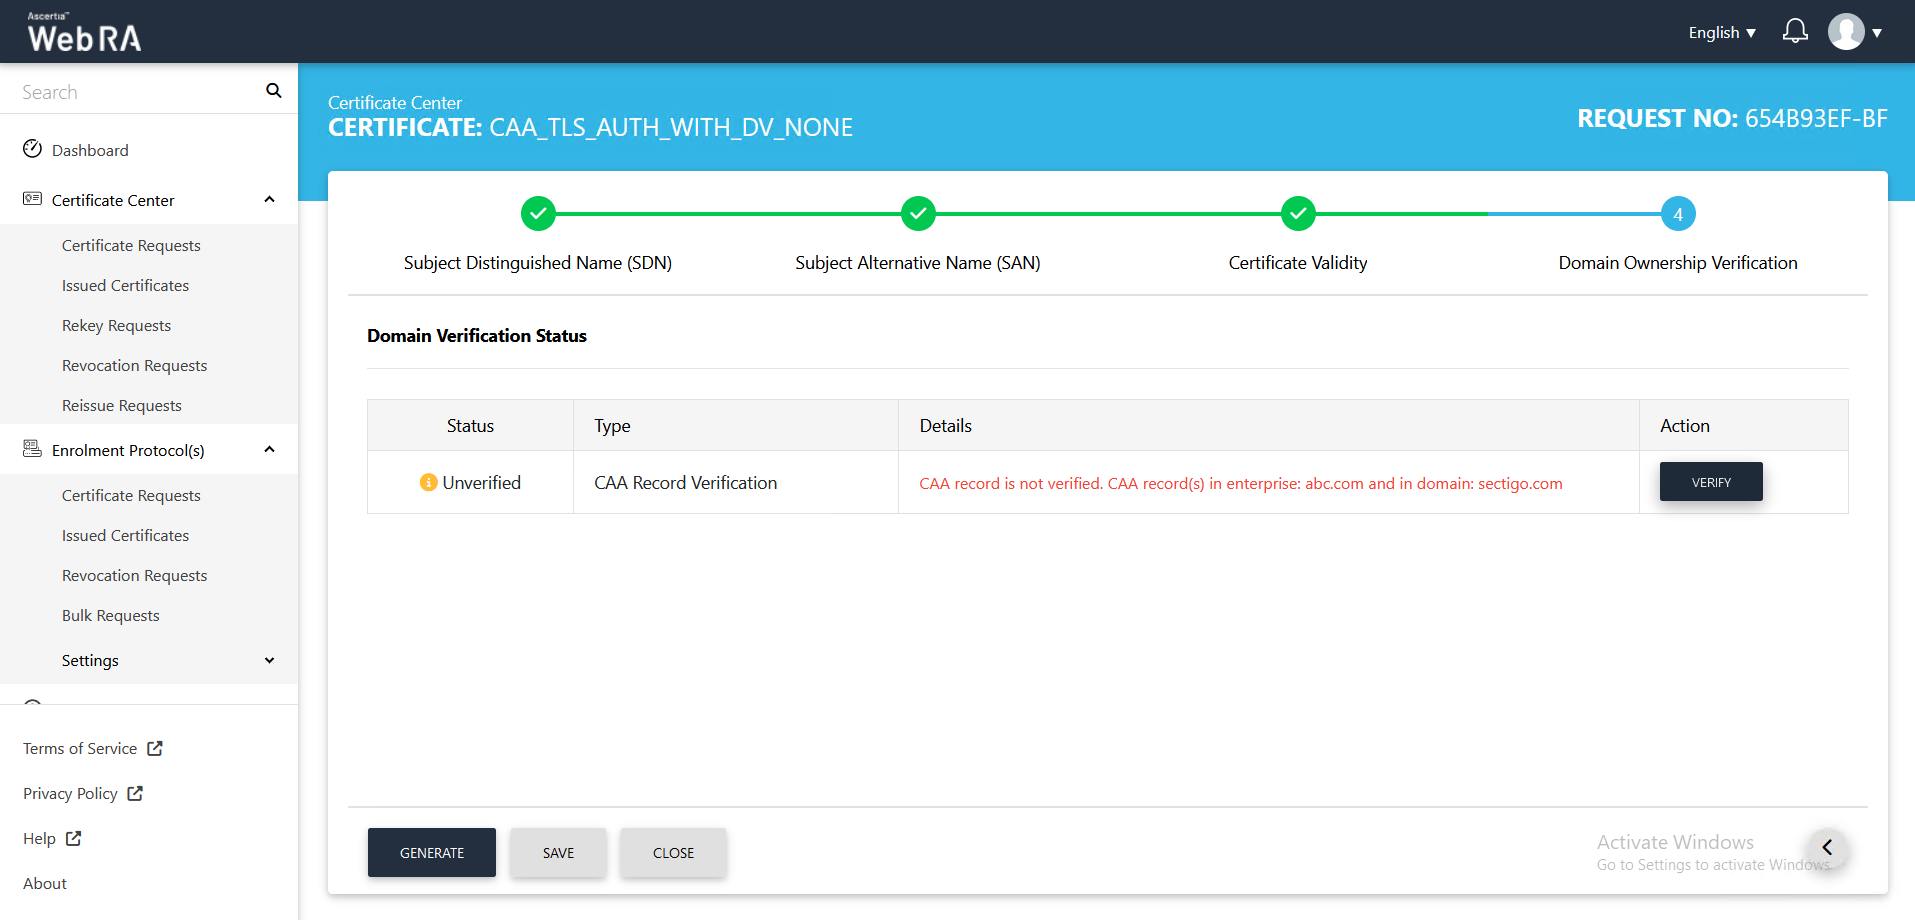
- If the CAA records you configured in the Enterprise Domain configurations matches the CA record you entered in the DNS entry, the Domain Verification Status will appear Verified, as displayed below:

If the CAA records you configured in the Enterprise Domain configurations does not match the CA record you entered in the DNS entry, the Domain Verification Status will appear Unverified, as displayed below
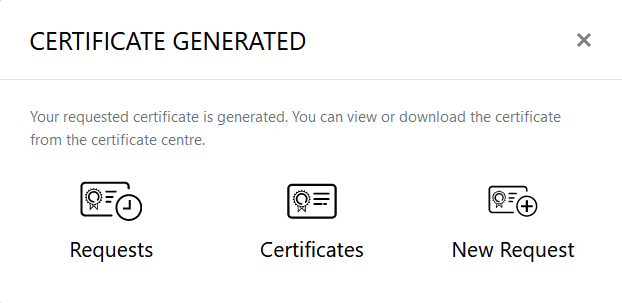
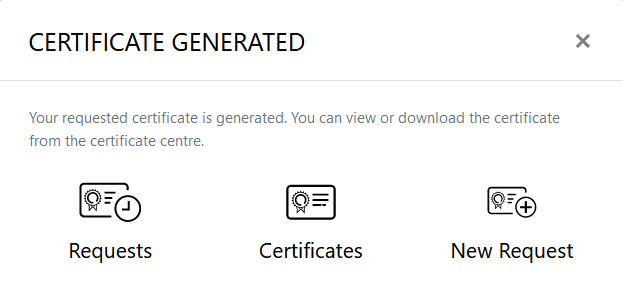
- In case of Verified, click Generate to process a certificate.
The Certificate Generated confirmation message will appear, as displayed below:

Rekeying a certificate generates a new key and certificate with the same name and expiration date as an existing certificate. Rekeying is used if an existing key is lost or compromised.
As a pre-requisite, the rekey certificate option should be enabled in the Policy section from the admin portal.
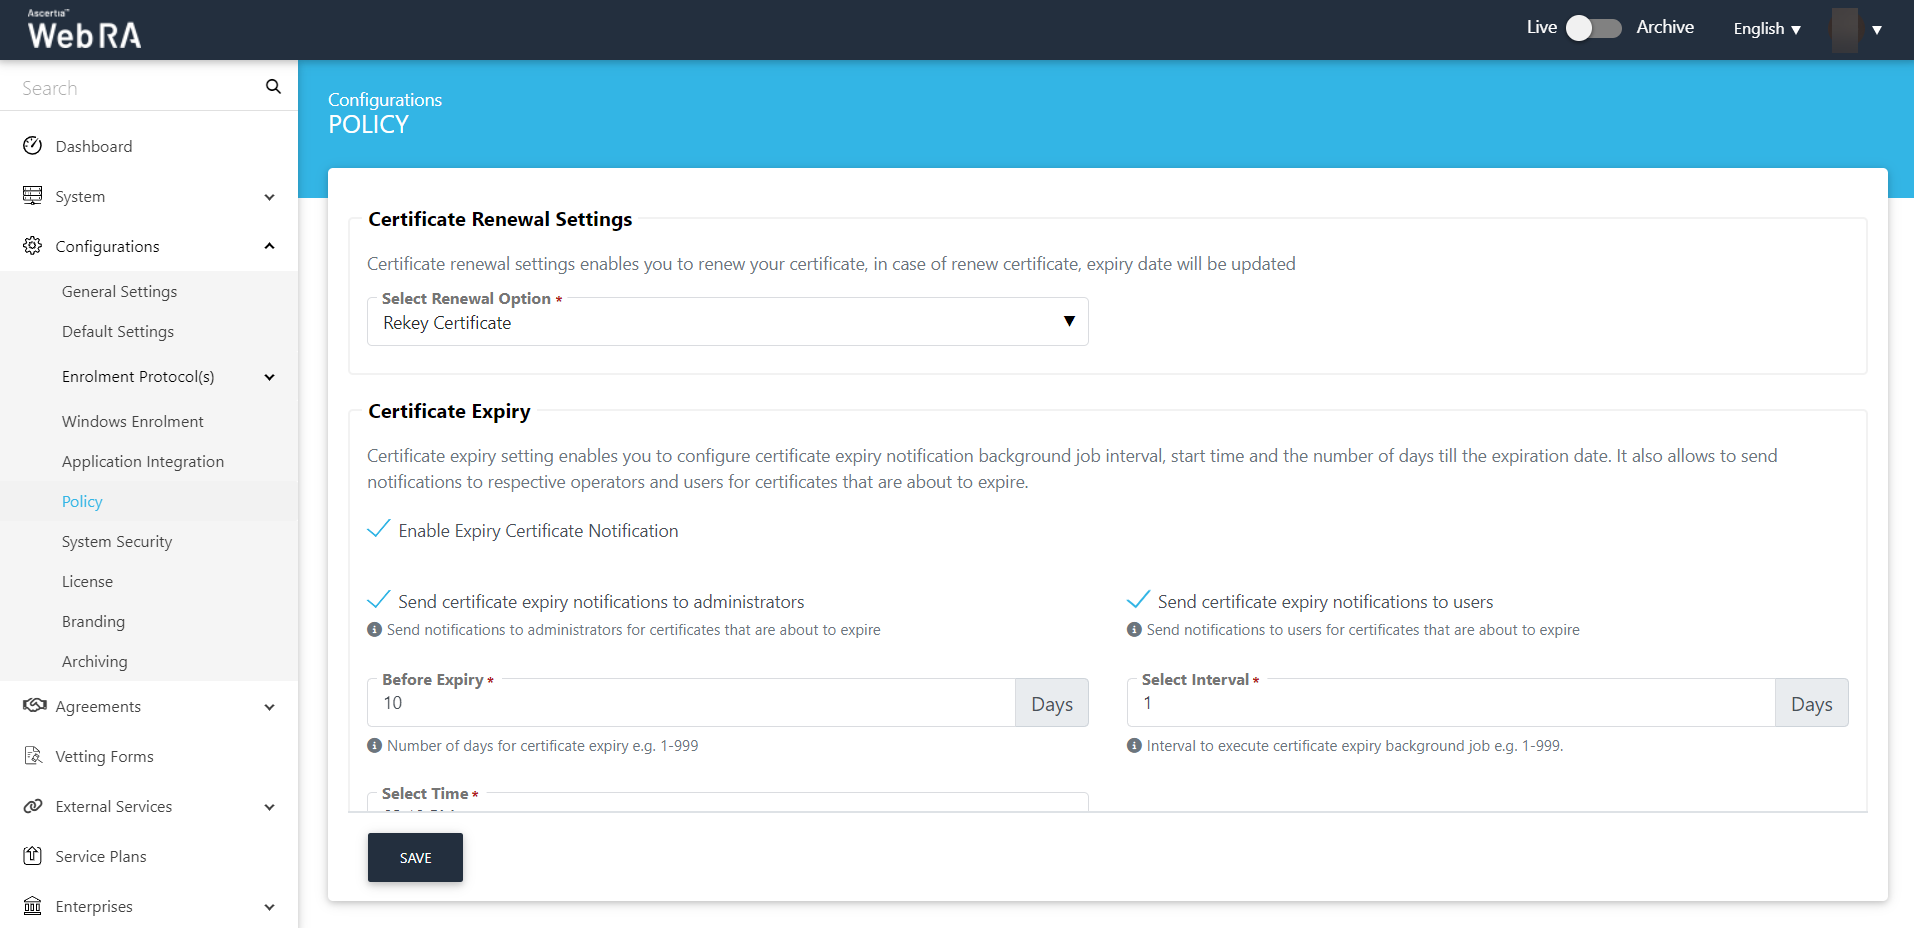
- At the ADSS Web RA admin portal, expand Configurations > click Policy.
- From the certificate Renewal Settings drop down, select Rekey Certificate and click Save to save the configurations.
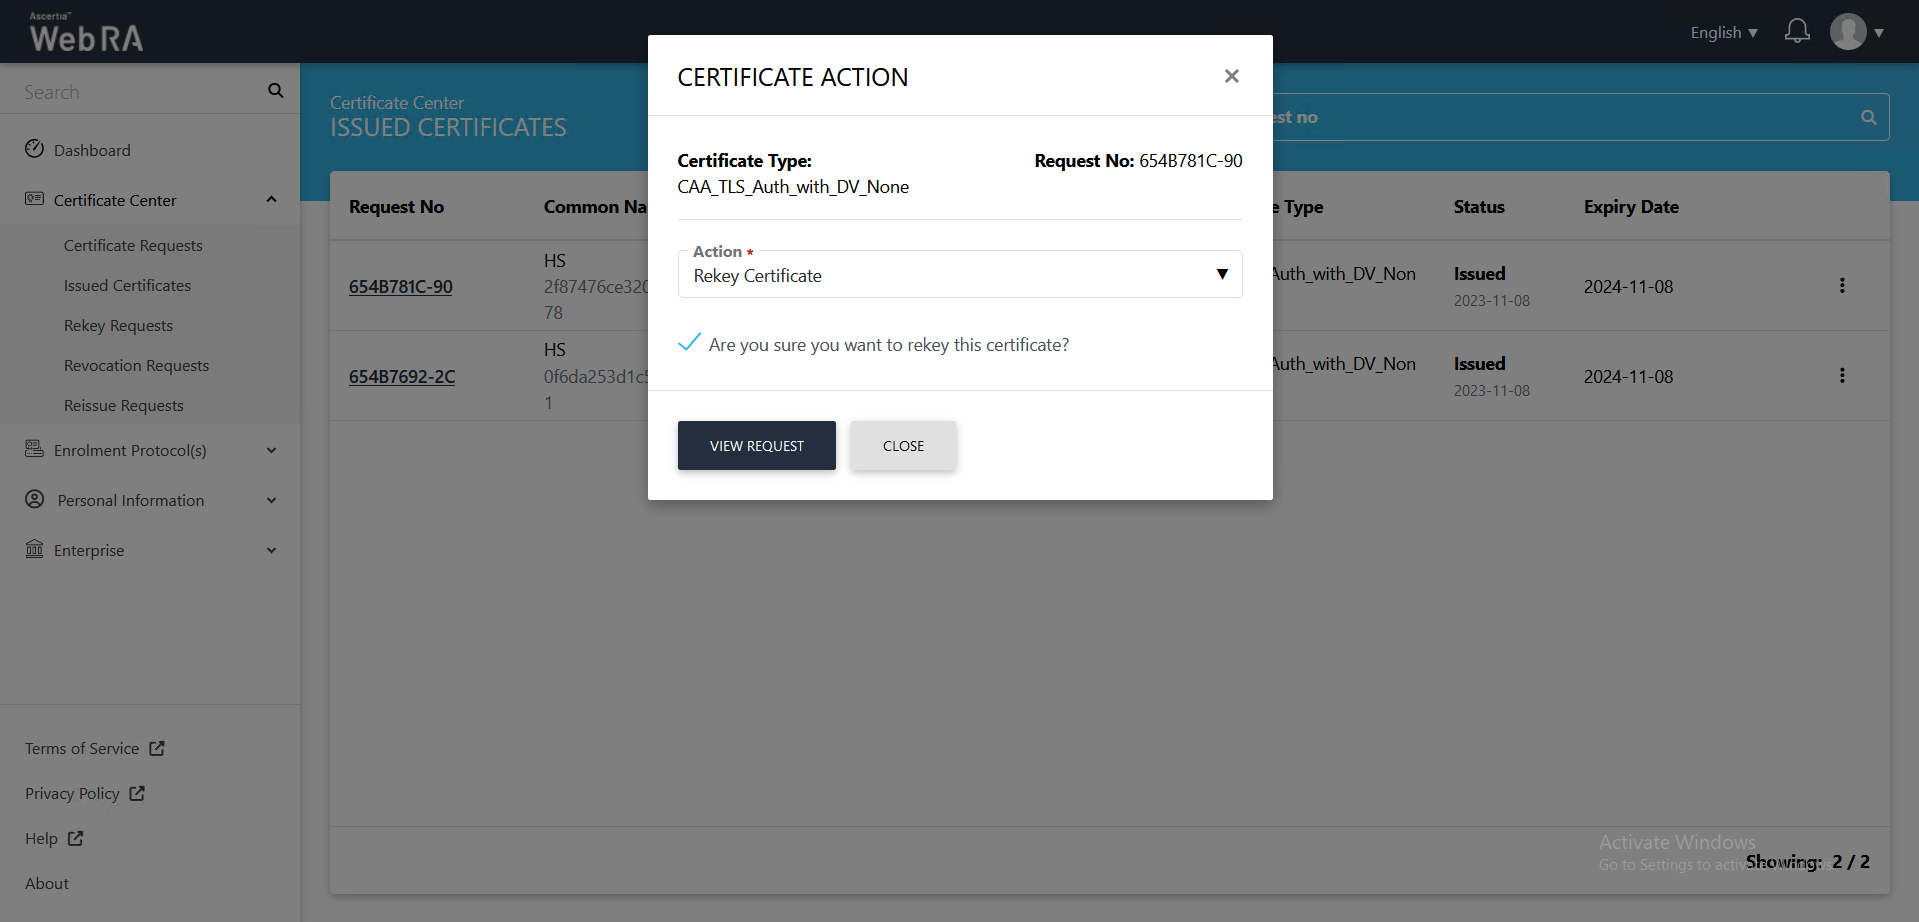
To rekey, return to the ADSS Web RA web portal and perform the following steps:
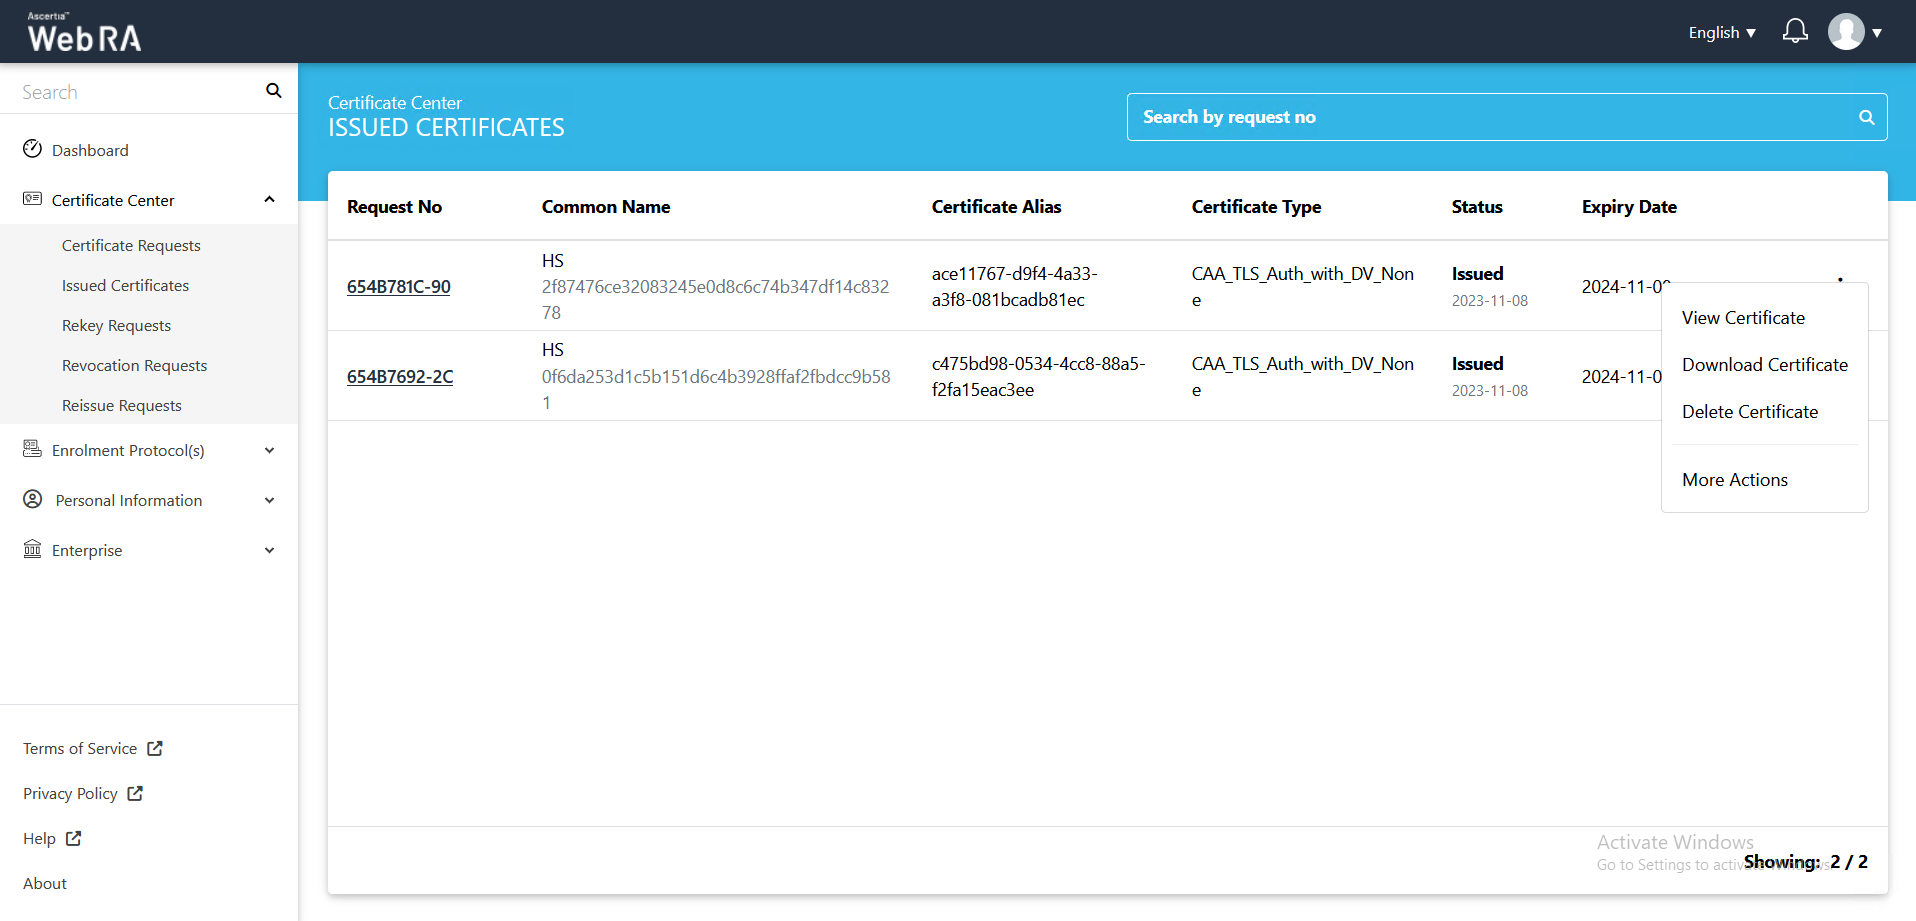
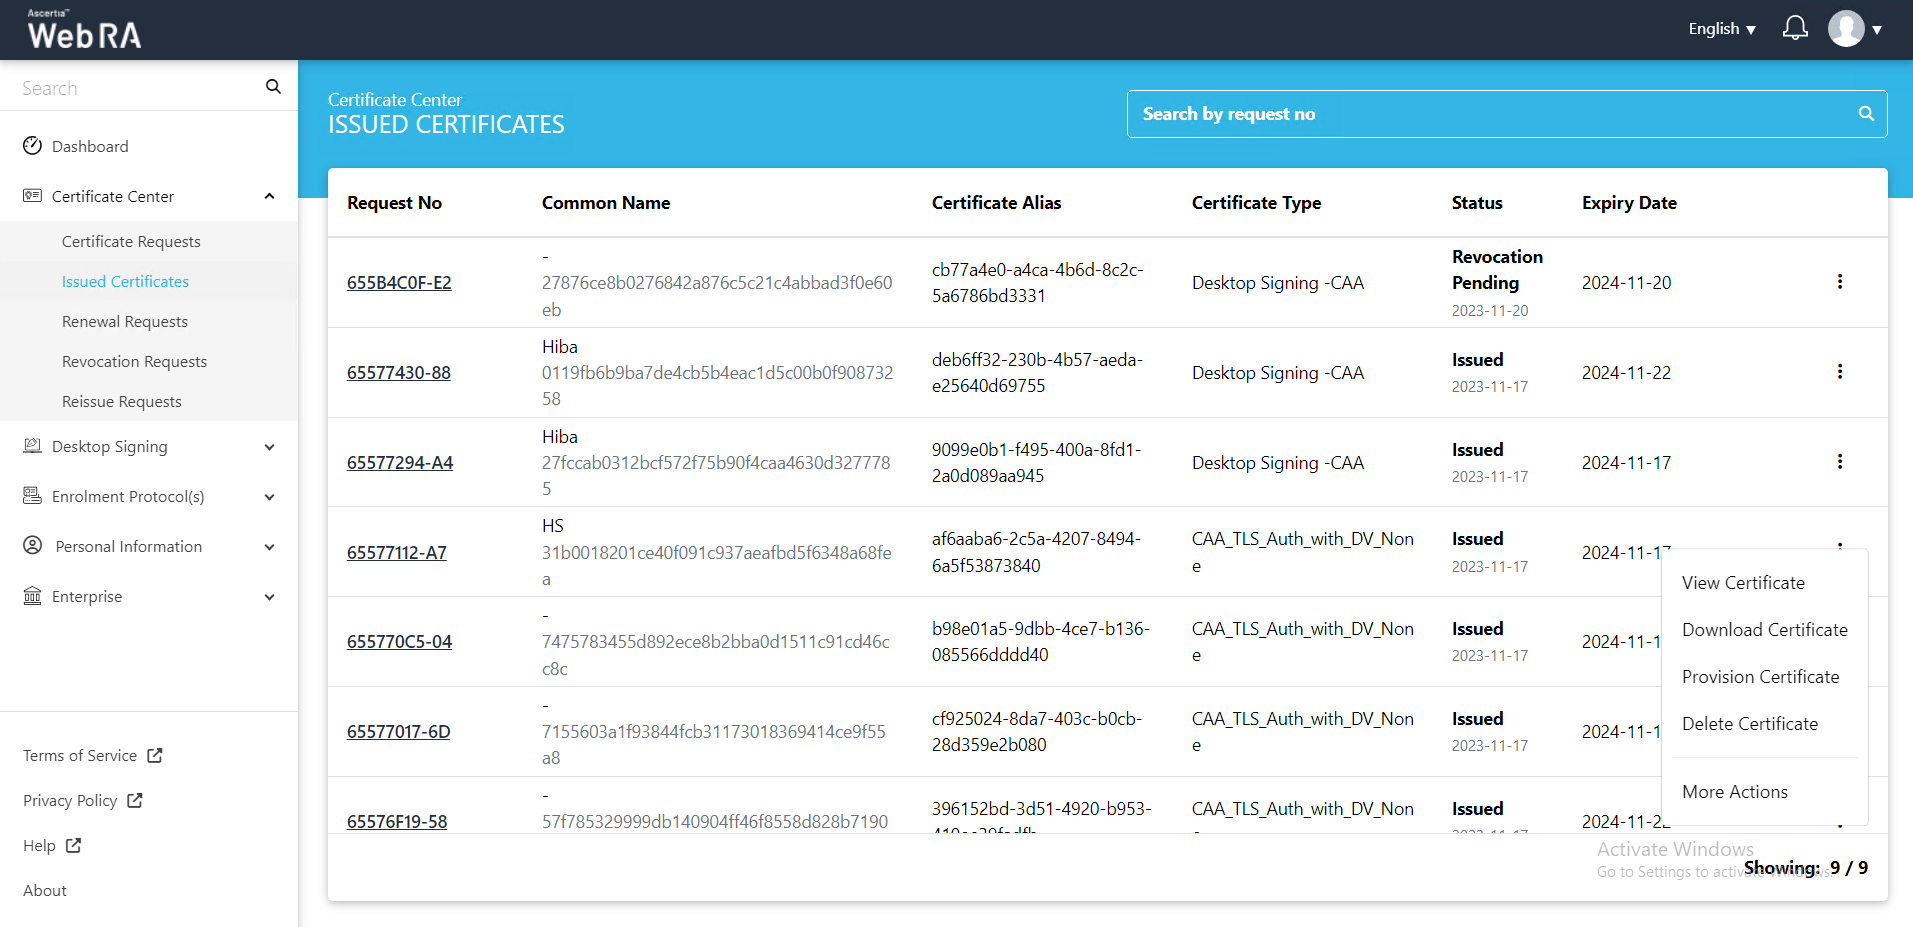
- Expand Certificate Center > Issued Certificates.
- Click the button against the certificate that you want to rekey and click on More Actions.
- Certificate action screen will be displayed.
- Action
Select Rekey Certificate from the drop down.
- Select Are you sure you want to rekey this certificate?
Then click View Request.
- The Subject Distinguished Name (SDN) screen, they will appear in a disabled form. Click >.
- The Subject Alternative Name (SAN) screen will appear. Click >.
- The Certificate Validity screen will appear. Click >.

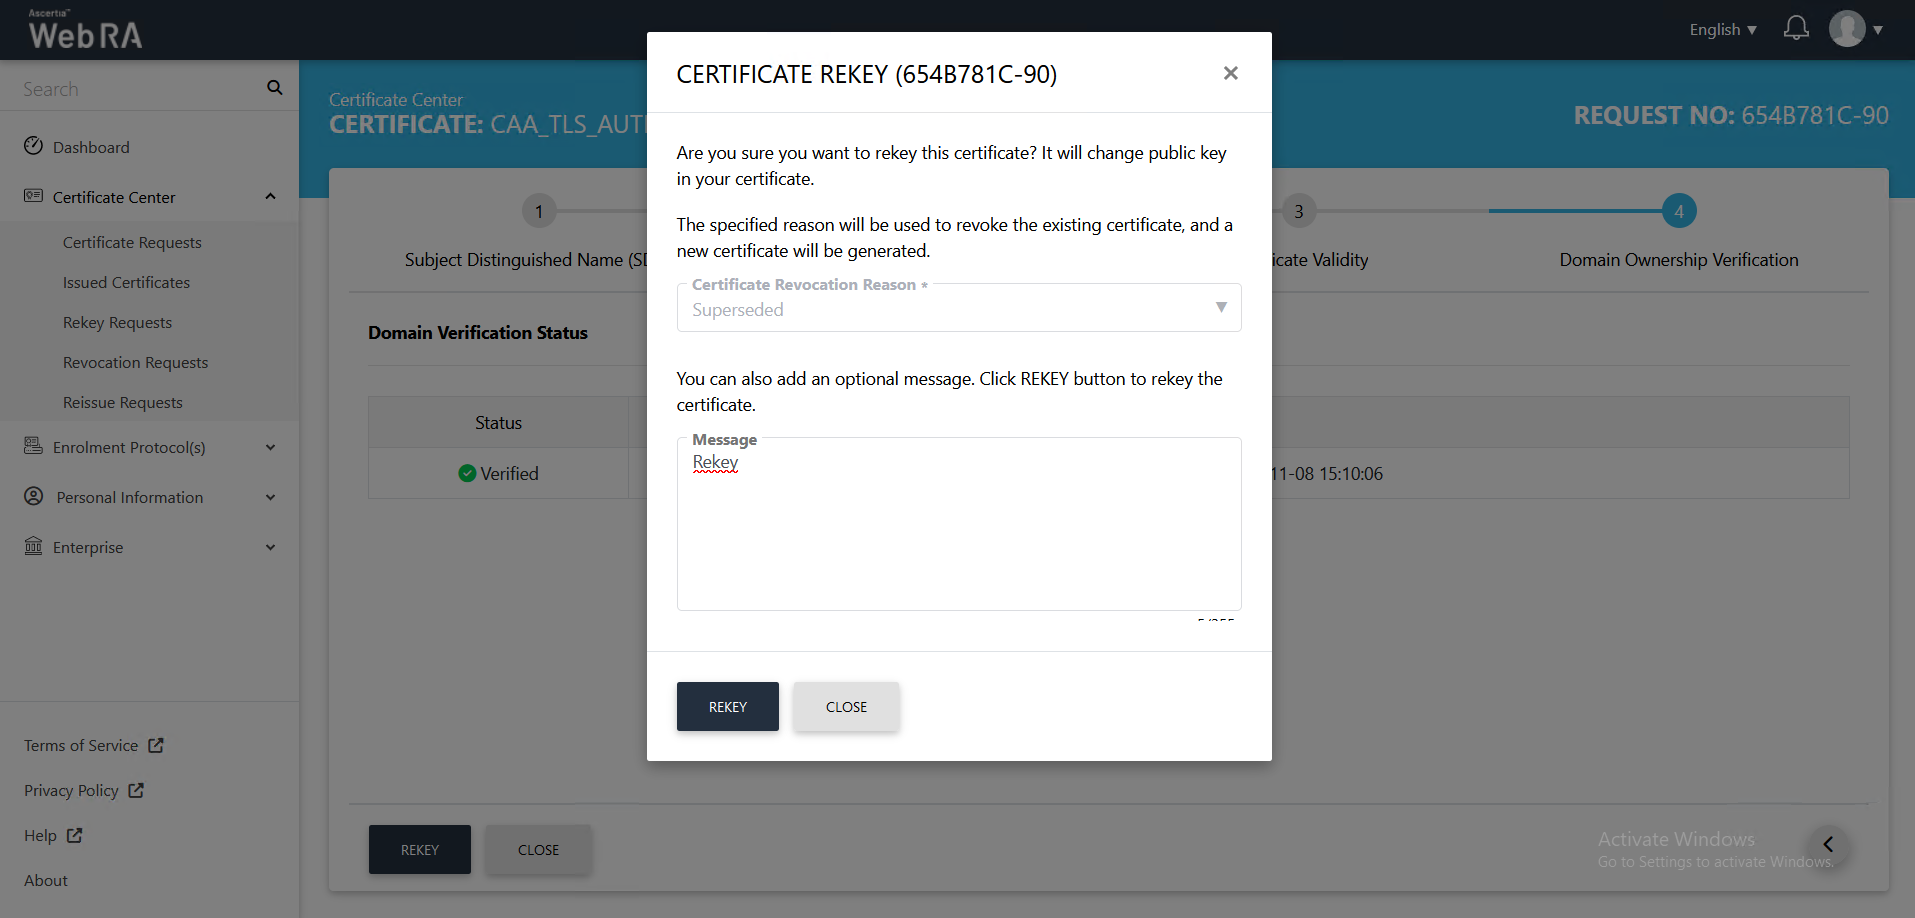
- The Domain Ownership Verification screen will appear with the CAA record as unverified. Click the Verify button to validate the CAA record.
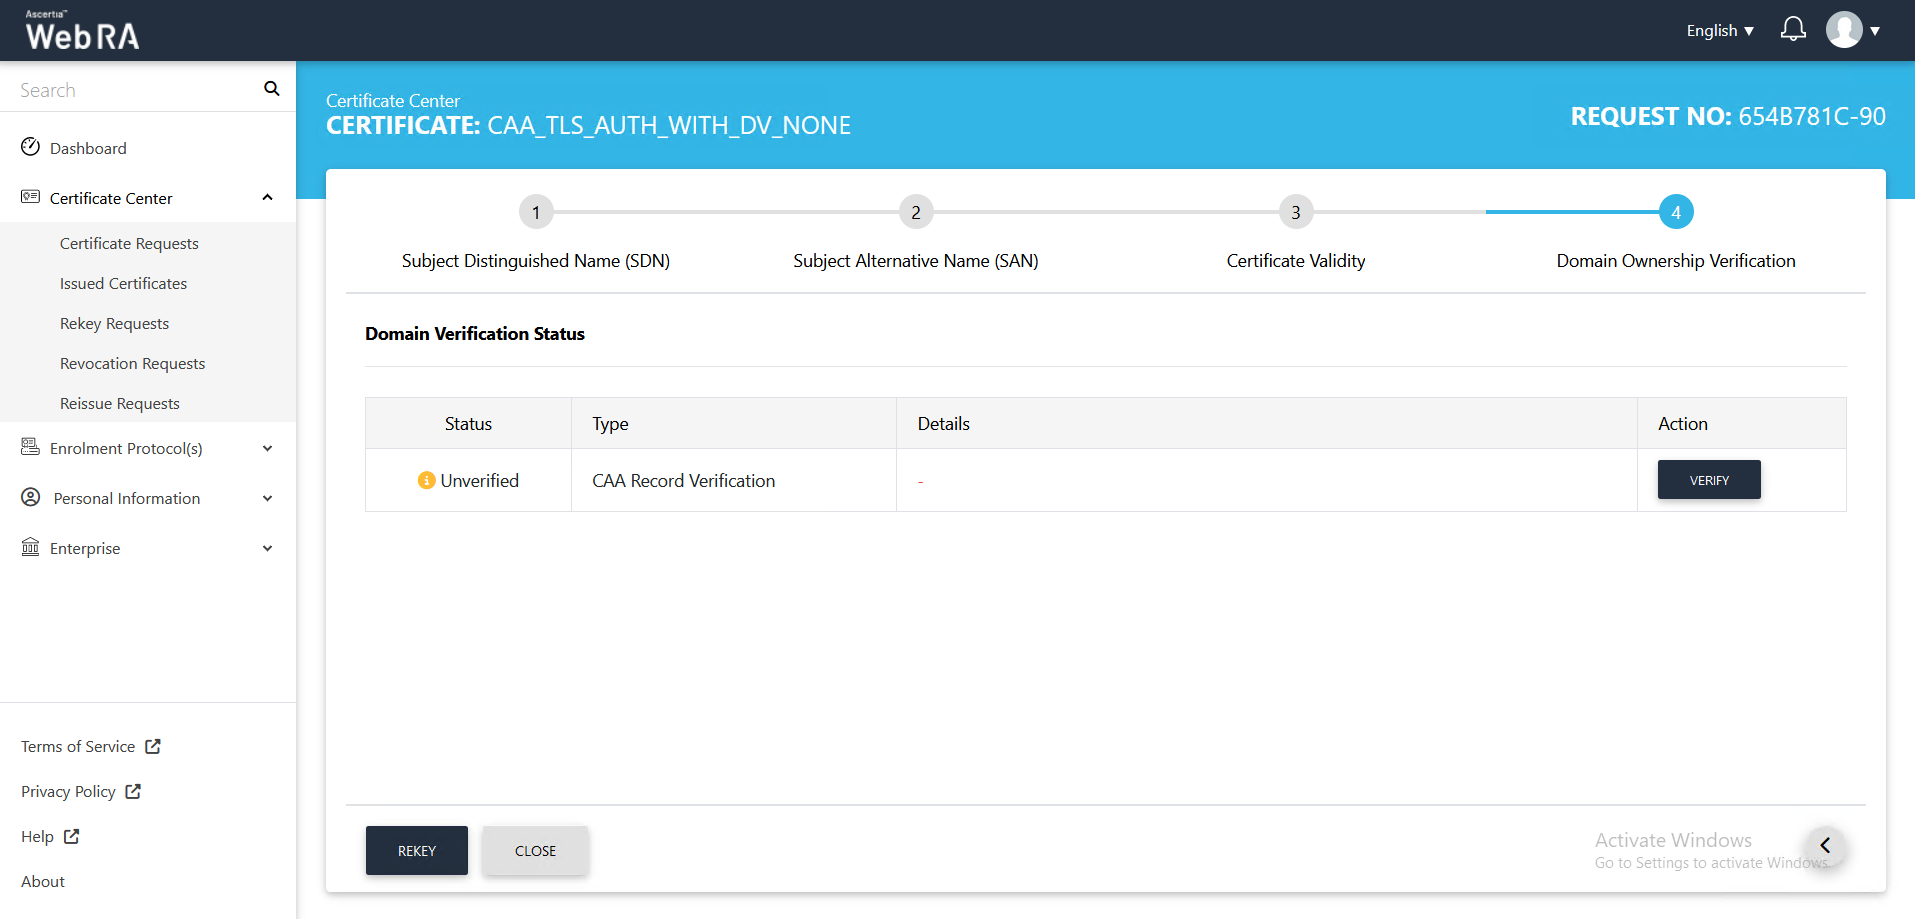
- Once the CAA record is verified, click Rekey.
- The Certificate Rekey screen will appear.
You can add an optional message.
Then click Rekey.
- Once the certificate rekey process is complete, a certificate will be generated.
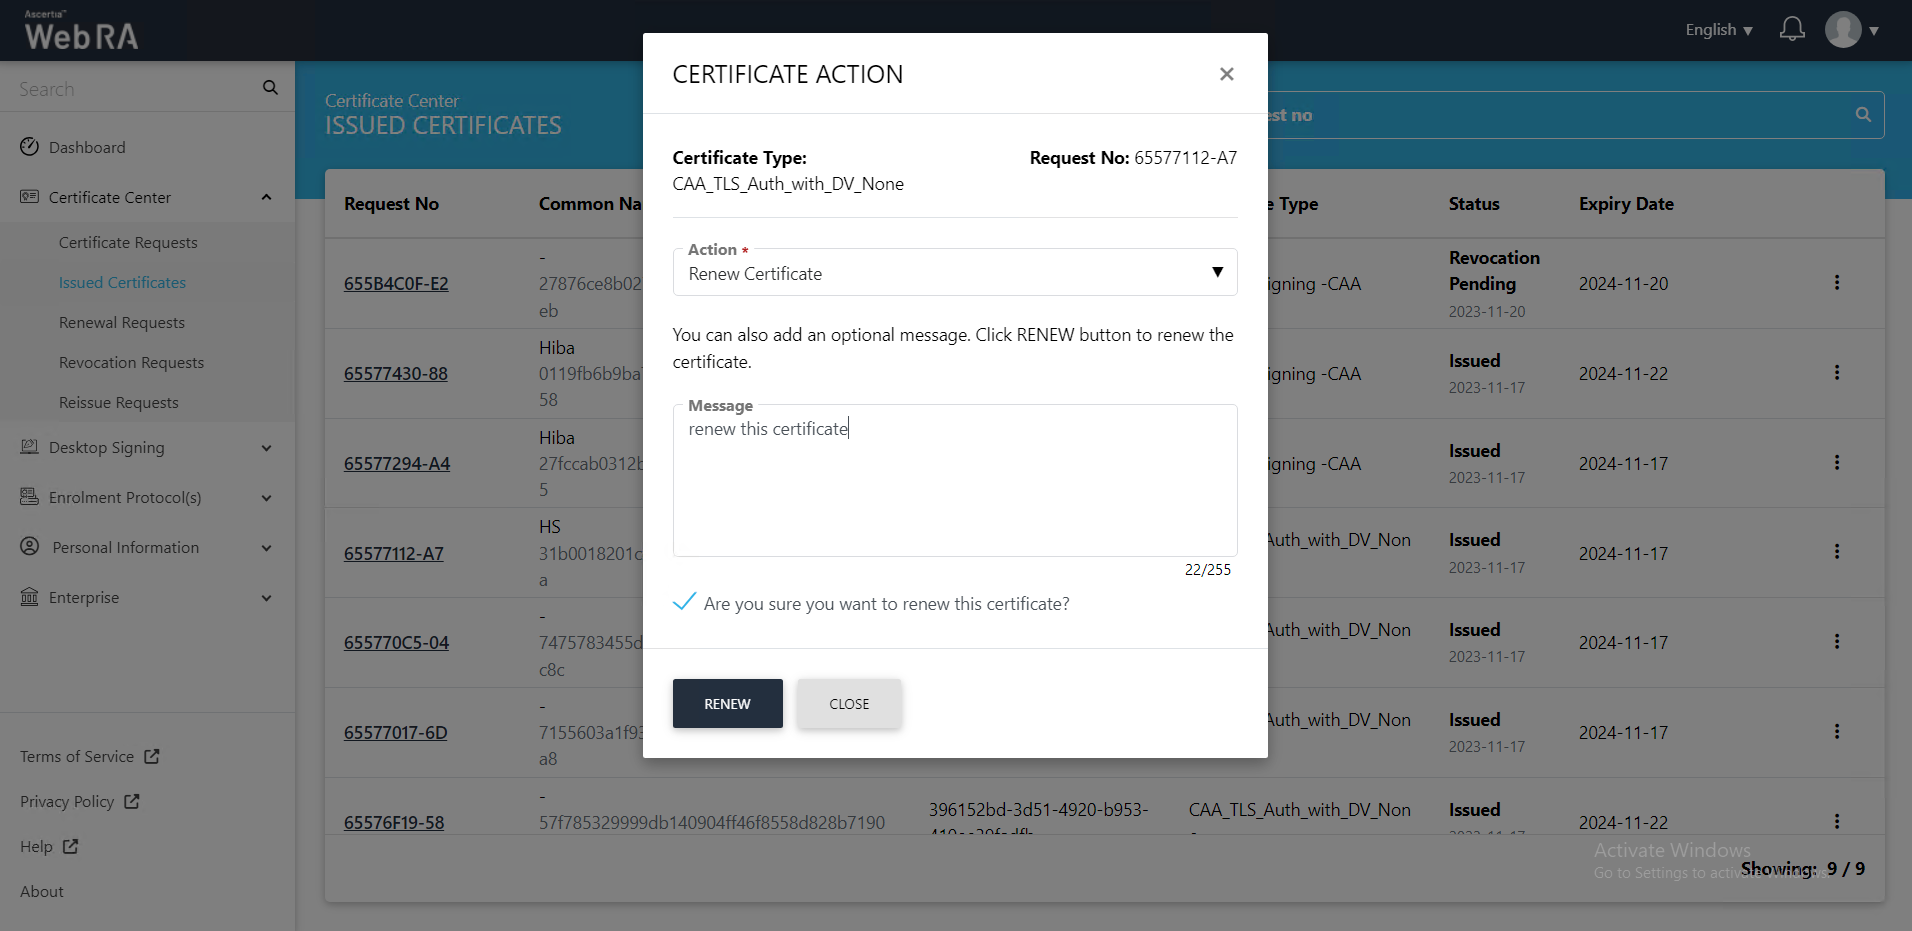
ADSS Web RA Server supports certificate renewal before a certificate expires. It is the process by which a user renews a certificate for the same public key used in an expiring certificate.
As a pre-requisite, the renew certificate option should be enabled in the Policy section from the admin portal.
- At the ADSS Web RA admin portal, expand Configurations > click Policy.
- From the Certificate Renewal Settings drop down, select Renew Certificate and click Save to save the configurations.

To renew, return to the ADSS Web RA web portal and perform the following steps:
- Expand Certificate Center > click Issued Certificates.
- Click the button against the certificate that you want to renew and click on More Actions.
- Certificate action screen will be displayed.
- Action
Select Renew Certificate from the drop down.
- Select Are you sure you want to renew this certificate?
Then click Renew.
- The certificate generated roaster message will appear. This certificate request will appear in the renewal requests listing.
Certificate revocation is a process in which a certificate's usage is terminated before the validity period expires.
This section lists all the certificate revocation requests.
To revoke a certificate from the web portal:
- Expand Certificate Center > click Issued Certificates.
- Click the button against the certificate that you want to revoke and click on More Actions.

- Certificate action screen will be displayed.
ADSS Web RA supports the following types of TLS certificates:
- EVS TLS Server authentication
- TLS Client authentication
- TLS Server authentication
When an EV TLS Server authentication certificate is revoked, ADSS Web RA will support only the following revocation reasons:
- Key Compromise
- Affiliation Change
- Superseded
- Cease of Operation
- Privilege Withdrawn
- Action
Select Revoke Certificate from the drop down,
- Certificate Revocation Reason
Select a reason for revocation
- Select Are you sure you want to revoke this certificate?
Then click Revoke.
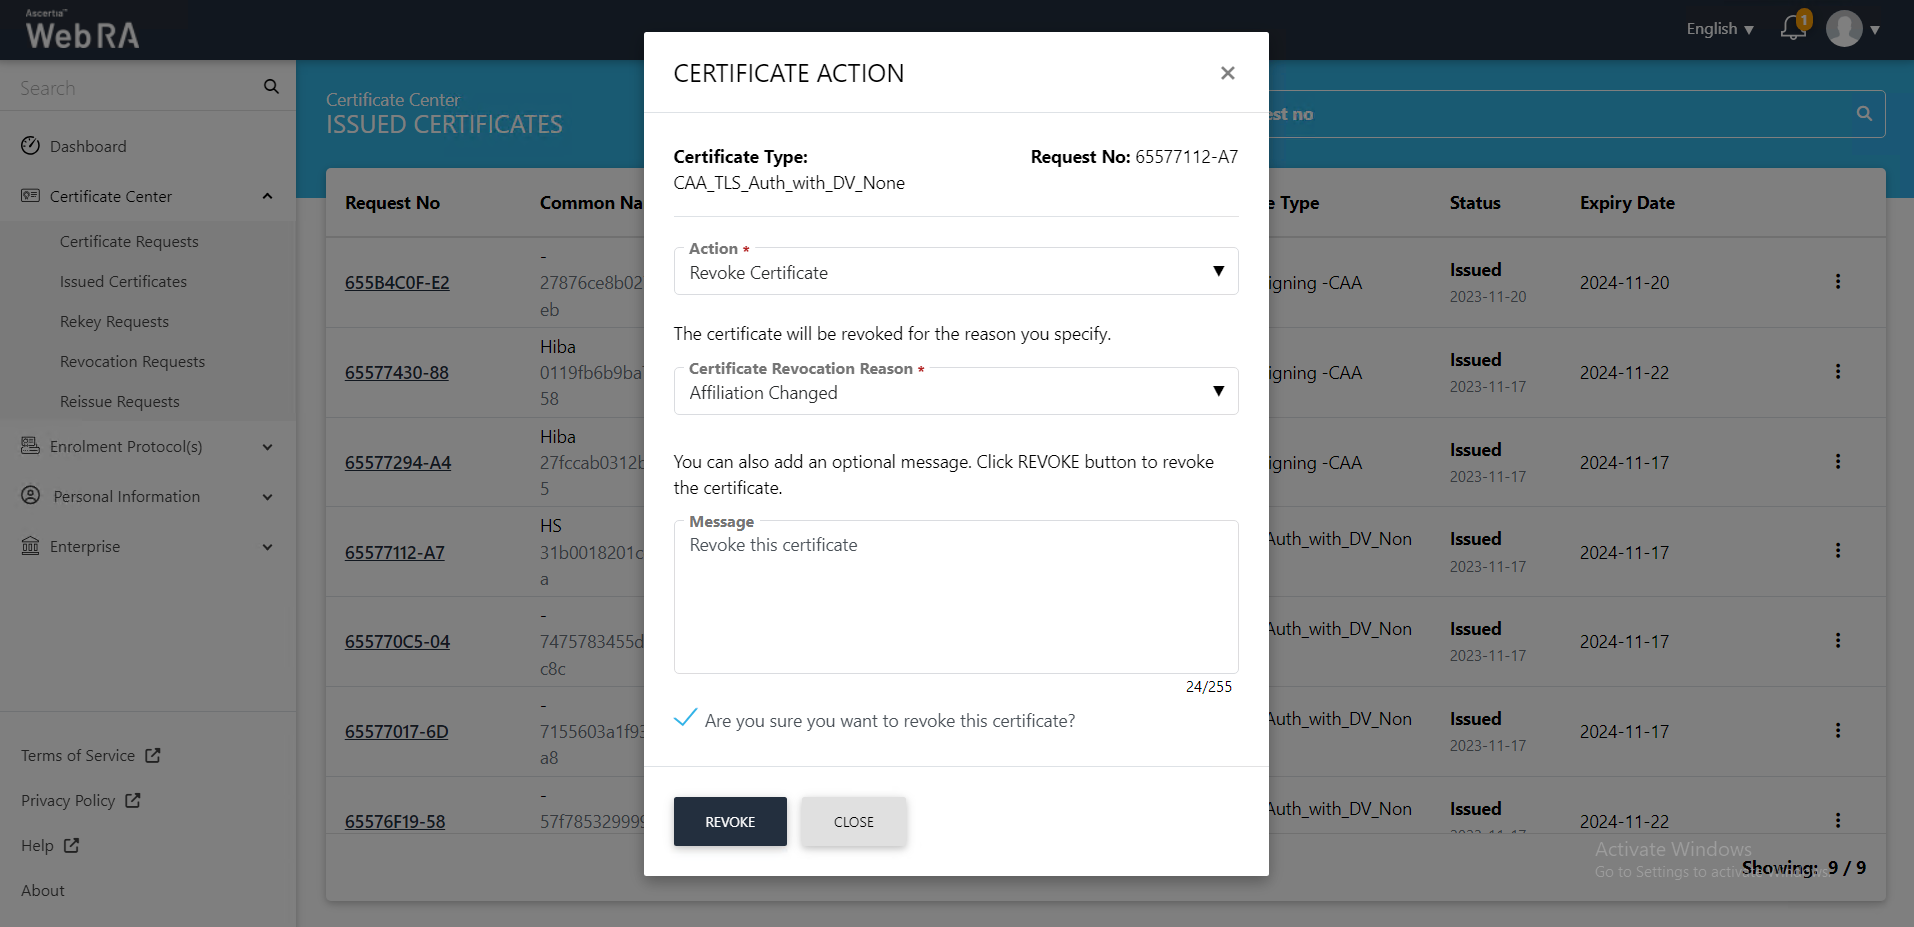
The certificate will be revoked and it will appear in the revocation requests list.
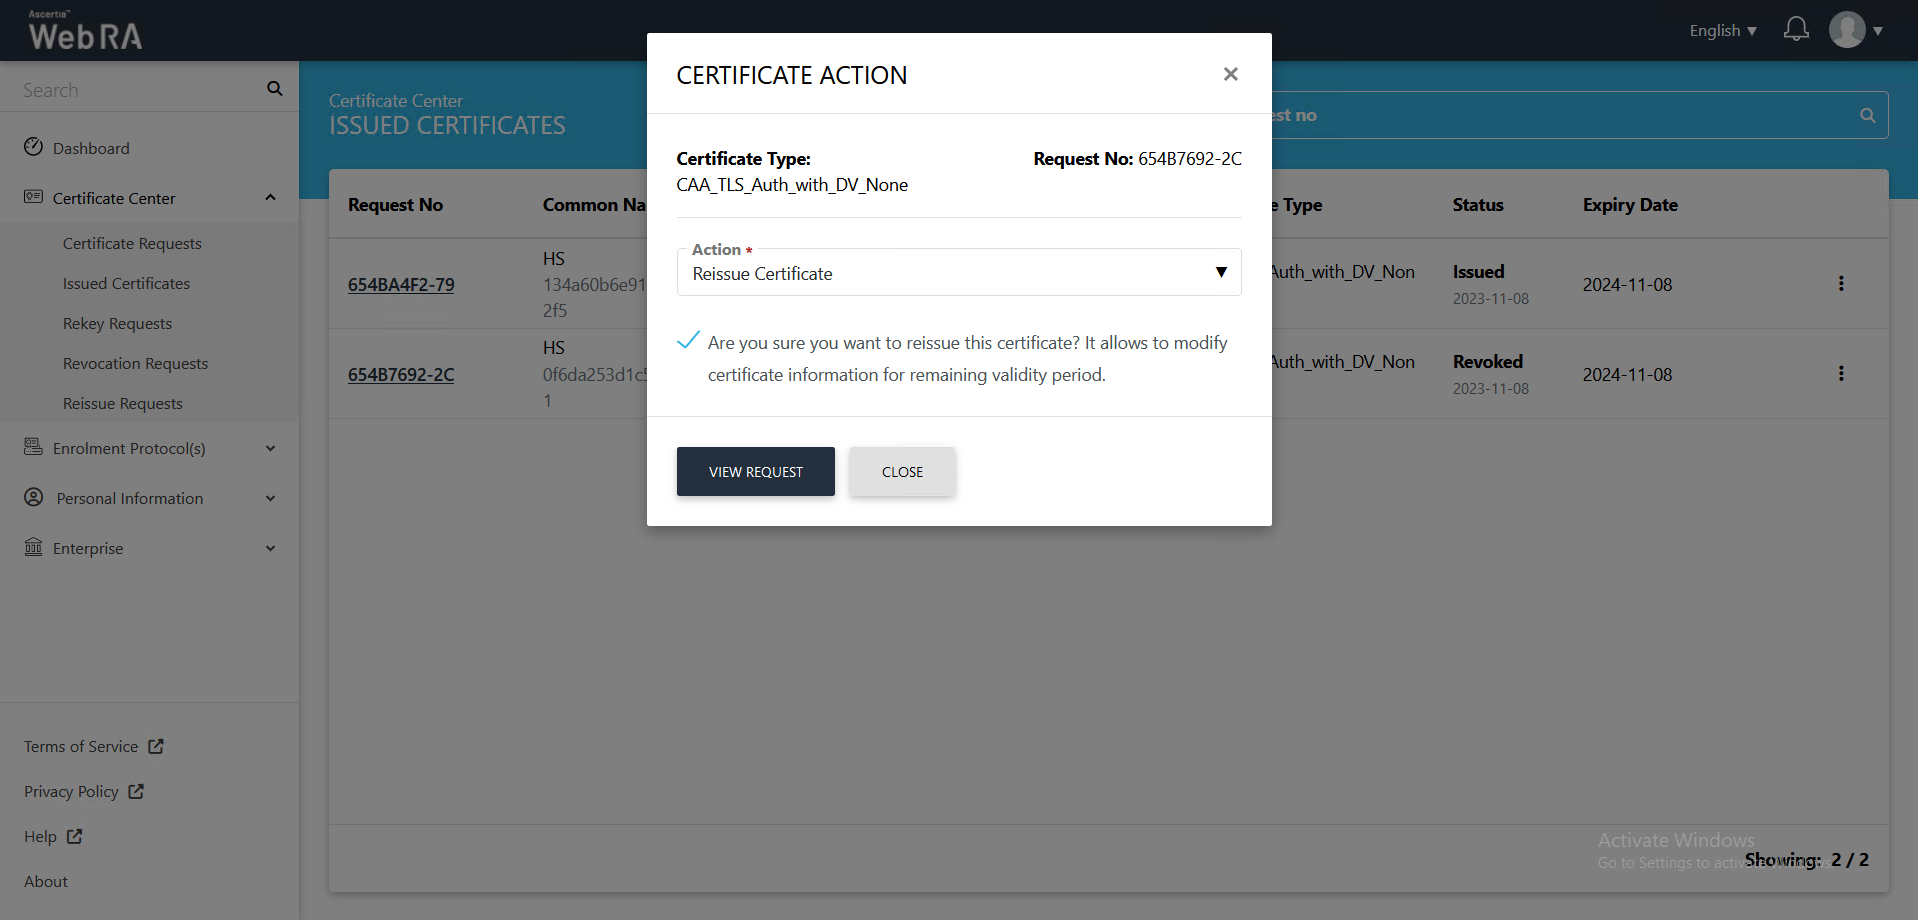
A certificate re-issue is a process in which the a user generates a new private key and CSR for an existing certificate. A user may need to proceed with certificate issuance if he loses or deletes his private key.
If they want to change any of the certificate information, or if they want to change the certificate's encryption level. Once re-issuance process is complete, a new digital certificate is generated.
- Expand Certificate Center > click Issued Certificates.
- Click the button against the revoked certificate that you want to reissue and click on More Actions.
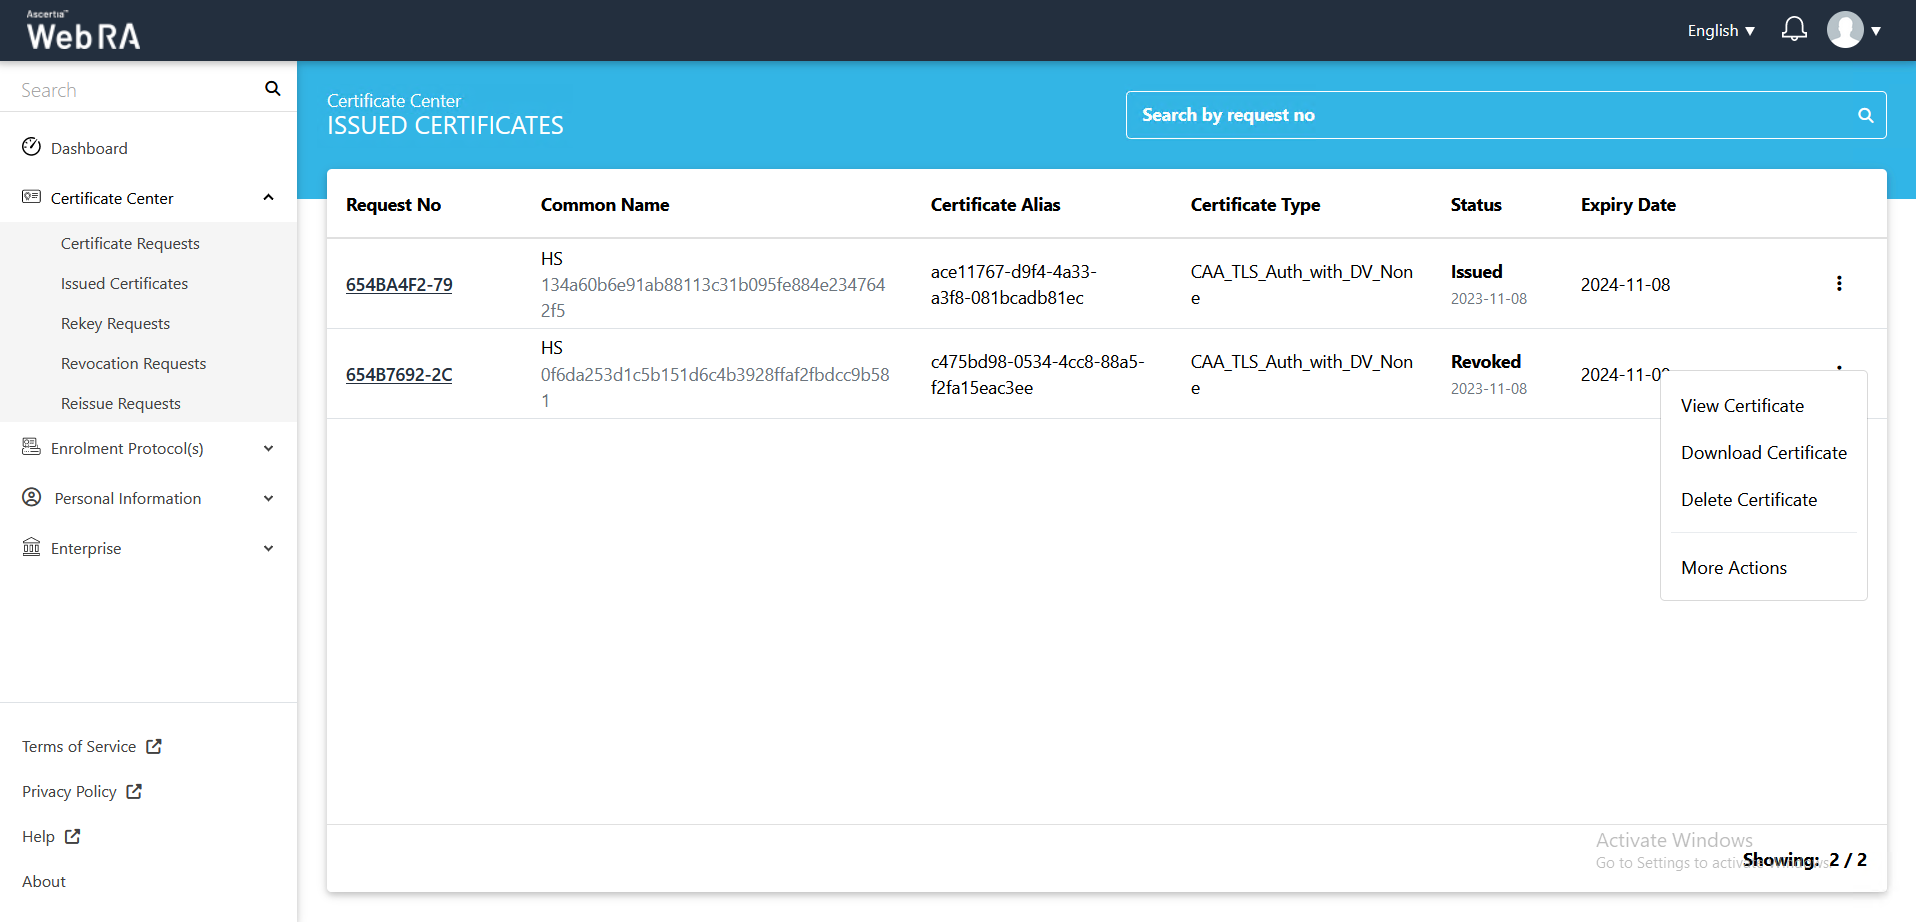
- Certificate action screen will be displayed.
- Action
Select Reissue Certificate from the drop down,
- Select Are you sure you want to reissue this certificate?
Then click View Request.
- You will be navigated to the Subject Alternative Name (SDN) screen.
- Common Name
Enter a common name of a person or an organisation.
Enter an email address.
- Locality
Enter local area name.
- State
Enter the state.
- Country
Select a country from the drop down.
Click >.

- The Subject Alternative Name (SAN) screen will appear. Enter the details below:
Domain Names (DNS).
Select the domain names (DNS) from the drop down.
IP Address
Enter an IP address.
Email Address
Enter an email address.
Other name
OID
Enter the OID.
Value
Enter a value and click Add Other Name.
Click > to proceed.

- Then the Certificate Validity screen will appear. Click > again to proceed.
- The Domain Ownership Verification screen will appear. The Domain Verification Status will appear Unverified. Click Verify to proceed.
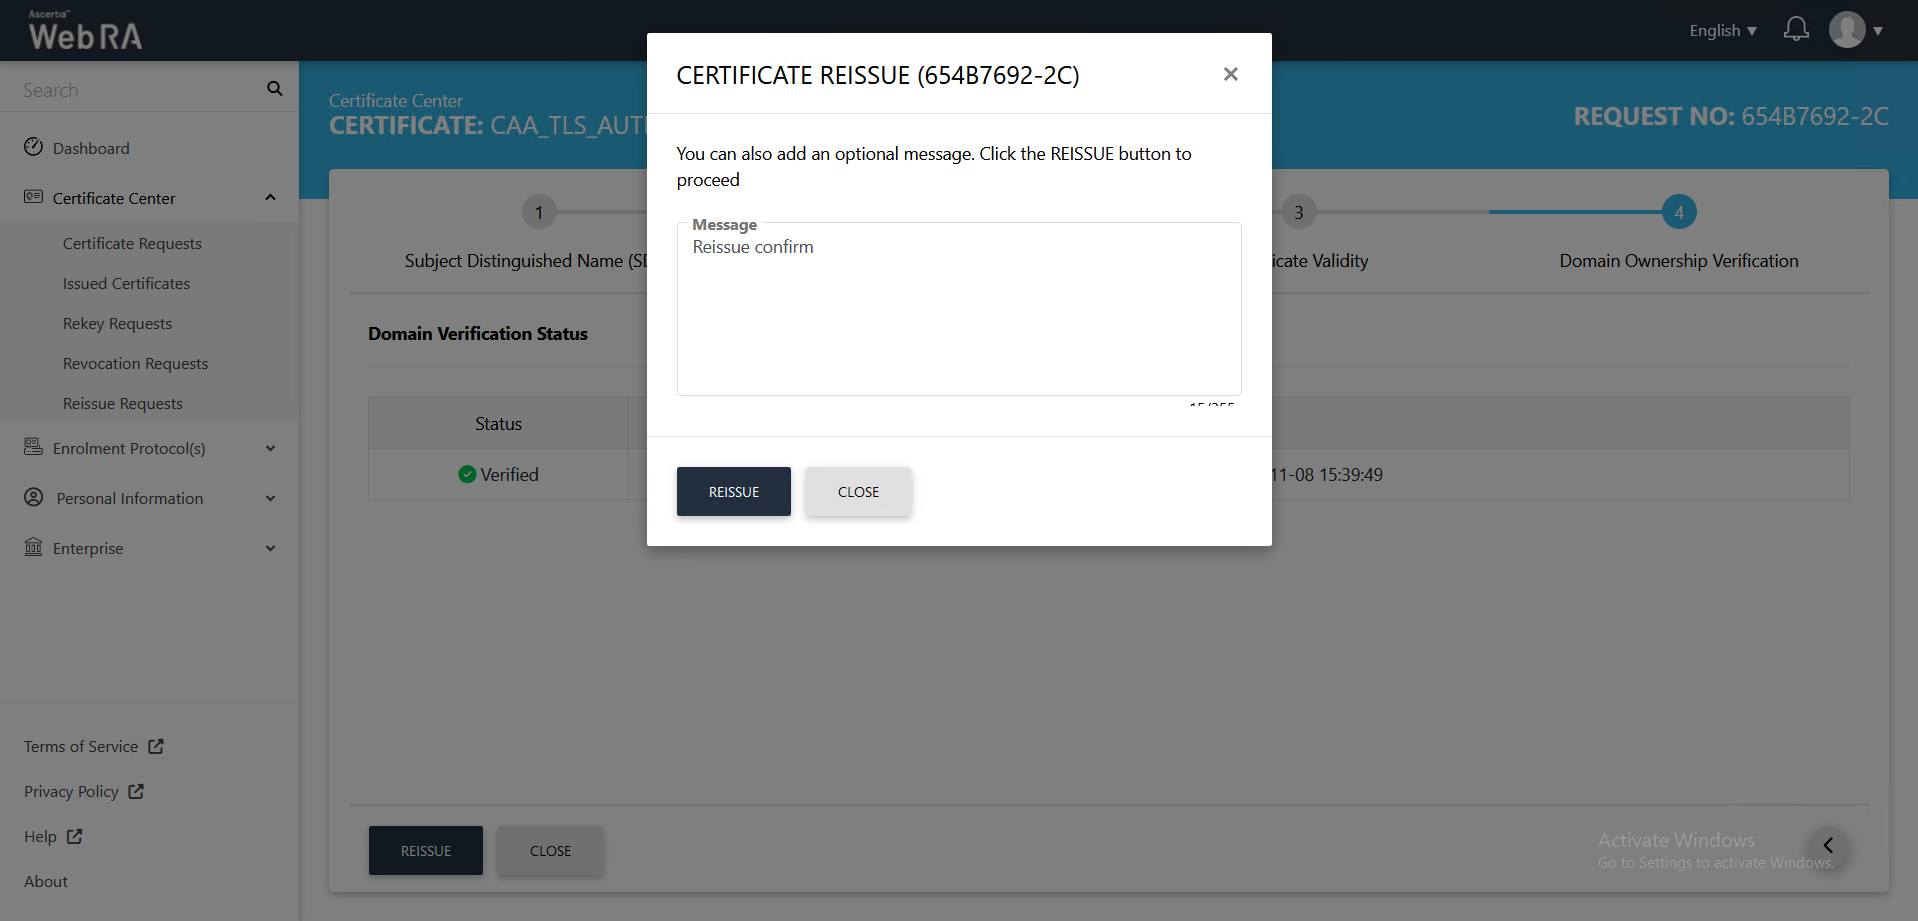
- Once the status is Verified, click Reissue.

- You can add an optional message and click Reissue.
- The Certificate Generated confirmation message will appear, as displayed below: