App registration for OIDC in Azure Portal
This section explains app registration for OIDC in the Azure portal.
OpenID Connect (OIDC) is an open authentication protocol, built upon the OAuth 2.0 framework. OIDC enables individuals to employ single sign-on (SSO) for accessing various relying party sites by leveraging OpenID Providers (OPs). These providers, like email services or social networks, authenticate user identities. The protocol provides pertinent user information, authentication context, and access to profile details to the application or service involved.
The purpose of OIDC is to enable users to utilize a single set of credentials across multiple sites. When users sign in to an application or service through OIDC, they are directed to their chosen OpenID Provider (OP). After authentication at the OP, they are redirected back to the application or service they intended to access.
OIDC stands as a contemporary security protocol engineered to safeguard browser-based applications, APIs, and native mobile applications. It delegates user authentication to the service provider hosting the user account, granting authorization to third-party applications for accessing the user's account.
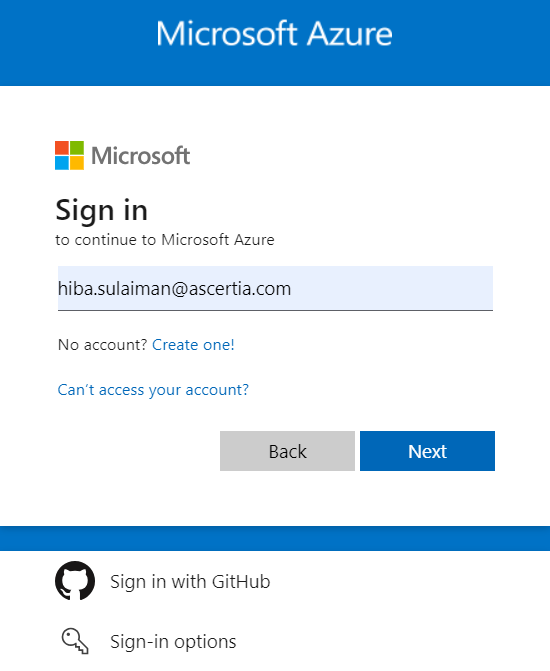
- Access the link portal.azure.com
- You will be redirected to sign-in using your organizational directory's email, then click Next.
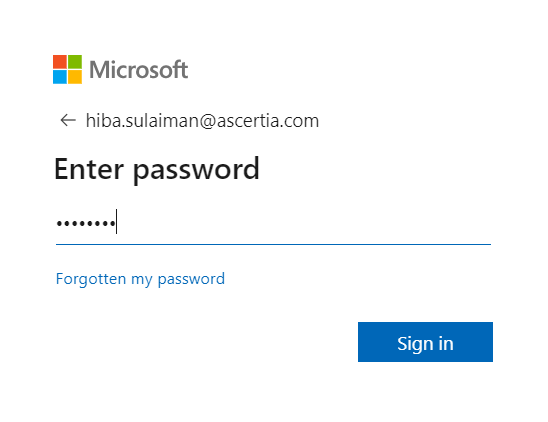
- Enter password and click Sign in.
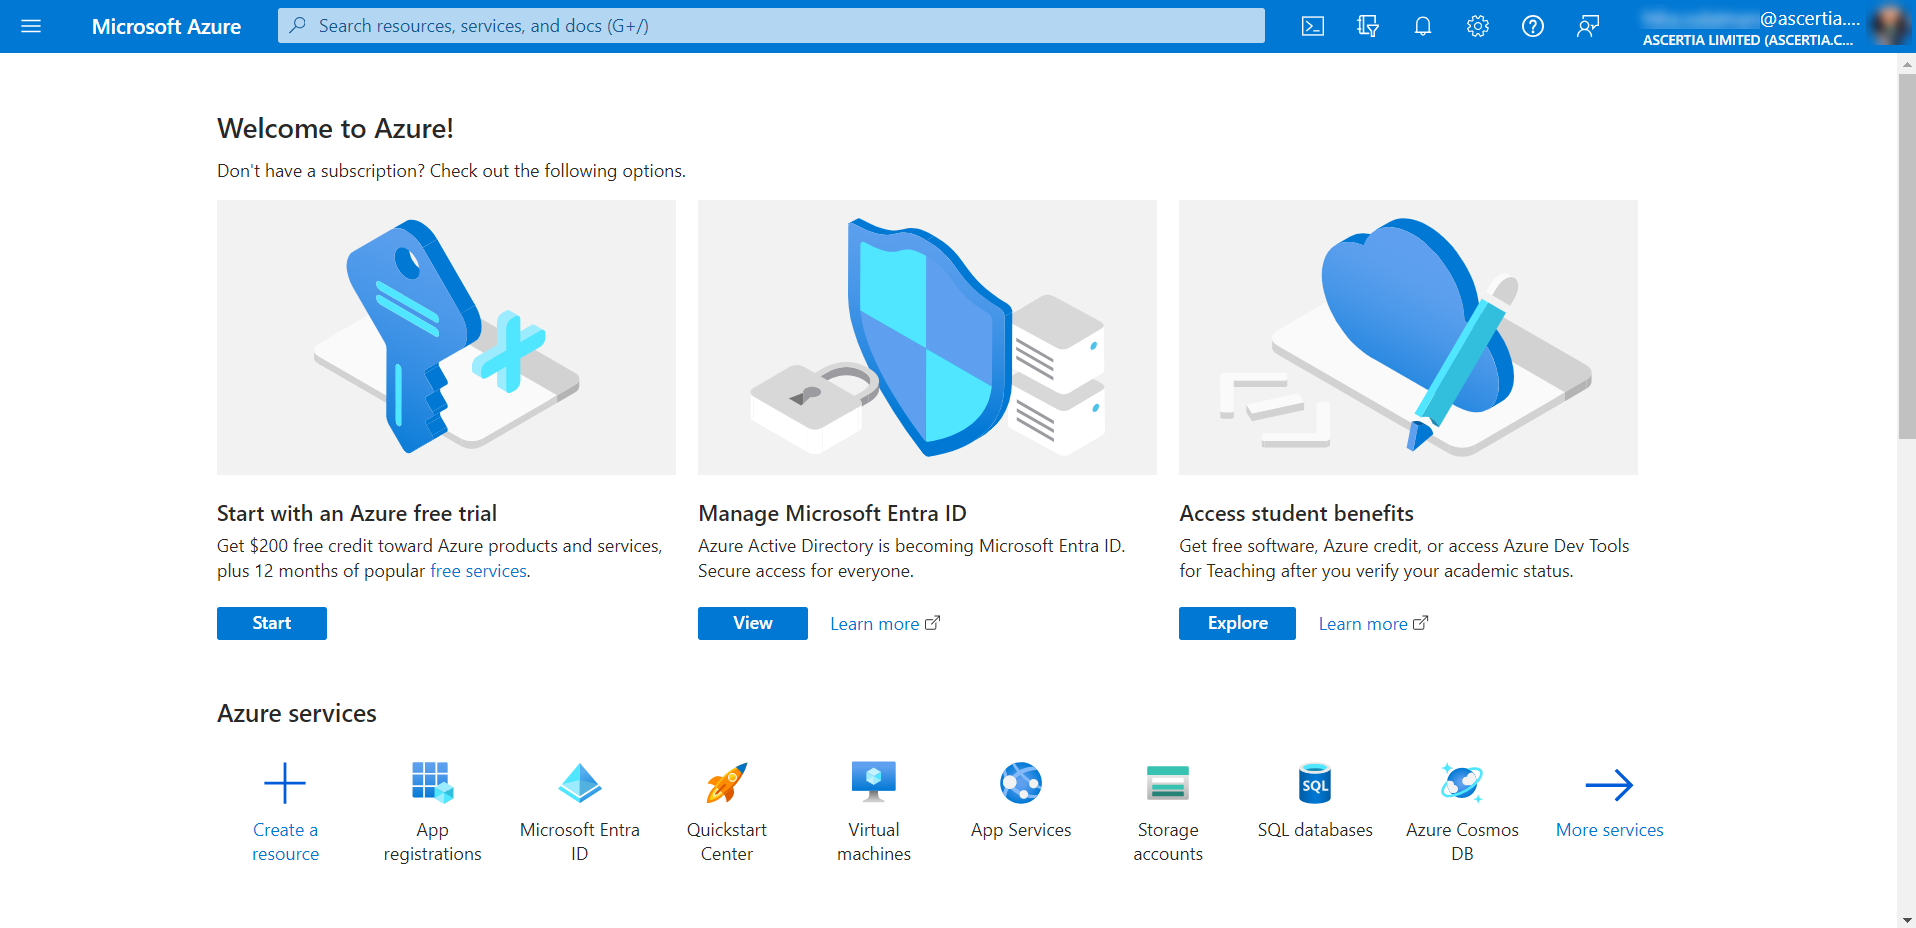
- The Azure Portal home page will appear. Click App registrations from the Azure services.
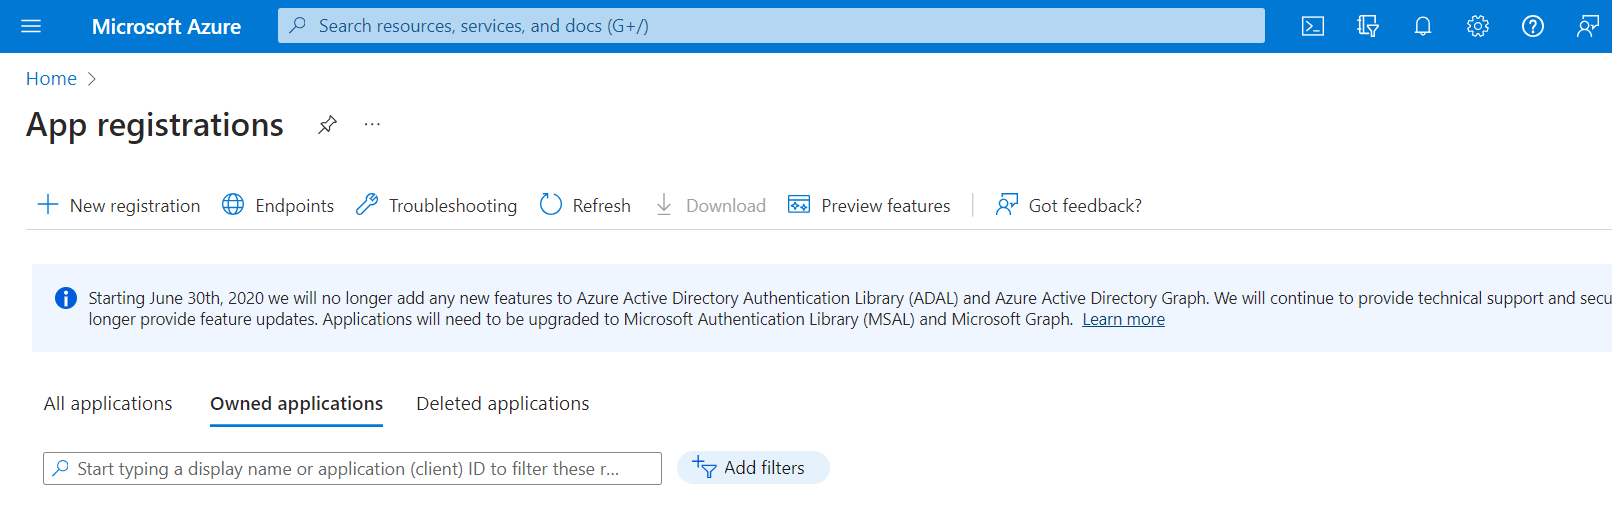
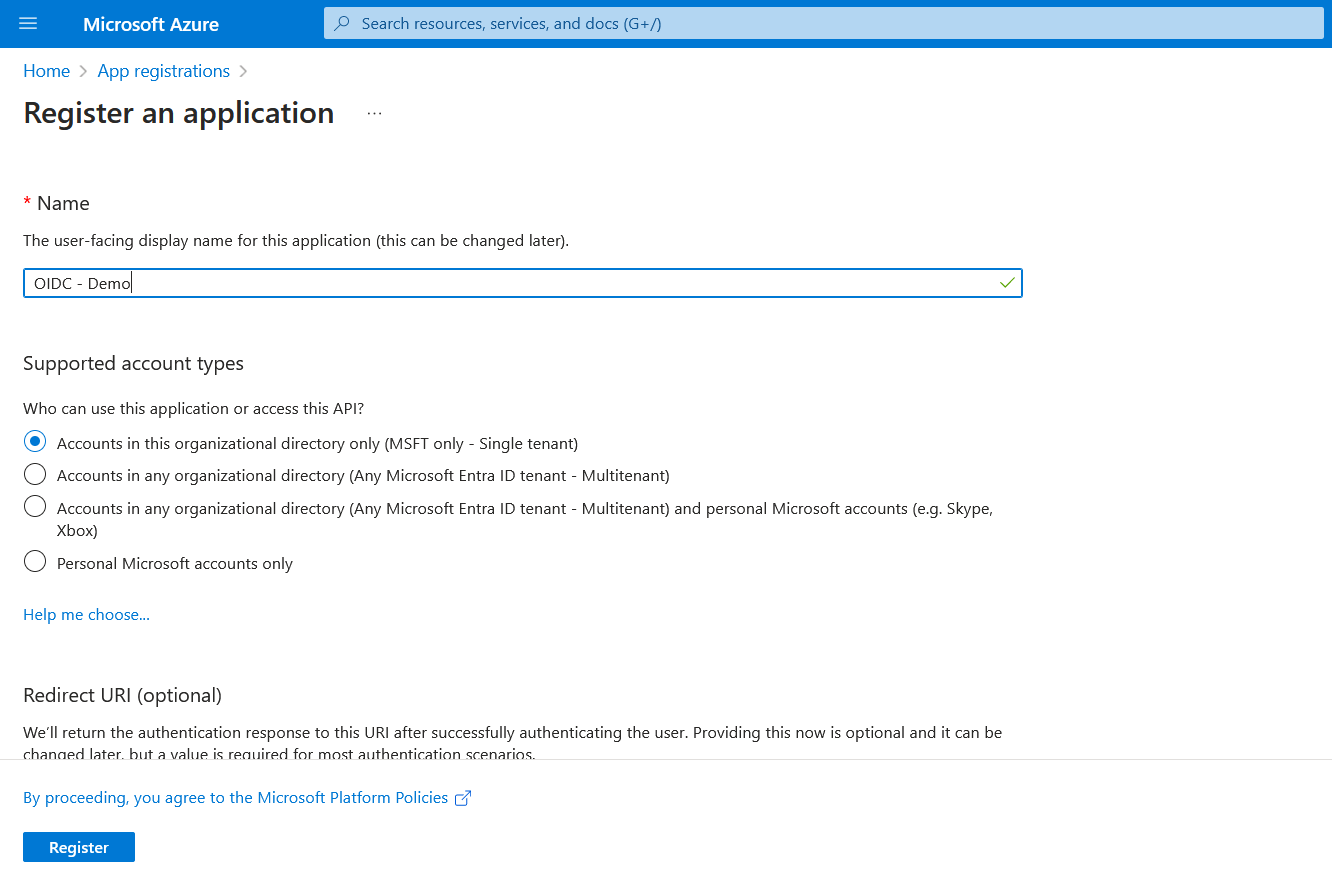
- Click New registration.
- Enter the name, select an option from the supported account types, e.g. Accounts in this organizational directory only (MSFT only - Single tenant). Then click Register.
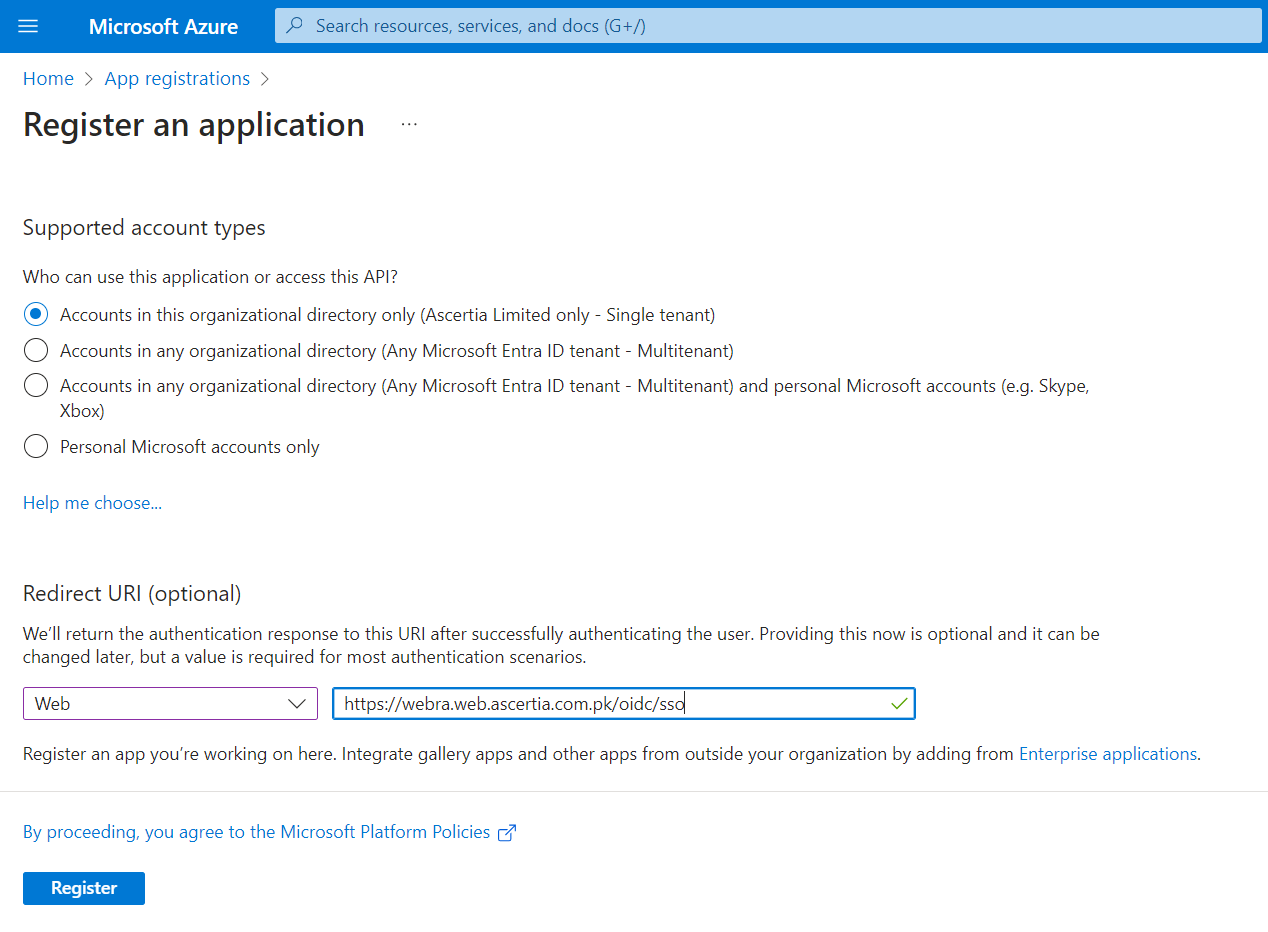
If you select the second option from the supported account types, e.g. Accounts in any organizational directory only (any Microsoft Entra ID - Multi tenant), then you will be required to enter the URI as displayed below:
Select Web and then for ADSS Web RA web, enter its URL and then append /oidc/sso after it, e.g. https://webra.web.ascertia.com.pk/oidc/sso
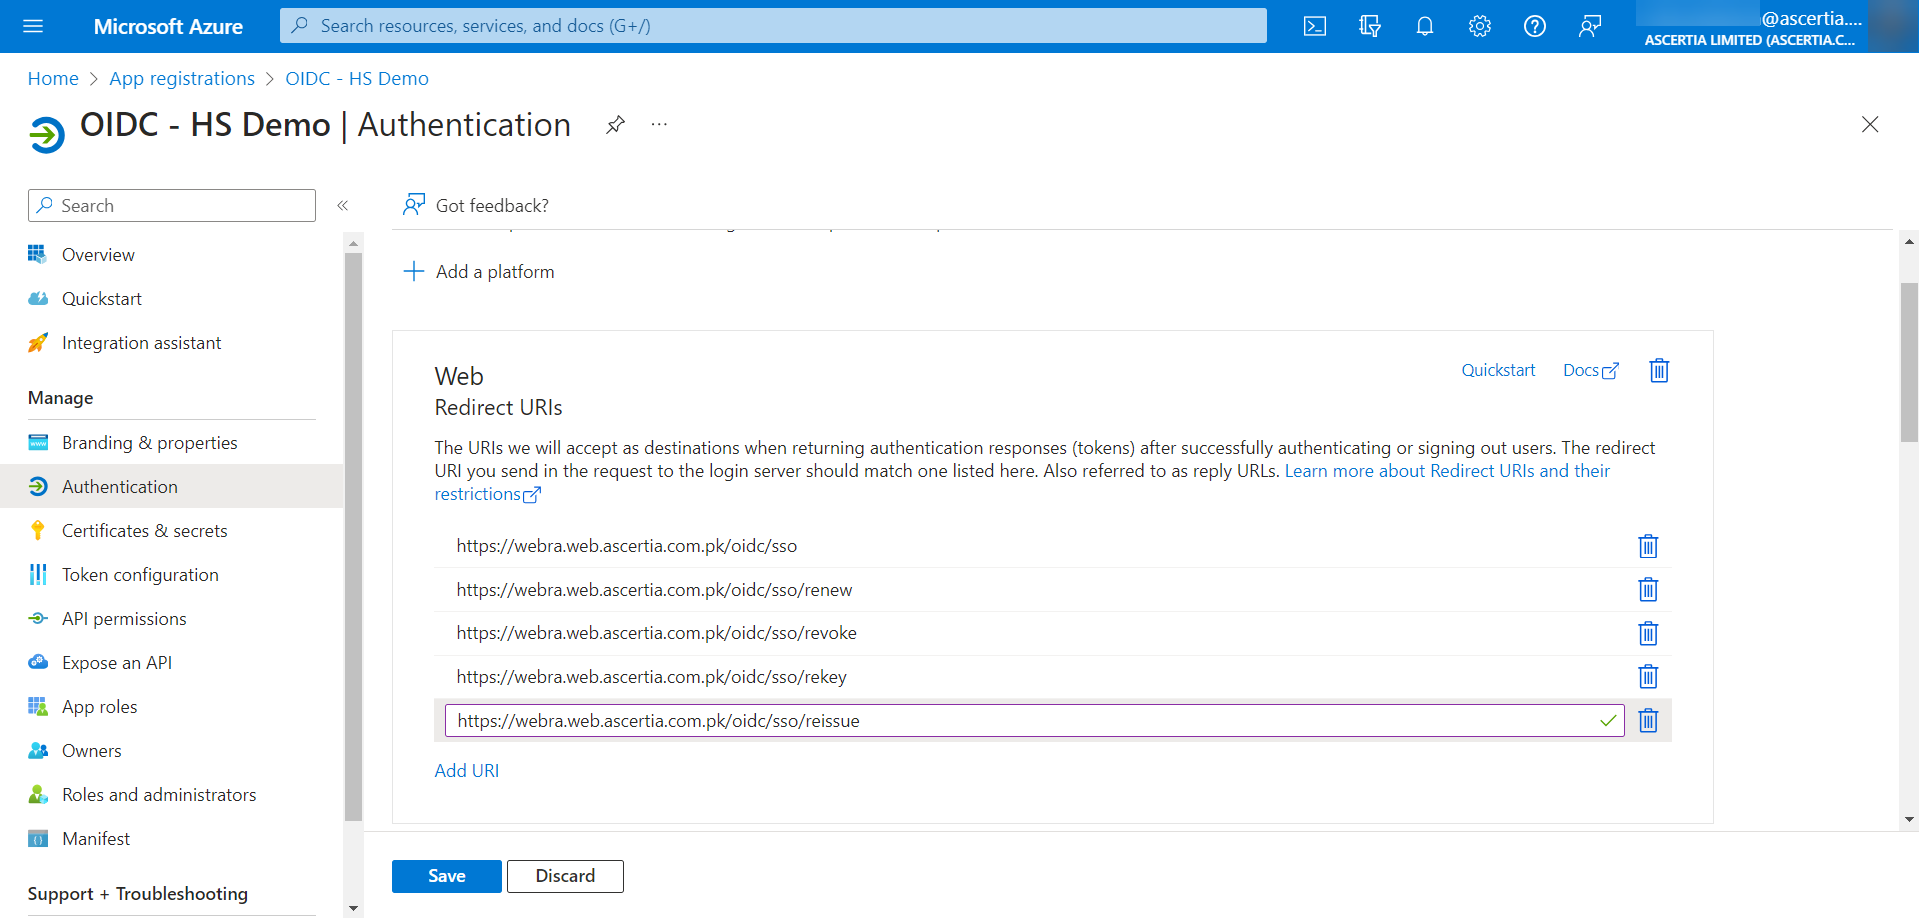
Similarly, you can also add URIs for renew, rekey, rekey, etc. Click Authentication from the left menu pane, then click Add URI and enter the link.
Enter the ADSS Web RA URL and then append /oidc/sso/renew after it, https://webra.web.ascertia.com.pk/oidc/sso/renew
Click Save.
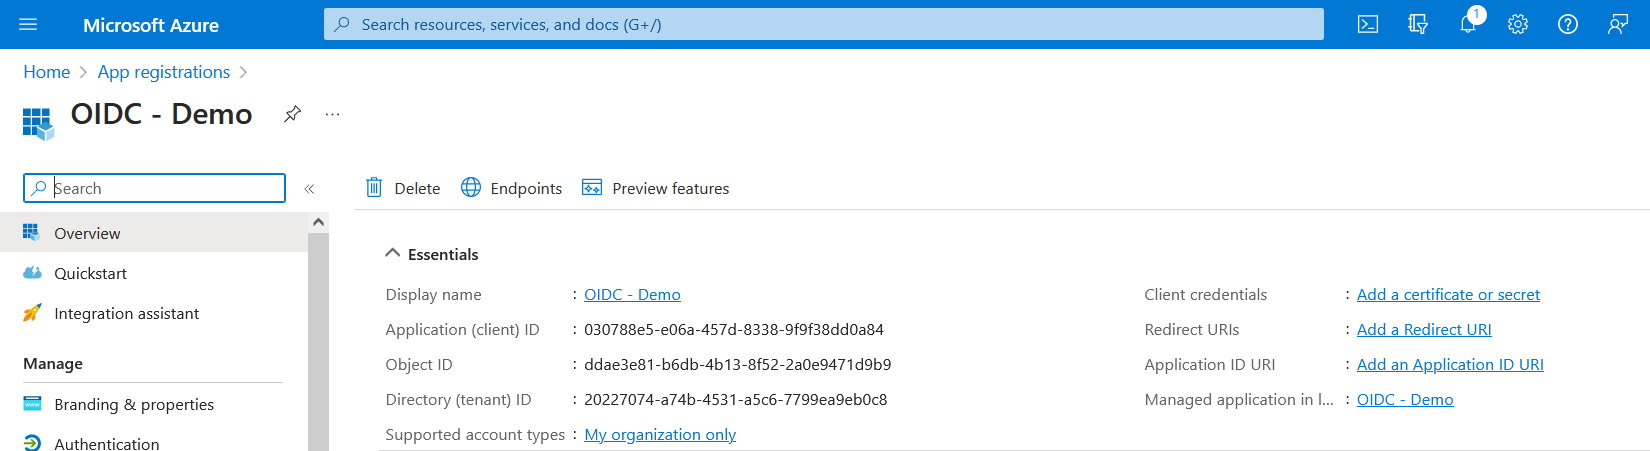
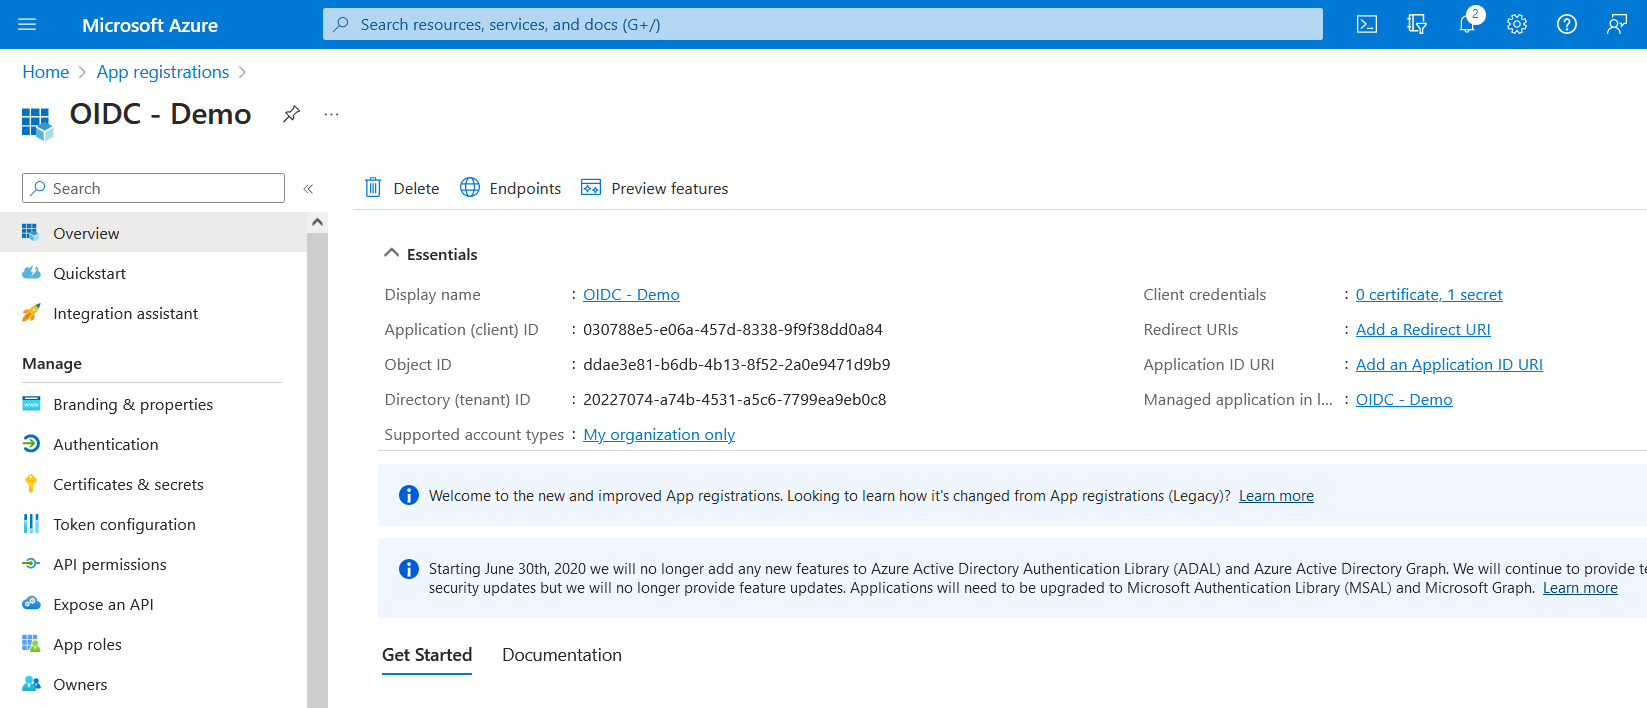
- The app will be created and its details will appear as displayed below:
Copy the Application (client) ID and save it for future use. (That is required as the client ID in ADSS Web RA's connector)
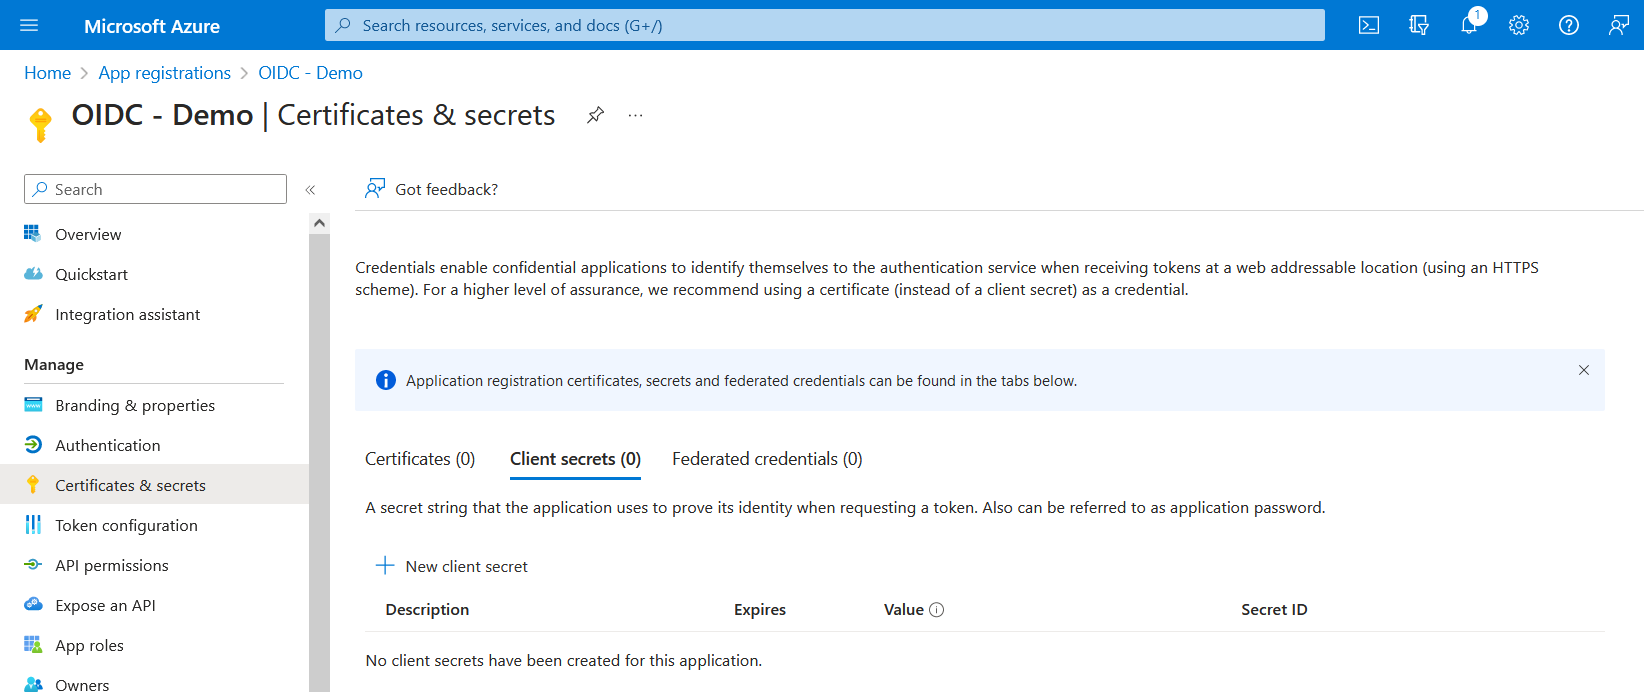
- Click the link against Client credentials or Certificates & secrets under Manage. Then click New client secret.
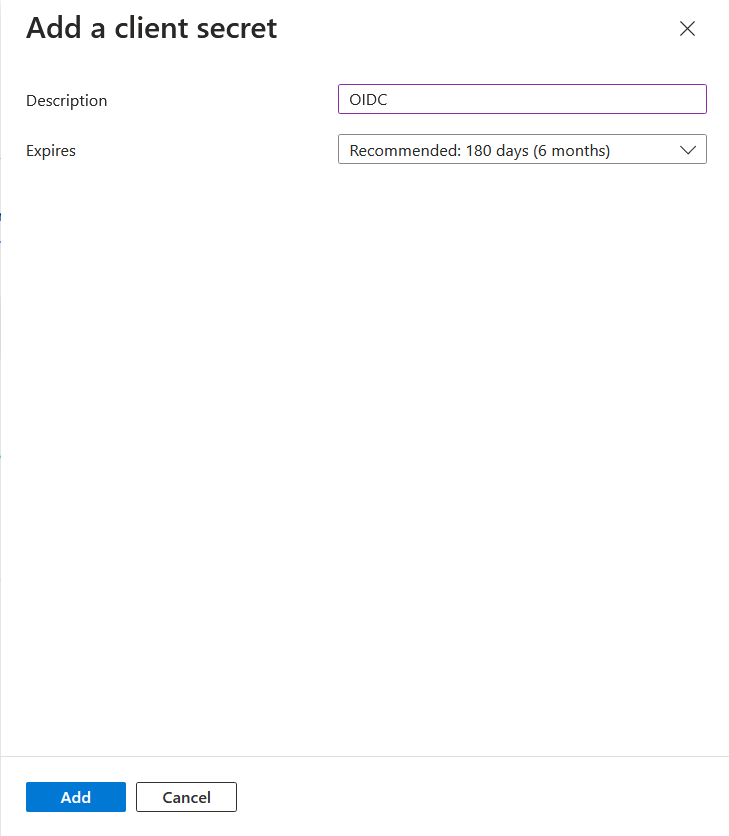
- At the Add a client secret window, enter the description and expiry. Click Add.
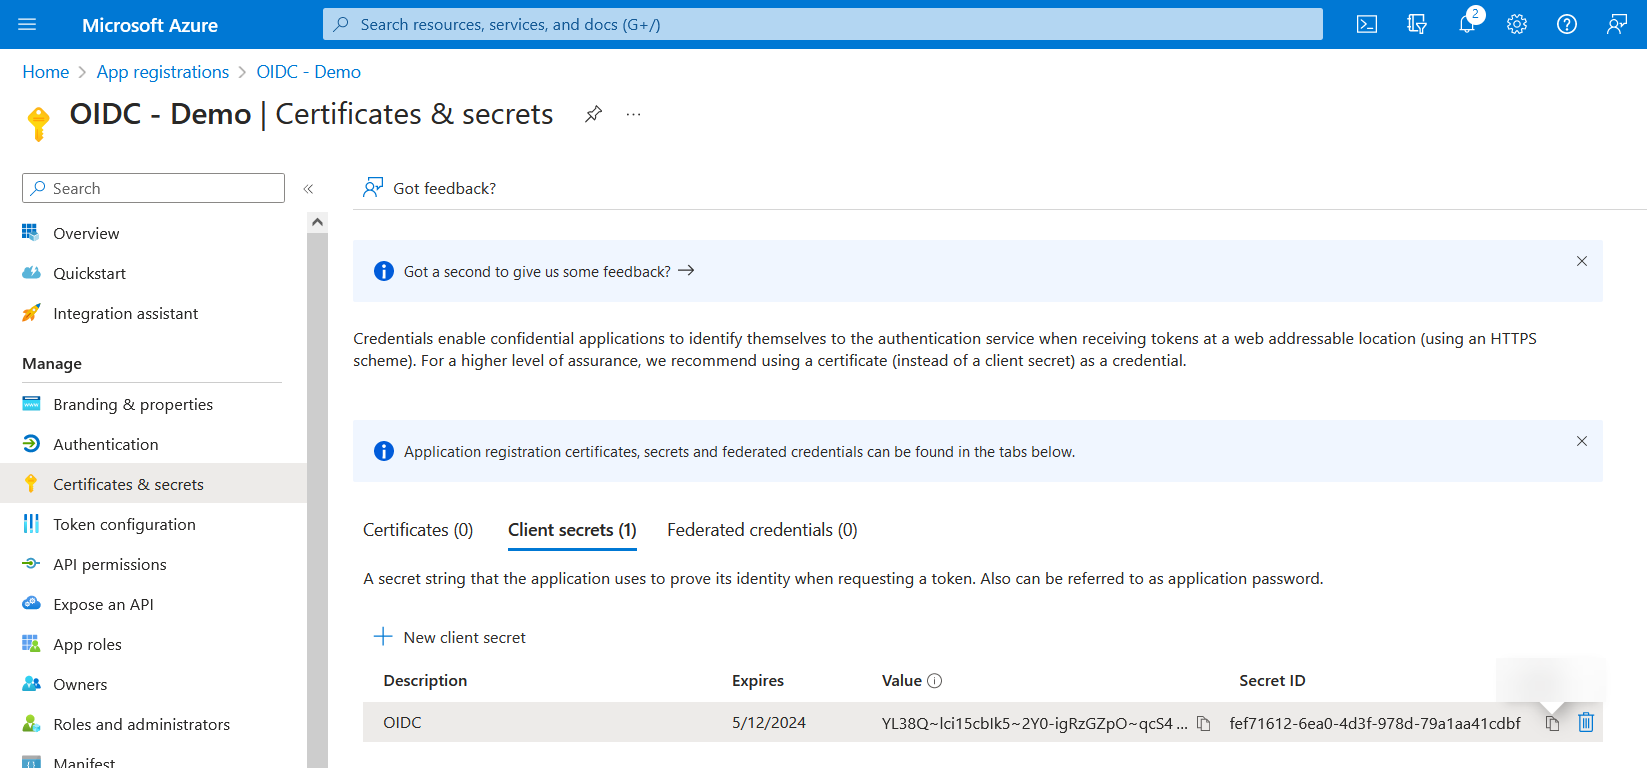
- Once the client secret is created, it will appear in the list. Copy the value and save it for future use. (That is required as the Client Secret in ADSS Web RA's connector).
- Then click Overview and return to the application you created. Then click Endpoints.
- From here, the value against OpenID Connect metadata document is the Discovery document URL (that is required in the ADSS Web RA's connector). Copy and save this value for later use.

The process for app registration and all information required from the Azure portal for ADSS Web RA (connector) is complete.