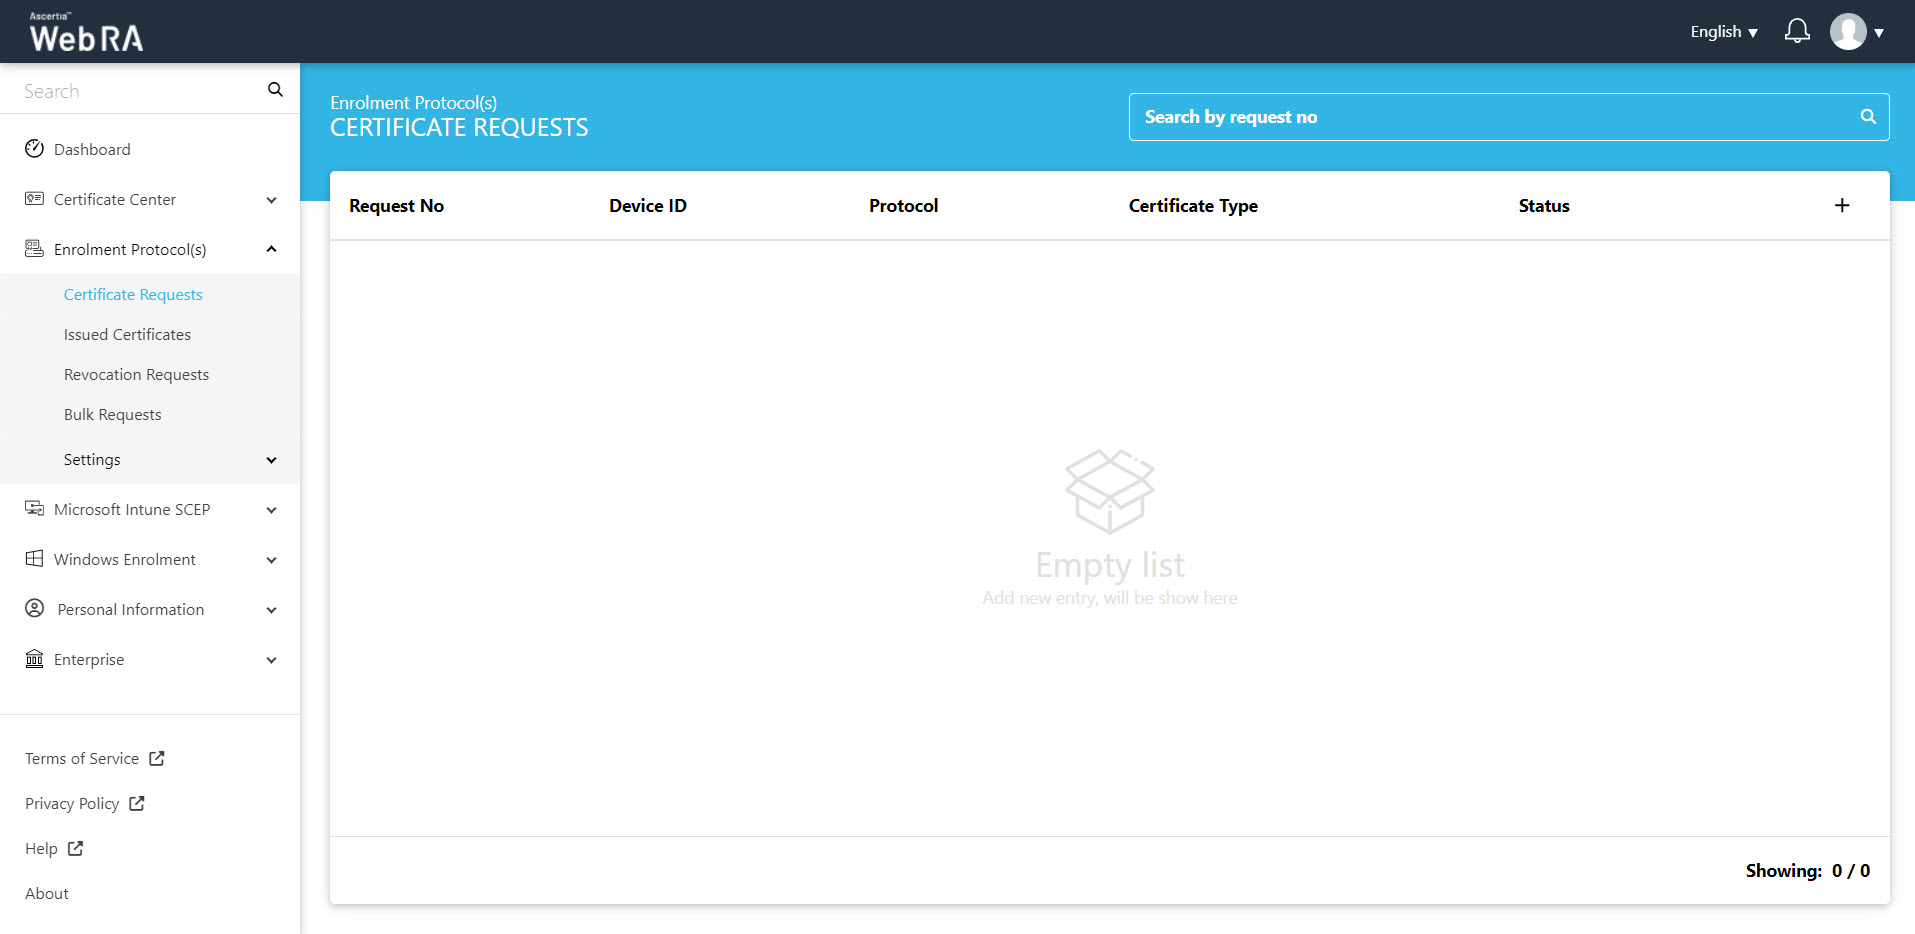
Certificate Requests
This section lists down all the certificate requests pertaining to device enrolment.
ADSS Web RA Server supports the following devices to generate certificates. The following will describe how to create a certificate for each device type:
- Certificate Request for SCEP
- Certificate Request for ACME
- Certificate Request for EST
- Certificate Request for CMP
Create a Certificate Request for SCEP
Once you have set-up device enrolment, follow these steps to create a certificate request:
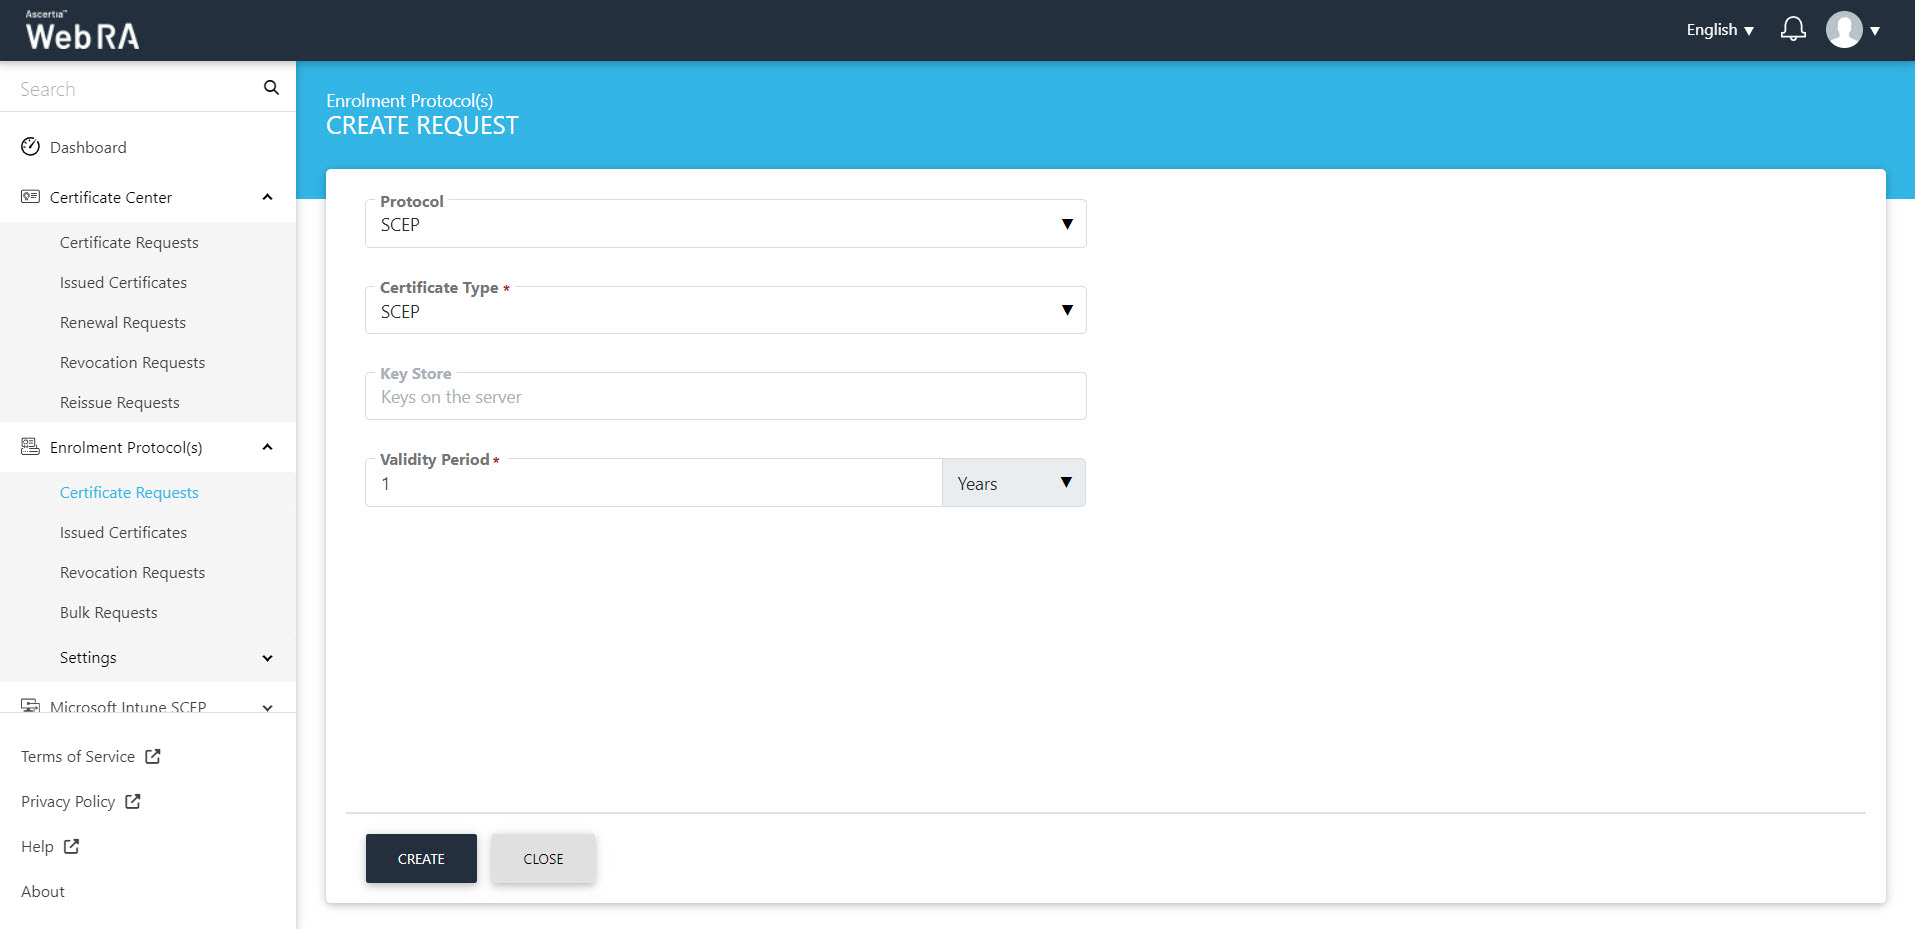
- You can create a certificate request, using
 icon on top right.
- An operator will be required to select a protocol and a certificate type. Once you select the relevant profile from the certificate type drop down, the Key Store will appear auto-filled and disabled. Select a Validity Period and click Create.
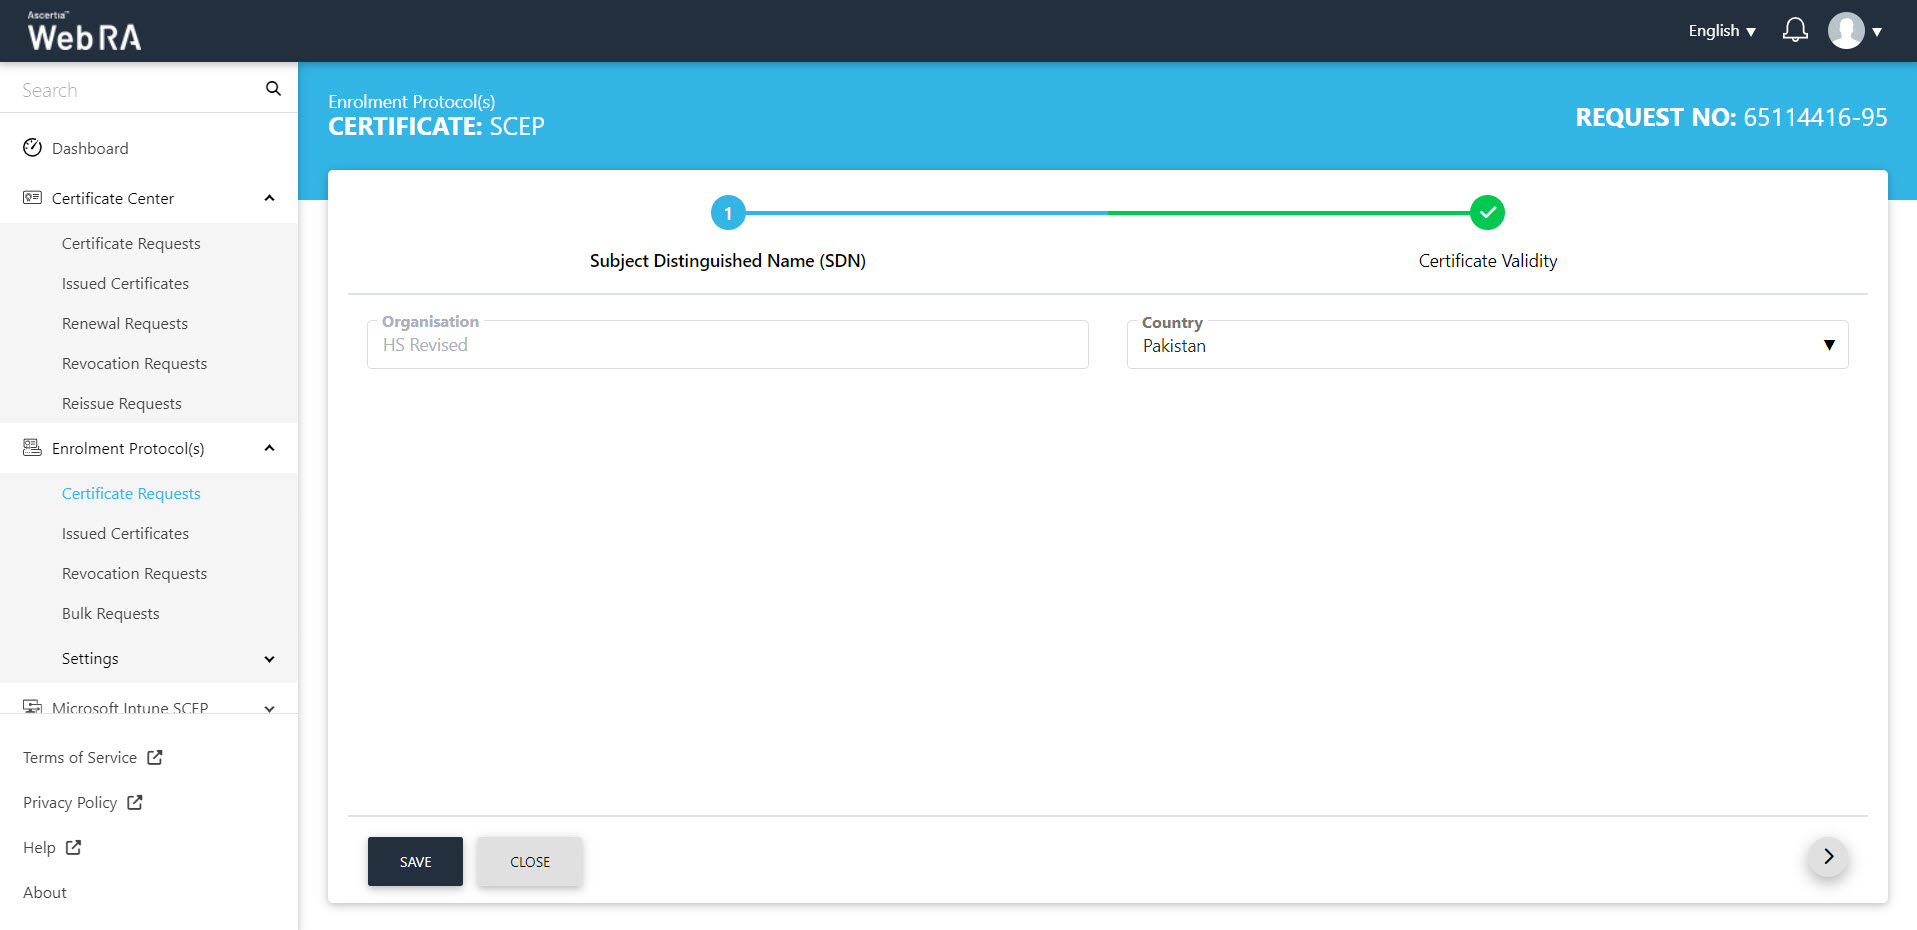
- The Subject Distinguished Name (SDN) screen will be displayed. Select the Country and click next.
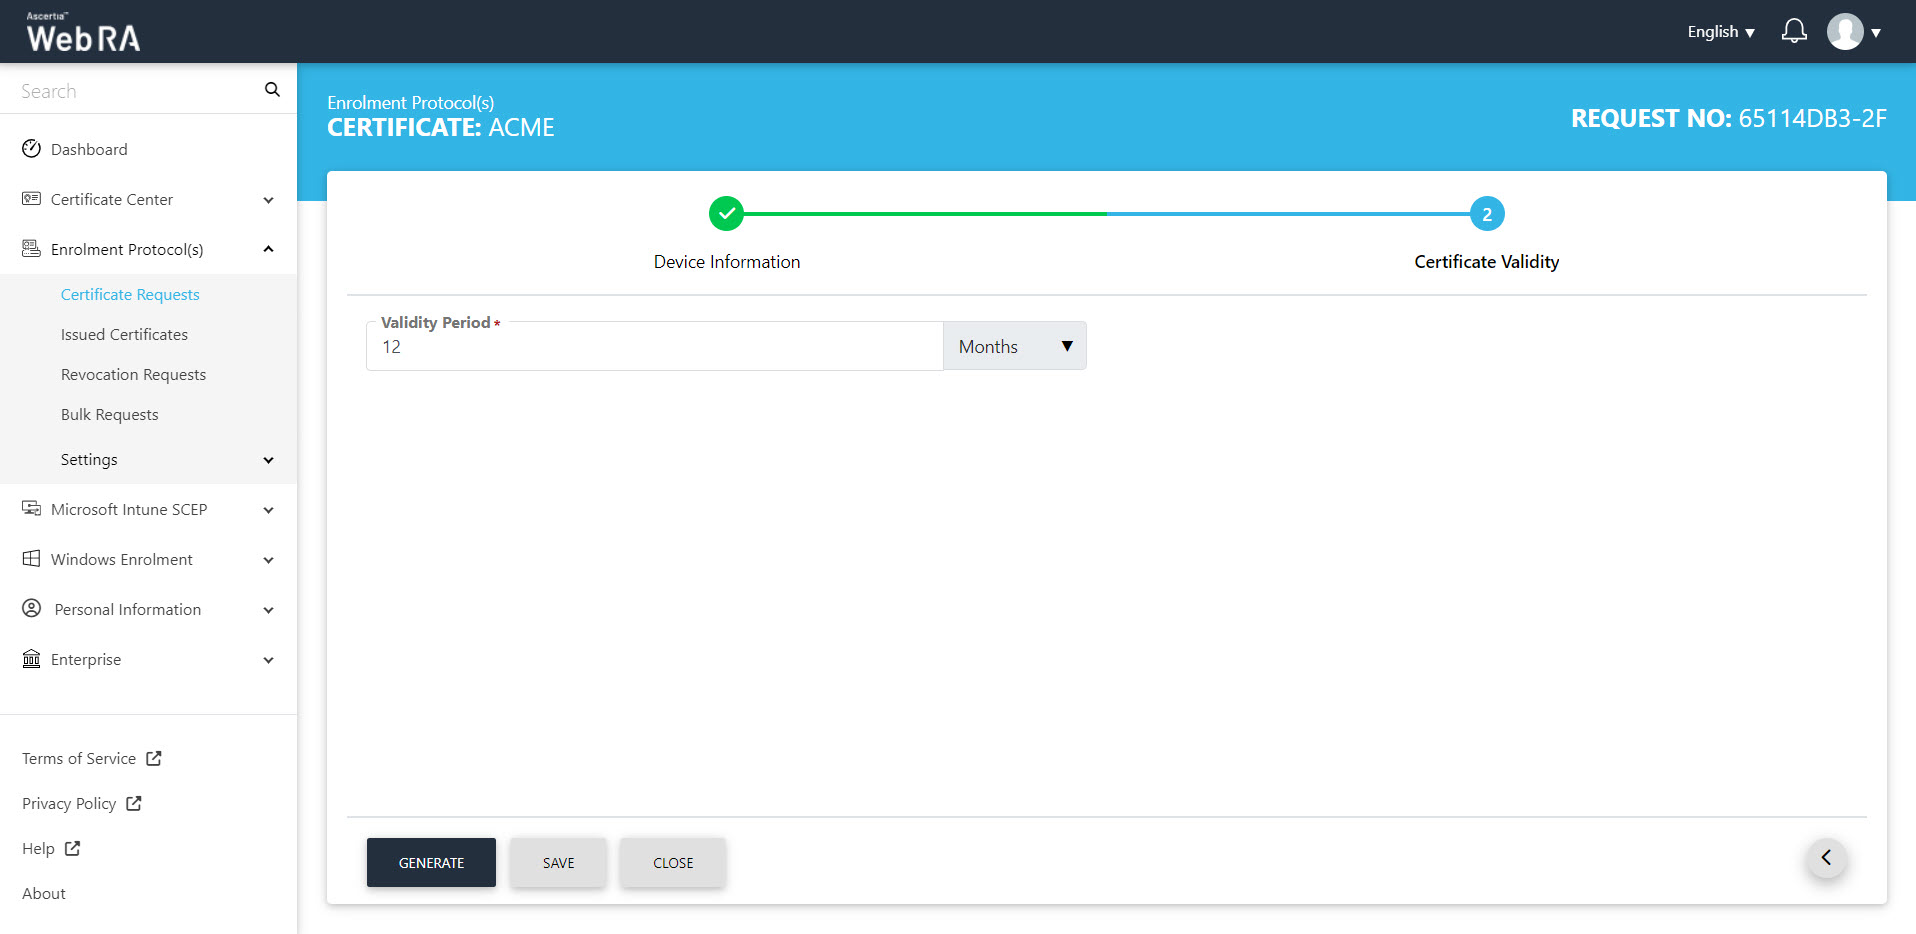
- Select the Validity Period from the Certificate Validity screen.
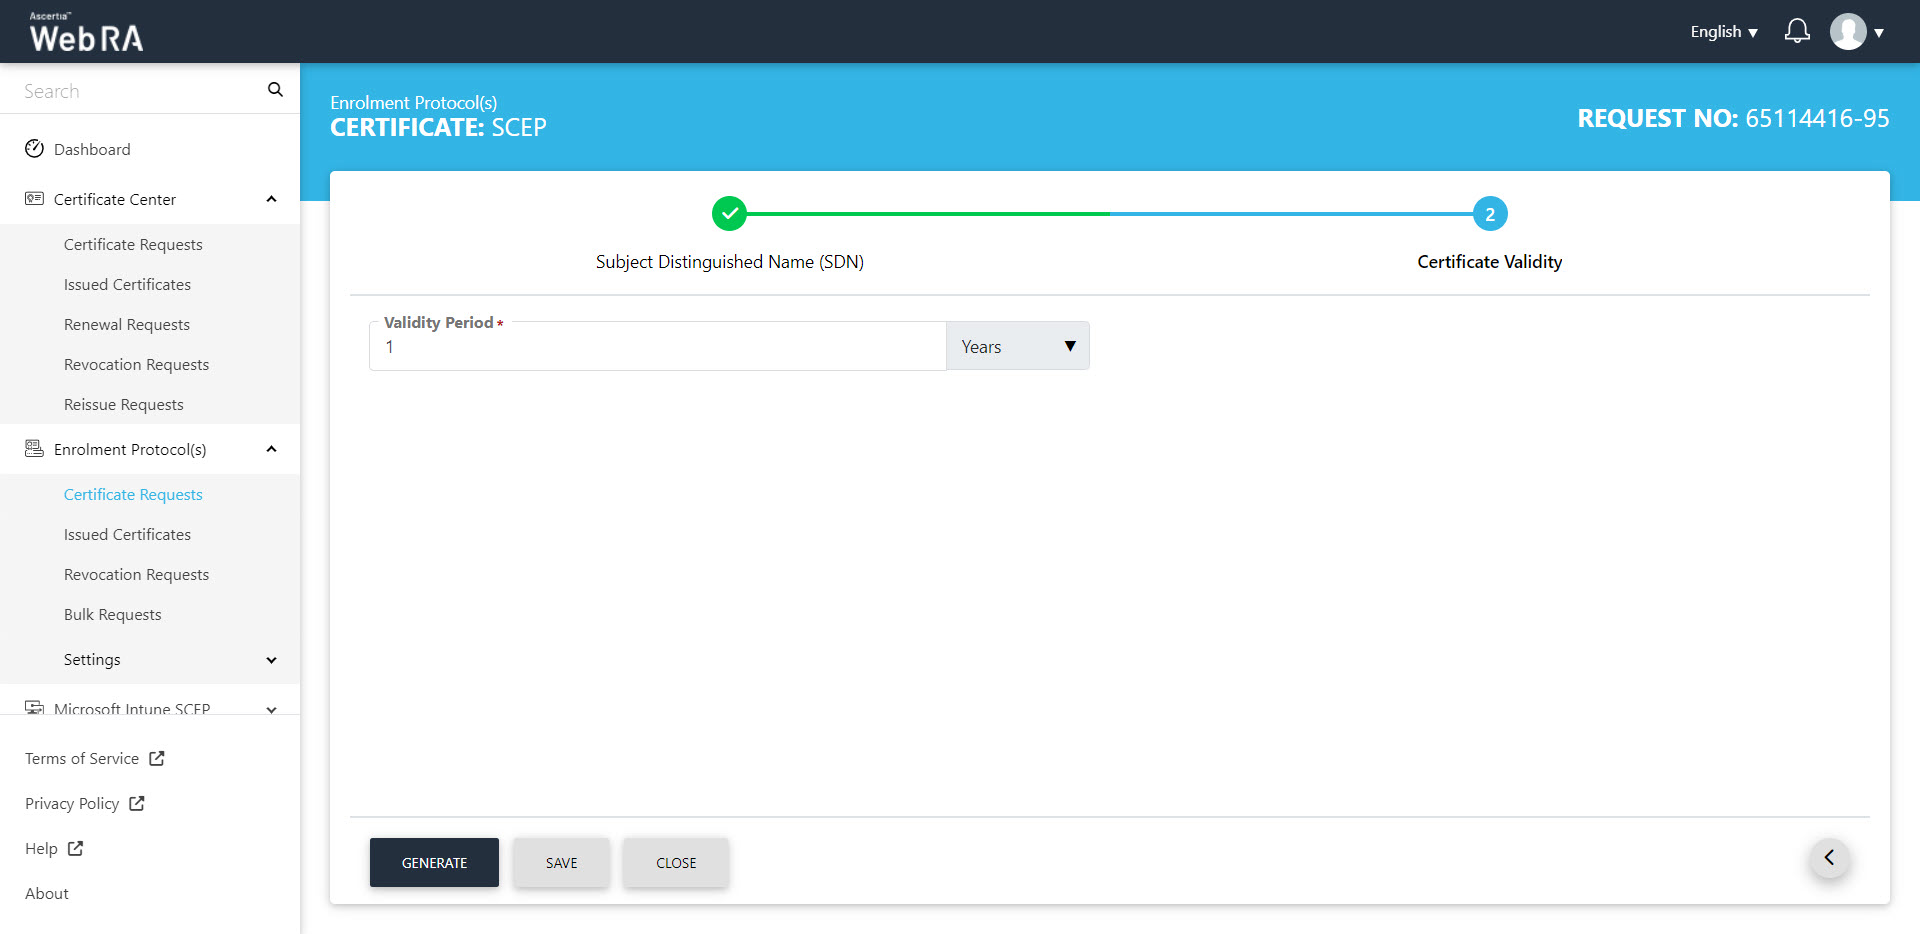
- Click the "Generate" button.
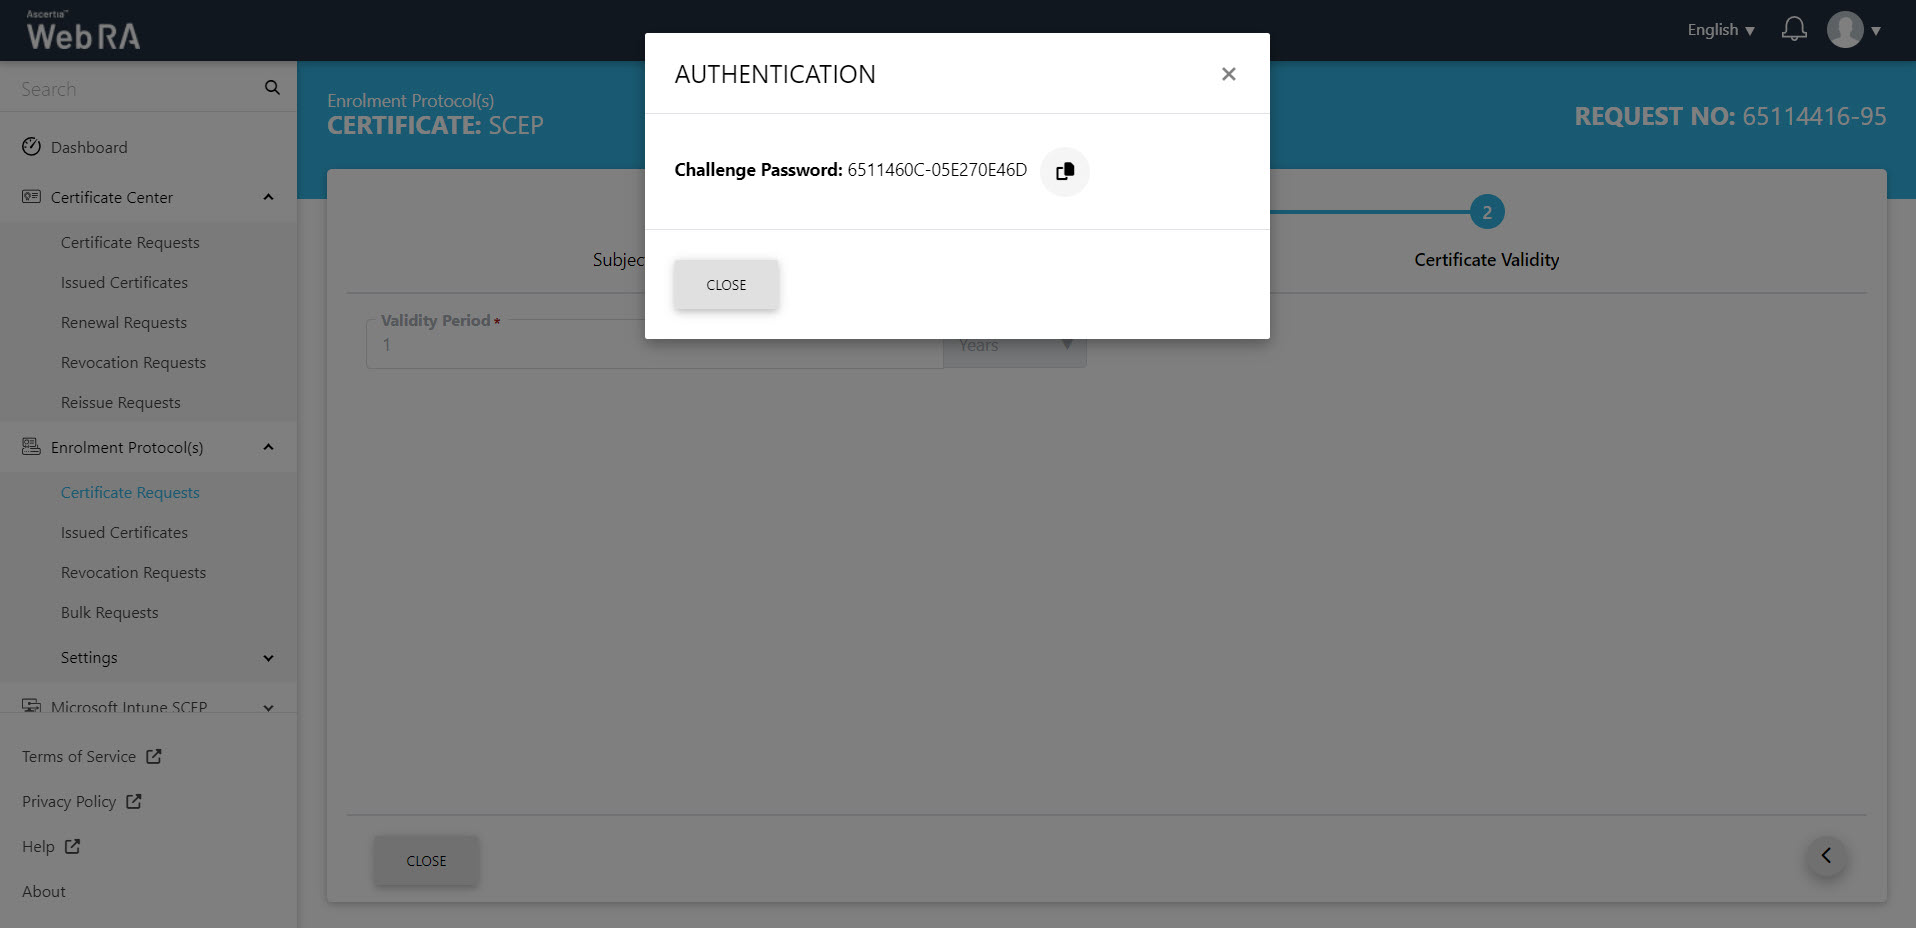
- A challenge password will be generated for request authentication. You can also copy the password.
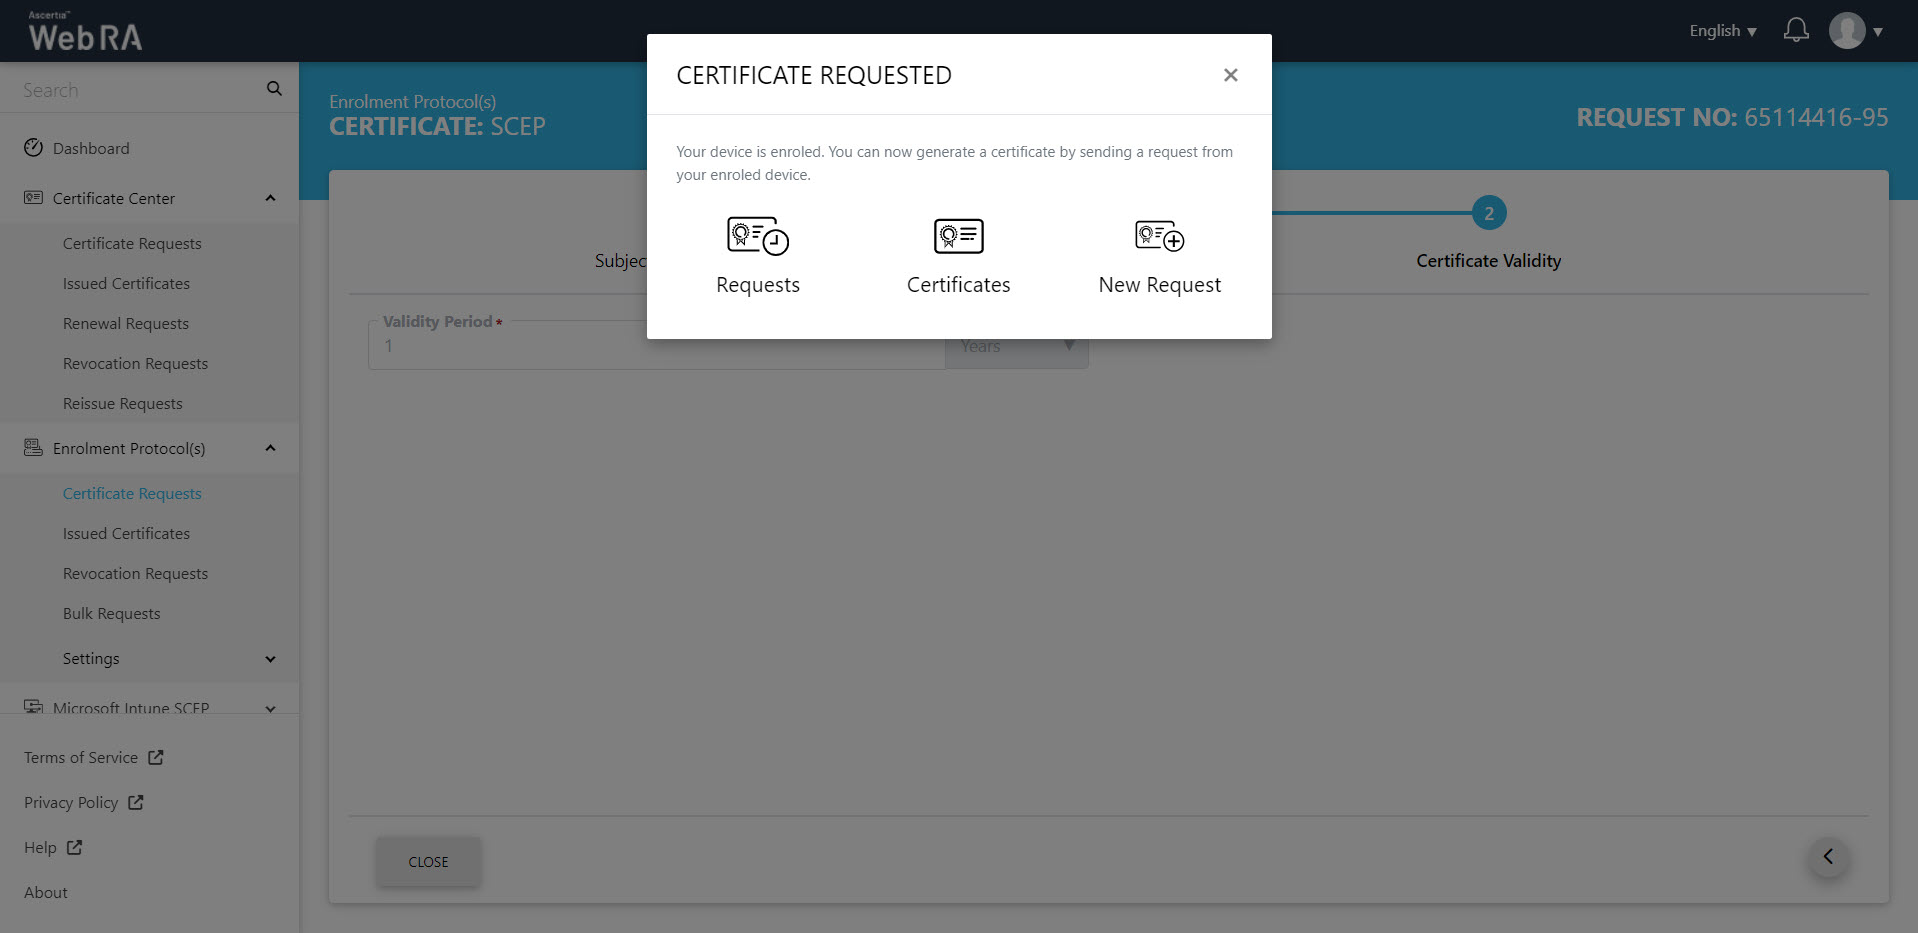
- The device enrolment confirmation message will appear.
Once you have your enrolled device, all the certificate requests related to the devices user will be listed here.
Request Notes
If an operator has added customized request notes in certificate requests pertaining to a specific enterprise, they will appear in all types of certificates requests i.e. issued, rekey, revoked, renewed and reissued certificate requests. The request notes will appear on the steppers only against which the operator has customised them.
An operator can configure it from the Enterprise Request Notes section in the admin portal.
The steps to create device requests for SCEP and CMP are the same. But in case of ACME and EST, there will be slight changes in the second and third stepper as displayed and explained below:
Create a Certificate Request for ACME
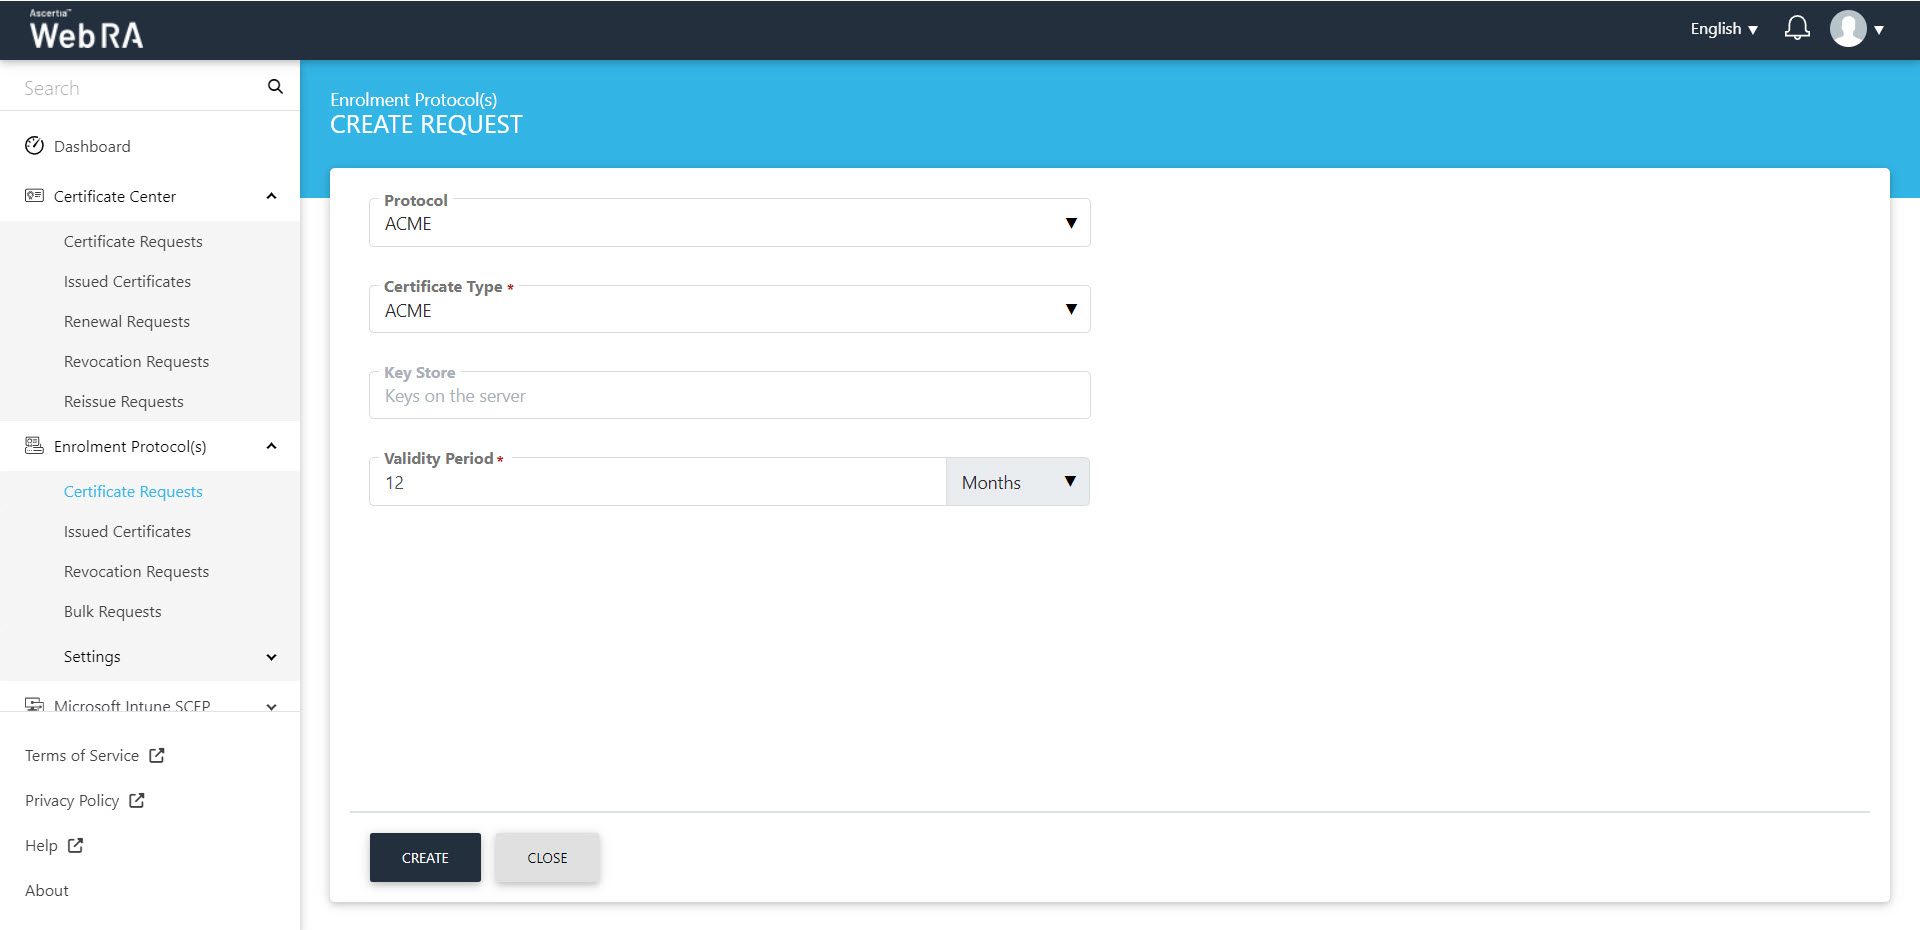
- To create a certificate request, click icon on top right. Select the Protocol and the Certificate Type. The key store and validity period will appear in a disabled form. Click "Create".
- The Device Information screen will be displayed. Enter the Device ID and Email, then click next.

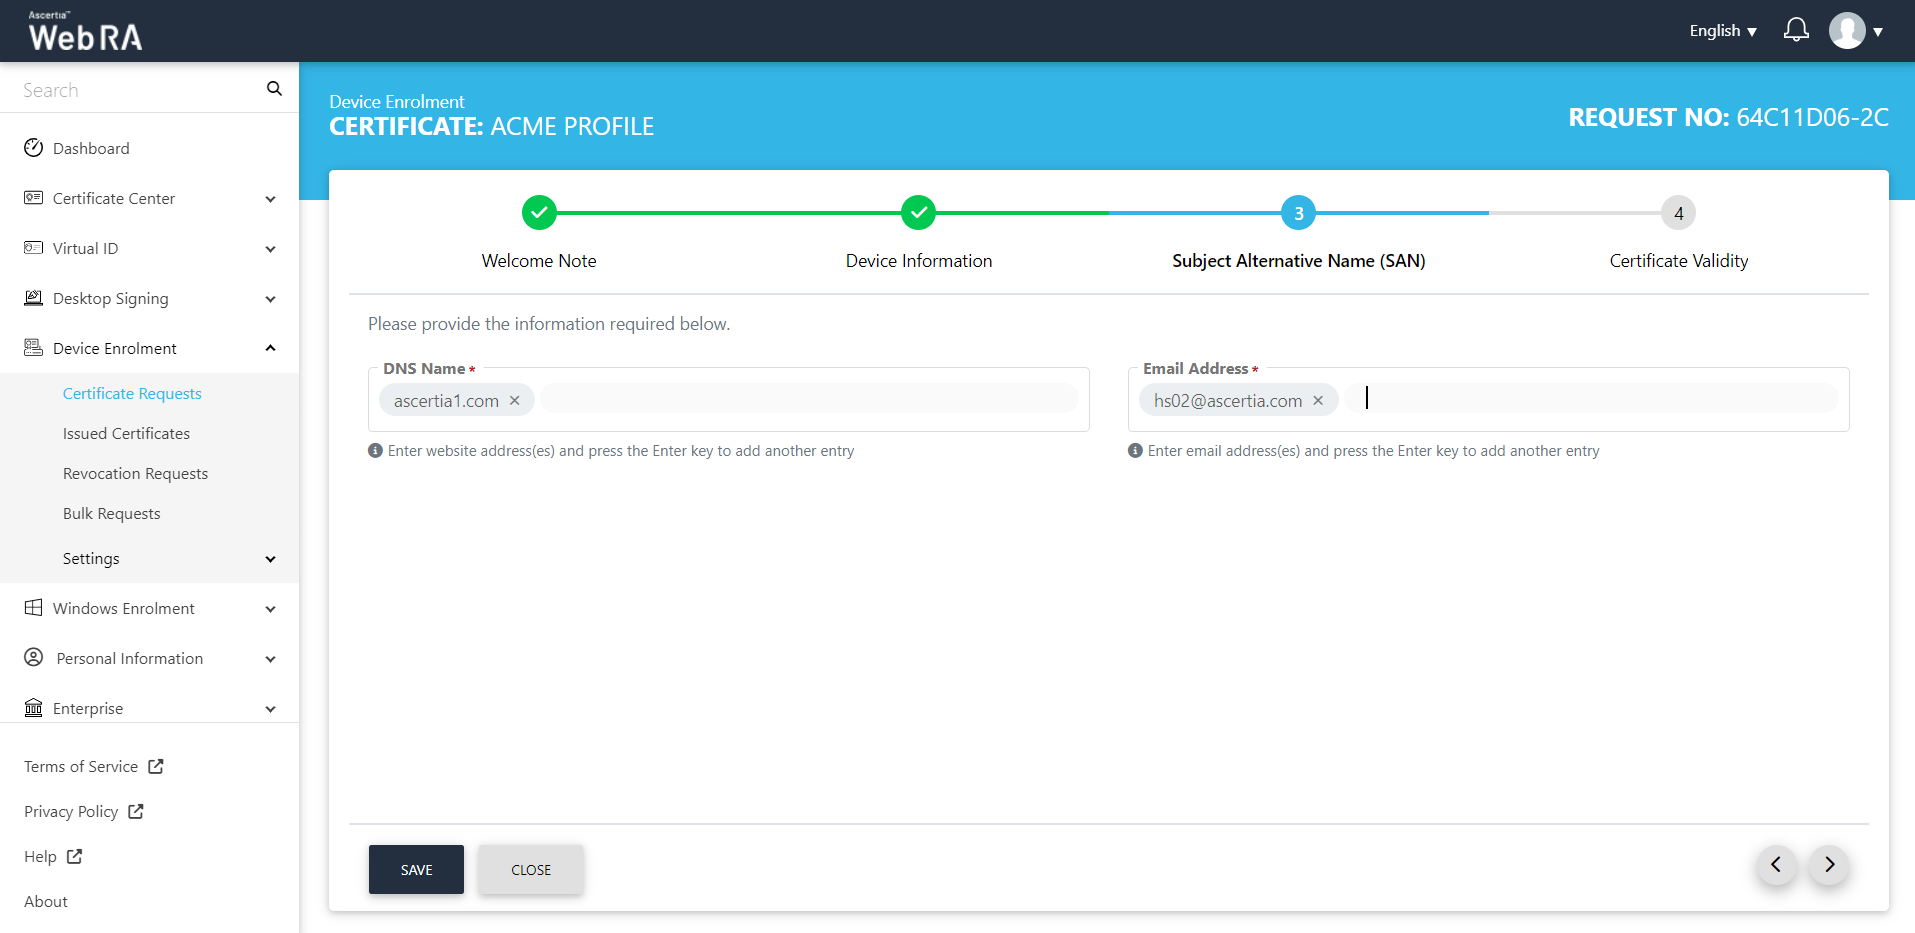
- The Subject Alternative Name (SAN) screen will be displayed.
- Enter the Certificate Validity.
- Click "Generate".
- Once you generate a request from your enrolled device, the status of the certificate request will be shown as Approved in the requests listing, while the certificate status will be shown as Issued in the certificates listing.
- The certificate can be downloaded by clicking on the Download button once you open the certificate.
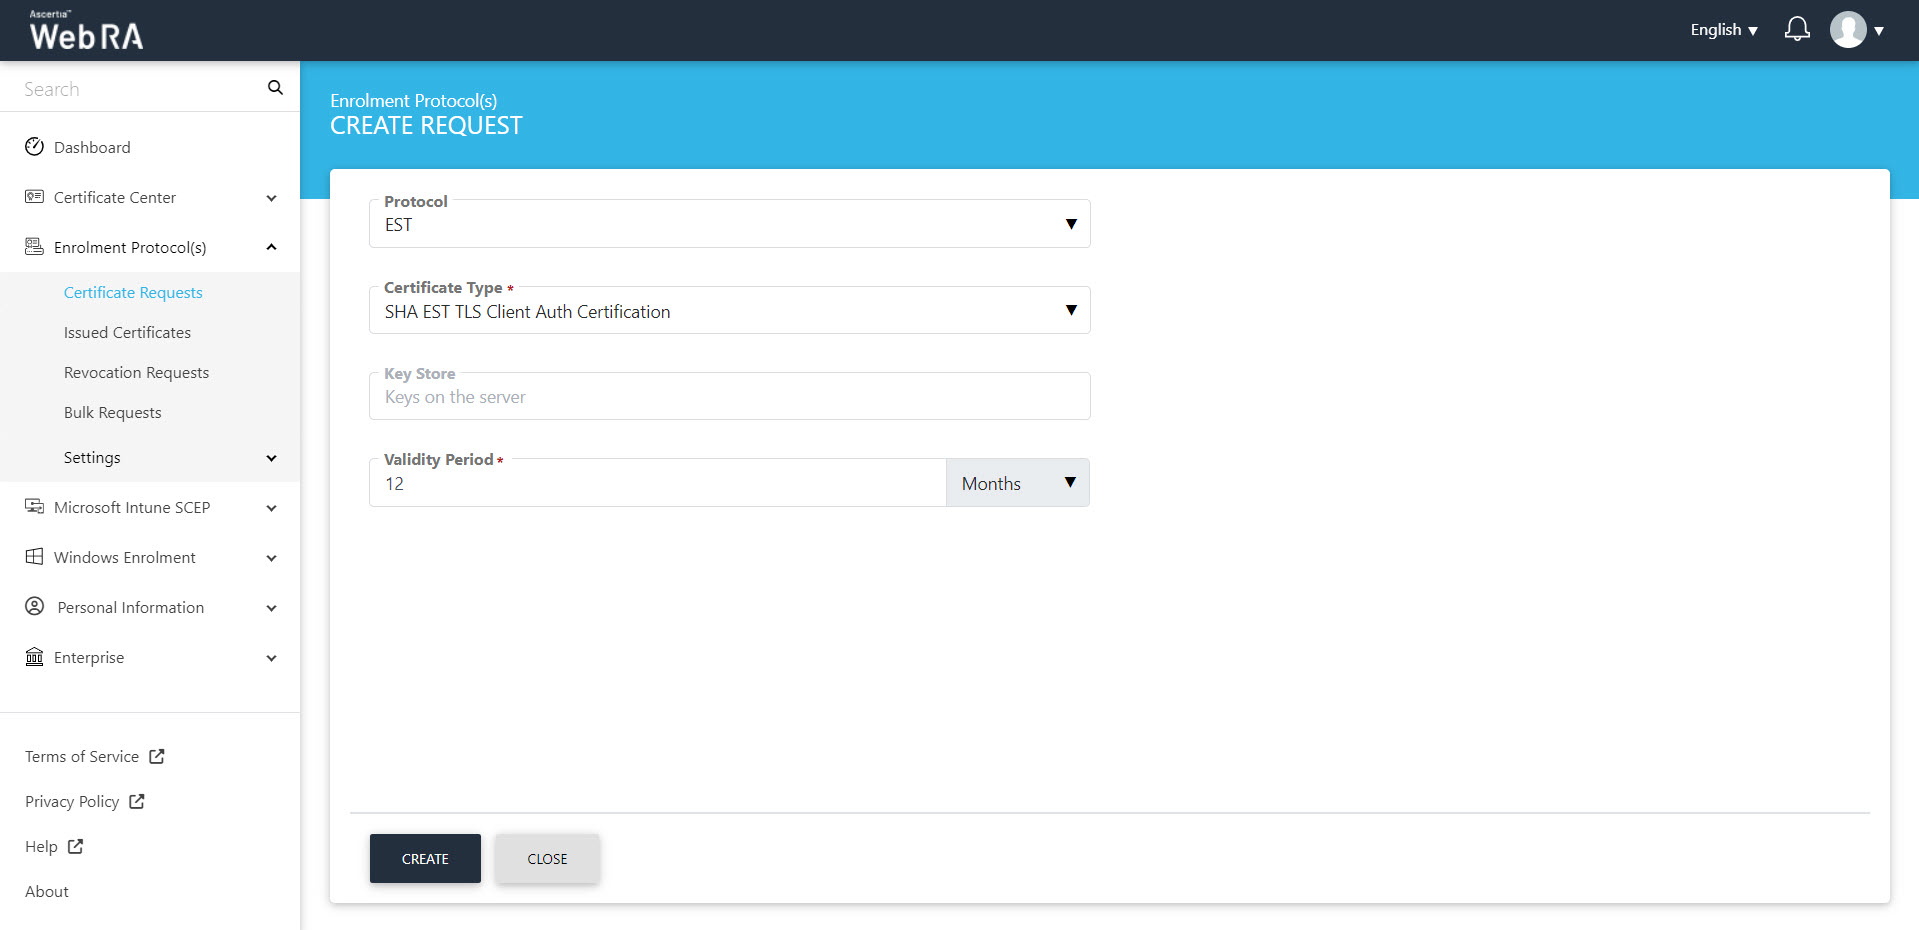
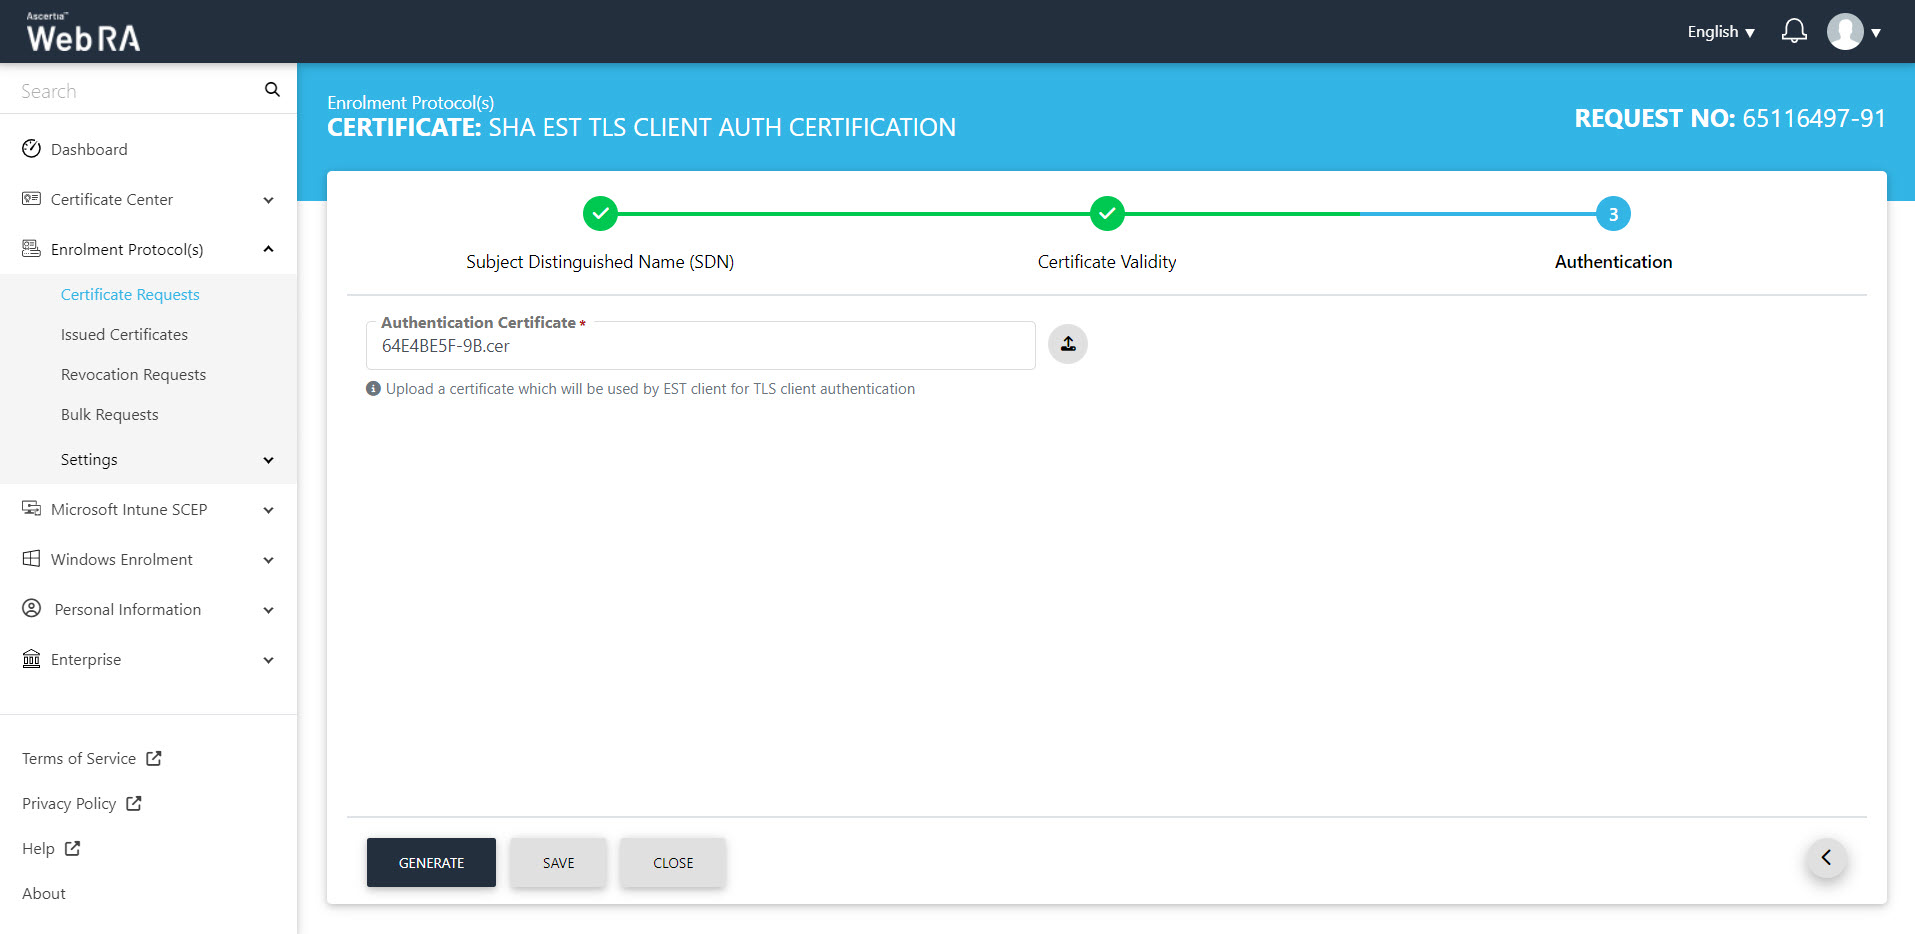
Create a Certificate Request for EST
- To create a certificate request, click icon on top right. Select the Protocol and the Certificate Type. The key store and validity period will appear in a disabled form. Click "Create".
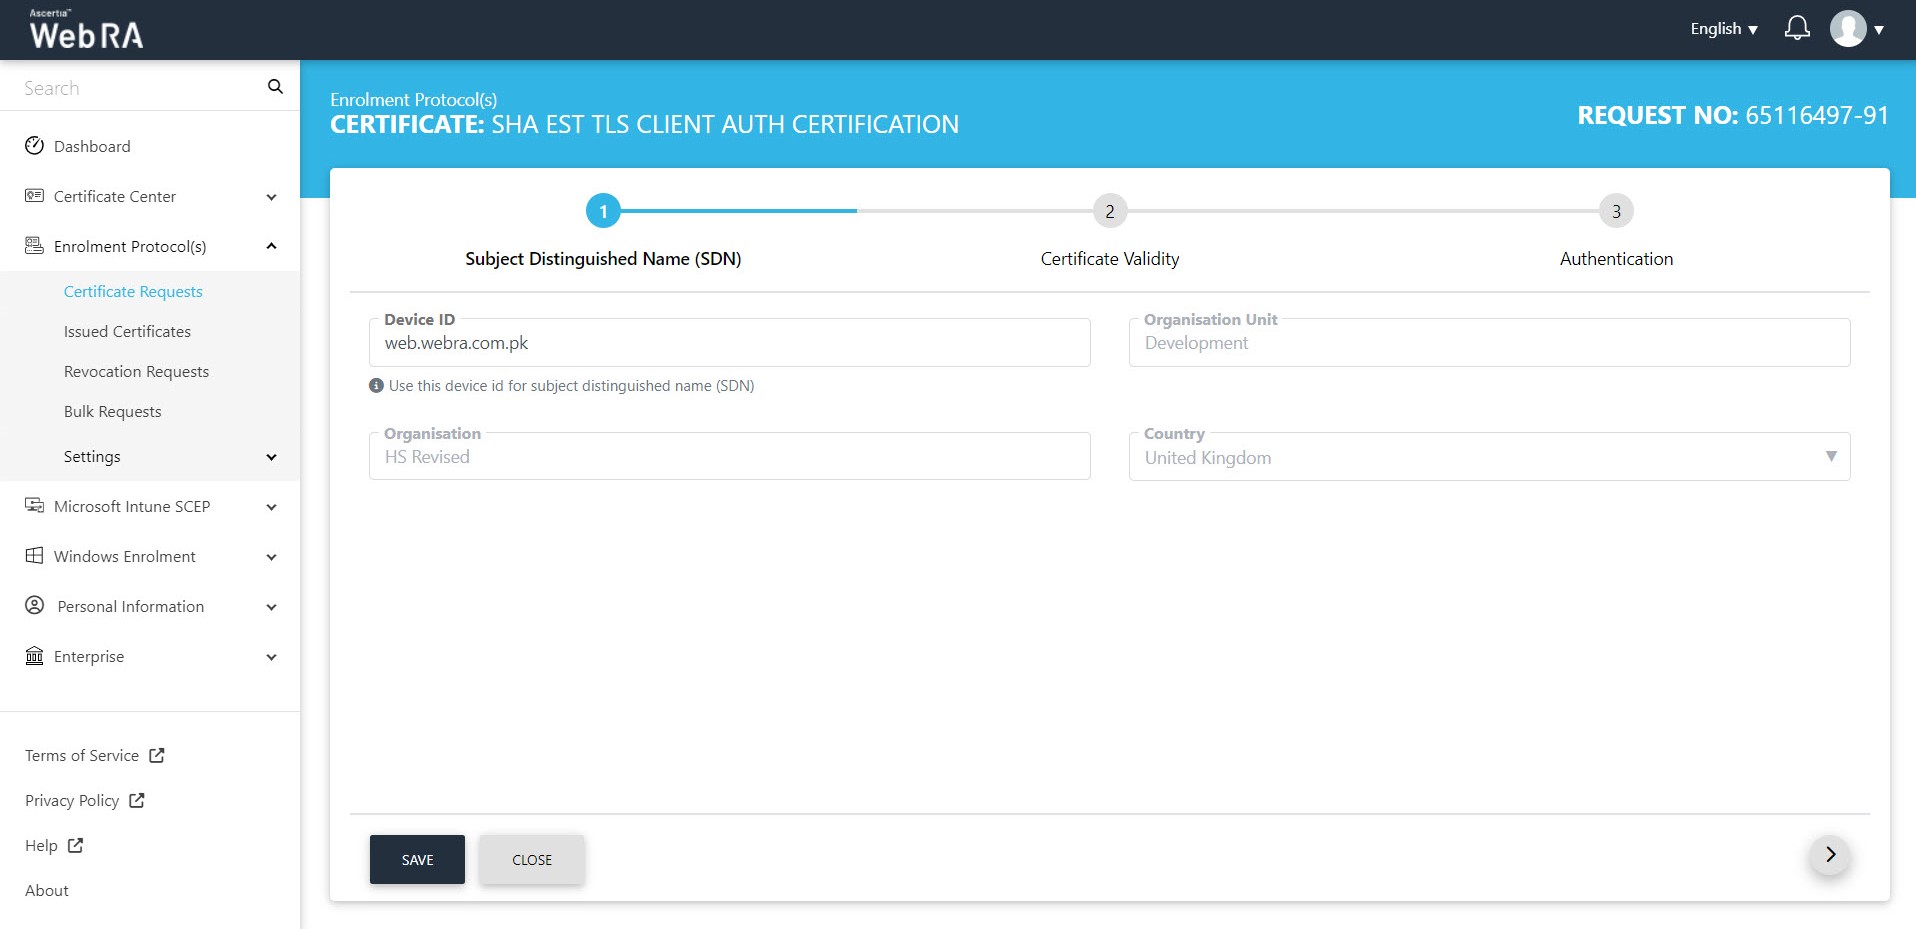
- The Subject Distinguished Name (SDN) screen will appear. Enter your Device ID and click next.
- On the Certificate Validity screen, enter your validity period and click next to proceed.

- Authentication tab will appear. Upload an authentication certificate and click "Generate".
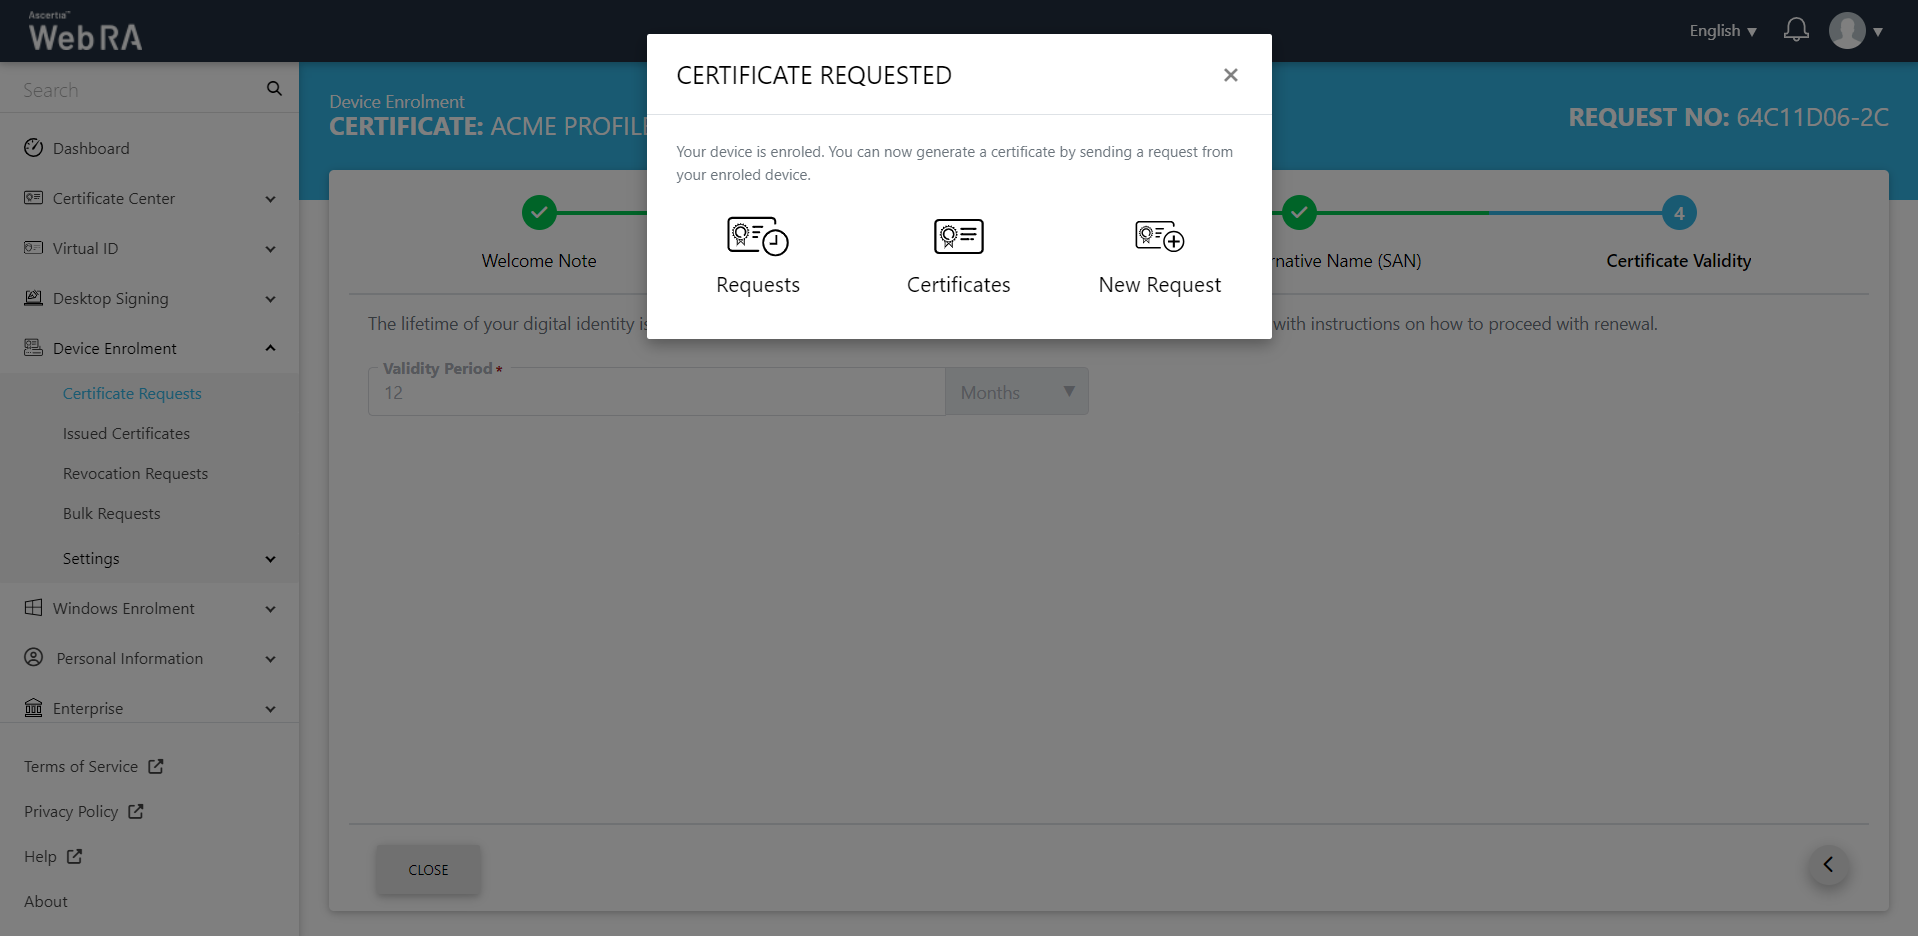
- The Certificate Requested tab will appear, stating that your device is enroled.
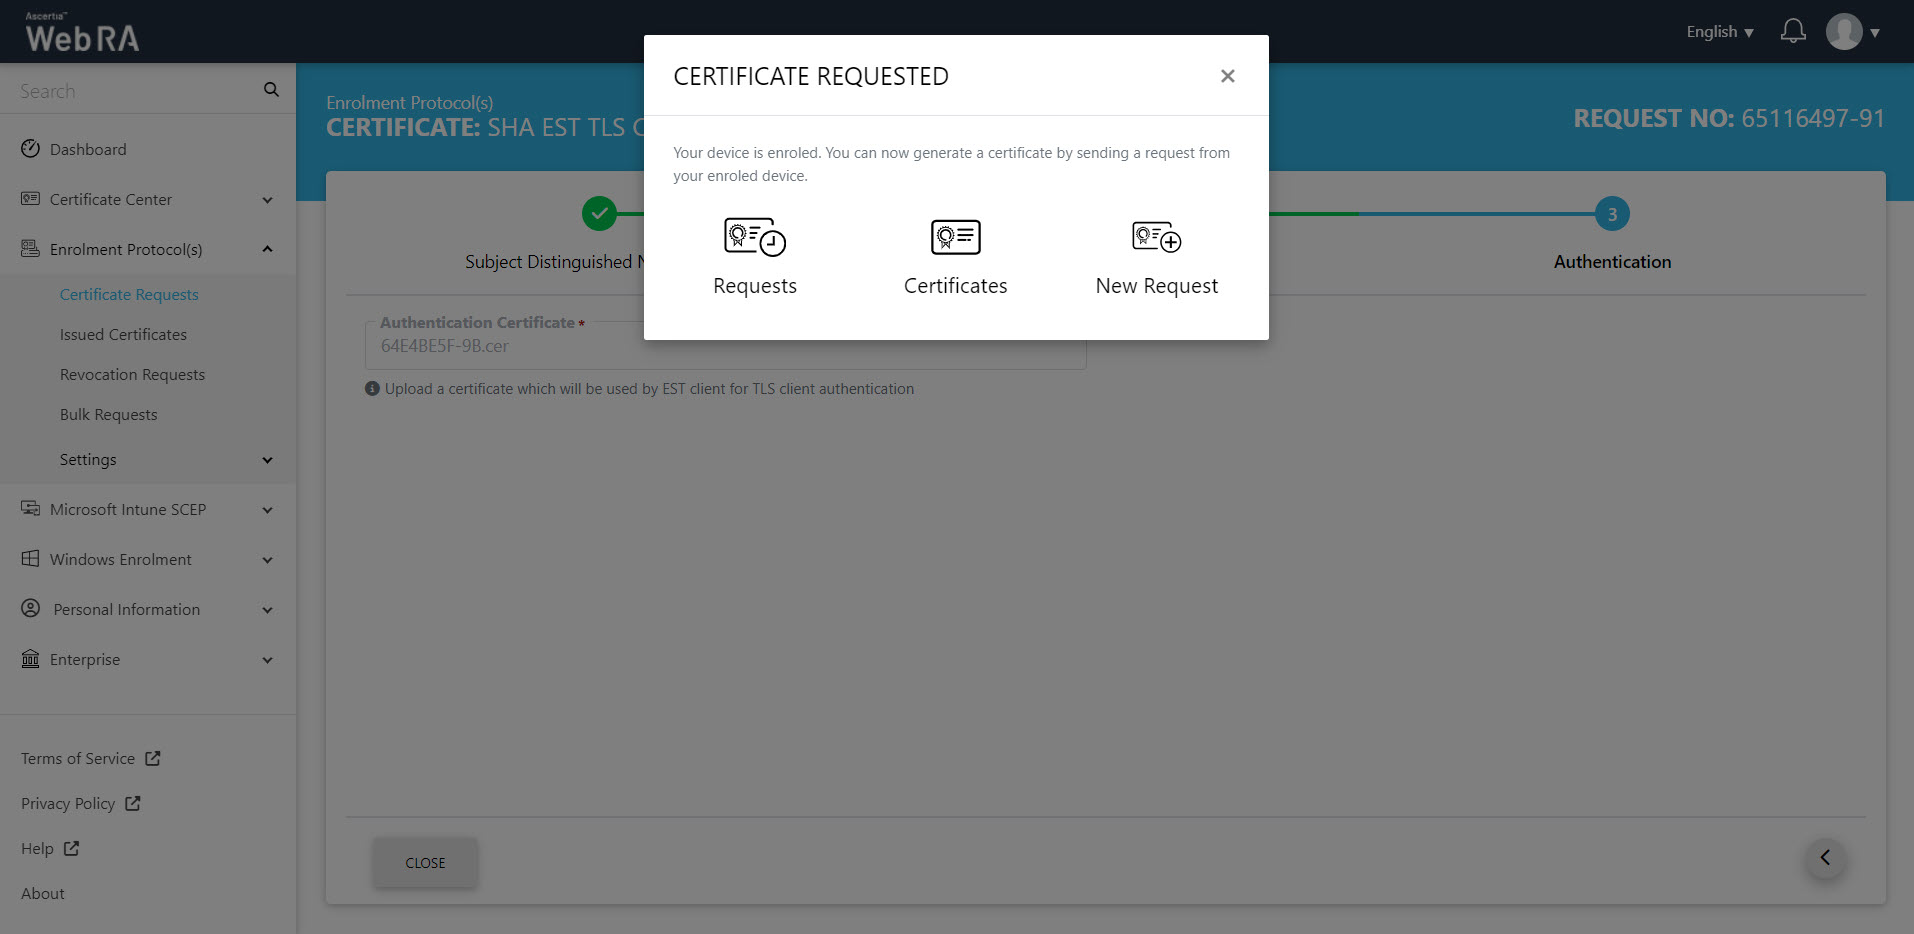
- Once you generate a request from your enroled device, the status of the certificate request will be shown as Approved in the requests listing, while the certificate status will be shown as Issued in the certificates listing.
- The certificate can be downloaded by clicking on the Download button once you open the certificate.
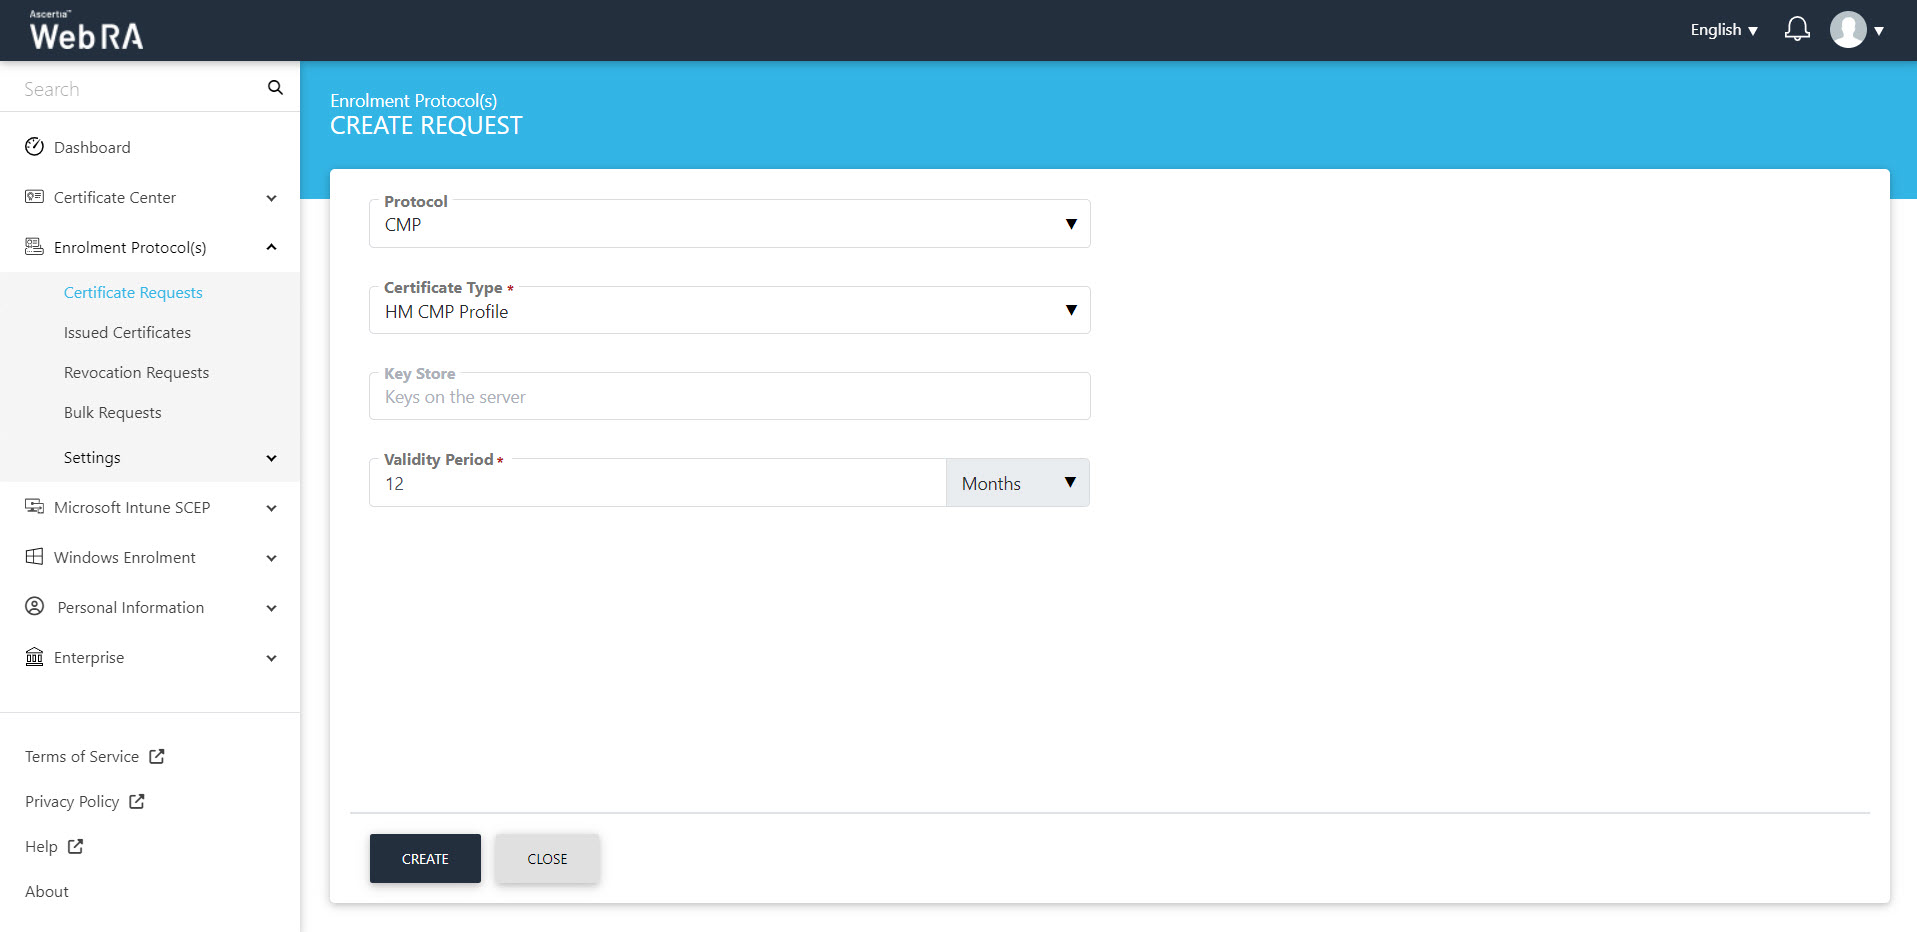
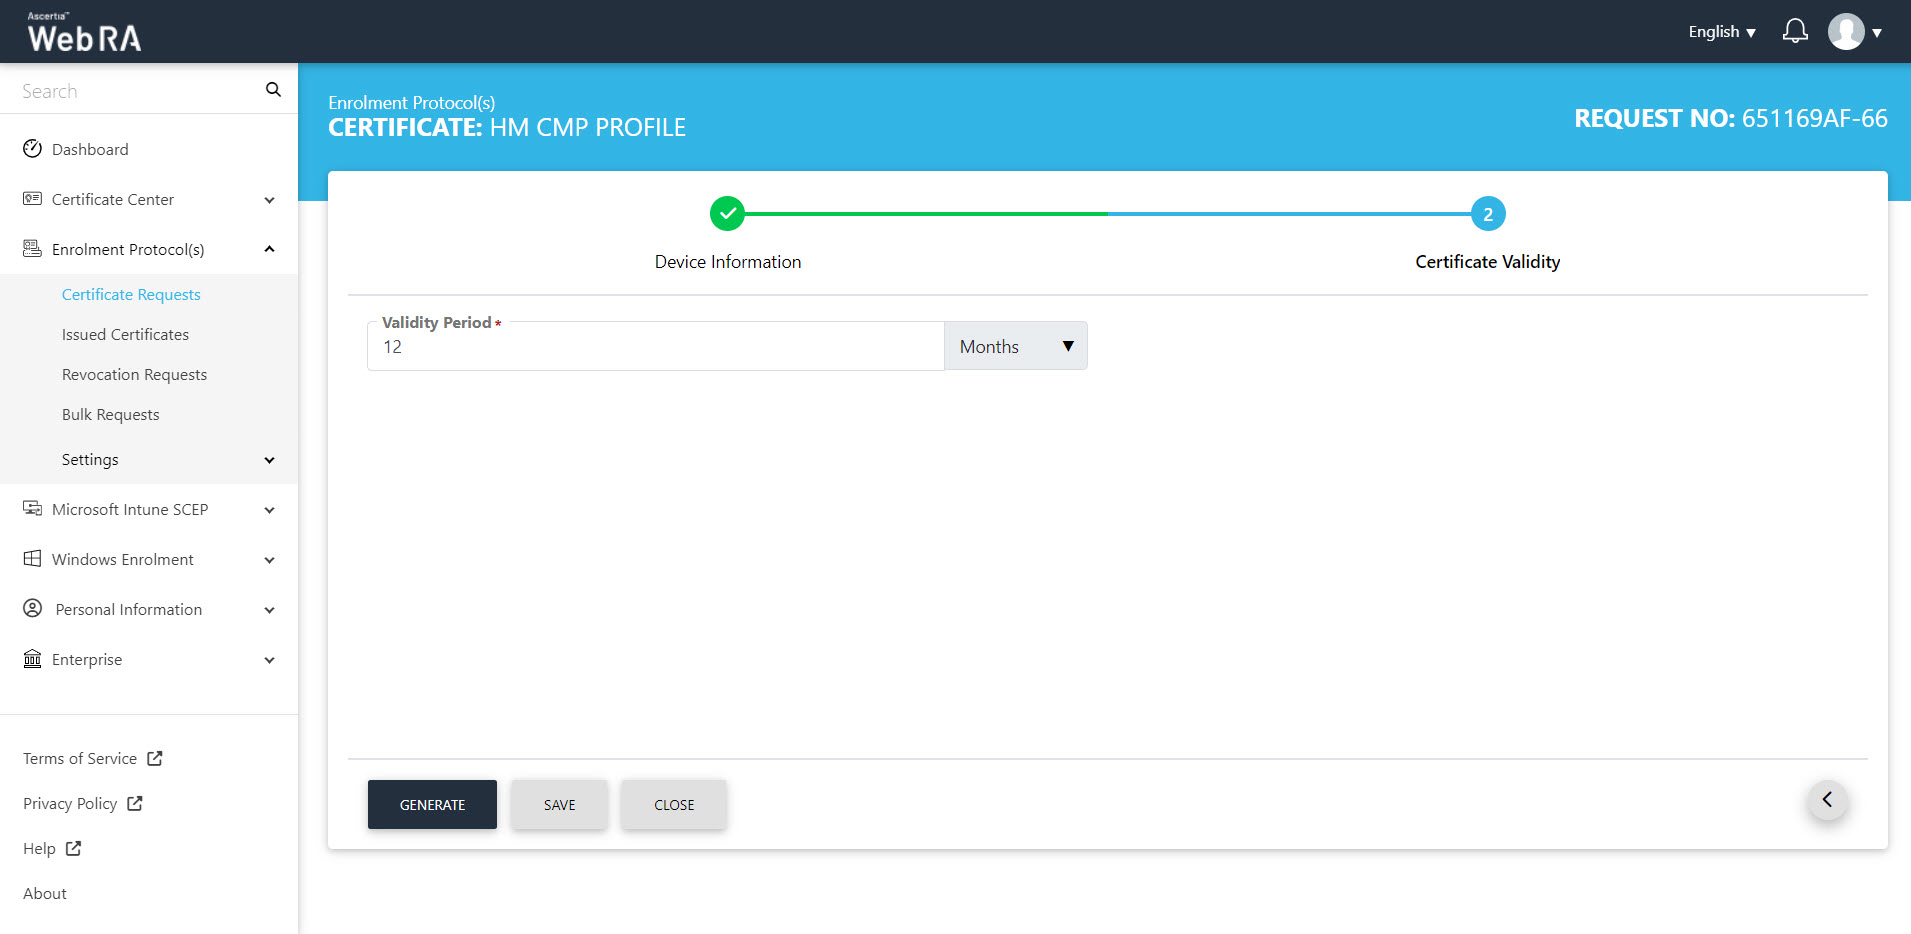
Create a Certificate Request for CMP
- To create a certificate request, click icon on top right. Select the Protocol and the Certificate Type. The key store and validity period will appear in a disabled form. Click "Create".
- The Subject Distinguished Name (SDN) screen will appear. Enter your Device ID and click next.
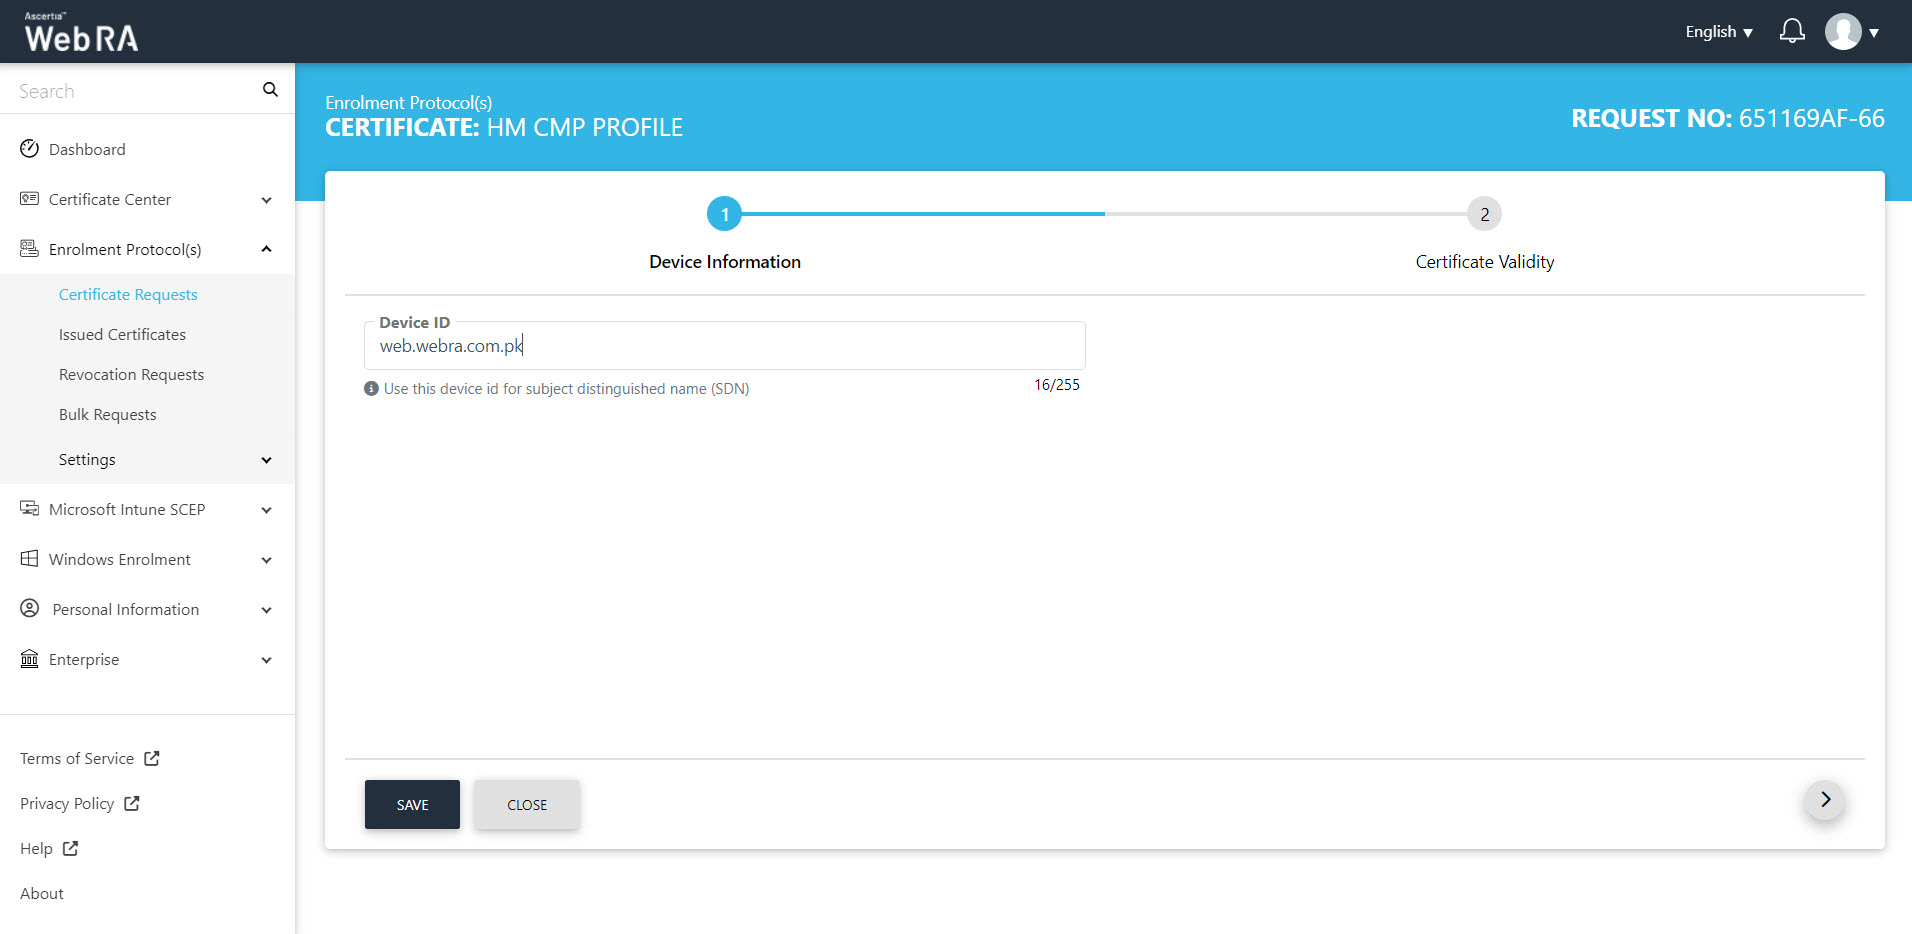
- On the Certificate Validity screen, enter your validity period and click next to proceed.
- The Certificate Requested tab will appear, stating that your device is enroled.
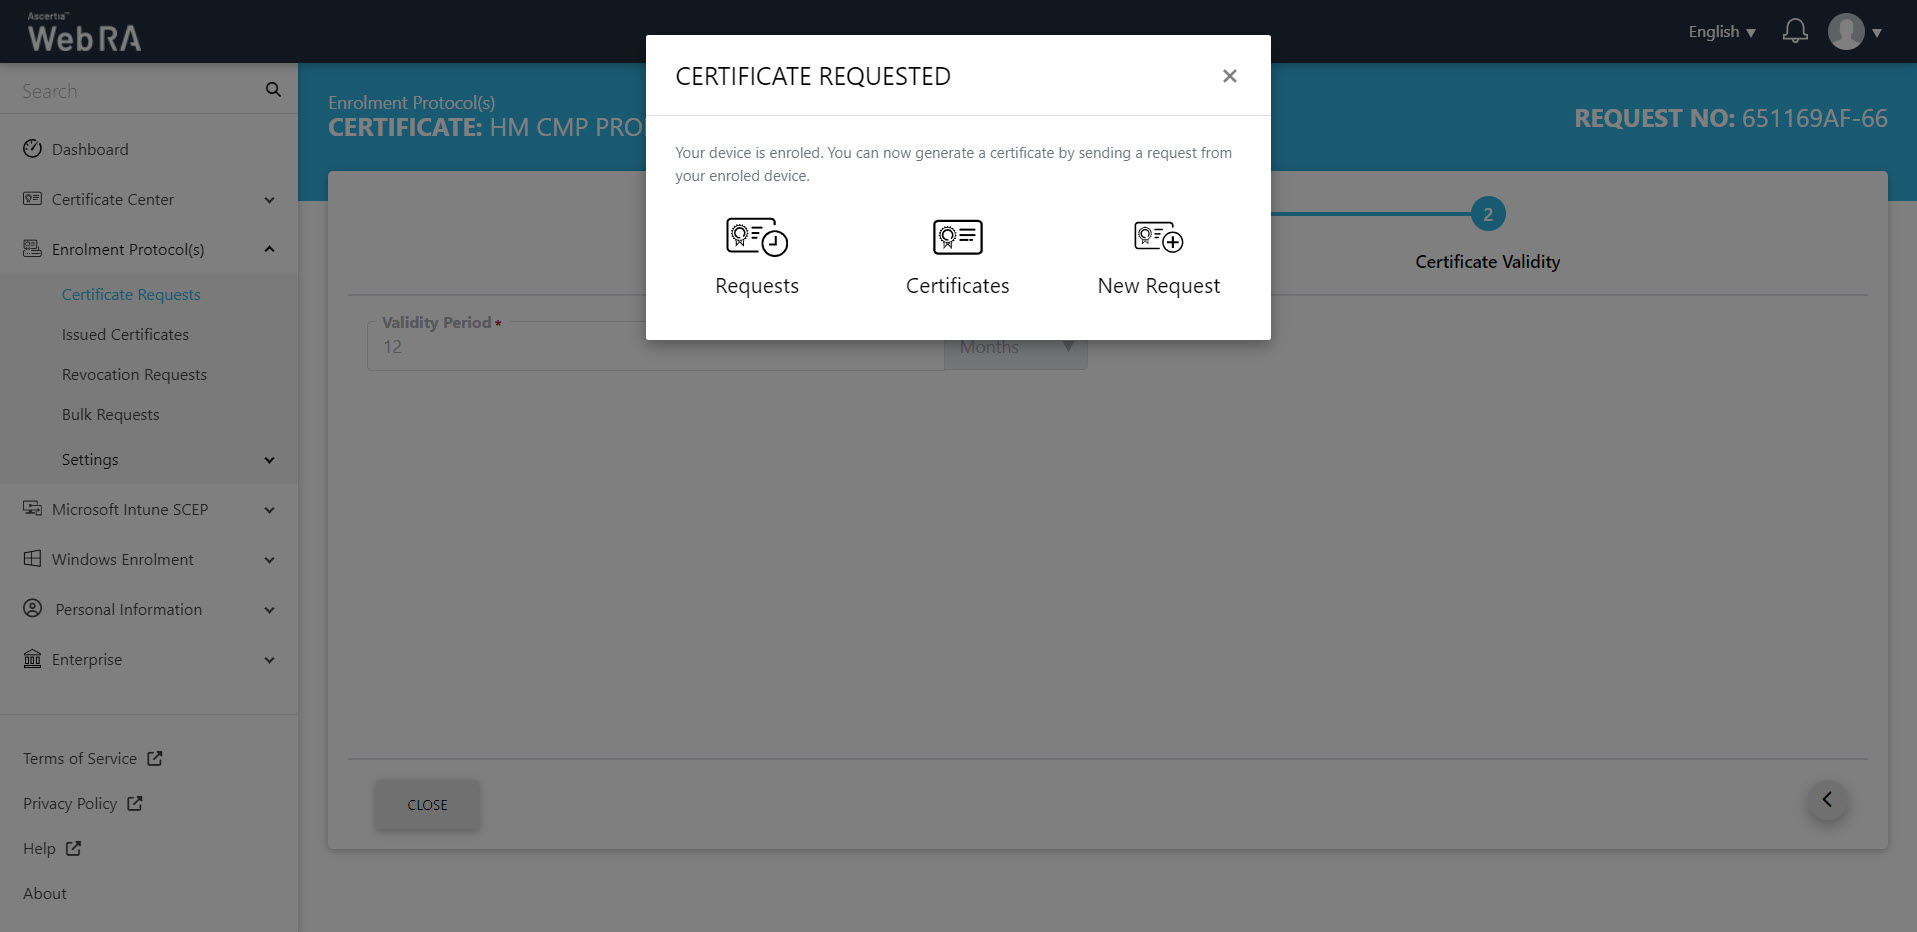
- Once you generate a request from your enroled device, the status of the certificate request will be shown as Approved in the requests listing, while the certificate status will be shown as Issued in the certificates listing.
- The certificate can be downloaded by clicking on the Download button once you open the certificate
Second Factor Authentication
If second factor authentication is enabled on certificate requests, the configured authentication mechanism will function accordingly. When a user clicks on the Generate button, the authentication window will appear, and once it accepts the selected method, it will generate a certificate.
The authentication mechanism can be one of the following:
- SMS OTP Authentication
- Email OTP Authentication
- Email & SMS Authentication
- SAML Authentication
- Active Directory Authentication
- Azure Active Directory Authentication
- OIDC Authentication