Requests
In this section, an operator can set policy for the following areas in the ADSS Web RA:
- CSR Verification
- PIN Password Policy
- PUK Password Policy
- Email Validation
- Request Settings
- Domain Configurations
- Certification Authority Authorisation (CAA) Records
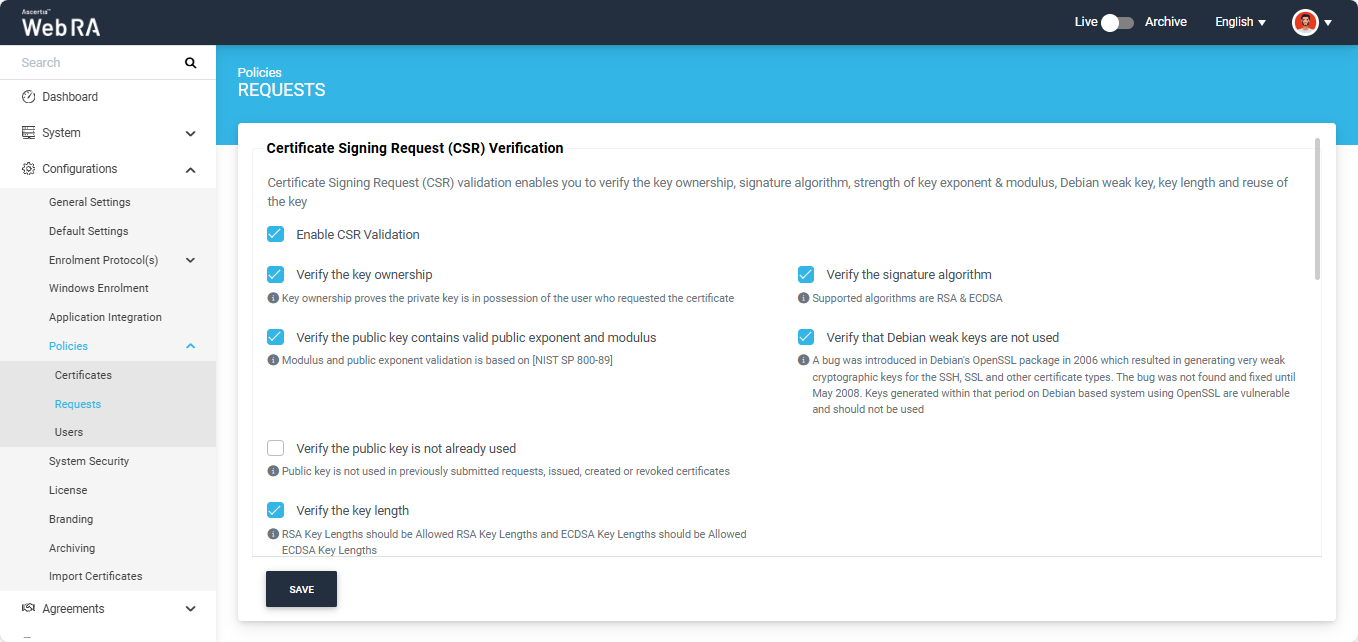
Certificate Signing Request (CSR) verification settings allows you to verify the key ownership, signature algorithm, strength of key exponents & modulus, Debian weak key, key lengths and key reuse while creating a CSR certificate on web portal.
- To setup CSR validation policies, click on Enable CSR Validation, this will display some more options to configure as validation policy including Key Ownership, Signature Algorithm, Public Key Exponent & Modulus, Debian Weak Key, Public Key Reuse and Key Length.
- On selection of one of the above configurations, that particular validation policy will be verified at the time of CSR generation. If one of the policies are not fulfilled then the certificate generation request cannot be completed.
|
|
These validation policies once applied, will be applicable across the application, and will validate these upon creation of CSR. |

Expand Configurations > Policies > Requests from the left menu pane.
Enable CSR (Create Signing Request) Validation
To configure CSR validation policies, first of all you need to select the 'Enable CSR Validation' checkbox. You can tick the following checkboxes to configure settings for CSR generation:
|
Enable CSR Validation |
|
|
Validation |
Description |
|
Verify the Key Ownership |
Verify if the private key is in possession of the user who requested for a certificate at the time of CSR generation. |
|
Verify the Public Key contains Valid Public Exponent and Modulus |
Validate if the key length is among the allowed list of key lengths against the algorithm used in the CSR |
|
Verify the Public Key is not already used |
Verify if the public key is not already used in previously submitted requests, issued, created or revoked certificates |
|
Verify the Key Length |
Validate if the key length is among the allowed list of key lengths against the algorithm used in the CSR |
|
Verify the Signature Algorithm |
Verify the signature algorithms must be either RSA or ECDSA. |
|
Verify that Debian weak keys are not used |
Validate if the CSR keys are not generated using Debian Weak keys. Debian weak keys are generated because of a bug introduced in openSSL package in 2006. The bug was founded in 2008. All keys generated within that period are vulnerable and should not be used. |
|
|
1) CSR Validation policies only validate when Enable CSR Validation is set. |
PIN Password Policy
Expand Configurations > Policies > Requests from the left menu pane.
This is a default policy that will determine the default values for PIN and govern the process for users or operators when resetting these credentials.
When enabled by the operator, it applies at the enterprise level. The selected settings and options are automatically reflected at the Enterprise level in the ‘Policies’ section.
When the operator enables the ‘Enable PIN Password Policy’ checkbox, the following fields will appear.
|
Fields |
Description |
|
Minimum Password Length |
Defines the minimum number of characters required for a valid password. |
|
Include numeric only |
If enabled, only numeric values (for example, 123) can be used to set the PIN Password.
Note: Enabling this checkbox disables all ‘Include 1 or more’ policy checkboxes, and only the numeric policy is saved. |
|
Include 1 or more lowercase characters |
If enabled, the password must contain at least one lowercase character. |
|
Include 1 or more uppercase characters |
If enabled, the password must contain at least one uppercase character. |
|
Include 1 or more special characters |
If enabled, the password must contain at least one special character. |
|
Do not retain password |
If enabled, the system does not store the PIN password in the application database after issuance or reset. |
|
Force user to reset the password at first login |
If enabled, users are required to reset their PIN password during their first login to the Web Portal. |
|
Enforce second factor authentication for PIN access |
If enabled, users are required to complete second factor authentication before accessing the token PIN. |
|
|
The ‘Force user to reset the password at first login' policy is applicable only when the operator creates a request on behalf of a user from the Admin portal using a certificate request, and the user is registered through this request. When this check box is enabled, the system will display a ‘SET TOKEN PIN’ dialog to the user during their first login, allowing them to reset the Token PIN. The user can skip the dialog to log in; however, the same dialog will continue to appear on each login until the user resets their Token PIN. |

|
|
To select the secondary authentication method, navigate to Enterprise > Roles > Login Authentications, enable secondary authentication, and choose the required Secondary Authentication Profile. If secondary authentication is not configured in this section, the application will ignore the PIN/PUK policies that require secondary authentication. |

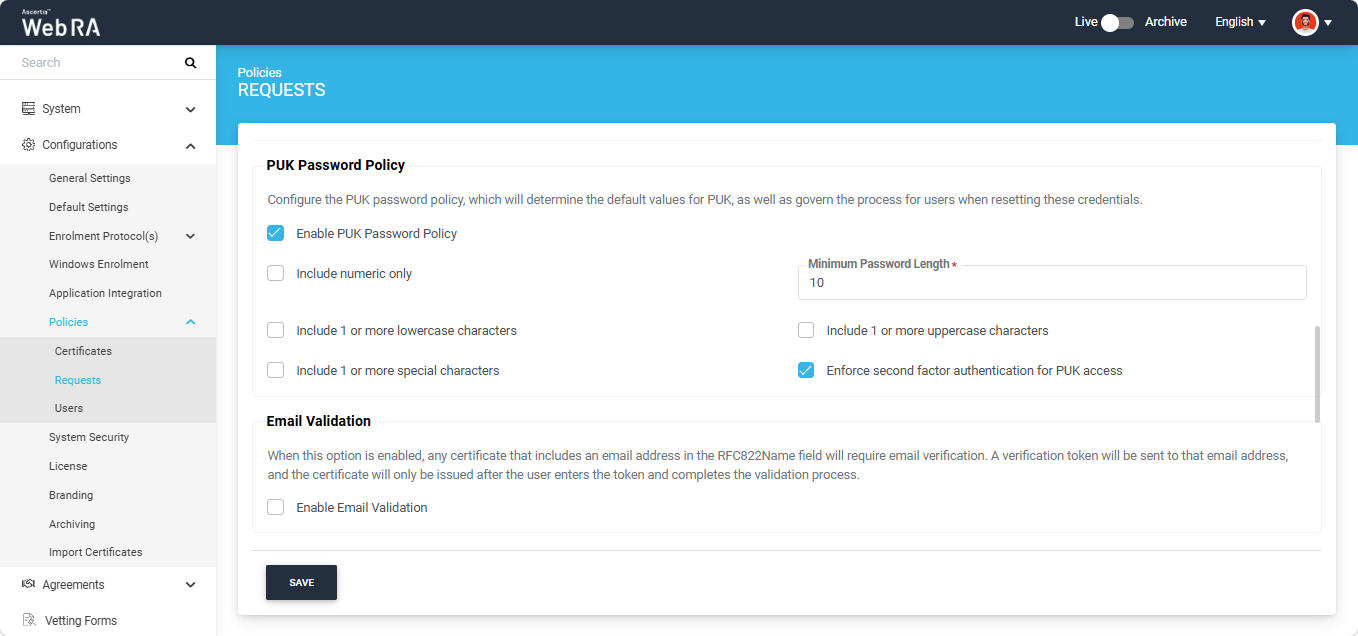
PUK Password Policy
Expand Configurations > Policies > Requests from the left menu pane.
This is a default policy that will determine the default values for PUK and govern the process for users or operators when resetting these credentials.
When enabled by the operator, it applies at the enterprise level. The selected settings and options are automatically reflected at the Enterprise level in the ‘Policies’ section.
When the operator enables the ‘Enable PUK Password Policy’ checkbox, the following fields will appear.
|
Fields |
Description |
|
Minimum Password Length |
Defines the minimum number of characters required for a valid password. |
|
Include numeric only |
If enabled, only numeric values (for example, 123) can be used to set the PUK Password. Note: Enabling this checkbox disables all ‘Include 1 or more’ policy checkboxes, and only the numeric policy is saved. |
|
Include 1 or more lowercase characters |
If enabled, the password must contain at least one lowercase character. |
|
Include 1 or more uppercase characters |
If enabled, the password must contain at least one uppercase character. |
|
Include 1 or more special characters |
If enabled, the password must contain at least one special character. |
|
Enforce second factor authentication for PUK access |
If enabled, users are required to complete second factor authentication before accessing the token PUK. |
|
|
To select the secondary authentication method, navigate to Enterprise > Roles > Login Authentications, enable secondary authentication, and choose the required Secondary Authentication Profile. If secondary authentication is not configured in this section, the application will ignore the PIN/PUK policies that require secondary authentication. |
Expand Configurations > Policies > Certificates from the left tree menu.
When the operator enables the Email Validation policy, any certificate that includes an email address in the RFC822Name field will require email verification before it can be issued.
A verification token is sent to the provided email address, and the user must enter this token to complete the validation process. The certificate is issued only after the email address has been successfully verified.
Note: If enabled, this policy is applied globally to all certification profile types (excluding Email Signing profiles) created in the Admin portal, as well as to certificate requests being created from the User portal.
The policy can be enabled by selecting the ‘Enable Email Validation’ checkbox.
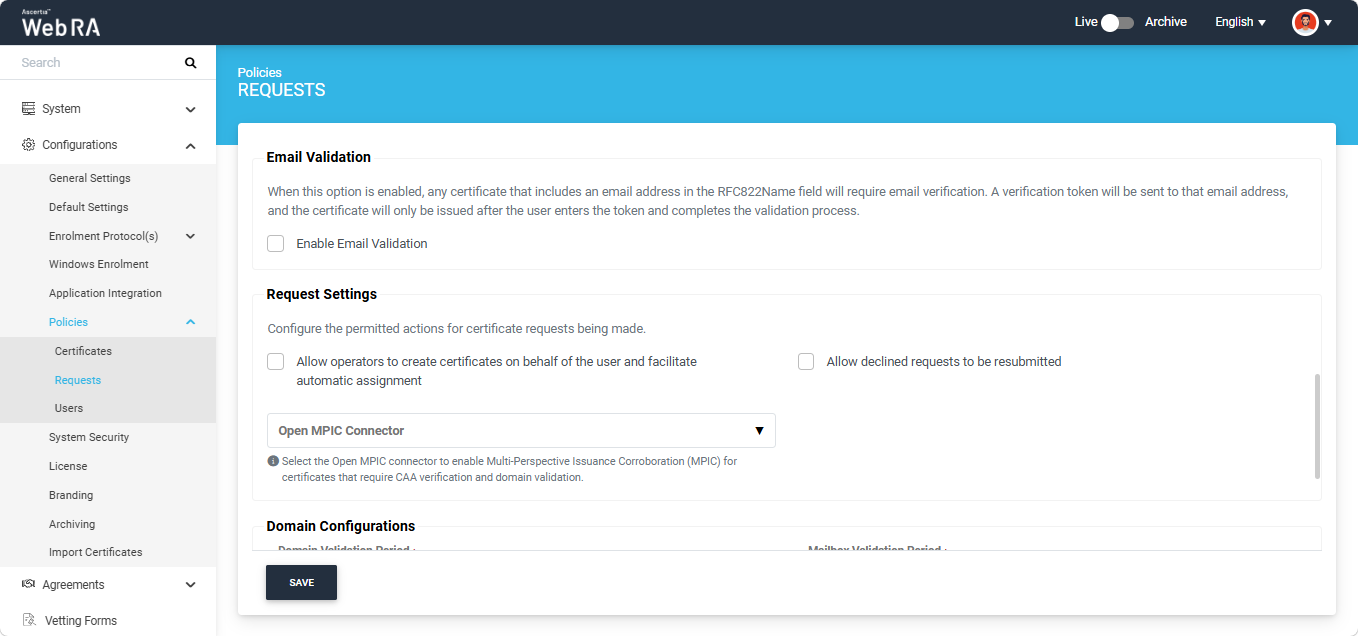
Request Settings
Expand Configurations > Policies > Requests from the left menu pane.
This section allows operators to configure the permitted actions for certificate requests.
- Allow operators to create certificates on behalf of the user and facilitate automatic assignment
If this policy is enabled, the operators will have the option to generate certificates for users.
Note: If the certificate is being created for a user who does not exist in the system, a new account will be created for the user along with the certificate.
If the user already has a registered account in the WebRA system, only the certificate will be created. The user will be notified via email about the certificate generation.
Meanwhile, if the user exists in the system but is not part of the enterprise where the certificate is being created, the system will send an invitation for the user to join that enterprise and will generate the certificate as well.
- Allow declined requests to be resubmitted
If this policy is enabled, users can resubmit a certificate request that has been declined. This allows them to modify the required details and submit the request again for approval.
- Open MPIC Connector
The Open MPIC Connector is responsible for establishing a secure communication with the MPIC service to perform required validation checks during the creation of certificate request.
If you click the dropdown field, it displays all the active Open MPIC connectors created in the Web RA system.
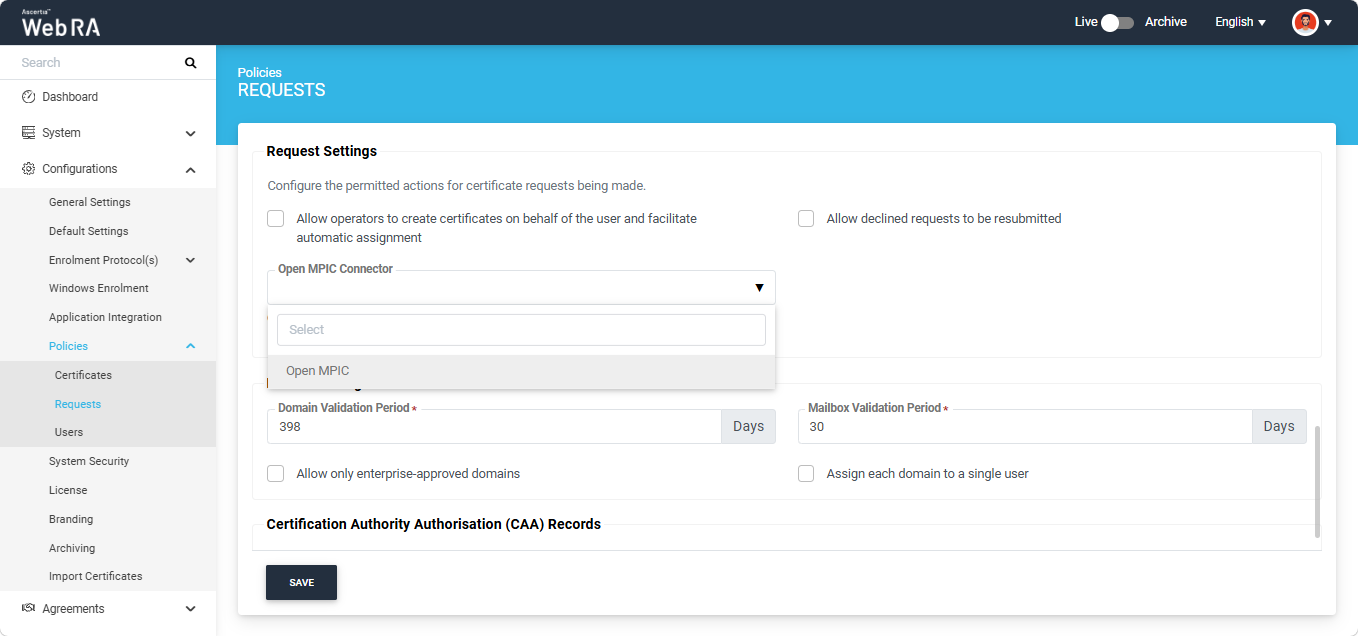
You can select the required connector from the list, which will then appear in the dropdown field.
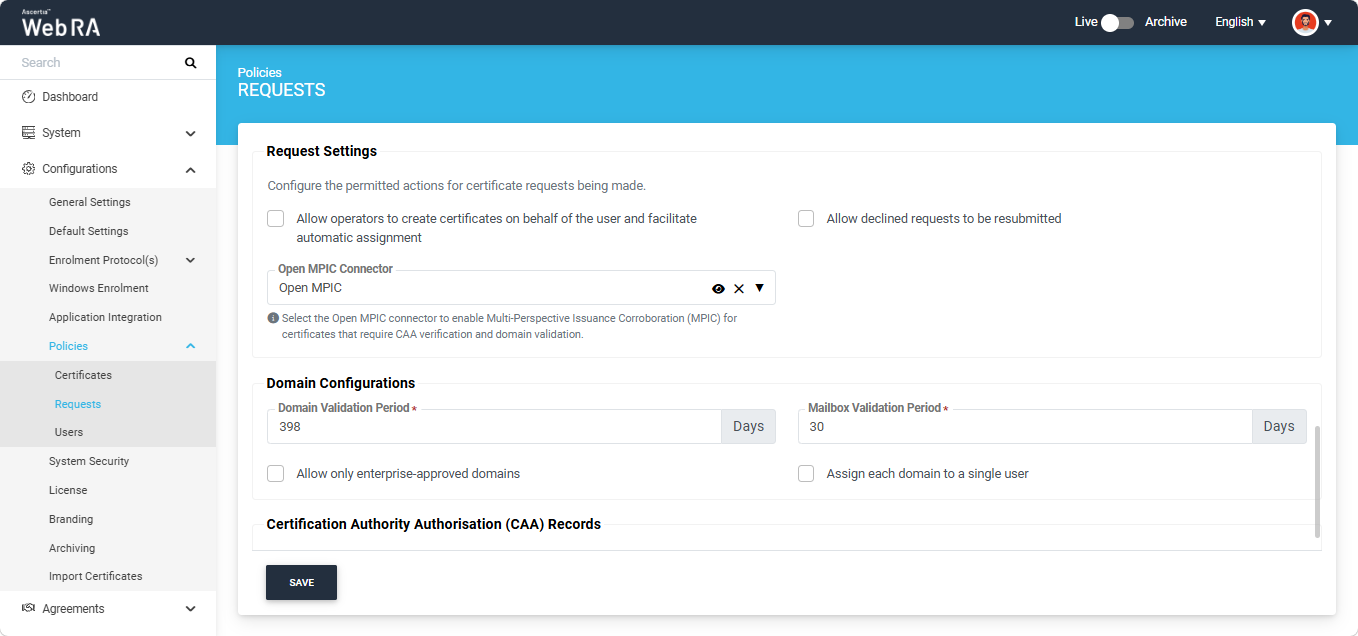
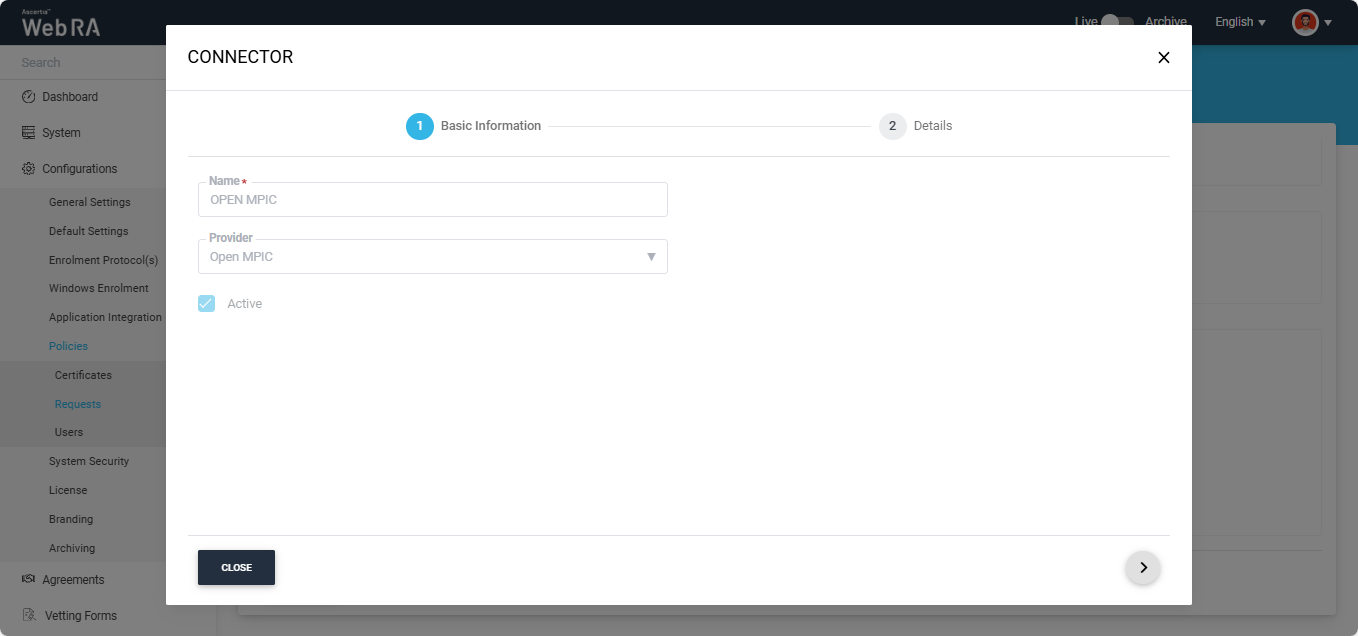
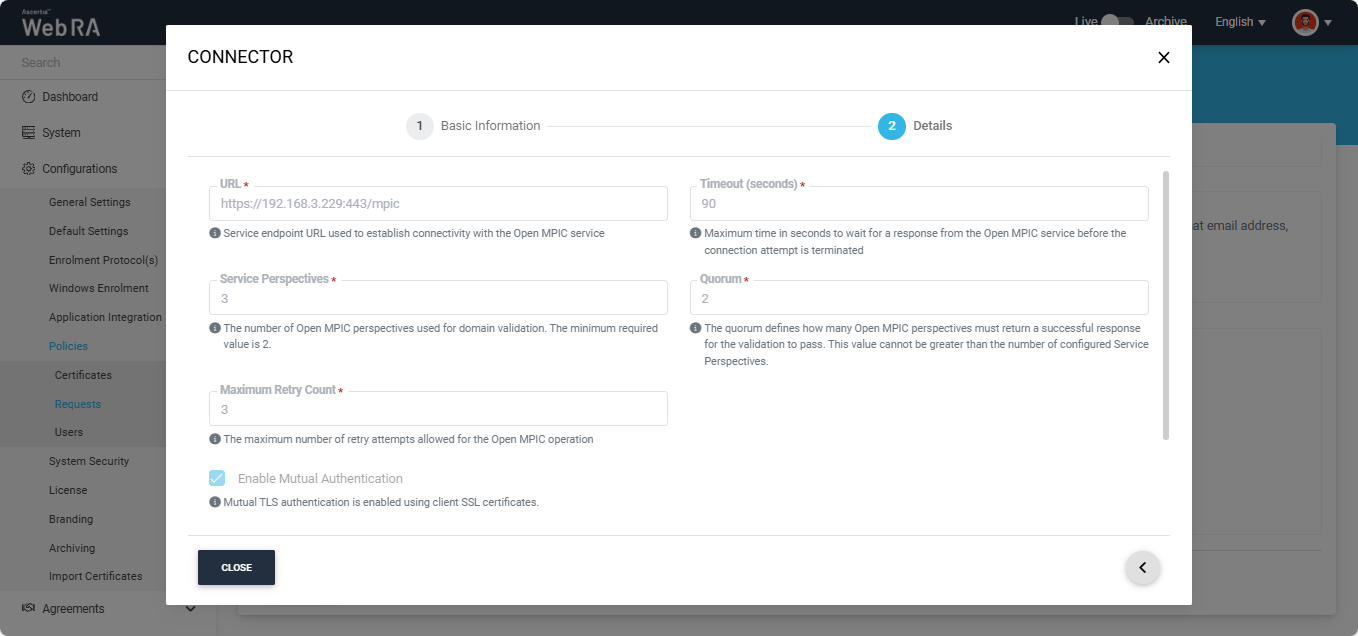
If you want to view the details of the selected connector, click the ‘Eye’ icon. The system will display the ‘Connector’ dialog with the complete information in read-only mode.
To remove the selected connector, click the cross ‘x’ icon present on the right side of the dropdown field.
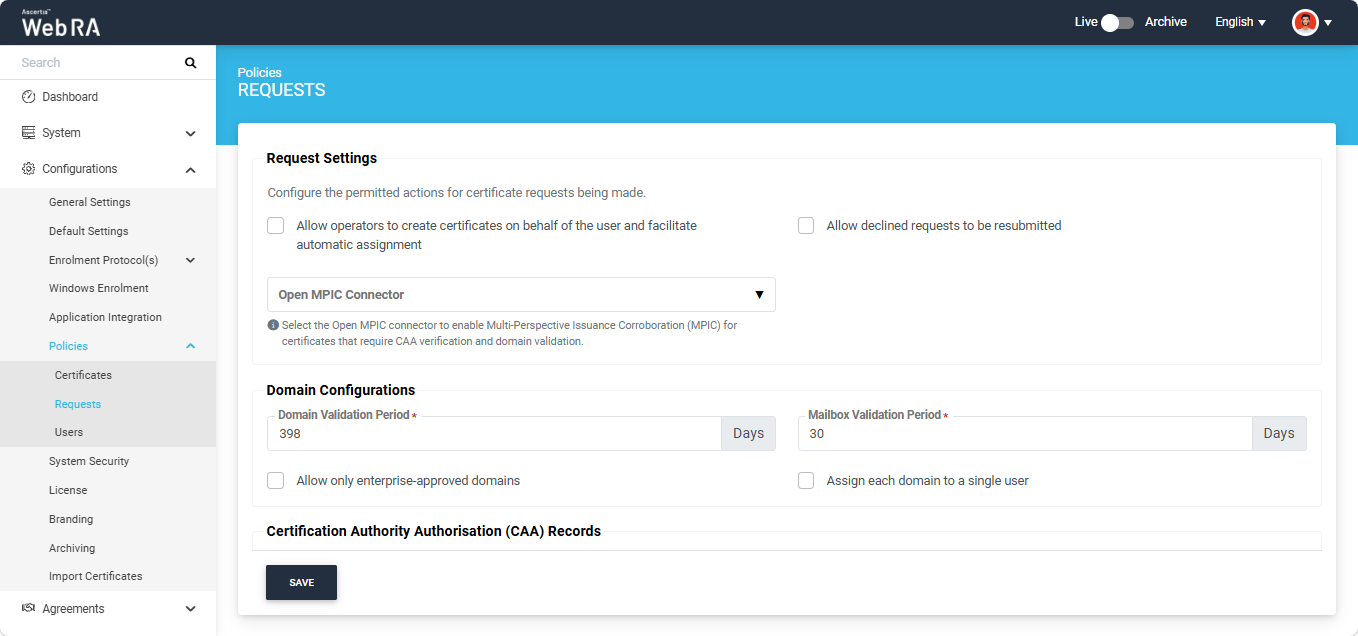
The Domain Configurations section allows administrators to define how domain and mailbox validation is managed within the system. These settings control the validation validity period, domain ownership behaviour, and whether users are permitted to add and validate domains during certificate request creation.
|
|
The policy changes for domain configurations made from this screen will be applied to all newly created Enterprises. However, the operator can make enterprise-specific policy changes for domain configurations from the Enterprise Policies section. |
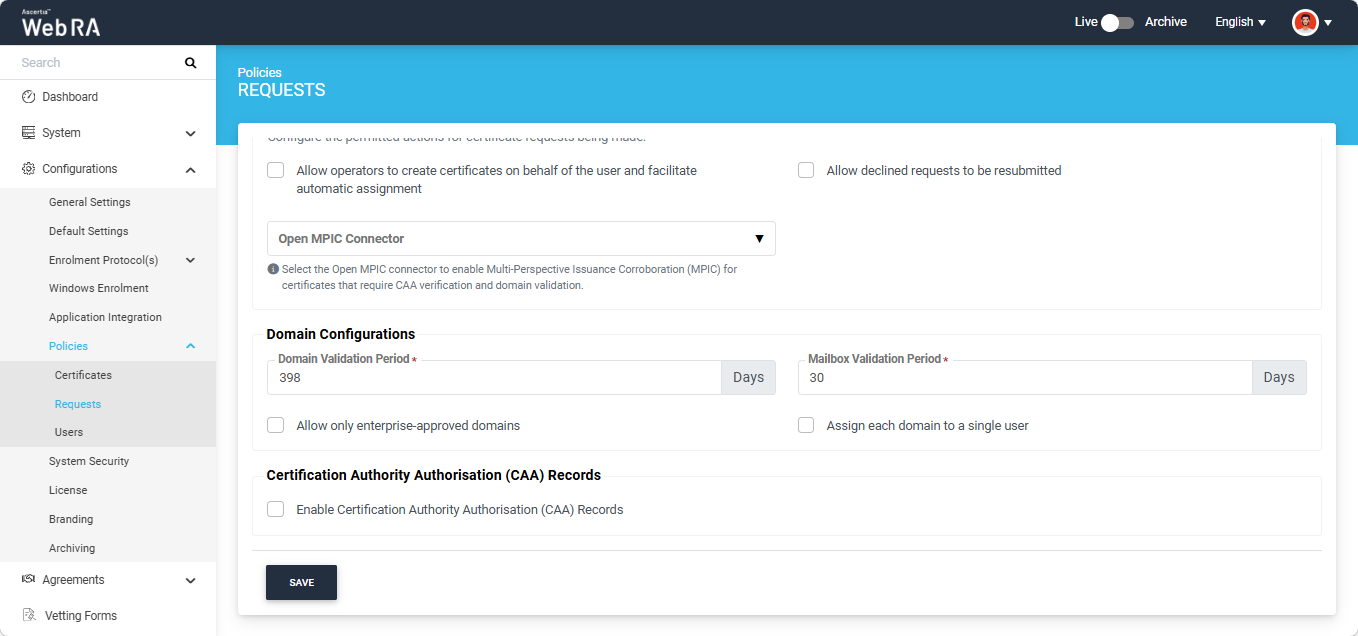
Domain Validation Period (Days)
This policy defines the validity period for domain validation across the Web RA application. The configured validity period applies to both domains and subdomains validated within the system.
The default value is 398 days and the configured value must not exceed 398 days.
Once the configured validation period expires, the domain must be revalidated before it can be used for certificate issuance.
Mailbox Validation Period (Days)
This policy defines the validity period for mailbox validation across the application. The default value is 30 days and the configured value must not exceed 30 days.
Once the configured validation period expires, mailbox validation must be performed again before certificate issuance.
Allow only enterprise-approved domains
This checkbox controls whether users are permitted to add and validate new domains during certificate request creation.
Note: If this checkbox is enabled, the ‘Assign each domain to a single user’ checkbox becomes disabled. You can only enable and select one option at once.
When Enabled
Users are only allowed to select domains that have already been validated and approved at the enterprise level. They are not permitted to add or validate new domains during certificate request creation.
When Disabled
Users may either select an existing enterprise-validated domain or add and validate a new domain during certificate request creation. The newly validated domains are automatically added to the enterprise validated domain list.
|
|
If the user adds and validates a new domain during the certificate request creation, then the domain validity period for that domain will be applied according to the configured validity period in the certification profile. |
Assign each domain to a single user
This checkbox controls domain visibility and reuse between users within the same enterprise.
|
|
If this checkbox is enabled, the “Allow only enterprise-approved domains” checkbox becomes disabled. You can only enable one option at once. |
When Enabled
Domains validated by a user are only visible and usable by that same user. Other users within the enterprise cannot view or reuse domains validated by another user.
With this checkbox enabled, the users will only be allowed to use:
- enterprise-approved domains, and
- domains validated by themselves
|
|
Additionally:
|
When Disabled
Validated domains may be shared and reused across users within the same enterprise.
Certification Authority Authorisation (CAA) Records
Certificate Authorities (CAs) are organisations that are responsible for issuing identity-confirmation certificates for websites, digital IDs, and other entities. To restrict which CAs can issue certificates for your domain, you can configure a CAA record in your domain’s DNS settings.
A Certificate Authority Authorisation (CAA) record is a specific type of DNS record that enables domain owners to specify which CAs are authorised to issue certificates for their domain. By defining these preferences, unauthorized CAs are prevented from issuing certificates for the same domain.
Note: Any change in the CAA Records made from this section will be applicable globally to all Enterprises and Users. If the CAA Recrods checbox is disabled in this section, then the CAA Record setting of each Enterprise will be applied based on its individual configuration.
Configuring CAA records can help in the following situations:
- You aim to reduce the risk of relying on untrustworthy Certificate Authorities (CAs).
- You want to prevent employees from obtaining certificates from unauthorised certificate vendors.
- You want to prevent fraudulent certificate misissuance.
To add Certificate Authority Authorisation (CAA) Records, expand Configurations > Policies > Requests from the left-tree menu and select the ‘Enable Certification Authority Authorisation (CAA) Records’ checkbox. The system will display the ‘Certification Authorities (CA)’ field where you can enter multiple authorities as per your requirement.
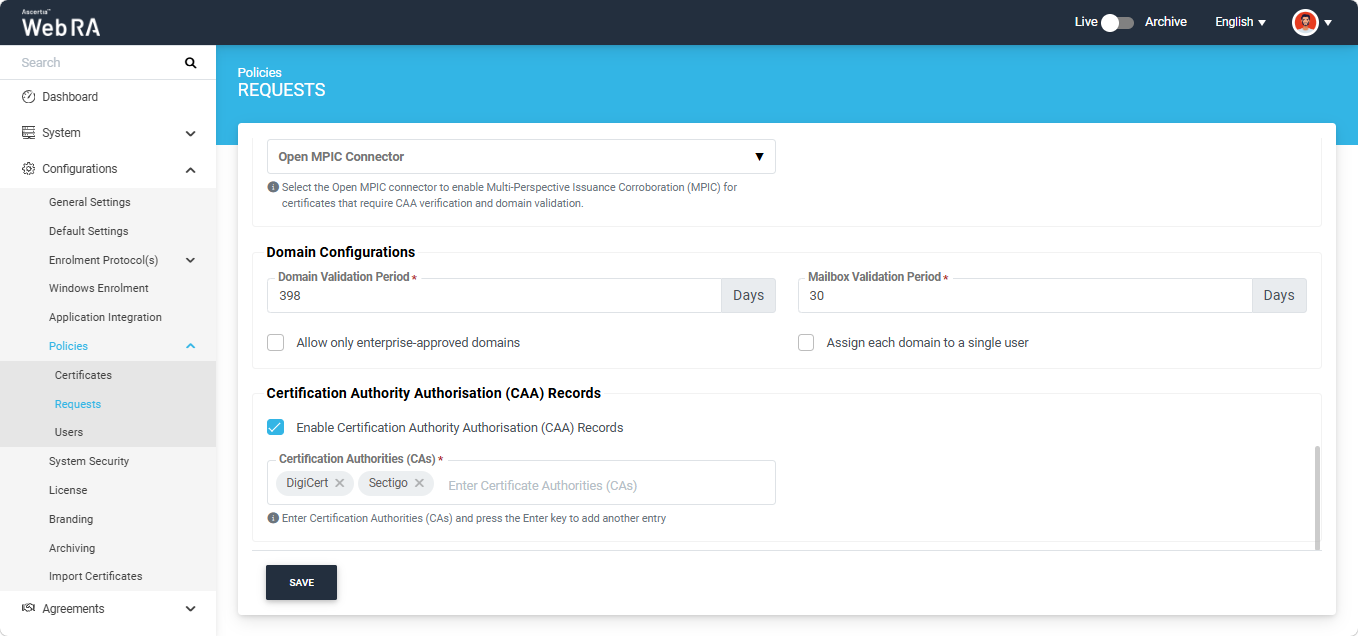
After entering the Certificate Authorities (CAs), click ‘Save’ to confirm the policy changes.