Unified Certification Profiles
The Unified Certification Profile allows you to configure multiple certification profiles within a single profile and generate multiple certificates as part of a single certificate request. Each certificate can have its own key pair, key usage, algorithm, key size, validity period, and Certificate Authority (CA) configuration.
You can configure up to four certification profiles in a Unified Certification Profile, allowing certificates with different configurations and purposes to be issued together while maintaining their individual certificate and key configurations.
- How to Create a Unified Certification Profile
- How to Search for a Unified Certification Profile
- How to Edit a Unified Certification Profile
- How to Delete a Unified Certification Profile
How to Create a Unified Certification Profile
To create a Unified Certification Profile, expand External Services > Unified Certification Profiles from the left-tree menu in the Admin portal.
The system displays the Unified Certification Profiles listing screen, where all unified profiles are listed in the table.
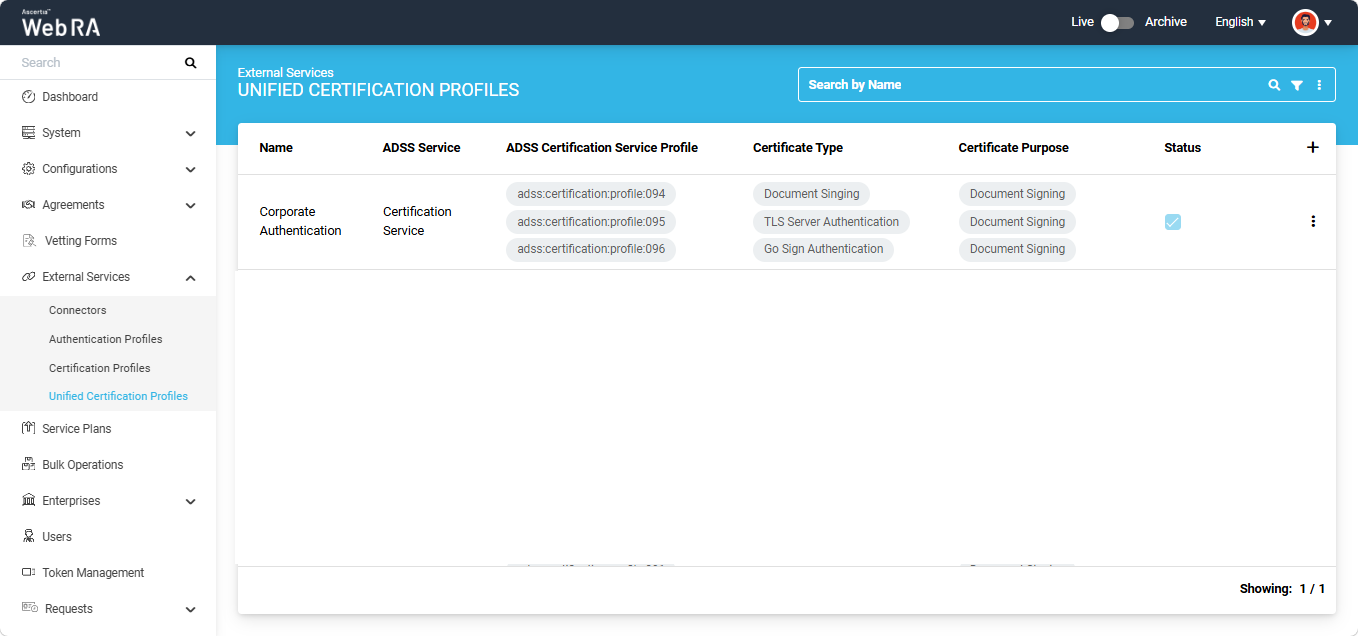
To create a new Unified Certification Profile, click the ‘+’ icon in the top-right corner of the table header.
The system displays the ‘Profile’ tab under the Add Unified Certification Profile screen.
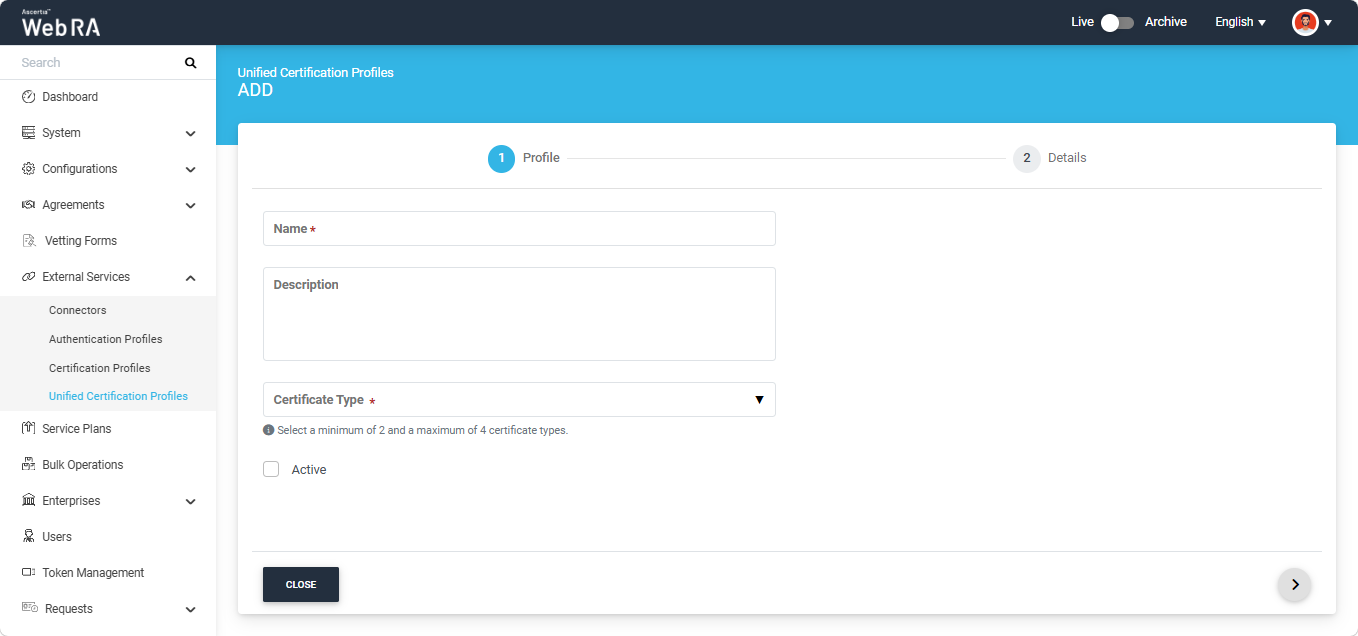
Enter a unique name for the Unified Certification Profile in the ‘Name’ field. Then, enter a description related to the profile in the ‘Description’ text box. The ‘Description’ field is optional.
Certificate Type
This dropdown displays all the active certification profiles configured in the Web RA system. The profiles available in the dropdown are segregated into the following two sections:
- Server-side Keys & Certificates
- Keys on Smartcard/Tokens
You can select a minimum of 2 and a maximum of 4 profiles from the dropdown. If the number of selected profiles is less than 2 or greater than 4, the system will not allow you to proceed to the ‘Details’ tab.
|
|
Note:
|

After selecting the certification profiles, select the ‘Active’ checkbox. If you do not select the ‘Active’ checkbox, you will not be able to configure this profile in the Service Plan.
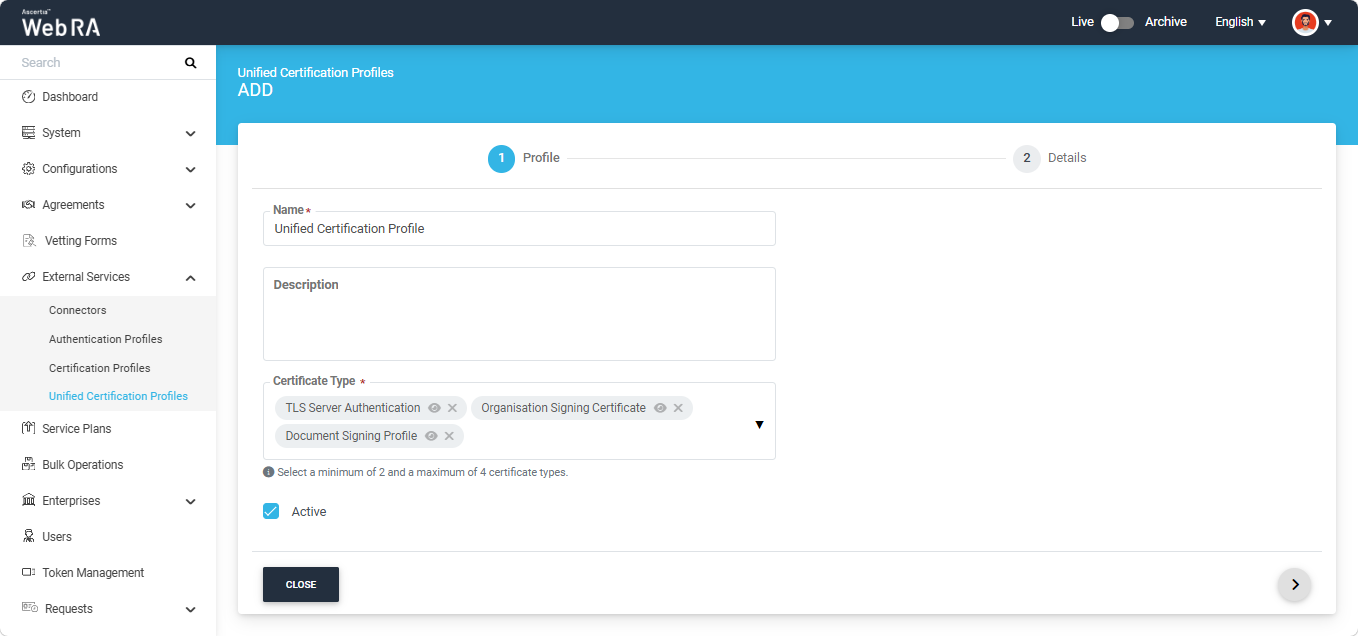
After making all the required changes under the ‘Profile’ tab, click the ‘>’ button to proceed to the ‘Details’ tab.
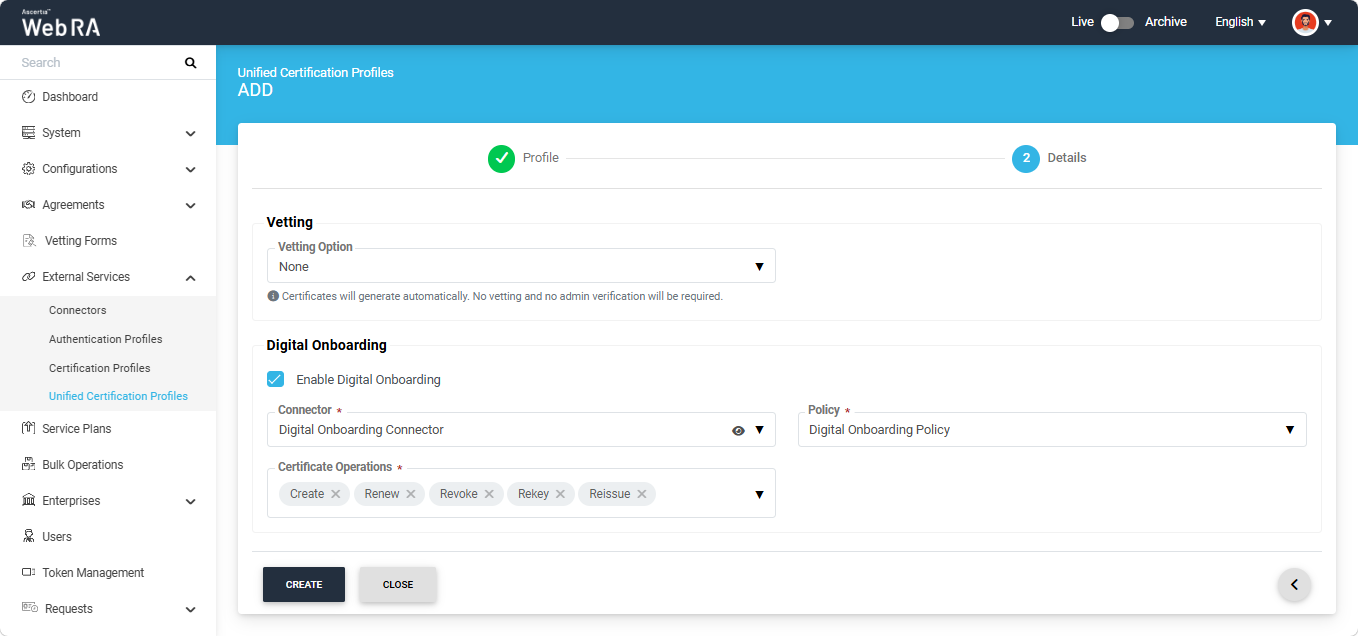
Details
The Details tab consists of the following sections:
- Authentications
- Vetting
- Digital Onboarding
- PIN and PUK
|
|
Note: The ‘PIN and PUK’ section is displayed under the ‘Details’ tab only if a Token-based or MSCAPI-type certification profile is selected in the ‘Profile’ section. |
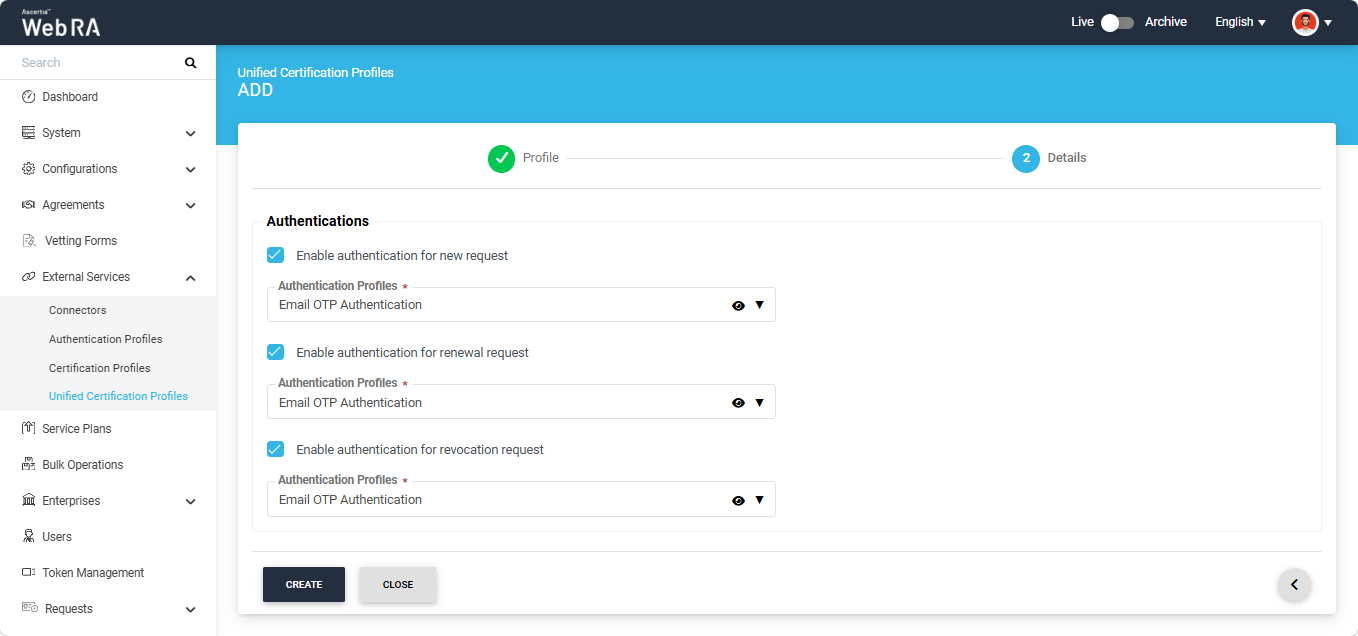
Authentications
From the ‘Authentications’ section, you can enable second-factor authentication for new certificate requests, revocation requests, and rekey requests created using this profile.
If you enable any checkbox, the system displays the ‘Authentication Profiles’ dropdown, from which you can select the required profile for second-factor authentication. The available authentication methods include OTP, SAML, Active Directory, Azure Active Directory, and OIDC.
|
|
Note:
|
Vetting
This section consists of the following fields:
|
Field |
Description |
|
Vetting Option |
This dropdown allows the administrator to choose whether vetting is required for certificate requests generated in the system. By default, the None option is selected. To require vetting for a certificate request, select the Manual Vetting option from the dropdown. |
|
Vetting Form |
This dropdown field appears only when ‘Manual Vetting’ option is selected in the 'Vetting Option' dropdown. It displays a list of all active vetting forms. Select the required form from the list to configure it with the certification profile. |
|
Enable Revocation Vetting |
Select this checkbox to enable vetting for revocation requests. |
|
|
Note: The Vetting configuration made in the Unified Certification Profile will override any configuration made in the individual certification profiles. If the ‘None’ Vetting Option is selected, vetting will not be required during certificate generation, even if vetting is enabled in any of the individual certification profiles. |
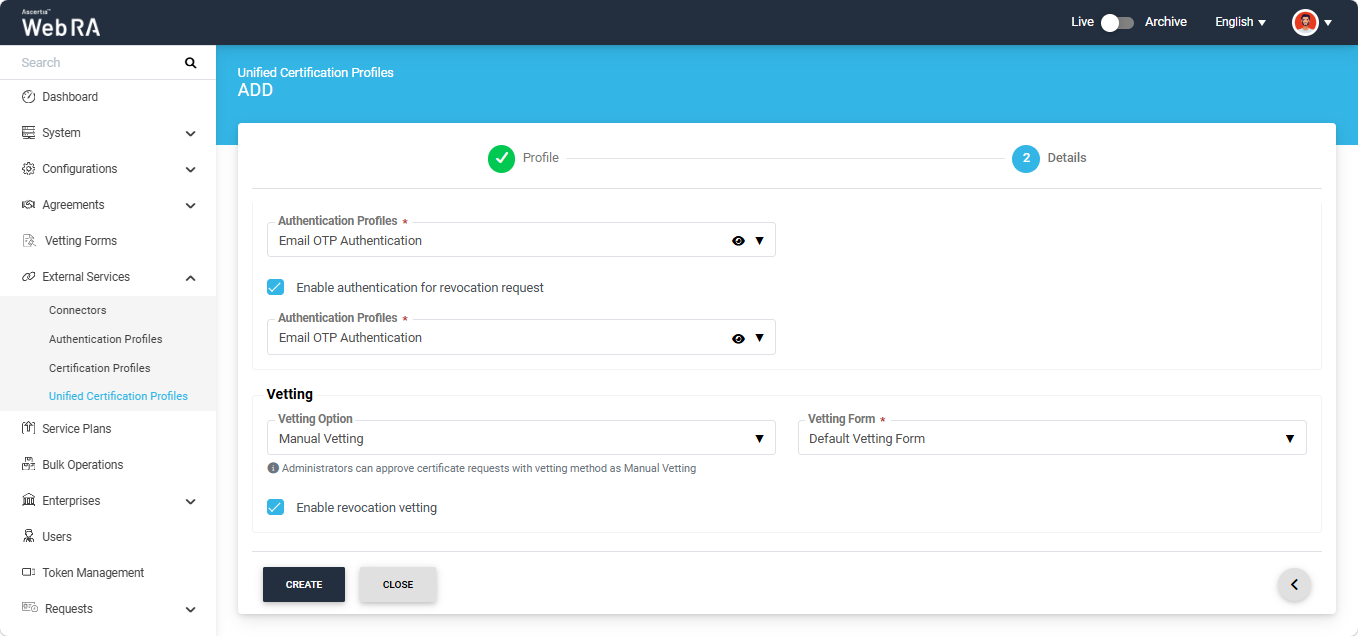
After making all the required selections on the ‘Details’ tab, click ‘Create’ to create the Unified Certification Profile.
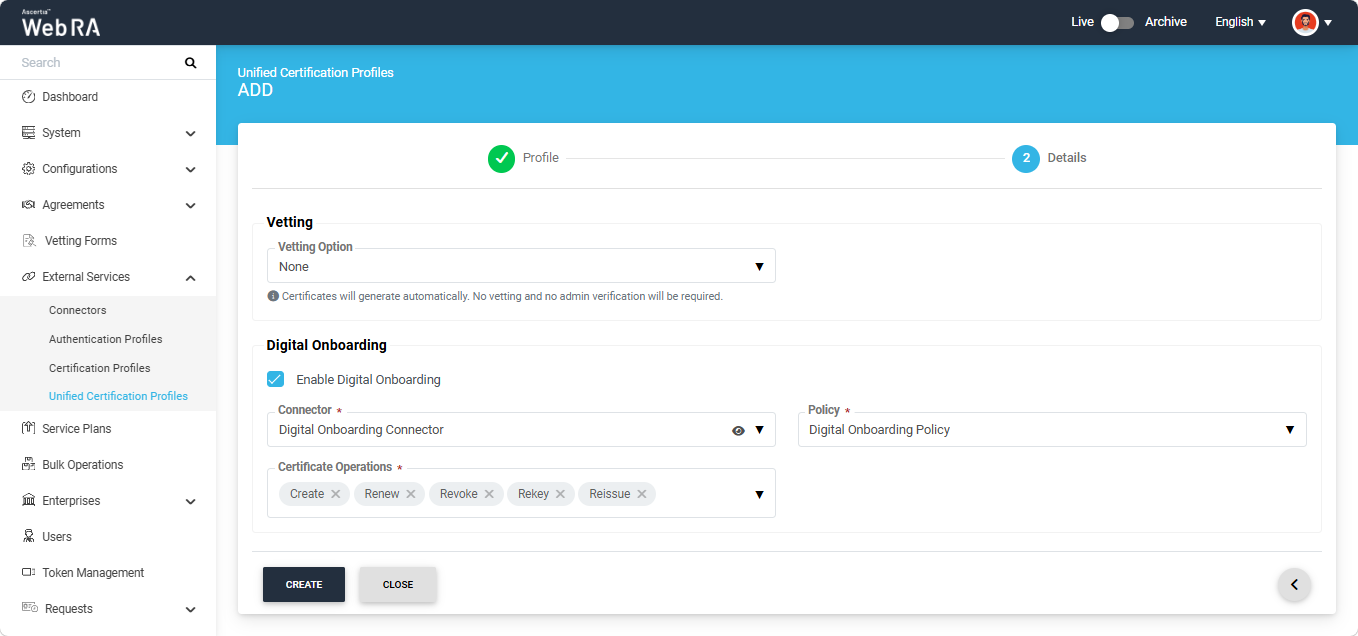
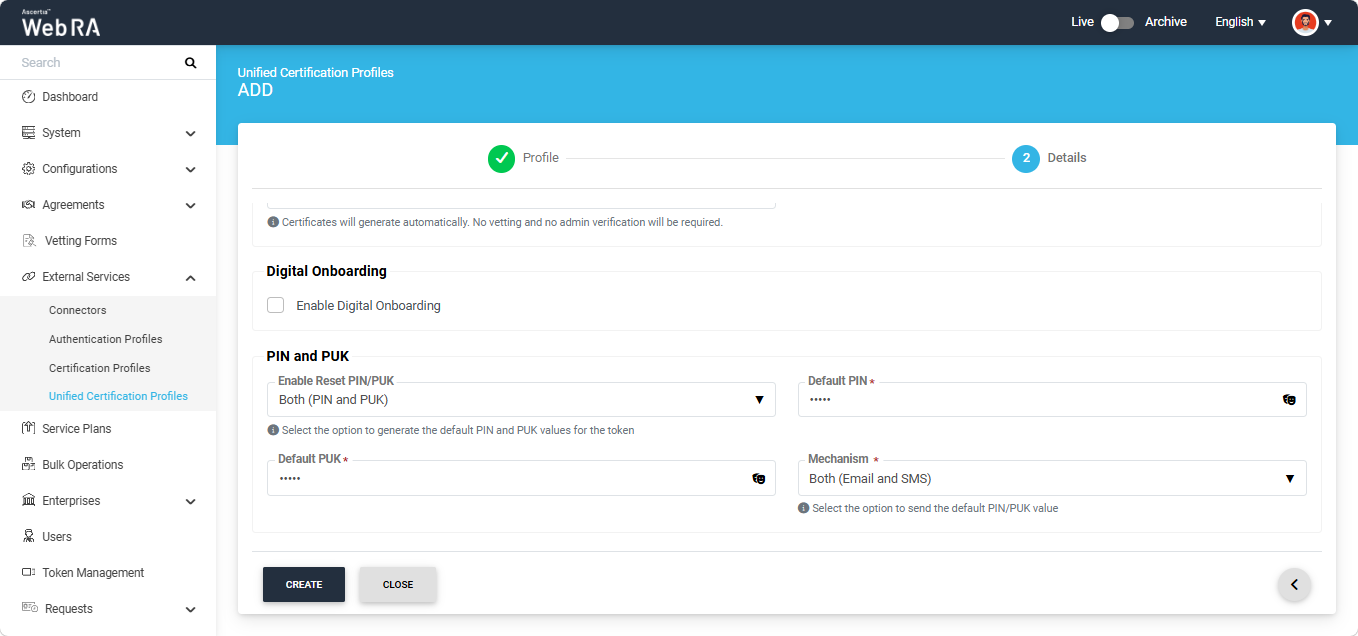
Digital Onboarding
Select the 'Enable Digital Onboarding' checkbox to ensure that users complete the digital onboarding process before performing certificate-related operations in the Web RA system.
When this option is selected, the following fields appear on the screen:
|
Field |
Description |
|
Connector |
Select the connector to be used for the digital onboarding process. |
|
Policy |
Select the digital onboarding policy to be applied during the onboarding process. |
|
Certificate Operations |
Select the certificate operations for which the digital onboarding process is required. Users must complete the digital onboarding process before they can proceed with the selected operation(s). |
PIN and PUK
Note: The ‘PIN and PUK’ section is displayed under the ‘Details’ tab only if a Token-based or MSCAPI-type certification profile is selected in the ‘Profile’ section.
The ‘Enable Reset PIN/PUK’ dropdown appears under the ‘PIN and PUK’ section, allowing you to reset the default PIN and PUK values for the token.
By default, the ‘None’ option is selected in the dropdown.
The following options are available in the dropdown:
- None
- PIN
- PUK
- Both (PIN and PUK)
You can reset the default value for either the PIN or PUK by selecting the respective option from the dropdown.
If the ‘Both (PIN and PUK)’ option is selected, the system displays both the ‘Default PIN’ and ‘Default PUK’ fields, where you can reset their default values.
Mechanism
Note: The ‘Mechanism’ dropdown appears only when any option other than the ‘None’ option is selected in the ‘Enable Reset PIN/PUK’ dropdown.
From this dropdown, you can choose how the default PIN and PUK values will be shared with the user. The available options are:
- SMS
- Both (Email and SMS)
If Both (Email and SMS) is selected, the entered PIN and PUK values will be shared with the user via both email and SMS.
You can search for a specific Unified Certification Profile by name using the Search bar at the top of the listing screen.
The listing screen also provides an Advanced Search option to search for profiles based on specific filters. To perform an advanced search, click the ‘Advanced Search’ icon next to the search bar.
The system will open a ‘Search’ dialog displaying all the available filters.
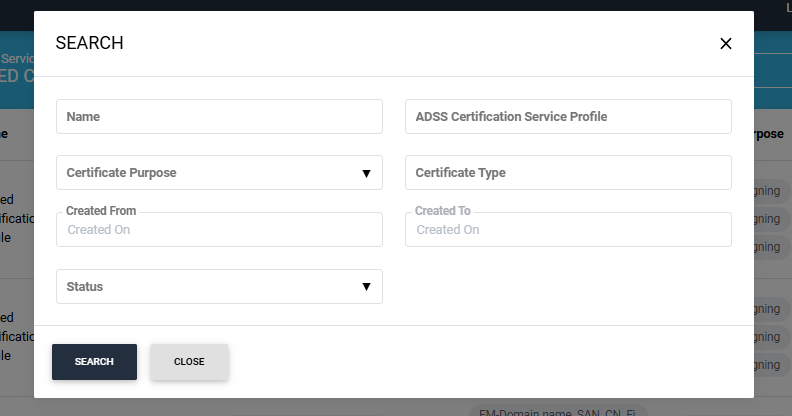
Apply the required filters from the dialog and click the ‘Search’ button. The listing screen will display the profiles based on your applied filters.
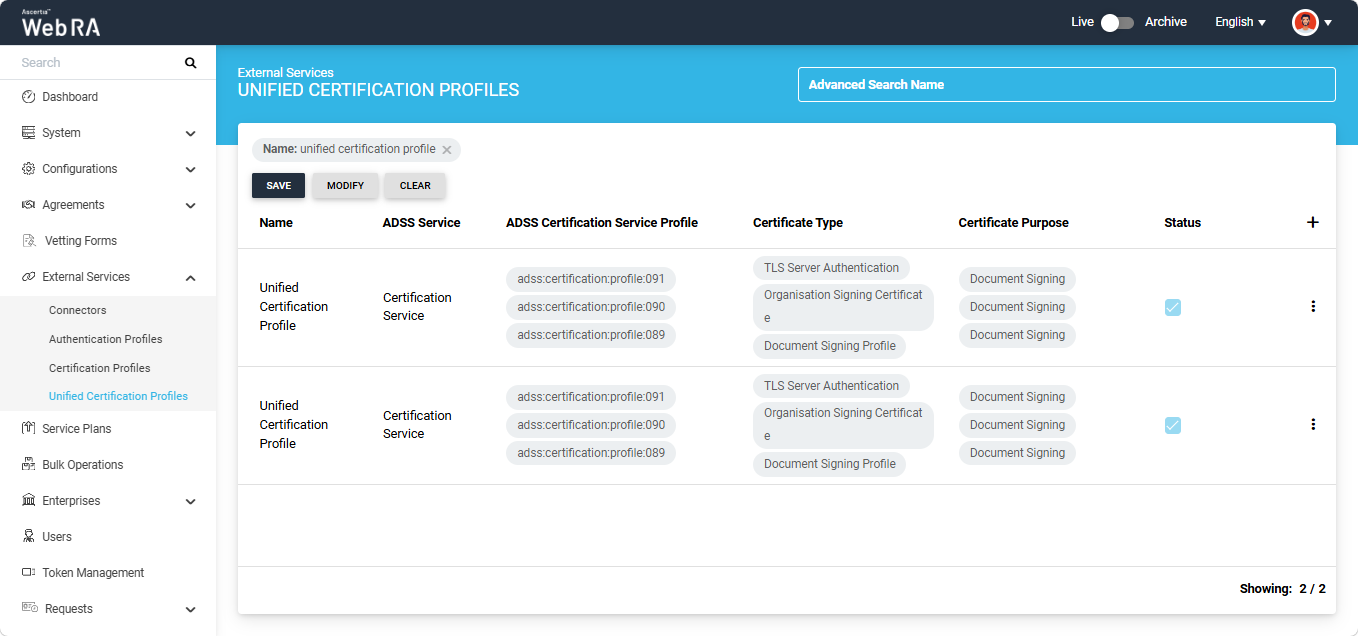
You can modify the filters by clicking the ‘Modify’ button or clear the filtered search by clicking ‘Clear’.
You can also save a specific filter by entering a name for the filter in the search bar and clicking ‘Save’.
Edit a Unified Certification Profile
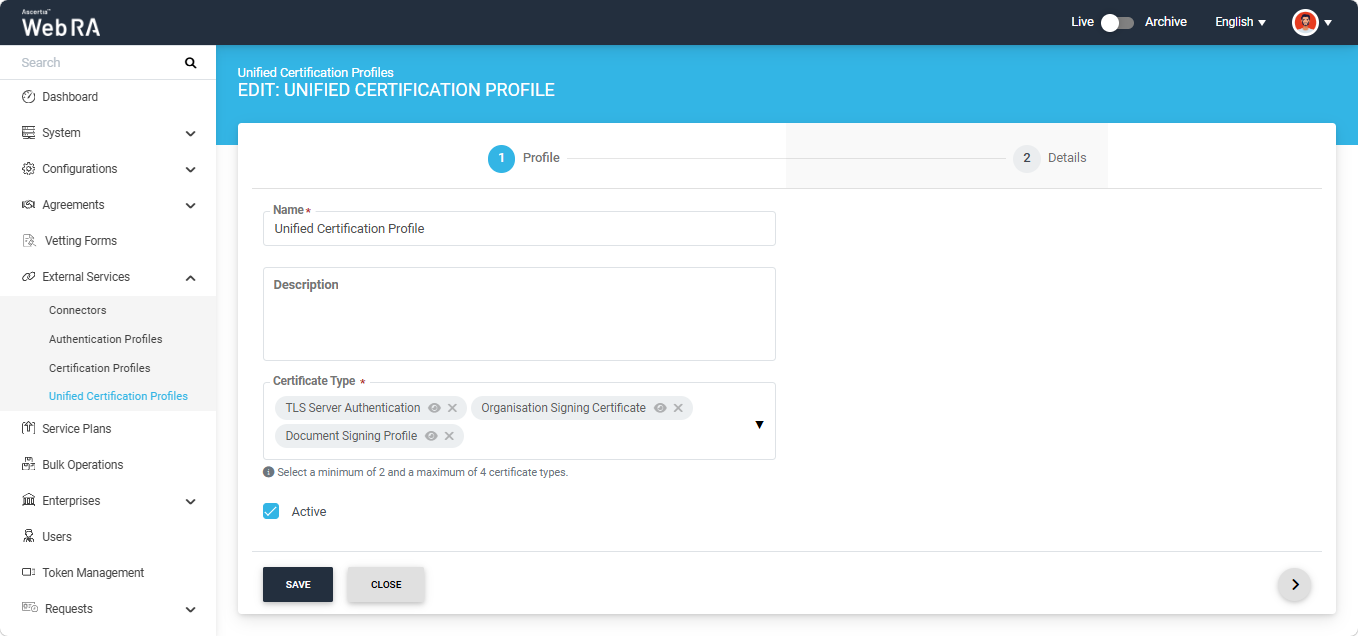
To edit a unified certification profile, expand External Services > Unified Certification Profiles from the left-tree menu in the Admin portal.
Then, click the three-dot button next the profile you want to edit and select ‘Edit’.
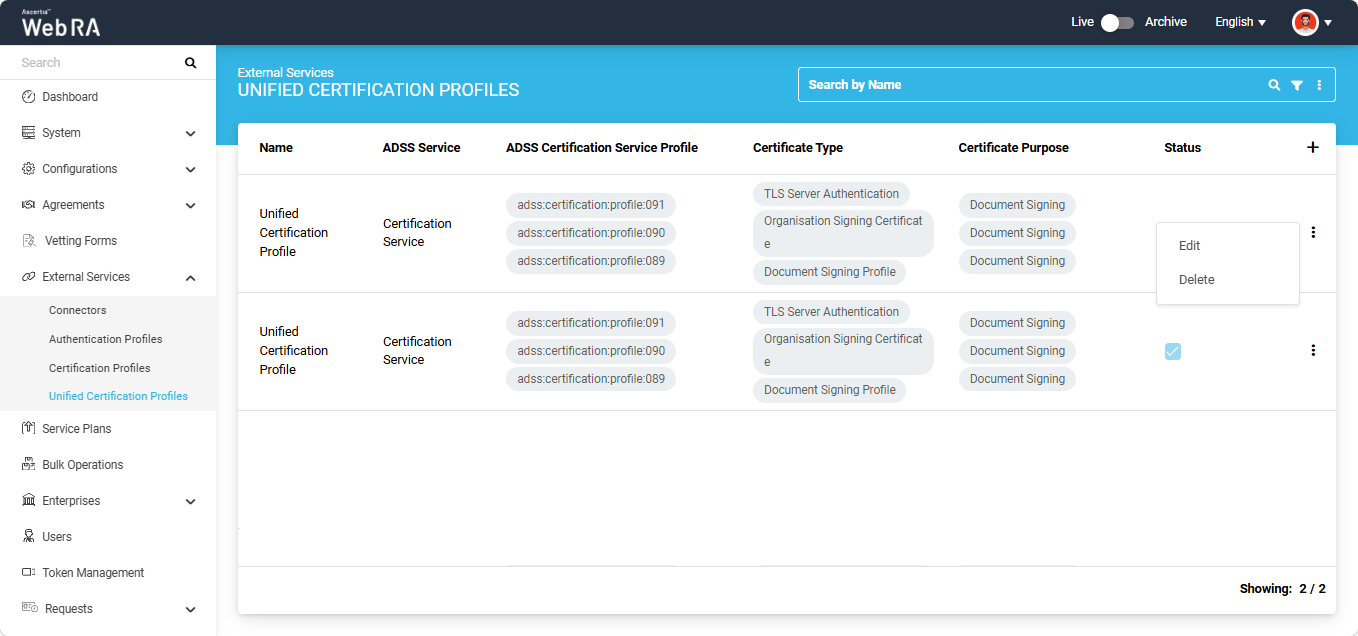
The system will open the profile in edit mode.
Delete a Unified Certification Profile
To delete a unified certification profile, expand External Services > Unified Certification Profiles from the left-tree menu in the Admin portal.
Then, click the three-dot button next the profile you want to delete and select ‘Delete’.
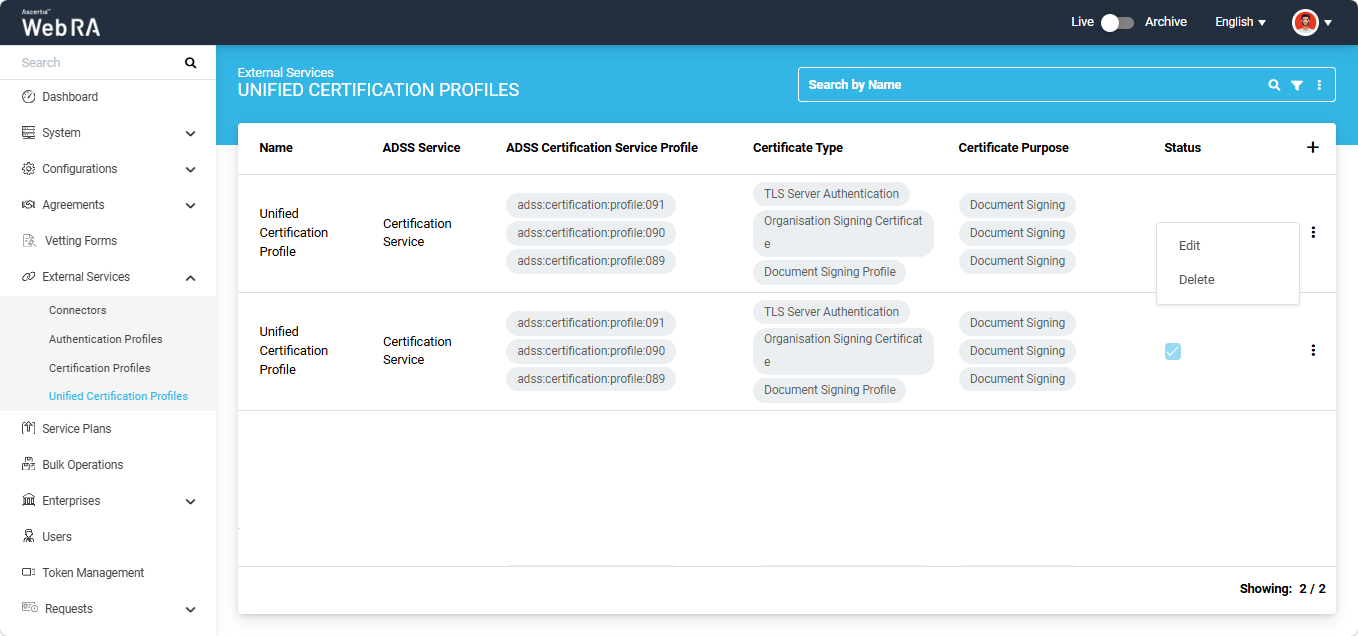
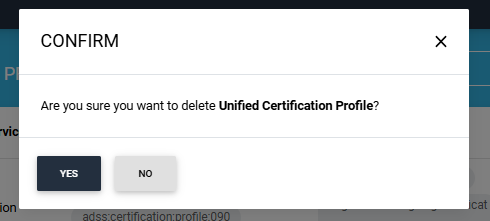
A confirmation dialog will appear on the screen. Click ‘Yes’ to proceed.