Settings
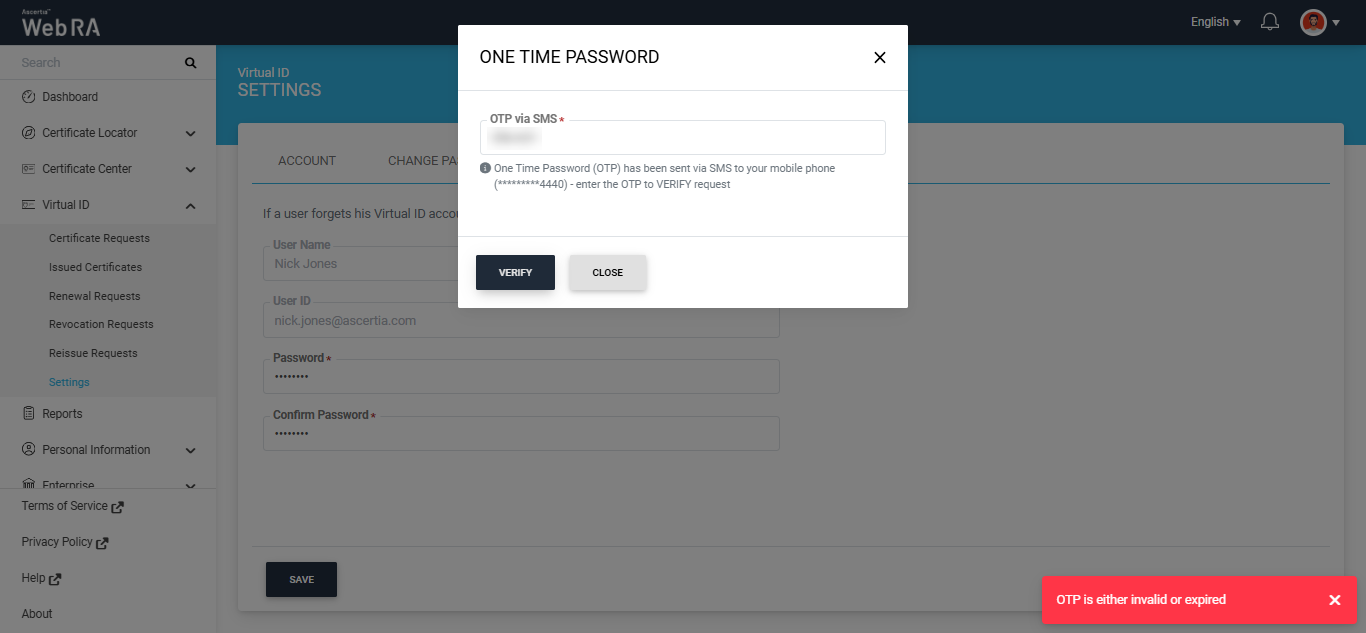
The Virtual ID Settings module displays the information provided by the user when creating the Virtual ID account in the Web RA system. It also allows the user to change or reset the Virtual ID password when required.
The following tabs are available under the Settings module:
Expand Virtual ID > Settings module from the left-tree menu in the Web RA user portal.
The fields appearing under the Account section are explained below:
|
Field |
Description |
|
User Name |
The name entered when creating the user account in the Web RA system. |
|
User ID |
The email address entered when creating the user account in the Web RA system. |
|
Mobile Number |
The mobile number entered when creating the user account in the Web RA system. The system displays only the last four digits of the mobile number. To view the complete number, click the mask icon. |
Change Virtual ID Mobile Number with OTP Verification
The user can change the mobile number saved in the Virtual ID settings. To do so, enter the new mobile number in the designated field and click 'Save'.
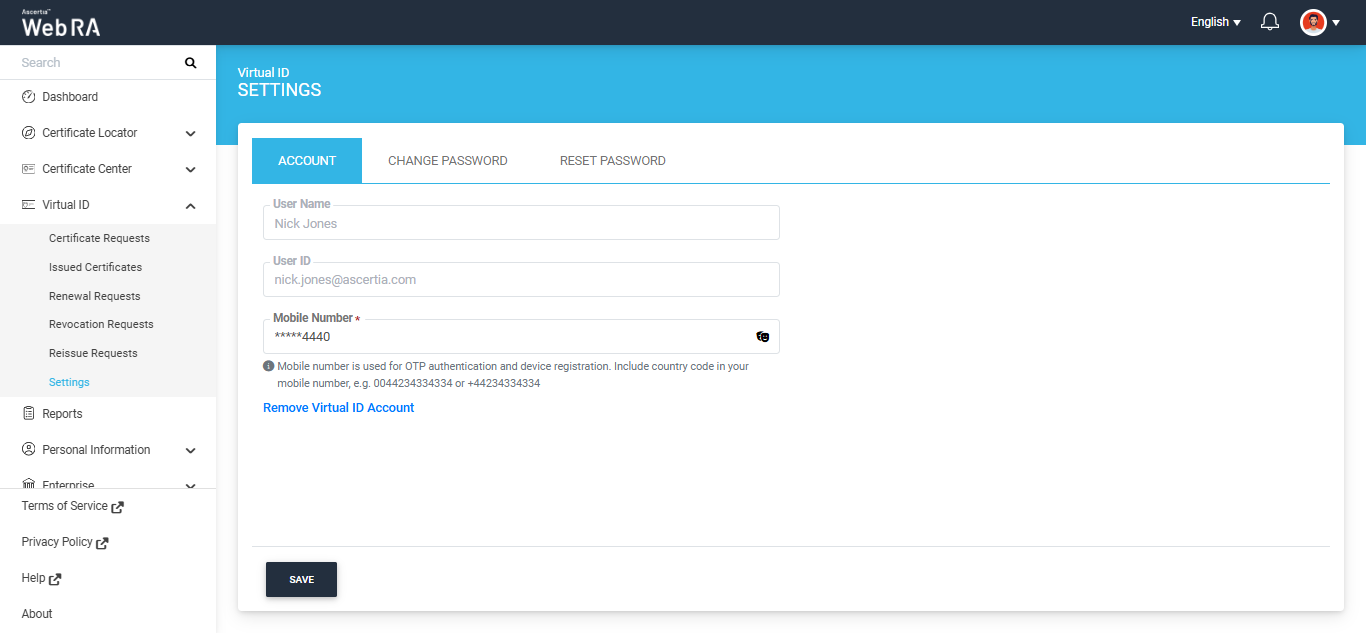
The system displays the 'One Time Password' dialog containing the 'OTP via SMS' and 'OTP via Email' fields. Enter the OTPs received through both methods and click 'Verify'.
The OTP via SMS will be sent to the new mobile number. Enter the received OTP in the 'OTP via SMS' field.
Meanwhile, the OTP via Email will be sent to the user's registered email address. Enter the received OTP in the 'OTP via Email' field and click 'Verify' to proceed.
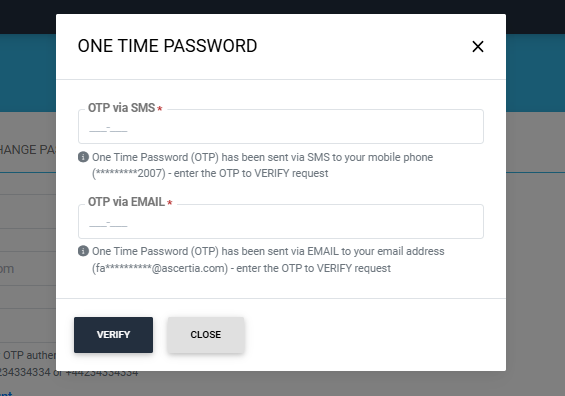
After successful verification, the new mobile number is saved, and the system displays a 'Virtual ID updated' success alert on the screen.
|
|
Note:
|

Remove Virtual ID
- Expand Virtual ID > Settings from the left-tree menu in the Web RA user portal.
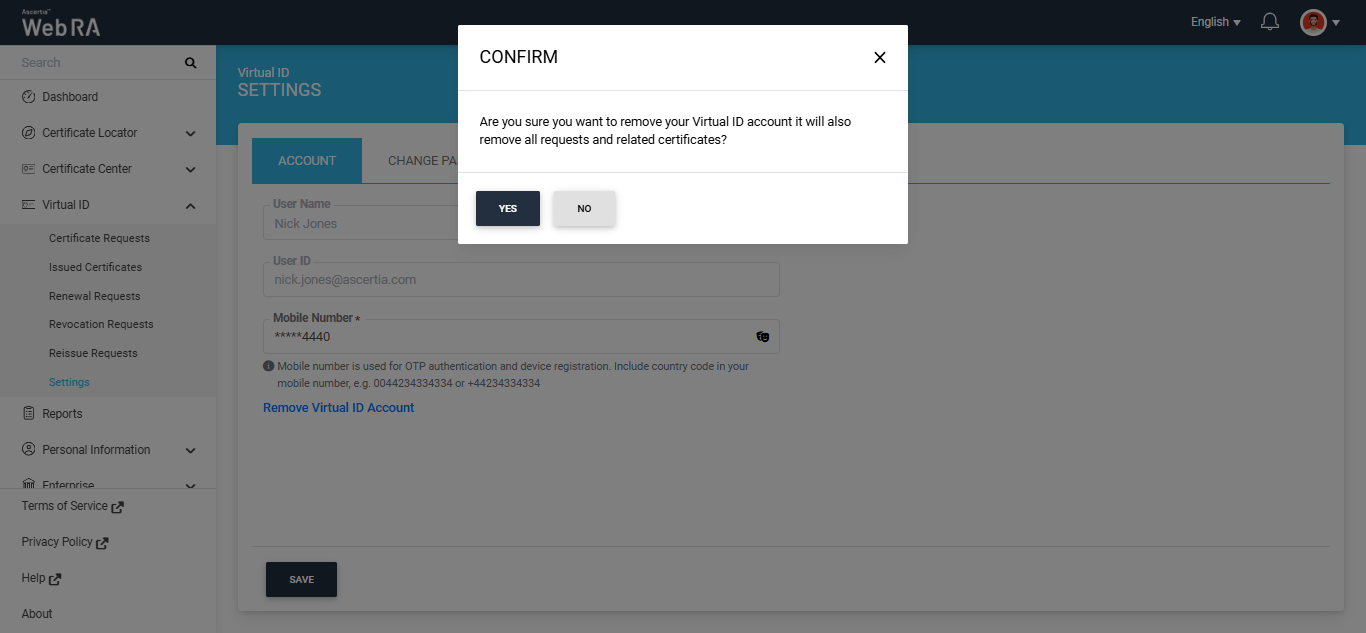
- Click the blue "Remove Virtual ID Account" link.
A confirmation message appears on the screen. Click "Yes" to confirm the removal of the Virtual ID account.
|
|
Note: Once you delete your Virtual ID account, all its associated requests and certificates will be removed permanently. |
- Expand Virtual ID > Settings from the left-tree menu in the Web RA user portal.
- Navigate to the 'Change Password' tab.
The system displays three password fields that are requierd to change the Virtual ID password.
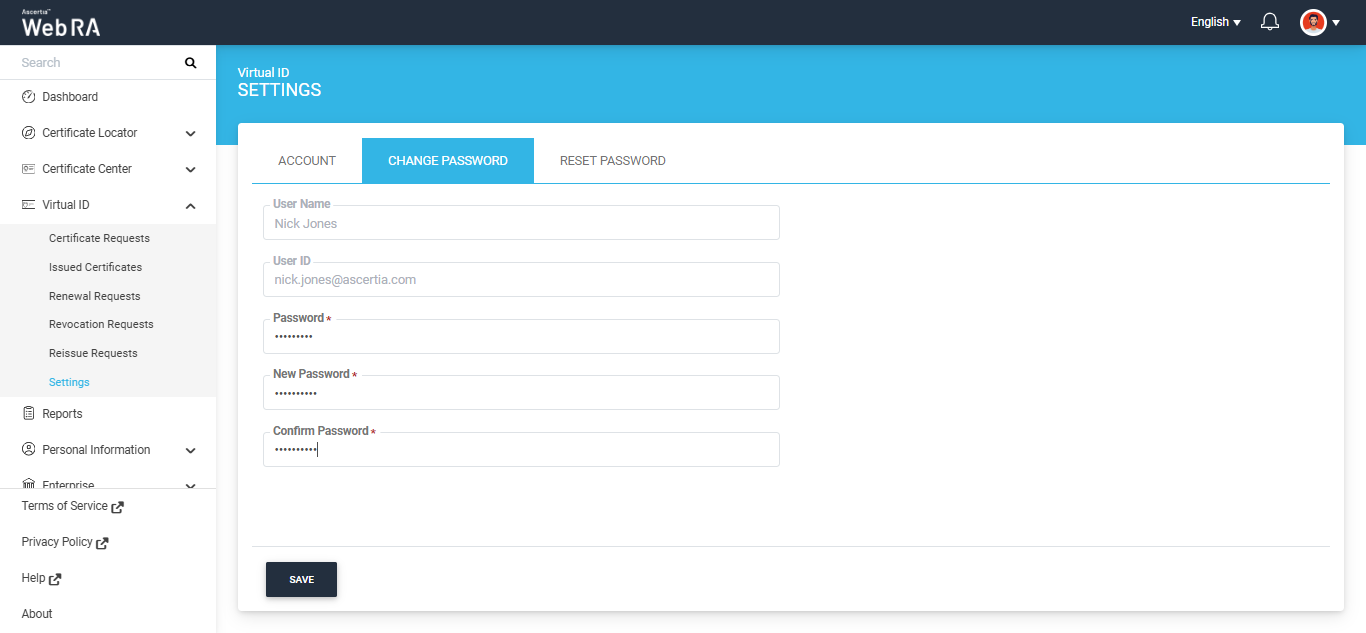
Enter your current password in the ‘Password’ field. Then, enter the new password in the ‘New Password’ and ‘Confirm Password’ fields.
Click ‘Save’ to implement the new changes.
The Web RA system allows users to reset their Virtual ID password if they forget it.
- Expand Virtual ID > Settings from the left-tree menu in the Web RA user portal.
- Navigate to the 'Reset Password' tab.
The system displays the 'Password' and 'Confirm Password' fields on the screen.
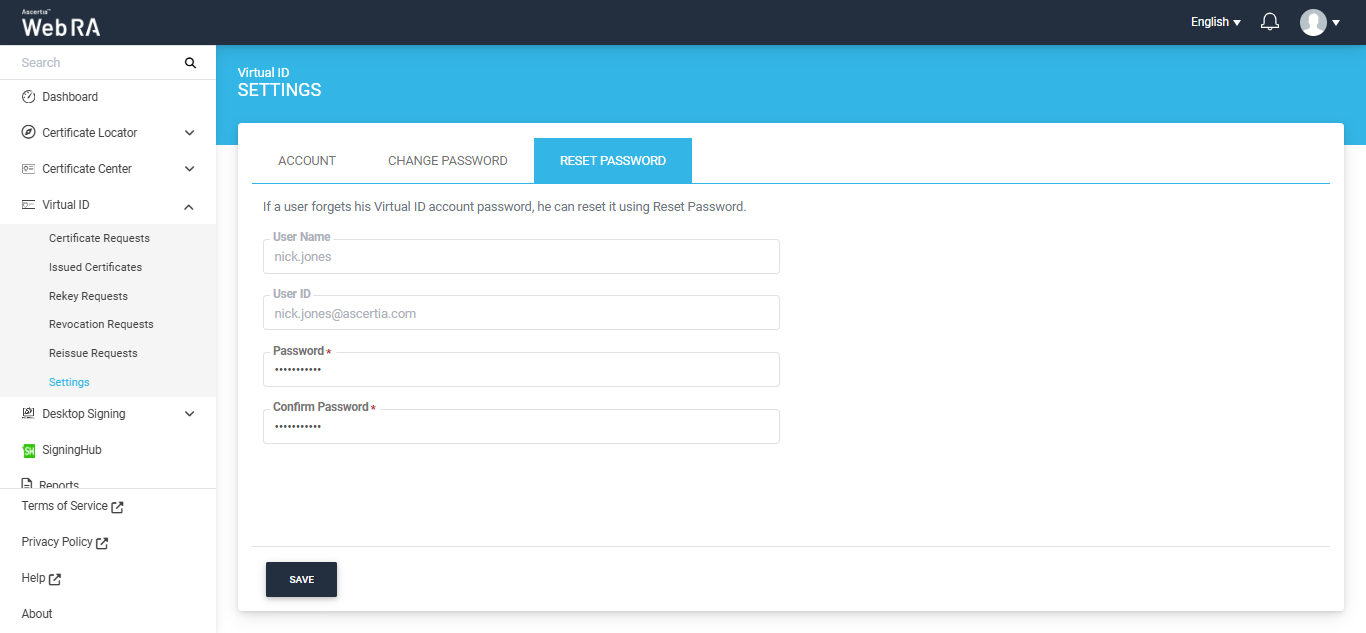
Enter the new password in the ‘Password’ and ‘Confirm Password’ fields and click ‘Save’.
After you click 'Save', the 'One Time Password' dialog appears, requiring OTP verification to complete the password reset.
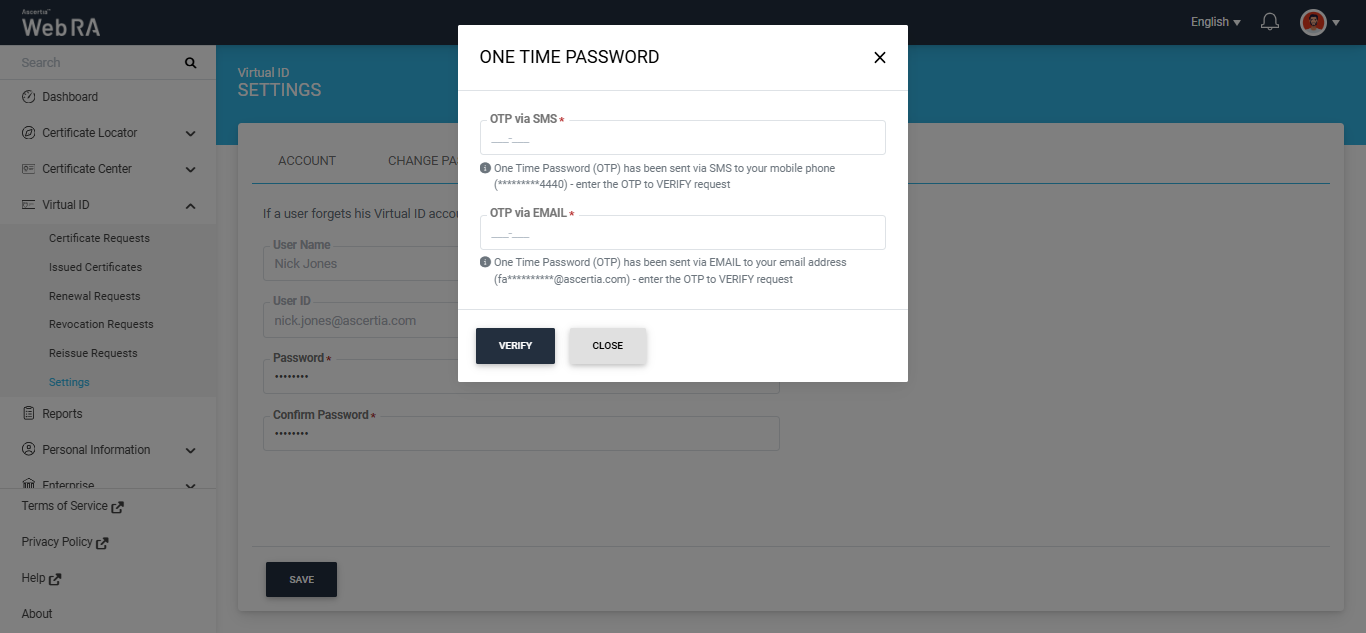
The 'OTP via SMS' will be sent to the mobile number configured under the 'Account' tab. Enter the received OTP in the 'OTP via SMS' field. Meanwhile, the 'OTP via Email' will be sent to the user's registered email address. Enter the received OTP in the 'OTP via Email' field and click 'Verify' to proceed.
|
|
Note: The OTP verification method depends on the 'Virtual ID Reset Password OTP Mechanism' configured in the certification profile:
|

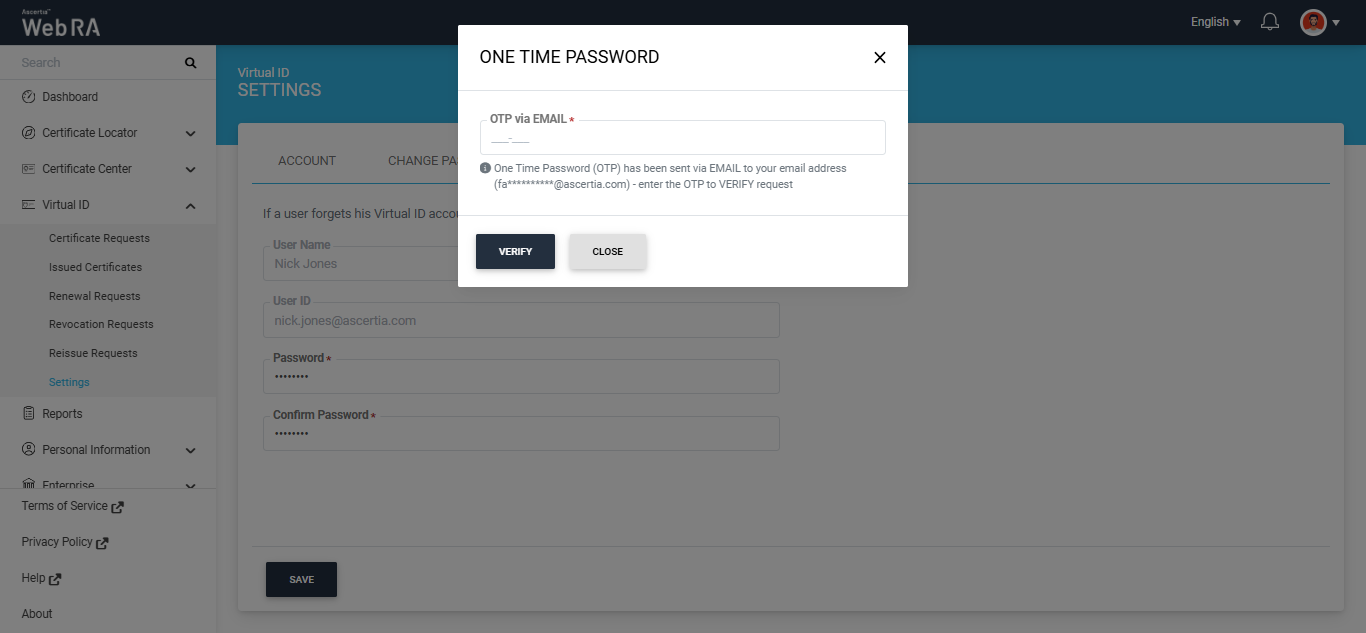
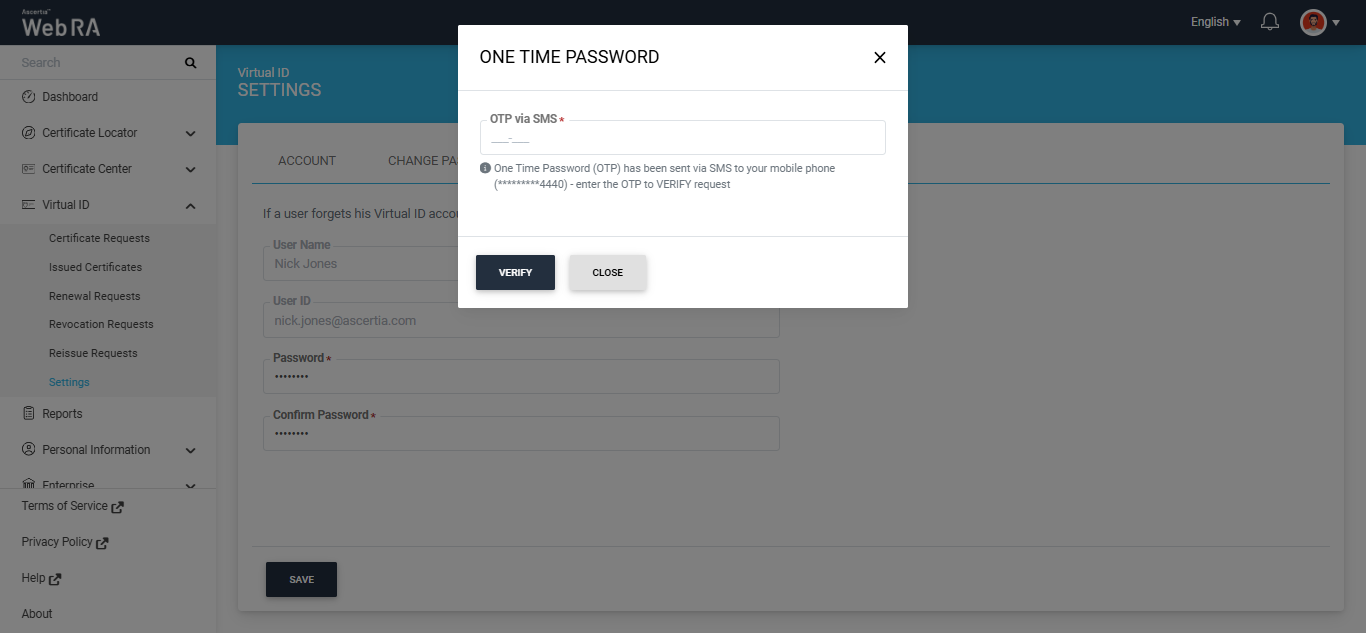
After entering the required OTP in the dialog, click 'Verify'. If the provided OTP is valid, the system will reset the Virtual ID password and a 'Password Reset' success alert will appear on the screen.
|
|
Note: Ensure that the relevant SMS or Email Setting is enabled in the ADSS Server under Global Settings > Notification Settings for the OTP verification mechanism selected in Web RA. If both Email and SMS are selected as the OTP verification mechanisms for password reset in Web RA, both the Email and SMS notification settings must be enabled in the ADSS Server. |
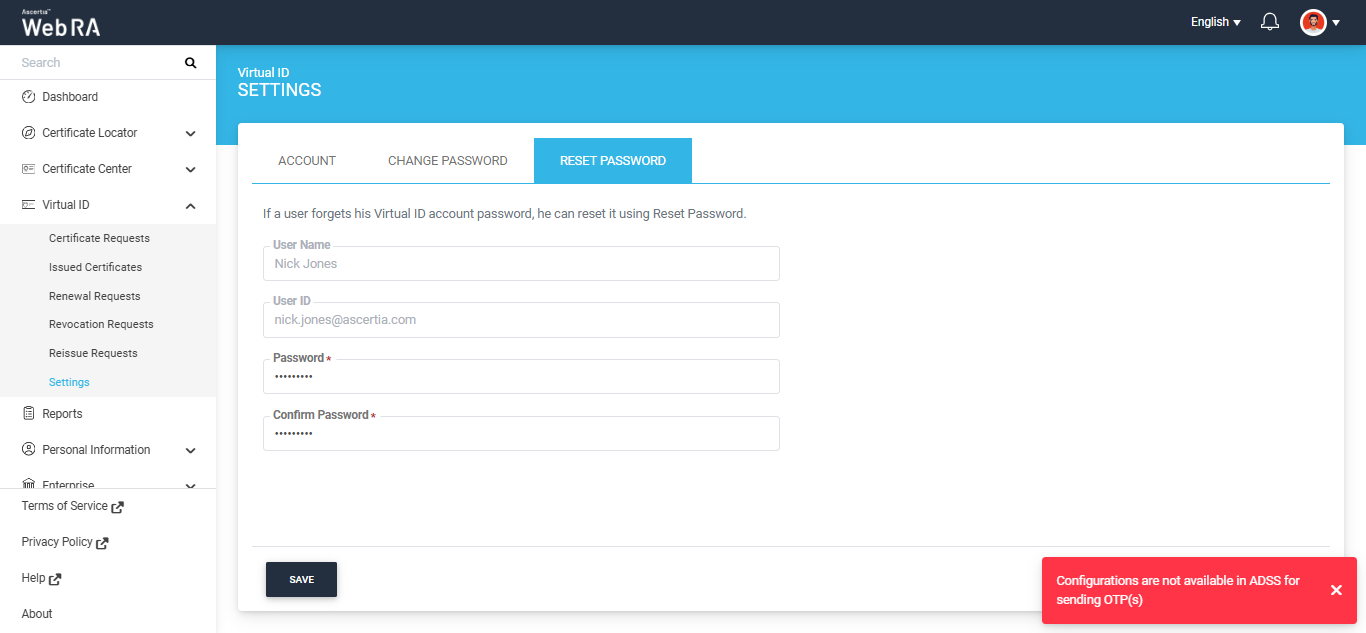
If SMS is configured as the 'Virtual ID Reset Password OTP Mechanism' in the Web RA certification profile, but the SMS notification setting is disabled in the ADSS Server, the following error is displayed in Web RA when resetting the Virtual ID password. The same applies when Email is configured as the OTP mechanism in Web RA but the Email notification setting is disabled in ADSS Server.
|
|
Note: The system will not display the 'Change Password' and 'Reset Password' tabs under the 'Settings' module if the 'Enable Virtual ID Registration With Password' option is disabled in the RAS certification profile. |
|
|
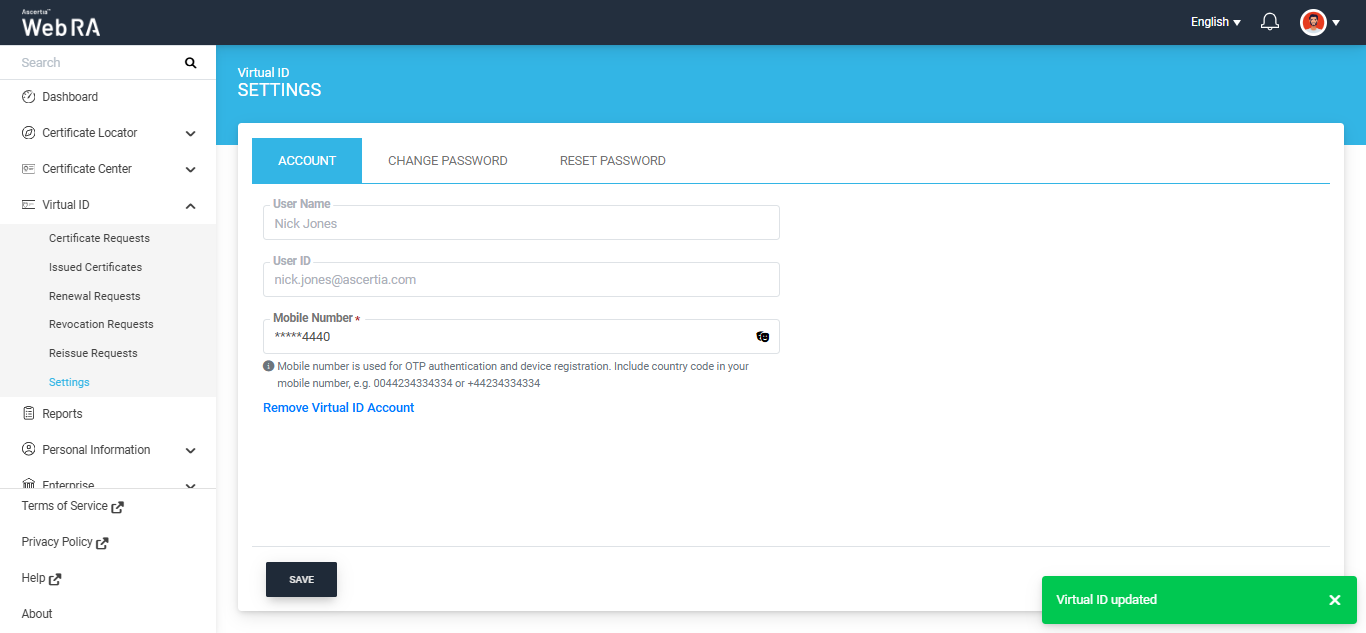
Troubleshoot Note: If Web RA displays the 'OTP is either invalid or expired' error after you enter a valid OTP, the issue may be related to the SMS or Email Notification Settings in the ADSS Server. To resolve the issue, refresh the affected notification settings:
The OTP should then be accepted, allowing the Virtual ID password to be reset successfully. |