
Certificate Requests
This section of the ADSS Web RA admin portal lists down all types of certificate requests, including those pending approval, under review, or already approved.
To access the certificate requests listing page, expand Requests > Certificate Requests from the left menu pane. The certificate requests listing will appear as displayed in the screenshot below.
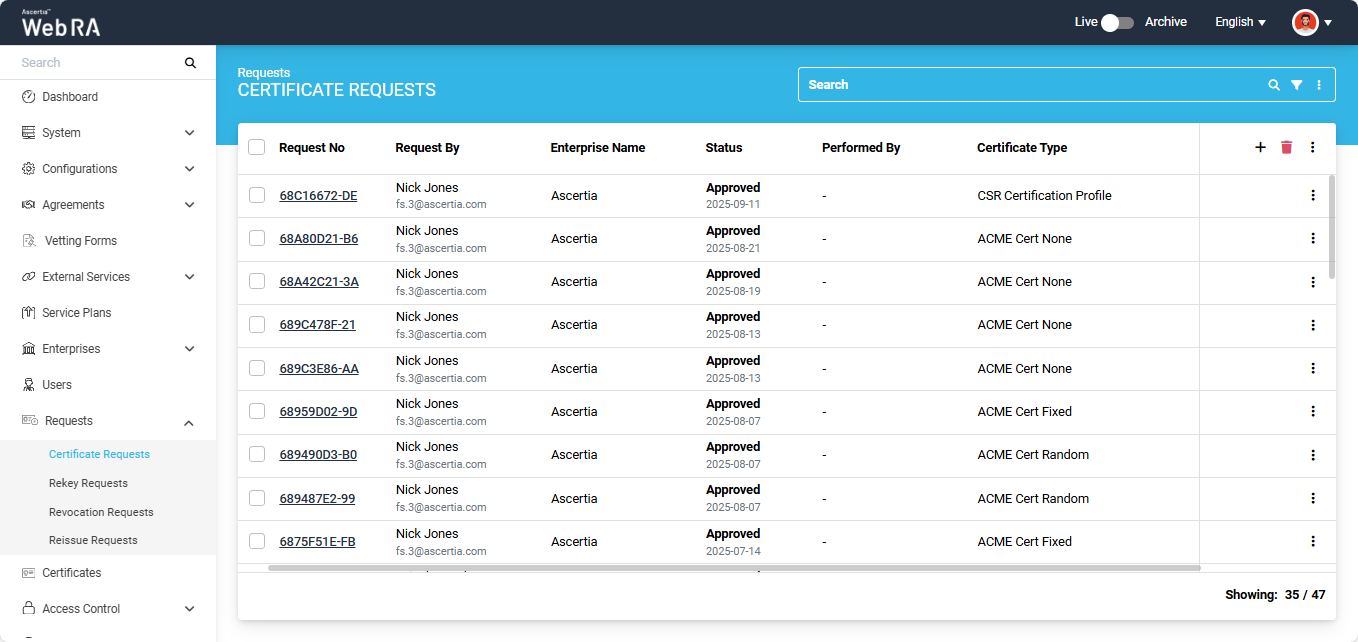
You can click on the '+' button to create a new certificate request for the following types:
The following operations can be performed from the Certificate Request listing screen:
- Search and Advanced Search
- Modify Columns
- Approve / Decline a Certificate Request
- Delete a Certificate Request
- Resubmit a Declined Request
- View Token Information
- Renew a Certificate
Users can search for specific certificate(s) in the listing using the search bar. The "Advanced Search" feature is also available for more targeted searches.
It allows users to perform detailed and refined searches within the certificate requests section. By applying specific filters and criteria, users can quickly find the certificates they want to view.
To access the advanced search, click on the ‘Advanced Search’ icon next to the search box.
This will open the ‘Search’ dialog, which contains more than a dozen filters that allow users to refine their search results based on specific criteria.
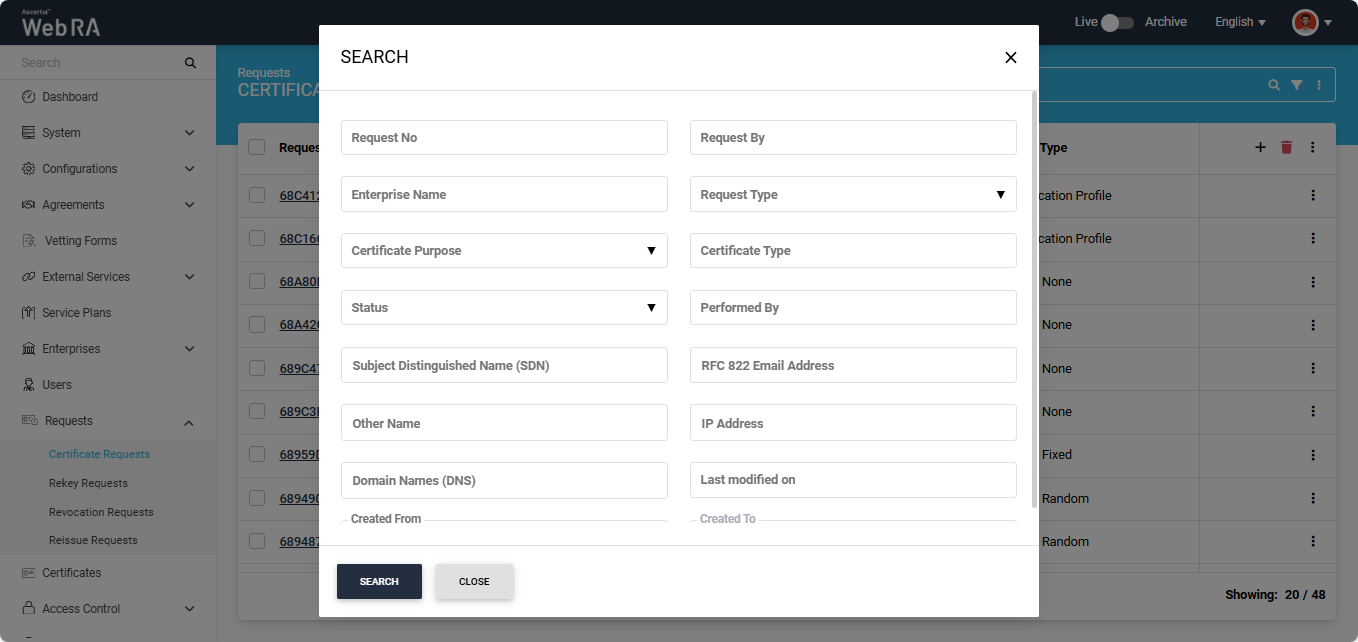
After applying the required filters, click the ‘Search’ button.
The listing section will display the certificates based on your applied filters.
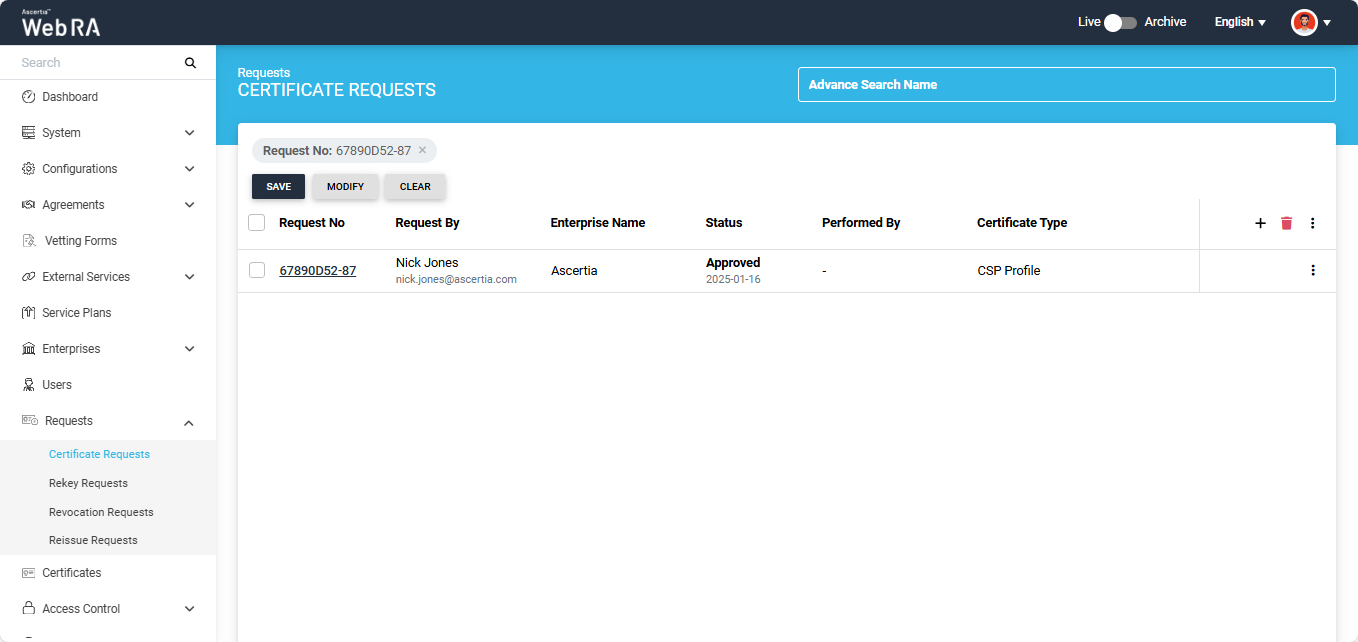
On this screen, users have the option to save the search criteria, modify it, or clear the criteria to view all certificates in the listing again.
Users have the option to modify the columns in the listing. To do that, click the button present on the extreme right of the table header.
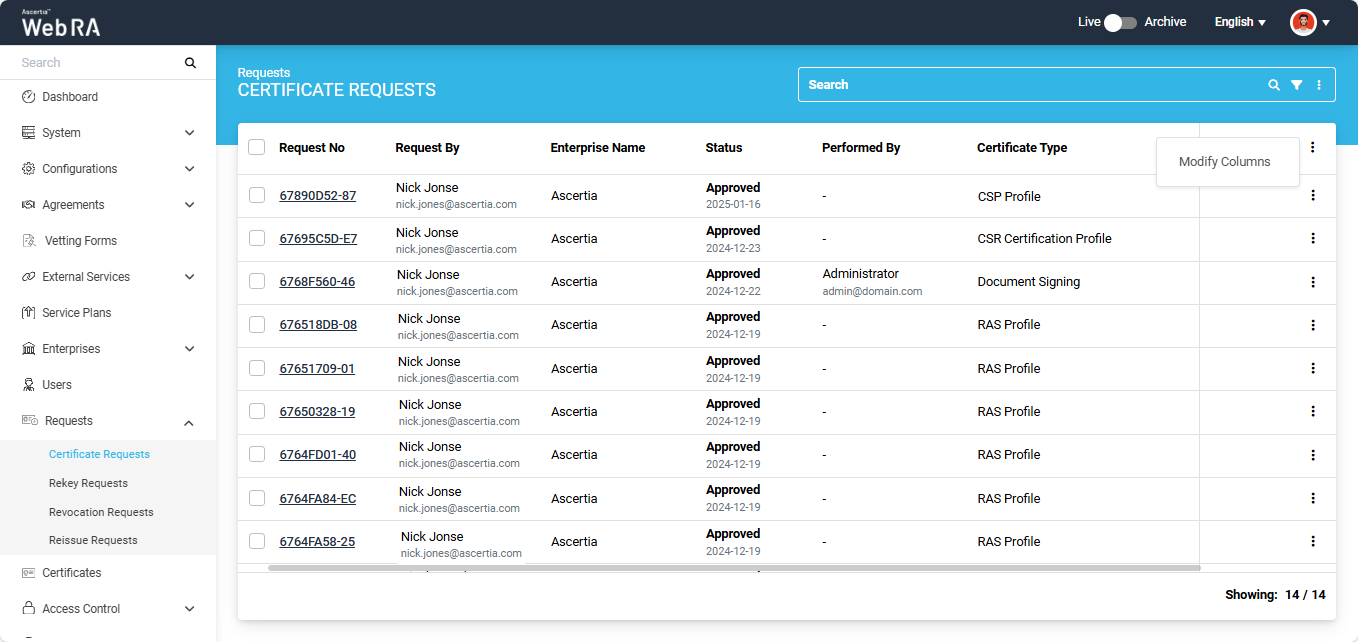
Click on the ‘Modify Columns’ option to edit the listing column entries. This will open a ‘Modify Columns’ dialog.
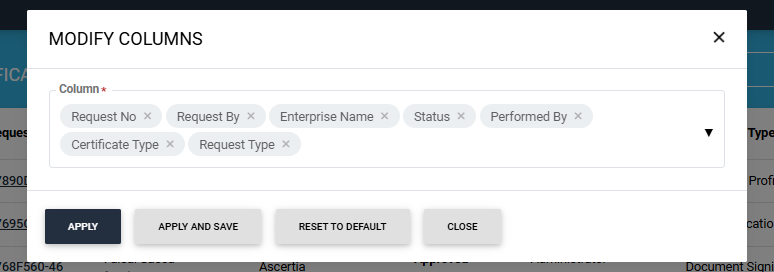
Click on the ‘Column’ dropdown to add more columns in the listing.
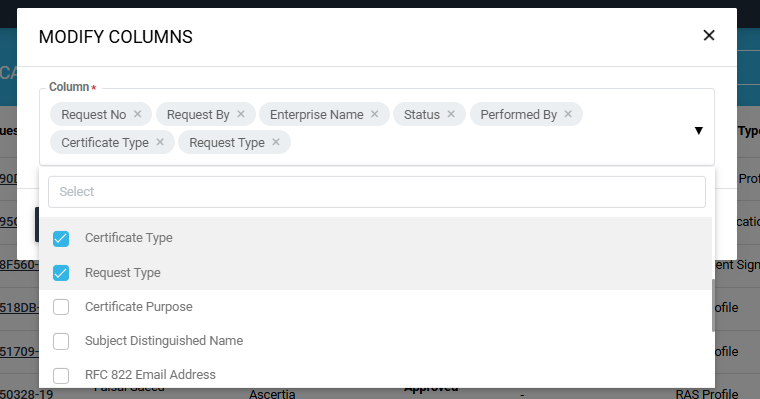
Scroll down the list to view the available options. Check the boxes for the options you want to view in the listing. The selected options will then appear in the ‘Column’ box.
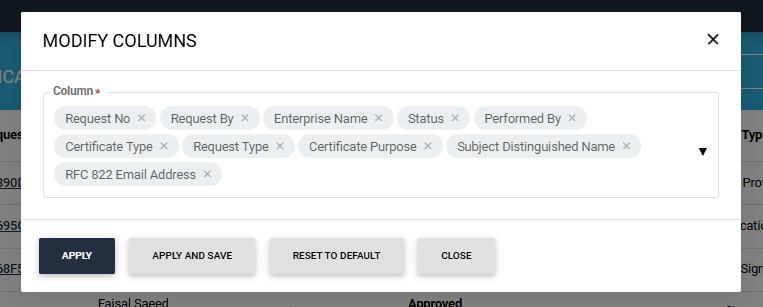
To remove any selected option, click on the cross present next to the column entry.
After selecting the required options, click the ‘Apply’ button to view the changes in the table listing. Click the ‘Apply and Save’ button to permanently save the changes in the table.
Users can also change the order in which columns appear in the listing table. To do this, first, remove all the selected options. Then, select the options from the dropdown one by one in the exact order you want them to appear in the listing table.
The 'Reset to Default' button will revert the column entries to their default settings.
Note: The 'Request By' section will display 'Citizen ID' below the username if it is enabled in the Configurations > Default Settings.
|
|
Important notes: 1) CSR Validation policies only validate when Enable CSR Validation is set under Configurations > Policy. |

Approve / Decline a Certificate Request
Expand Requests > Certificate Requests from the left-tree menu in the Admin Portal.
Click the three-dot  icon next to the certificate request that you want to approve or decline. Then, click 'Vetting'.
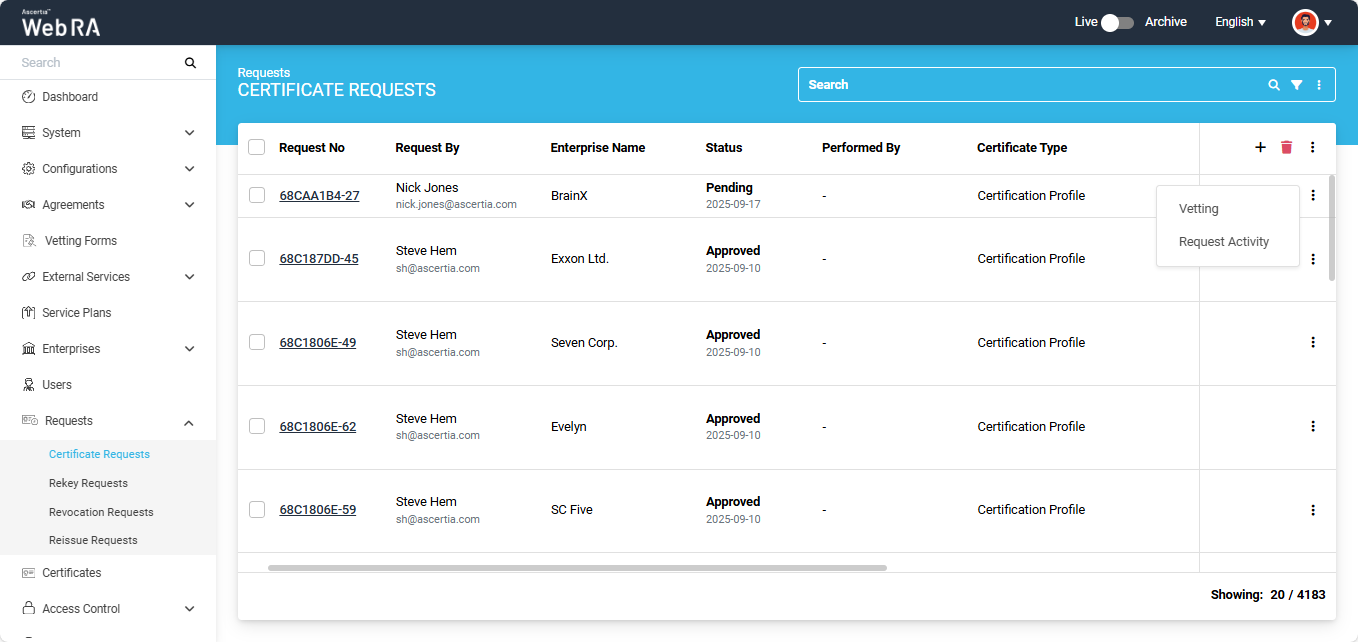
The certificate request will open, and the ‘Certificate Signing Request (CSR) screen will appear.
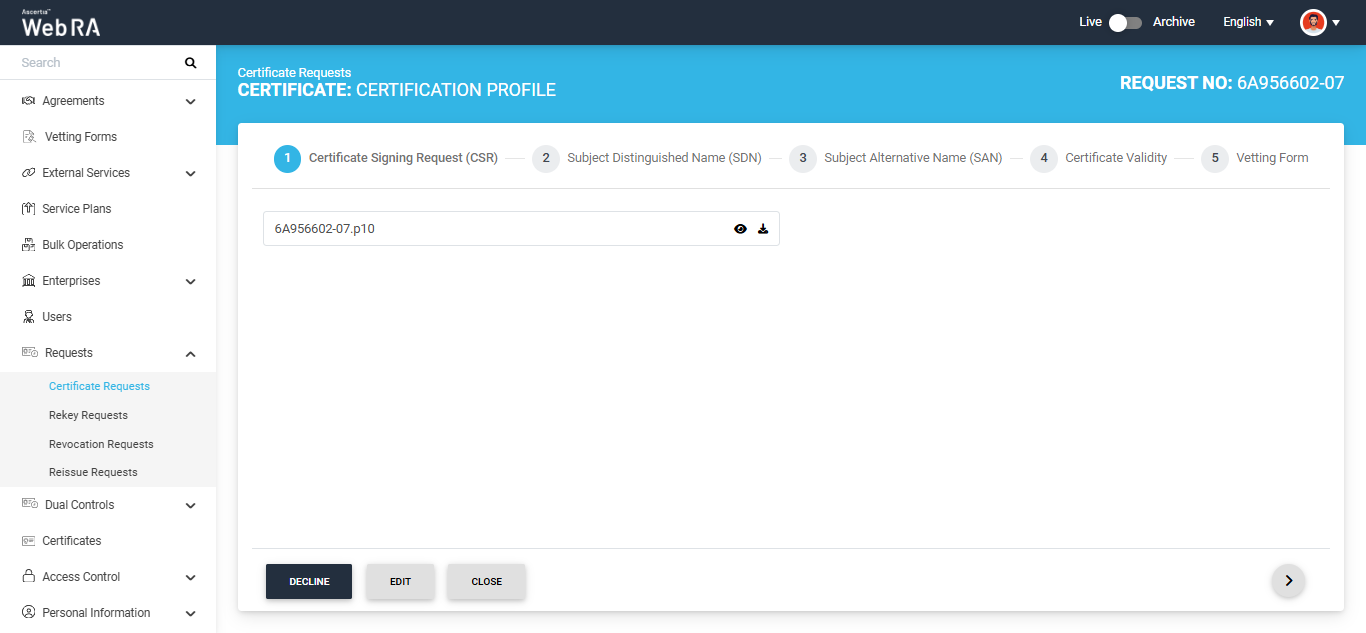
Click the next ‘>’ button to navigate to the Subject Distinguished Name (SDN) screen.
|
|
If the ‘Allow Operators to Edit New and Rekey Pending Requests’ setting is enabled in the Configurations > Policies > Requests module, the ‘Edit’ button will appear next to the Decline and Approve buttons. |

If you want to make changes to the information in the certificate request, click the ‘Edit’ button. The system will make the applicable fields editable. To make changes in different sections of the certificate request, navigate between the sections using the Previous (<) and Next (>) buttons.
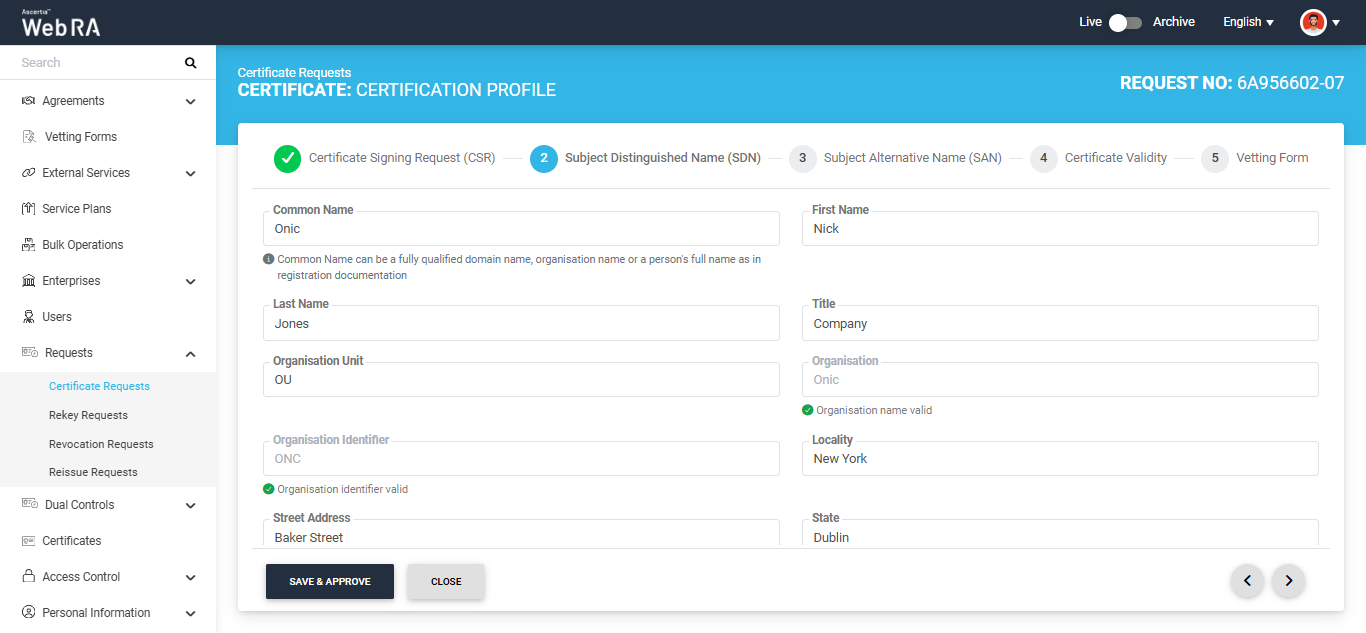
A certificate request is submitted for approval only if the ‘Manual Vetting’ option is enabled in the Certification Profile and a Vetting Form is attached to it. You can edit the information in the available tabs of the certificate request according to the rules described in the notes below.
|
|
Important Notes:
|
After making the required changes to the certificate request fields, click ‘Save & Approve’.
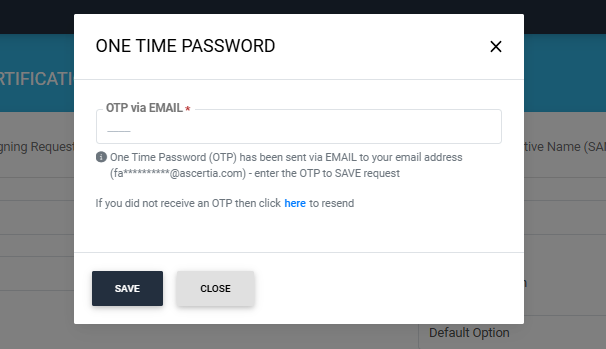
The system will display the secondary authentication dialog.
|
|
The secondary authentication method displayed in the dialog depends on the ‘Secondary Authentication Profile’ configured in the ‘Pending Request Settings’ section under Configuration > Policies > Requests. For example: if ‘Email OTP’ is selected, the dialog will prompt you to enter the OTP received by email to save the changes. |
Enter the OTP in the dialog and click ‘Save’. The ‘Approve Request’ dialog will appear.
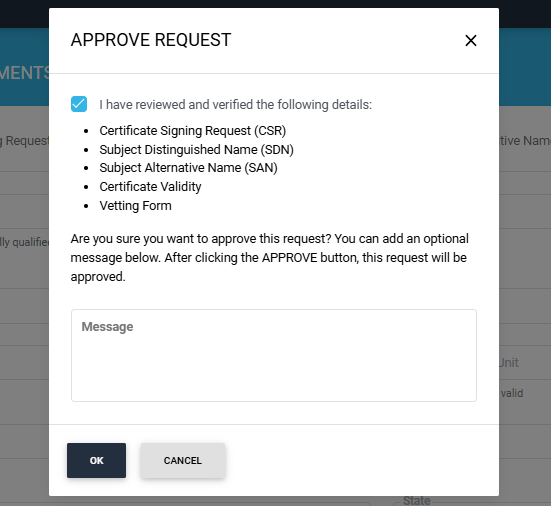
Select the ‘I have reviewed and verified the following details’ checkbox and click ‘Ok’ to approve the certificate request. You can also add an optional message related to the certificate request in the ‘Message’ box.
The certificate request will be approved, and a ‘Certificate request approved’ success alert will appear on the screen.
|
|
If ‘Dual Control’ is enabled for the ‘Requests’ module in ‘Configurations > General Settings’, the request will be transferred to the Dual Control operator for approval after Enterprise RAO approves the request. To learn more about how a request is approved from the Dual Control module, navigate to the Dual Control > Requests section. |
|
|
Note:
|
Decline a Request
If you want to decline the certificate request instead, click the ‘Decline’ button. A 'Decline' dialog will appear. Enter the reason for declining the request in the 'Reason' box and click 'Decline'.
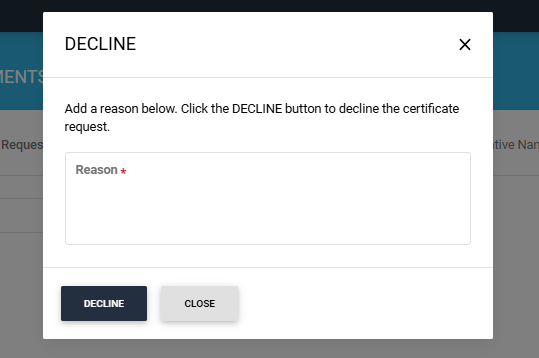
A success alert will appear on the screen indicating that the request has been declined.
Permanent Deletion
An operator will only be able to delete a certificate request permanently if he has enabled permanent deletion from the Policy section.
If an operator wants to delete a certificate request from the Admin portal, follow the steps below:
- Expand Requests > Certificate Requests.
- A list of certificate requests will appear. Select the request number check box against the request you want to delete. Then click the
 button.
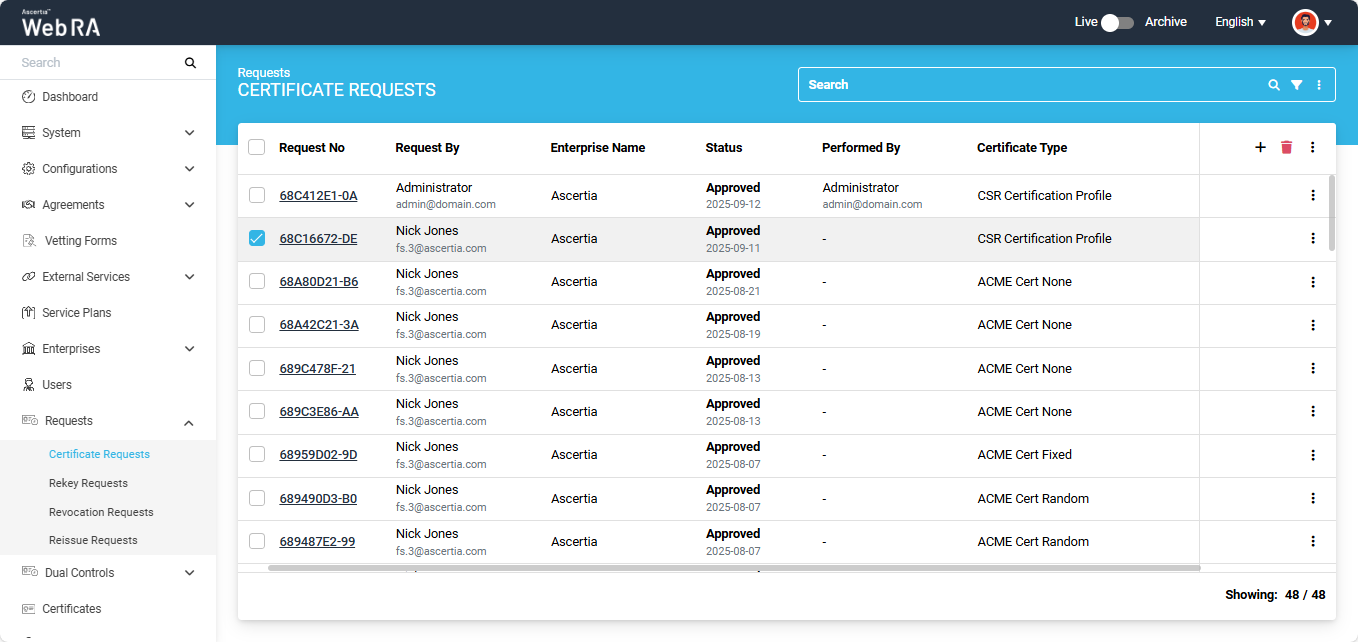
- A confirmation dialog will appear as displayed below. If you click 'Yes', the system will delete all certificates and activities against this request permanently. The deleted information will not be retrievable.
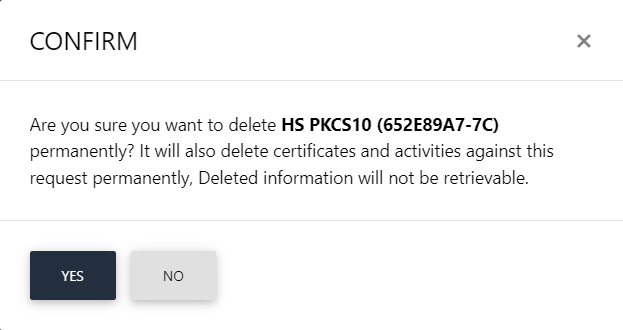
Temporary Deletion
An operator will only be able to delete a certificate request temporarily if he has disabled permanent deletion from the Policy section.
If an operator wants to delete a certificate request from the Admin portal, follow the steps given below:
- Expand Requests > Certificate Requests.
- A list of certificate requests will appear. Select the request number check box against the request to delete. Then click the button.
- A confirmation dialog will appear as displayed below. The dialog will notify you that if by clicking 'Yes', the certificate(s) against this request will also be deleted.
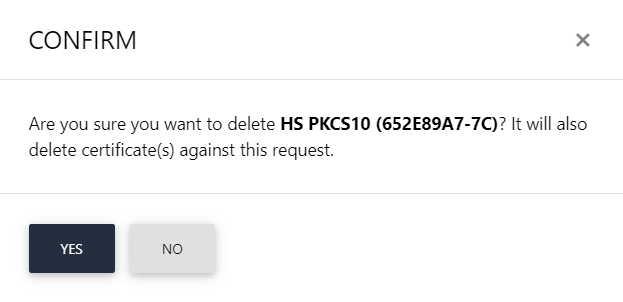
The text appearing on this dialog will be according to the configurations in the Policy section in the Admin portal.
The operator can resubmit a certificate request that has been declined. This allows them to modify the required details and submit the request again for approval.
|
|
Note:
|
Expand Requests > Certificate Requests to access the requests listing section.
Then, click the three-dot  button next to the certificate request that has been declined and select 'Resubmit'.
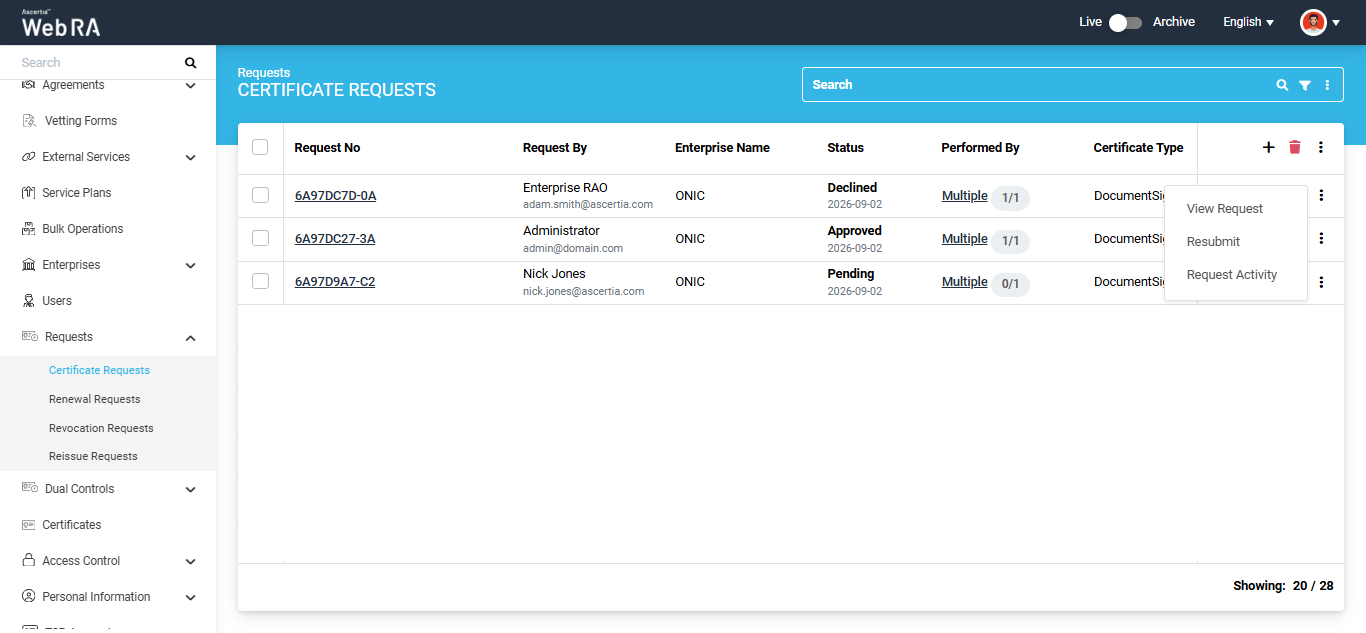
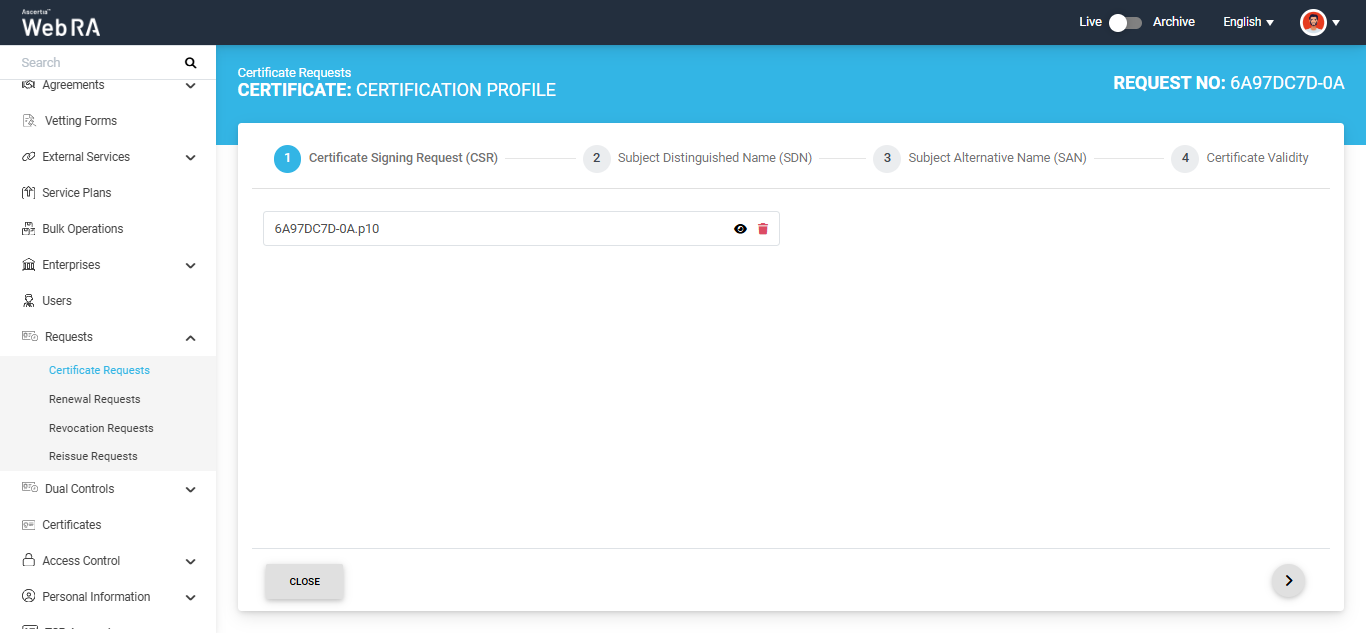
The system will open the certificate request in edit mode. The operator can modify the details in each section of the certificate request as per requirement.
After making all the required changes, click Submit, which appears at the end of the certificate request.
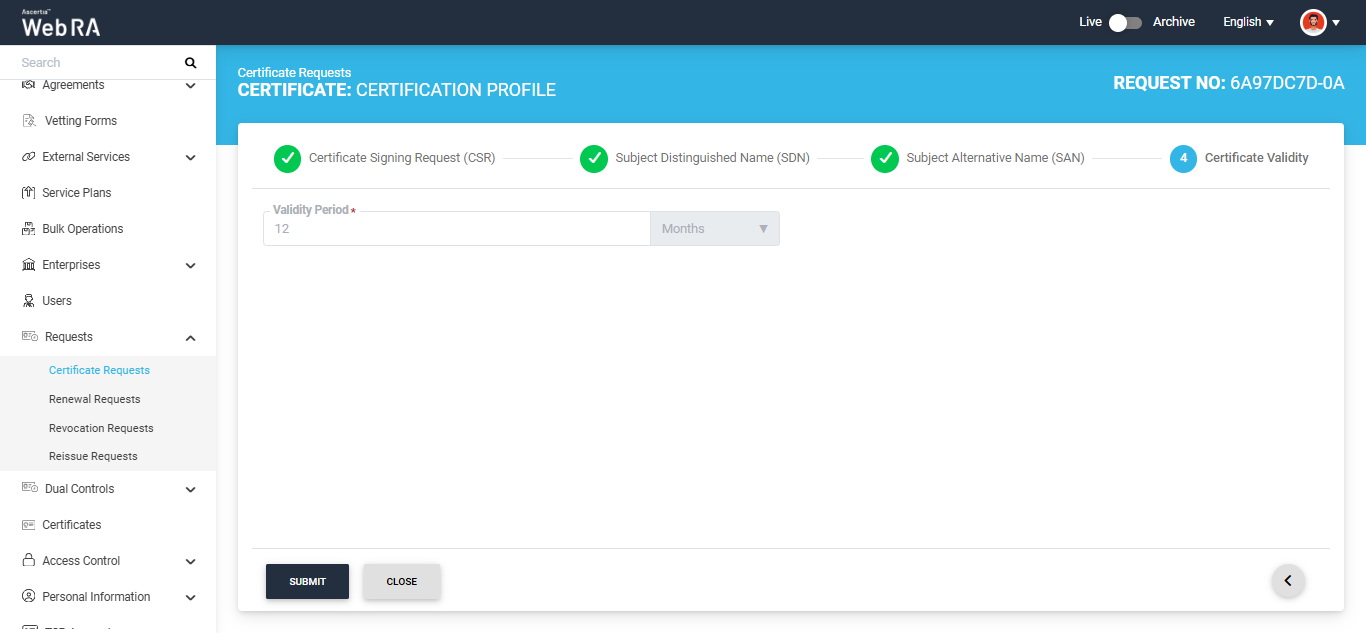
The request will be submitted for approval again.
The operator can view the token information of a certificate from the Certificate Requests listing screen.
To do that, click the  button next to the certificate for which a token has been generated. The system will display the ‘Token Information’ option in the menu.
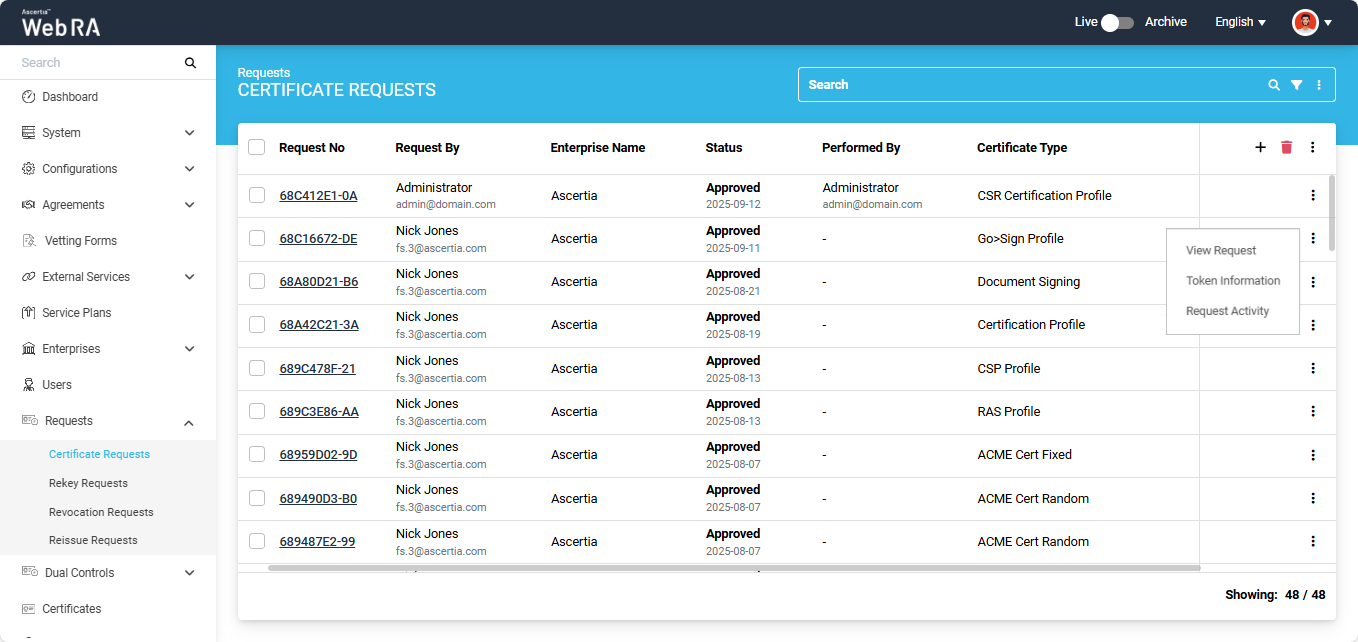
Click ‘Token Information’, and the system will open a dialog displaying the complete token details for that certificate.
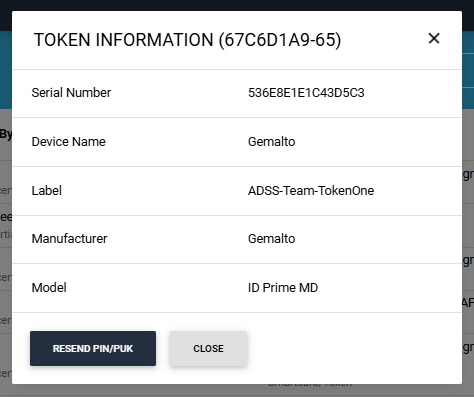
The system also provides an option in the 'Token Information' dialog to resend the values of PIN/PUK to the user.
If the operator clicks on the 'Resend PIN/PUK' button, the values will be shared with the user via Email or SMS or on both platforms. The mechanism to receive the PIN/PUK values is configured during the creation of certification profile. View Certification Profiles section for more details about how to select mechanisms.
To renew a certificate before its expiration, you need to first open the certificate request generated from the Web RA system.
To do this, expand Requests > Certificate Requests from the left-tree menu in the Admin portal.
Then, click the request number of the certificate that you want to renew. Alternatively, click the three-dot button next to the certificate request entry and select the 'View Request' option.
The system will then open the certificate request in View mode.
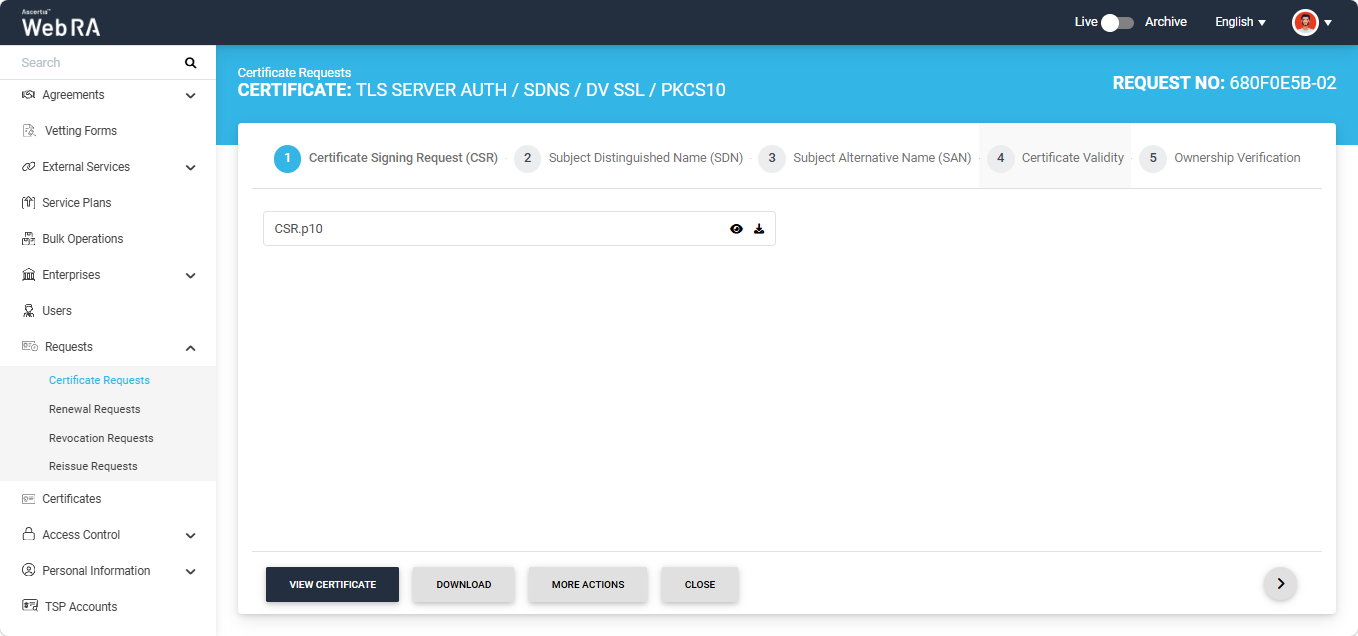
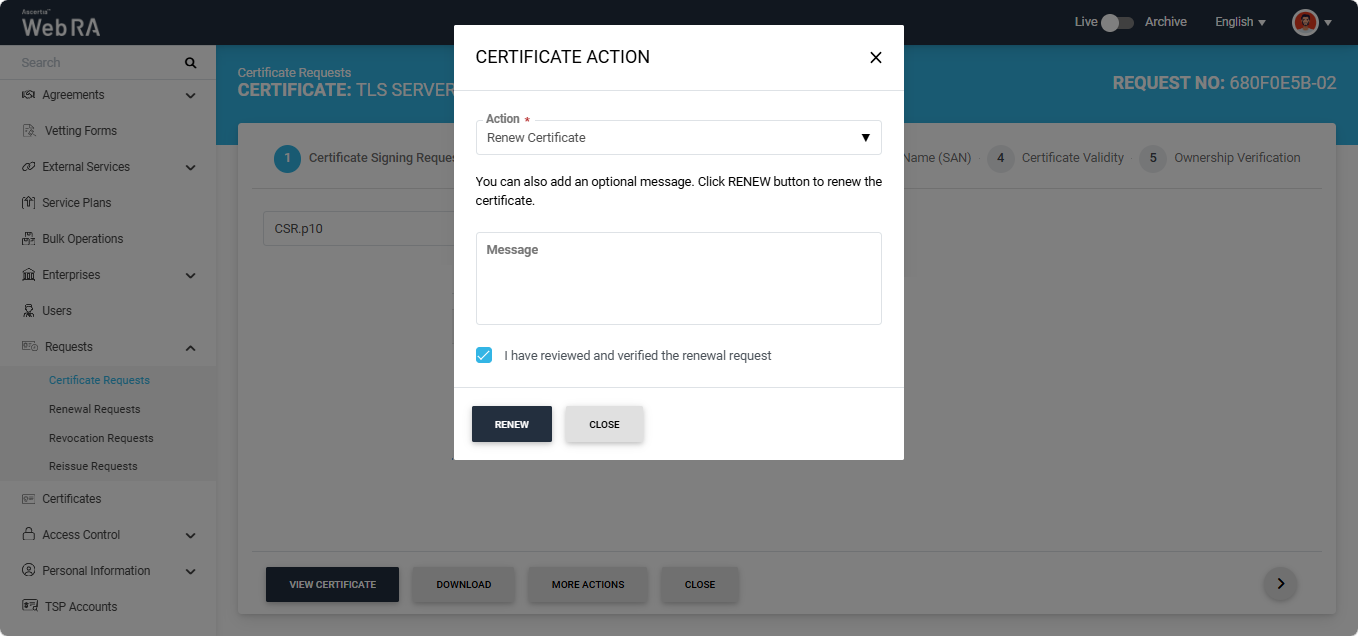
To renew the certificate, click the 'More Actions' button. A dialog titled 'Certificate Action' will appear on the screen.
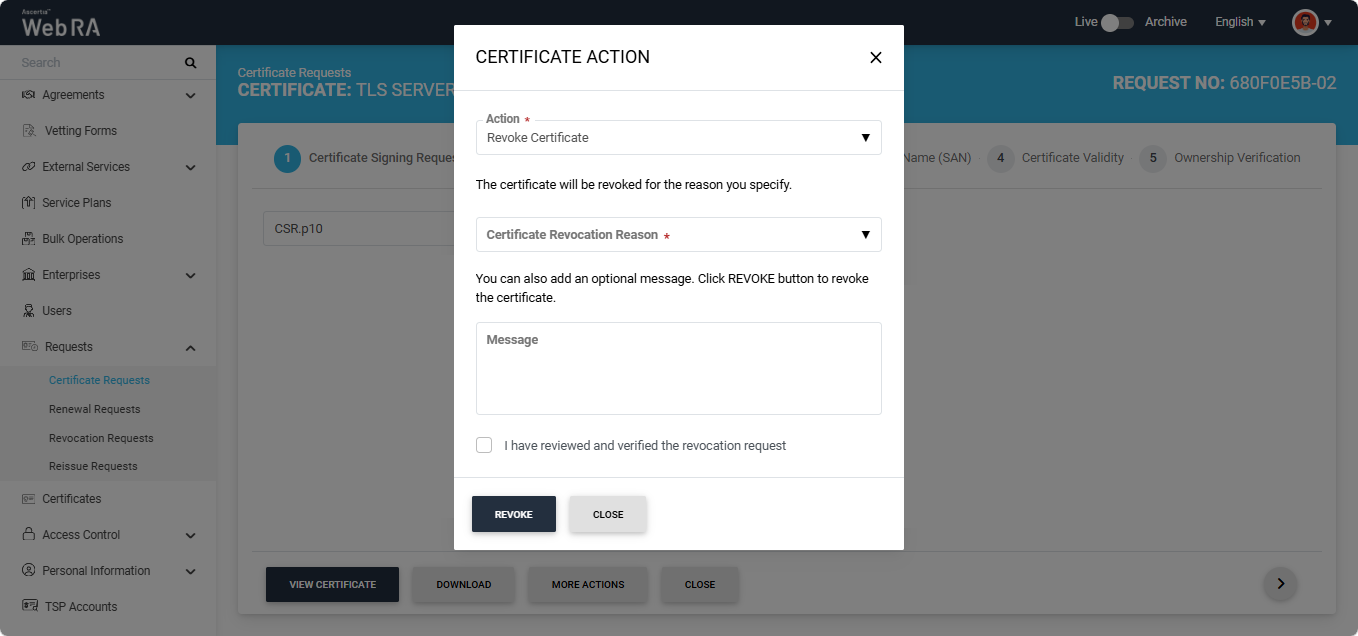
Click the 'Action' dropdown and select the 'Renew Certificate' option.
Note: The 'Renew Certificate' option appears in this dropdown only if the 'Renew Certificate' policy is selected in Configurations > Policies > Requests section under the certificate renewal settings.
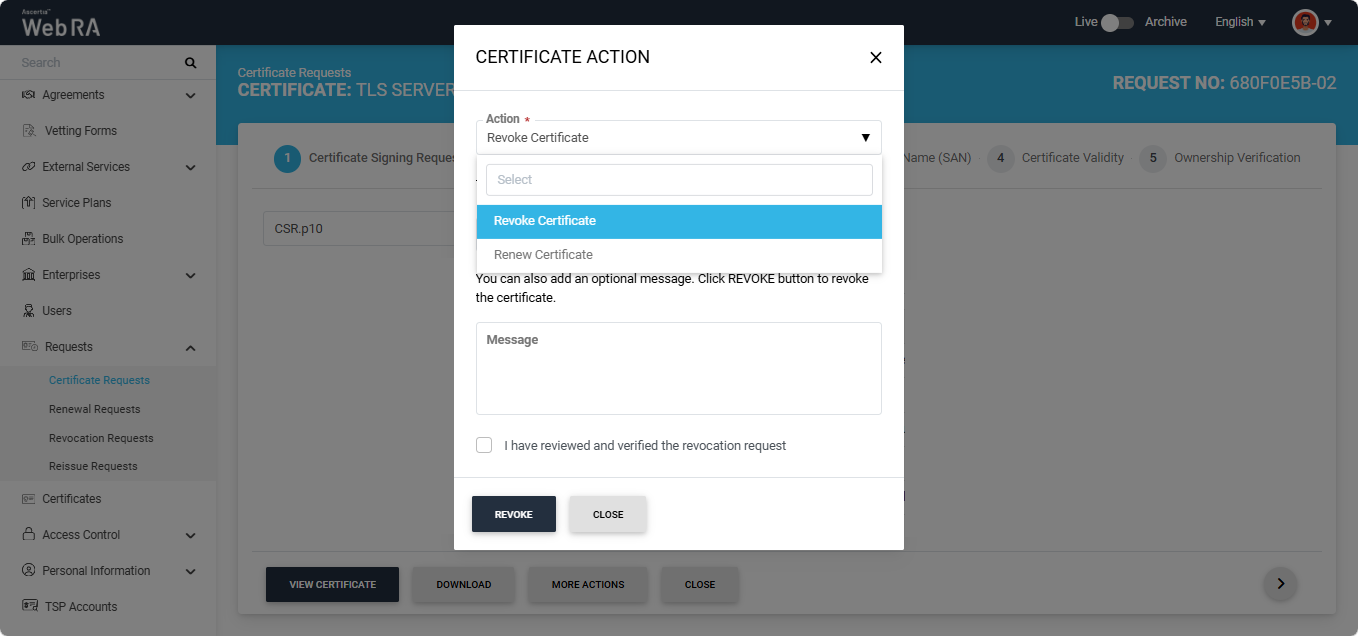
After selecting the required option, select the 'I have renewed and verified the renewal request' checkbox and click the 'Renew' button.
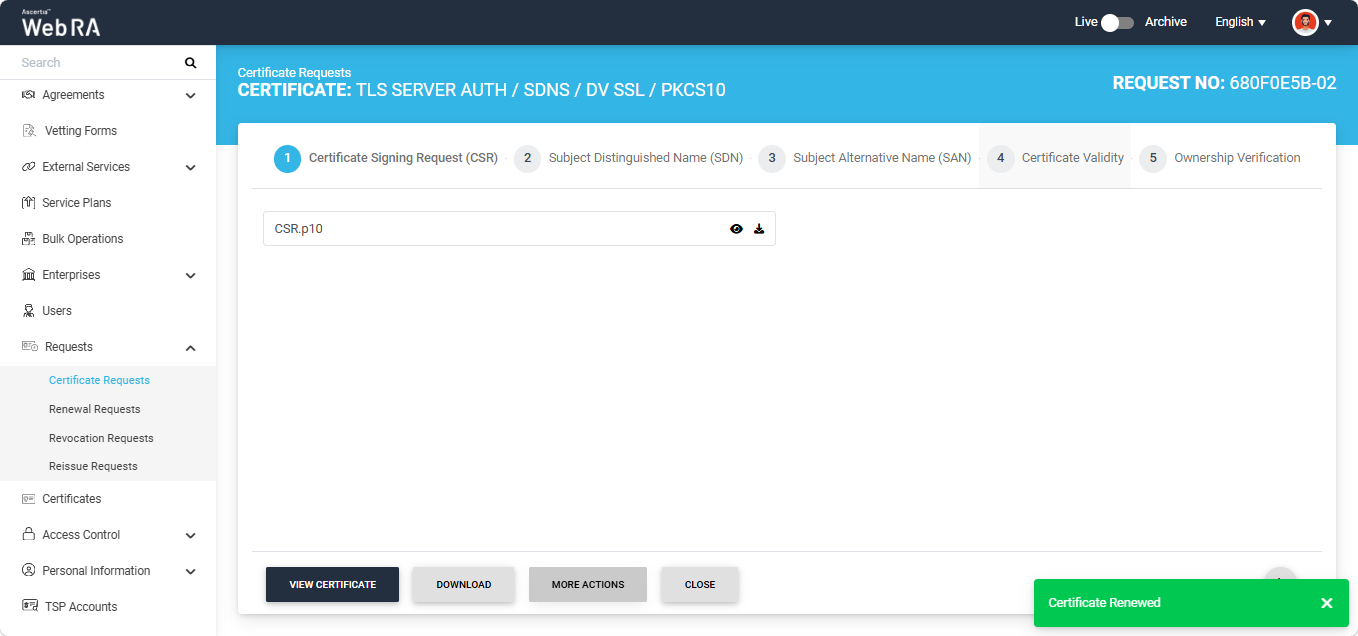
The certificate will be renewed, and the system will display a 'Certificate Renewed' alert on the screen.
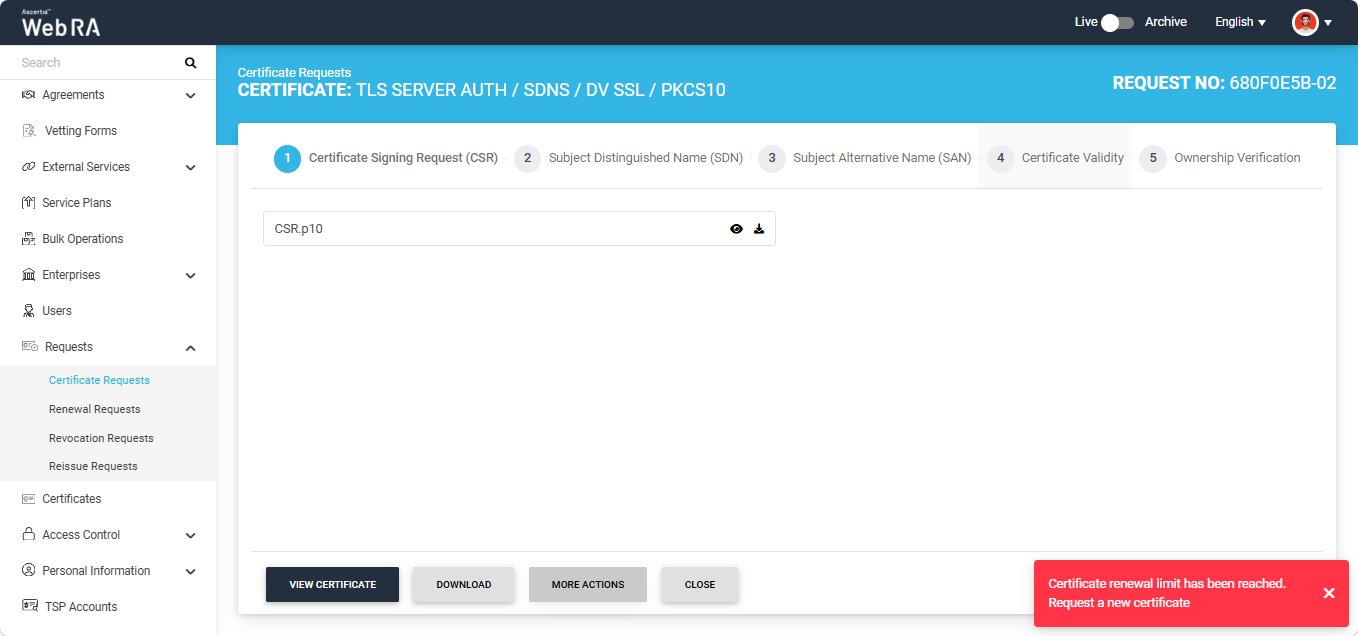
Each certificate can be renewed only up to the renewal limit configured in the certification profile. For example, if a renewal limit of 1 is configured in the certification profile, a certificate can only be renewed once. Any subsequent attempt to renew the same certificate will result in an error being displayed by the system.
The following error will appear on the screen if you attempt to renew a certificate after the renewal limit has been reached.
Note: If the renewal limit is set to zero in the certification profile, certificates generated under that certification profile cannot be renewed.
Second Factor Authentication
If second factor authentication is enabled on certificate requests, the configured authentication mechanism will function accordingly. When a user clicks on the Generate button, the authentication window will appear, and once it accepts the selected method, it will generate a certificate.
The authentication mechanism can be one of the following:
- SMS OTP Authentication
- Email OTP Authentication
- Email & SMS Authentication
- SAML Authentication
- Active Directory Authentication
- Azure Active Directory Authentication
- OIDC Authentication