Manage your electronic seals
SigningHub enables you to manage (Add, Edit, and Delete) the Electronic Seals of the enterprise. These enterprise Electronic Seals are available to the enterprise users within your enterprise, based on their role, when they need to add an electronic seal to a workflow.
The "Electronic Seals" section will appear if "Electronic Seals" is enabled, as a featured, in the service plan.
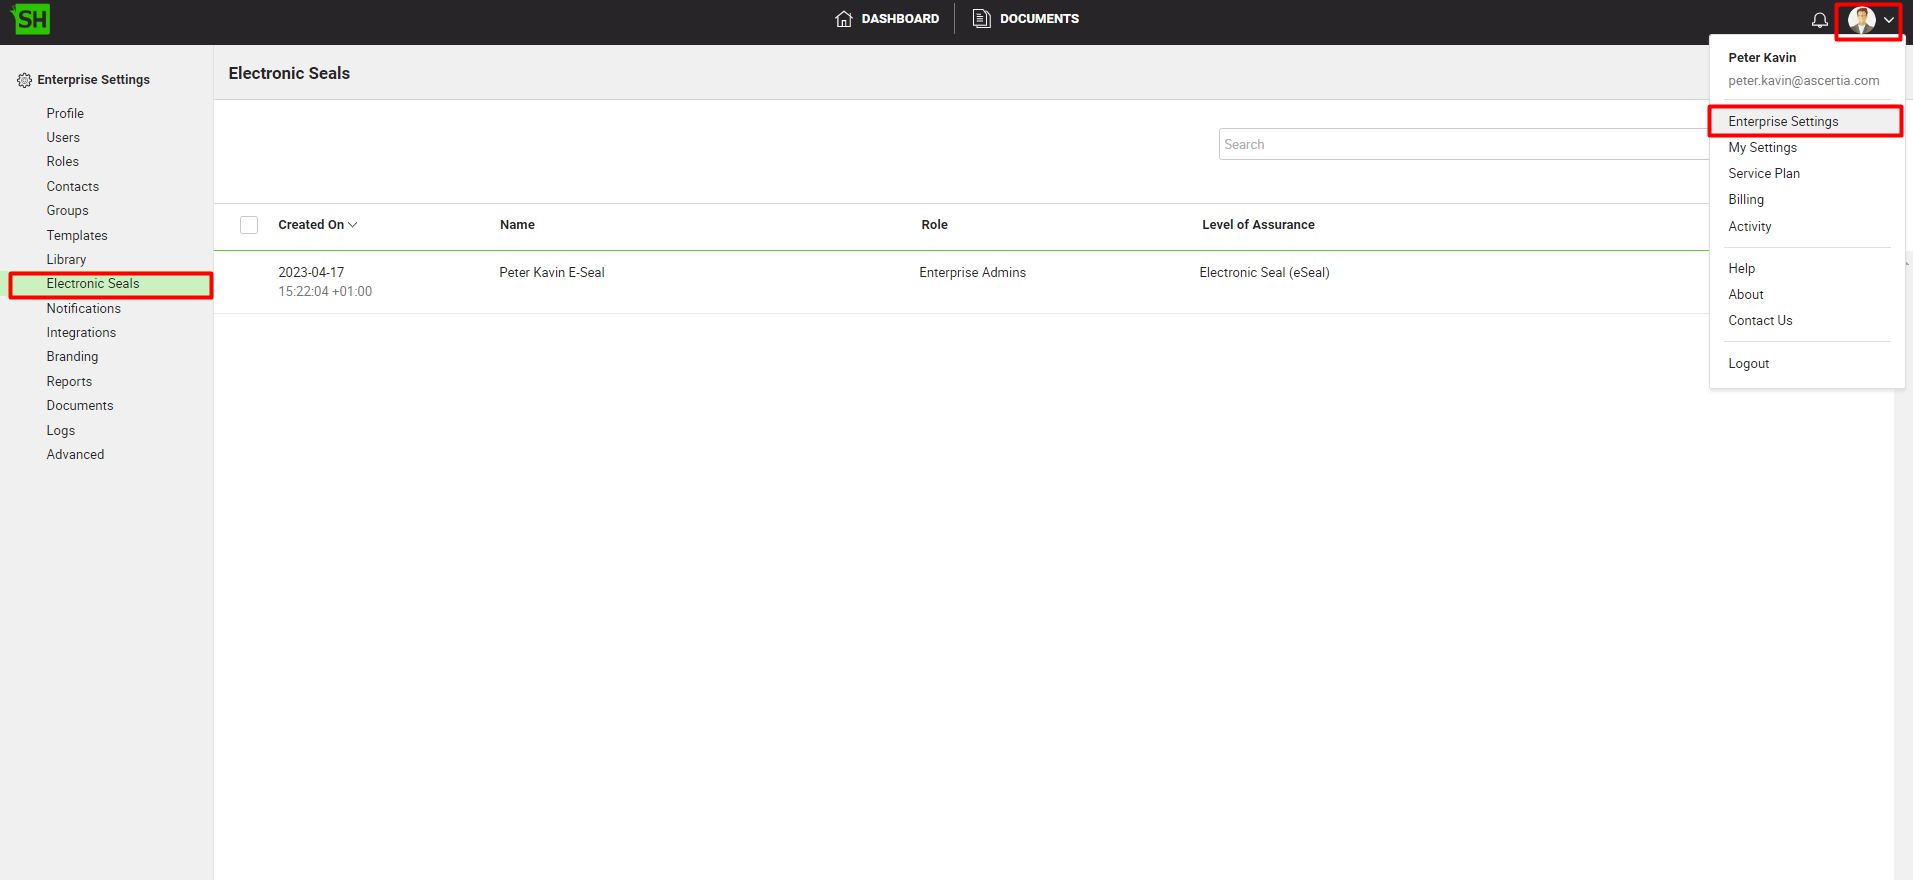
View your electronic seals
- Click your profile drop down menu (available at the top right corner).
- Click the "Enterprise Settings" option.
- Click the "Electronic Seals" option from the left menu. All of the existing electronic seals will be displayed.
Create a new electronic seal
- Click your profile drop down menu (available at the top right corner).
- Click the "Enterprise Settings" option.
- Click the "Electronic Seals" option from the left menu.
- Click
 from the grid header. The "Add Electronic Seals" dialog will appear.
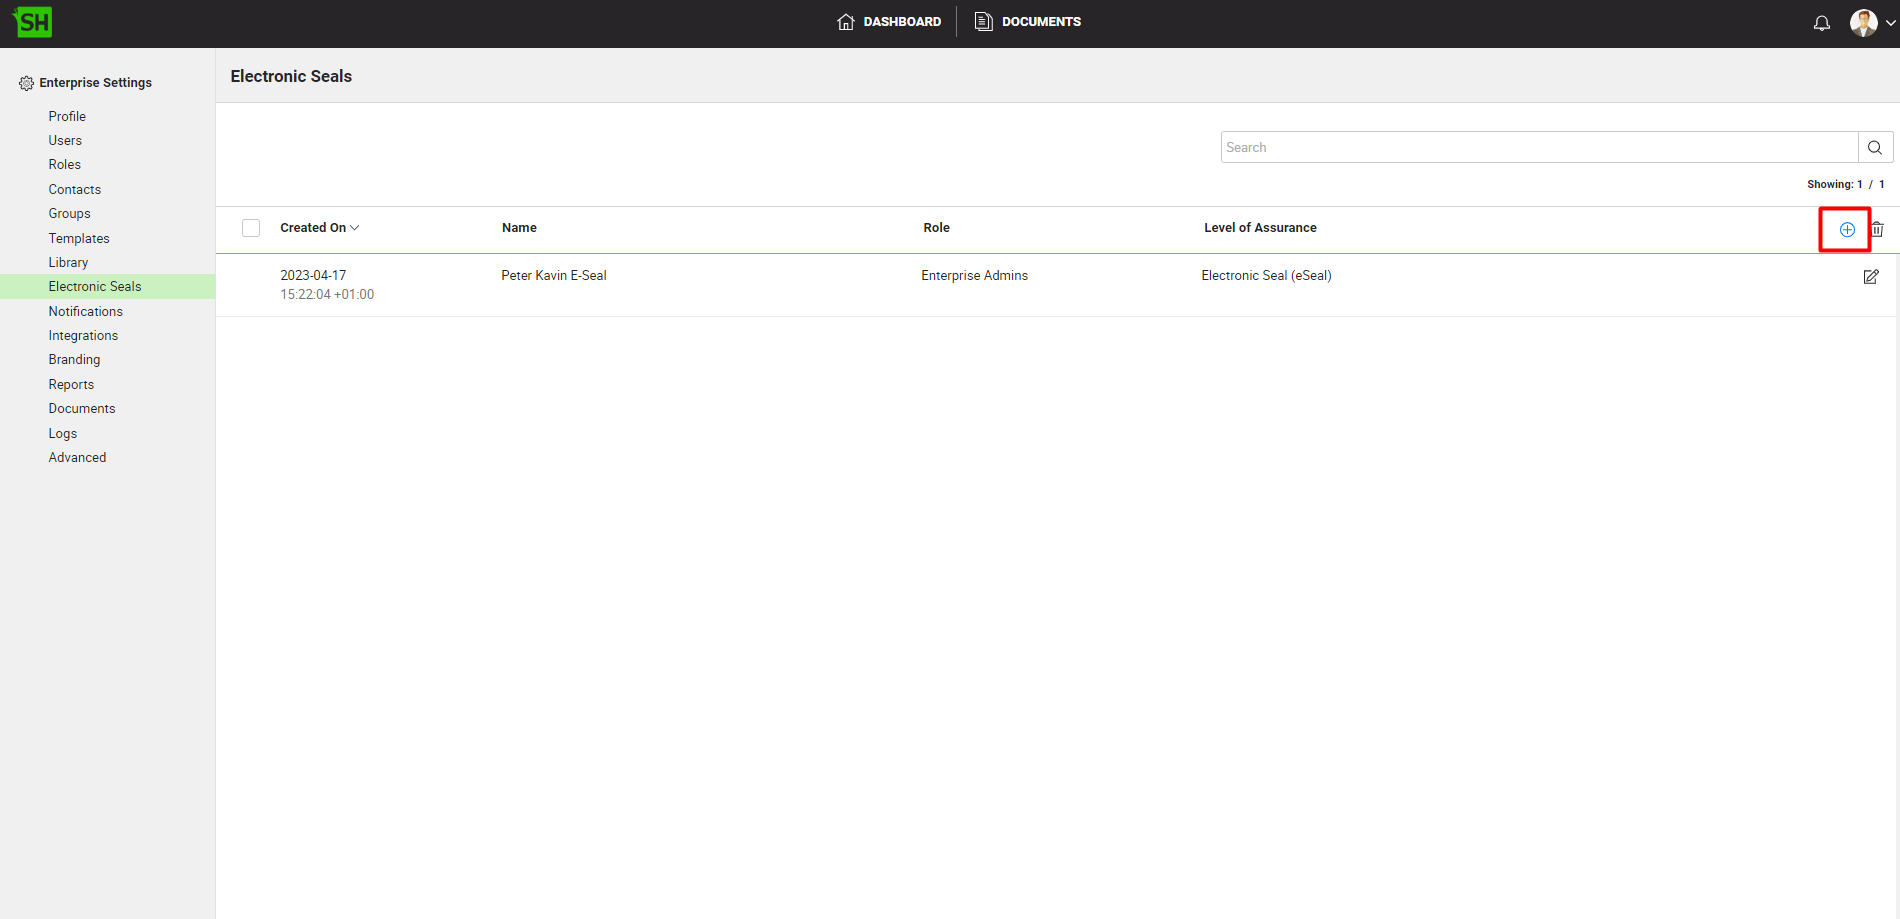
- The "Add Electronic Seals" dialog is comprised of three sections, i.e. Basic Information, Appearance, and Details.
The following table describes the fields on the "Basic Information" section of this dialog.
|
Basic Information |
|
|
Fields |
Description |
|
Name |
Specify a unique name for this electronic seal, i.e. Peter Kavin-Electronic Seal. |
|
Role |
Select a role from the existing enterprise roles. The users of the selected role will be able to use this electronic seal. |
|
Signing Server |
This field will display the Electronic Seal Signing Servers configured in the service plan. Signing Capacity The "Signing Capacity" field appears only when an ADSS Electronic Seal Signing Server is selected. From the drop down, select a signing capacity for this electronic seal. Credential ID and Credential PIN The "Credential ID" and "Credential PIN" fields appear only when a CSC Electronic Seal Signing Server is selected. Specify a Credential ID and a Credential PIN for this Electronic Seal. |
|
Level of Assurance |
When an ADSS Electronic Seal Signing Server is selected, the "Level of Assurance" field will be disabled. The "Level of Assurance" field will display the level of assurance associated with the above configured "Signing Capacity". When a CSC Electronic Seal Signing Server is selected, from the "Level of Assurance" drop down select the level of assurance which you want your electronic seal to feature. |
Specify the "Basic Information" and click the "Next" button. The following table describes the fields on the "Appearance" section of this dialog.
|
Appearance |
|
|
Fields |
Description |
|
Appearance Design |
This field is used to configure the signature appearance design (i.e., Hand Signatures Only, Hand Signature with Details and Logo, Hand Signature with Details or a Custom Appearance) for your signature. The available appearances are as per the configuration in the service plan. Choose your appearance from the available ones. |
|
Hand Signature |
This field is used to upload a hand signature image to be included in the signature appearance. You can then crop this image to remove unnecessary white spaces as required. |
Specify the "Appearance" and click the "Next" button. The following table describes the fields on the "Details" section of this dialog.
|
Details |
|
|
Fields |
Description |
|
Signed By |
Specify the name which will appear against the "Signed By" attribute to be included in the signature. |
|
Signing Reason |
Specify the signing reason which will appear against the "Reason" attribute to be included in the signature. |
|
Location |
Specify the location which will appear against the "Location" attribute to be included in "Signature Verification Details" dialog. This is an optional field. |
|
Contact Information |
Specify the contact information which will appear against the "Contact Info" attribute to be included in "Signature Verification Details" dialog. This is an optional field. |
- Click the "Finish" button. A new Electronic Seal will be saved and displayed in the list.
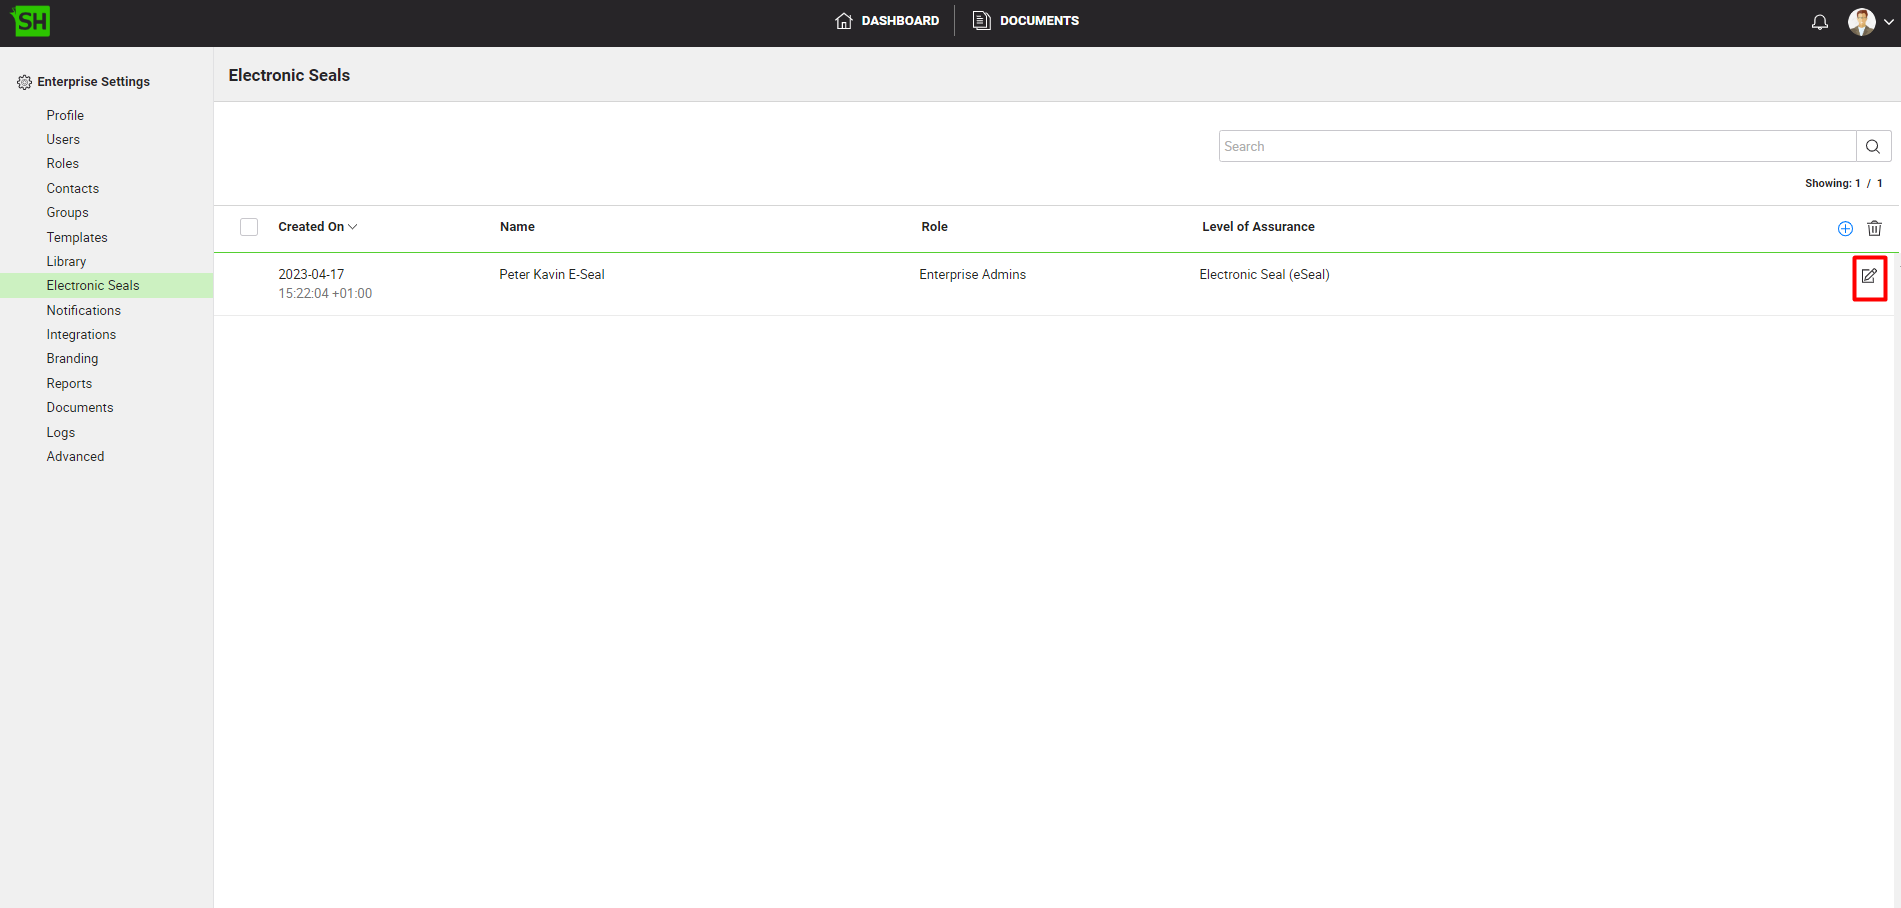
Edit an electronic seal
- Click your profile drop down menu (available at the top right corner).
- Click the "Enterprise Settings" option.
- Click the "Electronic Seals" option from the left menu. Your existing electronic seals will be listed.
- Search/ move to the electronic seal to edit and click
 adjacent to it. The "Edit Electronic Seals" dialog will appear.
- Edit the required details (i.e. Name, Role, Appearance Design, Hand Signature Image, Signed by, Signing Reason, Location and Contact Information).
- Click the "Finish" button.
Delete an electronic seal
- Click your profile drop down menu (available at the top right corner).
- Click the "Enterprise Settings" option.
- Click the "Electronic Seals" option from the left menu. Your existing electronic seals will be listed.
- Select the Electronic Seals(s) to delete and click
 from the grid header.
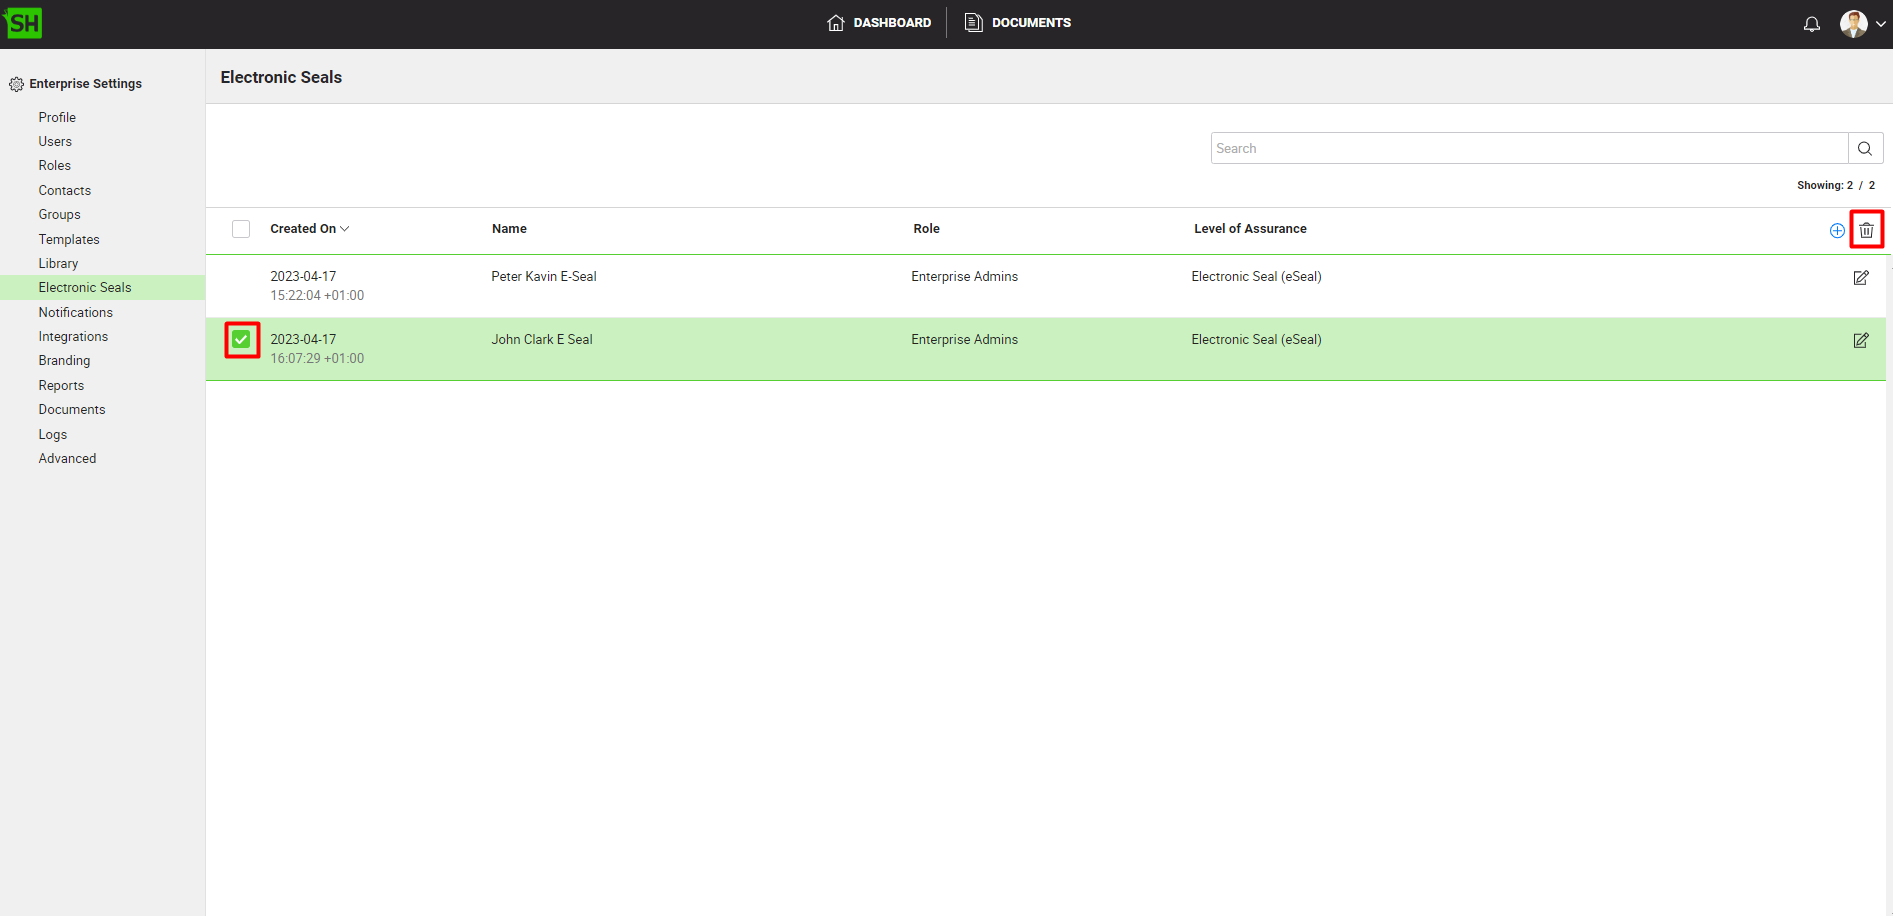
- Confirm to delete the selected Electronic Seals(s).
|
|
|

See Also
- Set up your enterprise profile
- Manage your enterprise users
- Manage your enterprise contacts
- Manage your users roles
- Manage your enterprise groups
- Manage your enterprise templates
- Manage your enterprise library
- Configure your enterprise email notifications
- Integrate third party applications
- Manage your enterprise documents
- Brand your enterprise
- Configure advanced settings
- View Your Enterprise Logs
- View your enterprise reports
- View your advanced enterprise reports