How to Obtain the HubSpot Integration Key
- Introduction
- How it works?
- Create an account on HubSpot
- Create a private app on HubSpot
- Create a property in HubSpot
HubSpot is a CRM platform that connects everything scaling companies need to deliver a best-in-class customer experience into one place. HubSpot's integrated CRM platform contains the marketing, sales, service, operations, and website-building software you need to grow your business. SigningHub allows its users to use third party services along with SigningHub. HubSpot is one of these third party services that is supported by SigningHub. In this section you will learn about configuring your HubSpot private app, creating a property in your private app and integration with SigningHub.
- Visit the HubSpot website and create an account.
- Create a private app by providing the "Basic Information" and select "Scopes".
- Create a property in HubSpot.
- Go to the HubSpot pricing page by clicking on the following URL:
https://www.hubspot.com/pricing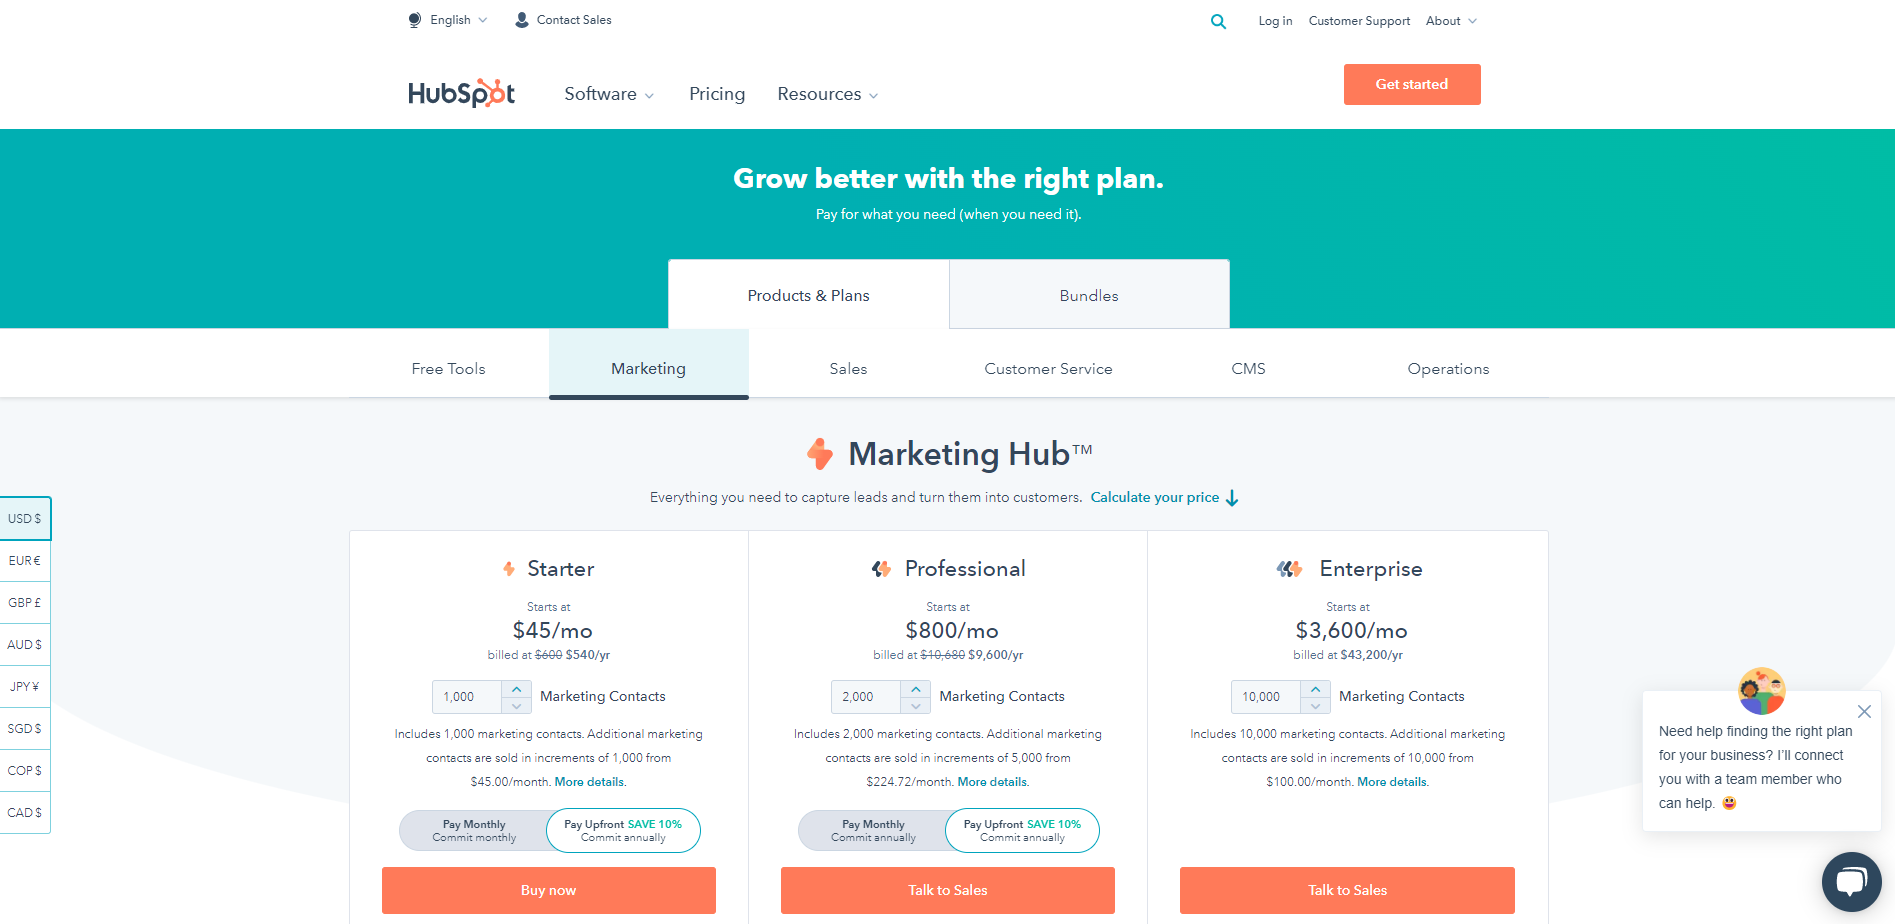
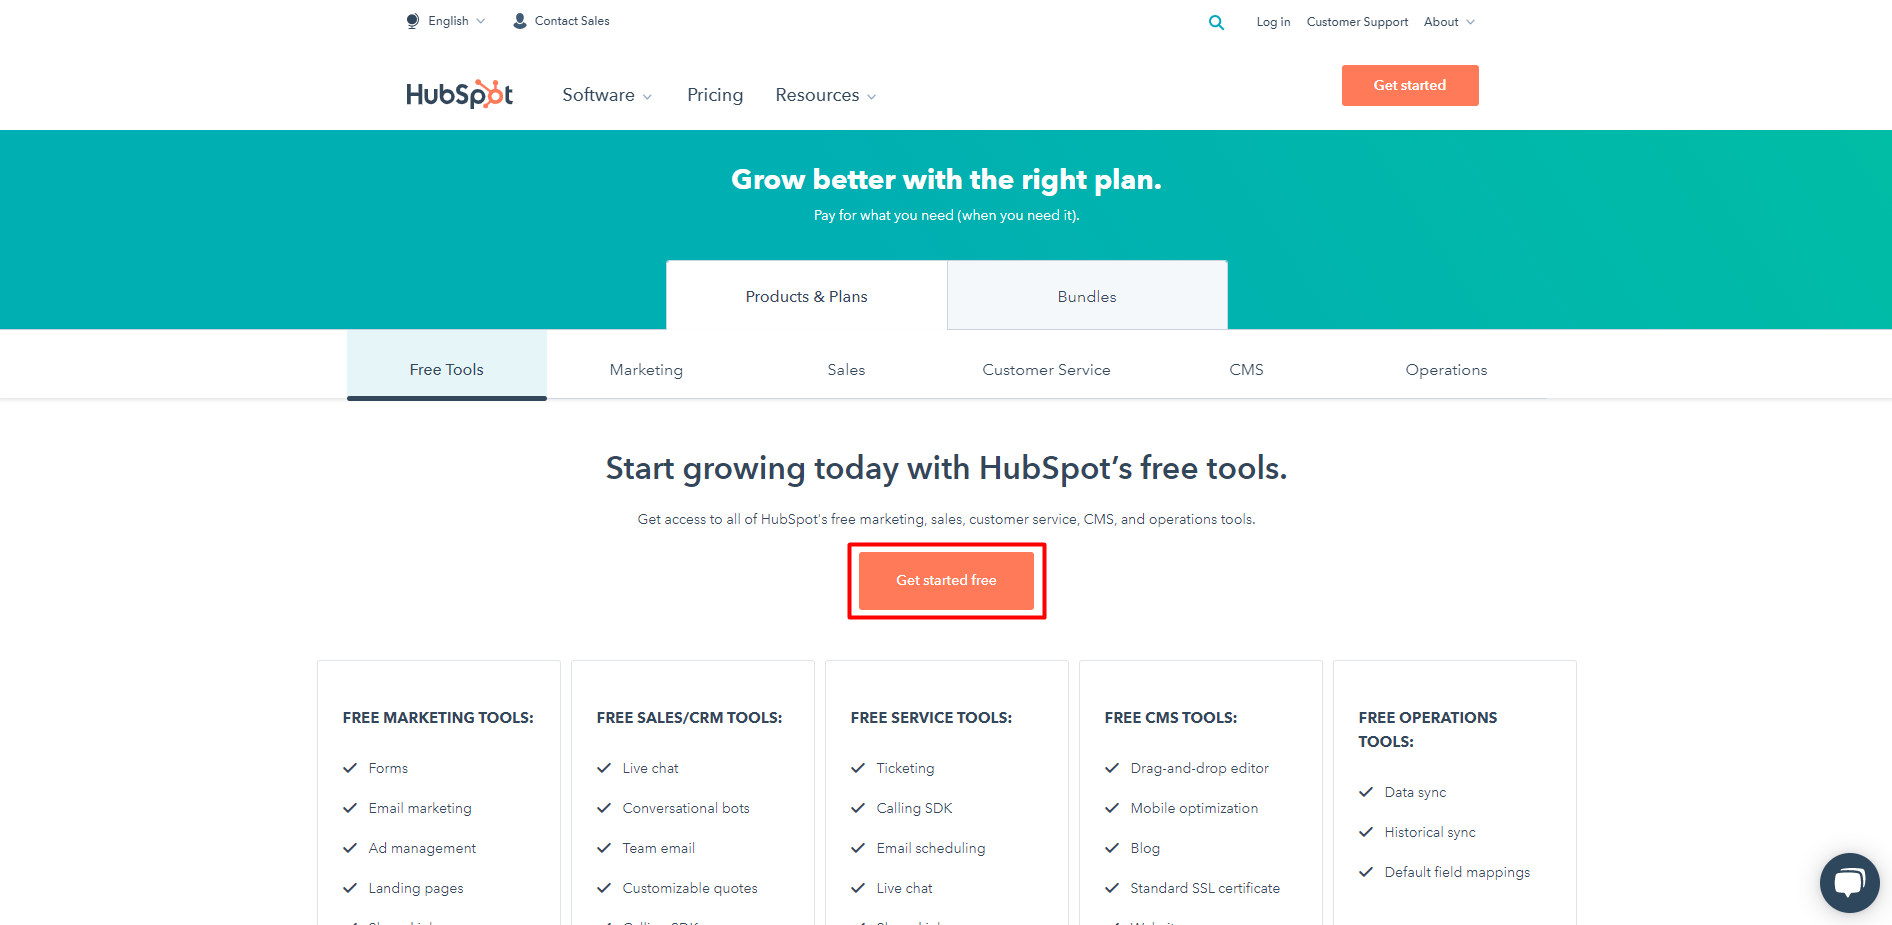
- Click on the "Free Tools" tab.
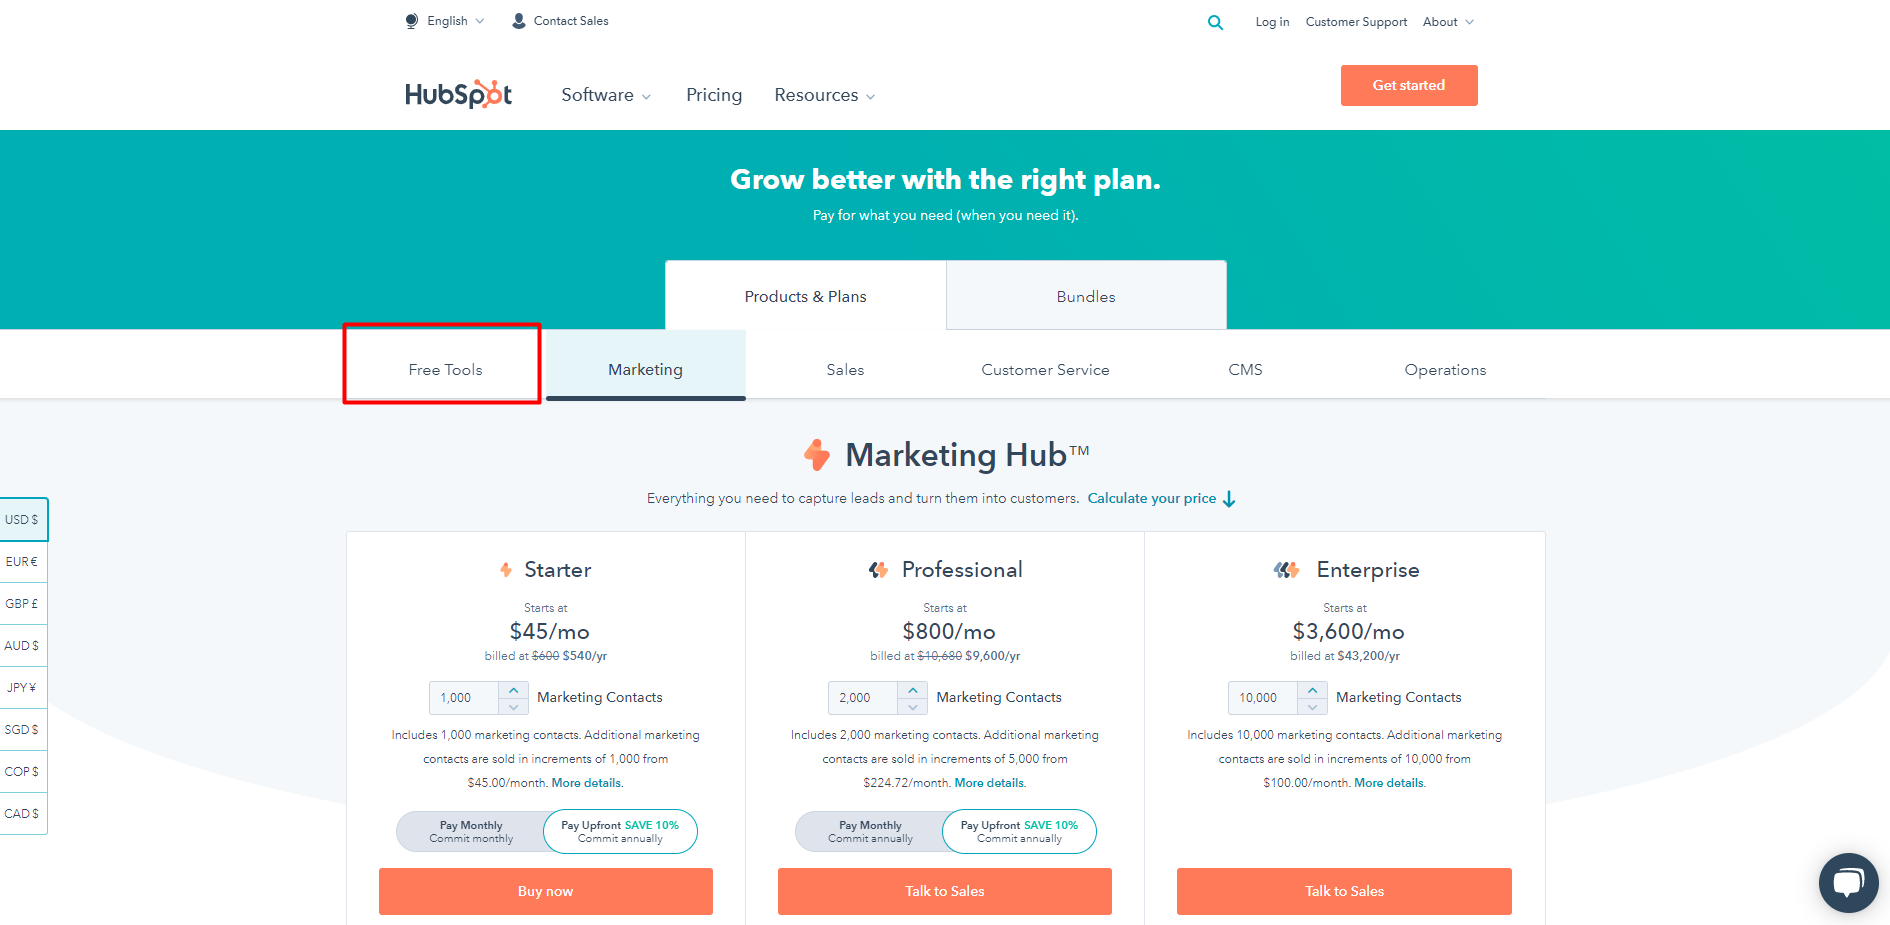
- Click on the "Get started free" button at the centre of the screen.
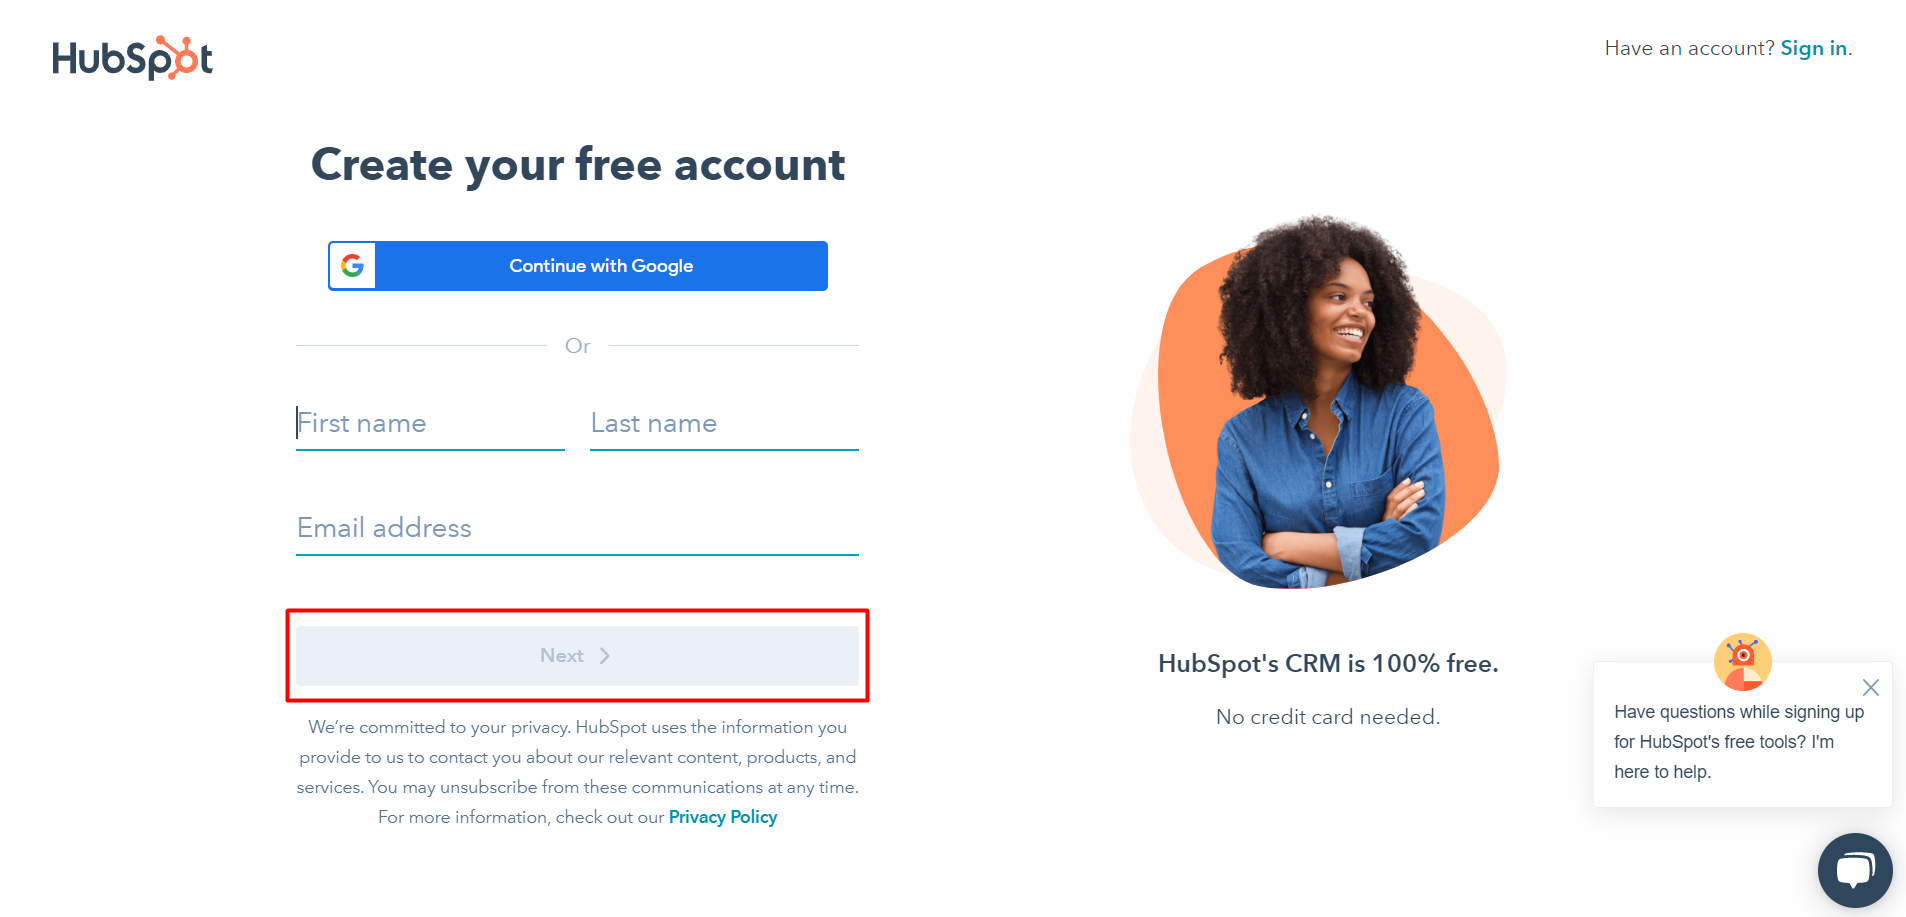
- Create a new account by providing your "First name", "Last Name", "Email address", and then clicking on the "Next button. Provide all the information required in the upcoming screens.
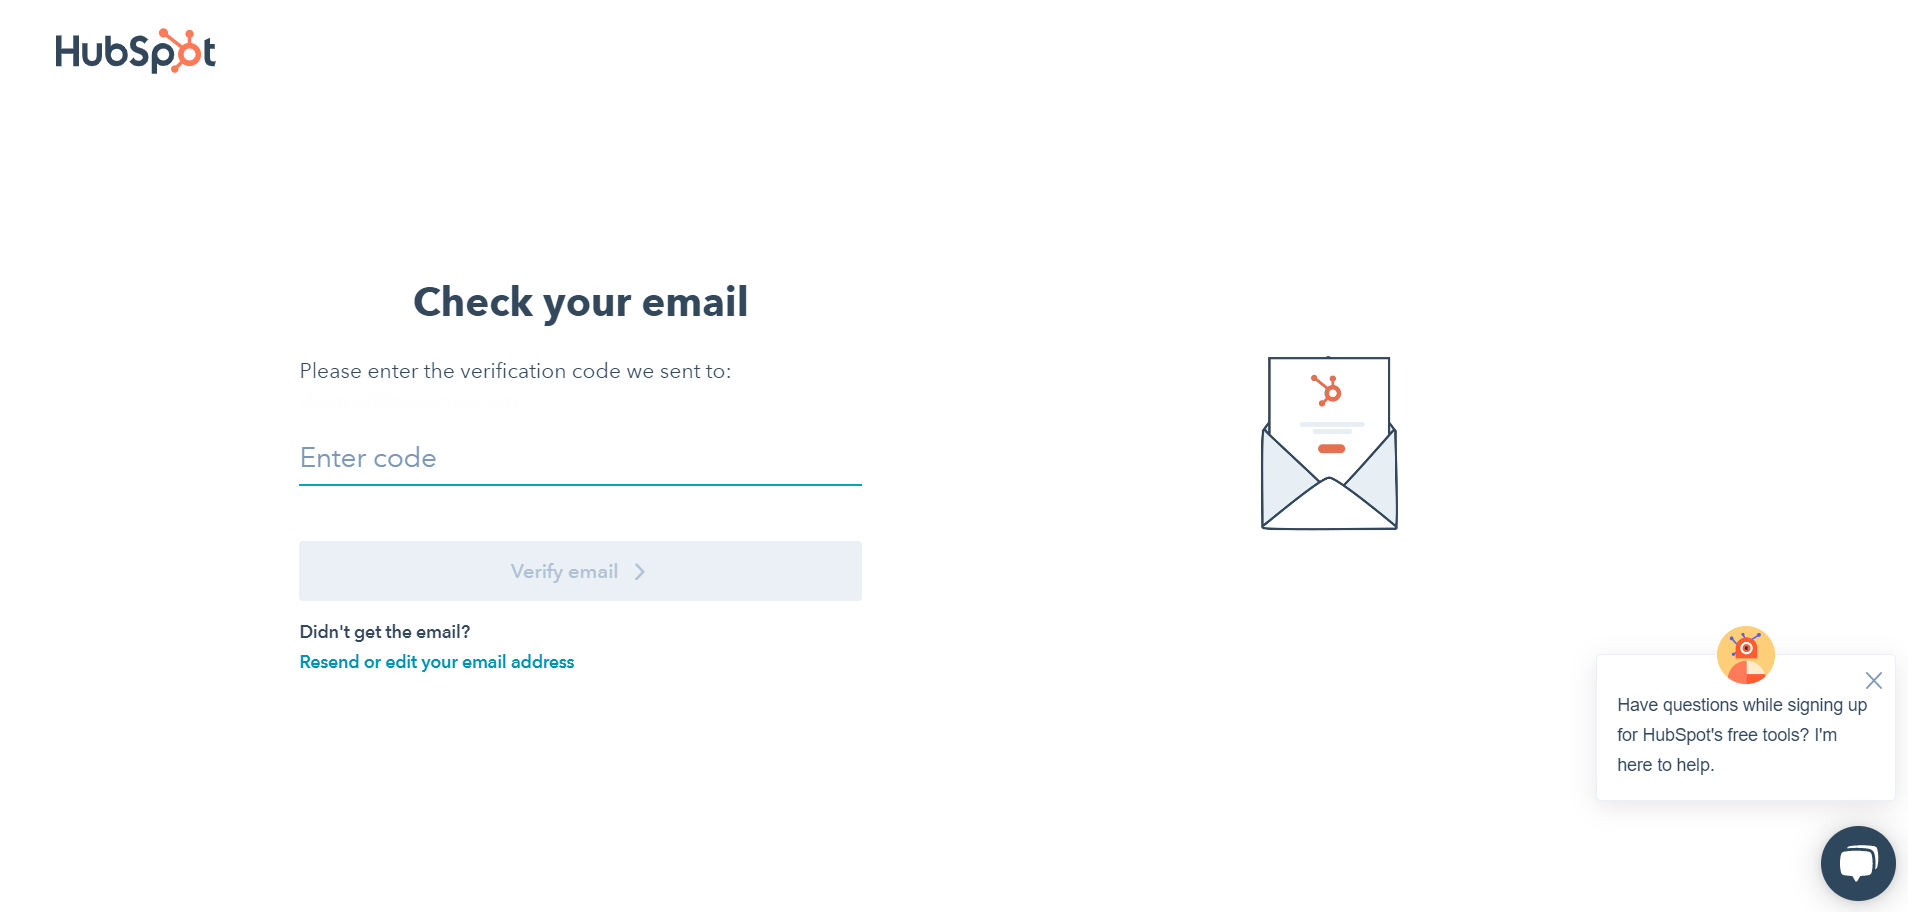
- Verify your email by entering the code, sent to your email address, in the field below. Click on the "Verify email" button after entering the code.
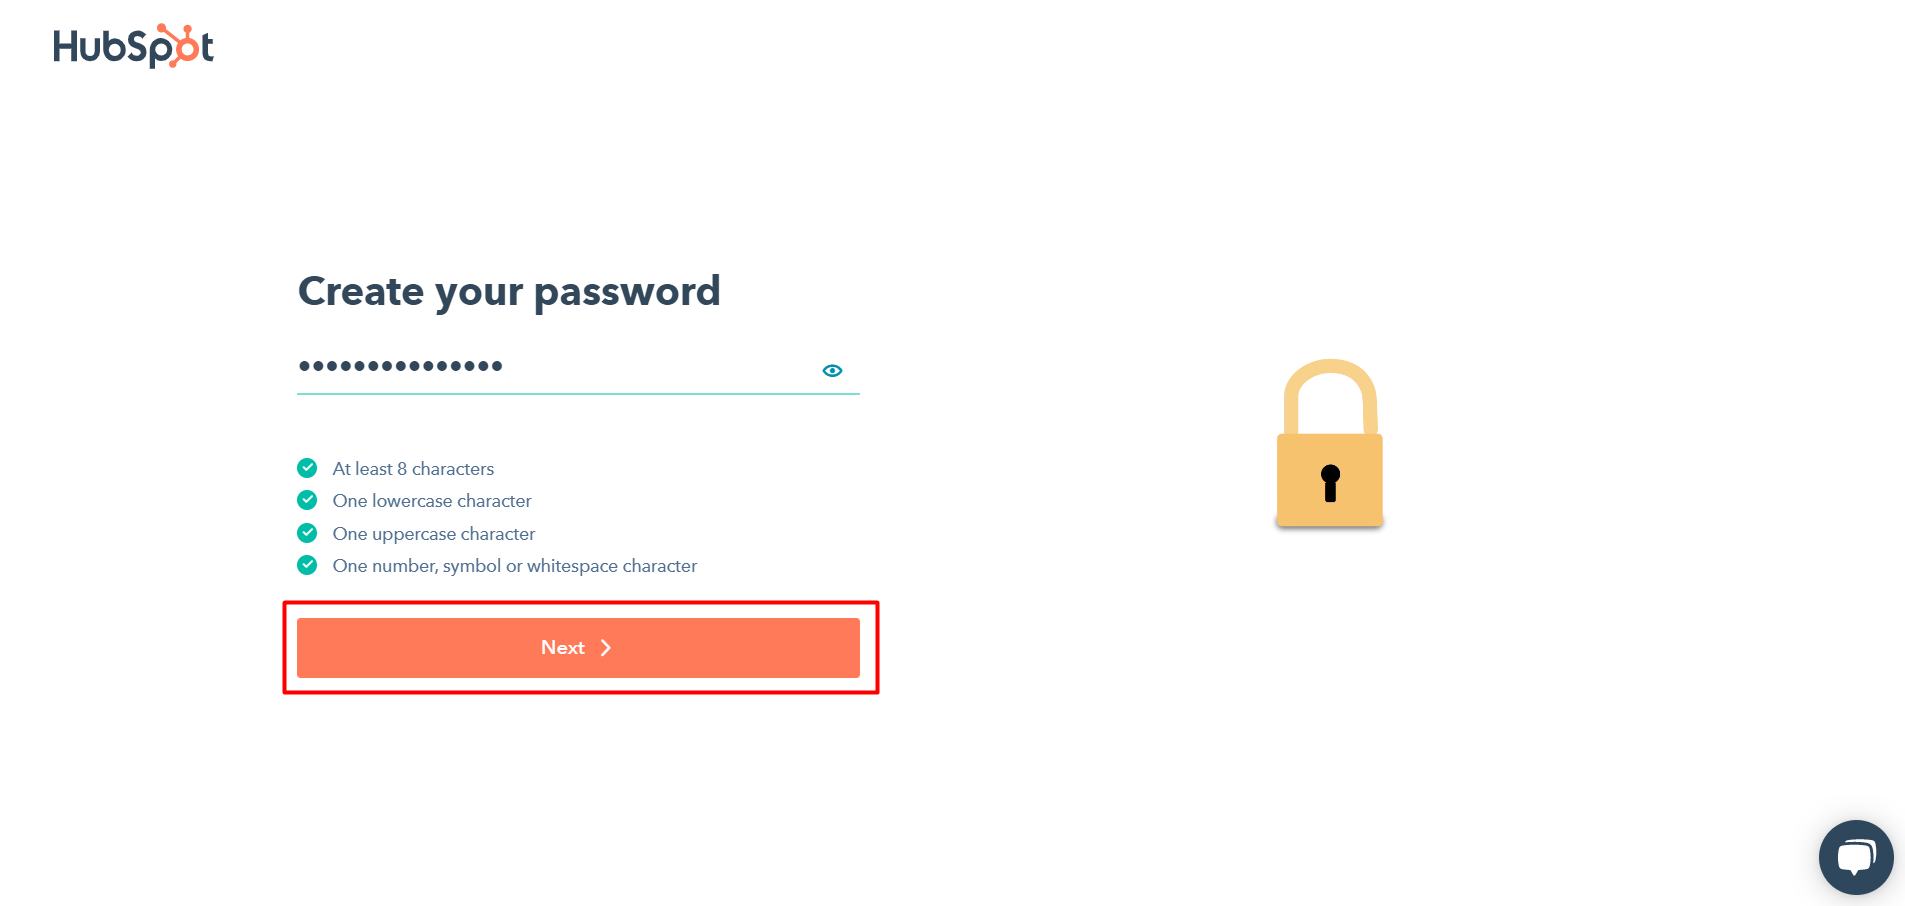
- Create a password for your account and click on the "Next" button.
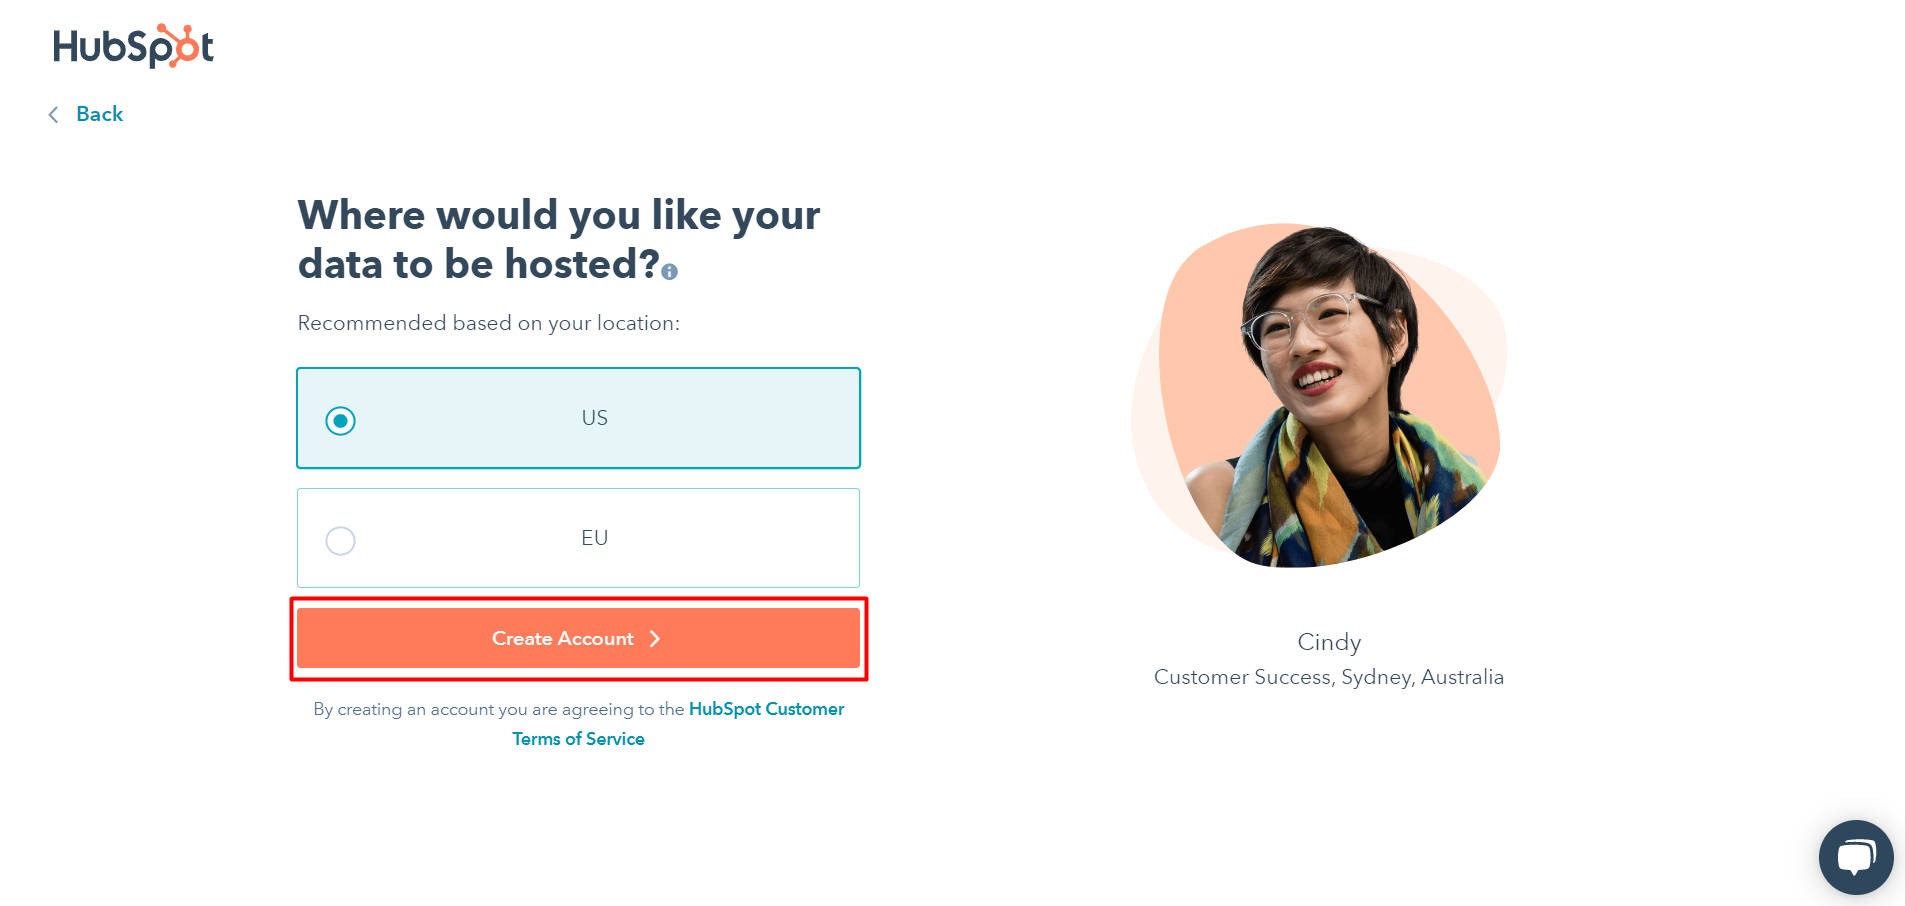
- Select an option for where you would like your data to be hosted, and click the "Create Account" button.
- Select your preferences as per the questions being asked on the following screens.

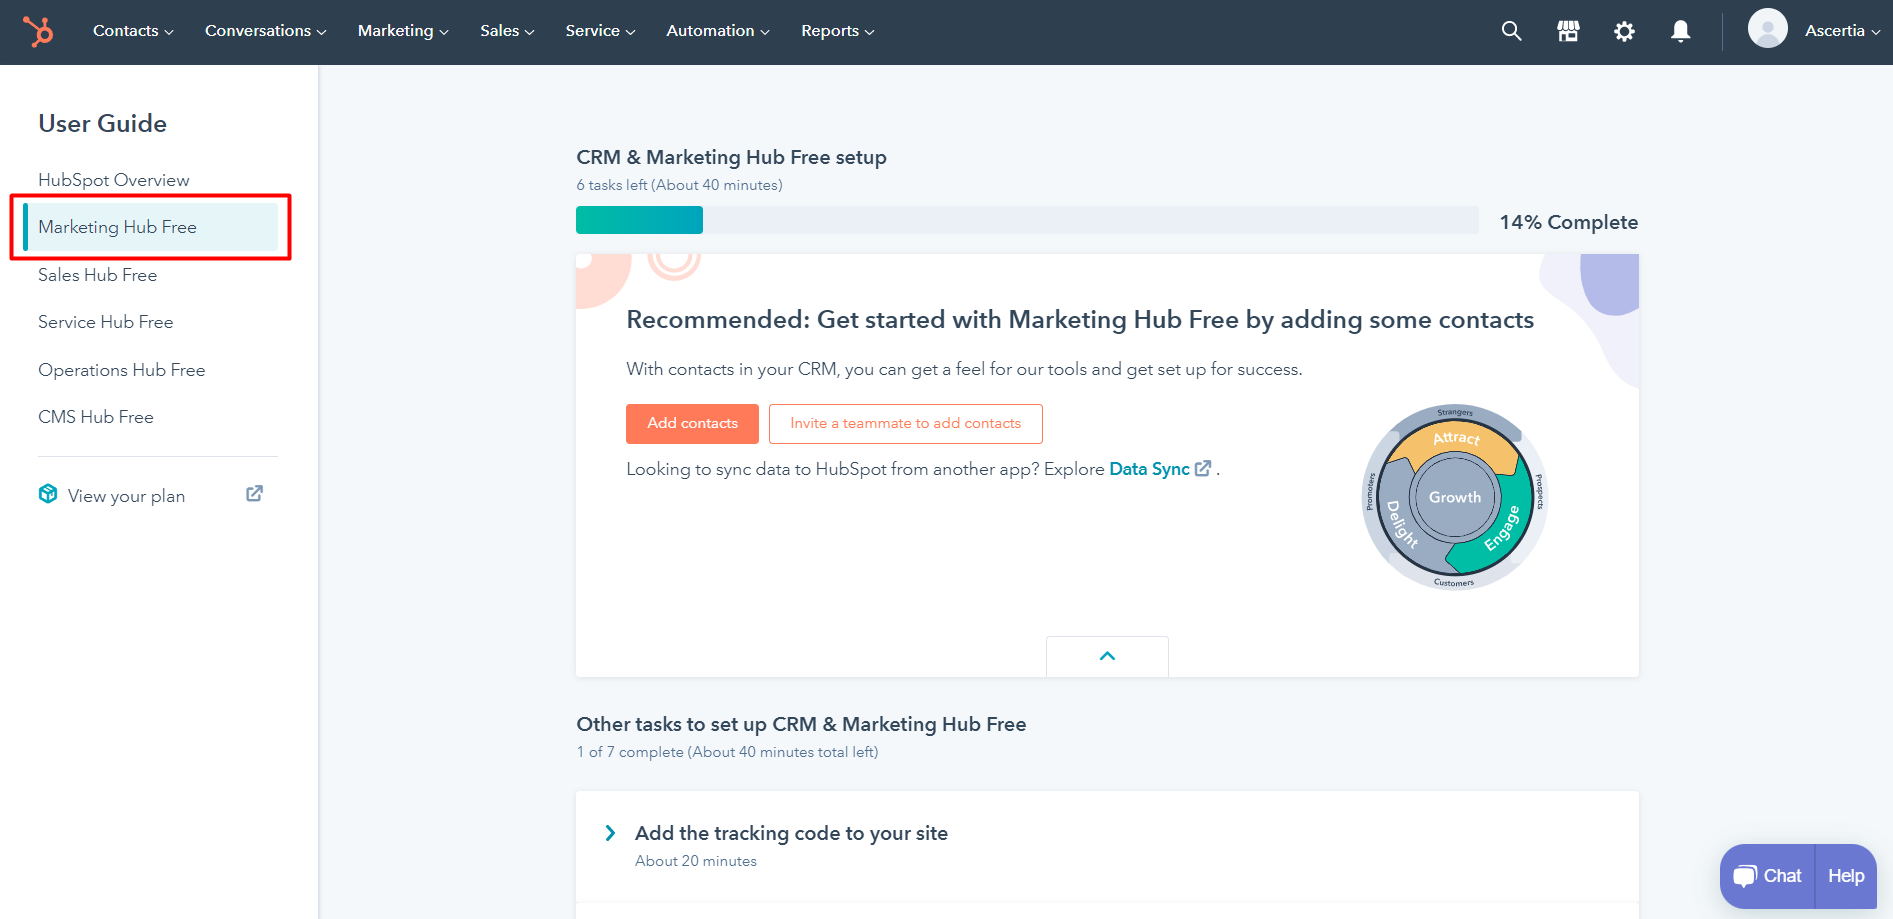
- Once done with the account set up process, click on the "Marketing Hub Free" tab from the left panel.
Create a private app on HubSpot
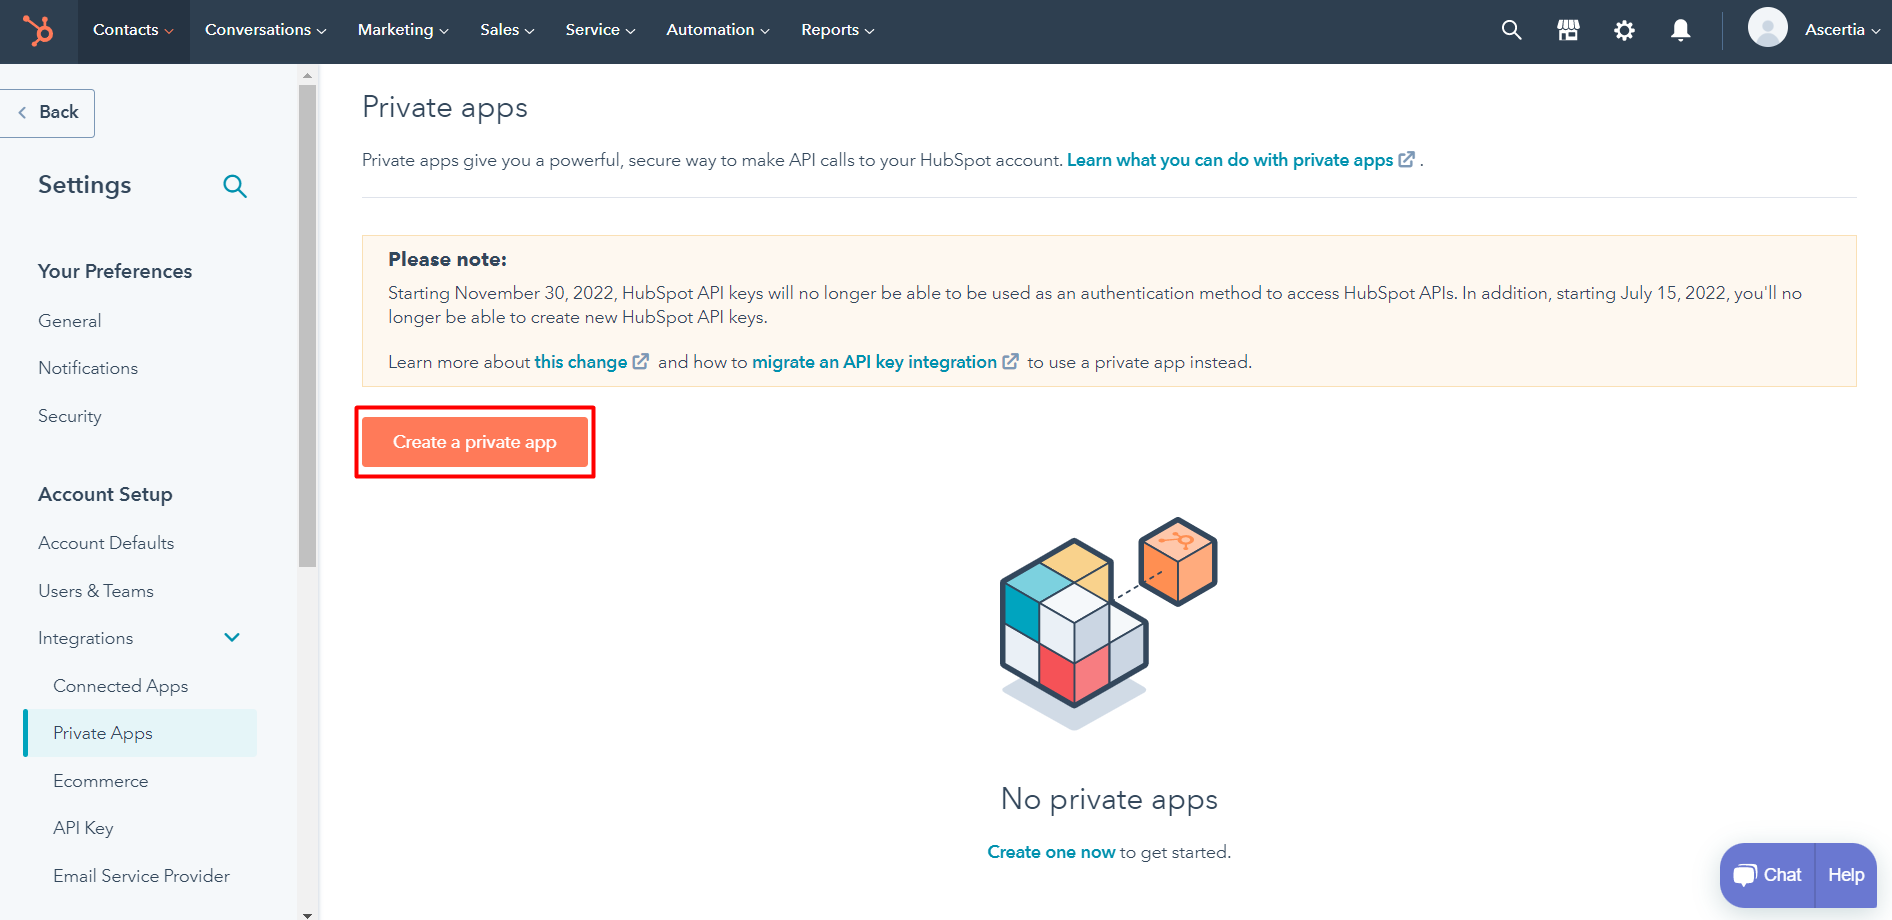
- Click on the "Settings" icon, from the page header. From the left panel, select "Integrations" and then "Private Apps" from the drop down.

- Click on the "Create a private app" button.
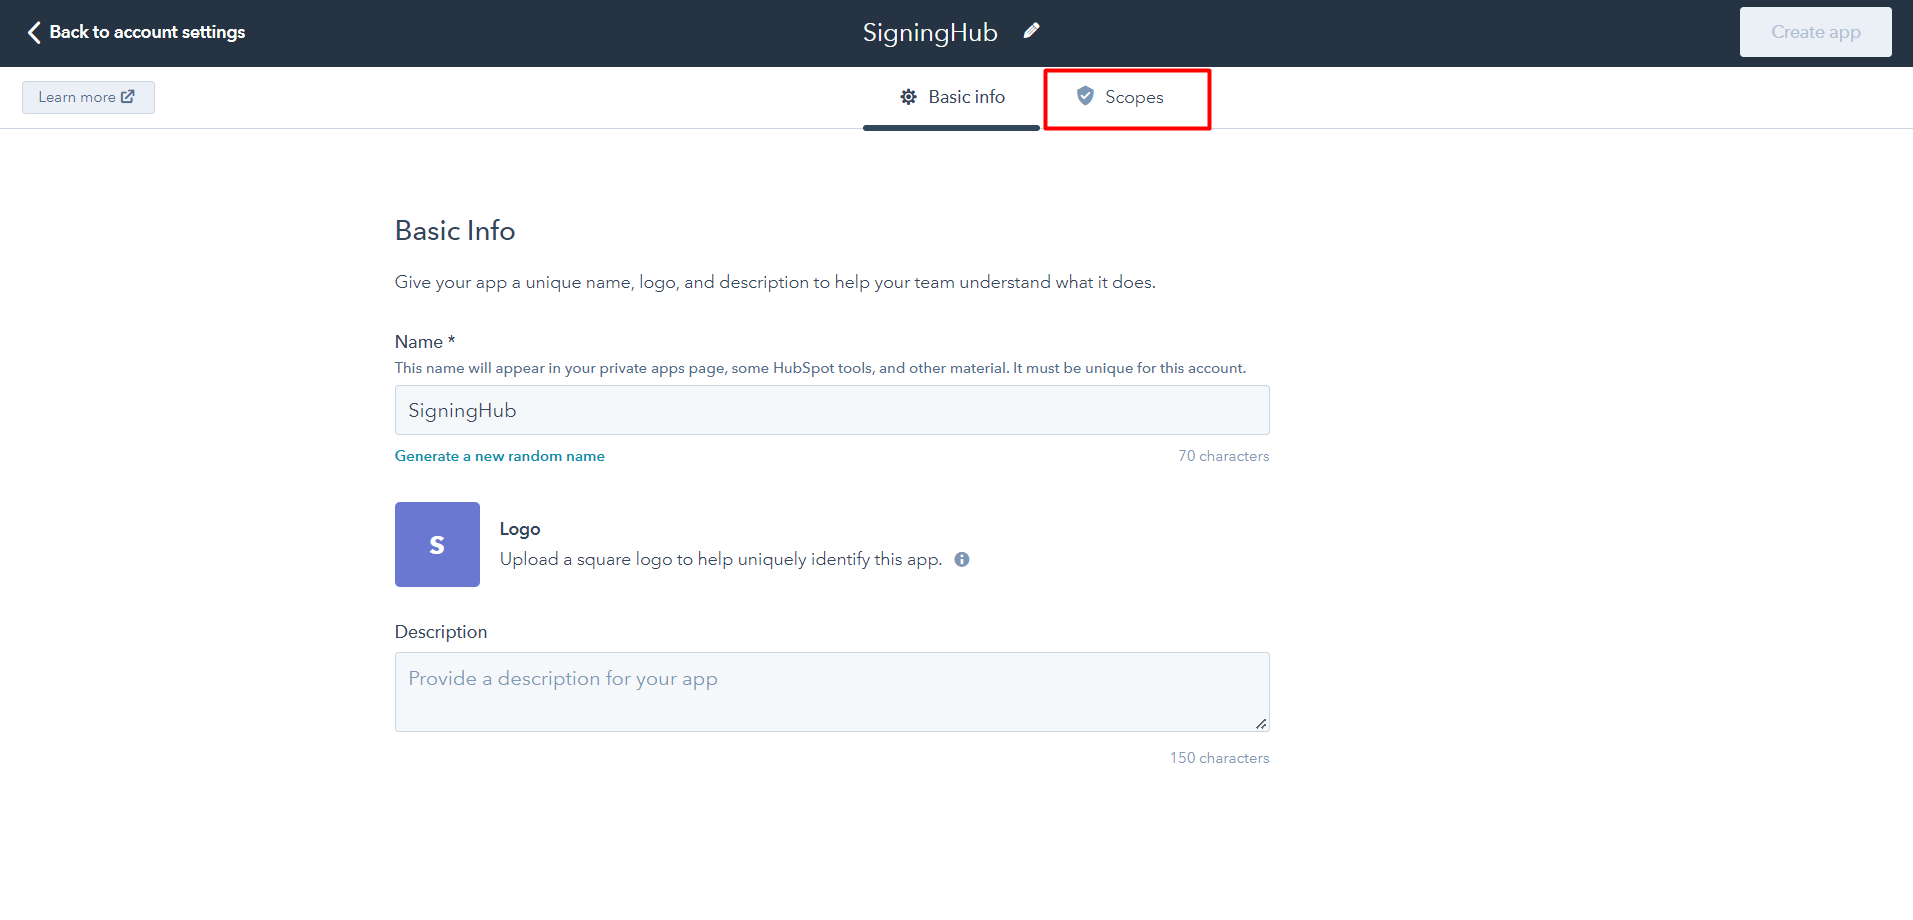
- Provide the basic information and click on the "Scopes" tab.
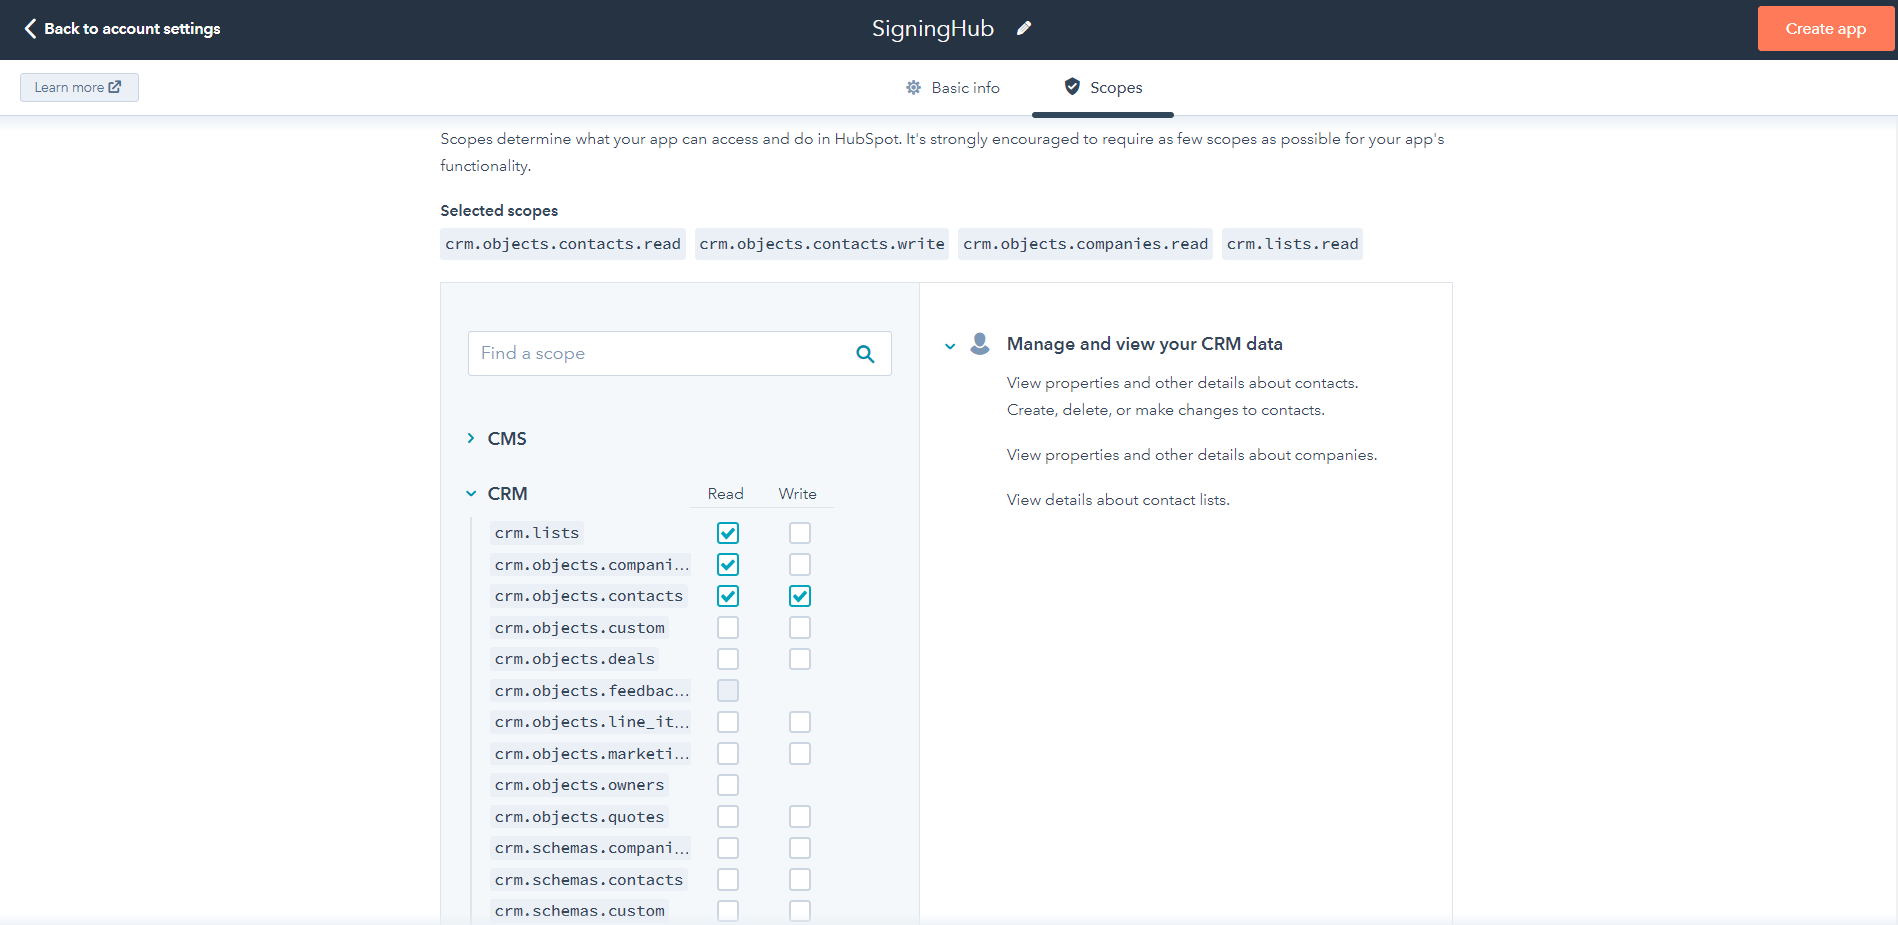
- Select the "Read" or "Write" checkbox for each scope that you want your private app to be able to access. You can also search for a specific scope using the "Find a scope" search bar.
|
|
|
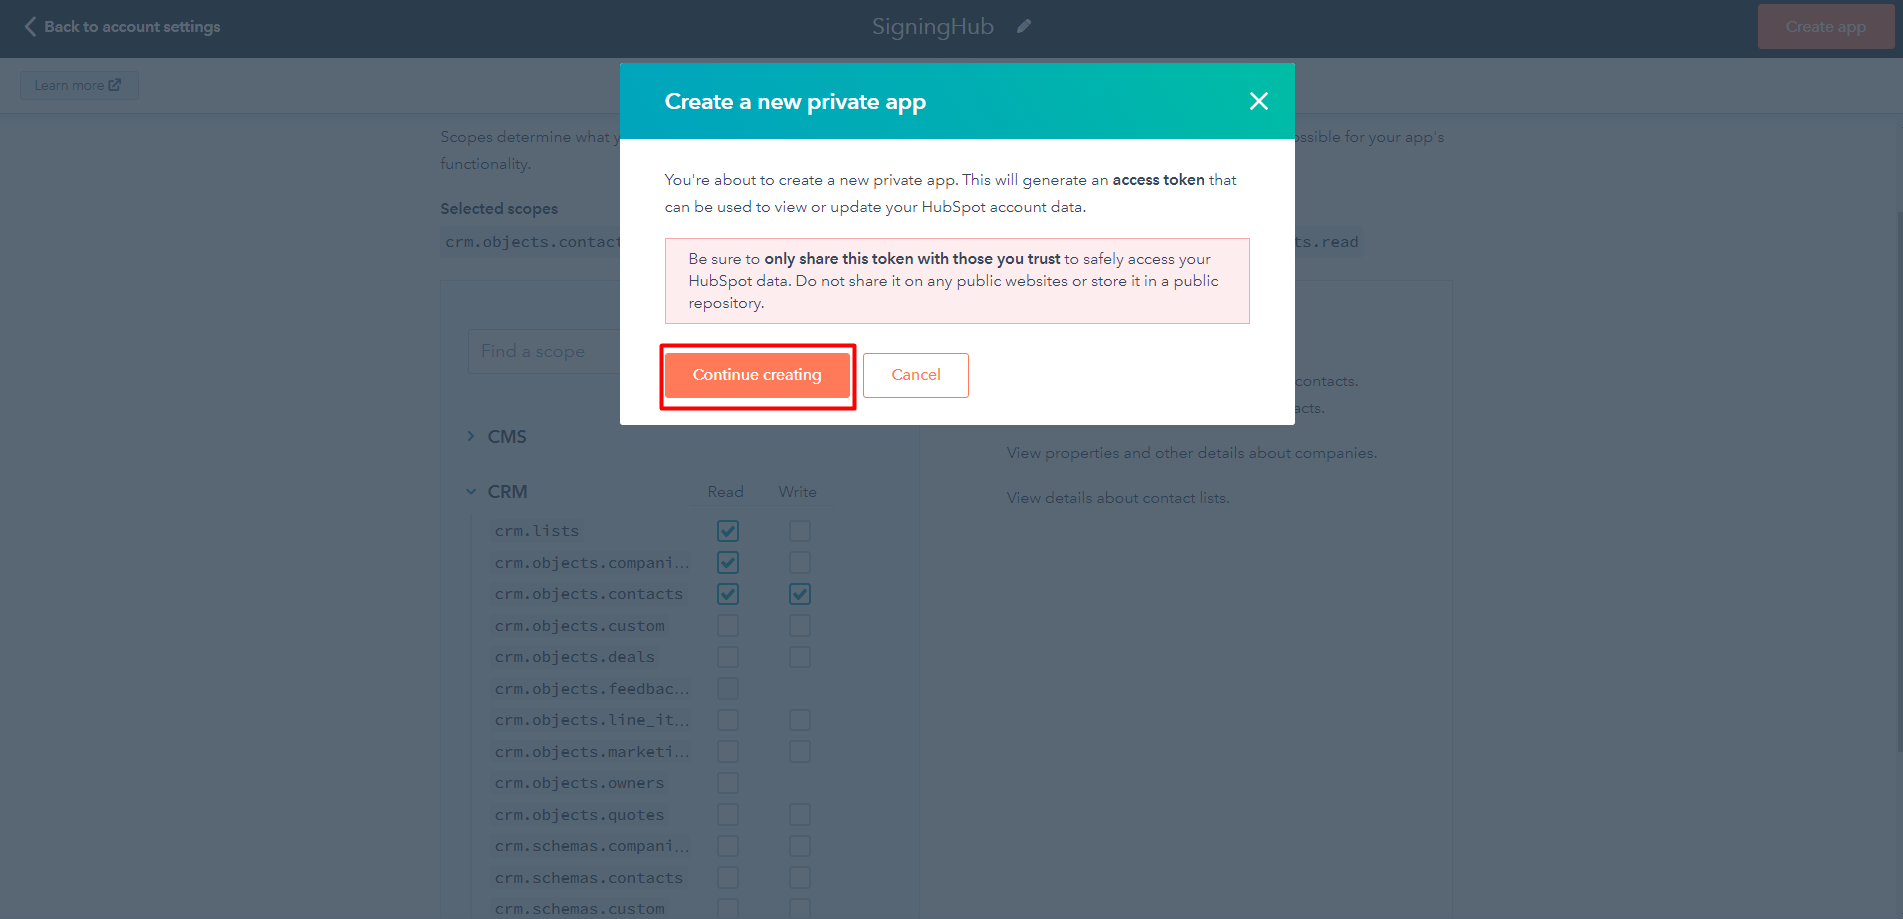
- After you are done configuring your app, click on the "Create app" button on the top right of the screen.

- Click on the "Continue creating" button.
- Your app will be created and access token will be generated. Copy the access token for future use. Click on the "Skip for now" button.
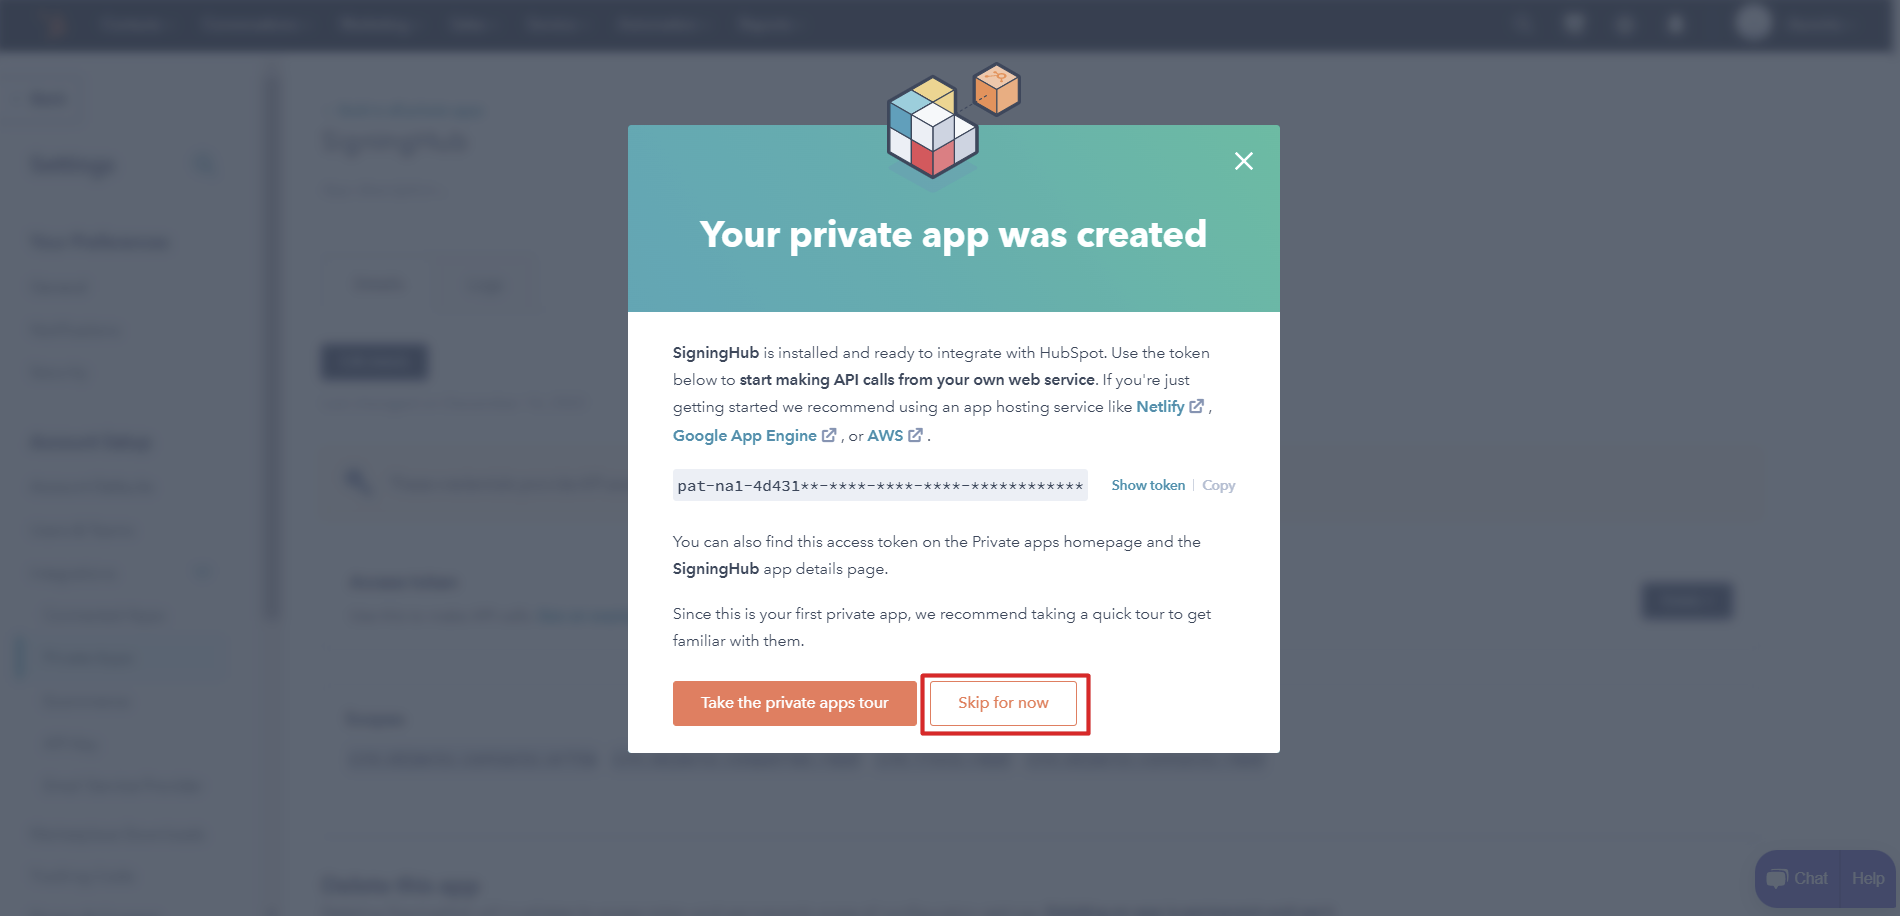
- The app details page will appear.
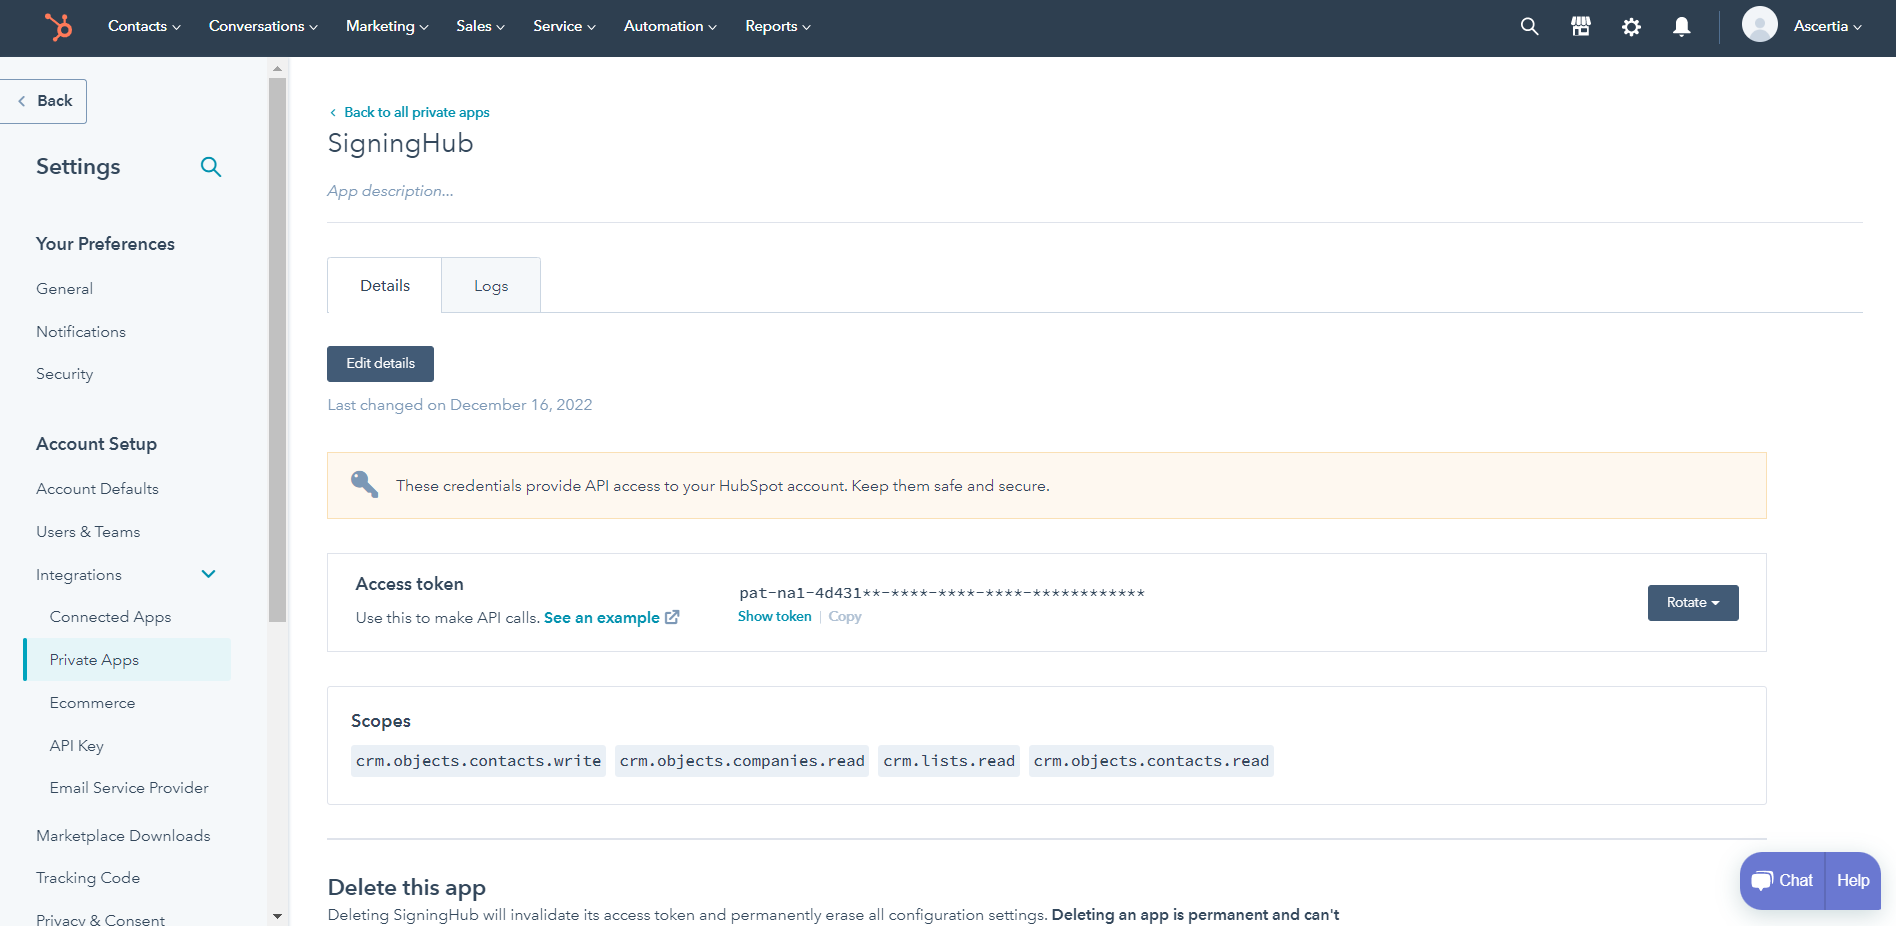
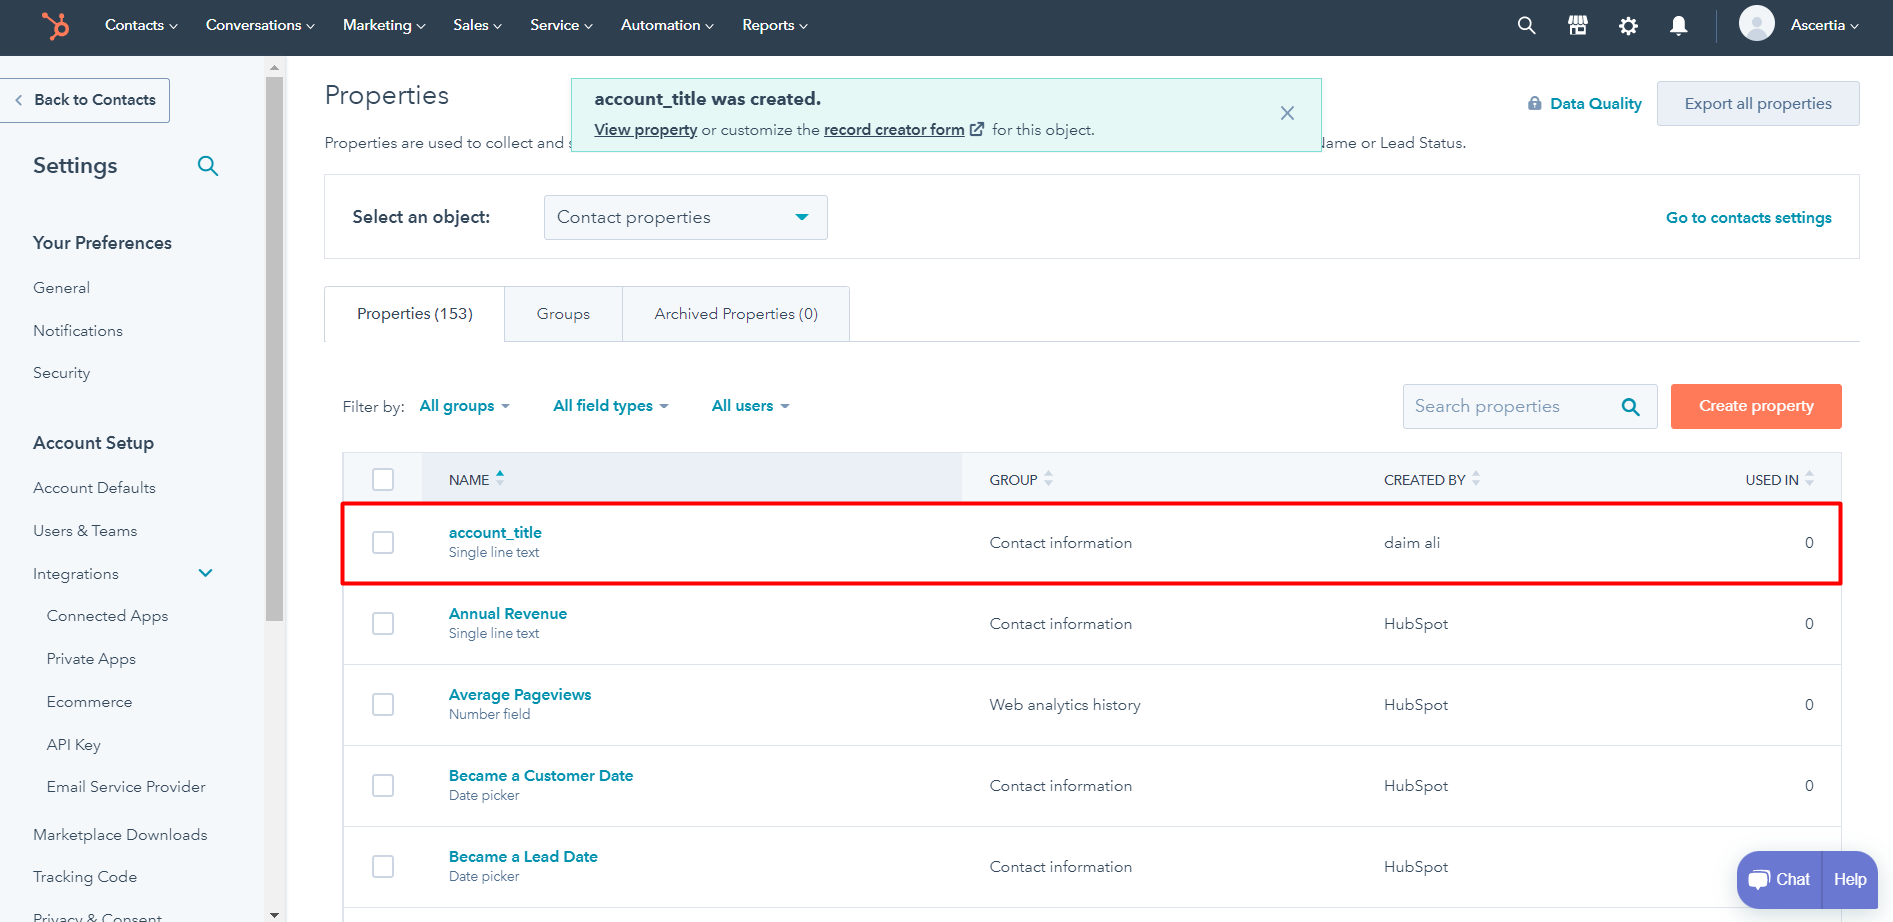
- Click on the "Contacts" tab in the header, and select "Contacts" from the drop down.
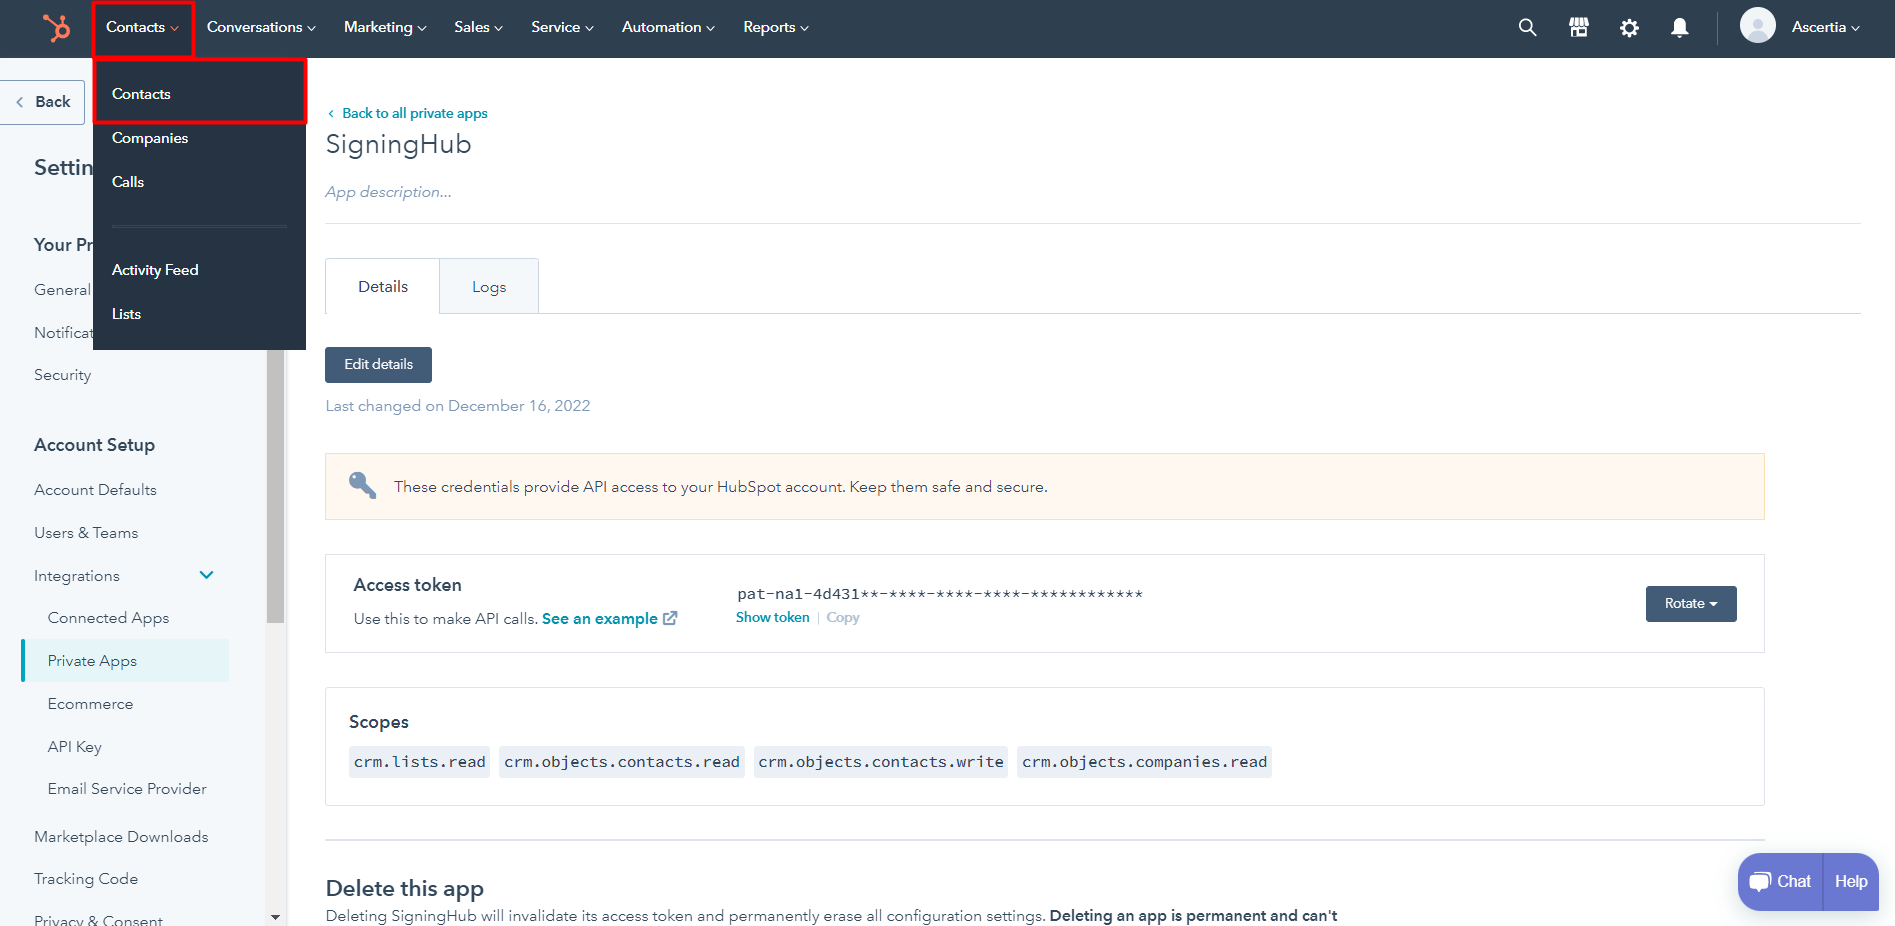
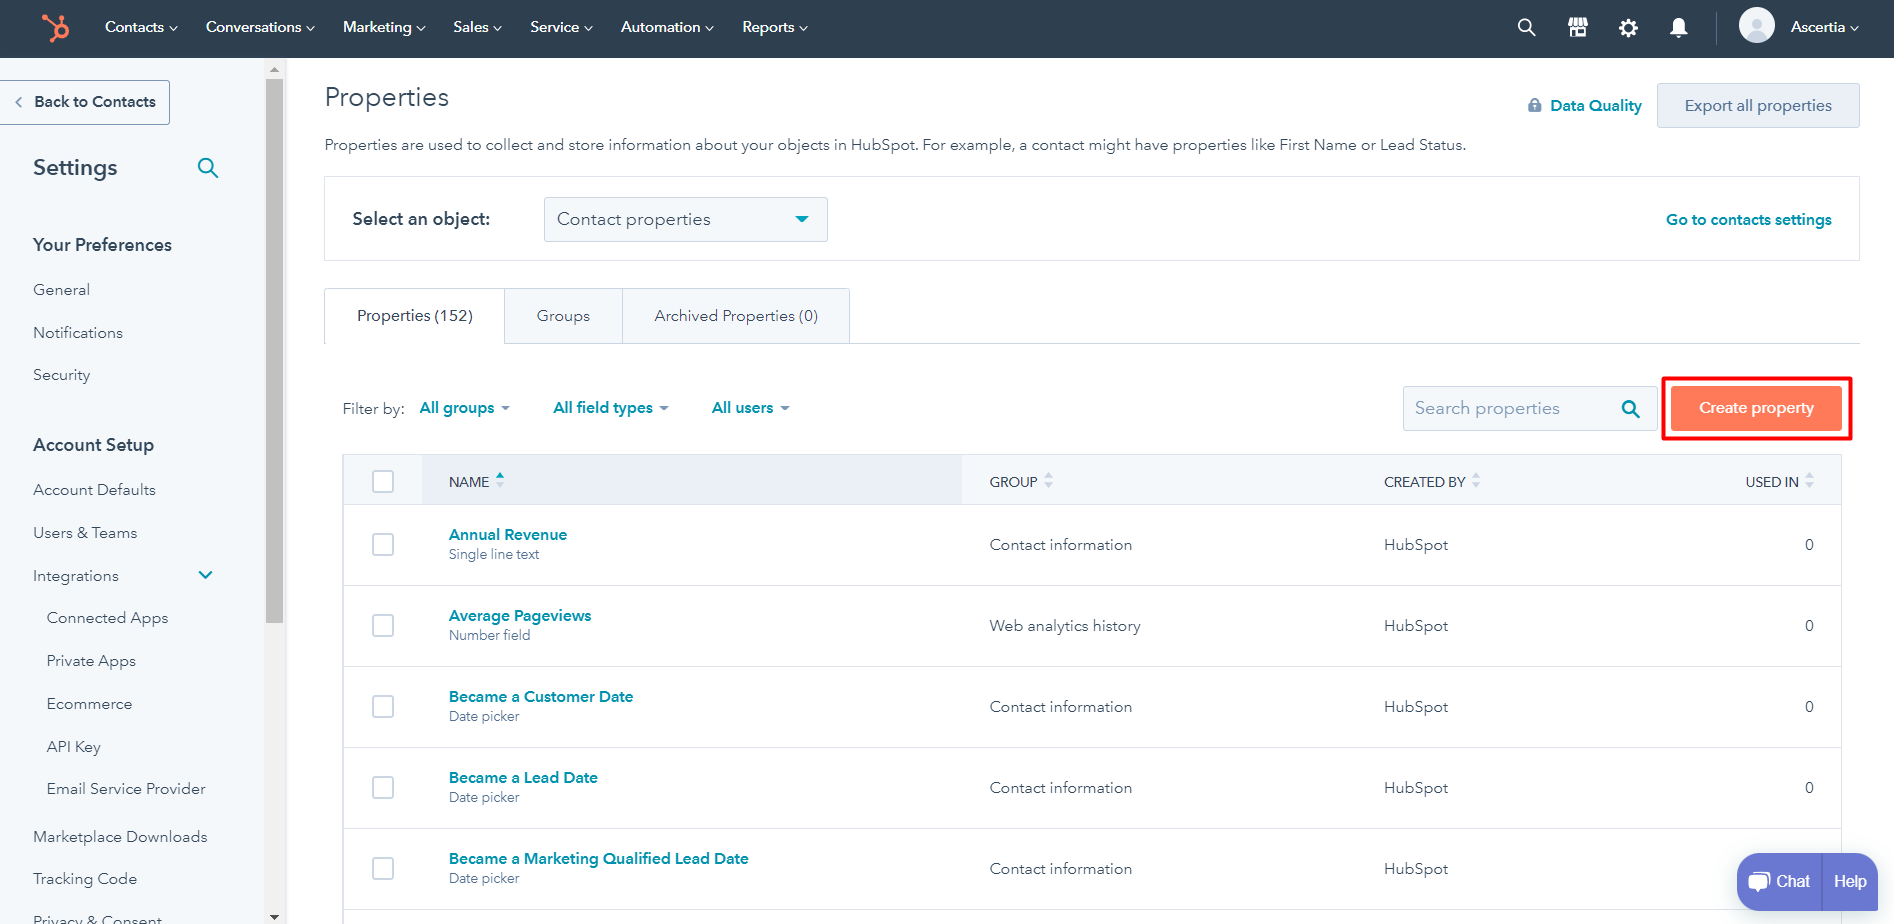
- Click on the "Actions" button, and select "Edit properties" from the drop down.
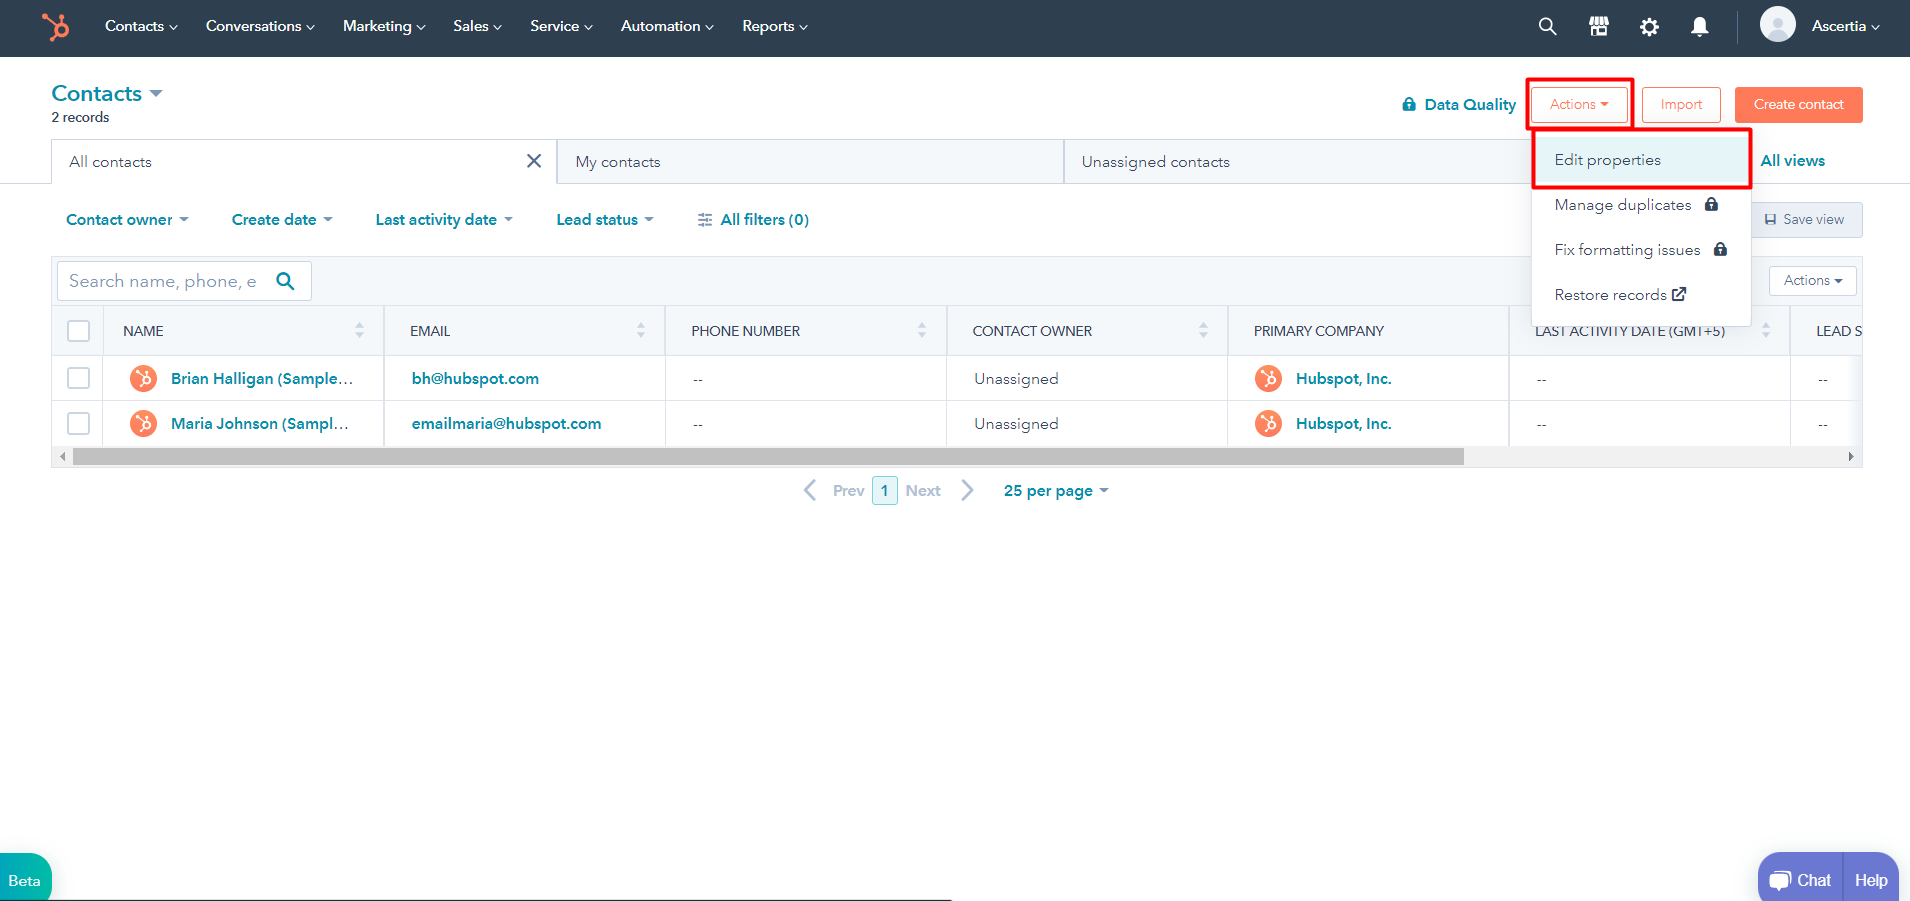
- Click on the "Create property" button.
- Create a property having "account_title", as label, with the following shown information in each step.
After filling the basic information, click on the "Next" button.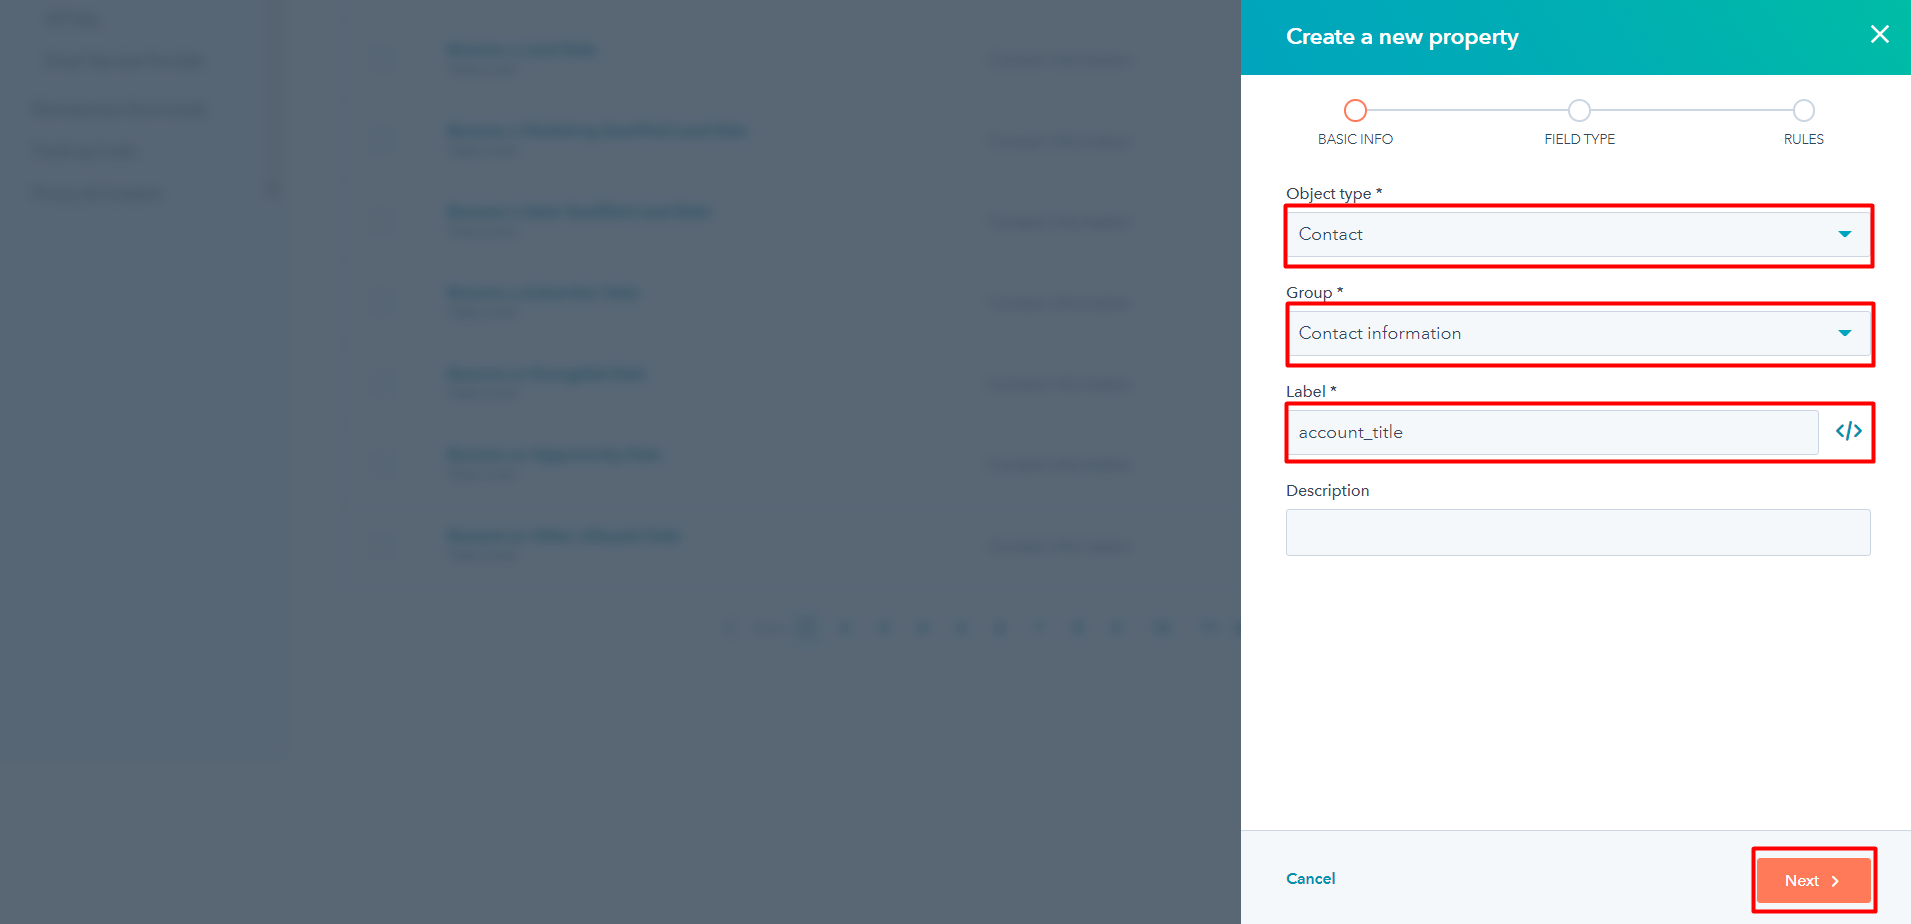
After selecting the field type, click on the "Next" button.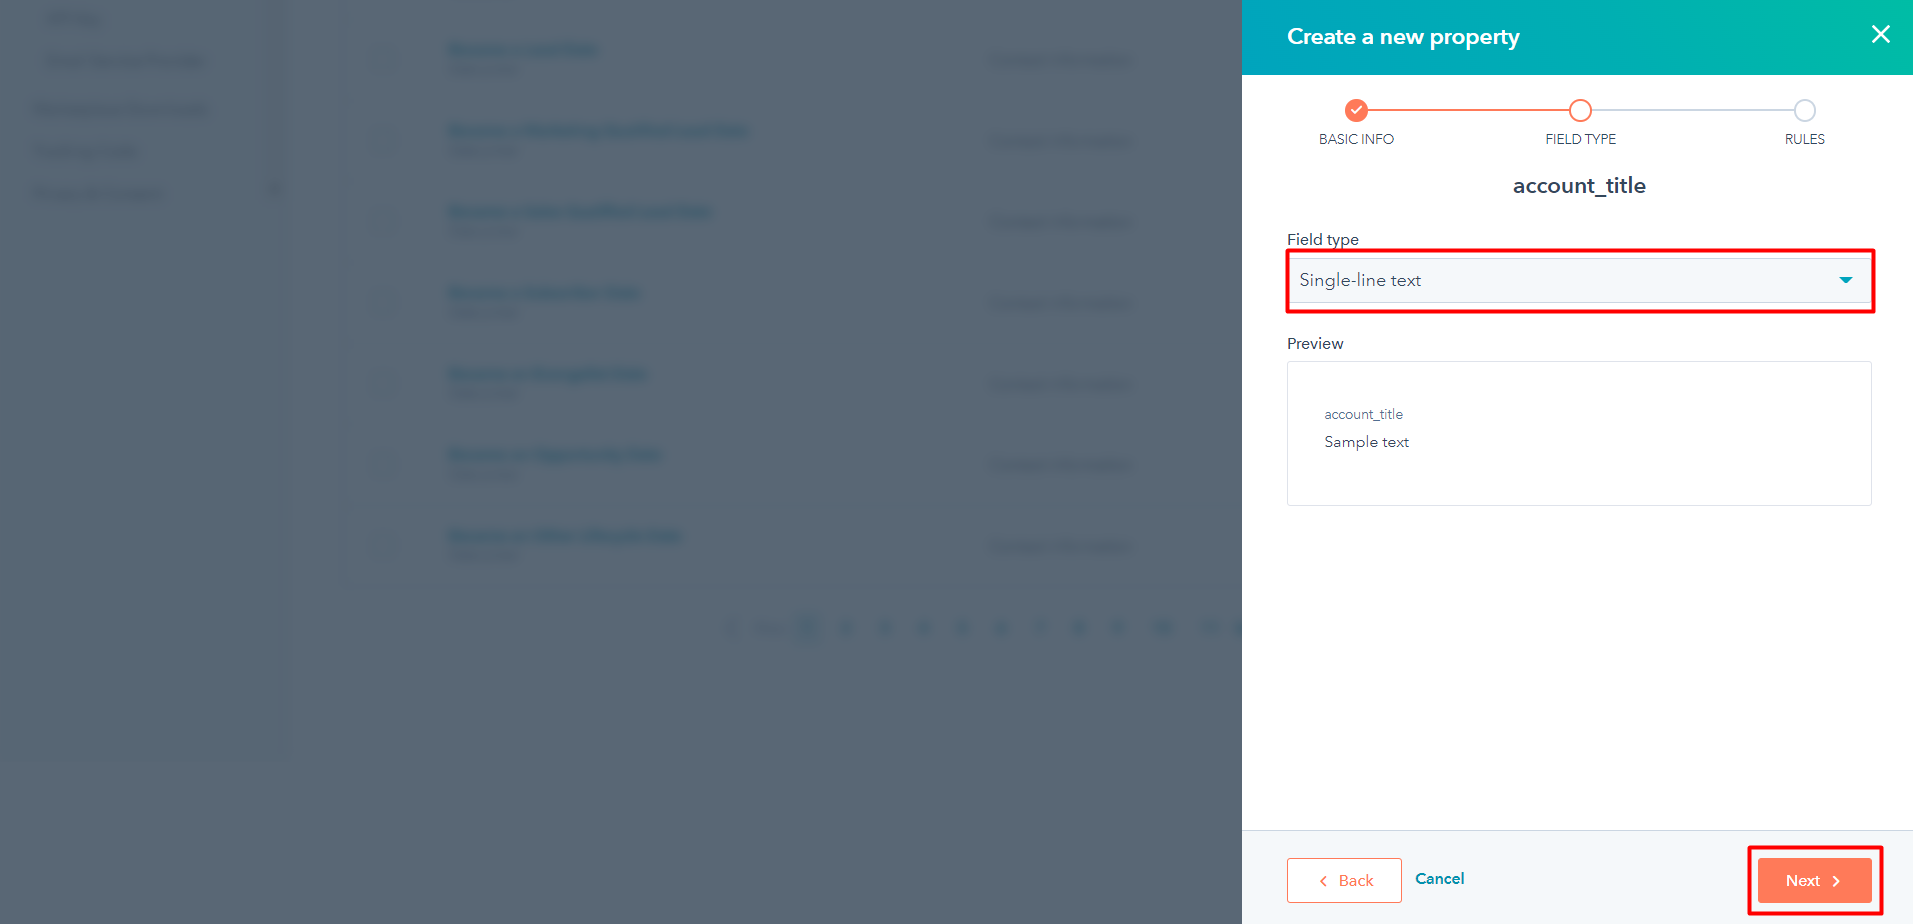
After selecting the property rules, click on the "Create" button.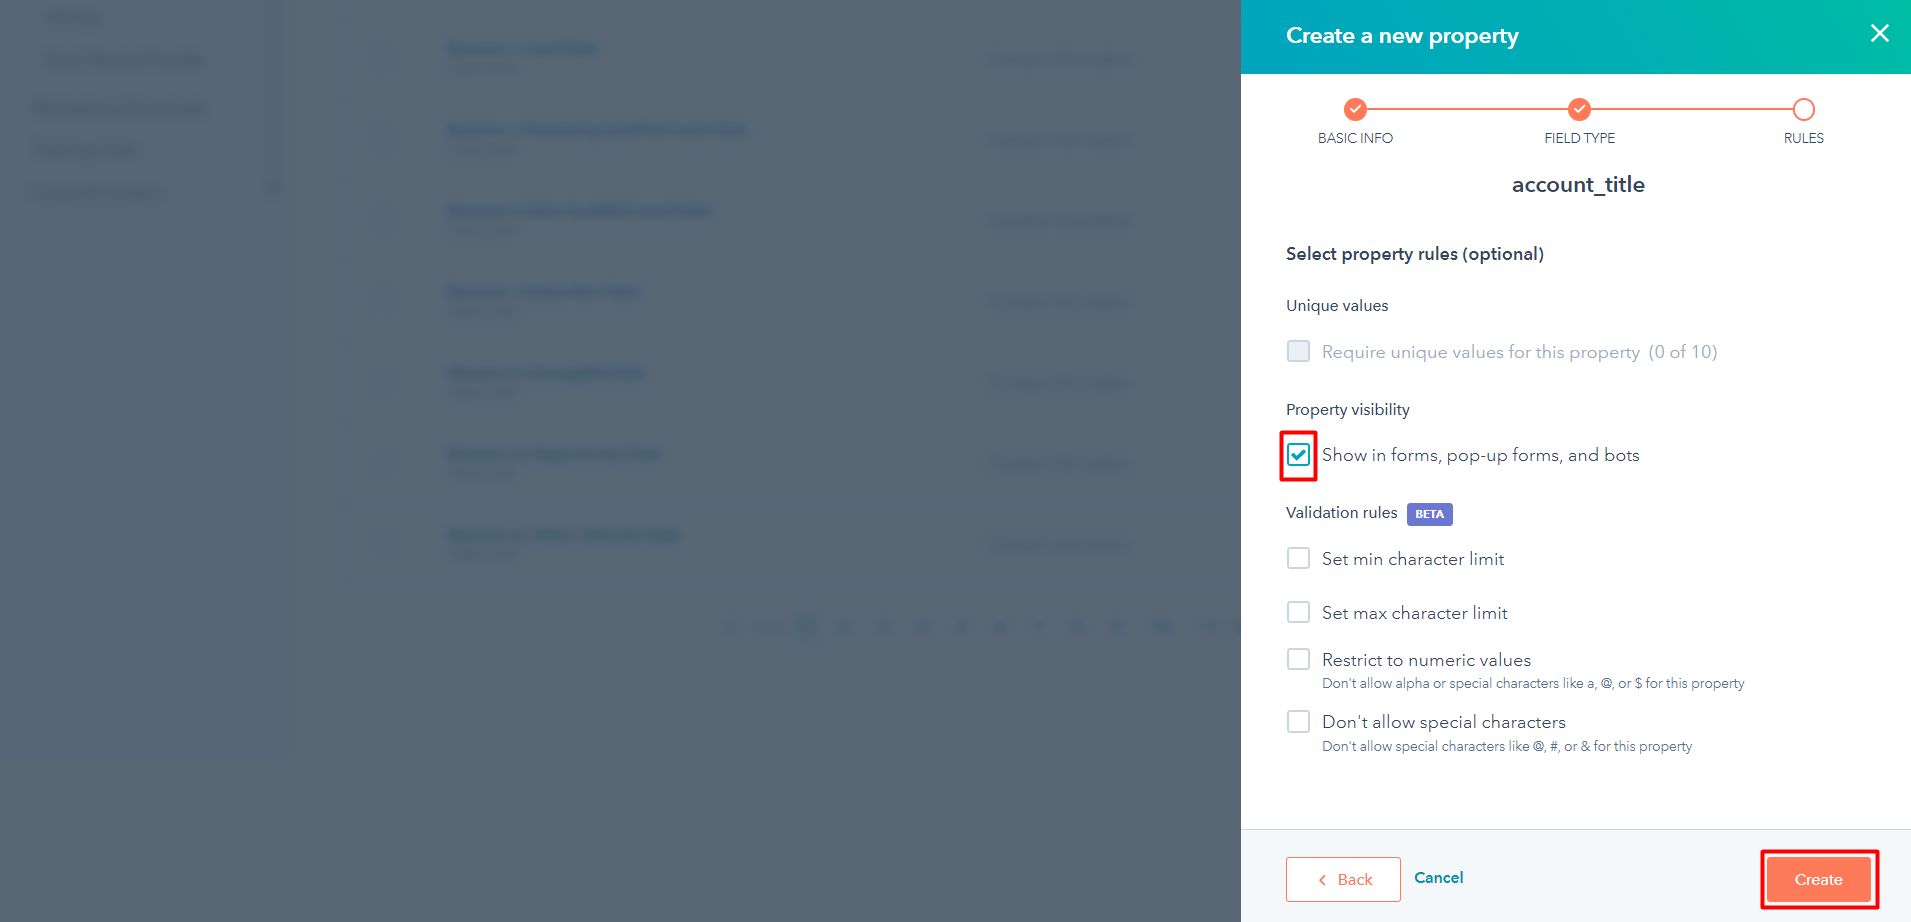
- Your property will be created.
Create a HubSpot connector
- Access the SigningHub Admin portal.
- Click the "Configurations"section from the left menu.
- Click the "Connectors" tab. The "Connectors" screen will appear.
- Click
 from the grid header.
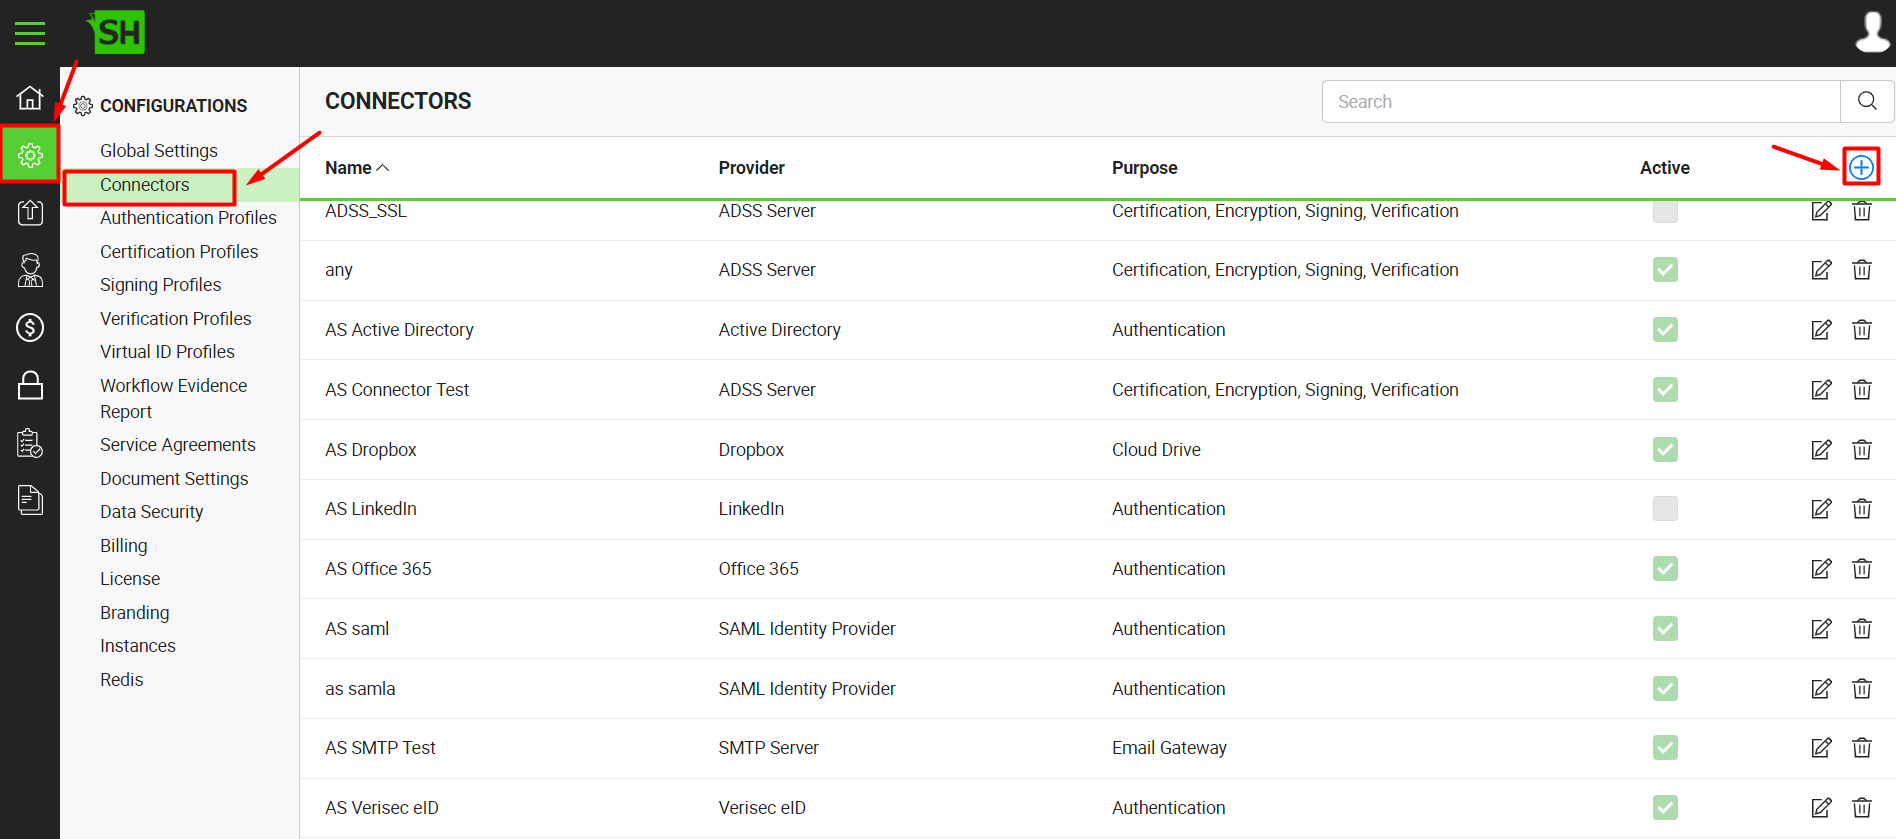
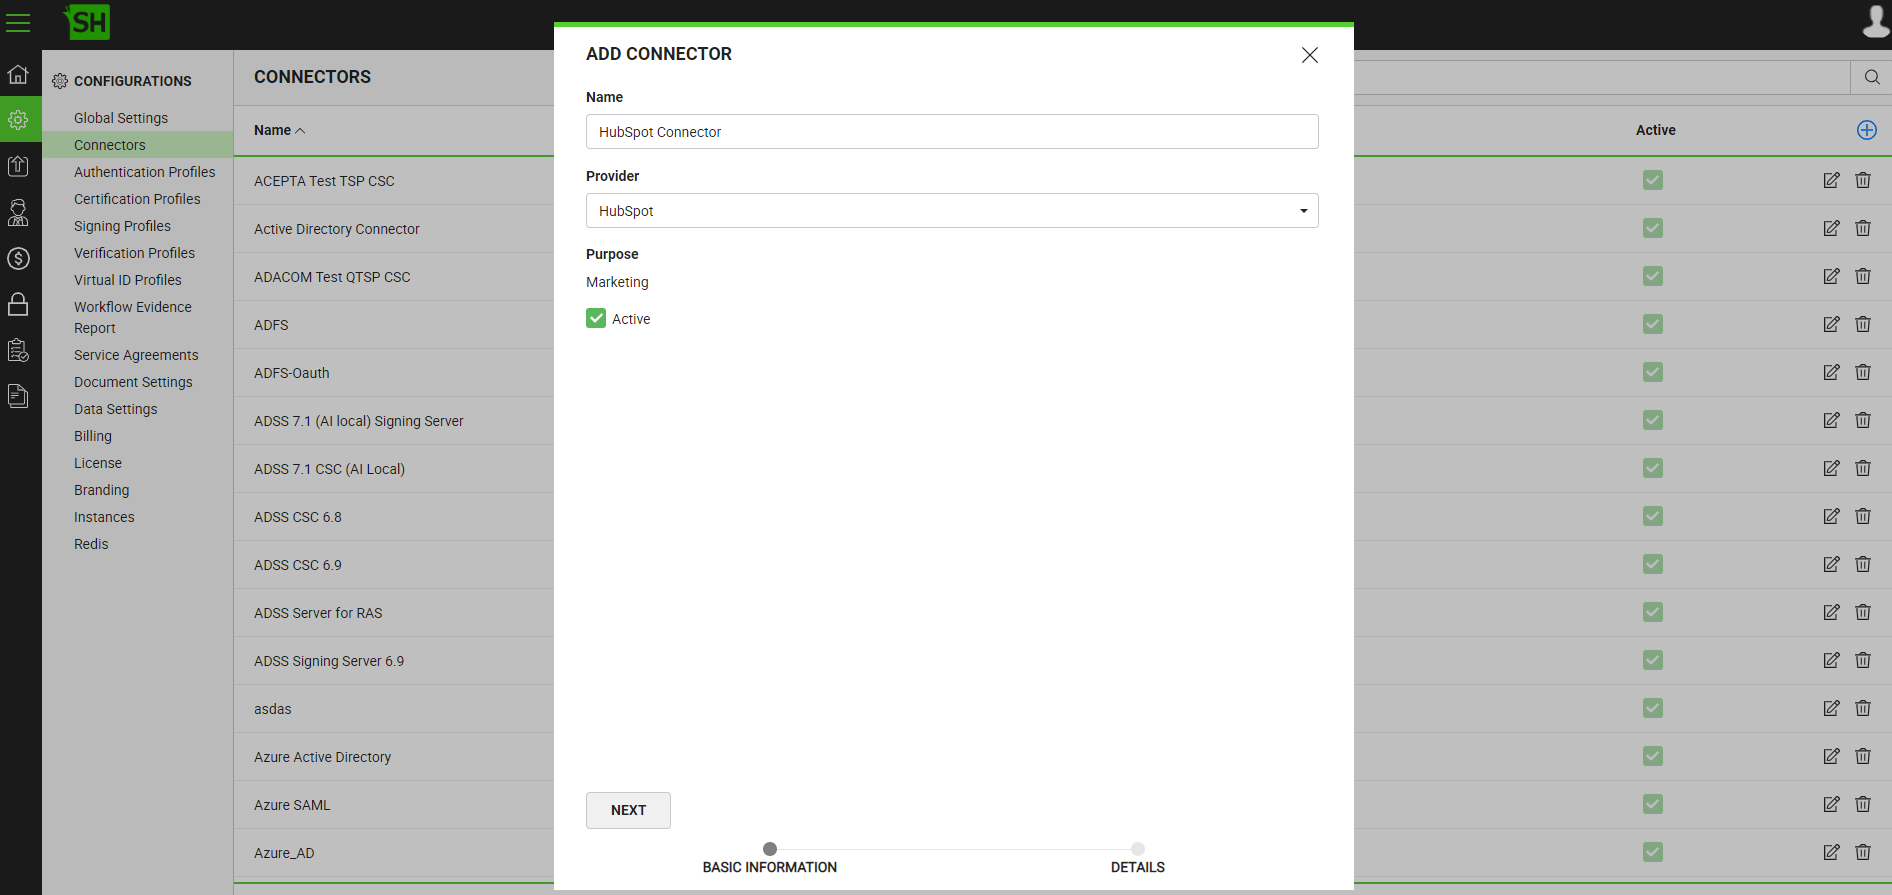
- A dialog will appear to add the connector details. The connector dialog is comprised of two screens, i.e. Basic Information and Details. Specify the basic information and click the "Next" button to provide the respective connector details. See the below table for fields description.
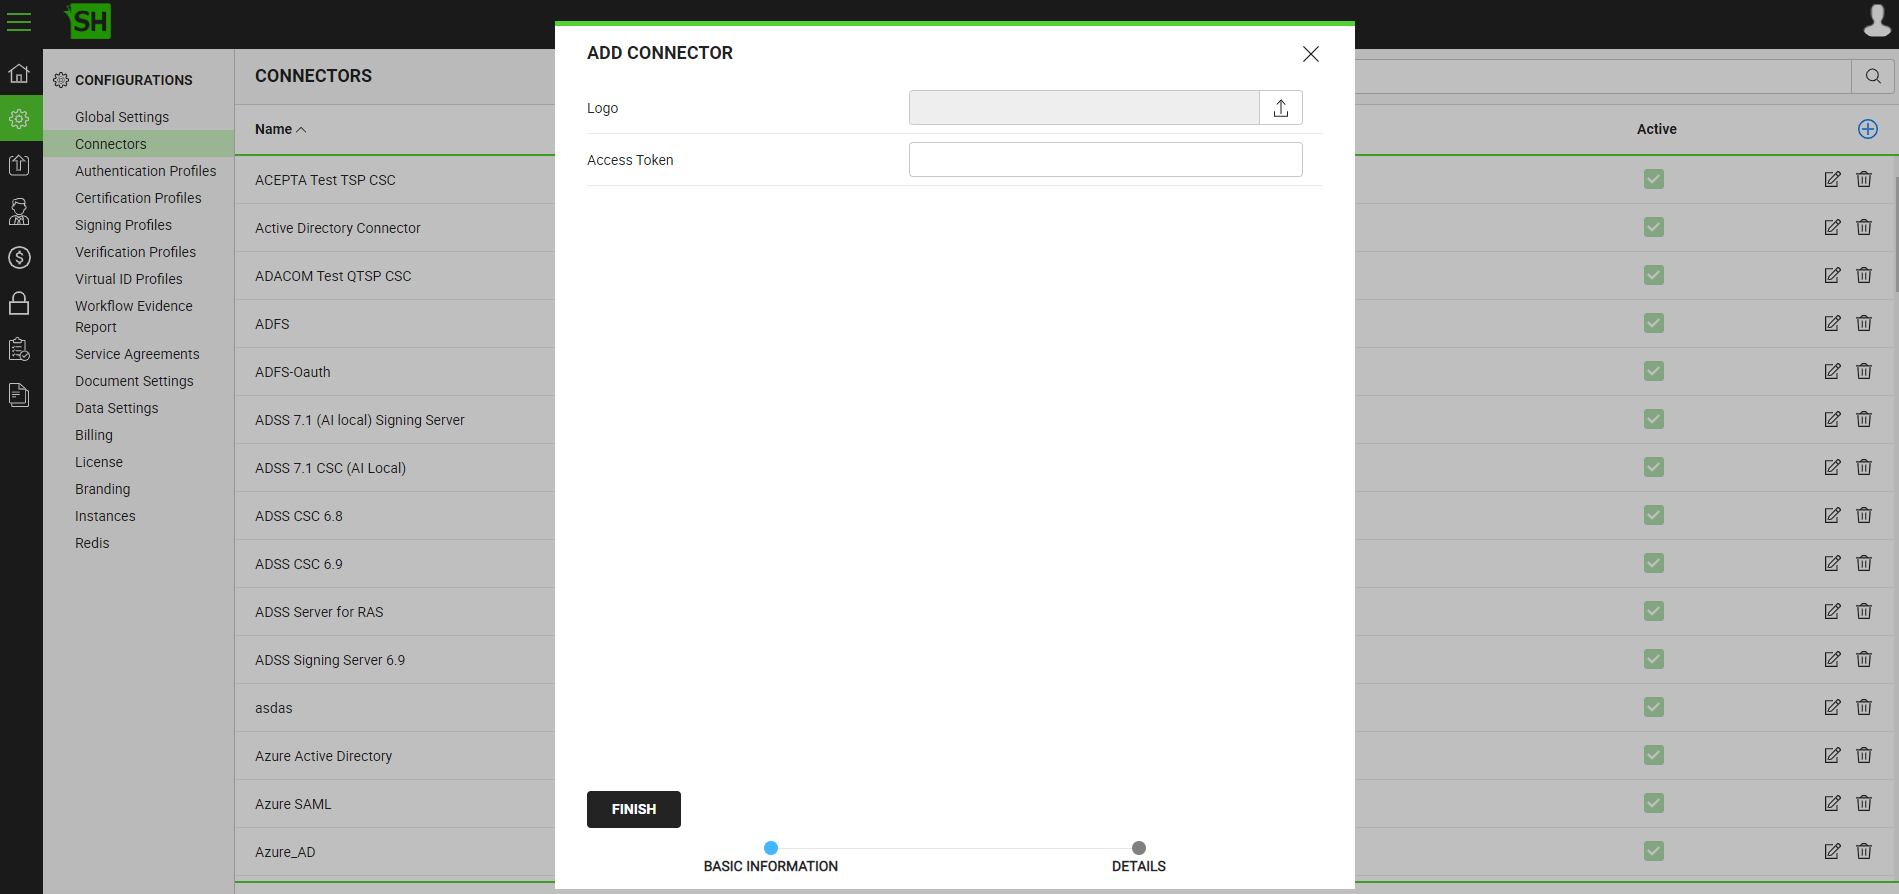
- Click the "Finish" button. A new connector will be saved and displayed in the list.
|
Basic Information |
|
|
Fields |
Description |
|
Name |
Specify a unique name for this connector, i.e. My HubSpot. This connector will be used in the configuration of Global Settings. |
|
Provider |
Select the provider for this connector, i.e. "HubSpot". |
|
Purpose |
This field will display the purpose of the selected provider above. |
|
Active |
Tick this check box to make this connector active. Inactive connectors cannot be configured in the Global Settings. |
|
Details |
|
|
Fields |
Description |
|
Logo |
Select an appropriate image in the jpeg, jpg, gif or png format for the connector's logo that will be displayed on the login screen. |
|
Access Token |
Specify the registered Access Token that has been provided by HubSpot to connect to the HubSpot server, i.e. "PyIE9KFm068PbsRf0fKaN2Ek9b53sYySh". |
Configure the HubSpot Connector as Default in the SigningHub Global Settings
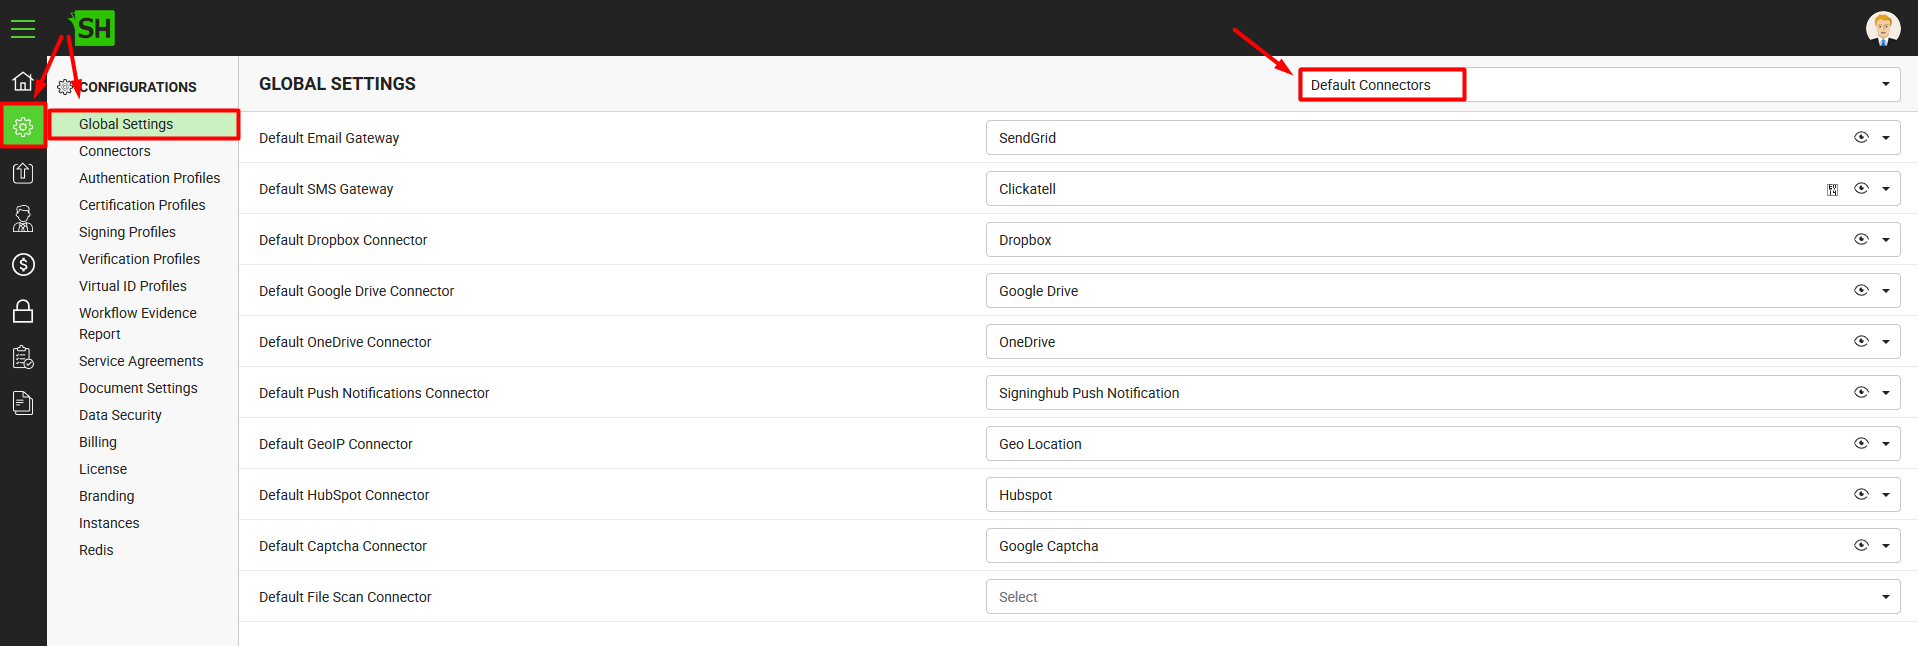
- Click the "Configurations" option from the left menu.
- Click the "Global Settings" option.
- Global Settings will appear, select the "Default Connectors" option from the top right drop down.
- Configure these settings as required and click the "Save" button from the screen bottom.
- Select the default HubSpot connector for your SigningHub deployment. The selected connector will be used to communicate with the HubSpot server. When configured, the end user while singing up for the new registration will see an optional checkbox, whether they want to receive the promotional/ marketing emails from SigningHub or not. The HubSpot connectors are managed through the connectors section, see details.
|
|
|
See Also
- How to Obtain the Azure AD Integration Key
- How to Obtain the Office 365 Integration Key
- How to Obtain a Salesforce Consumer Key
- How to Obtain the Dropbox Integration Key
- How to Obtain the Google Drive Integration Key
- How to Obtain the OneDrive Integration Key