Manage Signing Certificates
Add Custom Signing Certificate
An Enterprise Administrator with the permissions to manage enterprise users in his role, can import a custom certificate for signing. Furthermore, the signing certificates appears at signing time. The signing capacities appear on the signing dialog as per the capacities available in a user's role. Enterprise Roles are described in detail here.
- Login with your enterprise admin credentials.
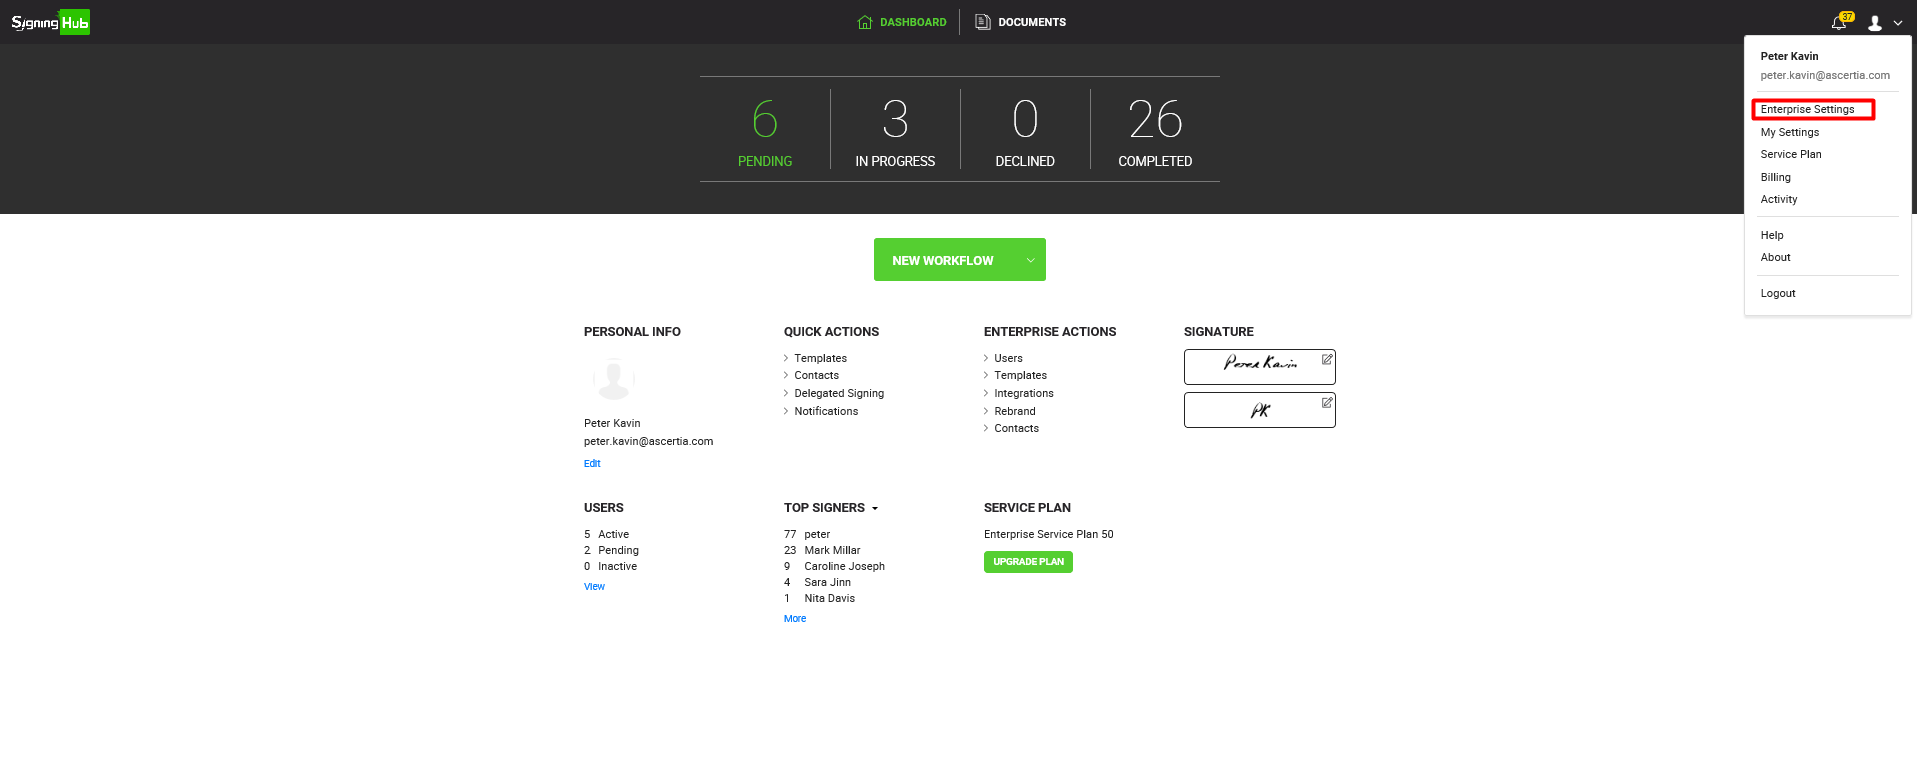
- Click the profile drop down menu (available at the top right corner).
- Select the "Enterprise Settings" option.

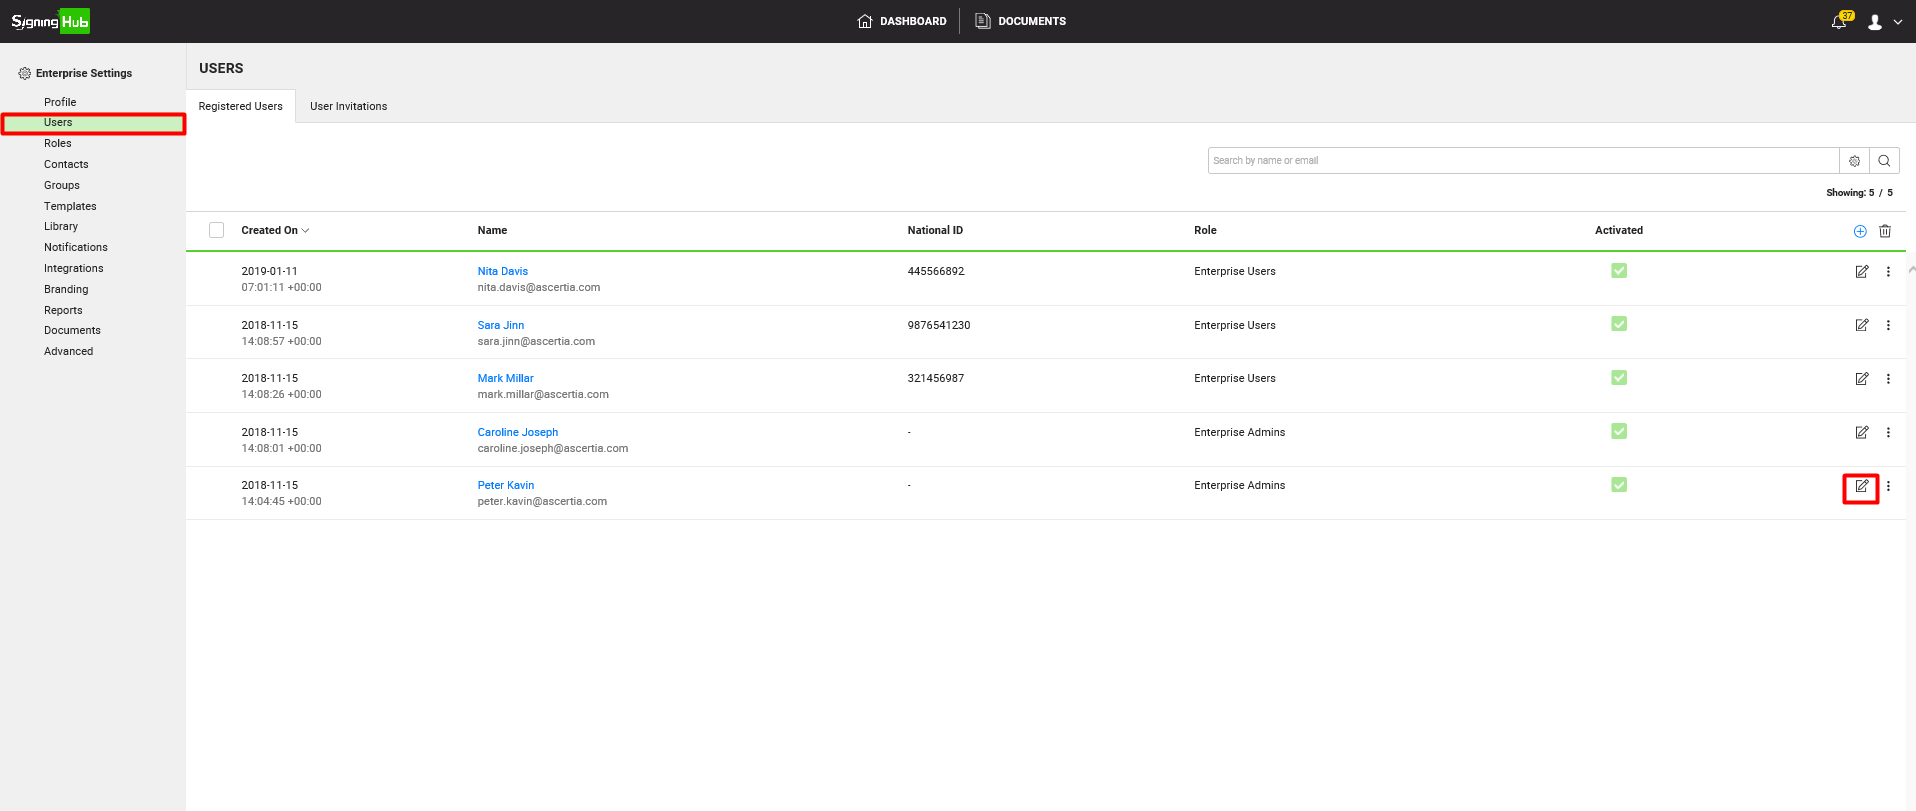
- Select the "Users" option from the left menu.
- The "Users" screen will appear listing all registered enterprise users.
- Click on the edit icon
 to add a custom signing certificate.

- Click on the add icon
 to add a signing certificate.

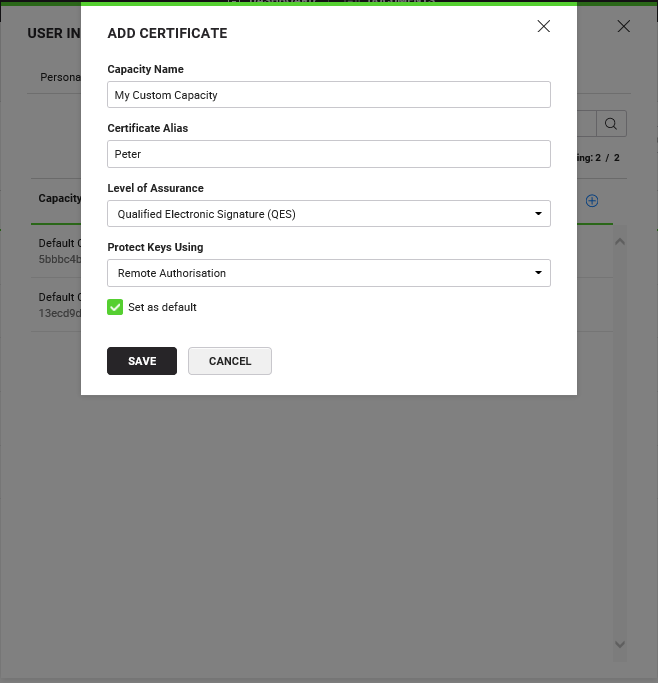
- Provide the Capacity Name and Certificate Alias for your certificate. Click the Set as default option if you want to display your certificate as selected by default in the signing dialog. Additionally, you can select Level of Assurance and Protect Keys Using Option too. Default selected value for Level of Assurance will be Advanced Electronic Signature and for Protect Keys Using it will be User Password.
|
|
Only one capacity can be set as a default at a time. If a capacity is already set as default, then setting a new capacity will revoke the previous as the default signing capacity |

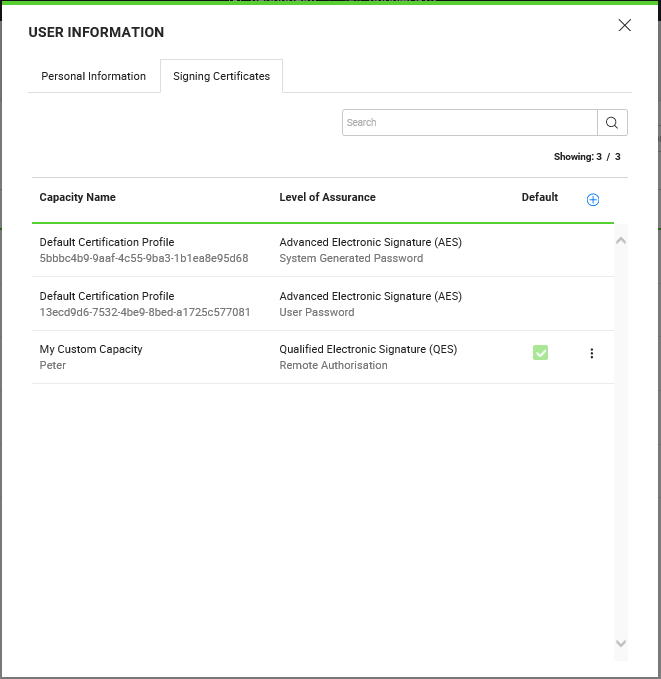
- Click on the Save button to proceed. The newly added signing certificate, can now be seen in the Signing Certificates list.

|
|
|

Edit Signing Certificate
You can also update the information for a custom signing capacity, if any changes are required e.g. Capacity Name, Certificate Alias etc.
- Login with your enterprise administrator credentials.
- Click the profile drop down menu (available at the top right corner).
- Click the "Enterprise Settings" option.
- Click the "Users" option from the left menu.
- The "Users" screen appears listing all your registered enterprise users.
- Click on the edit icon
 to see a list of custom signing certificates.

- Click on the menu icon
 and select the Edit option to update information for a signing certificate.

- You can update Capacity Name, Certificate Alias and Level of Assurance for your certificate. Click on the Set as default option if you want to display your certificate as selected by default in the singing dialog.

- Click on the Save button to apply your changes. Updated information appears in the Signing Certificates list.
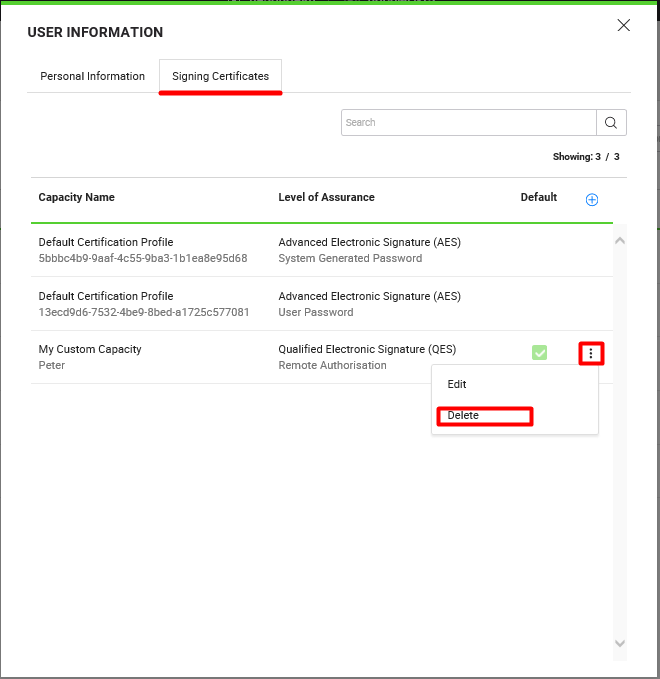
Delete Signing Certificate
You can delete an existing custom signing capacity, if it's no longer in use for signing purposes.
- Login with your enterprise administrator credentials.
- Click your profile drop down menu (available in the top right corner).
- Click the "Enterprise Settings" option.

- Select the "Users" option from the left menu.
- The "Users" screen will appear listing all your registered enterprise users.
- Click on the edit icon
 to see a list of custom signing certificates.
- Click on the menu icon
 and then select the Delete option to remove a signing certificate.
- A confirmation message appears when deleting a certificate. Click on Yes to delete your signing certificate.
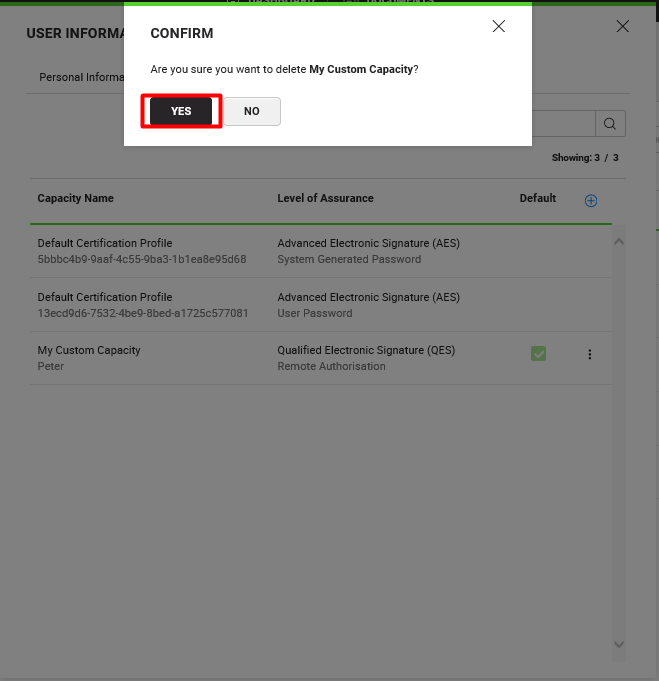
- A confirmation message appears and your certificate no more appears in the certificate list upon successful deletion.
See Also
- Register an enterprise user
- Register enterprise users via CSV file
- Edit Enterprise User Details
- Reset the password of your enterprise user
- View activities of your enterprise users
- Set service quota of your enterprise user
- Invite an enterprise user
- Invite enterprise users via CSV file
- Pre-authorize Active Directory users
- Disable an enterprise user
- Search an enterprise user