Create a New Account
You can also register new accounts directly from the SigningHub Admin interface. The respective users can be configured to receive account activation emails, through which they can activate their accounts.
Create a new account
- Click the "Accounts" option from the left menu.
- The "Accounts" screen will appear.
- Click
 from the grid header.
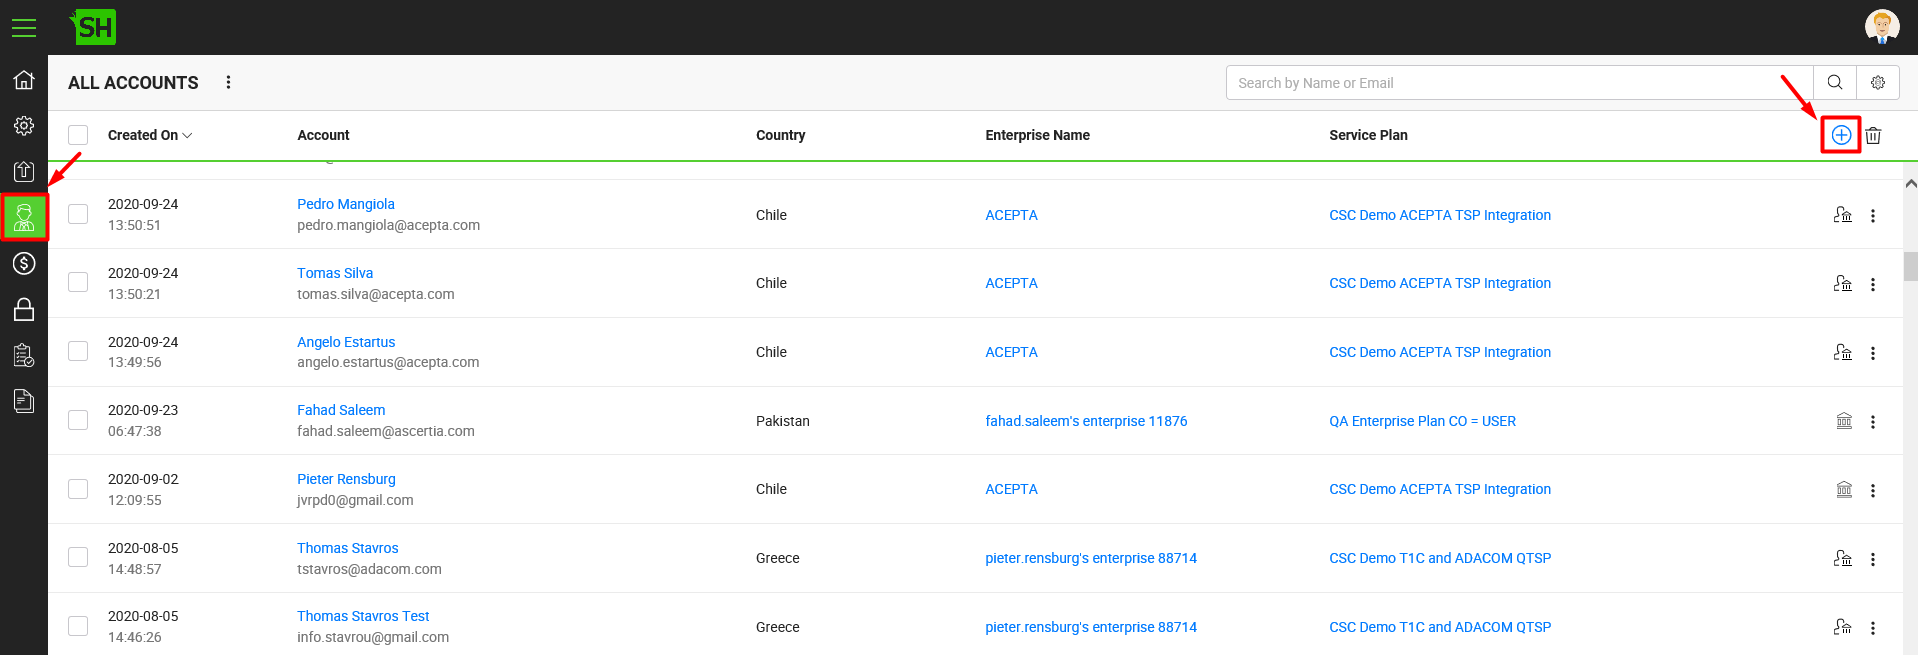
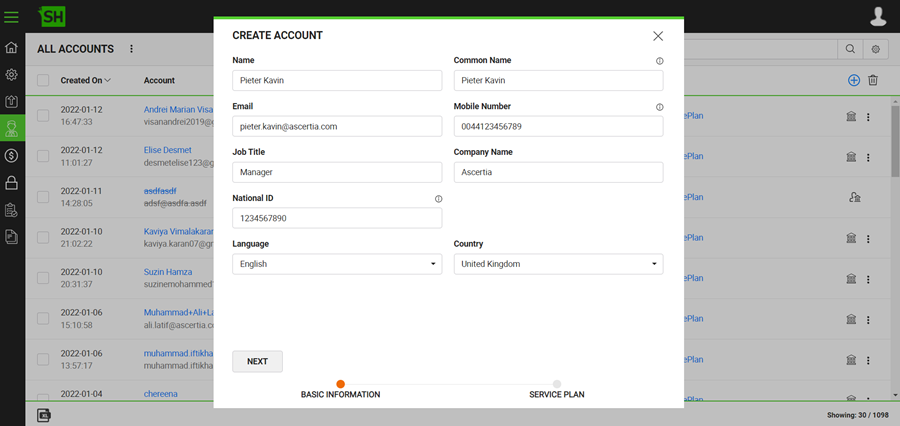
- The "Create Account" screen will appear. A dialog will appear to configure the account details. The account dialog is comprised of two screens, i.e. Basic Information and Service Plan. Specify the basic information and click the "Next" button to provide further. Click the "Create" button. See the below table for fields description. A new account will be created and shown in the accounts list.
|
Basic Information |
|
|
Fields |
Description |
|
Name |
Specify the name of new account owner. |
|
|
Specify a unique email ID for this account. |
|
Common Name |
This field is used for the certificate name that is issued against each registered user. The issued certificate identifies the user and their enterprise. |
|
Mobile Number |
Specify the mobile number of this account owner along with the respective country and area codes. |
|
Job Title |
Specify the job title of this account owner. |
|
Company Name |
Specify the company name of this account owner. |
|
Language |
Specify the language (i.e. English) of this account owner. This field is controllable from Global Settings > Default Locale, see details. |
|
Country |
Specify the country (i.e. United Kingdom) of this account owner. This field is controllable from Global Settings > Default Locale, see details. |
|
Service Plan |
Select a service plan from the list for this account. |
|
Enterprise Name |
In case the (above) selected service plan is for an enterprise registration, then this field is appeared. Specify the name of enterprise. |
|
Certificate |
In case the user has got the signing keys ownership (i.e. "Protect server-side signing keys with user password" option is enabled) in the (above) selected service plan, then this field is appeared. There can be two options, i.e.
|
|
Send Email |
Specify when should SigningHub send the notification email to the newly registered user, i.e.:
|
|
|
|

Account registration and activation without email
You can also auto activate a user account from here (i.e. SigningHub Admin interface) without sending them the activation email. This is useful for those clients who don't want to receive activation emails, or don't intent to configure SMTP servers in their on-premises deployments.
However it is applicable against those service plans only, in which user has got the signing keys ownership i.e. the "Protect server-side signing keys with user password" option has been enabled.
To configure this:
- While creating a new account, specify all the relevant details and click "Next".
- Select the "None" option from the "Send Email" field.
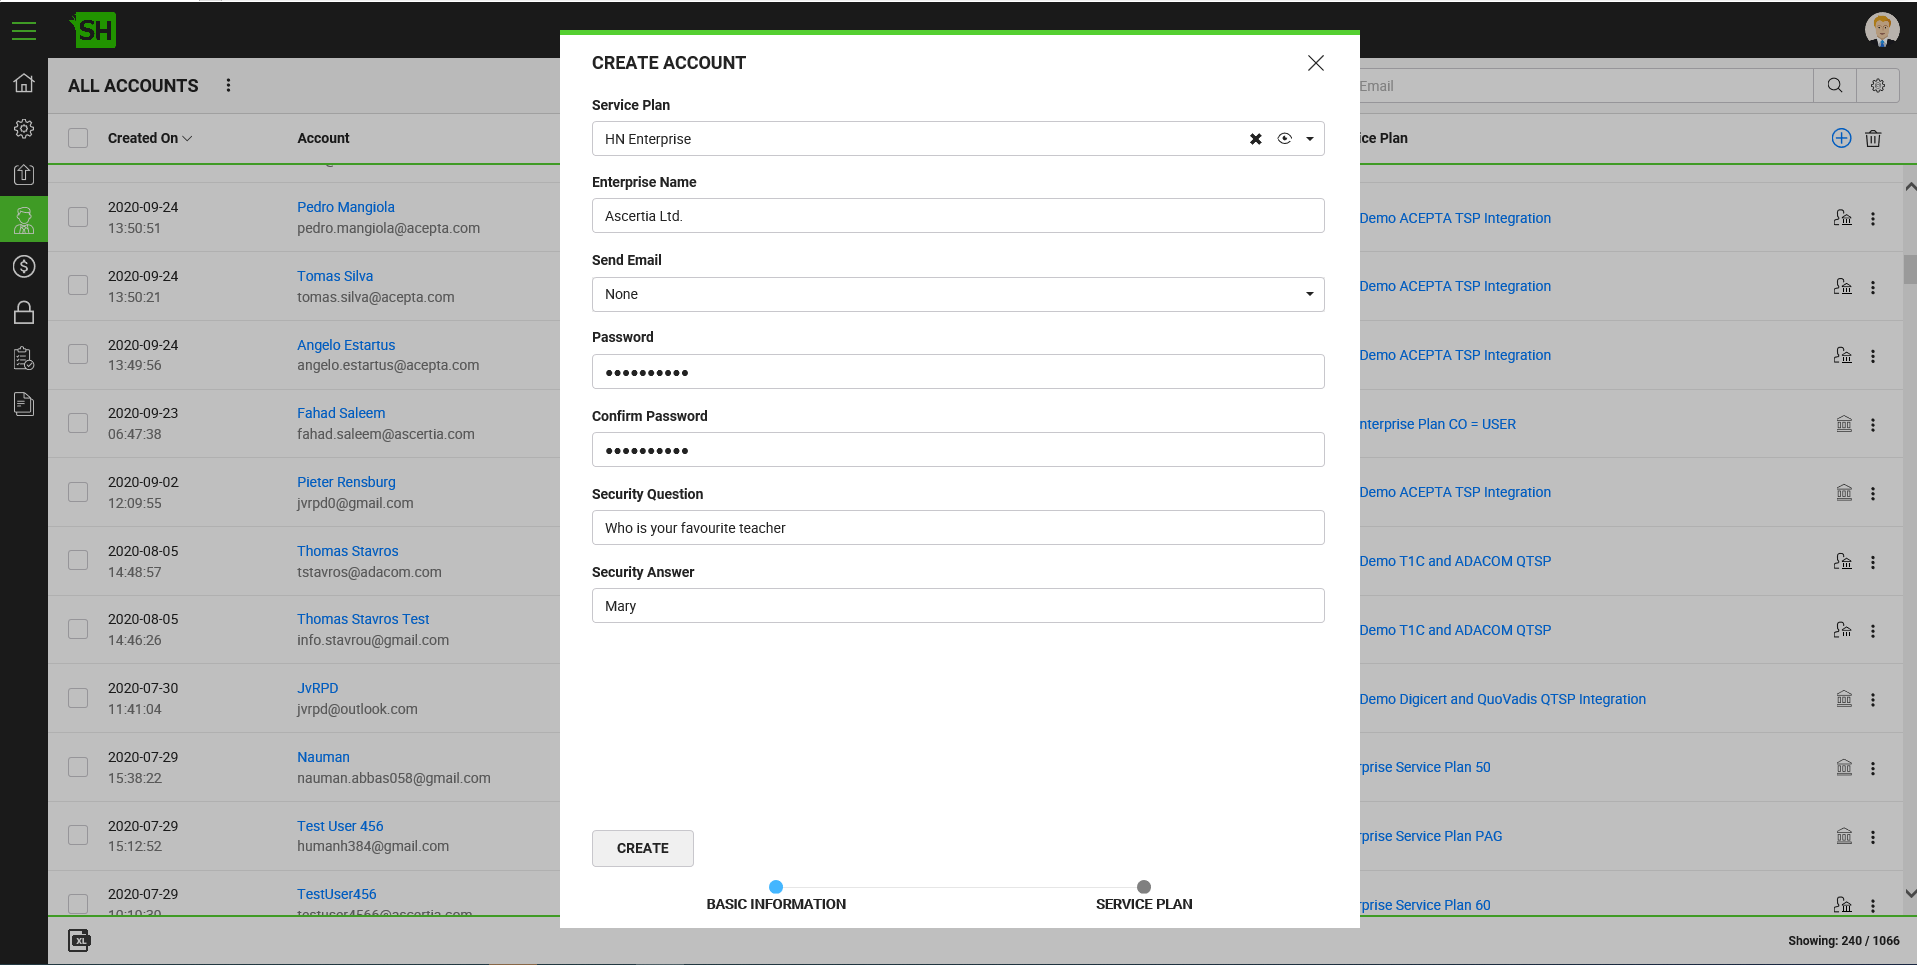
- Consequently, four fields will appear, i.e. Password, Confirm Password, Security Question, and Security Answer. Fill in these fields with the respective information. The specified password should comply with the system password policy.
All the fields are mandatory, so you cant leave any of these fields blank. - Click the "Create" button.
|
|
|
