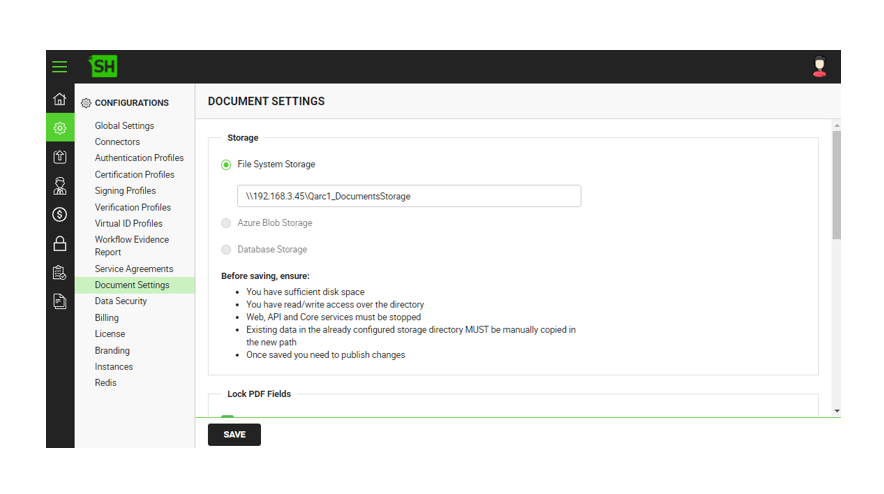
SigningHub allows multiple storage areas to save the documents transactions (revisions), templates, and library files. During deployment, the SigningHub Installer gives you three different options to choose the one for saving this data in an encrypted format, i.e.:
- File System Storage
- Azure Blob Storage
- Database Storage
The option selected during installation, is shown read-only on the SigningHub Admin interface. However the related details are editable and can be updated as required. Similarly, you can also configure document locking settings from here that require an invisible signature on the PDF.
|
Document Settings
|
|
Fields
|
Description
|
|
Storage
|
|
File System Storage
|
When the "File System Storage" option is selected from the SigningHub Installer:
- SigningHub Installer will require a valid document storage directory that could be used to store all the data, and ensures that the required permissions (rights) are available on the folder.
- All the data will be stored on I/O.
- Whenever a new document is uploaded from a user end (i.e. SigningHub Desktop Web, SigningHub Mobile Web), a new folder with their "package ID" name is created (inside the document storage path) to store all its revisions with their unique GUID names, and its workflow evidence report that is placed upon workflow completion.
- Similarly when a document is added from a library or it is added in a personal or enterprise library, then it is always saved inside the "Library" folder of the document storage path. The same goes for creating personal and enterprise templates, they are saved inside the "Templates" folder of the document storage path.
- The actual path of document directory is editable in SigningHub Admin.
|
|
Azure Blob Storage
|
When the "Azure Blob Storage" option is selected from the SigningHub Installer:
- SigningHub Installer will require a valid Azure storage account to store all the data. When specified, an Azure blob connector will be created (inside SigningHub Admin) with the Azure account details upon successful installation.
- All the data will be stored on Azure Blob Storage.
- Whenever a new document is uploaded from a user end (i.e. SigningHub Desktop Web, SigningHub Mobile Web), a new folder with their "package ID" name is created (inside the Azure Blob Container) to store all its revisions with their unique GUID names, and its workflow evidence report that is placed upon workflow completion.
- Similarly when a document is added from a library or it is added in a personal or enterprise library, then it is always saved inside the "Library" folder of the Azure Blob Container. The same goes for creating personal and enterprise templates, they are saved inside the "Templates" folder of the Azure Blob Container.
|
|
Database Storage
|
When the "Database Storage" option is selected from the SigningHub Installer:
- All the documents, library items, and template related documents will be stored on database.
- The documents are saved in the "DocumentRevision" database table.
- The library items are saved in the "DocumentLibrary" database table.
- The template related documents are saved in the "TemplateDocument" database table.
|
|
Lock PDF Fields
|
|
Lock PDF fields by adding invisible signature in the document
|
Tick this option to configure documents locking settings. For document locking, an invisible signature is added on the PDF file after the last recipient so that it cannot be amended later.
A couple of fields will appear, i.e. "Signing Profile" and "Signing Capacity". The "Signing Profile" field will display the list of ADSS Signing Profiles. Select the one to compute PAdES-B-LT invisible signatures for the PDF documents to be locked. Click  to view the details of the selected signing profile. to view the details of the selected signing profile.
Select the signing capacity that is configured based on Electronic Seal as a level of assurance from "Signing Capacity" list
When configured, system will be automatically lock those documents having form fields:
- In which "Document Locking" option is enabled, and
- Whose workflows are complete, and
- Irrespective of last recipient's action (i.e. signing, declining, reviewing, editing, etc.)
If you keep this option un-ticked, documents auto locking will not be triggered as per the above mentioned conditions and hence no invisible signatures will be added on the PDF documents.
|
|
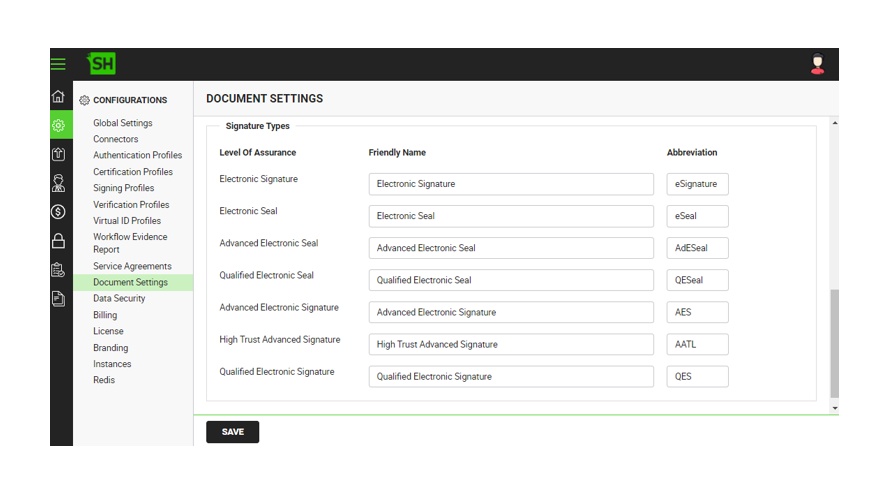
Signature Types
|
|
Level of Assurance
|
Displays the level of assurances available as listed below.
- Electronic Signature
- Electronic Seal
- Advanced Electronic Seal
- Qualified Electronic Seal
- Advanced Electronic Signature
- High Trust Advanced Signature
- Qualified Electronic Signature
|
|
Friendly Name
|
Enter a friendly name against each level of assurance. The system will reflect the specified friendly name instead of the default names, for example in places like Connectors,
Certification Profile, Service Plan, and Signature Settings of a role.
The naming format of the friendly name will be as follows:
Friendly Name (Abbreviation)
For example, Advanced Electronic Signature will be shown as follows:
Advanced Electronic Signature (AES)
|
|
Abbreviation
|
Enter an abbreviation again each Level of Assurance.
You cannot enter an abbreviation longer than 10 characters.
The system will reflect the specified abbreviations under the Reports > Signatures > Statistics.
In addition, abbreviation is displayed along with the friendly name as well in the following format:
Friendly Name (Abbreviation)
For example, Advanced Electronic Signature will be shown as follows:
Advanced Electronic Signature (AES)
|
To configure document settings
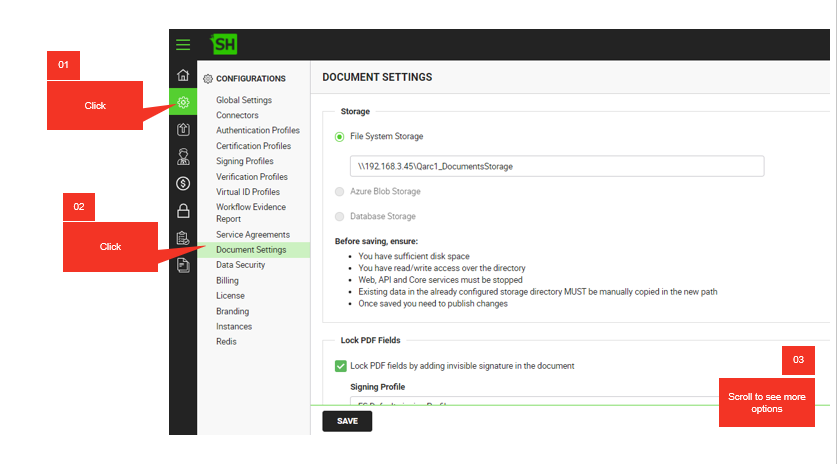
- Click the "Configurations" option from the left menu.
- Click the "Document Settings" option.
The "Document Settings" screen will appear displaying the selected storage option from the SigningHub Installer in read-only mode. See the "Document Settings" table above for fields description.
- In case of File System Storage, edit the Document Storage Path as required.
In case of Azure Blob Storage, change the Azure Blob connector as required.
- Set the PDFs locking configuration as required.
- Under the "Document Settings" section, specify the friendly names and abbreviations for the available Level of Assurances.
- Click "Save".
|

|
- When you are looking to replace a local path with a network path and vice versa, then refer to the SigningHub installation guide for their configuration details.
- When you need to configure a new path, then move all the SigningHub data manually to the new location before changing the existing path.
|
See Also