Post installation customisations
After successful installation, the last step is to customize the page layouts. In order to send documents to SigningHub, you need to customize the layouts of the "Opportunities", "Accounts", "Contacts", "Contracts", "Quotes", "Leads", "Cases", "Events", "Tasks", "Orders", and "Campaign" pages. The following provides an example of customizing the "Opportunities" page layout, the same process can be followed to customize other pages as well.
Customize your "Opportunities" page
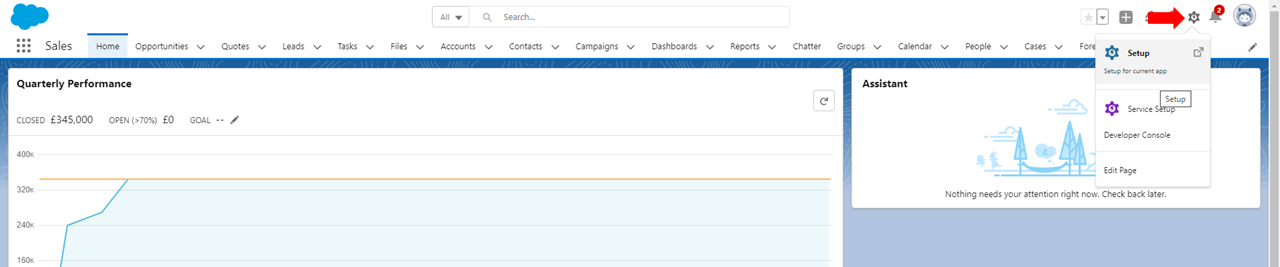
- Login into your Salesforce account with a "System Administrator" profile.
- Click the "Setup" cog and select Setup from the menu.
- Expand the "Objects and Fields" option from the left hand menu, and select "Object Manager".
- The "Object Manager" page will display, select "Opportunity"
- The "Opportunity Page Layout" page will display, select "Page Layouts".
- Click "Opportunity Layout" to edit the page.
- The "Opportunity Layout" page will display
- Select "Buttons", and drag the "Share using SigningHub" button into the "Custom Buttons" area.
- The "Share using SigningHub" button will be shown in the "Custom Buttons" area.
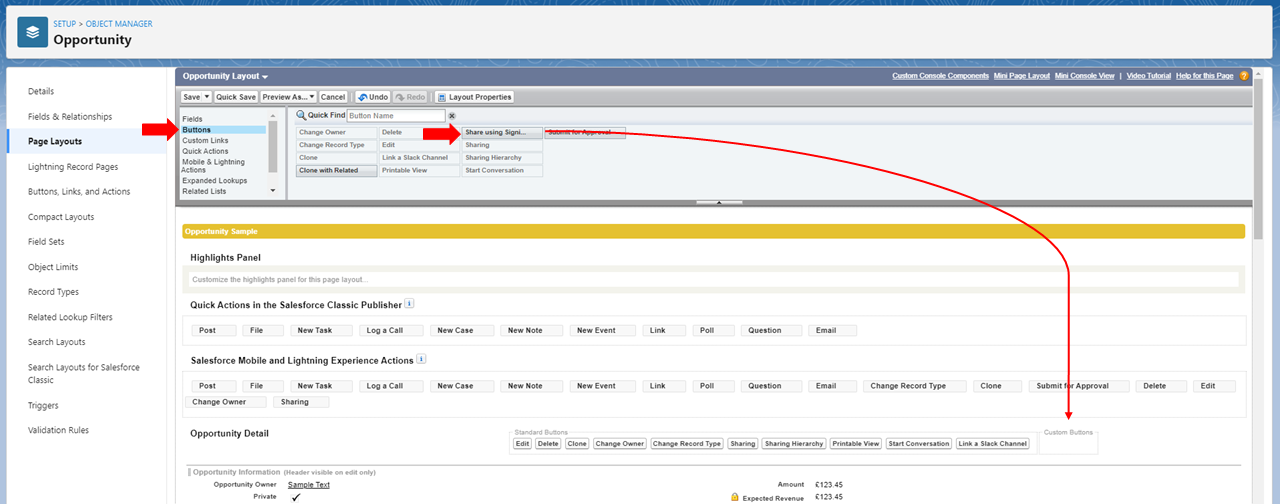
- The "Share using SigningHub" button will be shown in the "Custom Buttons" area.

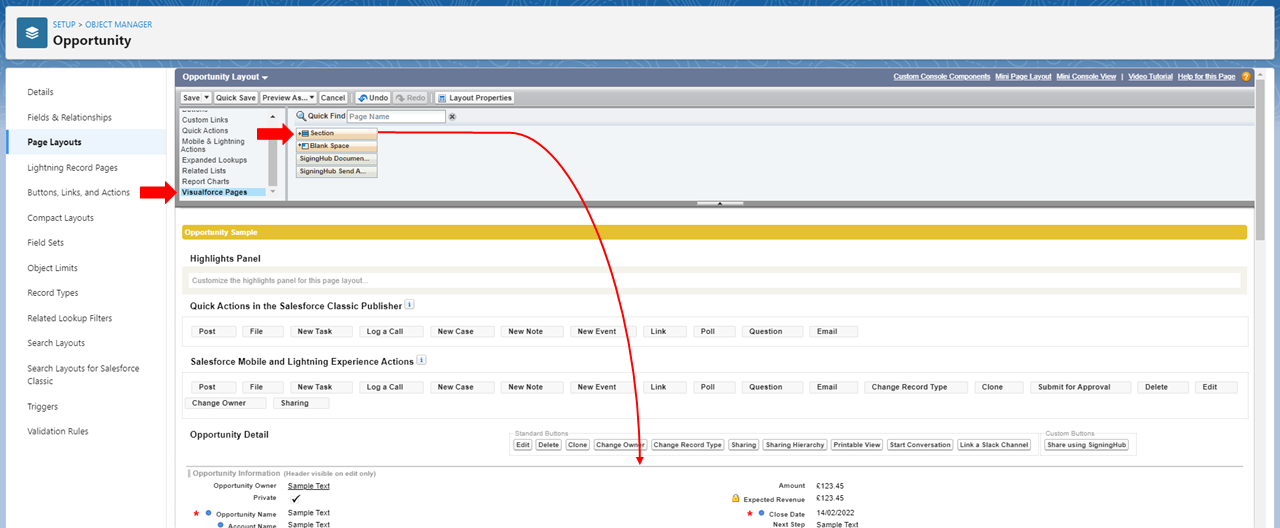
- Now select "VisualForce Pages" and drag "Section" to the "Opportunity Details" area.
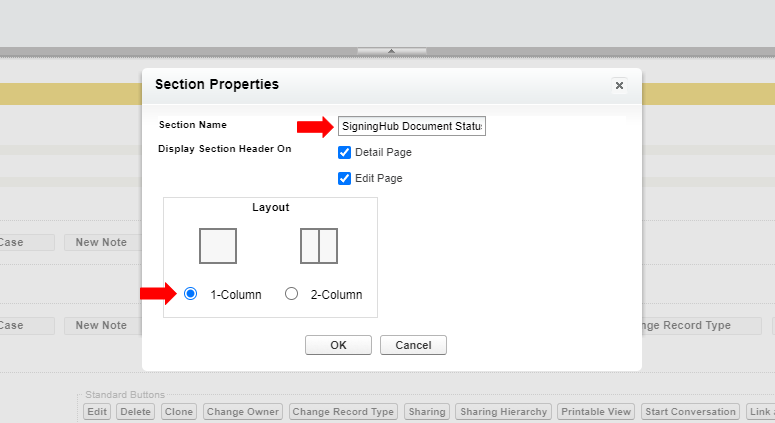
- The "Section Properties" dialog will appear. Specify the section name as "SigningHub Document Statuses".
- Select the "1-Column" layout and click the "OK' button.
- Drag "SigningHub Document Status" to the " SigningHub Document Statuses" area.
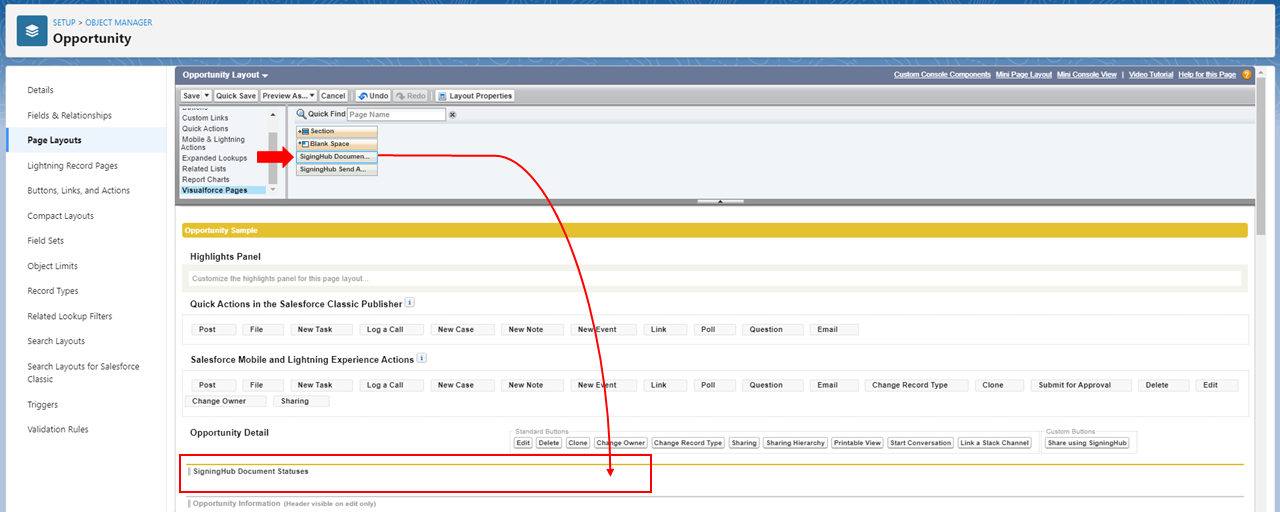
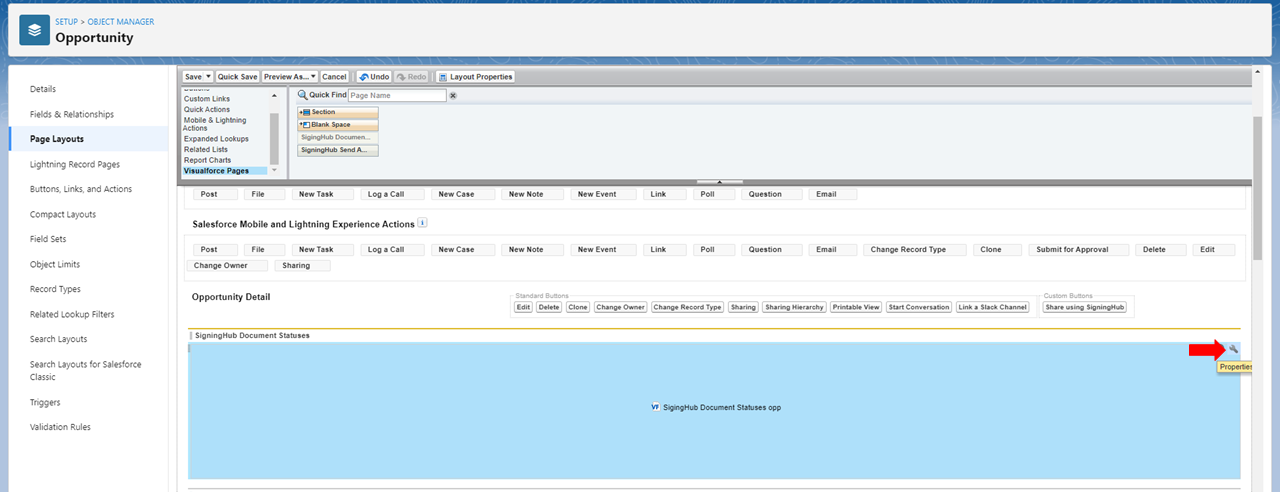
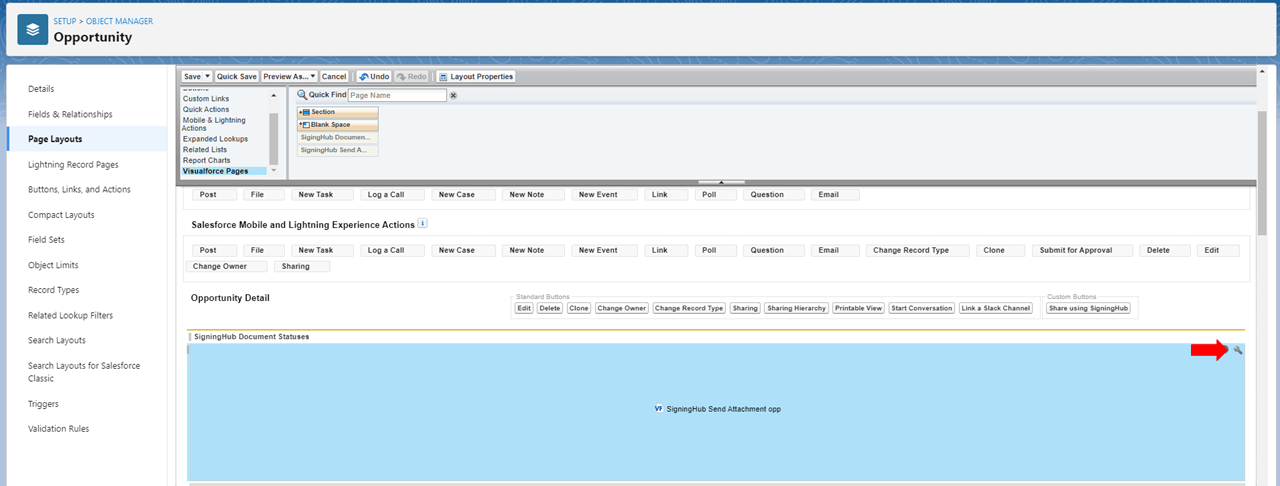
- The "SigningHub Document Status opp" will be added to the "SigningHub Document Statuses" section, click the wrench to edit the properties of the "SigningHub Document Status opp".
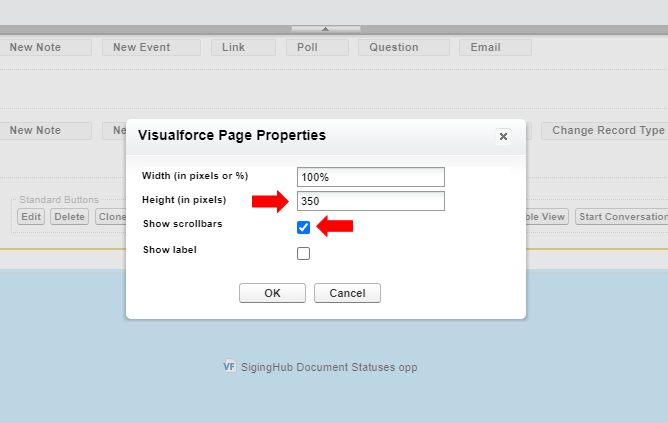
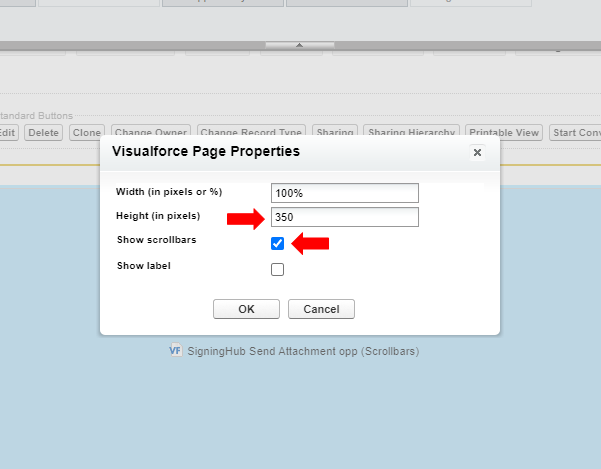
- A Visualforce Page Properties dialog will display, enter 350 in the "Height (in pixels)" field and check tick the "Show scrollbars" check box, click OK.
- Drag "SigningHub Send Attachment opp" to the " SigningHub Document Statuses" area.
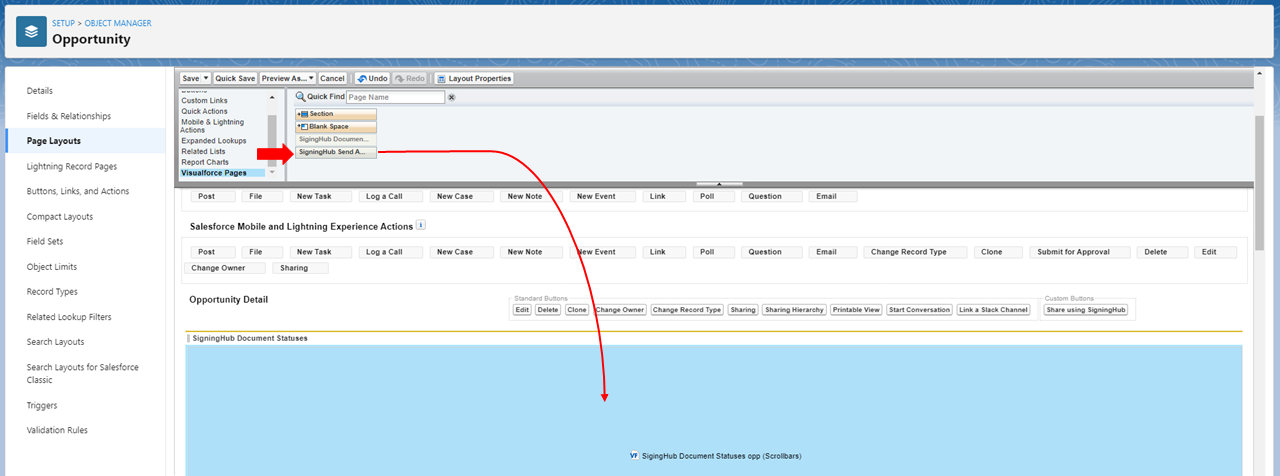
- The "SigningHub Send Attachment opp" will be added to the "SigningHub Document Statuses" section, click the wrench to edit the properties of the "SigningHub Send Attachment opp".
- A Visualforce Page Properties dialog will display, enter 350 in the "Height (in pixels)" field and check tick the "Show scrollbars" check box, click OK.
- Select "Mobile & Lightning Actions", and drag the "Share using SigningHub" button into the "Salesforce Mobile and Lightning Actions" area.
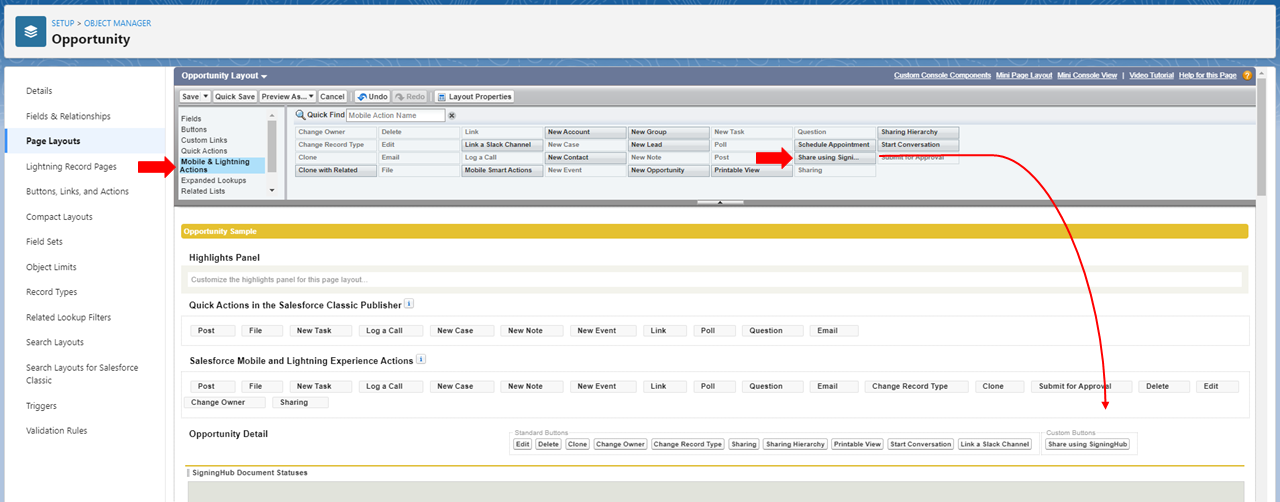
- The "Share using SigningHub" button will be shown in the "Custom Buttons" area.

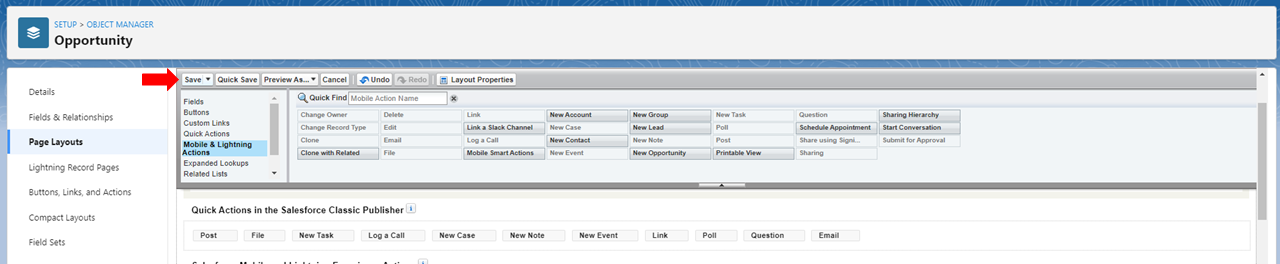
- Click the save button to save the changes to the Opportunity page layout.
- Repeat this process for "Accounts", "Contacts", "Contracts", "Quotes", "Leads", "Cases", "Events", "Tasks", "Orders", and "Campaign" pages if required.
For more customizations and usage instructions, see how to create a custom entity in Salesforce?