Add a new user in Salesforce
In order to allow your Salesforce users to access SigningHub, you need to:
- Add them in the "Manage Users" section of Salesforce, and
- Assign the "SigningHub App Permissions" to them
Add a user in Salesforce for SigningHub
- Login into your Salesforce account with a "System Administrator" profile.
- Click the "Setup" cog and select Setup from the menu.

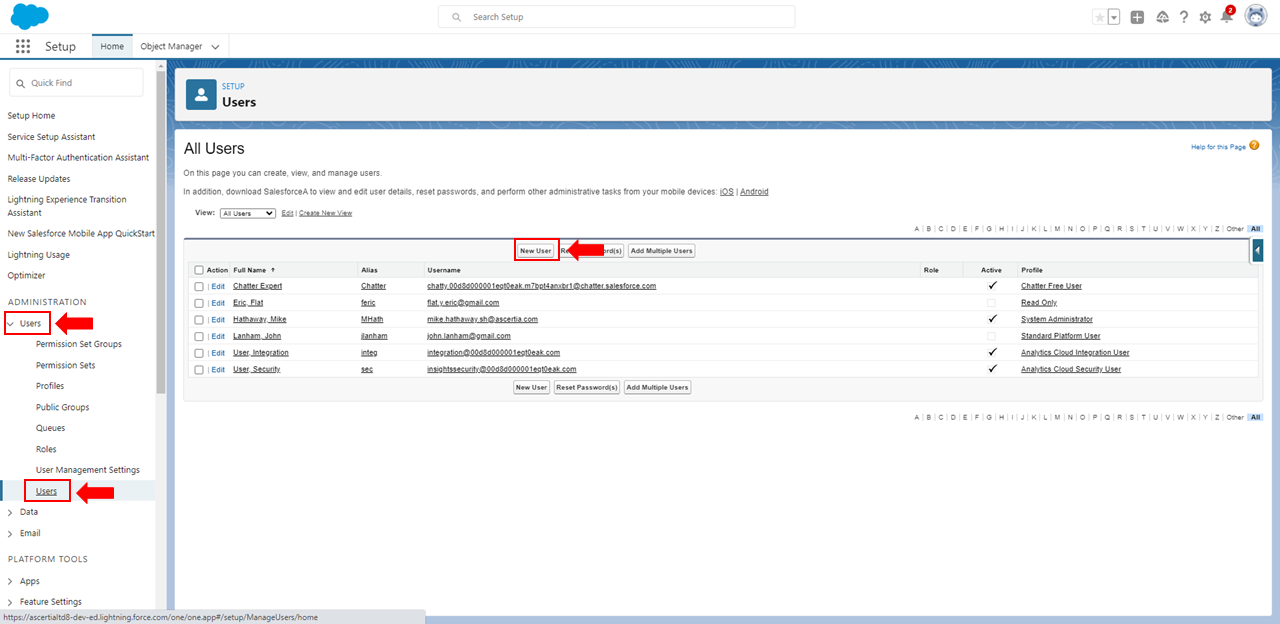
- From the left menu under Administration, expand Users and select users, click the "New User" button.

- The New User form will display, input the required user information, click the "Save" button.
Make sure to select the "Active" option, as highlighted on the below image. The inactive users will not be listed inside the SigningHub app.

New (Active) user(s) will be listed in the "Users" sections of Salesforce and the SigningHub app both.
After adding user(s) to Salesforce you must assign SigningHub App Permissions to them.
Assign "SigningHub App Permissions" to a Salesforce user
- Login into your Salesforce account with a "System Administrator" profile.
- Click the "Setup" cog and select Setup from the menu.

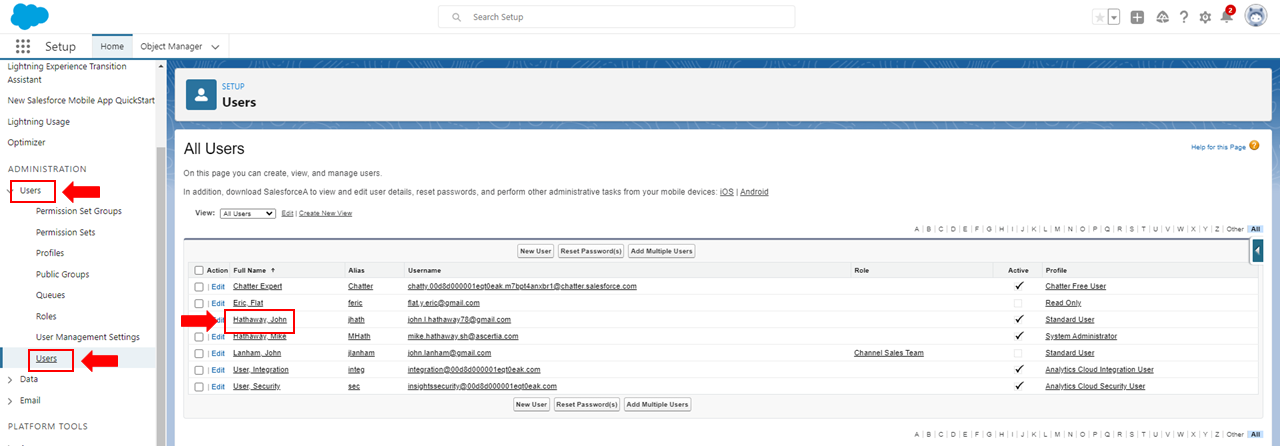
- From the left menu under Administration, expand Users and select users
- Click the user's name you want to assign the SigningHub app permissions.

- The Users account properties page will display, click the "Permission Set Assignments" link.

- Click the "Edit Assignments" link.

- Add the "SigningHub App Permissions" item from "Available Permission Sets" to "Enabled Permission Sets".
- Click "Save".

- When adding a new user, make sure to select the "Active" option. The inactive users will not be listed inside the SigningHub app.
- Salesforce users require "SigningHub App Permissions" to use the SigningHub app, so its a mandatory step.