To view your SigningHub users:
- In case of an on-premises deployment, log into your locally deployed Dynamics CRM instance through your domain user and password (active directory credentials).
OR
In case of an Office 365 installation, clear your browser cache and log into your Office 365 account. - Click the "Service" tab and then click the "Settings" module, as marked with red arrows on the below image.
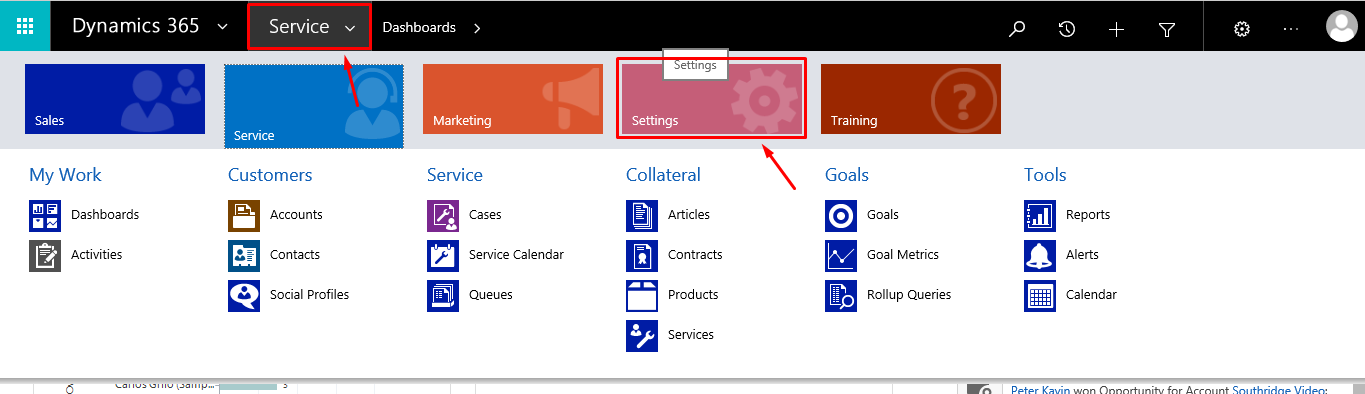
- From the next appearing "Settings" menu, click the "SigningHub Configuration" option being displayed under "Extensions".

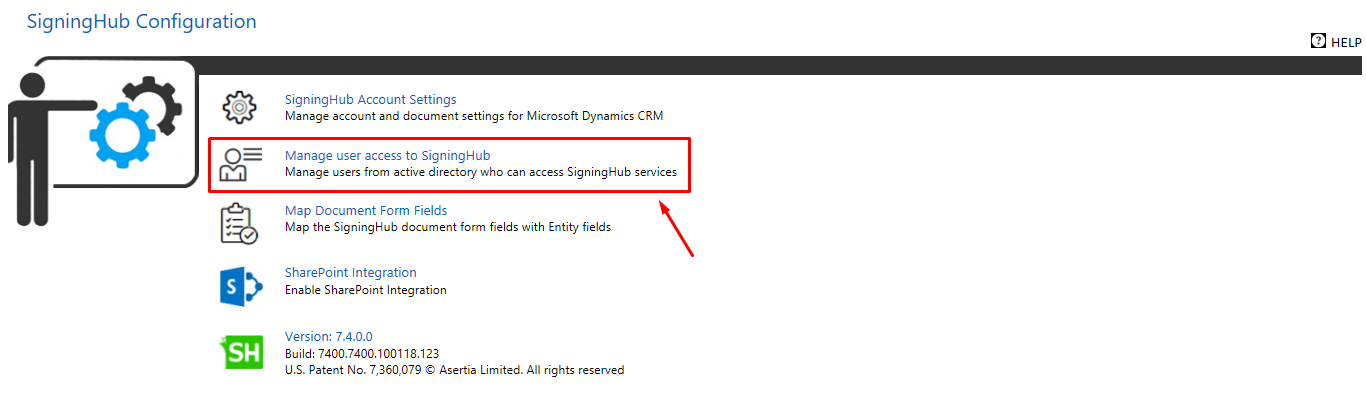
- Click the "Manage user access to SigningHub" option, as marked with an arrow on the image below.
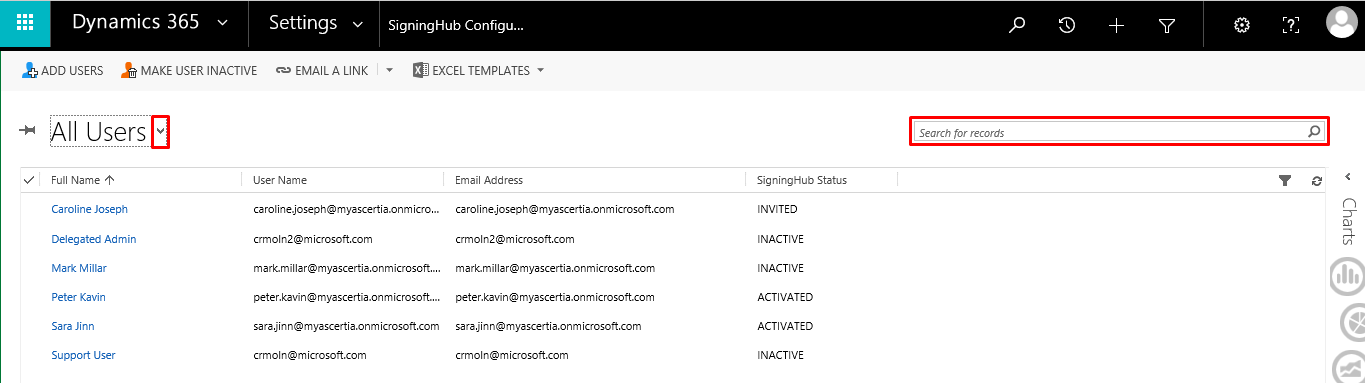
- The "All Users" screen will appear, listing all your Microsoft Dynamics CRM users along with their respective information, i.e. Full Name, Username, Email and SigningHub Status. These users are managed (add/ edit/ delete) by your Microsoft Dynamics CRM administrator.
- Click the "All Users" drop down (as marked with red colour on the left side of the image below) and select the "SigningHub Active Users" or "SigningHub Inactive Users" option to filter the users list accordingly.
- Use the "Search" field (as marked with red colour on the right side of the image below) to search a specific user from the list on the basis of their First/ Last name.
The Microsoft Dynamics CRM user who needs to invite/ remove other users, should either be the SigningHub Enterprise Admin or the Enterprise user to whom inviting privileges have been assigned (i.e. the "Enterprise User" checkbox should be selected in their assigned role).