Step 4 - Advanced Settings

Configuring Certificate Quality
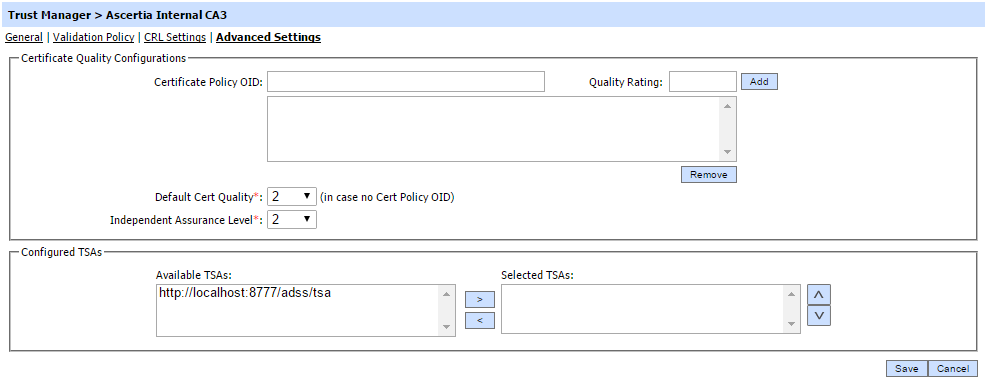
The CA registration wizard allows a quality rating to be defined for the CA. This can be configured on a per Certificate Policy OID basis and also on a default basis if no certificate Policy OID is used. ADSS Server assigns all certificates issued by the CA the corresponding quality defined here. If the certificate being validated has a Certificate Policy extension containing a policy OID that matches the one for the defined OID, then the relevant quality level defined for this policy is used. If no matching policy is found, then ADSS Server assigns the certificate the default quality level. The quality level for the certificate will be returned to the requester in the signature verification response message. The certificate quality level is also used in the calculation of the overall signature quality level as explained in the ADSS Verification Service module - see the section ADSS Verification Service.
In the screen above simply enter the Certificate Policy OID details (i.e. the policy unique identifiers under which this CA issues certificates), enter the calculated quality rating associated with this policy and then click the Add button.
|
|
It is mandatory to add a default certificate quality rating Provide the values for the default Certificate Quality and Independent Assurance Level for this CA according to the PEPPOL Trust ratings. |
Configuring TSAs
Configured TSAs section allows one or more timestamps authorities to be identified for use when using a certificate issued from this CA, specifically when creating a long-term signature in the Signing Service or when extending a signature to a long-term format in the Verification Service. Its important to note the way this association works:
- When a CA has a one or more TSAs configured here, these override any TSAs that are defined in Signing or Verification Profiles.
- When a CA has no associated TSA defined here, then the TSAs configured in Signing or Verification Profiles will be used.
|
|
Click on the Save button to complete the CA registration. |
See also

