Advanced Settings
This page is used to configure which certificate revocation mechanism(s) will be used for CAs not registered within Trust Manager. In addition it also allows the configuration of settings for:
- Validation policy setting for non-registered CAs
- Signature and Certificate Quality levels
- Signature Time and Historic Verification.
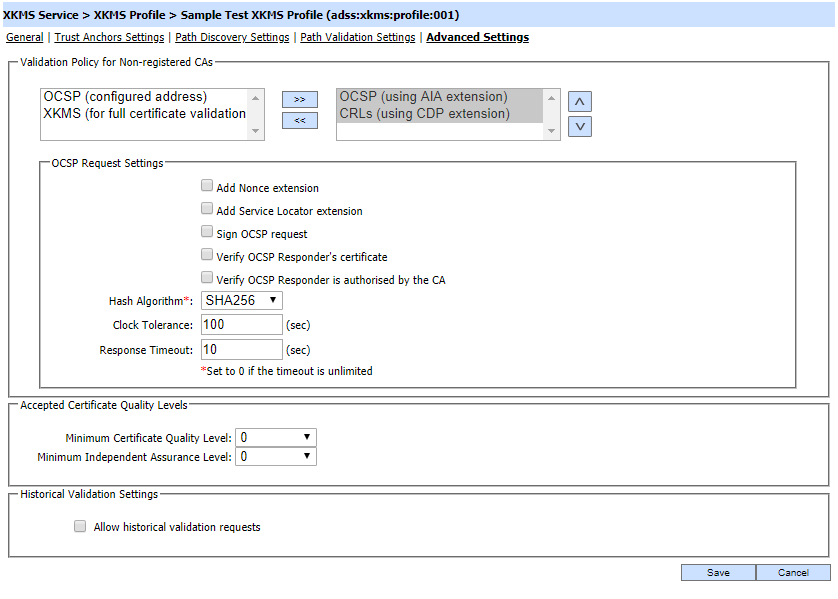
Each element of the form is described below:
| Item |
Description |
| Validation Policy for Non-registered CAs |
If intermediate CA certificates are discovered dynamically during path building process, these configurations are used to define the their validation mechanism.
|
| OCSP Settings |
These configurations are shown when OCSP (using AIA extension) or OCSP (configured address) option is selected:
|
| OCSP Responder Address |
This option is shown when OCSP (configured address) is selected and you have to configure the OCSP responder address. Usually this option is used when AIA or CDP address is not found is target certificate. |
| XKMS Server Address |
This option is shown when XKMS (for full certificate validation) is selected. Another XKMS server address is configured to check the revocation of complete chain. |
| Sign XKMS Request | Select this checkbox if the XKMS service requires request messages to be signed. Then select the XKMS Request Signing Certificate which pre-exists in the Key Manager. |
| Accepted Certificate Quality Levels |
Specify the default certificate quality and independent assurance level for minimum acceptable quality levels for the clients using this profile. |
| Historical Validation Settings |
The checkbox Allow historical verification requests means that the client can check certificate validity in the past by identifying a specific date and time within the request message. For historical verification with basic path validation, two CRLs can also be checked in a certain approach. If CRL available at the time of signing does not contain the revocation information and next CRL also exists then system is going to check the status in next CRL as well. If there is no next CRL in database then system is going to rely on first CRL only as it will be the latest CRL. |
If it is required that path validation to strictly follow PKIX guidelines then after creating the profile, then follow these instructions:
1. Launch ADSS Server admin console
2. Navigate to location Global Settings > Advanced Settings
3. Search for the property PKIX_COMPLIANCE_MODE and set its value to TRUE.
Note: By setting the flag to TRUE, PKIX path validation is applied to timestamp and CRL certificates as well as the signer's certificate.
4. Click on Save button
5. Restart ADSS Server core, Console and Service instances from Windows service panel or Unix daemon to have the changes take effect
See also