Microsoft Intune SCEP
In this section, learn about the end to end user flow for Microsoft Intune in ADSS Web RA through Citizen ID / email ID.
Microsoft Intune is a cloud-based endpoint management solution. It manages user access and simplifies application and device management across various devices, including mobile devices, desktop computers, and virtual endpoints. Microsoft Intune can help you keep your managed devices secure and up to date while helping you to protect your organization’s data from compromised devices.
Microsoft Intune SCEP
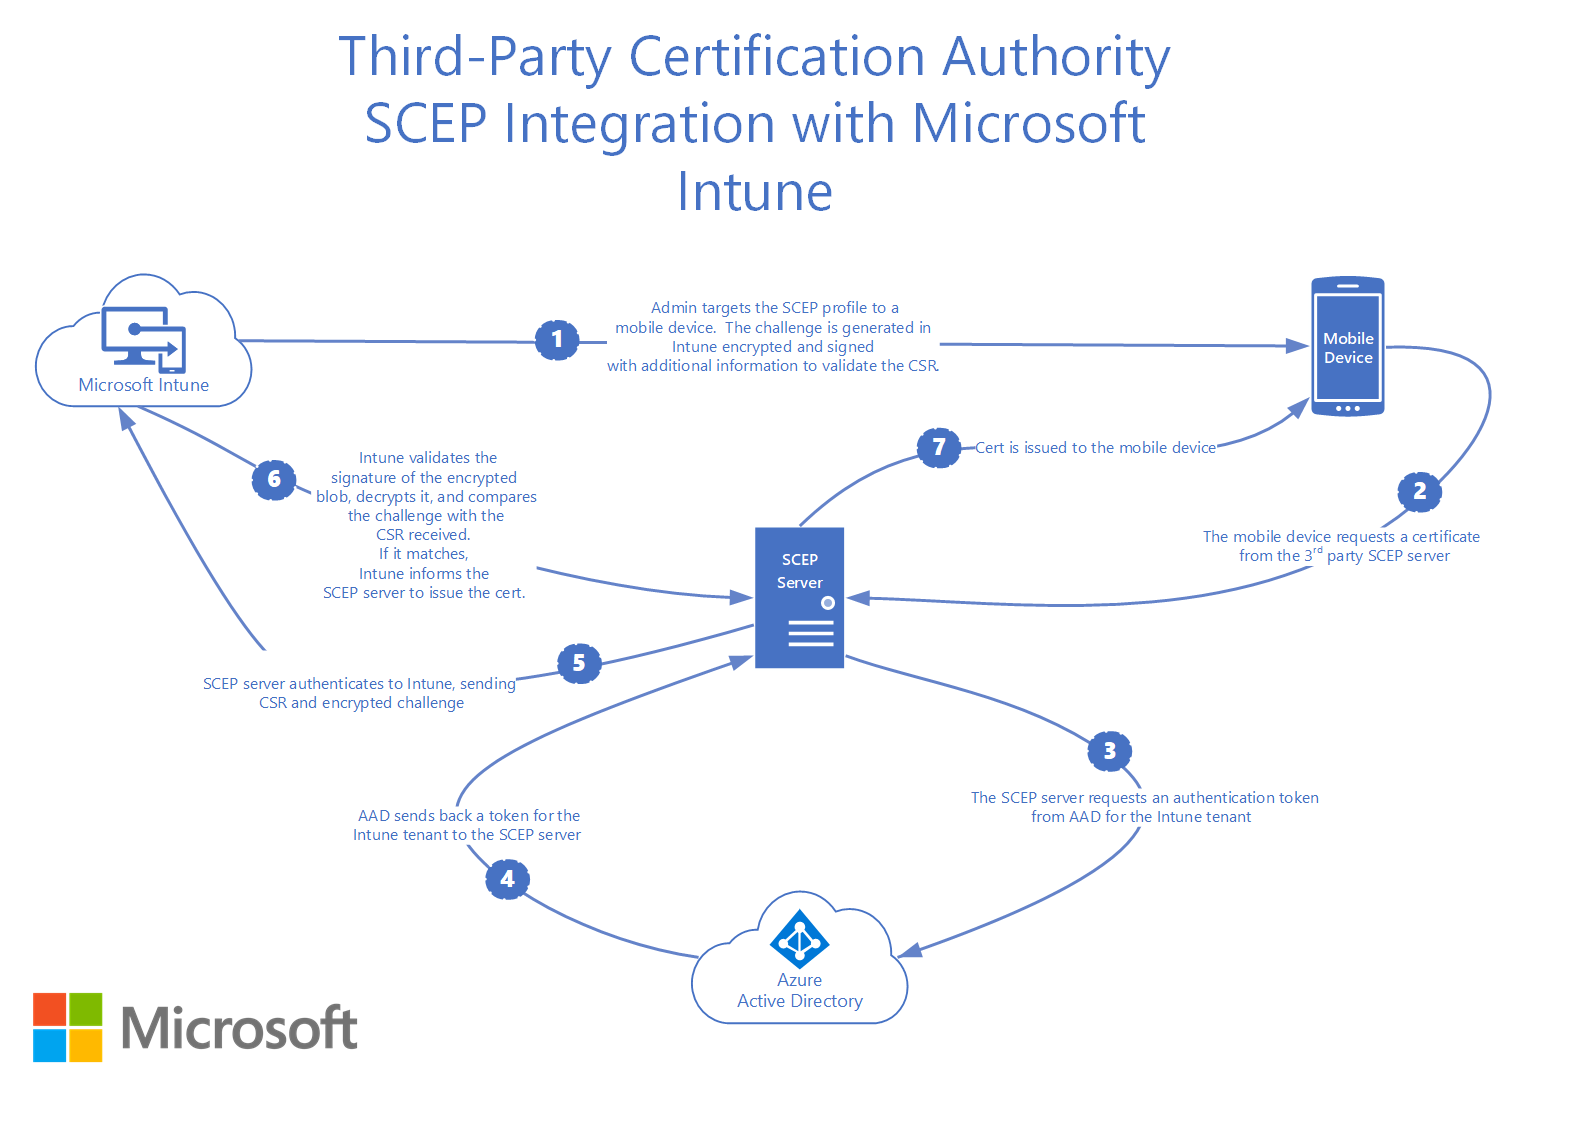
Intune enables the utilization of the Simple Certificate Enrollment Protocol (SCEP) for authenticating connections to both your applications and corporate resources. SCEP relies on the Certification Authority (CA) certificate to ensure the security of the communication when generating the Certificate Signing Request (CSR). If your infrastructure is compatible with SCEP, you can utilize Intune SCEP certificate profiles, which are a specific type of device profile within Intune, for distributing these certificates to your devices.
Deployment Pre-Requisites
The installation of ADSS Web RA Server to support Microsoft Intune SCEP requires the following pre-requisites to be met.
Installation of:
- ADSS Server installed with Root and Issuing CA pre-configured
- SMTP Server
- Microsoft Azure Active Directory
ADSS Server Pre-Requisites
Before you begin with Microsoft Intune setup, ADSS Server must be installed and configured. A Root and Issuing Certification Authority need to be created prior to installing the ADSS Web RA Server. The Issuing CA operator will need to create certification profiles required to issue certificates to Android, iOS and Windows platforms.
You are required to upload Root and Intermediate certificates, but if you do not have them, the steps below will guide to create certificates from ADSS Server to build a chain of trusted certificates, that will be required while creating configuration profiles in the Microsoft Intune admin center.
Generate a Key Pair from ADSS Server
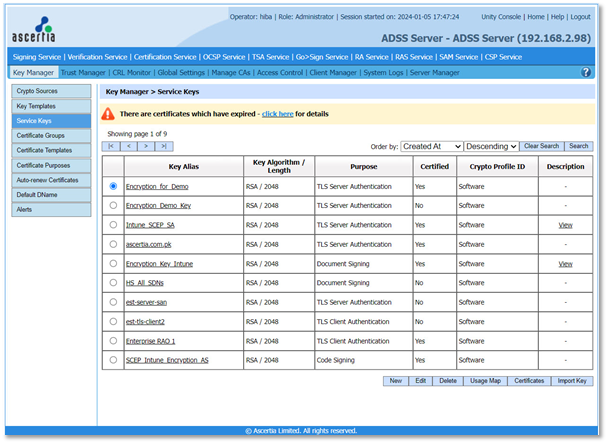
- Access the ADSS Server. From the main menu, click the Key Manager > Service Keys.
- To generate a new key press the New button in the main Service Keys page.
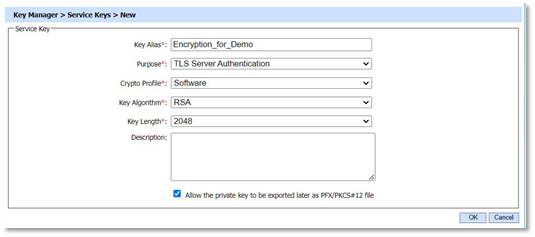
A form is presented. The ones with a red Asterisk are mandatory fields:
- Key Alias
Define a name for the new key e.g. Encryption_for_Demo.
- Purpose
Select the certificate purpose for this key pair e.g. TLS Server Authentication.
- Crypto Profile
Select where to generate and store this key e.g. Software.
- Key Algorithm
Select the key algorithm to be used e.g. RSA.
- Key Length
Select the key length to be used e.g. 2048.
- Description
Enter a description.
- Select Allow the private key to be exported later.
Then click OK.
Create a Certificate in ADSS Server
- Click on the key pair you created above, e.g. Encryption_for_Demo, then click Create CSR/Certificate.

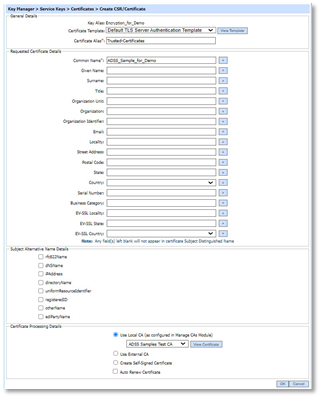
- In the General Details section: (The ones with a red steric are mandatory fields)
- Certificate Alias
Define a unique name for the certificate e.g. Trusted-Certificate.
- In the Requested Certificate Details section, enter the Subject Distinguished Name (SDNs):
- Common Name
Enter a common e.g. ADSS_Sample_Demo.
- The rest of the fields are optional include the Given Name, Surname, Title, Organization Unit, Organization, Organization Identifier, Email, Locality, Street Address, Postal Code, State, Country, Serial Number, Business Category.
To learn more about the description of these fields, you can refer to ADSS Server Admin Guide.
- The following fields appear under the Subject alternative Name Details. (These fields are not mandatory to be filled)
Rfc822Name, dNSName, iPAddress, directoryName, uniformResourceIdentified, registeredID, otherName, ediPartyName.
- In the Certificate Processing Details section
- Select Use Local CA (as configured in manage CAs Module)
From the drop down, select the certificate e.g. ADSS_Sample_for_Demo, and click OK.
In this case, Key Manager will automatically communicate with the ADSS Local CA and the certificate will be issued and imported within Key Manager without further manual intervention.
The certificate will be generated.
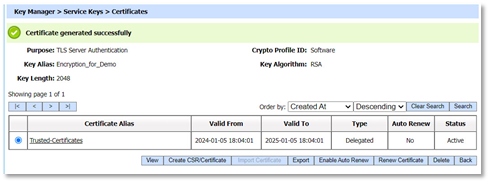
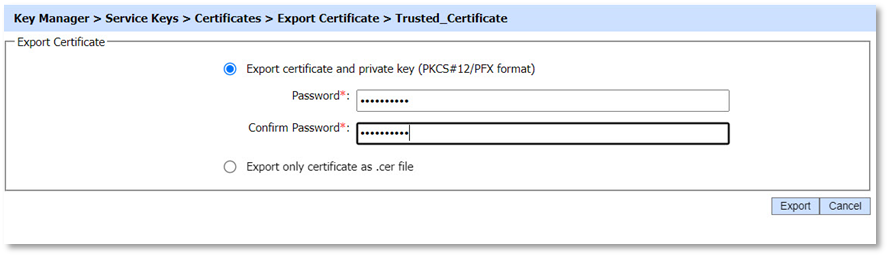
- To export a private key and its associated certificate, click the Export button in the Certificates screen. The following form is presented.
- You can choose to export certificate and private key, for which you will be required to enter a password to protect the keys. Then click Export.
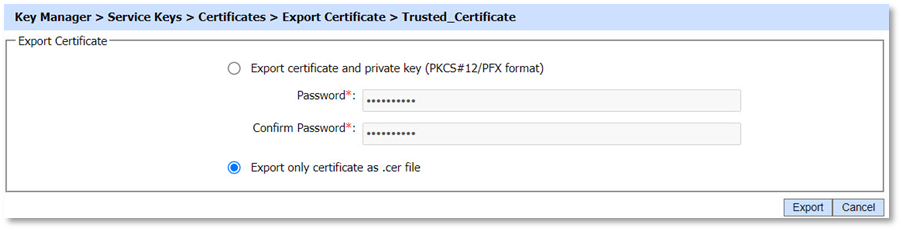
- You can export the certificate as a .CER file, and then click Export.
To build a trust on your deployment machine follow the steps below:
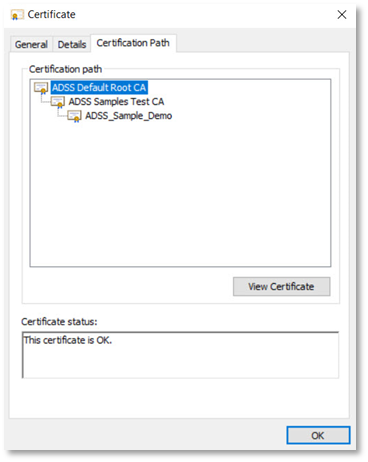
First, you will extract the chain of certificates (Root CA and Intermediate) from the certificate you created from the ADSS Server.
Extract the Root CA Certificate
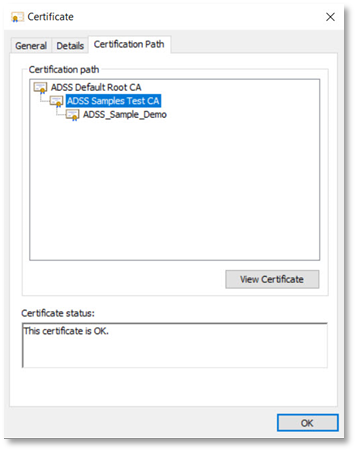
- Double-click on your certificate > Open file > Certification Path. Then click View Certificate against the ADSS Default Root CA.
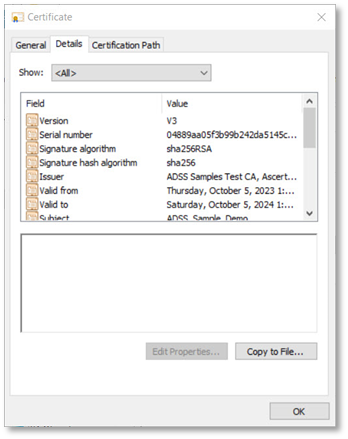
- From the Details tab click Copy to File…

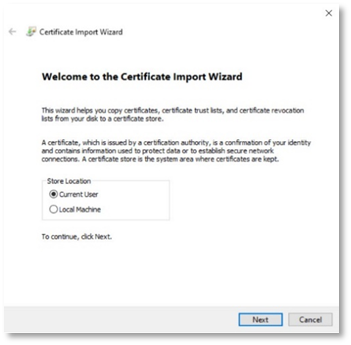
- On the Certificate Import Wizard, click Next.

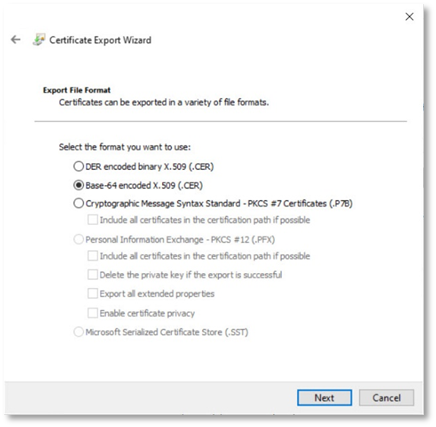
- Select the export file format as Base-64 encoded X.509 (.CER) and click Next.
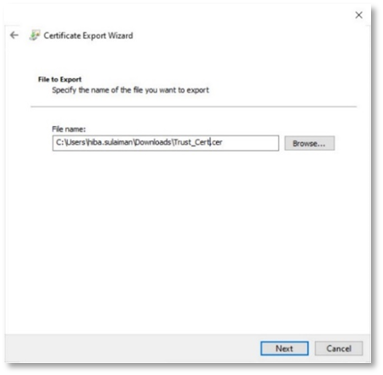
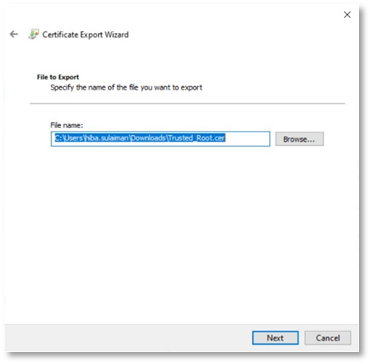
- In the next step, specify the name of the file you want to export e.g. Trust_Cert and click Next.
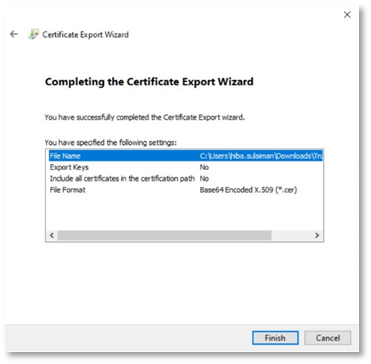
- Click Finish to complete the certificate export wizard.

Extract the Intermediate certificate
- In the next step, you will extract the intermediate certificate from the Trusted_Root. Double-click on your certificate > Open file > Certification Path. Then click View Certificate against the ADSS Samples Test CA.
- From the Details tab click Copy to File…
- On the Certificate Import Wizard, click Next.
- Select the export file format as Base-64 encoded X.509 (.CER) and click Next.

- In the next step, specify the name of the file you want to export e.g. Trust_Cert and click Next.
- Click Finish to complete the Certificate Export Wizard.
- Once your certificate is imported, the following screen will appear. Click OK.
You have successfully extracted the chain of certificates that will be required to get certificates trusted in the Microsoft Intune Admin Centre.
The next step is to download the certificates on your deployment machine:
- The certificate will be exported to your Downloads folder.
Right-click on your certificate e.g. Trusted_Certificate.cer, and click Install certificate. The Certificate Import Wizard will appear. Select the Current User and click Next.
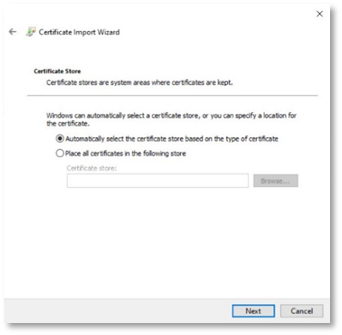
- The Certificate Store screen will appear, choose your destination folder, or select automatically select the certificate store based on the type of certificate, and click Next.
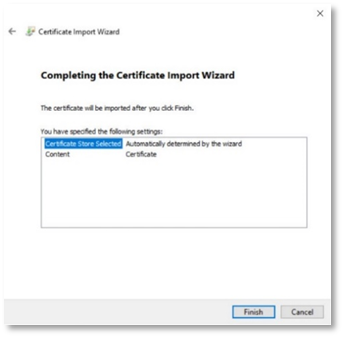
- To complete the Certificate Import Wizard, click Finish.
- Once your certificate is imported, the following screen will appear. Click OK.
You have successfully downloaded the certificate on your machine.
ADSS Web RA Server Pre-Requisites
Before configuring ADSS Web RA Server for Microsoft Intune, you will need the following:
- Root CA Certificate from ADSS Server.
- Certificate Templates, ADSS Certificate Profiles, Client ID and Secret from ADSS Server.
- Microsoft Certificate Templates to map to ADSS Server Certificate Templates.
- Microsoft Azure Active Directory.
Installing ADSS Web RA Server
ADSS Web RA Server should be installed by following the installation steps defined within the product installation guide.
- IIS 10+ required features.
- ASP.NET Core Runtime 7.0.0 or above
- IIS URL Rewrite Module.
ADSS Web RA Installation
The Microsoft Intune SCEP feature will only be available when the administrator installs the latest ADSS Web RA Server package from the installer.
- Extract the ADSS Web RA Server installation package to the following path:
C:\ascertia\WebRA-v2.9-Win64-11Sep2023
- Using Windows Explorer, navigate to C:\ascertia\WebRA-v2.9-Win64-11Sep2023\setup, double click install.bat
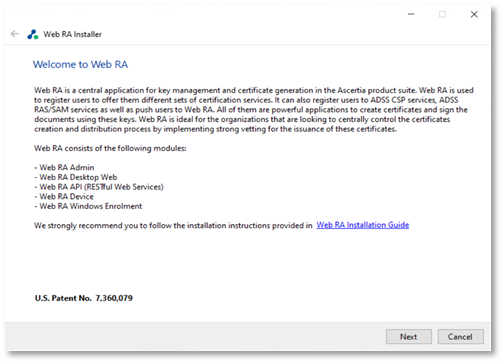
- The Web RA installer will launch, at the Welcome dialog, click Next.
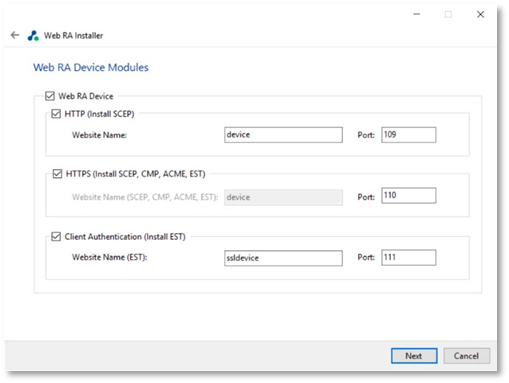
- The Web RA Device Modules dialog will display, Select the Web RA Device checkbox. Click Next. For each selected application, provide the web application name and port. Click Next to proceed.
Please refer to the ADSS Web RA installation guide for detailed steps for the installation process.
ADSS Web RA Server Integration with Microsoft Intune
Before configuring the Microsoft Intune SCEP feature, the following pre-requisites from the ADSS Web RA Server are necessary:
- External connectors for:
- ADSS Server
- SMTP Server
- Microsoft Azure Active Directory
- Certification Profiles created for ADSS Server and Web RA.
- Create a service plan.
- Create an enterprise.
- Import a license and allocate certificate quantities to the test enterprise.
- Create a default role with Microsoft Intune SCEP profile.
- Share certificate using the SDNs filter in the specific role.
- Set SCEP protocol in the enrolment protocol (s) section.
This part of the document describes the configurations in the ADSS Web RA Server as a third-party SCEP enrolment server for Microsoft Intune certificate enrolment.
Before you begin, you need to ensure that you have the following items:
- Microsoft Authenticator on your mobile device.
- Intune Company Portal app on your Android mobile device.
- Intune Company Portal app on your iOS mobile device.
ADSS Web RA Admin Portal
Following the installation of ADSS Web RA Server, the Intune SCEP feature must be enabled for any role who will need access to this feature. Use the following process to enable Microsoft Intune SCEP for the desired role.
Access Control
The default role i.e. Administrator, installed with ADSS Web RA Server has access to the Microsoft Intune SCEP feature. Apart from the administrator, other operators need to be enable it to configure the product.
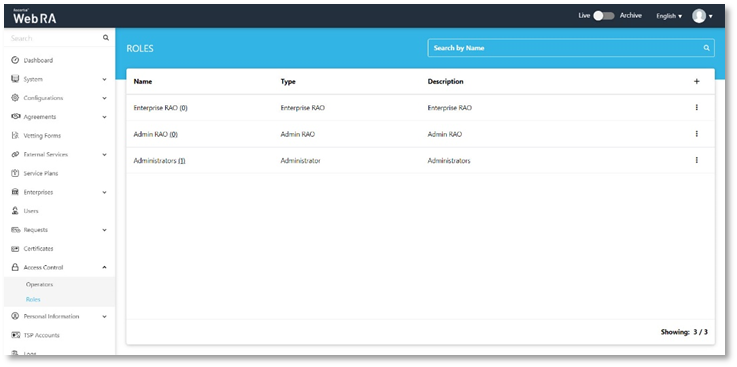
- Access ADSS Web RA administration portal as an administrator with permissions to assign the Microsoft Intune SCEP settings to roles.
Navigate to Access Control > Roles > ![]() > Edit.
> Edit.
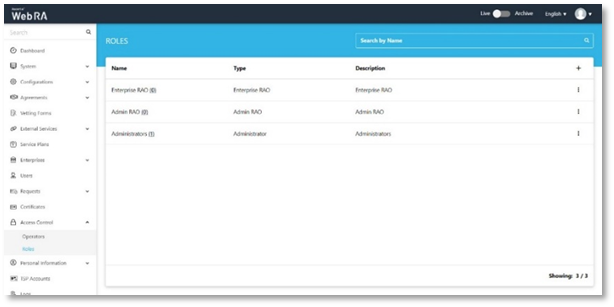
Select Microsoft Intune SCEP check box from the Configurations, select Microsoft Intune SCEP under the Enterprise section and then click Save.
Configurations
You will be required to enable Intune SCEP in the configurations. Use the following process to enable SCEP for Microsoft Intune Certificate Enrolment.
Access Web RA administration portal as an administrator to enable Microsoft Intune SCEP feature.
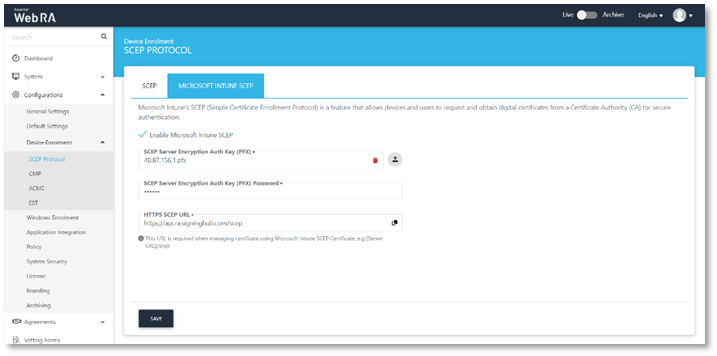
- Navigate to Configurations > Enrolment Protocol(s) > SCEP > Microsoft Intune SCEP.
- Select the Enable Microsoft Intune SCEP checkbox.
- Upload a SCEP Server Encryption Auth Key (PFX)
- Enter the SCEP Server Encryption Auth Key (PFX) Password.
- Add the HTTPS SCEP URL that the devices will use to communicate with ADSS Web RA and click Save. (Make sure you upload PFX and chain of the same Root & Intermediate certificates that you will be using in ADSS Web RA and in Microsoft Intune).
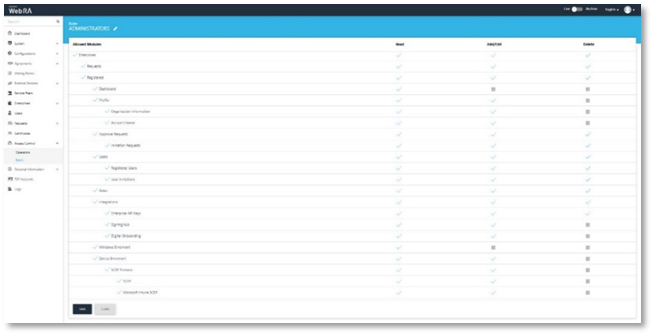
Assign Modules to Administrators
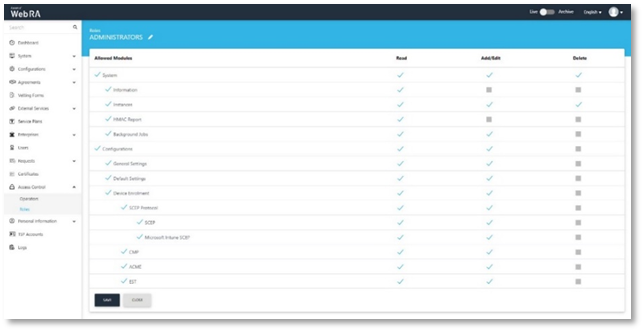
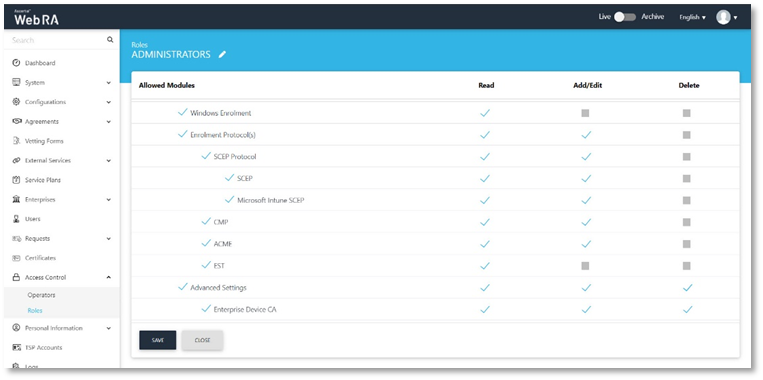
- Expand Access Control > Roles.
- Click
 against the administrator role.
- In the Allowed Modules section, select the Enrolment Protocol (s) to enable SCEP and Microsoft Intune SCEP.

- Scroll down, and from the Enterprise Role section
Select Enrolment Protocol (s) to enable and select SCEP Protocol, SCEP and Microsoft Intune SCEP. Then click Save.
Create Azure Active Directory Connector
In order to create a certificate, ADSS Web RA Server requires an Azure Active Directory connector. This section provides the configuration steps to create this connector.
- Expand External Services > Connectors > click +
- The basic information page will display, Enter a name and select Azure Active Directory from the provider drop-down, tick the Active check box, click >.

- The Details page will display, enter the Client ID, Client Secret, Account Type and Tenant ID. Then click Create.
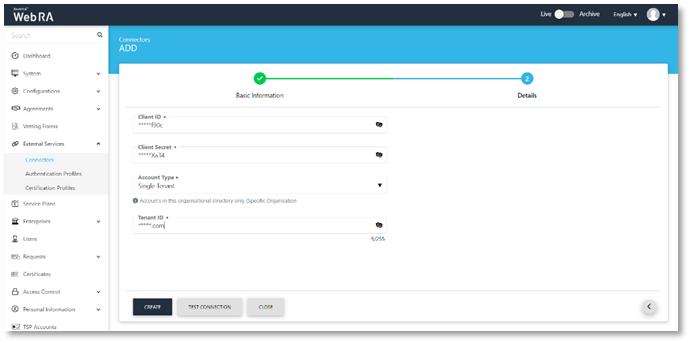
You are required to register an application in the Azure AD portal to get the client ID, client secret and tenant ID.
In order to enable a third-party SCEP server to perform customized challenge validation through Microsoft Intune, create an application in Azure AD. This application grants Intune the necessary privileges to authenticate SCEP requests.
Sign up for Microsoft Intune
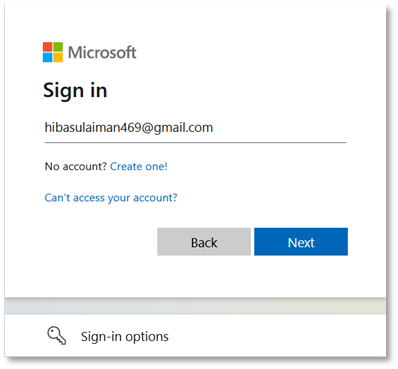
- To sign up Microsoft Intune, click Dashboard - Microsoft 365 Dev Center
Enter an active email address (preferably a Gmail account), and then click Next.
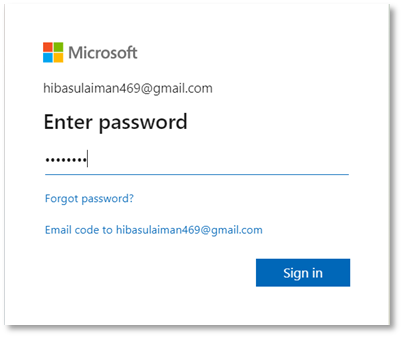
- Enter password, and then click Sign in.
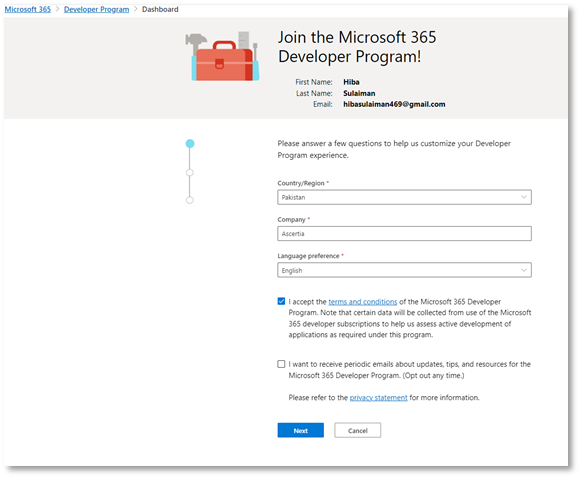
- Enter the following:
- Country Name
- Company
- Language preferences
- Select I accept the terms and conditions…
Click Next.
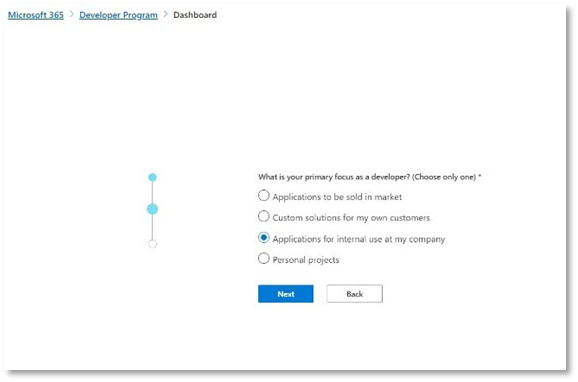
- Choose an option depending on your requirement.
In this scenario, we have selected Applications for internal use at my company. Then click Next.
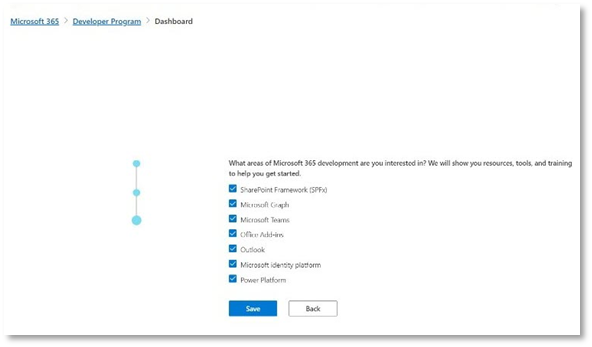
- On the next screen, make sure you select all the tools and resources as displayed below. Selecting all options is necessary as all Microsoft tools are interconnected and are required for Microsoft Intune, and click Save.
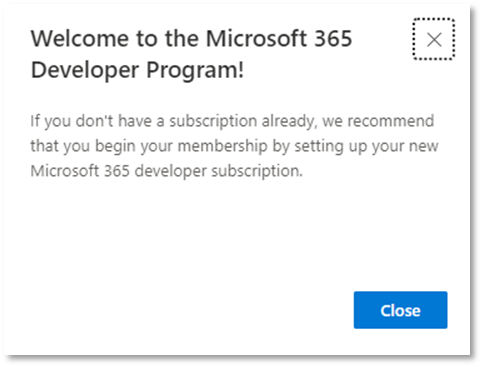
- The Welcome screen will appear, click Close.
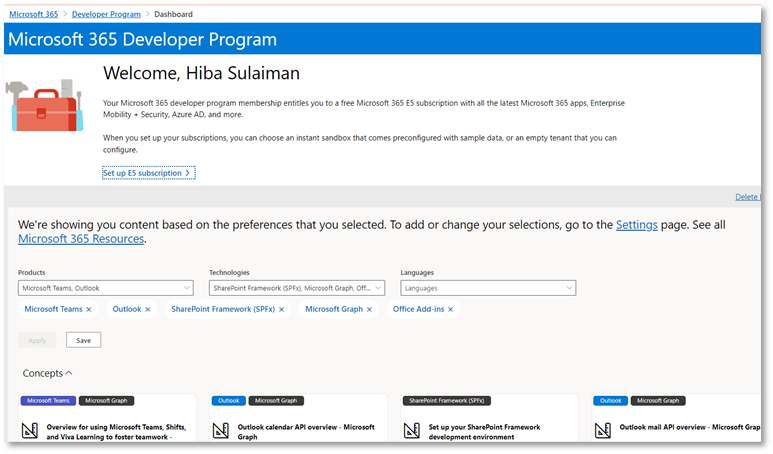
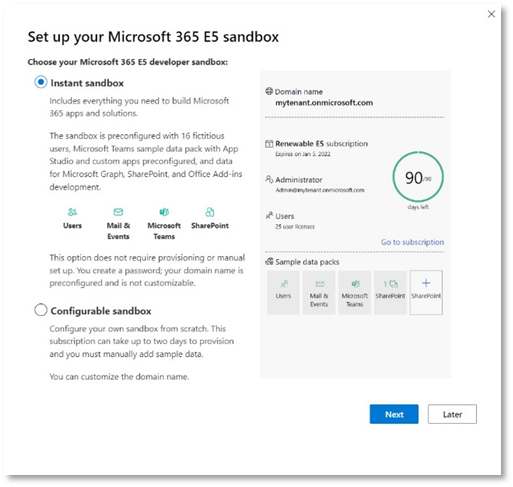
- From the Welcome screen, click Set up E5 subscription.
- Select the Instant sandbox option and click Next to proceed.
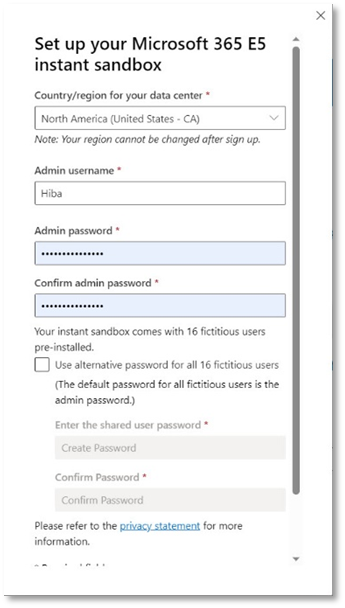
- Select and fill the following:
- Country
- Set up your user name
- Set up your password, and then click Next.
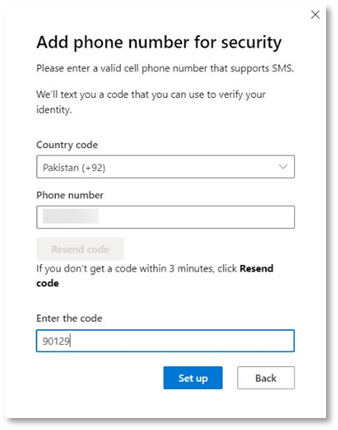
- Add the following:
- Country Code
- Phone Number
- Click Send Code.
Once you receive the code on your mobile number, enter it and click Set up.
- You will be redirected to the Microsoft 365 developer subscriptions page with your domain name e.g. 5xr6vp.onmicrosoft.com and the administrator e.g. HA@5xr6vp.onmicrosoft.com.
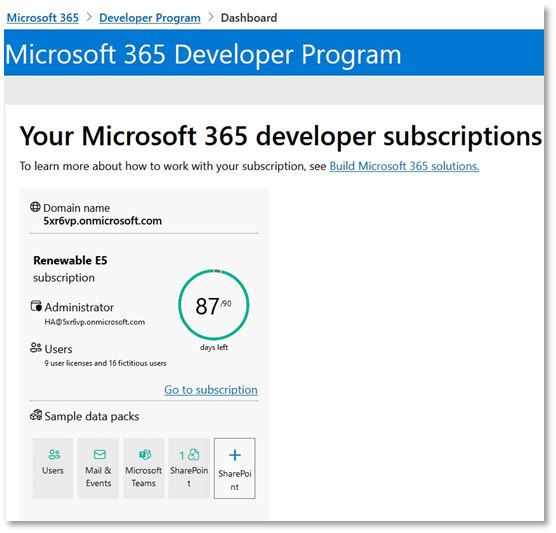
- If this page does not appear, refresh the Dashboard page, it will appear.
You have successfully completed the registration process for Microsoft Intune.
Create an application in Microsoft Azure Active Directory
- Log in to the Azure Portal by following this link https://portal.azure.com/. You will be required to sign in with a Microsoft account to login. Use the same email address you used to sign up for Microsoft Intune in step 5.1.5. Enter email address, and then click Next.
- Enter the password, and click Sign in.

You will be directed to the Home page.
- Search and click App Registrations in the Search Bar.
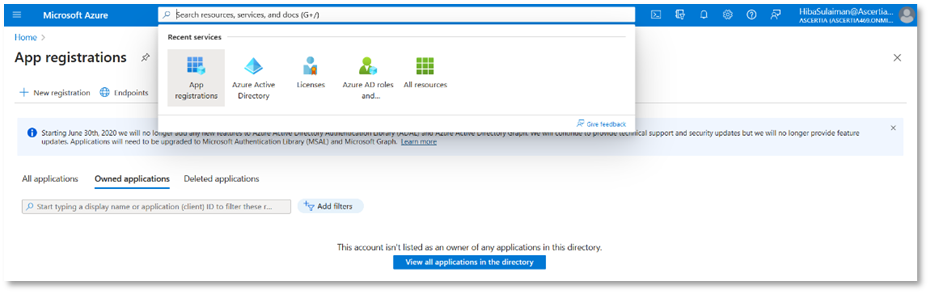
- Click New registration.

- On the Register an Application, fill in the required fields:
- Set a Name of the application, e.g. SCEP_HS.
- In Supported account types, select Accounts in this organizational directory only.
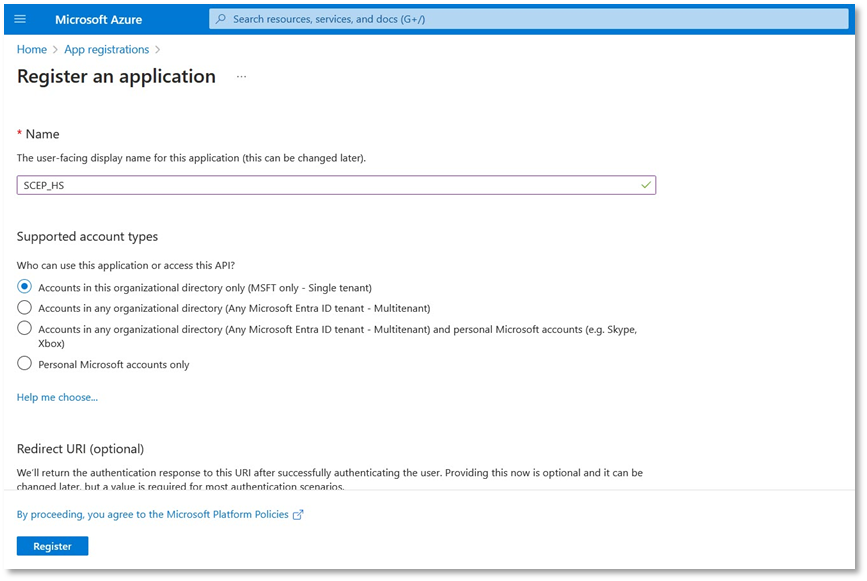
- Click Register to create the application.
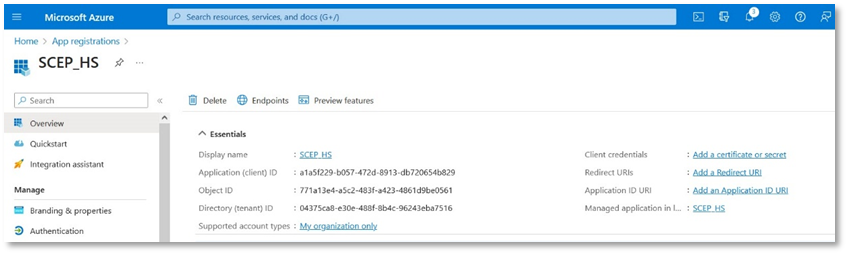
The details of the registered app will appear. Save the Application (client) ID as you will need it later while creating a connector in ADSS Web RA.
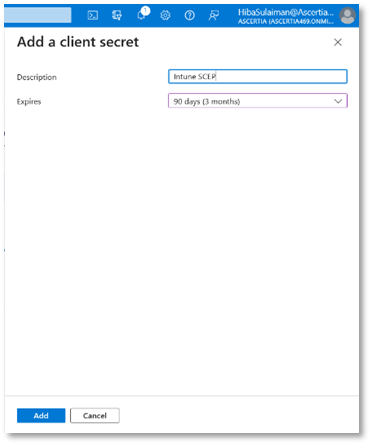
- Click Add a certificate or secret on right side against client credentials. The following screen will appear. Click New client secret.

- Specify the following:
- Description, e.g. Intune SCEP
- Select an expiry, e.g. 90 days (3 months)
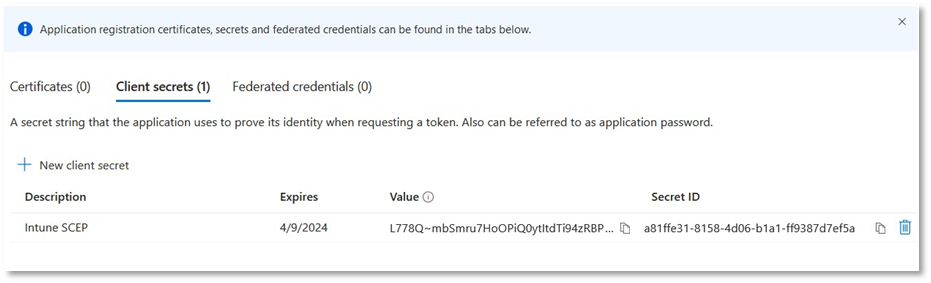
Then click Add to generate a value for the client secret.
- Save the new client secret value as it is known as the Client Secret, required in the ADSS Web RA’s connector.
- From the left pane under Manage, select API permissions
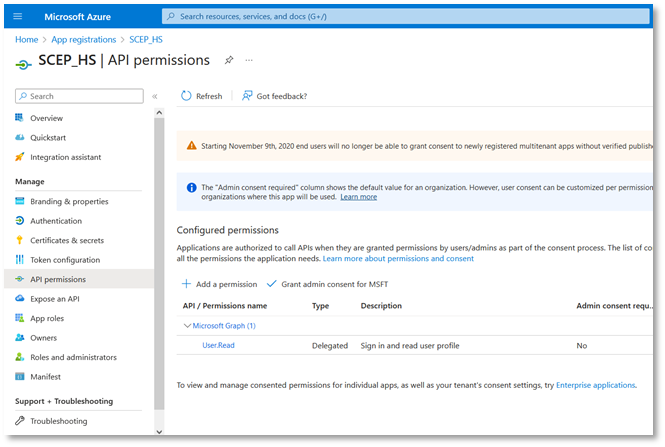
Then perform the following steps to add two separate API permissions:
- Click Add a permission.
- On the Request API permissions page, select Intune, and then click Application permissions.
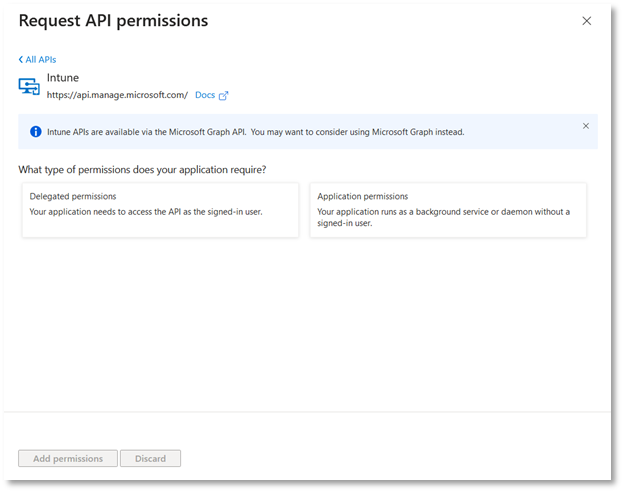
- Select the permission scep_challenge_provider (SCEP challenge validation), and then click Add permissions to save the configuration.

- Click Add a permission, again.
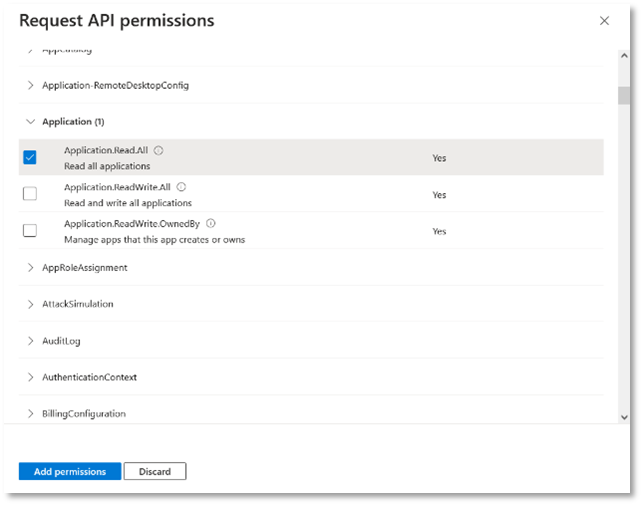
- On the Request API permissions page, select Microsoft Graph > Application permissions.
- Expand Application and select Application.Read.All (Read all applications), and click Add permissions to save the configuration.
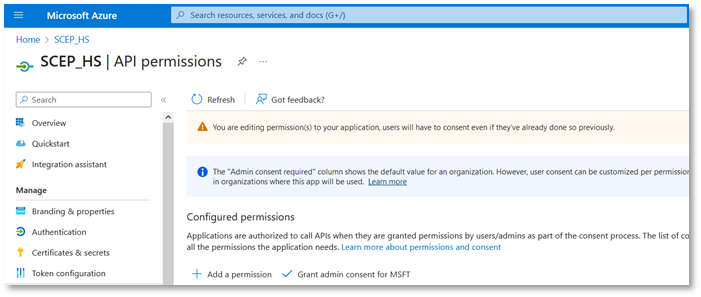
- On the API permissions page under the Configured permissions, click Grant admin consent for <Tenant name>, e.g: Grant admin consent for MSFT.
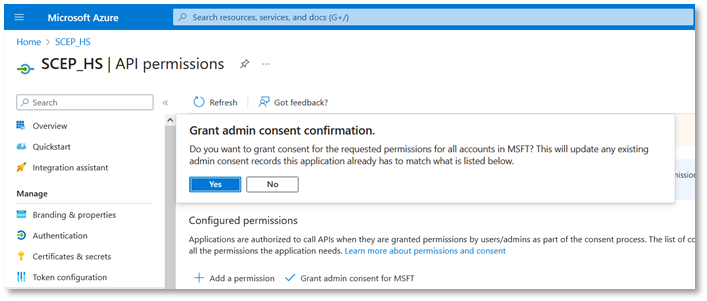
- Then click Yes when the grant consent confirmation appears.
The success message will appear.
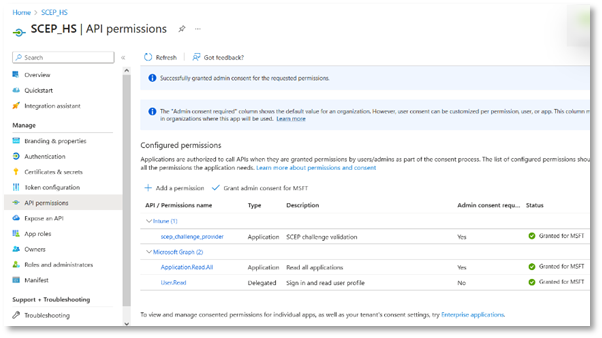
We can configure Microsoft Intune for the following platforms:
- Windows 10
- Android
- iOS
Azure AD connector
Now return to ADSS Web RA admin portal to complete the process of creating an Azure AD connector. Once you have created an application in the Azure AD in step 5.1.4 point 3, enter the client ID, client secret and tenant ID (from the app created in the Azure Portal) in the connector as displayed below and click Create.

Create ADSS Server Connector
ADSS Web RA Server issues certificates from ADSS Server based Certification Authorities. This section provides steps to create the connector between Web RA Server and the ADSS Server Certification Service.
- Expand External Services > Connectors > click +.
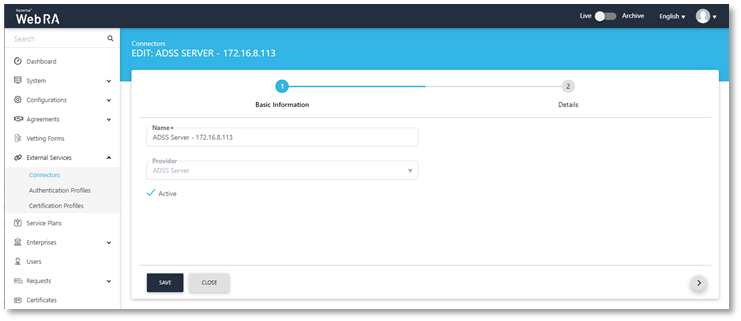
- The Basic information page will display, enter a name and select ADSS Server as the provider, select the Active check box, click >.
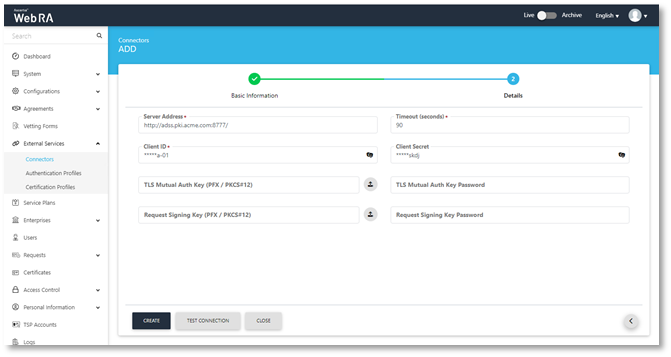
- The Details page will display, provide the following information, click Create.
- Server Address
Specify the address and port number of ADSS Server.
- ADSS Client ID
Specify the ADSS Client ID configured in the Client Manager module of the ADSS Server for this connector.
- ADSS Client Secret
Specify the ADSS client secret generated in the ADSS Server against this Client ID.
Create a Certification Profile
Azure Active Directory and ADSS Server maintain certificate templates that are used to generate keys and certificates for people, devices and applications. ADSS Web RA Server requires a certification profile for each type of certificate. It will be issuing using the Microsoft Intune SCEP feature, the following section provides steps on how to create a certification profile that maps a Microsoft Intune SCEP Certificate Template to an ADSS Server Certification profile and template to ensure that certificates are issued with the correct attributes, extensions, and validity periods.
The following is an example of creating a profile to support TLS User Authentication.
- Expand External Services > Certification Profiles > click +.
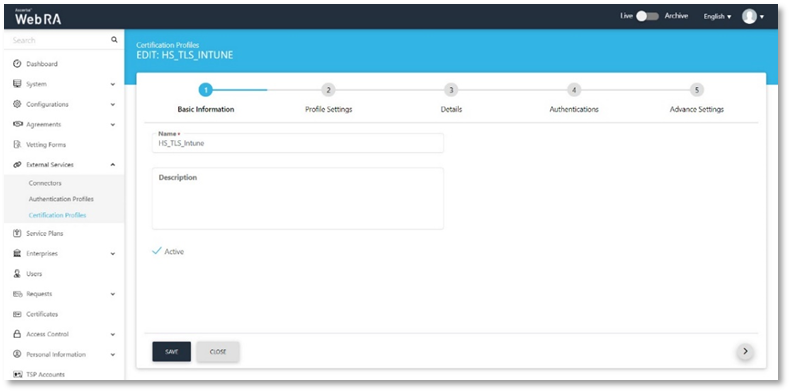
- The Basic information page will display, enter name, select the Active check box, click >.
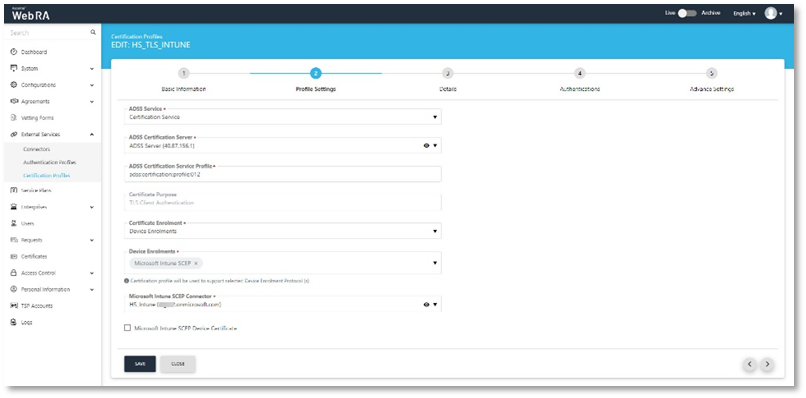
- The Profile Settings page will display, set the following, click >:
|
ADSS Service |
Certification Service |
|
ADSS Certification Server |
Set the ADSS Server connector configured in step 5.1.6. |
|
ADSS Certification Service Profile |
Set the ADSS Server Certification Service Profile Name e.g. Windows TLS User - 1 Year |
|
Certificate Purpose |
This is auto set by ADSS Server |
|
Certificate Enrolment |
Select Enrolment Protocol(s) |
|
Enrolment Protocol(s) |
Select the SCEP, and Microsoft Intune SCEP protocols |
|
Microsoft Intune SCEP connector |
Set to the Azure Active Directory Connector created in step 5.1.4. |
|
Microsoft Intune SCEP Device Certificate |
Select this checkbox if you want to create a device certificate |
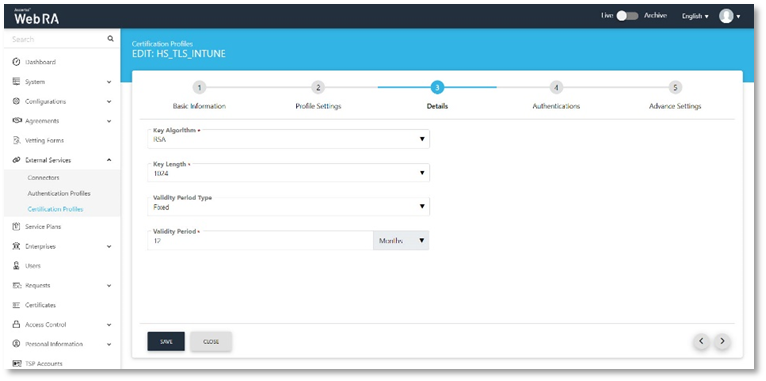
- The Details page will display, these values are only editable if the ADSS Server Certification Profile Allows, if editable set the following, click >:
- Key Algorithm
Key Algorithm that will be used to generate the key pair in the smart card/token. This configuration is coming from the ADSS Server so it cannot be changed.
- Key Length
Key Length that will be used to generate the key pair in the smart card/token. This configuration is coming from the ADSS Server so it cannot be changed.
- Validity Period Type
- Validity period type can be configured as a Fixed to restrict the enterprise user to change the certificate validity or it can be set as Custom if enterprise RAO allow an enterprise user to set validity period while creating a certificate request.
- These Fixed and Custom values can only be used on ADSS Web RA admin, if the selected ADSS Certification profile has set over ridable option in certification profile. It will be shown as fixed validity period type otherwise.
- Validity Period
Set the certificate validity period.
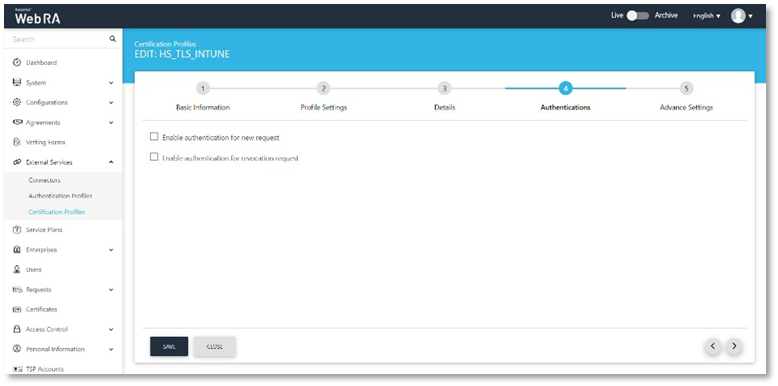
- The Authentications page will display. Accept the details, click >
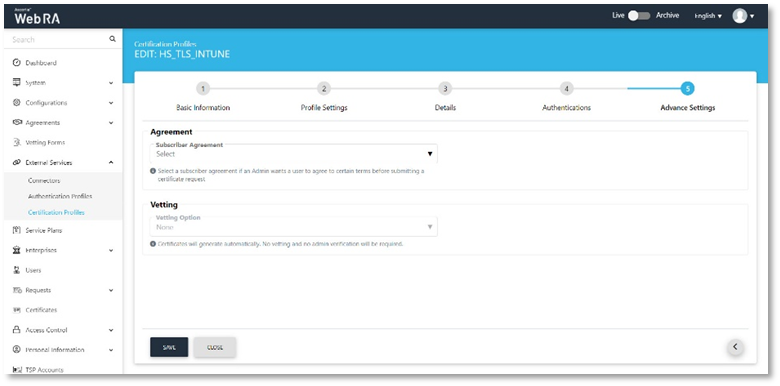
- The Advance Settings page will display, accept the default, click Create.
- Repeat this process for any other certificate templates that are required.
Configure a Service Plan
ADSS Web RA Server uses service plans to govern which services and features are available to a given enterprise. This section provides example steps on how to create a basic service plan that will enable the issuance of certificates for Microsoft Intune SCEP. For a detailed reference on service plan settings, please refer to the ADSS Web RA Server product documentation.
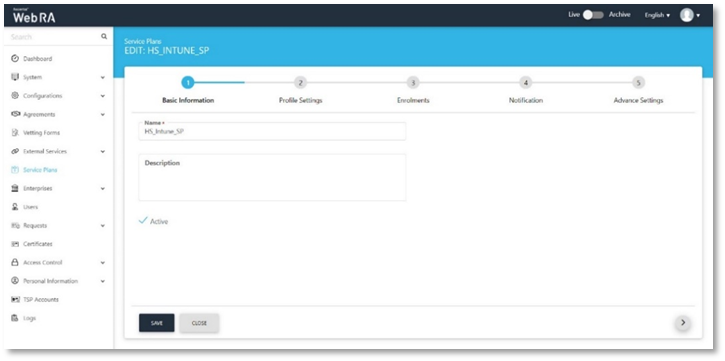
- Expand Service Plans click +
- The Basic Information page will display, enter a name, select the Active check box, and click >.
- The Profile Settings page will display. Click the Profile to create certificates for Intune SCEP and select the profile created in step 5.1.7, repeat for Profile to create certificates for SCEP , click >.
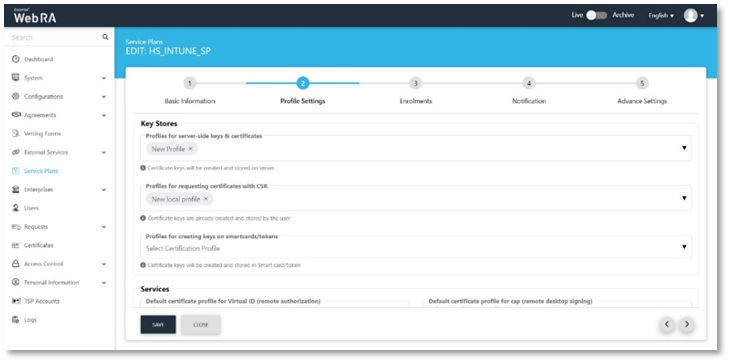
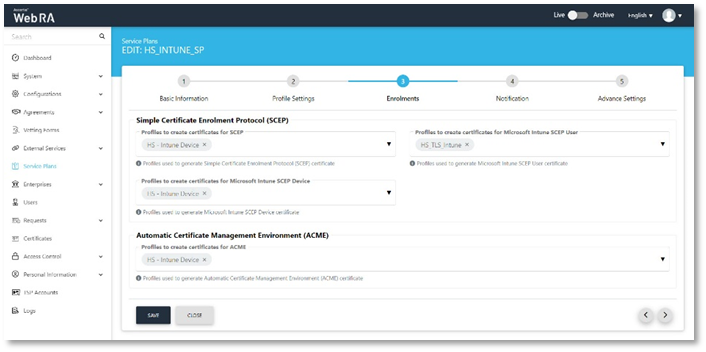
- The Enrolments page will display.
- This page consists of the different protocols that ADSS Web RA supports. Under the Simple Certificate Enrolment Protocol (SCEP) section, there are three types of profiles:
|
Profile to create certificates for SCEP |
Configure this profile for SCEP certificates |
|
Profile to create certificates for Microsoft Intune SCEP User |
Configure this profile for user-based certificates |
|
Profile to create certificates for Microsoft Intune SCEP Device |
Configure this profile for device-based certificates |
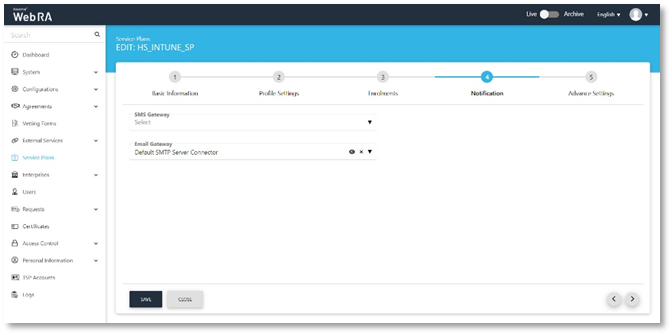
- Notifications page will display, enable the notification providers you require for user notifications to be sent, click >.
|
SMS Gateway |
SMS Gateway connector to receive OTP via SMS. |
|
Email Gateway |
SMTP connector to receive email notifications. |
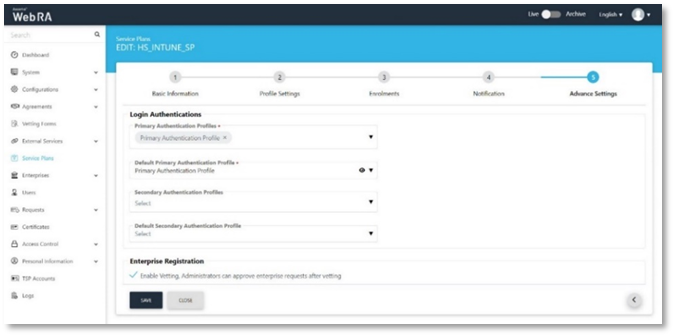
- The Advance Settings page will display, ADSS Web RA Server provides primary and secondary authentication profiles. “Primary Authentication Profiles” are used to control how a user authenticates to Web RA to access the user portal. “Secondary Authentication Profiles” are used when an enterprise wishes to use an additional separate authentication mechanism to authorise an action, such as certificate rekey or revocation.
Create an Enterprise
ADSS Web RA Server is a multi-tenanted product that enables different organisations or different departments to be created, each have their own administrative users that can create and manage user invites, and user and device certificates. This section provides steps to create an enterprise that will be used to issue and manager digital certificates for Microsoft Intune SCEP.
- Access Web RA administration as an administrator with permissions to create enterprises, navigate to Enterprises > Requests click on +.
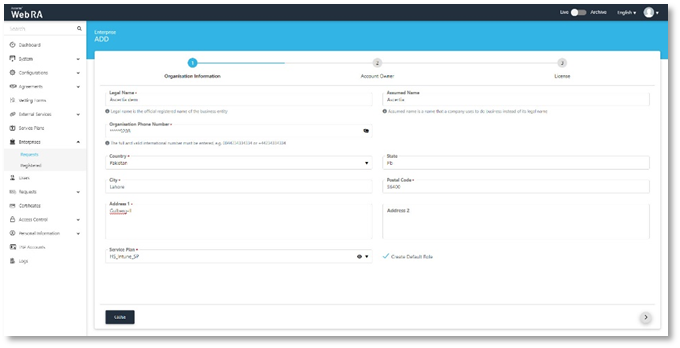
- The Organisation Information page will display, provide the following information, click >.
- Legal Name
Legal Name is the official name of the organisation under which the organization is registered with the government and it is the name that is used when submitting tax to the government e.g. Ascertia Limited.
- Assumed Name
Assumed Name could be the short hand name of the organisation that is commonly used e.g. Ascertia.
- Organisation Phone Number
Official phone number of the organisation that is registered in the government documents.
- Address
Complete address of the organisation as it was provided to government at the time of company registration.
The following fields should be filled as part of Address:
- Country
- State
- City
- Postal Code
- Address 1
- Address 2
- Service Plan
Select a service plan for this enterprise that you created for Microsoft Intune SCEP.
- Create Default Role
Tick this checkbox to create a default role while creating a new enterprise.
- The Account Owner page will display, enter the following information, click >
- Name
Name of the enterprise owner. It could be any representative of the organisation but ideally, it should be the CEO. The enterprise owner should initiate any change requested in the enterprise.
Email address of the enterprise owner. An email will be sent to this email address to create an account on the ADSS Web RA Web.
- Mobile Number
Mobile number of the enterprise owner to send the OTP code if enabled in the profile.
- Job Title
The role of the enterprise owner in his organisation.

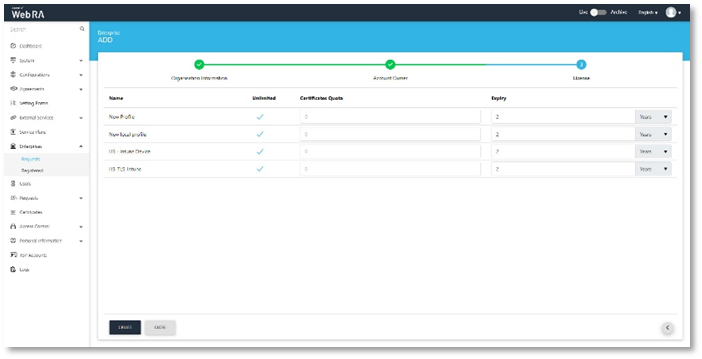
- The License page will display, enter the certificate quota and expiry for the Enterprise, click create.
- Name
Name of the certification profile for which an enterprise wants to use ADSS Web RA to create certificates.
- Unlimited
A check box can be used to allow a user to create unlimited certificates. This field will appear only if a user is allowed to create unlimited certificates.
- Certificates Quota
This defines the total number of certificates an enterprise is allowed to generate from ADSS Web RA against each certification profile.
- Expiry
This defines the duration for which these certificates are valid.
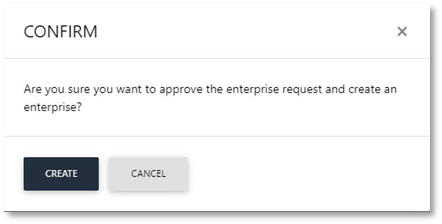
- A confirmation dialog will display, click Yes to create the enterprise.
- Click Registered from the left menu, your new enterprise will appear.
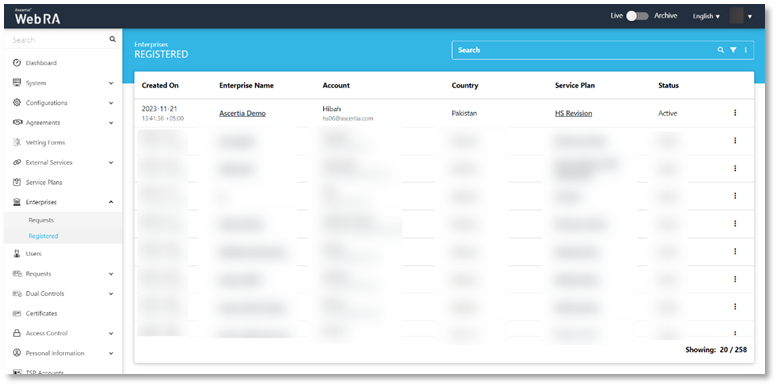
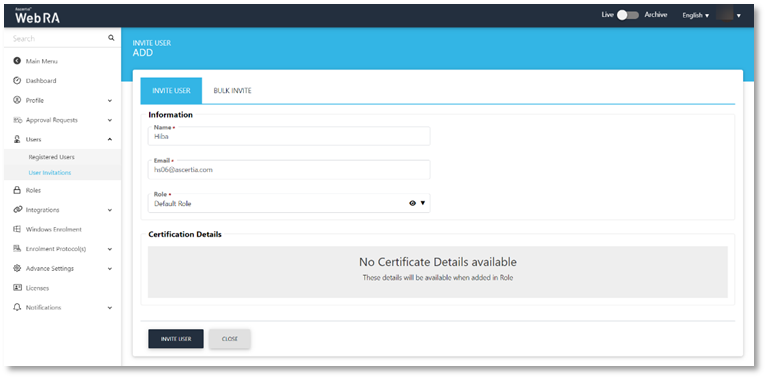
- Click on the enterprise name, you will be directed to the enterprise management screen. Expand Users > User Invitations.
Information
- Name
Enter name of the user you wish to invite to the enterprise.
Enter email of the user you wish to invite to the enterprise.
- Role
Select a role for the user.
Click Invite User.
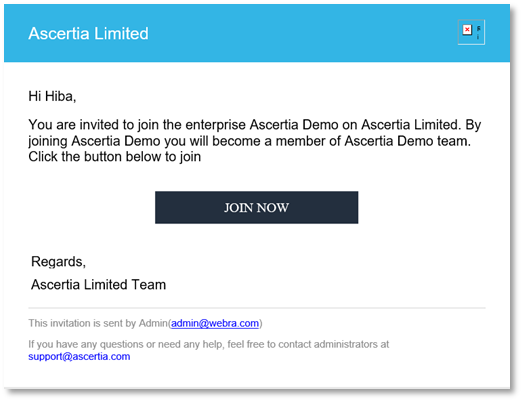
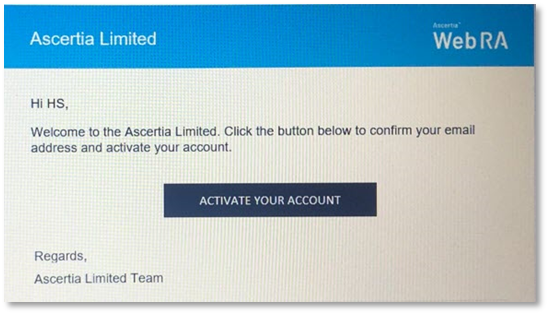
- An email will be sent to the user on the above configured email address. (As displayed below) Click Join Now.
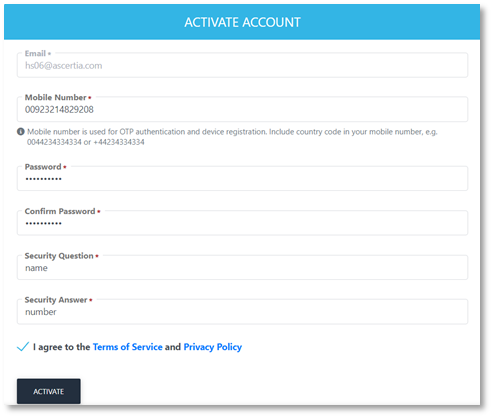
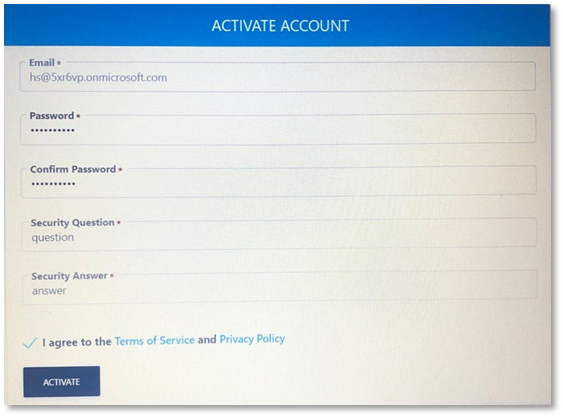
- The user will be redirected to the ADSS Web RA web portal’s account activation screen. Enter the details:
Email of the user to register on the Web portal.
- Mobile Number
Mobile number of the user.
- Password
Set a password for the login email.
- Confirm Password
Confirm password for the login email.
- Security Question
Set a security question for password recovery
- Security Answer
- Set a security answer for password recovery
Select I agree to the Terms of Service and Privacy Policy.
Click Activate.
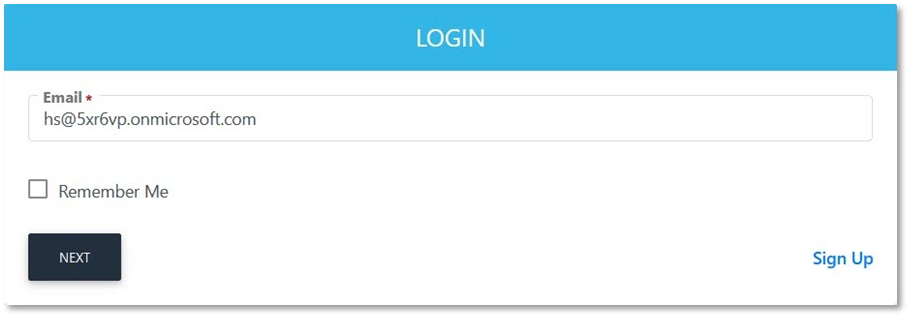
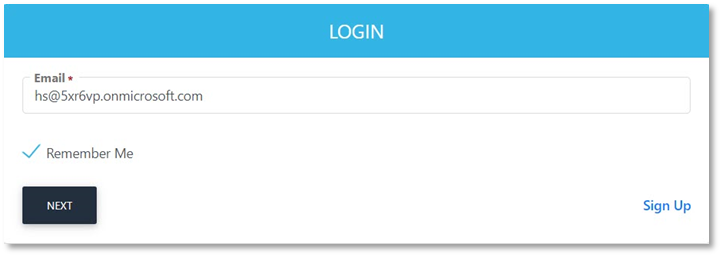
- The user will now be directed to the Login screen, enter the user email and click Next.
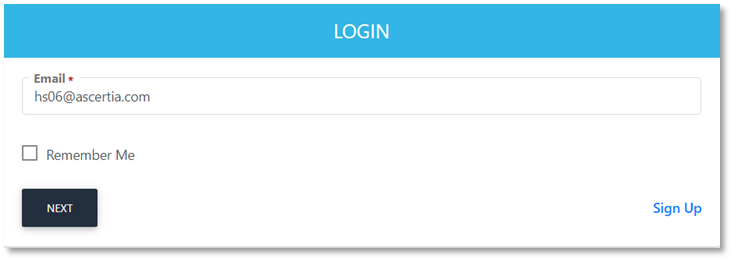
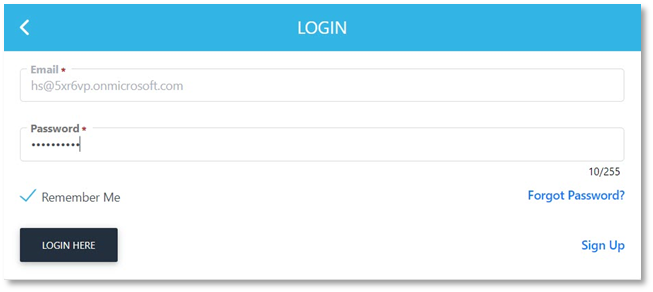
- Enter the password and click Login Here.
- The user will be logged in to the ADSS Web RA web portal. Expand Microsoft Intune SCEP > Settings to generate the SCEP Profile URL that will be required while creating SCEP profile in Microsoft Intune.
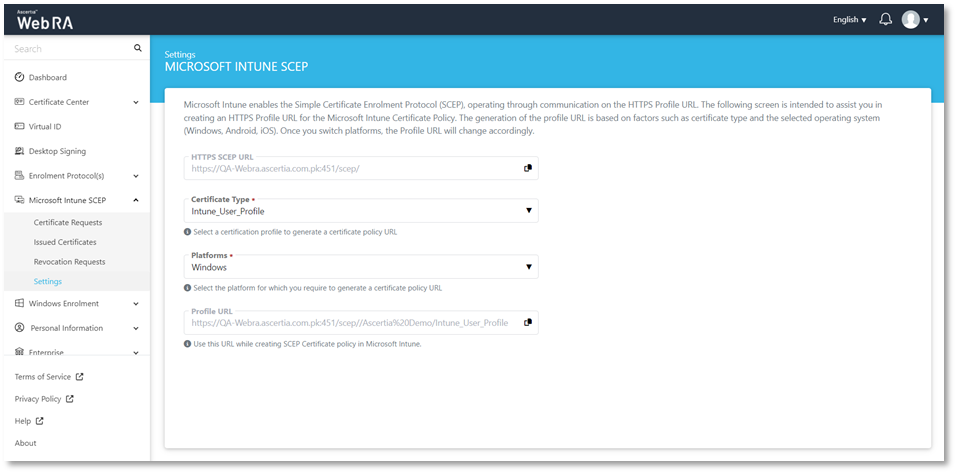
- Certificate Type
Select the certificate profile to generate a certificate policy URL, i.e. user, user device, or device.
- Platforms
Select the platform for which you require to generate a certificate policy URL i.e. Android, iOS or Windows.
- Profile URL
Once you select the certificate type and platform, a URL will be generated. You will be required to use this URL while creating SCEP certificate policy in Microsoft Intune.
Edit the Enterprise Default Role
Microsoft Intune users are automatically registered in the default enterprise role during the auto-enrolment of certificates. This section includes the steps to control which certificates will be displayed to a user in the ADSS Web RA Server User Portal.
- Access ADSS Web RA administration as an administrator with permissions to edit roles, expand Enterprises > Registered > select the Enterprise Name > Manage> Roles > click the
 to edit the Default Role > Enrolments.
 - Select the Enrolment Protocol (s) check box and select the certificate profiles from the various enrolment protocol (s) available.
- Click Save when complete.
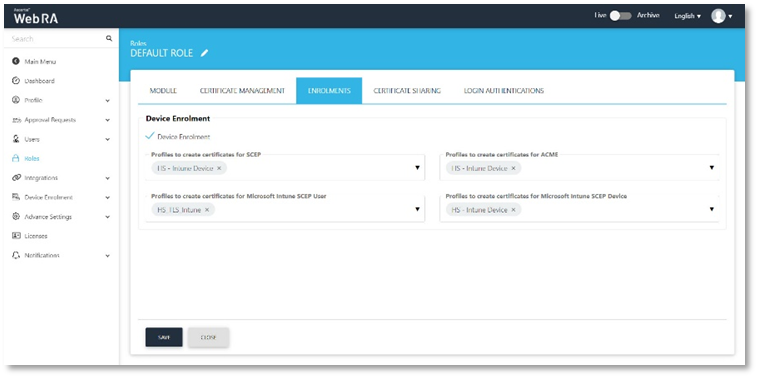
Users can access ADSS Web RA admin to manage certificates issued to them by the Intune SCEP enrolment process. The Profiles to create certificates for SCEP drop-down enables Web RA Administrators to define which user profiles a user can access via the Web RA user portal. The Profile to create certificates for ACME drop-down enables Web RA Administrators to define which SCEP profiles a user can access via the Web RA user portal. The Profiles to create certificates for Microsoft Intune SCEP User drop-down enables Web RA Administrators to define which user profiles a user can access via the Web RA user portal. The Profiles to create certificates for Microsoft Intune SCEP Device drop-down enables Web RA Administrators to define which device profiles a user can access via the Web RA user portal.
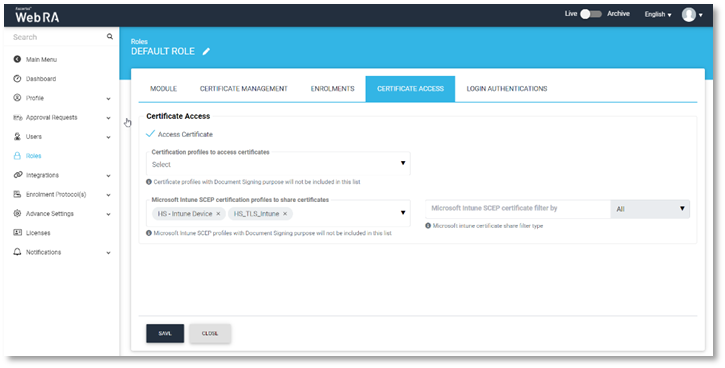
Certificate Access
- Select the Access Certificate check box and select certification profiles to access certificates. This drop down allows users to gain access to certificates based on the profiles they configure.
- Select a Microsoft Intune SCEP certification profiles to share certificates with other users. This setting allows you to configure profiles to share certificates.
- Microsoft Intune SCEP certificate filter by:
Once configured, this profile will enable you to apply a filter based on elements of a certificate’s subject distinguished name (SDNs), these include, all, common name, first name, country, etc. on basis of which certificate requests will appear on the ADSS Web RA web portal, and the user will only be able to manage according to the filters applied here. Once the required filters have been defined, click Save.
Enrolment Protocol (s)
If the Microsoft Intune SCEP is enabled in the Configurations section in the ADSS Web RA admin portal, then the following section with appear in the Enterprise section under the Enrolment Protocol(s) section.
Access ADSS Web RA administration as an administrator with permissions to edit roles, expand Enterprises > Registered > select the Enterprise Name > Manage> Enrolment Protocol (s) > SCEP Protocol, click the Microsoft Intune SCEP.
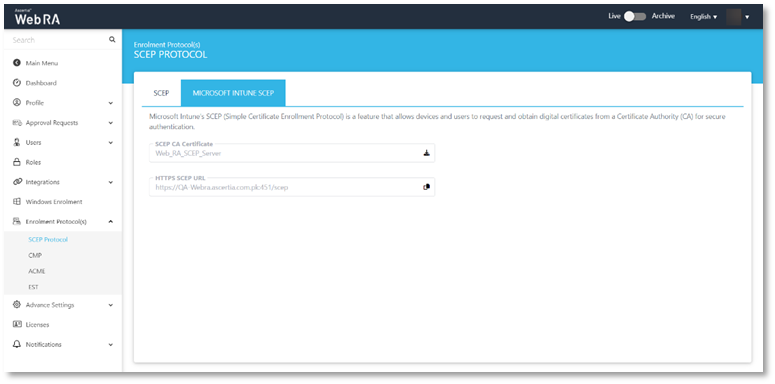
You can click on the download button against the SCEP CA Certificate to download the chain of certificates from ADSS Web RA Sever that will be used later to create trusted certificates in Microsoft Intune.
Configure Microsoft Intune
The following system and environment pre-requisites need to be fulfilled prior to the configurations of the ADSS Web RA Server Microsoft Intune SCEP.
Configure Microsoft Intune
Before you begin, you need to configure your Microsoft and secure with two-factor authentication.
- Login to Microsoft Intune through this link https://endpoint.microsoft.com/#home.
- Use your Microsoft administrator e.g. HA@5xr6vp.onmicrosoft.com to login. Click Next.
- Then enter the password and click Sign In.
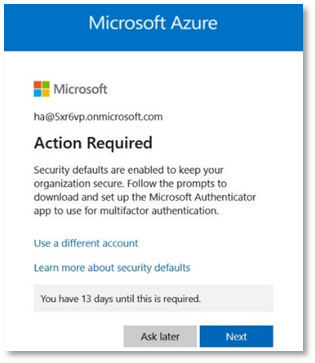
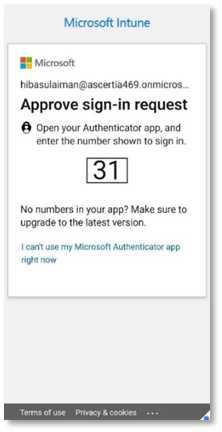
- A security action will be required to set up the Microsoft Authenticator, click Next.
- The keep your account safe screen will appear, click Next.
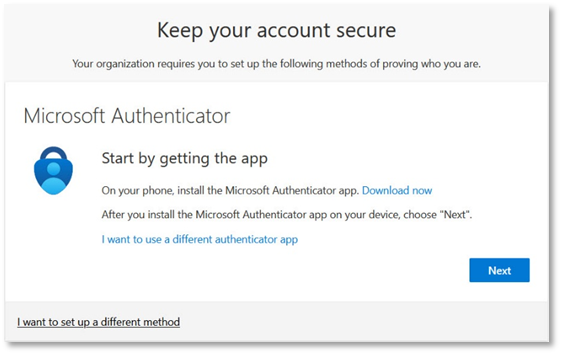
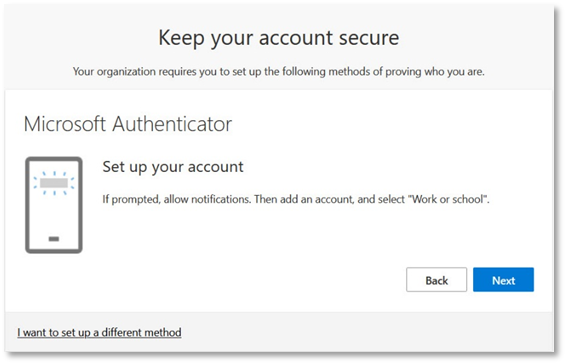
- To set up the Microsoft Authenticator account, click Next.
- Download the Microsoft Authenticator app from the App Store on your mobile device and Scan the QR code appearing on the screen, and click Next.

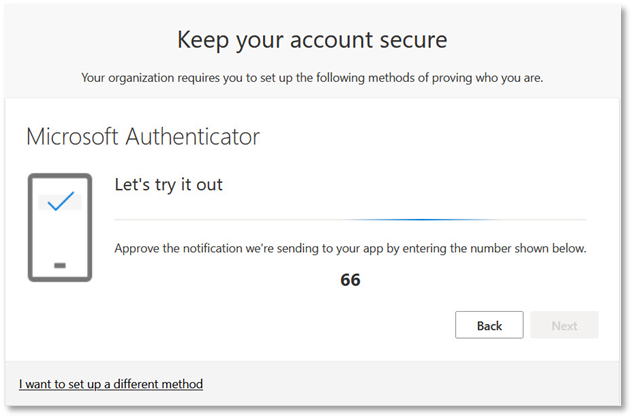
- Open the Authenticator app on your mobile device and enter the code, e.g. 66.
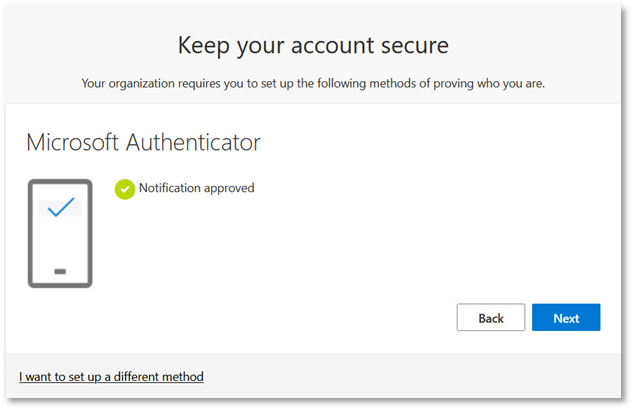
- The notification approved message will appear, click Next to proceed.
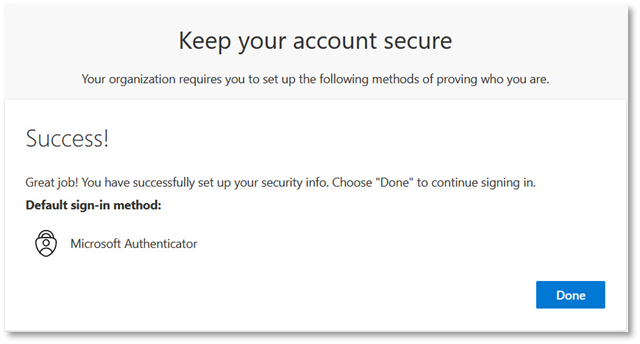
- Once the success message appears, click Done to complete the process.
Follow the steps defined below to configure Microsoft Intune for Certificate Enrolment.
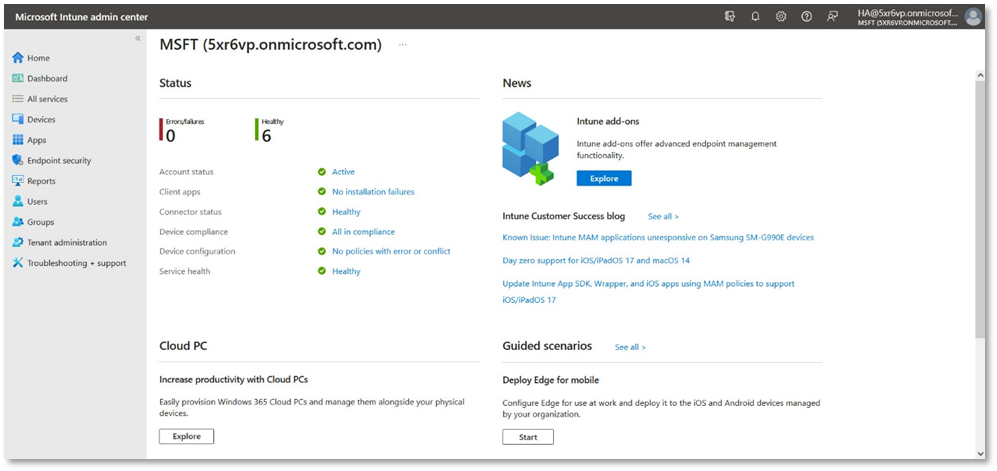
- After completing the two-factor authentication successfully, you will be directed to the Microsoft Intune admin center.
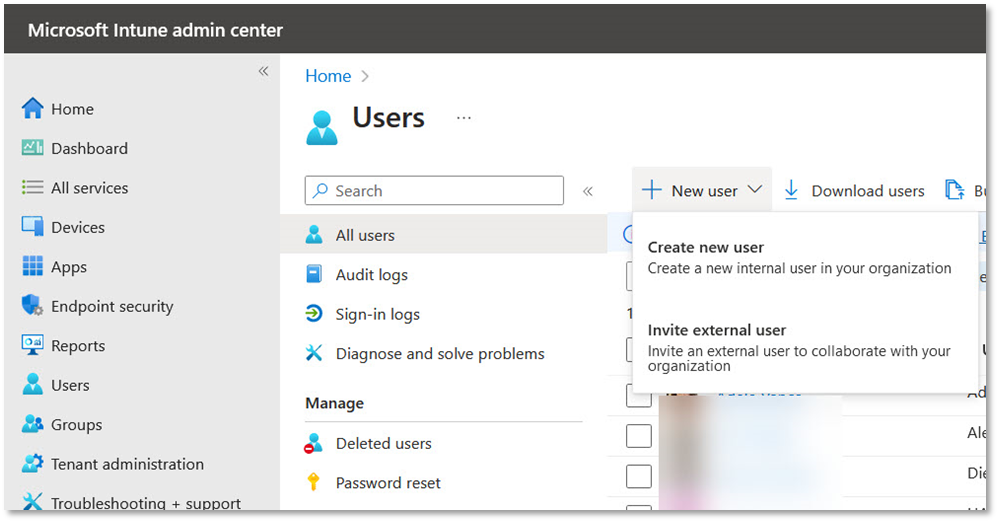
- Select Users from the left panel.
Then click New user > Create new user from the drop down.
- Provide the following user details in the Basics tab:
- User principal name
Universal principle name (UPN) stored in Azure Active Directory used to access the service, e.g: Hiba.Sulaiman.
- Mail nickname
The Derive from user principal name is checked by default.
- Display name
Set any name e.g. Hiba Sulaiman.
- Password
You can opt for an auto-generated password or create one manually.
The auto-generate password is checked by default, copy and save it for later use.
- The Account enabled is checked by default.
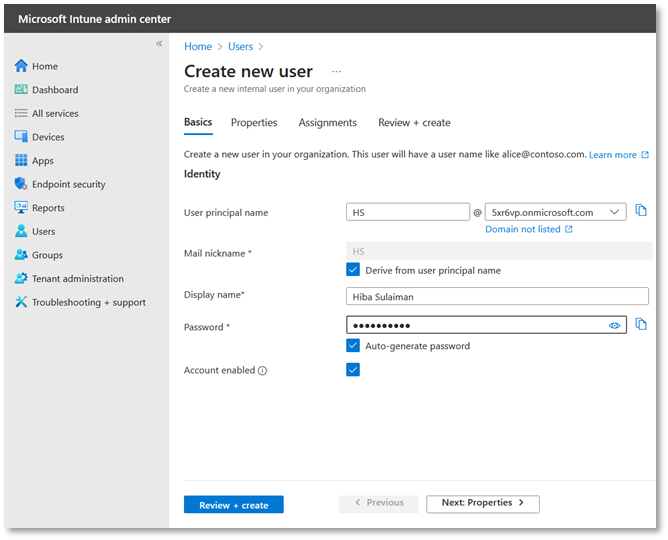
- Click Next: Properties >.
- Enter email.
- Under the Settings > set Usage location. (This is required to assign license to a user in the next steps).
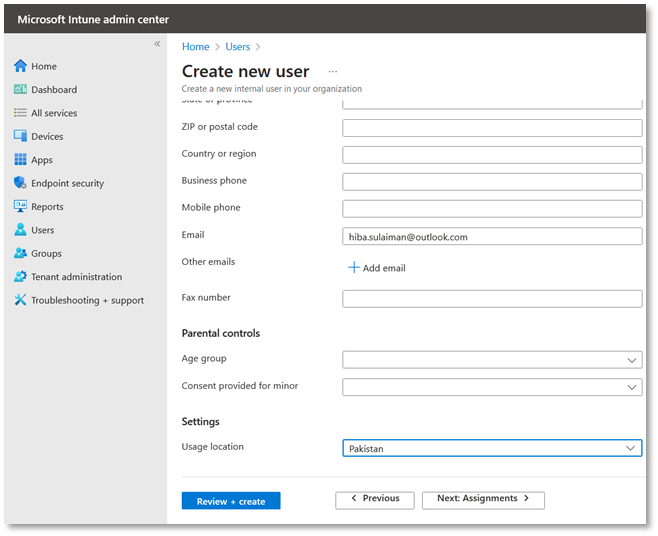
- Click Review + Create.
The user will be added successfully. Click the Refresh button if it does not appear in the list.
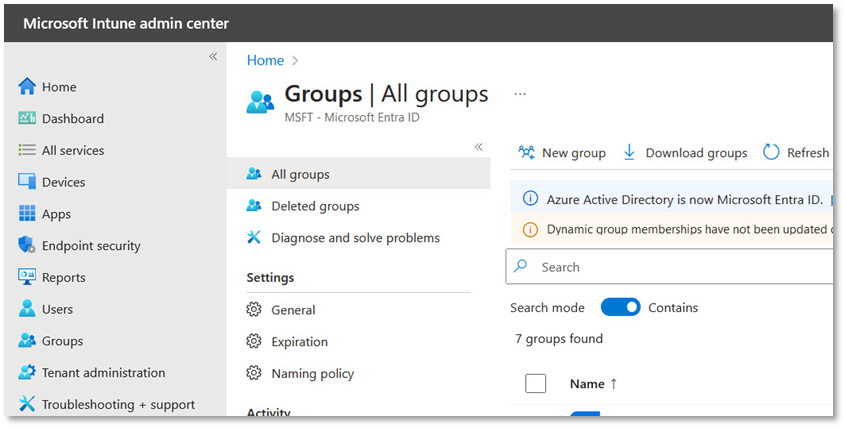
Use the following steps to create a new group.
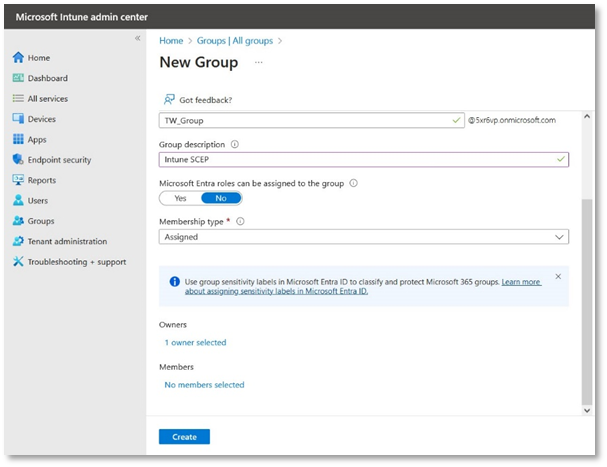
- Select Groups from the left panel and then click New group.
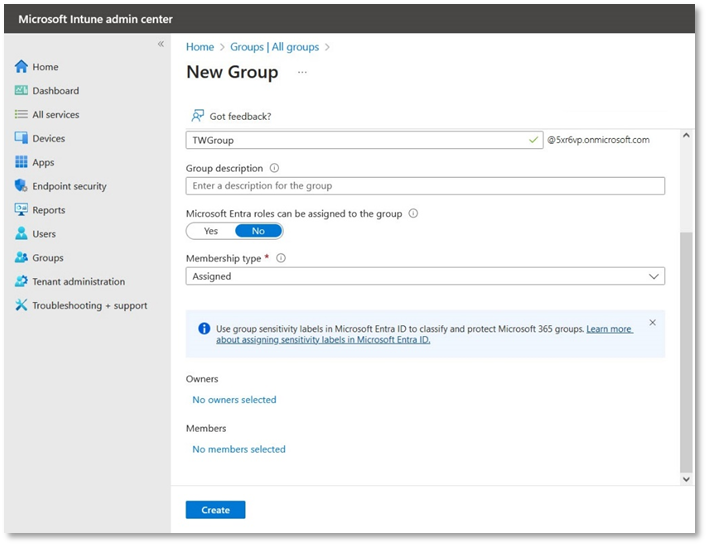
- Provide the following group details:
- Specify a Group type
e.g. Microsoft 365.
- Set a Group name
e.g. TW_Group.
- Provide a Group description
This should be specific and should include information so others know what the group is for, e.g. Intune SCEP.
- Select Azure AD roles can be assigned to the group
No.
- Membership type
Administrators manually assign users or devices to this group, and manually remove users or devices, e.g. Assigned.

- Scroll below and under the Owners tab click on No owners selected.
- On the Add owners screen, select you user e.g. Hiba Sulaiman from the list and click Select.
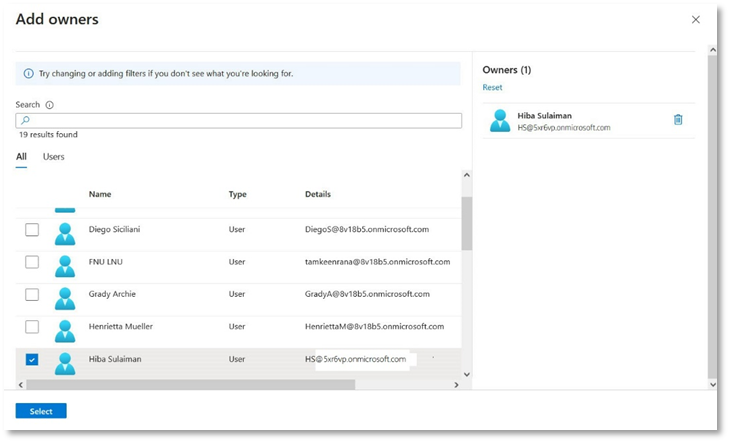
- You will returned to the New Group screen, and 1 owner selected will be updated. From the Members tab, click No member selected to select members you want to allow to this group.
- The Add Members screen will appear. Select the user from the list e.g. Hiba Sulaiman and then click Select.
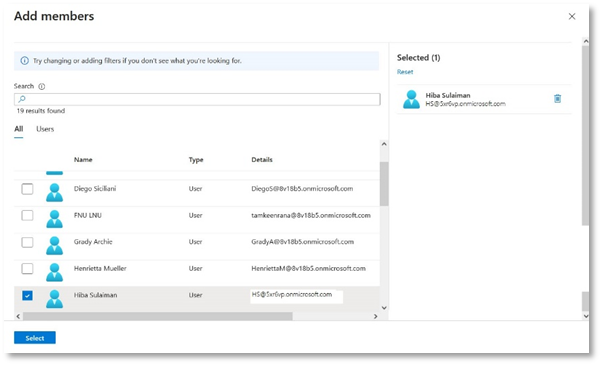
- Click Create to add the new group. Your group is shown in the list.
If it does not appear, click Refresh button and your group will be listed as shown in the screen below. Click your group e.g. TW Group.

You must assign each user an Intune license or Group before users can enrol their devices in Intune.
Assign an Intune license in the Microsoft Intune admin center
In Microsoft Intune, you can assign licenses to users or groups, so that they can enrol their devices. You can assign a license either to an individual user or to a group, so that the license is applied to all the users in a certain group.
Assign License to a User
Use the following steps to assign an Intune license to the added user:
- Click Users from the left panel.
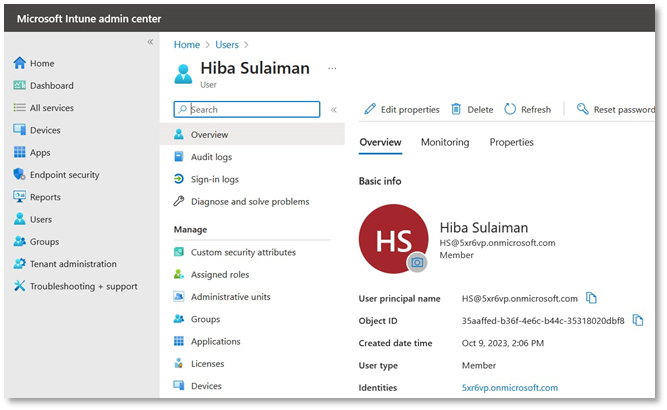
Then search and click on the user you added from the list, e.g. Hiba Sulaiman.
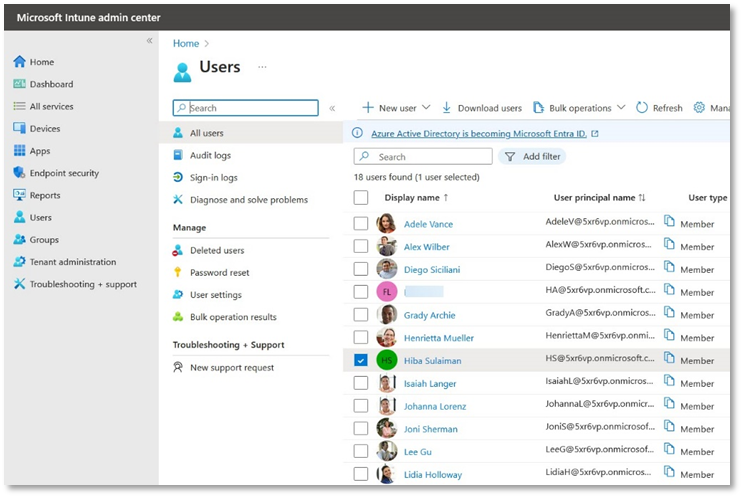
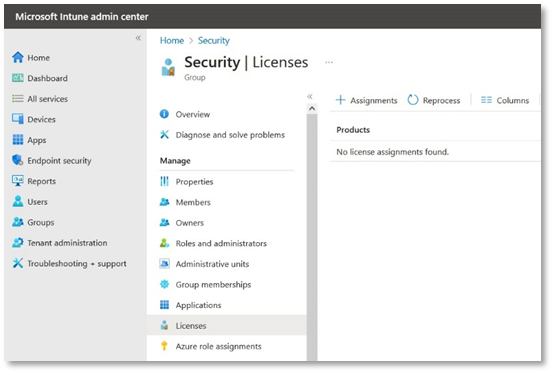
- The Overview screen will be displayed. From the Manage tab, click Licenses.
- On the Licenses screen, click Assignments
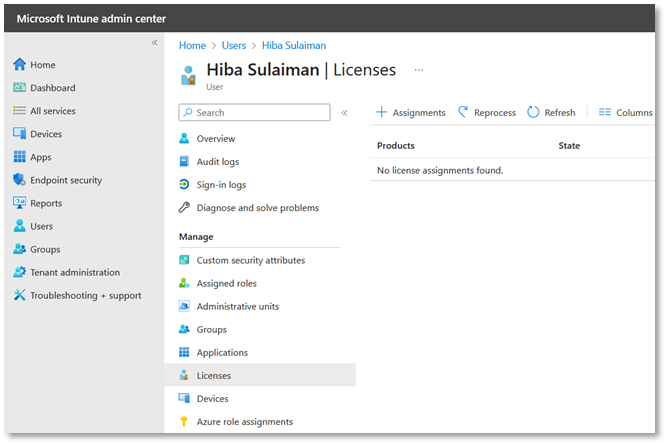
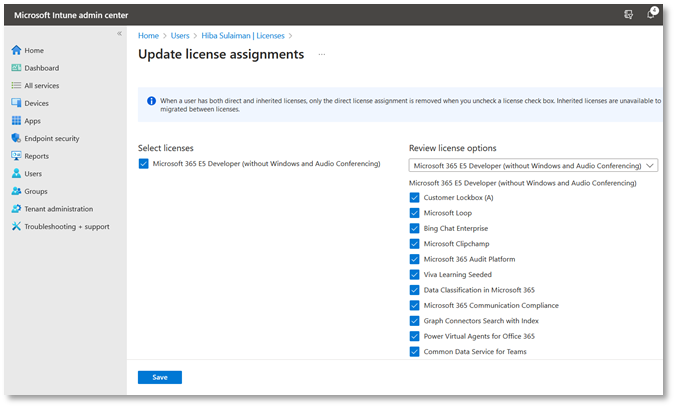
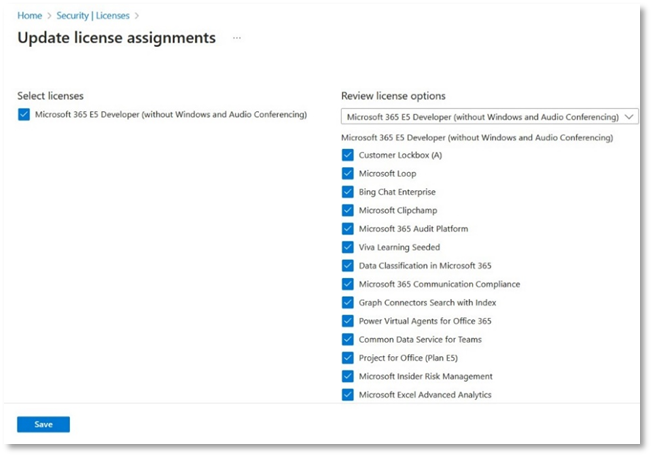
- Update license assignments screen will appear.
Select licenses against the Microsoft 365 plan. Then select Microsoft 365 from the drop down, check all options and click Save.
Assign License to a Group
Use the following steps to assign an Intune license to the added group:
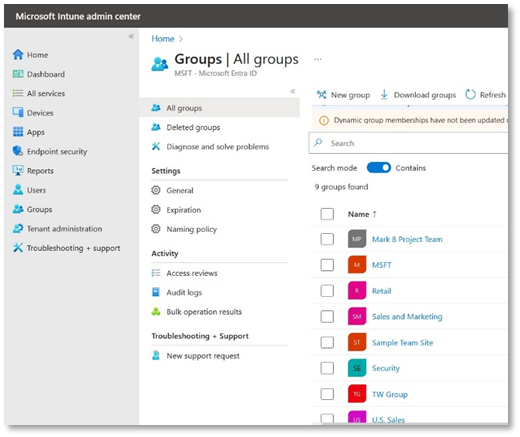
- Click Groups.
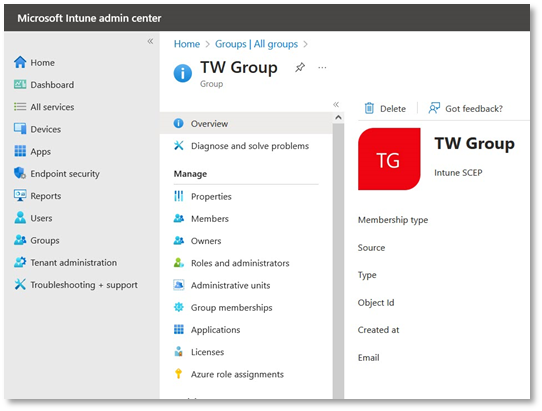
Select the added group e.g. TW Group.
- The Overview screen will be displayed. From the Manage tab, click Licenses.
- On the Licenses screen, click Assignments.
- Update license assignments screen will appear.
Select licenses against the Microsoft 365 plan.
Then select Microsoft 365 from the drop down, check all options and click Save.
Authorize communication between CA and Intune
Add Mobile Device Management (MDM) Authority
A user needs to register the Mobile Device Management (MDM) authority to use Microsoft Intune. Access Azure portal https://portal.azure.com by using the credentials used in section 5.1.5.
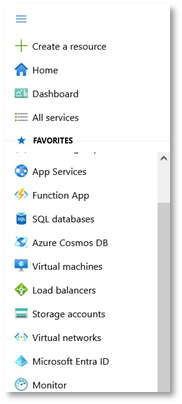
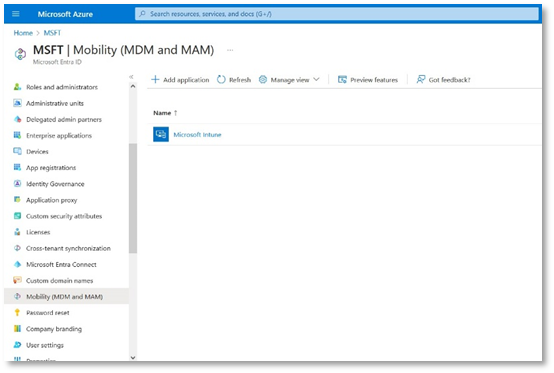
- From the Microsoft Azure portal home page, open the left menu, scroll and click on Microsoft Entra ID.
- From the left menu under Manage, click Mobility (MDM and MAM).
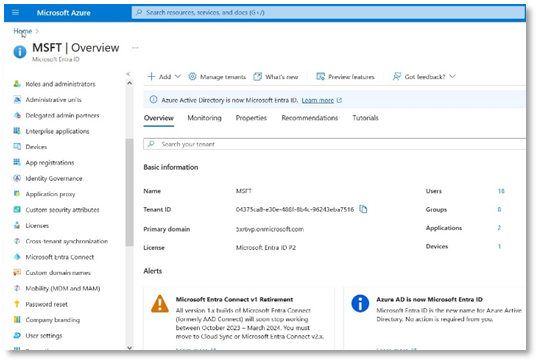
- Then click Microsoft Intune.
- You can specify settings to allow All users to enrol a device, or choose to allow Some users (and specify a group).
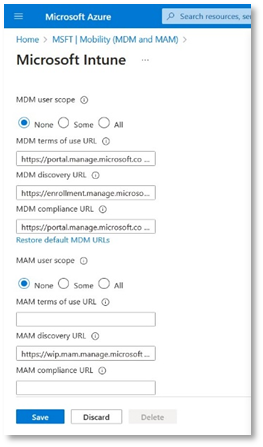
- In this document we have selected Some.
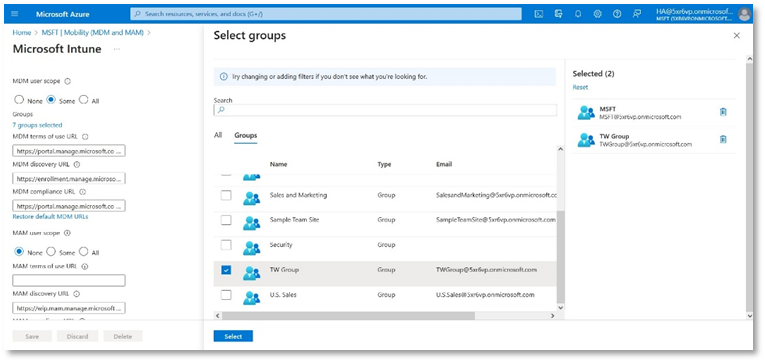
Add group Select the group e.g. TW Group from the list and click Select.
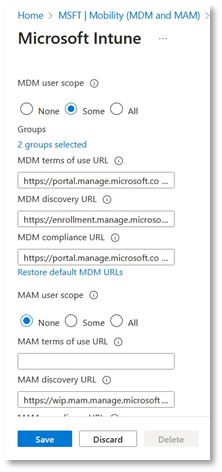
- Then click Save.
Configure Intune Policy
After setting up both, Microsoft Intune and Microsoft Azure AD to activate Simple Certificate Enrolment Protocol (SCEP), you gain the ability to create SCEP profiles for users and devices. These profiles can be allocated within the Microsoft Intune environment.
However, for devices to utilize a SCEP certificate profile, it is essential to have a trusted root certificate. The establishment of trust for the root CA can be achieved through the deployment of a trusted certificate profile to the identical group that is granted the SCEP certificate profile.
Configure Intune Trusted Certificates and SCEP Certificate Profile
You need to create and configure the following Intune trusted certificates and SCEP certificate profile:
- Trusted Certificate profile for ADSS Web RA Root CA in Computer Certificate Store – Root.
- Trusted Certificate profile for ADSS Web RA Issuing CA in Computer Certificate Store – Intermediate.
- SCEP Certificate profile.
|
|
You are required to create and configure these three certificate profiles individually for each platform i.e. Android, iOS and Windows. |
This document explains you to create and configure certificate profiles for Windows 10 or later. The steps for the other platforms i.e. Android and iOS will be the same.
Trusted Certificate Profile for ADSS Web RA Root CA
To create a Trusted Certificate profile for ADSS Web RA Root CA, follow the steps below:
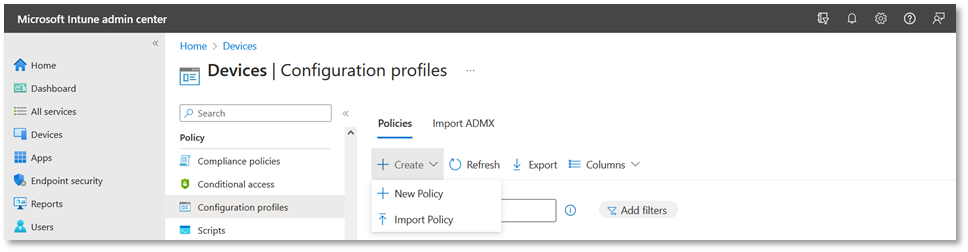
- Go to the Microsoft Intune admin center, and click on Devices from the main left menu.
Under the Policy tab > Configuration profiles > Policies > Create > New Policy.

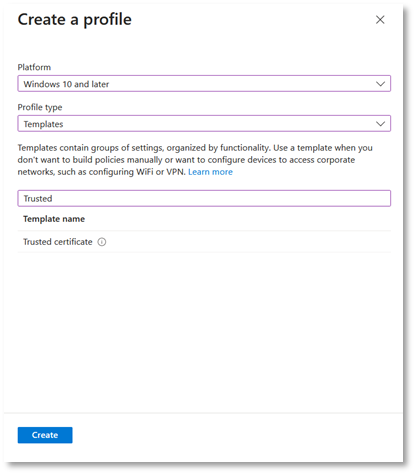
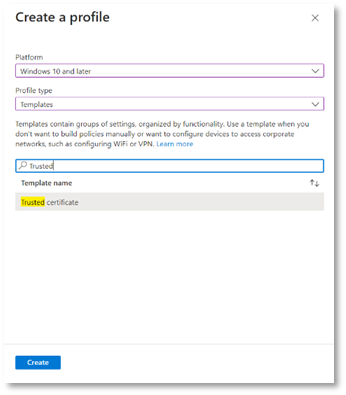
- In the Create a profile tab, perform the following actions for Windows:
- Select the Platform as Windows 10 and later.
- Profile type as Templates,
- Search Trusted Certificate from the search bar in Template name and click Create.
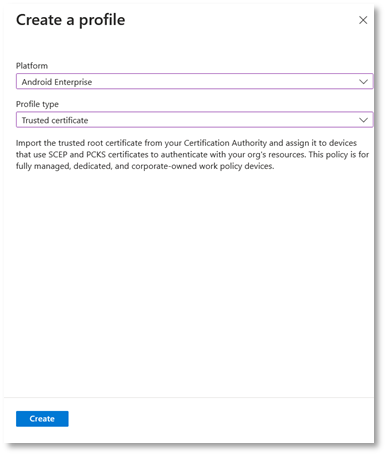
If you are creating a profile for Android, perform the following actions at this step:
- Select the Platform as Android Enterprise.
- Profile type as Trusted certificate,
Then click Create.
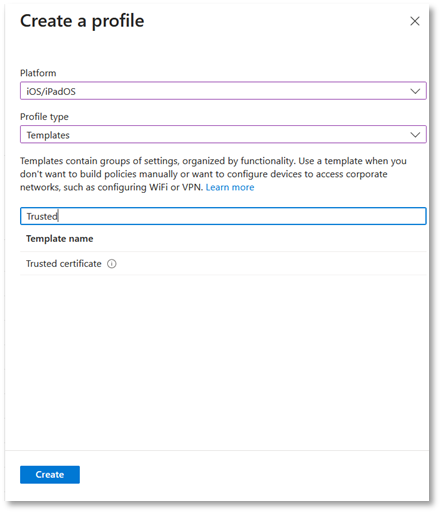
If you are creating a profile for iOS, perform the following actions at this step:
- Select the Platform as iOS/iPadOS.
- Profile type as Templates. Once you select this option, the Trusted drop down will appear.
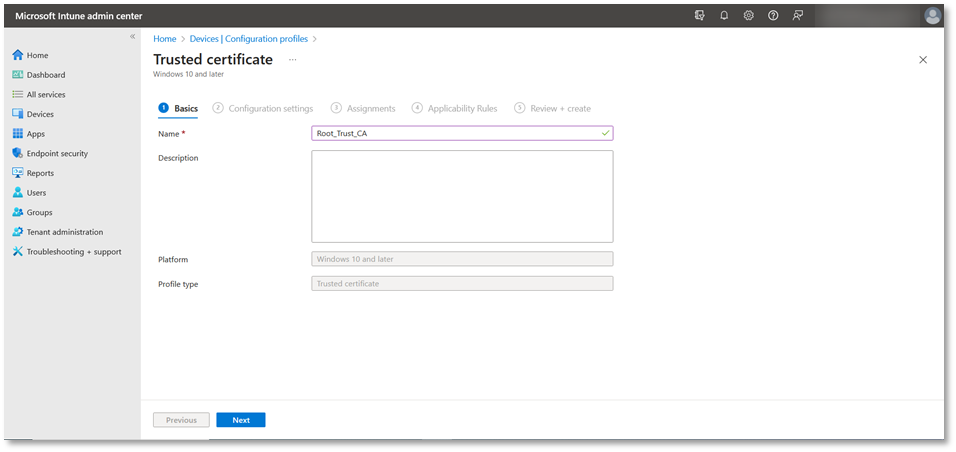
- In the Basics tab set:
A profile name for the Trusted Root Certificate. Then click Next.
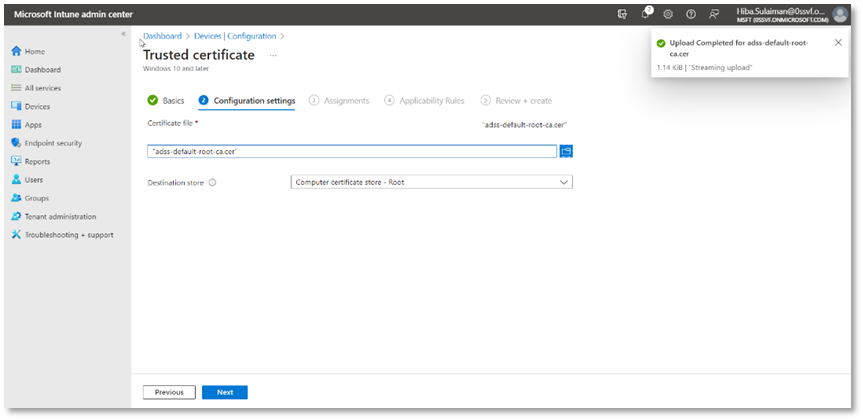
- In the Configuration Settings tab perform the following actions:
Upload the Root CA Certificate – Here you can either:
- Download the chain of certificates from ADSS Web RA mentioned in section 5.1.10 under the Enrolment Protocol (s) heading.
- You can create your own Trusted chain from ADSS Server as mentioned in section 3.1.
- If you have an existing CA certificate, you can use it here.
- Then from Destination store select Computer certificate store - Root, and then click Next.
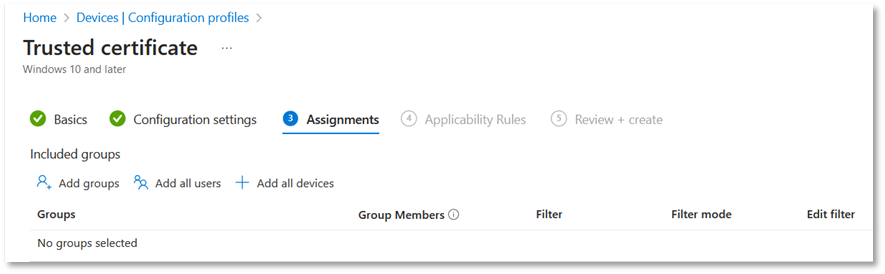
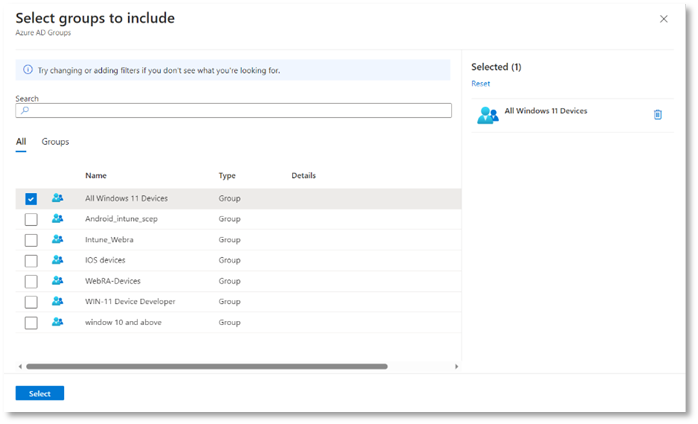
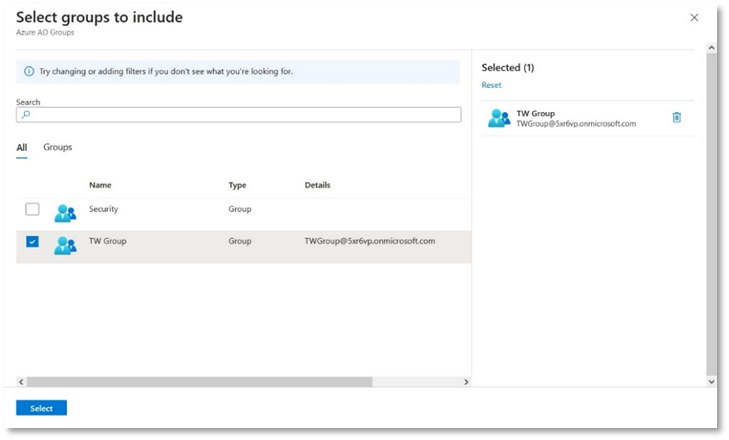
- In the Assignments tab, under Included groups, click Add groups.
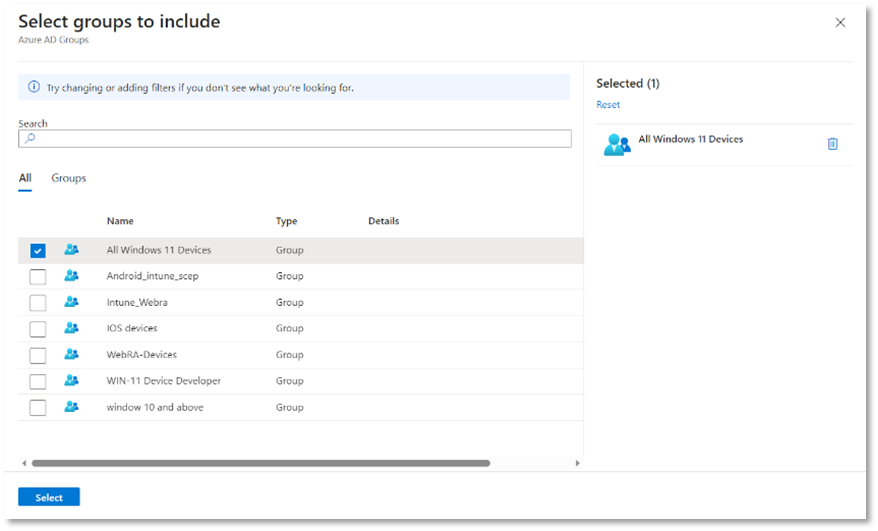
- From Select groups to include:
Search and select your group e.g. All Windows 11 Devices it, and then click Select.
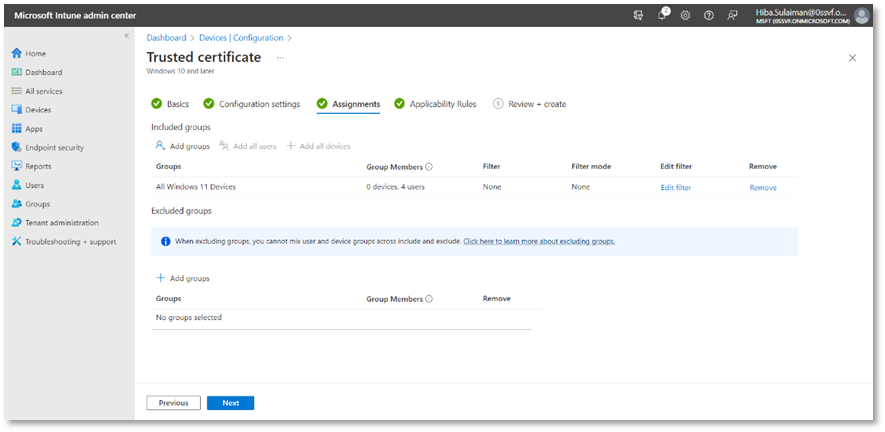
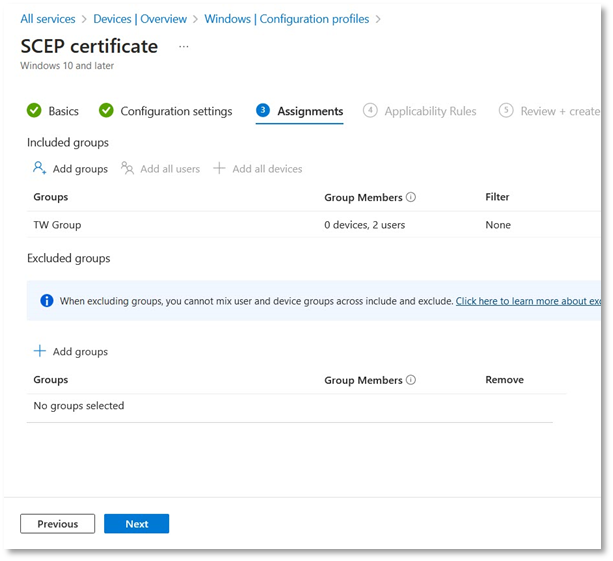
- The group will appear in the list of included groups, click Next. You can set the Applicability Rules, or leave the fields blank and then click Next to proceed.
- On the Review + create tab, click Create.
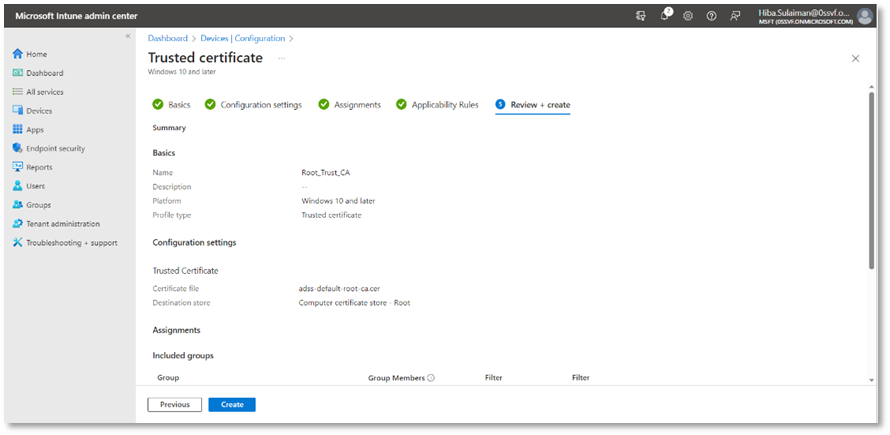
A certificate profile will appear in the listing. If it does not appear in the listing, click on the Refresh button.
Trusted Certificate Profile for ADSS Web RA Issuing CA
To create a Trusted Certificate profile for ADSS Web RA Issuing CA, follow the steps below:
- Go to the Microsoft Intune admin center, and click on Devices from the main left menu.
Under the Manage tab > Configuration profiles > Policies > Create > New Policy.

- In the Create a profile tab:
- Select the Platform as Windows 10 and later,
- Profile type as Templates
- Search Trusted Certificate from the search bar in Template name and click Create.
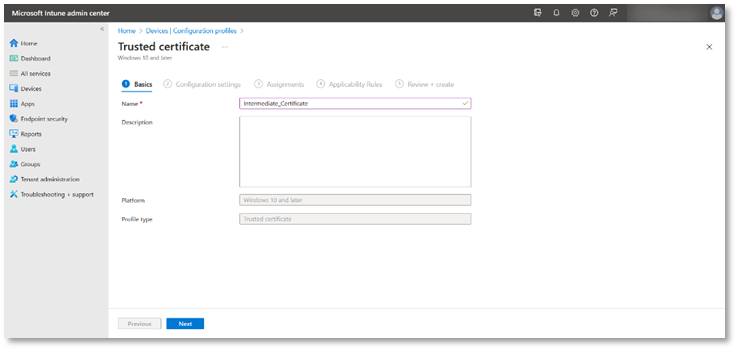
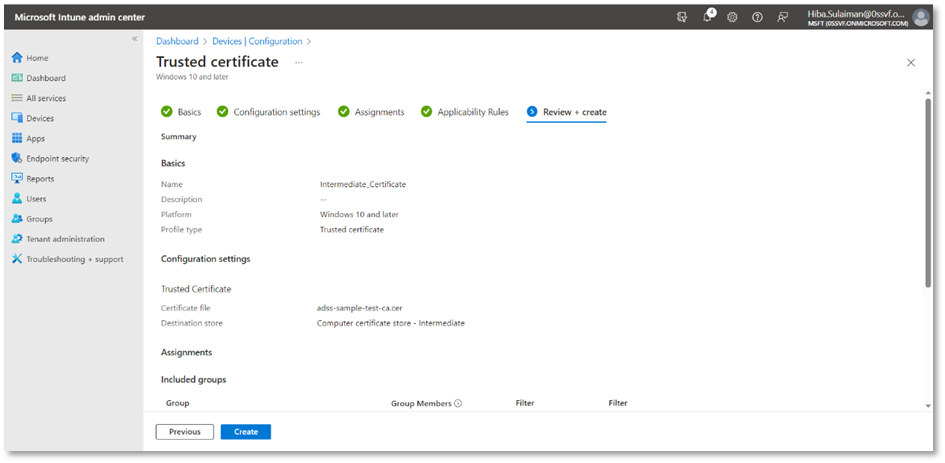
- In the Basics tab:
- Set a profile name for the Intermediate Certificate e.g. Intermediate_Certificate.
Then click Next.
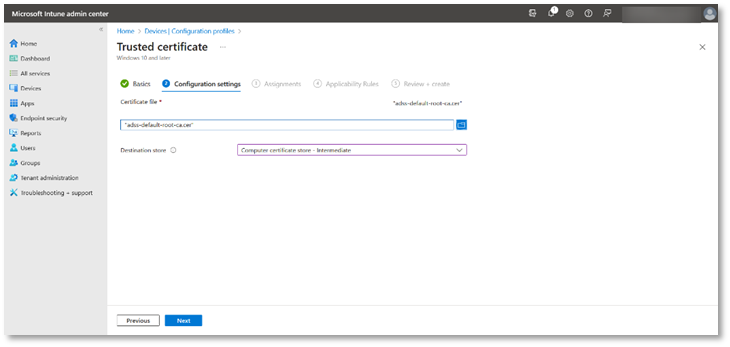
- In the Configuration Settings tab,
Upload the Intermediate Certificate – Here you can either:
- Download the chain of certificates from ADSS Web RA mentioned in section 5.1.10 under the Enrolment Protocol (s) heading.
- You can create your own Trusted chain from ADSS Server as mentioned in section 3.1.
- If you have an existing CA certificate, you can use it here.
- Then from Destination store select Intermediate certificate store - Root, and then click Next.
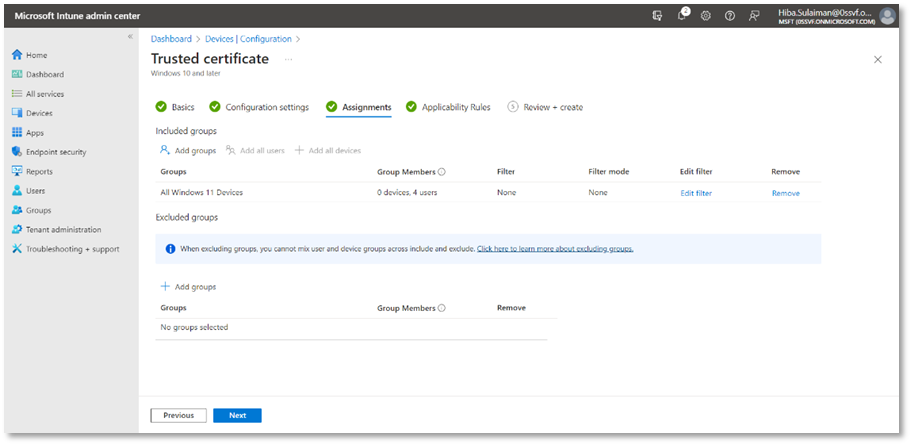
- In the Assignments tab:
- From the Included groups click Add group.
- Then select the groups to include, e.g. All Windows 11 Devices, and click Select.
- The group will appear in the list of included groups, click Next. You can set the Applicability Rules, or leave the fields blank and then click Next to proceed.
- On the Review + create tab, click Create.
A certificate profile will appear in the listing. If it does not appear in the listing, click on the Refresh button.
SCEP Configuration Profile
To create a SCEP Configuration profile, follow the steps below:
- In the Microsoft Intune admin center, click on Devices from the main left menu.
Under the Policy tab, > Configuration > Policies > Create > New Policy.
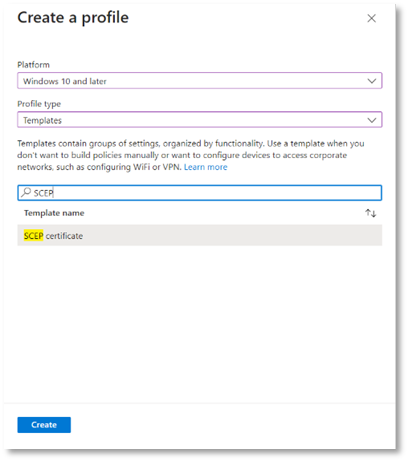
- In the Create a profile tab perform the following actions:
- Select the Platform as Windows 10 and later.
- Profile type as Templates.
- Search SCEP Certificate from the search bar in Template name and click Create.
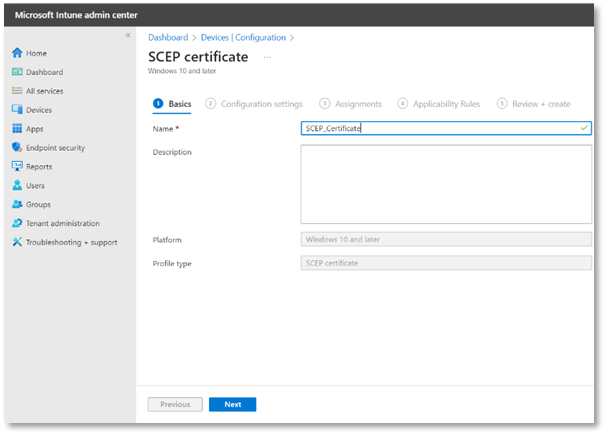
- In the Basics tab, set a profile name for the SCEP Certificate. Then click Next.
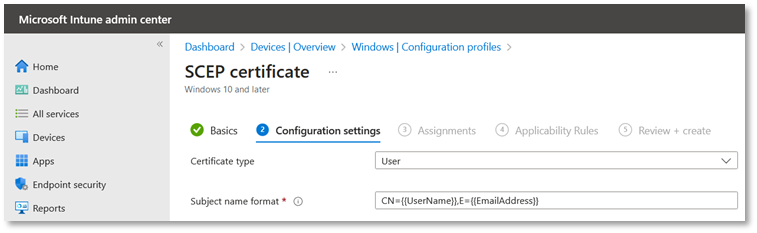
- While creating a SCEP certificate, in the Configuration settings tab, fill in the following fields:
Certificate type
Select a certificate type from the drop down.
- User
You can create two types of user certificates:
- User certificate
- User device certificate
- Device
- Device certificate
Subject name format
The options for the subject name format depend on the certificate type you select, either user, or device. You can also create a user device certificate, which is explained below:
- Subject name format if you are creating a user certificate:
To create a user certificate, enter a custom subject name format, for common name and email. You can learn more about setting variables by clicking on the info button next to the subject name format.
CN={{UserName}} - The user name of the user.
E={{EmailAddress}} - The email address of the user.
- Subject name format if you are creating a user device certificate:
To create a user device certificate, enter a custom subject name format, for common name and email.
CN={{DeviceName}} - The name of the user device.
E={{EmailAddress}} - The email address of the user.
- Subject name format if you are creating a device certificate:
To create a device certificate, enter a custom subject name format, for common name. You can learn more about setting variables by clicking on the info button next to the subject name format.
CN={{AAD_Device_ID}} - This is used to identify a device by its Azure AD ID.
In this document, we are creating a user certificate.
- Certificate validity period
You can select the duration in days, months or years, e.g. Years, 1.
- Key storage provider (KSP)
Specify where the key to the certificate is stored. Choose from the following values:
- Enroll to Trusted Platform Module (TPM) KSP if present, otherwise Software KSP
- Enroll to Trusted Platform Module (TPM) KSP, otherwise fail
- Enroll to Windows Hello for Business, otherwise fail (Windows 10 and later)
- Enroll to Software KSP

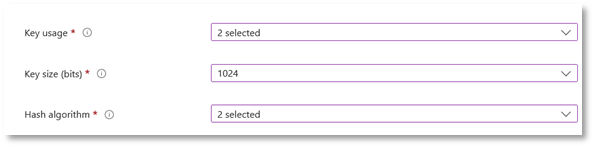
- Key usage
Select either both or one of the two options, e.g. Digital signature and Key encipherment from this drop down.
- Key size
Select the number of bits contained in the key:
- Not configured
- 1024
- 2048
- 4096
- Hash Algorithm
Select one of the available hash algorithm types to use with this certificate.
- SHA-1
- SHA-2 or you may select both.
Scroll down to fill in the remaining fields.
- + Root Certificate
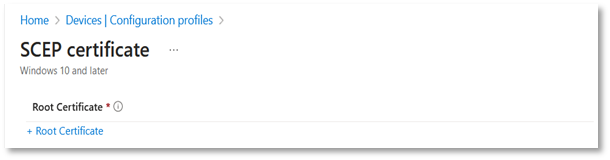
Select the trusted certificate you created in section 6.4.1 and click OK.
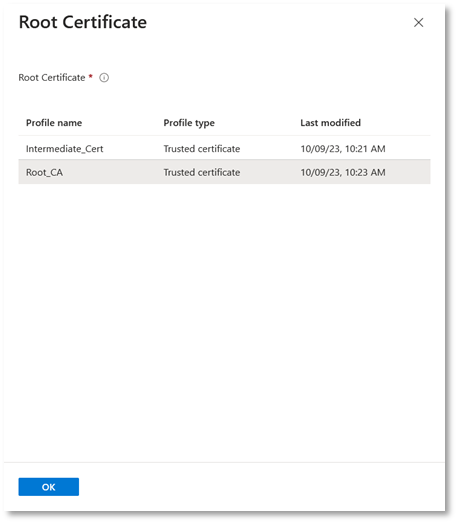
The trusted root certificate will be uploaded.
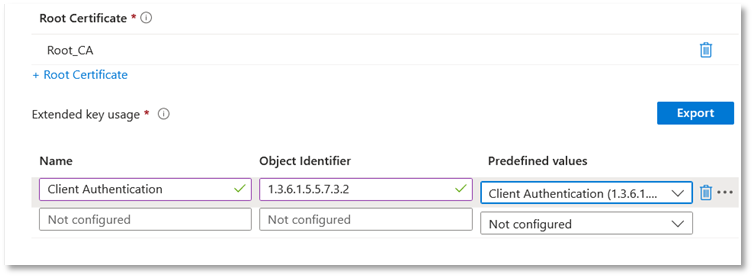
- Extended key usage
Add values for the certificate's intended purpose. In most cases, the certificate requires client authentication so that the user or device can authenticate to a server. Once you select, the Object Identifier and Name will be auto-filled.
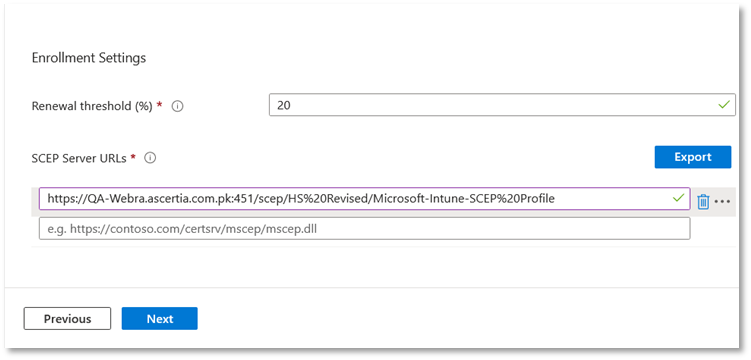
- Enrollment Settings
Renewal threshold (%) - Enter the percentage of the certificate lifetime that remains before the device requests renewal of the certificate. For example, if you enter 20, the renewal of the certificate will be attempted when the certificate is 80% expired.
At this step, copy the SCEP Profile URL that you created in Section 5.1.10 point number 12 and paste the URL here. Then click Next.
- In the Assignments tab, from the Included groups click Add groups.
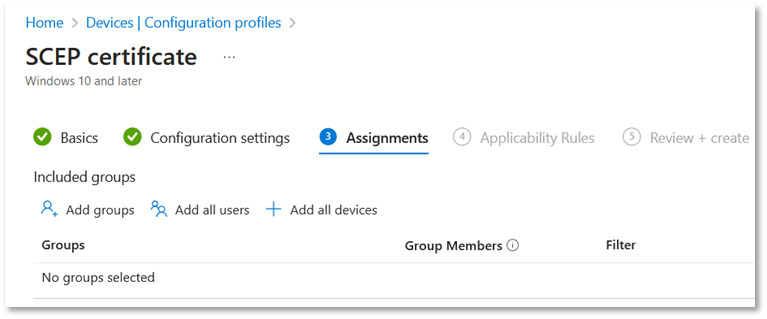
- Then select the groups to include and click Select.
- The group will appear in the list of included groups, click Next. You can set the Applicability Rules, or leave the fields blank and then click Next to proceed.
- On the Review + create tab, click Create.
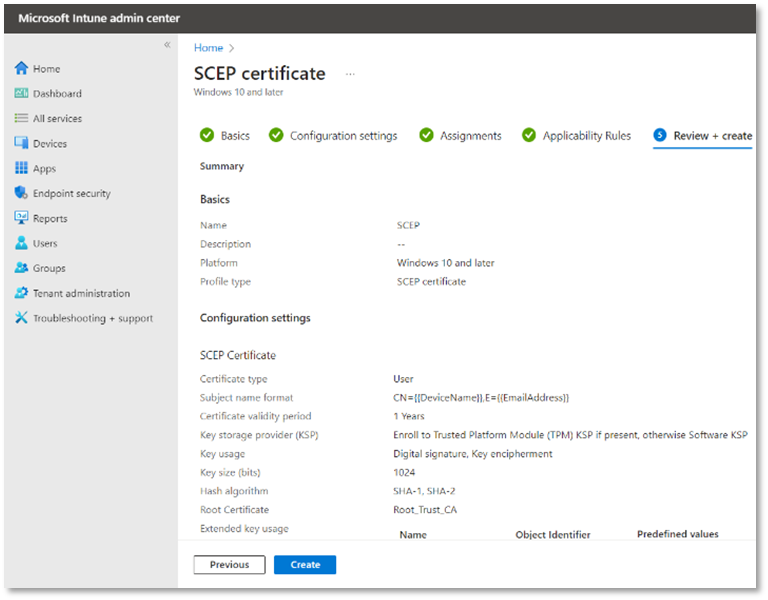
You have created a SCEP certificate profile successfully.
Windows Enrolment for Intune Policy
Log in to your Windows account with your Microsoft Intune user by following these steps:
- Log in to Windows account using your Microsoft Intune domain administrator, e.g. HA@5xr6vp.onmicrosoft.com.
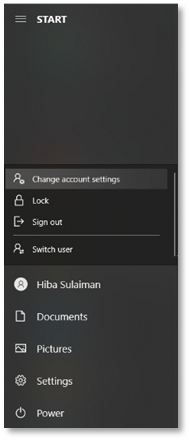
- From the Start button, launch Settings and scroll to your user e.g. Hiba Sulaiman > Change account settings.
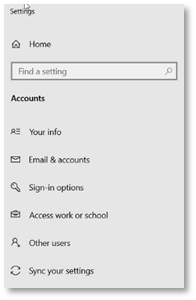
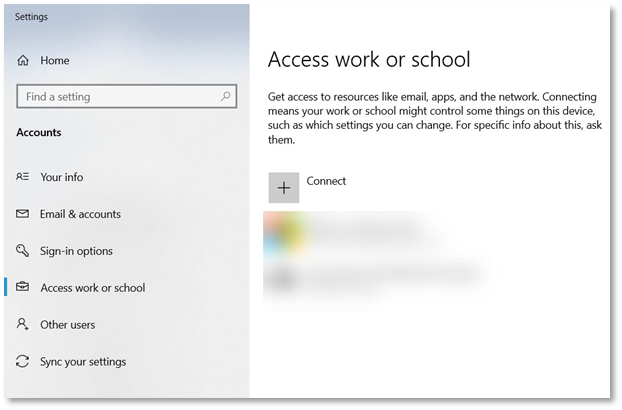
- Click Access work or school account.
- Then click on Connect.
- From the alternate actions:
Click Join this device to Azure Active Directory.
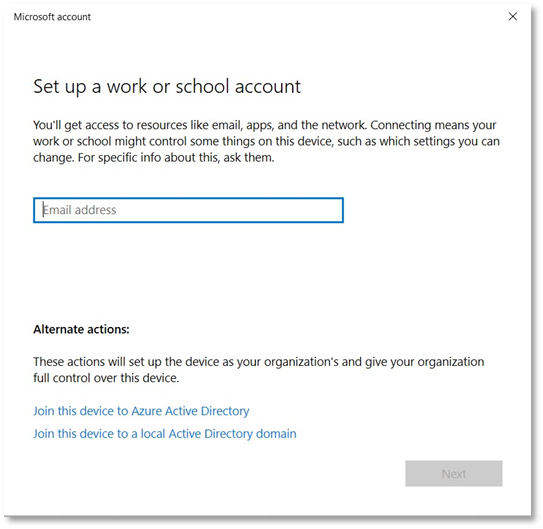
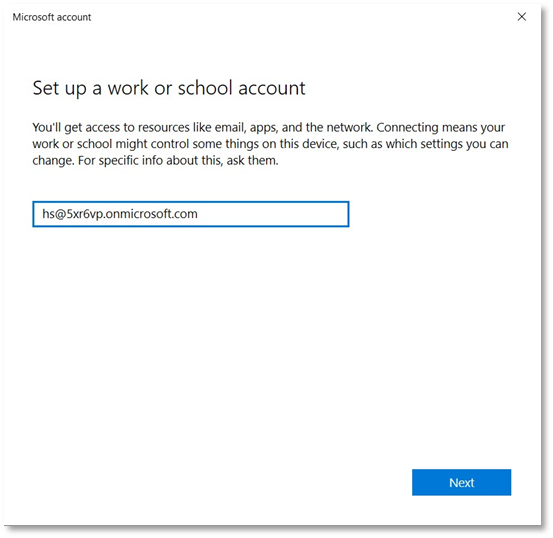
- Enter your Microsoft Intune account e.g. HS@5xr6vp.onmicrosoft.com and click Next.
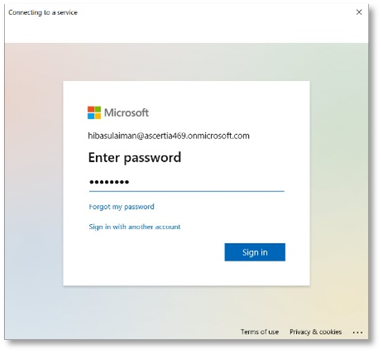
- You will be required to enter your password, and then click Sign-in.
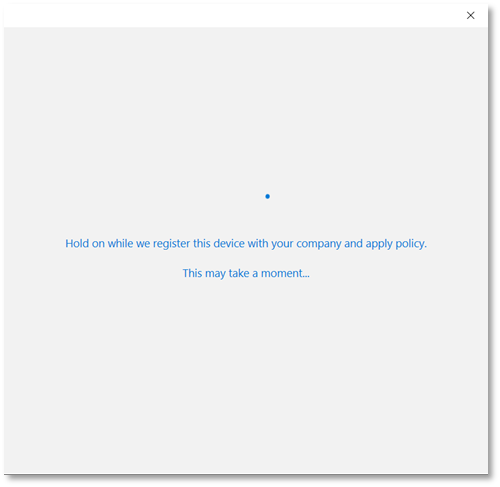
- It may take some time to register the device with your company an apply policy.
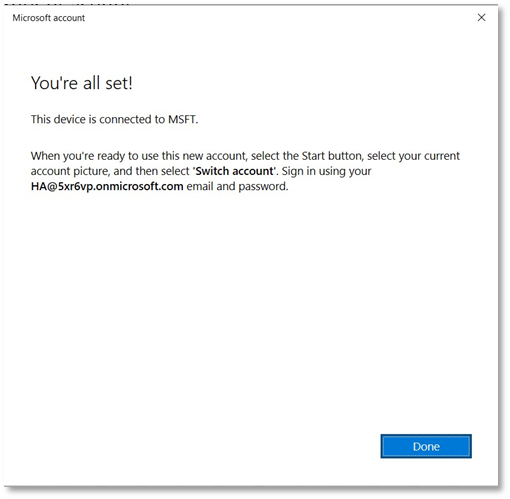
- Success message appears. Click Done.
- In the next step, you need to link your Windows account to Microsoft Authenticator app on your mobile device. Make sure you use your Microsoft Intune account credentials to log in to the Authenticator app.
Microsoft Authenticator app
Follow the steps below to link your Microsoft Intune account with Microsoft Authenticator:
- Launch the Microsoft Authenticator app on your mobile device and tap +.
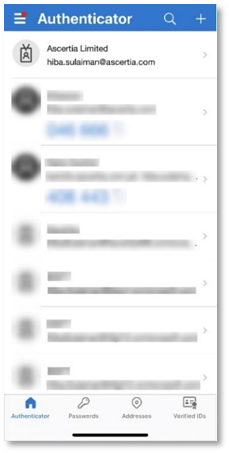
- On Add account, tap Add work or school account.
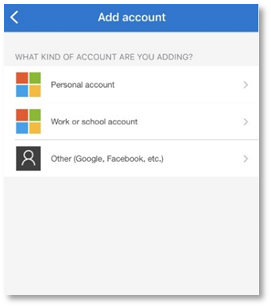
- Choose an option to Sign-in

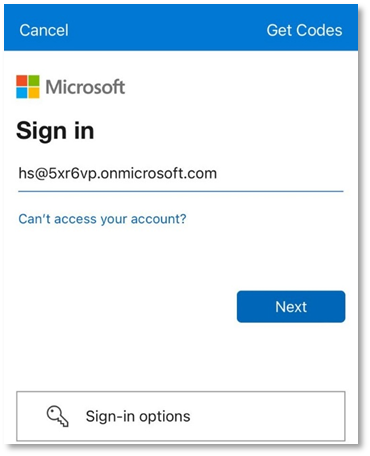
- Enter your Microsoft Intune email address and tap Next.
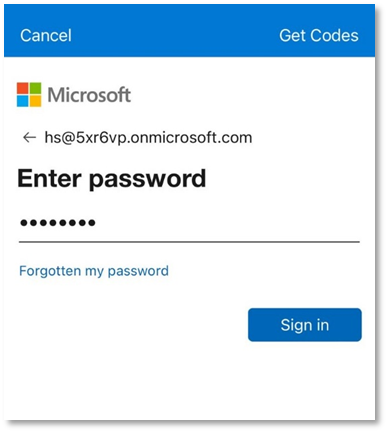
- Enter your password and tap Sign in.
- A code from Authenticator app will appear. Access your mobile phone to enter the code that appears on the screen.
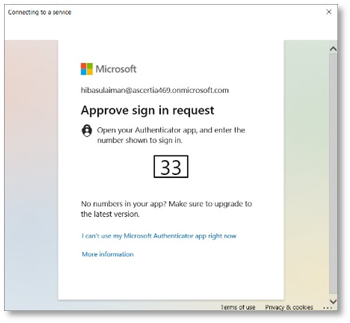 s
s
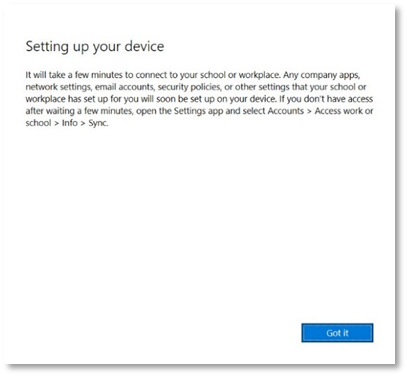
- Setting up your device confirmation will appear. Click Got it to complete the setup.
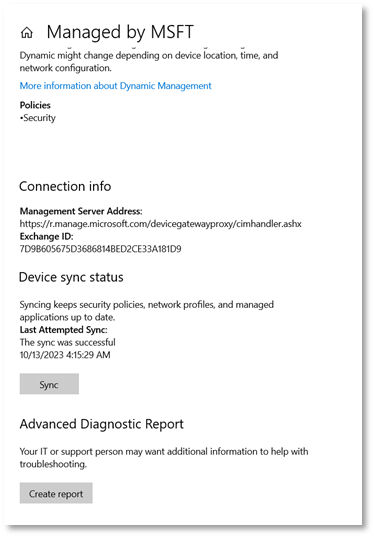
- Your account will be added, click Info.

- Click Sync to apply the policies to your configured Windows device.
- You can also Sync by following the steps below:
In the Microsoft Intune admin center perform the following actions:
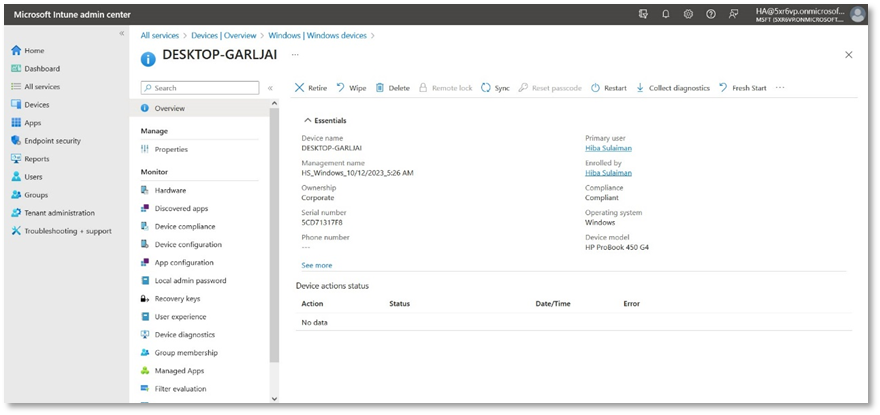
- Click Devices from the left menu and access your Windows device.
- Click Sync to apply all the configured policies.
After the Sync is complete, your user will appear in the ADSS Web RA admin portal.
- You can access ADSS Web RA to view it. From the left menu pane click Users:

- Then you need to sign up this user in the ADSS Web RA web portal.
Access Web RA web portal, enter your email and click Next.
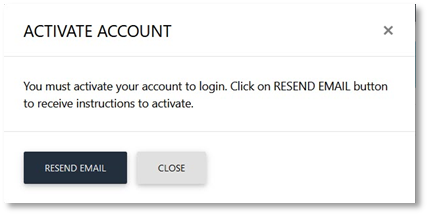
- An account activation dialog will appear, click Resend Email.
- An email will be sent to the Microsoft account. Click the link in the email to complete the sign up process.
- Fill the account activation details:
- Password
- Confirm Password
- Security Question
- Security Answer
- Select I agree to the Terms of Service and Privacy Policy
Click Activate.
- Then you will be directed to the Web RA login page.
Enter your email address, click Next.
- Then enter your password and click Login here.
Windows Sync to Generate Certificates
Once you log in to your Windows device with your user e.g. HS@5xr6vp.onmicrosoft.com, the following use cases will occur:
- When creating user certificate, all the configured policies will be applied to the enrolled Windows devices. This may take a few minutes to apply all the policies. Once applied, they will appear in the ADSS Web RA web portal.
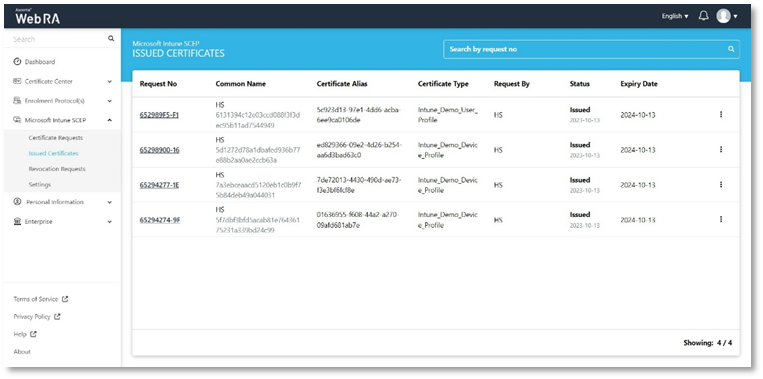
Access ADSS Web RA web portal > Certificates. The certificates appear in the listing.
- When creating a device certificate, as soon as you Sync, all the configured policies will be applied to the enrolled Windows devices automatically. Once applied, they will appear in the ADSS Web RA admin portal.

Android Enrolment for Microsoft Intune SCEP
By enrolling your device in Microsoft Intune, you get secure access to work or school apps on your Android device, and access to apps in Intune Company Portal and the Microsoft Intune app. The Company Portal app and Intune app also monitor your device settings to ensure they meet your organization's requirements and syncs including apps, policies, and updates from your organization to your device.
Firstly, you will create Android configuration policies for Trusted certificates and SCEP certificate similar to the ones created for Windows in section 6.4. Then you will proceed with the Android enrolment process.
Setup Android enrolment in Intune Application
- Access the Microsoft Intune admin center.
- From the left menu, click Devices > Android > Android enrollment.
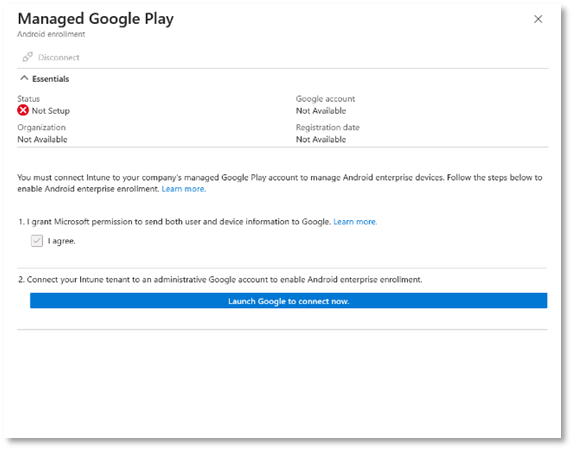
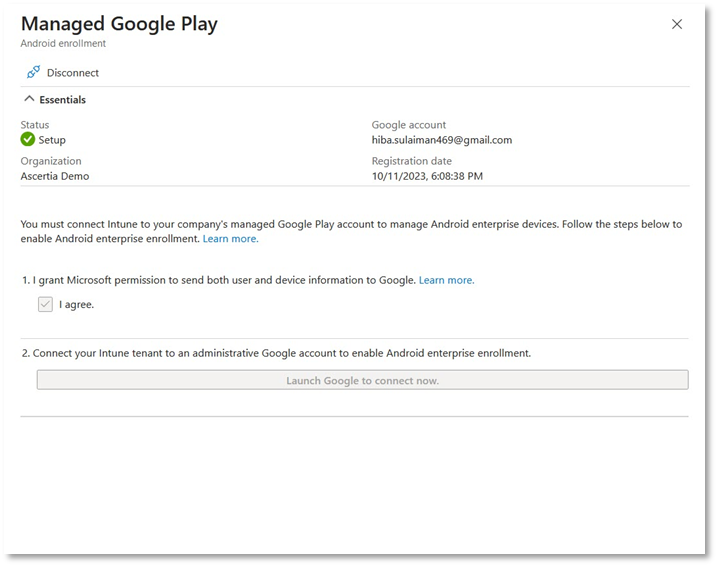
- Scroll to Android Enterprise and under Properties click on Managed Google Play.
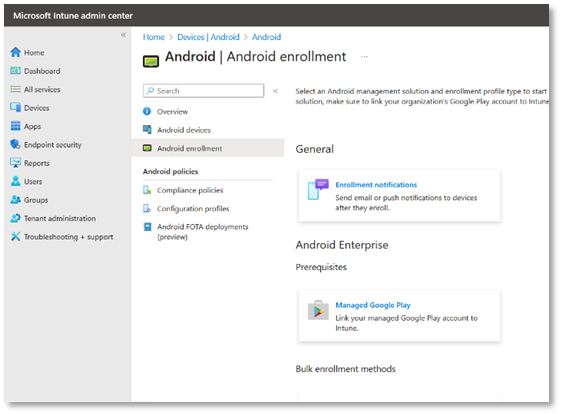
- The Status of this application is Not Setup.
- Select I agree under I grant Microsoft permission to send both user and device information to Google.
- Then click Launch Google to connect now.
- Follow the wizard under the Google Play, by clicking Sign in.

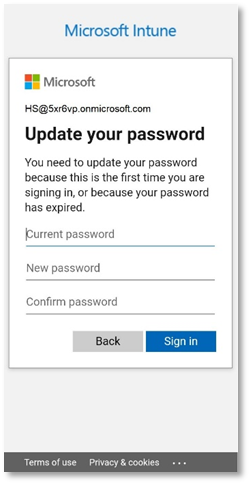
- The following screen will appear.
Enter your current password and set a new one. Then click Sign in.
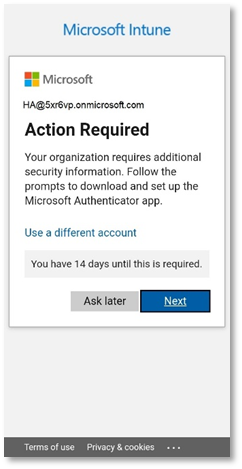
- If you have not followed the Windows enrolment for Microsoft Intune, and have not set up the Authenticator, the following will appear. Click Next.
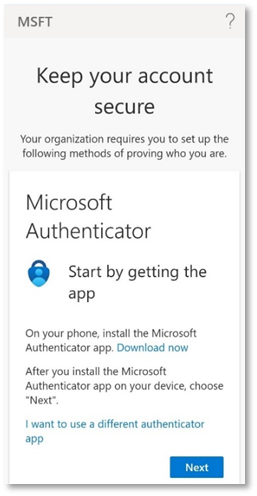
- The Keep your account secure will appear. Click Next.
- A code will appear on your mobile’s authenticator app, enter the code, then click Next.
- It will redirect you to Google’s log-in page.
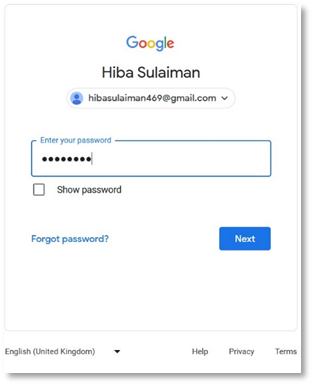
Enter email address and click Next.

- Then enter password and click Next.
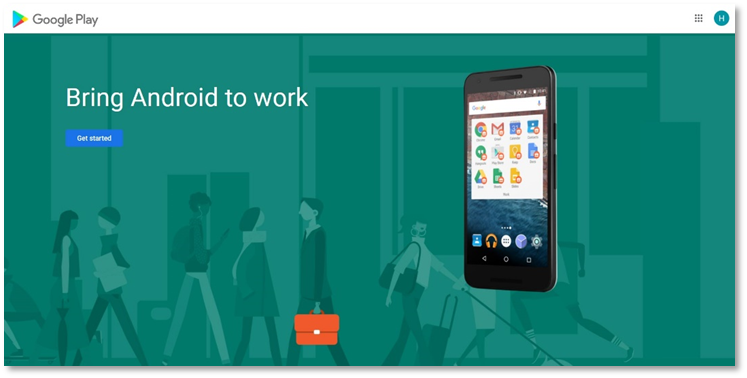
- Once you log in to your Gmail account, it will redirect you to the home page. Click Get started.
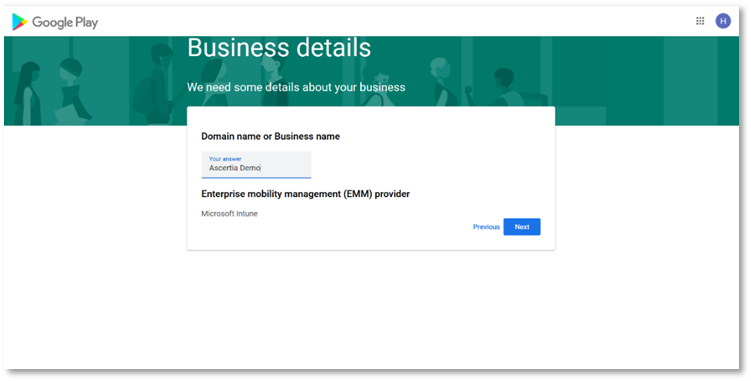
- Enter a Domain name e.g. Ascertia Demo and click Next.
- Enter the following:
- Your name
- Phone
- Select I have read and agree to the Managed Google Play agreement
Then click Confirm.

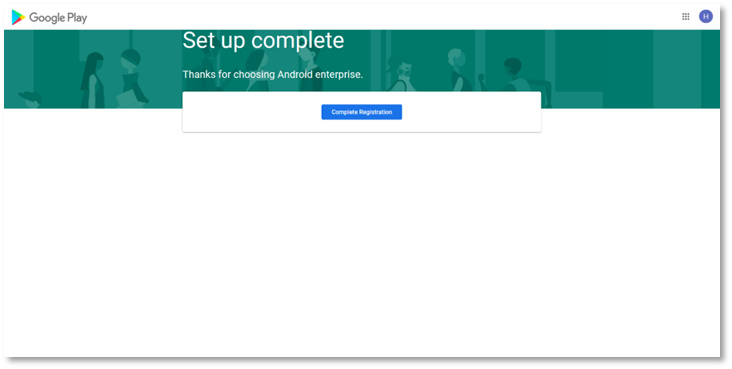
- Click Complete Registration to complete the setup.
- Intune will redirect you to the Managed Google Play tab with the status Setup. If it does not redirect you automatically, you can switch to the Microsoft Intune admin center, the status will appear as Setup.
- Once the device enrolment is compete, you have to enrol your Android device on the Company Portal app.
Enrol your Android device with Company Portal
Enrol your personal or corporate-owned Android device with Intune Company Portal to get secure access to company email, apps, and data. Use the same Gmail account to log in to this application that you have used in Microsoft Intune.
Company Portal supports devices running Android 8.0 and later.
Install Company Portal application
- On your Android device, tap Home, then tap Play Store.
- Search for and install Intune Company Portal.
- Tap Accept, when app permissions prompt.
Enrol Device
During enrolment, when prompted, choose a category that best describes how you use your device.
- Open the Company Portal app and sign in with your work account. If prompted to, review notification permissions for the application.
- If prompted to accept organization’s terms and conditions, tap Accept All.
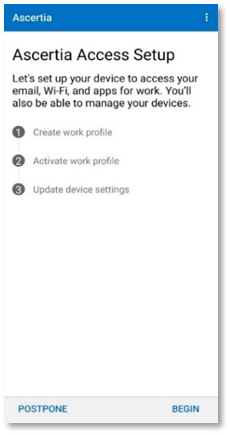
- Tap Begin to enrol your device.
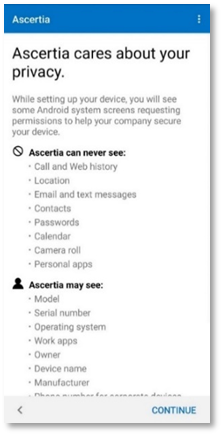
- Review what your organization can and cannot see. Then tap Continue.
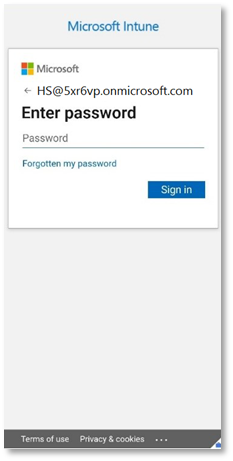
- Log in to your Microsoft Intune account by:
- Entering your email e.g. HS@5xr6vp.onmicrosoft.com
- Password
- Then click Sign in.
- Login to the Authenticator app and sign-in with your Microsoft Intune user credentials. Open the Authenticator app on your device and approve with the prompted verification code. Refer to section 6.1 point 4 to see the Microsoft Authenticator configurations.
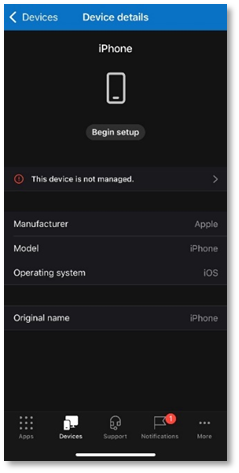
- Your device is enrolled in the Microsoft Intune admin center.
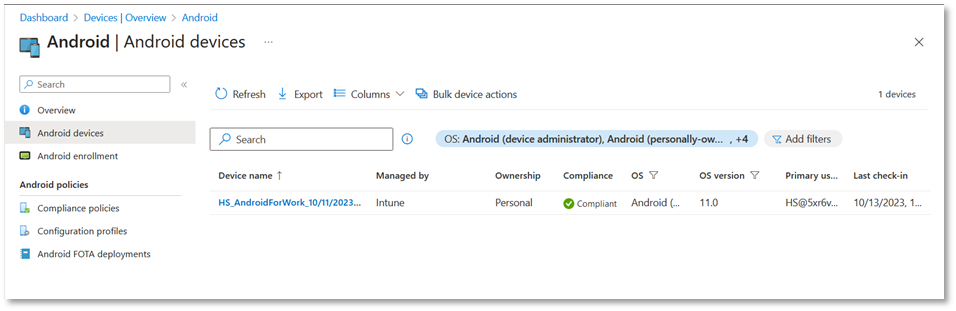
- Click on the device, all the details of the device will be displayed.

Android Sync to Generate Certificates
- Once your Google account is linked with Intune, click Sync to apply all the policies and updates.

- Now, you can Sync via Company Portal app or from the Microsoft Intune admin center as explained above, to apply all the profiles you have created for your Android device. Once the policies are applied, your certificates can be viewed from the ADSS Web RA admin or web portal (depending on the type of certificates i.e. User or device).
iOS Enrolment for Microsoft Intune SCEP
Enrol your iOS device with the Intune Company Portal app to gain secure access to your organization's email, files, and apps.
After your device is enrolled, it becomes managed. Your organization can assign policies and apps to the device through a mobile device management (MDM) provider, such as Intune.
Setup iOS Enrolment in Intune Application
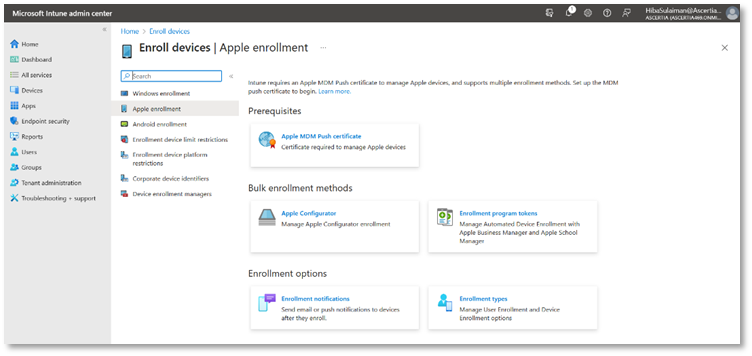
- From the left menu, click Devices > iOS/iPadOS > iOS/iPadOS enrollment. From the Prerequisites, click Apple MDM push Certificate. Select I grant Microsoft permission to send both user and device information to Apple.
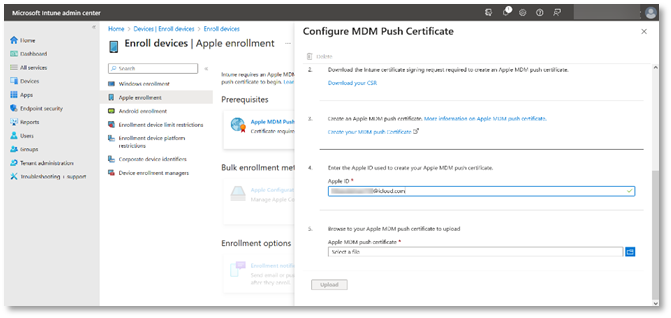
- Download the Intune certificate-signing request.
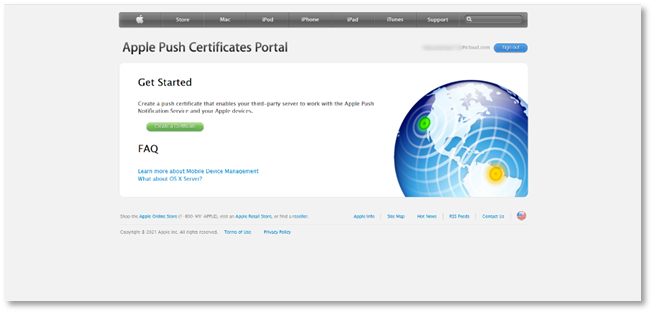
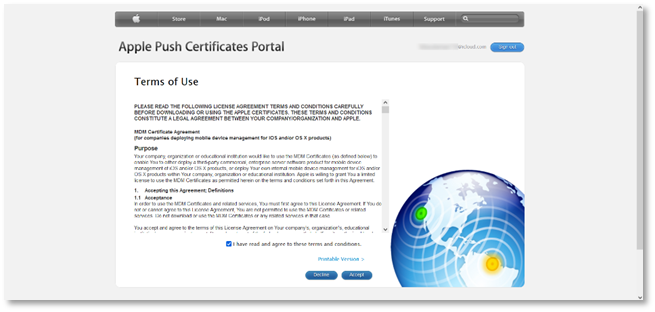
- Then create an Apple MDM push certificate. Click the link; it will redirect you to the Apple (Idms) portal. Login with your Apple ID.
- At the Terms of Use, select I have read and agree to these terms and conditions, and click Accept.
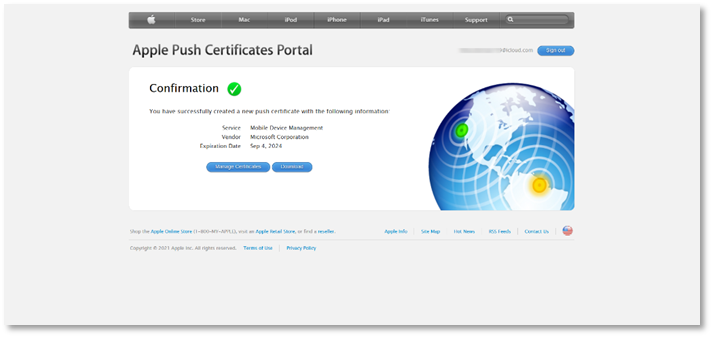
- In the next step, upload the CSR you downloaded in step 3, and click Upload.

- The confirmation screen will appear, where you can manage certificates or download it.
- In the Microsoft Intune admin center, enter your Apple ID.
- Upload your Apple MDM push certificate and then click Upload. Once the upload is complete, all the enrolment methods will be enabled.
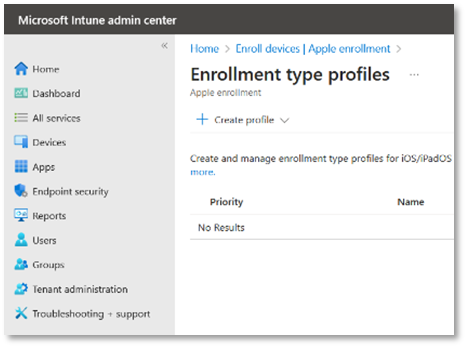
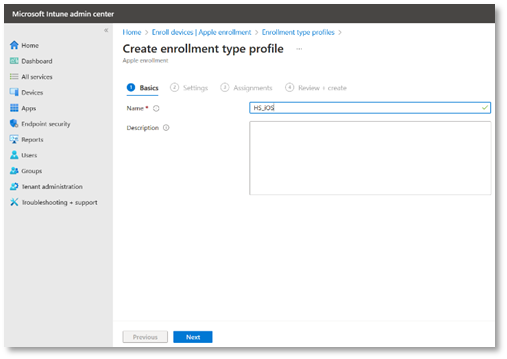
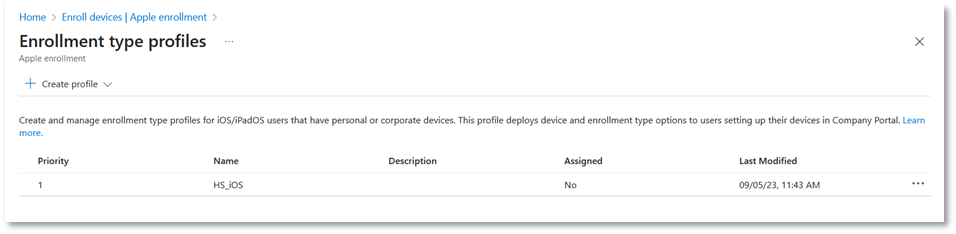
- From the Enrolment Options, click Enrolment Types. Then click Create profile. Select iOS/ iPadOS.
- In the Basics tab, set a profile name for the iOS Certificate e.g. HS_iOS. Then click Next.
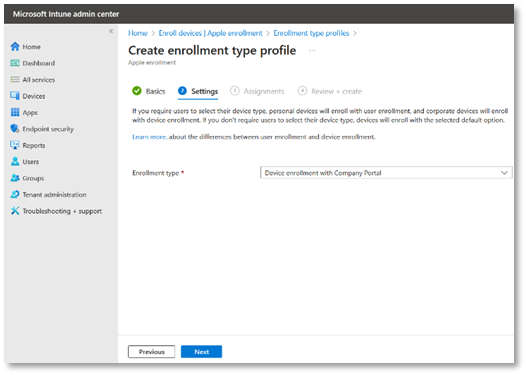
- In the Settings tab, select Device enrolment with Company Portal from the drop down, and click Next.
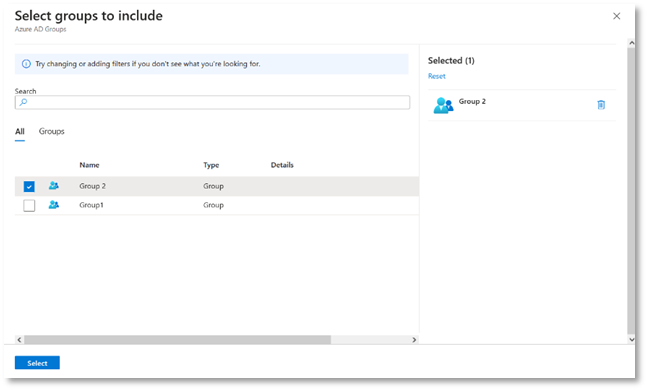
- In the Assignments tab, click Add groups, then select your relevant group e.g. Group 2 and click Select.

- The group will be added to the list of Included groups.
- On the Review + create tab, click Create.
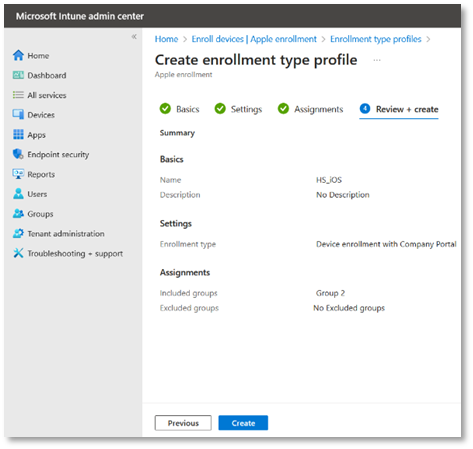
- The profile you created will be listed in the enrolment type profiles listing.
Once the device enrolment is compete, you have to enrol your iOS device on the Company Portal app.
Enrol your iOS device with Company Portal
Enrol your personal or corporate-owned iOS device with Intune Company Portal to get secure access to company email, apps, and data.
Company Portal supports devices running iOS 14.0 and later.
Install Company Portal application
- On your iOS device, tap Home, then tap App Store.
- Search for and install Intune Company Portal.
- Tap Accept, when app permissions prompt.
Enrol Device
During enrolment, when prompted, choose a category that best describes how you use your device.
- Open the Company Portal app and sign in with your work account. If prompted to, review notification permissions for the application.
- If prompted to accept organization’s terms and conditions, tap Accept All.
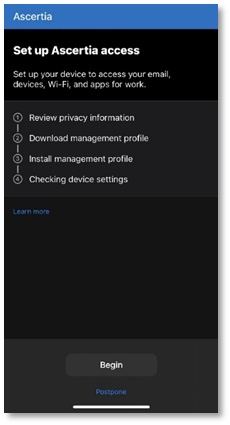
- Tap Begin setup to enrol your device.
- From the set up organization access screen, tap Begin.
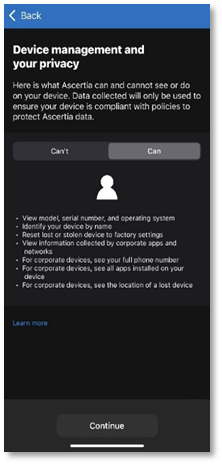
- Review what your organization can and cannot see. Then tap Continue.
- If prompted to, allow permissions to download a configuration profile.
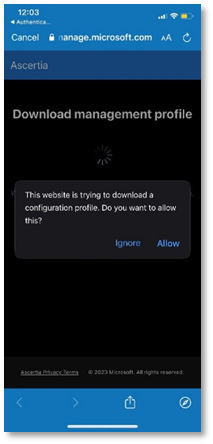
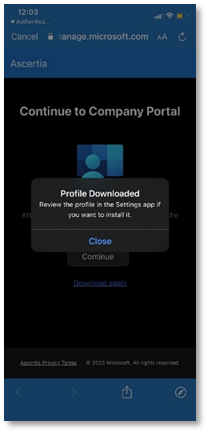
- Once the profile is downloaded, the following confirmation message will pop-up, tap Close.
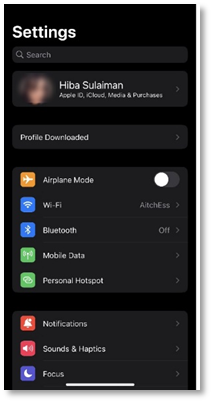
- Then go to your iOS device’s Settings. Under the Apple ID, tap Profile Downloaded.
- The configured management profile will be enabled, tap Install to proceed.

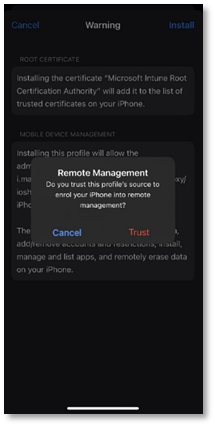
- While enrolling the certificate, the following will appear.
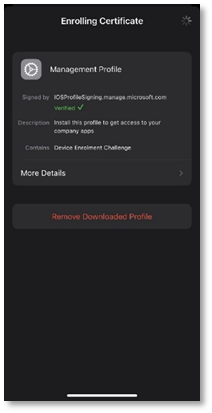
- When prompted, tap Trust to enrol your iOS device into remote management.
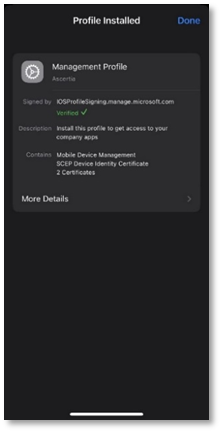
- Once the profile is installed, tap Done. Open the Company Portal app again.
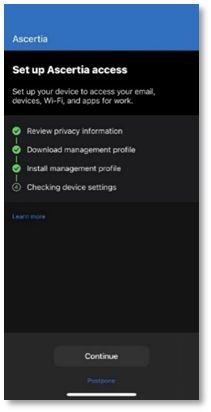
- The set up organization access screen will appear, tap Continue.
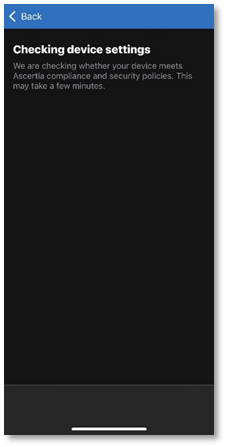
- The app will check the device settings. This may take some time.
- Once your device in enrolled, your device details will appear.

iOS Sync to Generate Certificates
- Once your iOS device is linked with Intune, in the list of devices you manage, select the iOS device to open its Overview pane, and then select Sync.

- To confirm, select Yes.
You can Sync via Company Portal app or from the Microsoft Intune admin center as explained above, to apply all the profiles you have created for your Android device. Once the policies are applied, your certificates can be viewed from the ADSS Web RA admin or web portal (depending on the type of certificates i.e. User or device).
View Certificates (from ADSS Web RA Web Portal)
The Microsoft Intune user can view and manage the certificates from ADSS Web RA web portal.
- Log in to ADSS Web RA web portal using your Microsoft Intune user credentials.

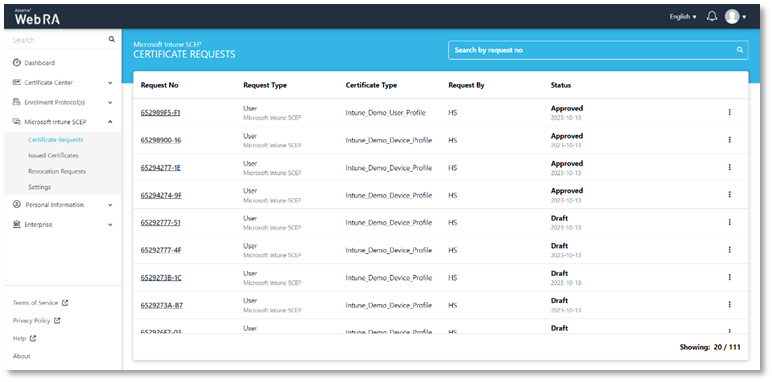
- From the left pane, expand Microsoft Intune SCEP > Create Requests.
This page consists of all the certificate requests including approved, and requests in draft form, due to any limitations from ADSS Web RA.
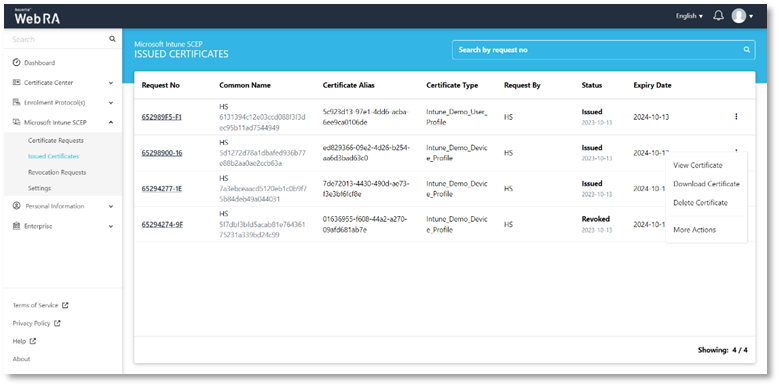
- Click Issued Certificates to view all the certificates including issued, revoked, expired, etc.

- To revoke a certificate, click
 against a certificate, and then click More Actions.
- Select Revoke Certificate, and Certificate Revocation Reason and click Revoke.
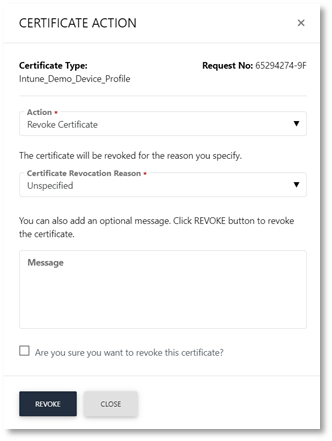
- The certificate will appear in the Revoked Certificates listing.

Troubleshooting
This section lists a few common issues that a user may face while setting up Microsoft Intune SCEP. To ensure a smooth process, you need to ensure the following:
- If you are already logged in to Ascertia’s domain, your Ascertia’s account signed up with Microsoft may be logged in automatically. You need to ensure that you either log out from your existing account, and re-login with other credentials or use a different browser.
- In case you are unable to access Groups in the Microsoft Intune admin center, make sure that you are not connected to Ascertia’s network. Switch to a different network to access Groups.
- While installing the Management Profile in the iOS company portal app, the profiles may not install due to poor network. Ensure that you do not have any connectivity issues while following the instructions mentioned in this document.