Desktop Signing
Desktop Signing facilitates to register user ID and provides the capability to manage its certificates keys. This certificate can be used for Advanced Electronic Signature, for the following purposes:
- Document Signing
- Attribute Authority
- Certificate/CRL Signing
- Code Signing
- Document Encryption
- DRM Agent
- Email Signing
- IP Sec
- Log Signing
- MSSP request Signing
- OCSP request Signing
- OCSP Response Signing
- Qualified Certificate
- Rights Issuer
- SCVP Request Signing
- SCVP Response Signing
- TLS Client Authentication
- TLS Server Authentication
- Timestamp Response Signing
- Verification Response Signing
- XKMS Request Signing
- XKMS Response Signing
A certificate request can be for issuance/approval, renewal and revocation.
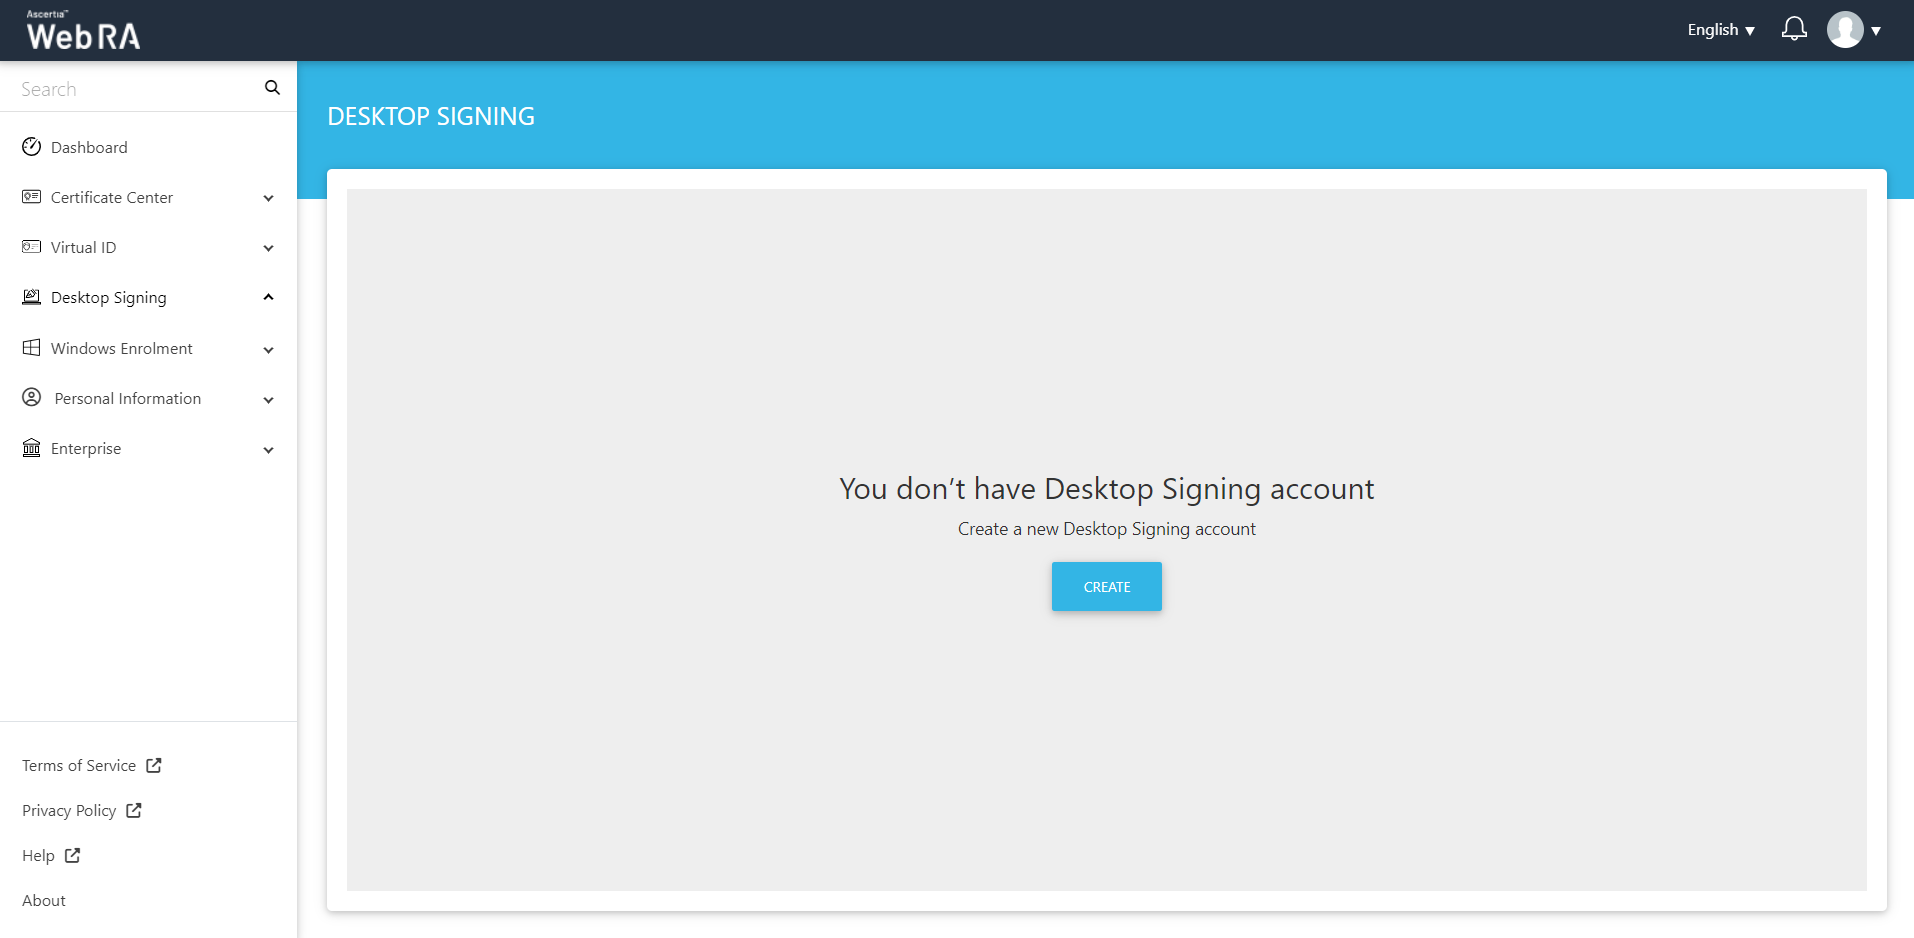
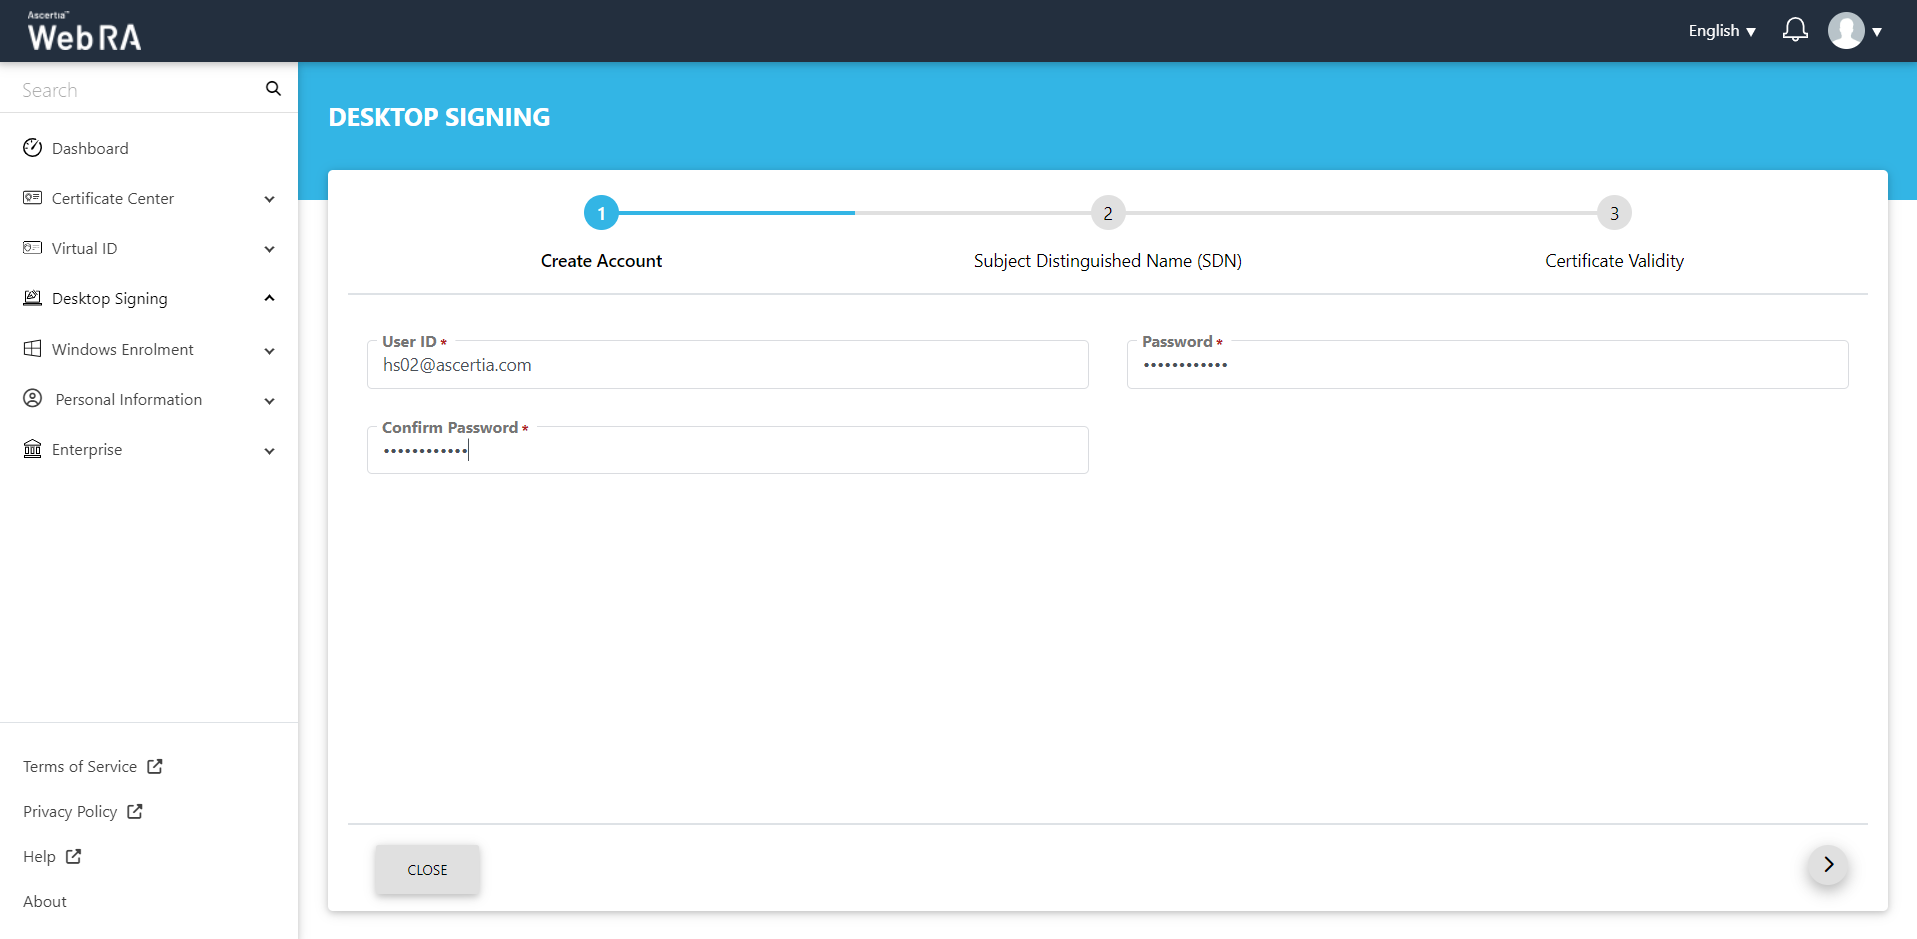
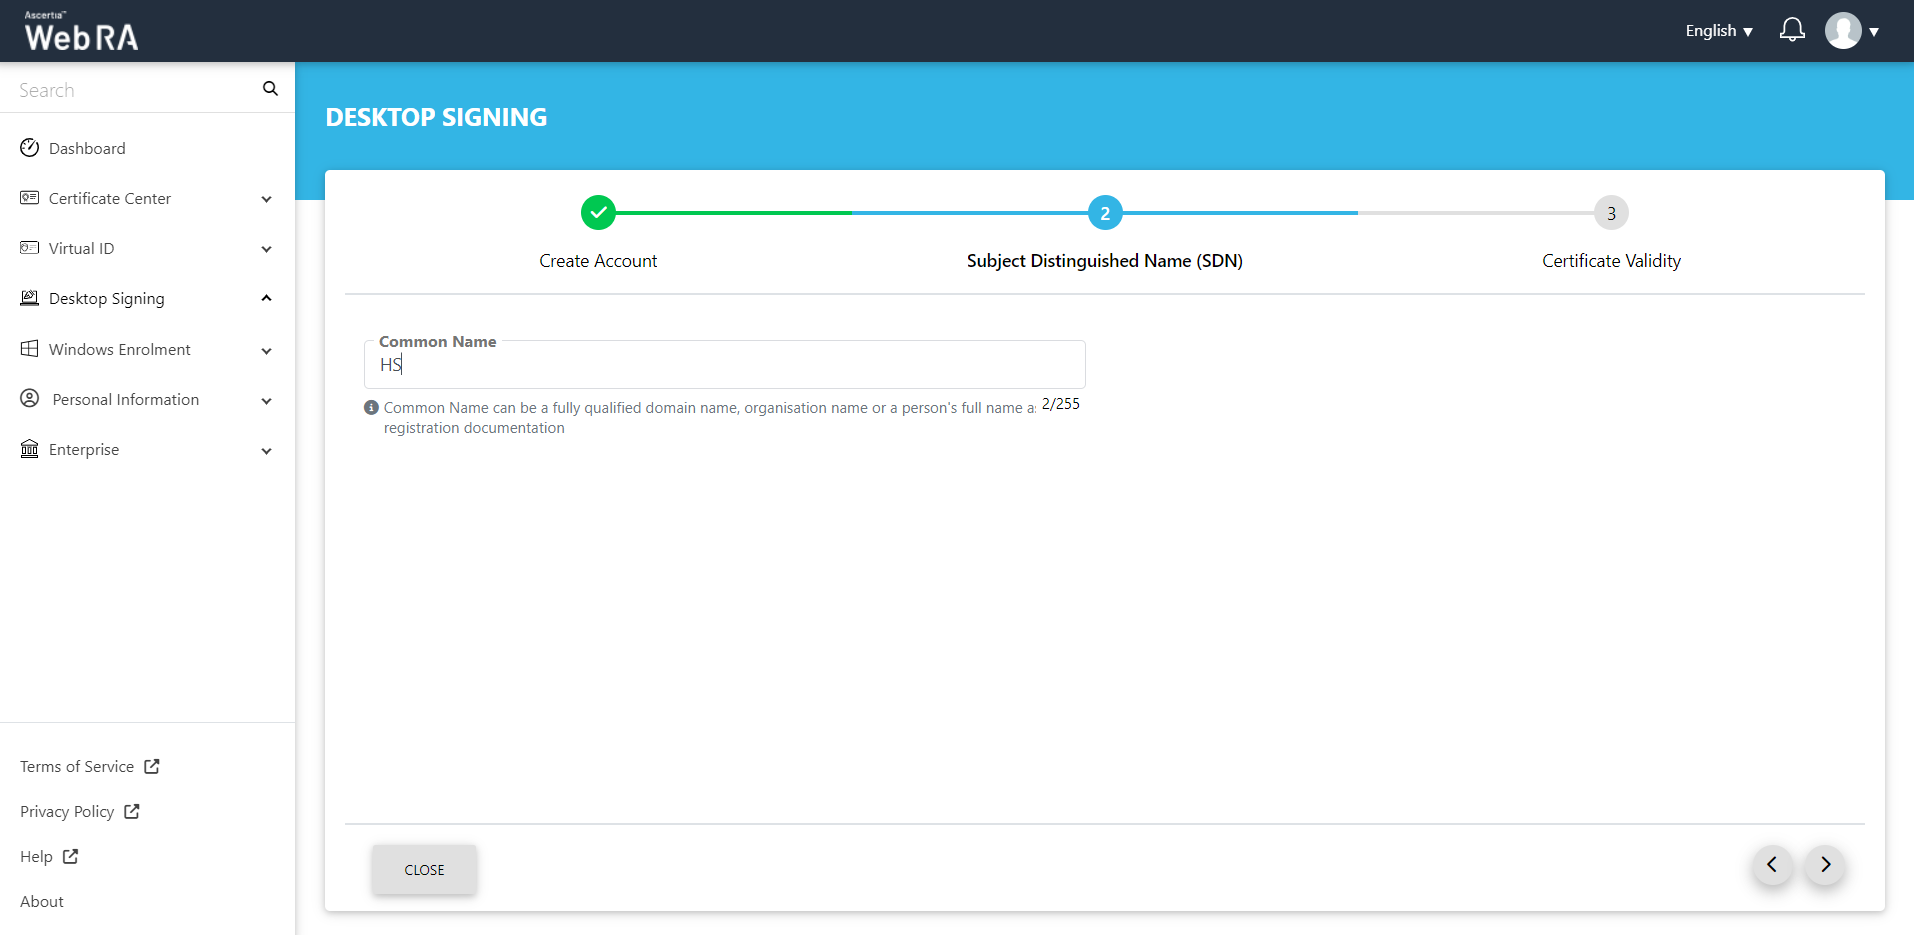
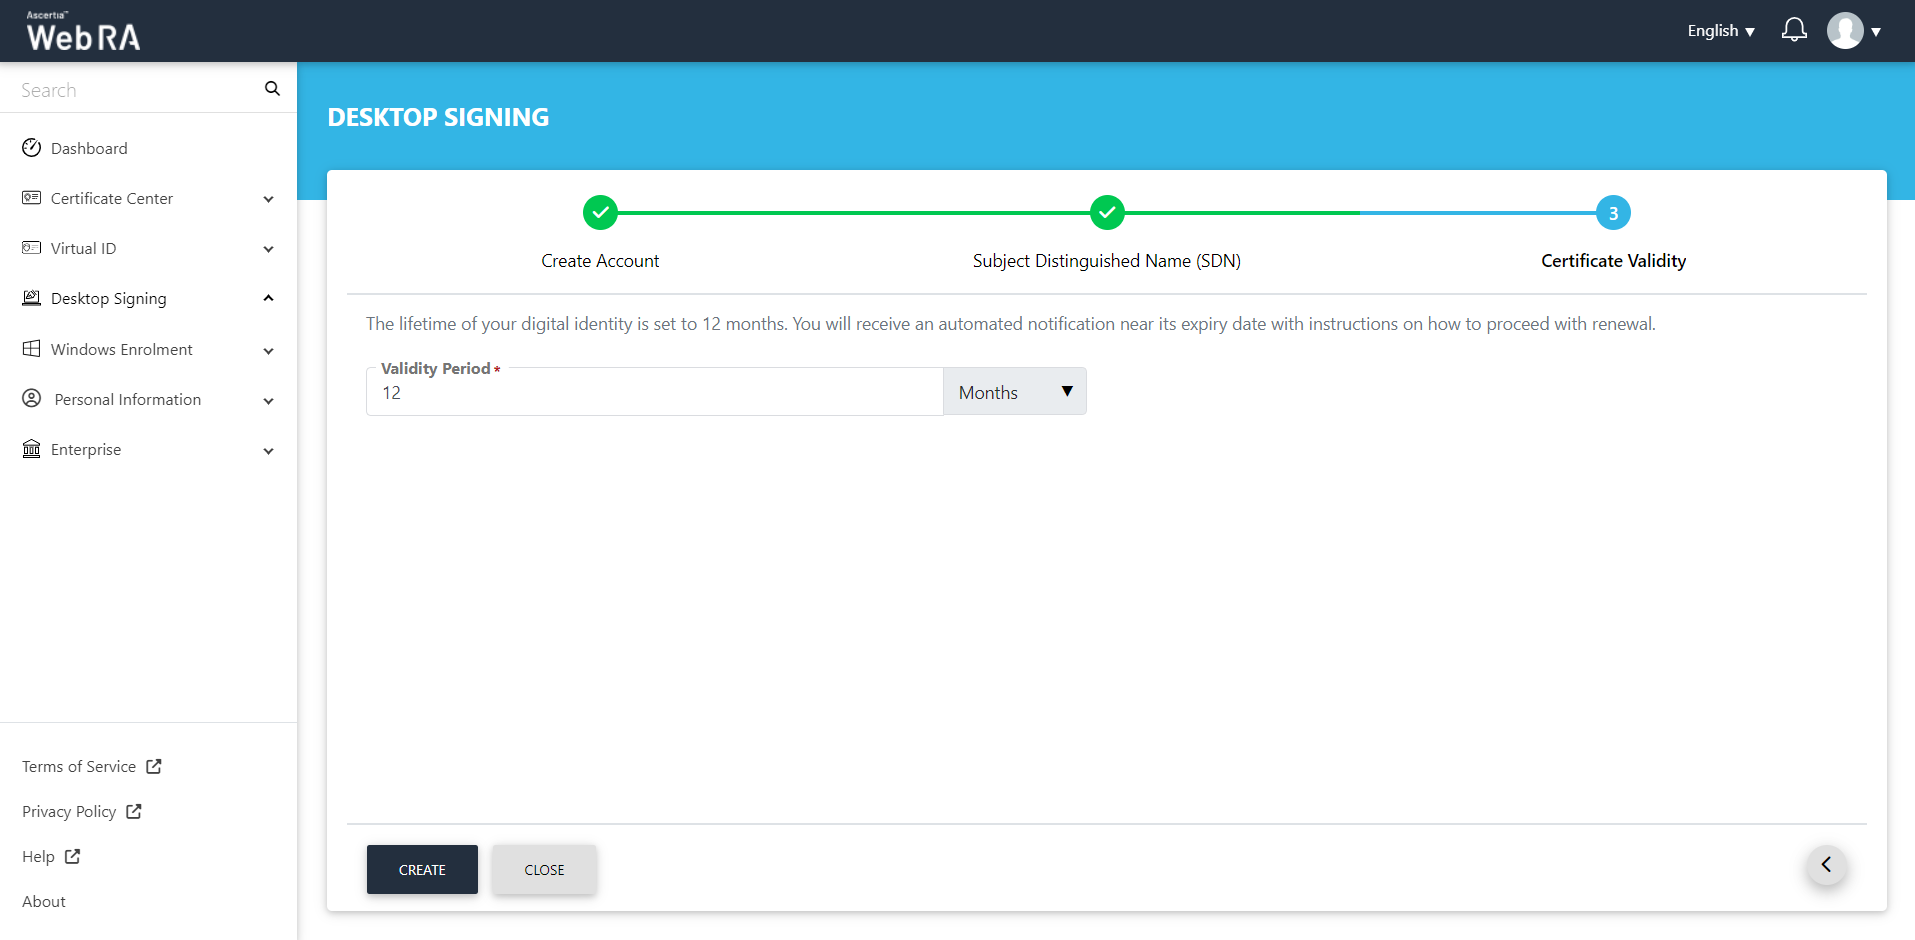
By default, the "Create" button will appear allowing you to create a Desktop Signing account for the first time. This can be done from Dashboard or by navigating to Desktop Signing option from left panel. You need to provide user ID, password, your full legal name and other organization related information for the certificate generation. Select the validity period (if allowed by your Enterprise RAO) for your certificate. Once your desktop signing account is successfully created, a dialog will pop -up to setup password for your PFX.
Create a Desktop Signing Account
- Click either on Dashboard or navigate to Desktop Signing. Click on "Create" to setup a new Desktop Signing account for the very first time.
- Enter the user ID, password and confirm password, then click next.
- Provide the common name and address, then click next.
- Select a validity period for the Desktop Signing certificate.
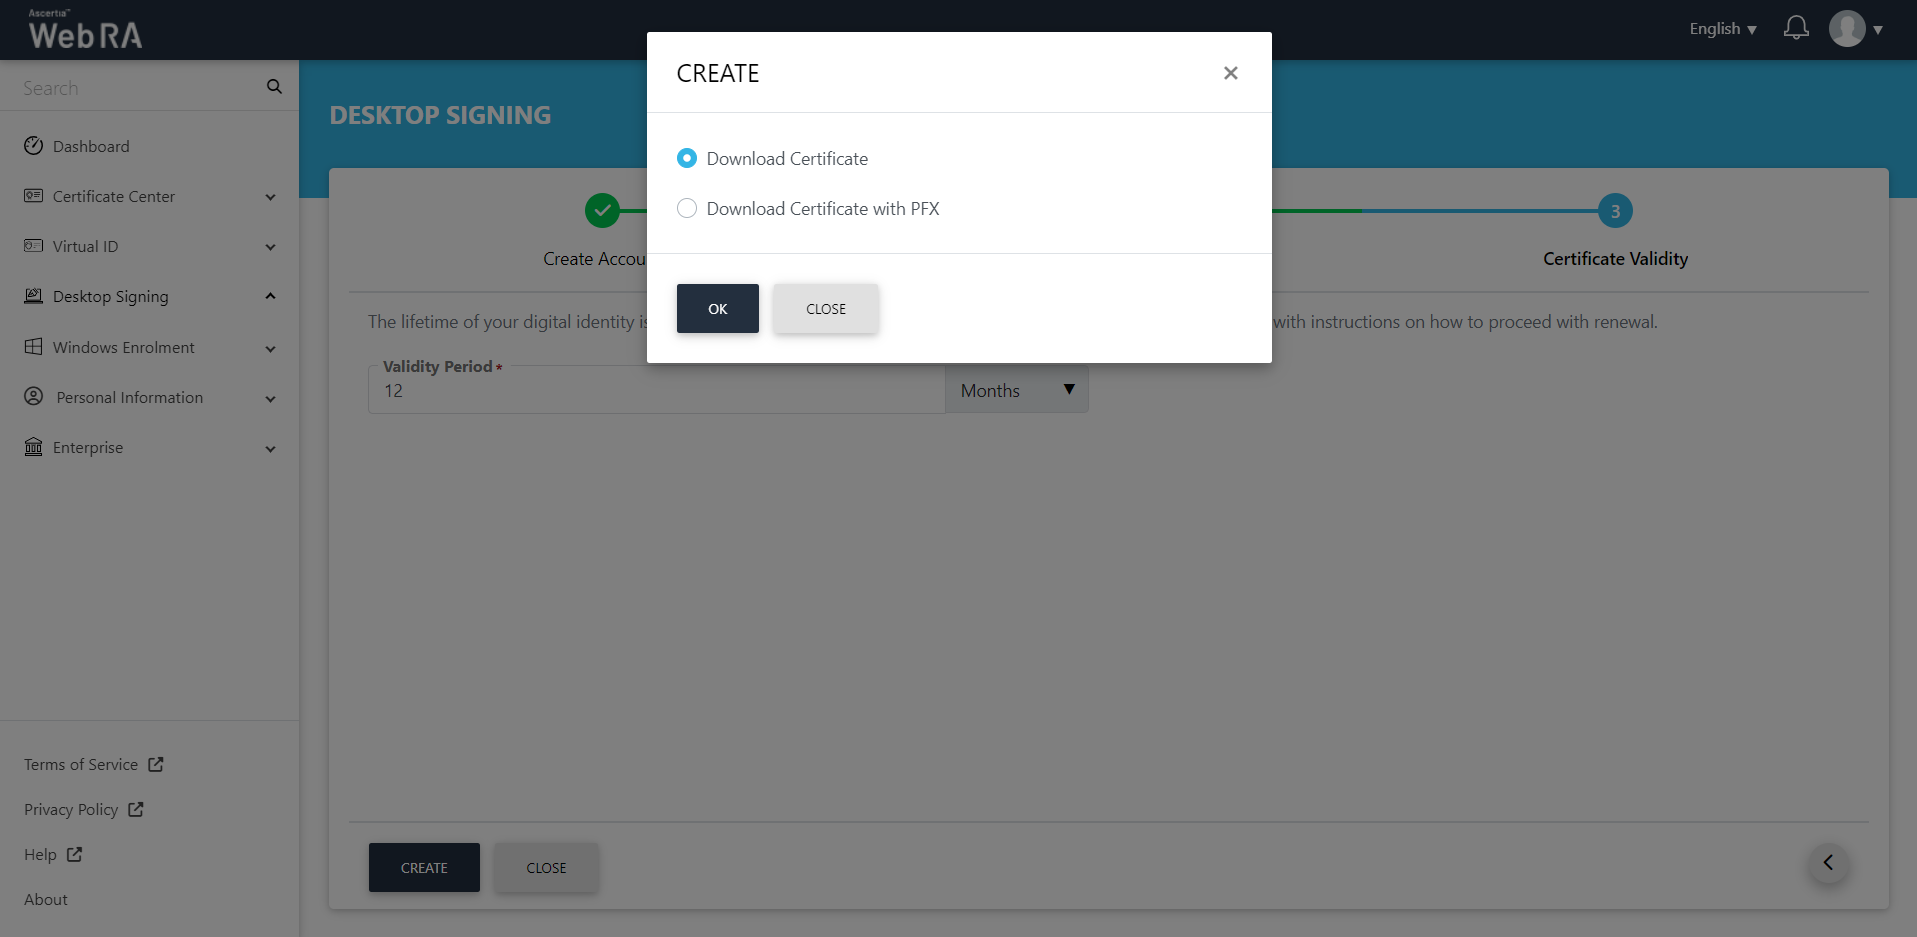
- A Create screen will appear, allowing you to select between "Download Certificate" and "Download Certificate with PFX". Select your option and then click "OK".
If you click "Download Certificate", an account creation confirmation will appear on the screen, and the certificate will be downloaded on your machine, as displayed below:

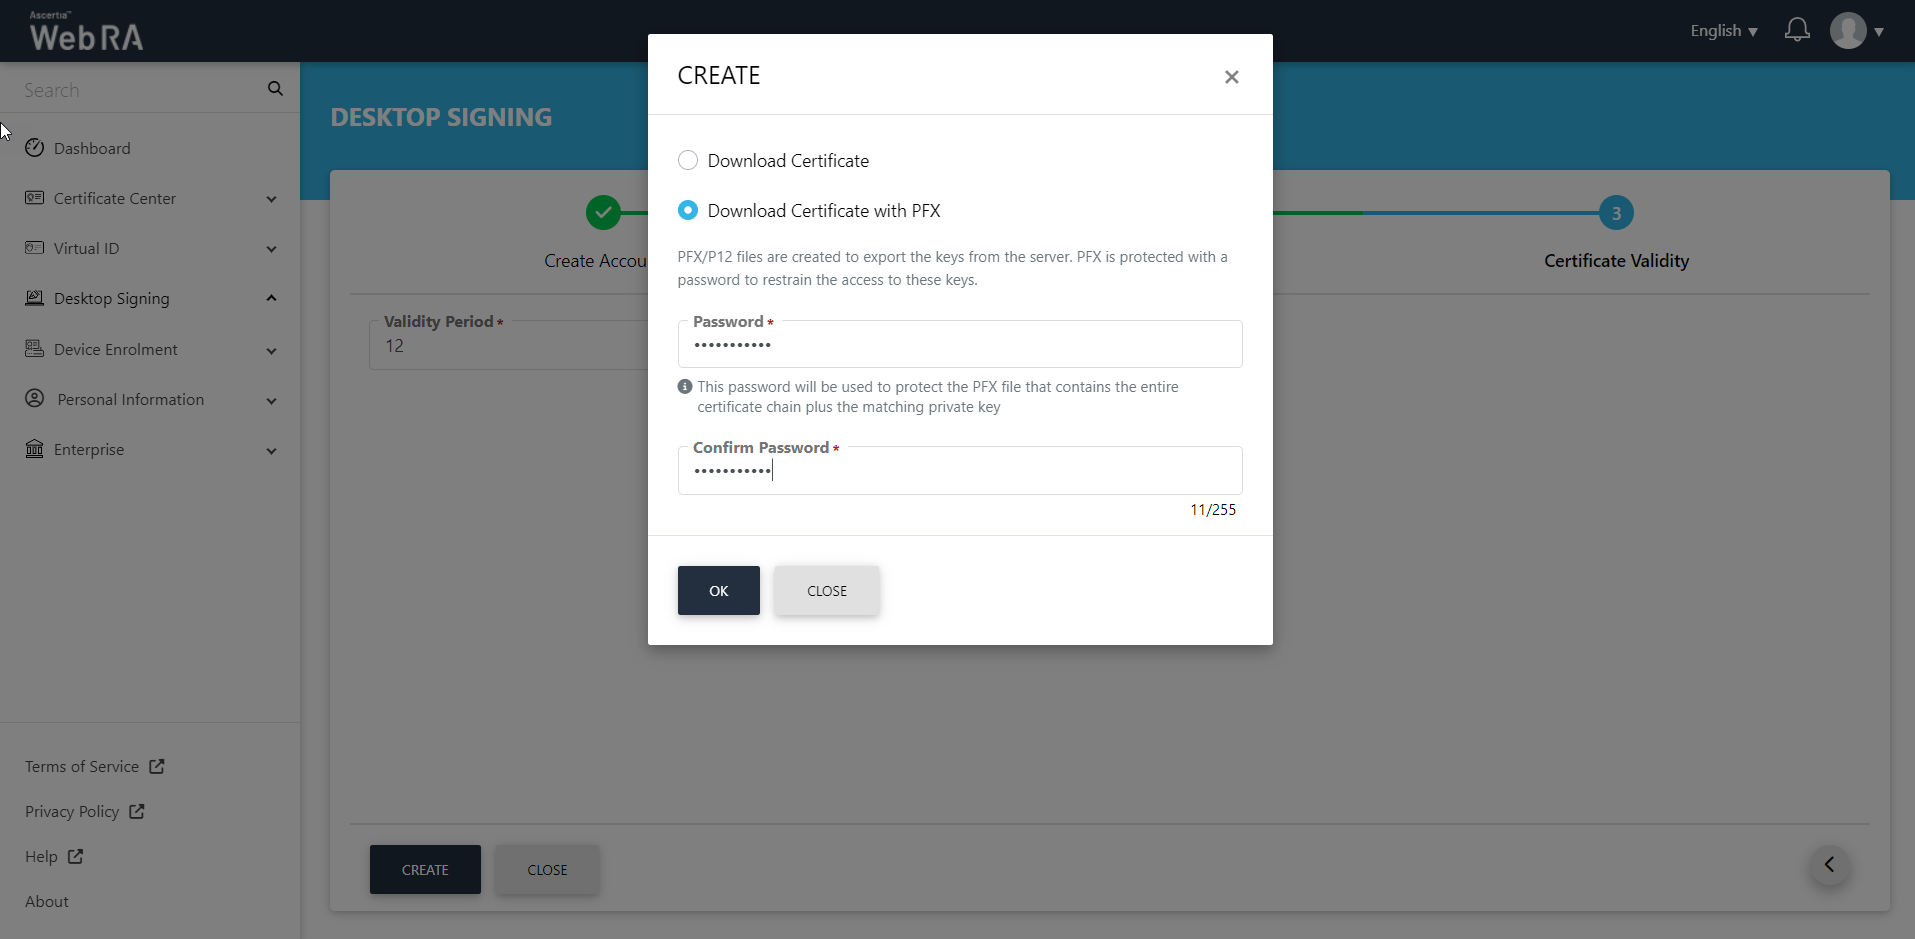
When you click "Download Certificate with PFX", you'll be required setting up a password, and message dialog will be shown on successful account creation along with an option to save Desktop Signing certificate and it's associated PFX.
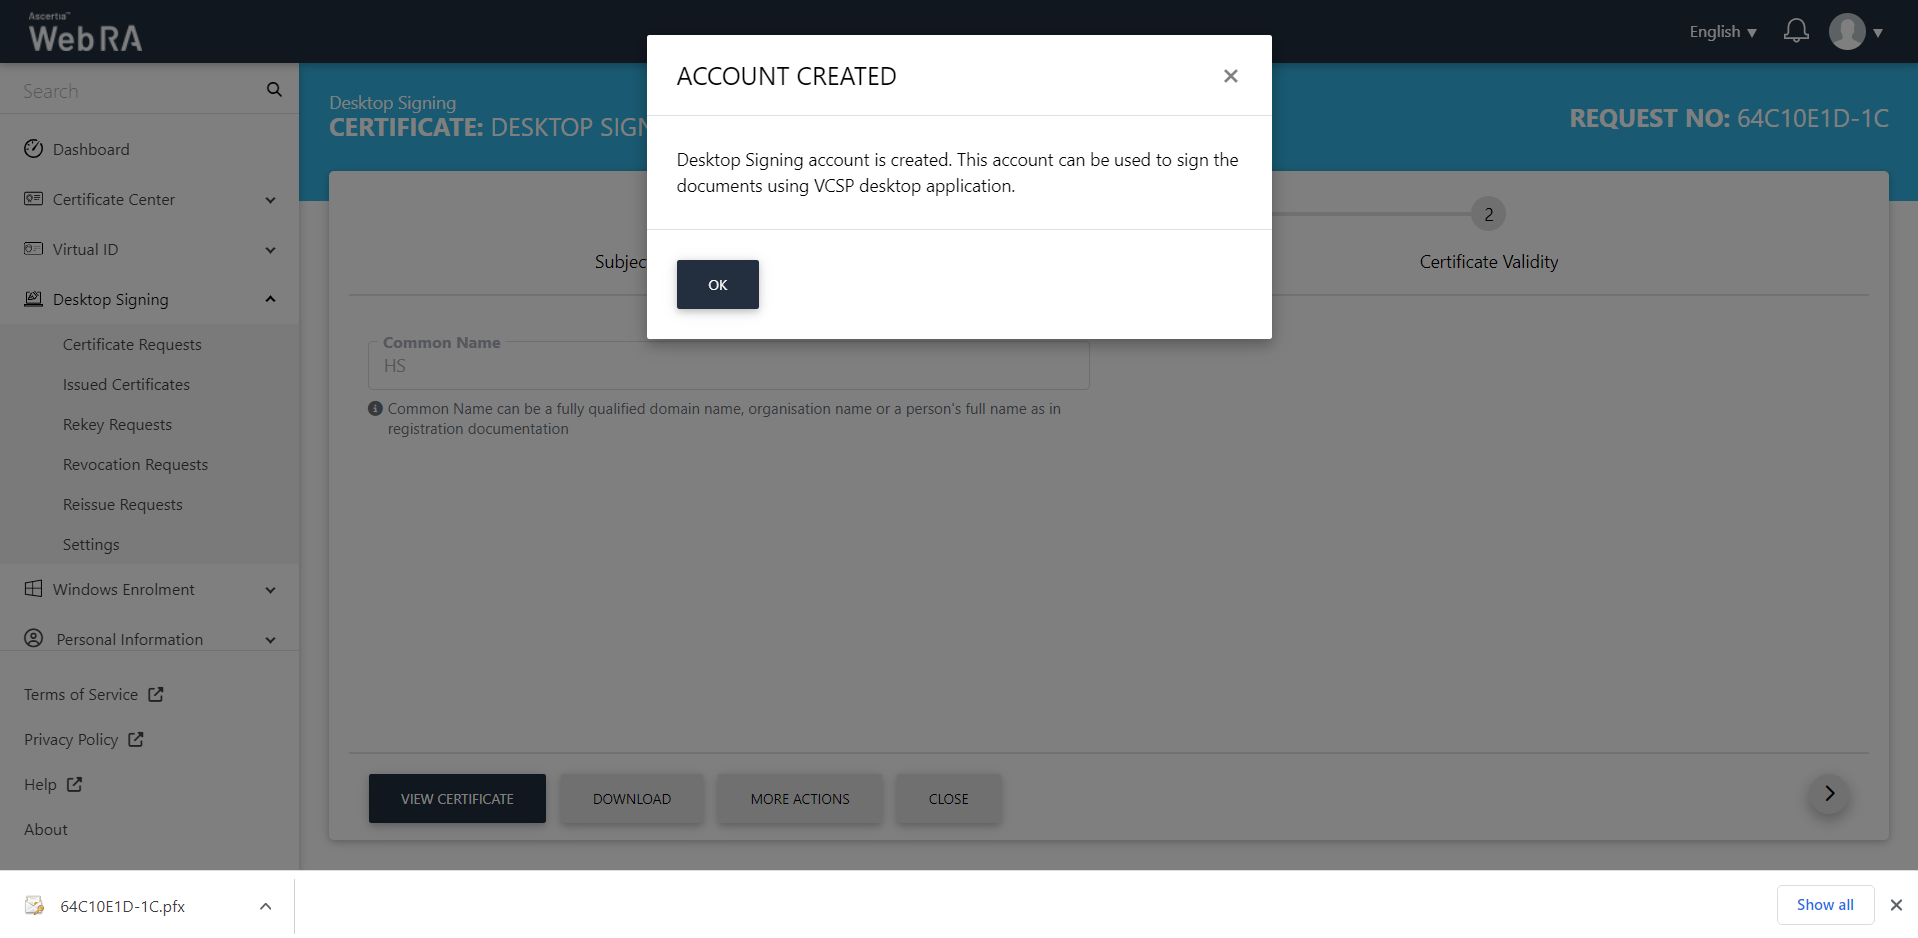
Once you enter password details, click "OK" and an account creation message will be displayed as below:
A certificate request with an approved status will be shown under "Certificate Requests" list. You can view your request details, and view or download your associated certificate as well. Same certificate will also be shown under "Issued Certificate" list.