Roles
This section allows the operator to manage all roles created in the enterprise.
Follow the steps given below to navigate to the 'Roles' screen.
- In the admin portal, click the 'Enterprises' module from left menu, and then click 'Registered' to open the list of registered enterprises.
- Click the three-dot
 button next to the enterprise you want to access, and select 'Manage' to navigate to the enterprise menu.
 - Click the 'Roles' module present in the enterprise menu.
Create a New Role
To create a new role in the enterprise:
- The operator can add a role by clicking on the
 button.
 - The operator then needs to enter the name and description, and can also set that role as default by ticking the check box 'Default'.
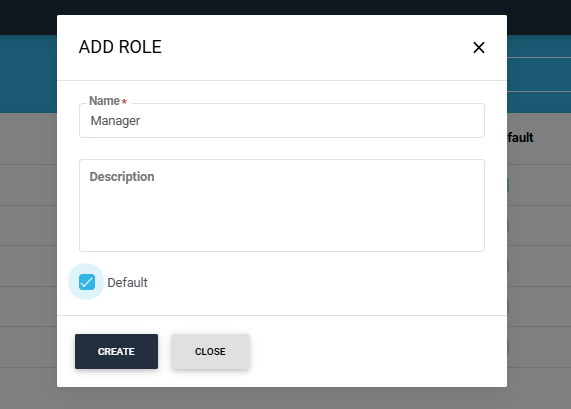
The operator can also set a role as 'Default'.
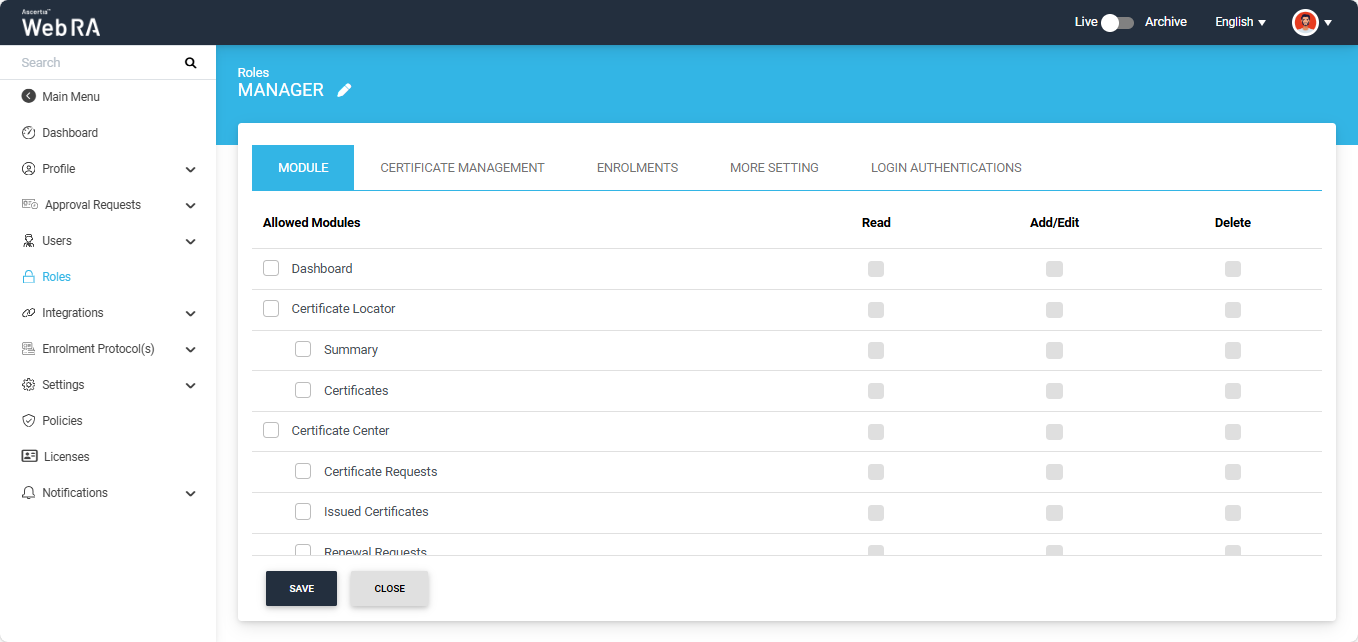
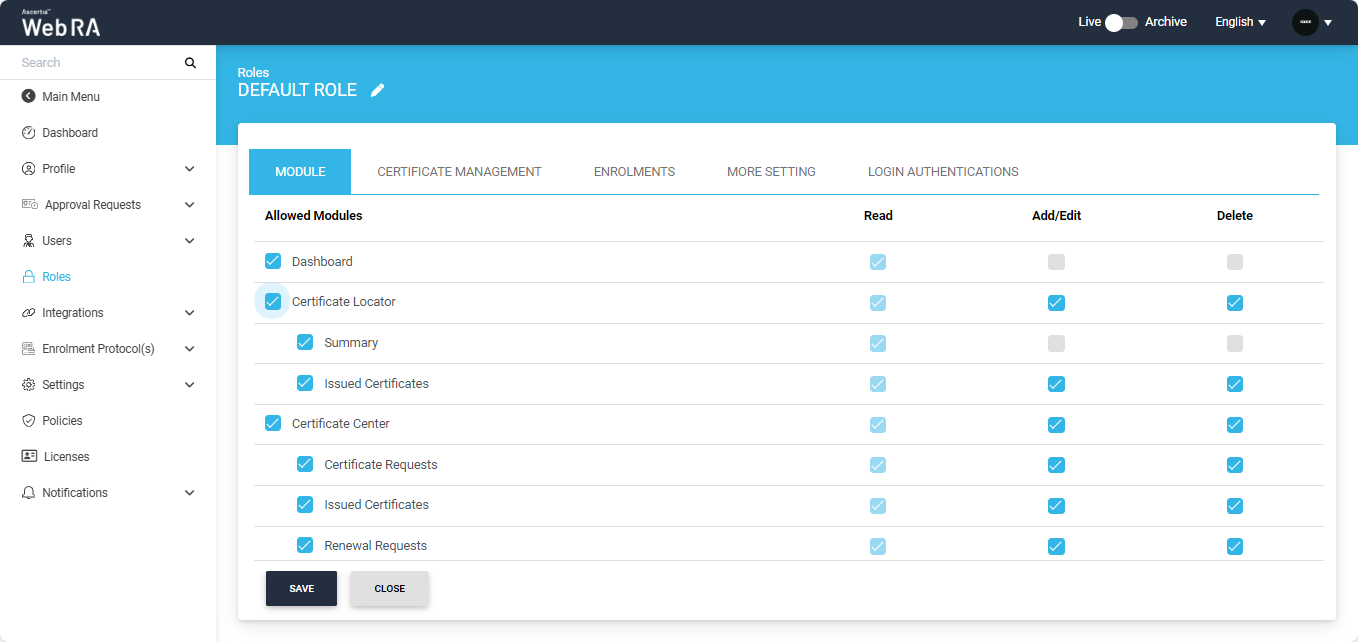
When an operator adds or edits a role, the 'Module' screen appears and displays all modules that can be allowed to a user. The operator can choose whether to allow Read, Add/Edit, and Delete permissions for each selected module.
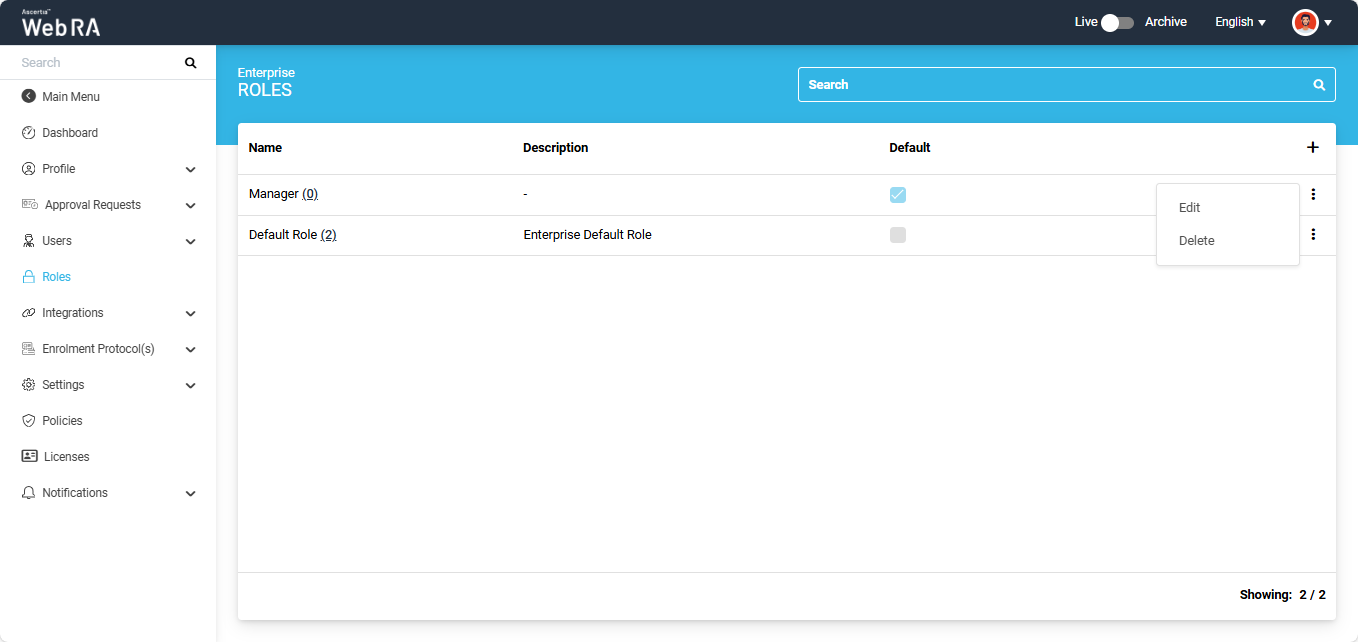
To delete an enterprise role, click the three-dot button next to the role and select 'Delete'.
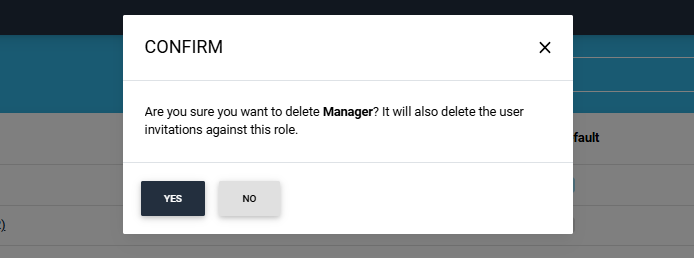
The system will display a confirmation dialog, click 'Yes' to proceed with the deletion.
To modify permissions within a role, click the three-dotbutton and select 'Edit'. The operator can make changes in the following sections of the role:
When an operator creates a new role, all options to "Read, Add/Edit and Delete" against the allowed modules are unchecked. The operator can choose from the options present in the module section to assign it with the role.
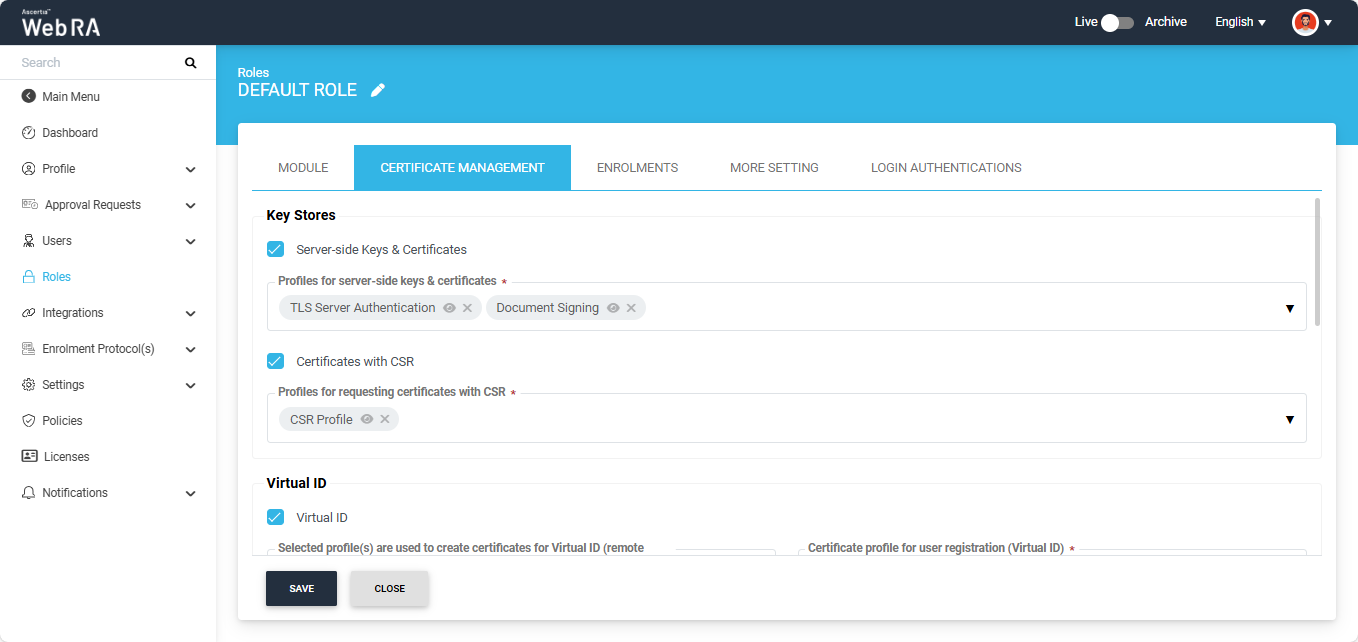
In the Certificate Management section, the operator can assign profiles to the role, allowing a user to create different types of certificates from the user portal.
|
Key Stores |
|
|
Field |
Description |
|
Server-side Keys & Certificates |
Select this checkbox to configure profiles for server-side keys and certificates. Then select the profiles from the drop down to that you want to allow for a role that belongs to an enterprise. |
|
Certificates with CSR |
Select this checkbox to configure profiles with CSR.Then select the profiles that you want to allow for a role that belongs to an enterprise. |
|
Virtual ID check box |
Select this checkbox to configure profiles to enable Virtual ID. |
|
Profiles to create certificates for Virtual ID (remote authorisation) |
Select the profiles that you want to use to create Virtual ID certificates. |
|
Certificate profile for user registration (Virtual ID) |
Select a profile to create a default Virtual ID certificate. |
|
Enable Virtual ID Auto Registration |
Select this checkbox to allow auto registration of Virtual ID in ADSS Server while user registration in ADSS Web RA Server. |
|
Desktop Signing check box |
Select this checkbox to configure profiles to enable Desktop Signing. |
|
Profiles to create certificates for Desktop Signing |
Select the profiles that you want to use to create certificates for Desktop Signing. |
|
Desktop Signing profile for user registration |
Select a profile that you want to use to register user and create a default certificate for Desktop Signing. |
|
Provision certificates in Desktop Signing |
Select this checkbox to allow certificate provisioning for Desktop Signing to users allowed in this role. |
|
SigningHub check box |
Select this checkbox to configure profiles to enable SigningHub. |
|
Default certificate profile for SigningHub |
Select a profile that you want to use to register user and create a default certificate for SigningHub using Virtual ID. |
|
Enable SigningHub Auto Registration |
Select this checkbox to allow auto registration of user in SigningHub while user registration in ADSS Web RA Server. |
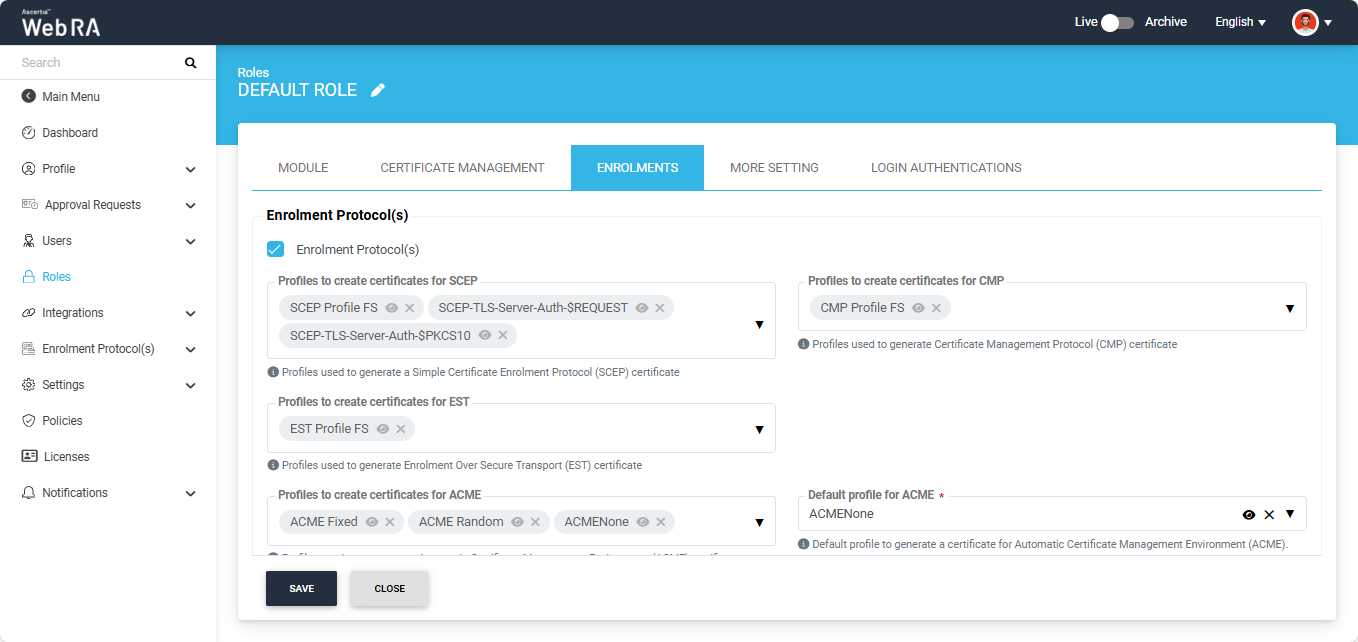
A user can create specific certificates by using different configurations and will be able to manage certificate key generation for the following:
- Device Enrolment
- SCEP
- CMP
- ACME
- EST
- Windows Enrolment
- WIndows User Enrolment
- Windows Device Enrolment
Certificate Access
This setting allows an enterprise owner to manage certificate access and certificate sharing amongst the enterprise users.

PIN/PUK Resend
Enable resend PIN/PUK
This setting allows the enterprise owner to enable or disable the Resend PIN/PUK functionality.
If the ‘Enable resend PIN/PUK’ checkbox is enabled, users of this enterprise will have the option to receive their PIN/PUK values again via email, SMS, or both, depending on the mechanism selected during the creation of the Certification Profile.
Note: If the operator has configured ‘None’ as the mechanism for sharing PIN and PUK values, the ‘Resend PIN / Resend PUK’ button will be hidden in the Token Information section of the Web Portal, even if the resend PIN/PUK permission is enabled in the user’s role permission.
For more details about 'how to configure mechanisms' view the Certification Profiles section.
Enable view PUK
This setting allows the enterprise owner to control the visibility of PUK in the user portal.
If the ‘Enable view PUK’ checkbox is selected, the system will display the PUK in the Token Information section of a certificate. Alternatively, if this checkbox is disabled, the PUK information will not be displayed in the Token Information section.
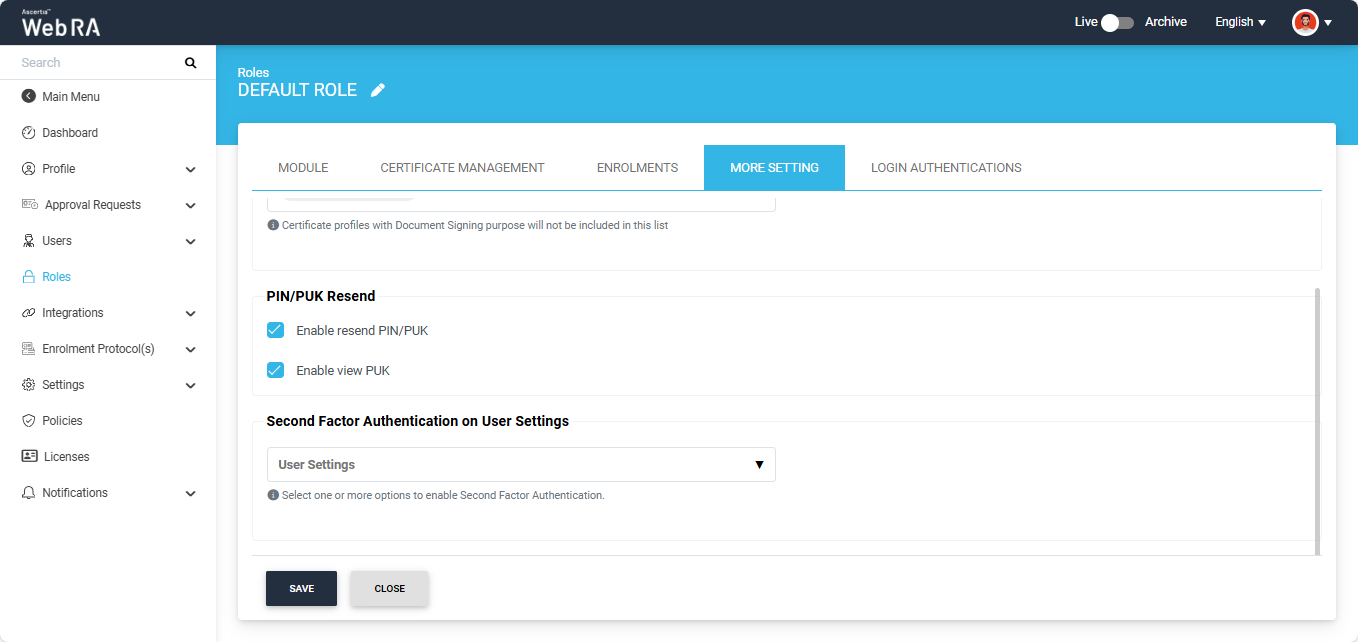
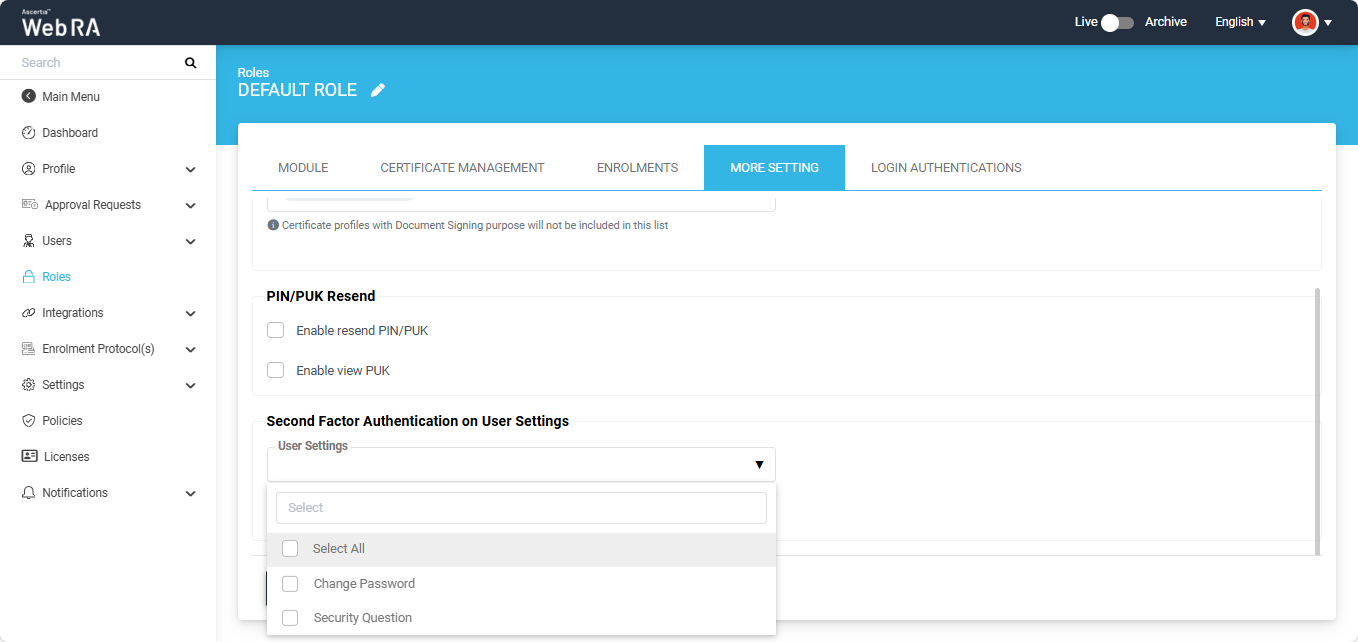
Second Factor Authentication on User Settings
This setting allows the enterprise owner to apply a second factor authentication check to two user actions available in the user portal: changing the password and updating the security question.
When this setting is enabled, any user belonging to the enterprise who attempts to change their password or security question in the user portal will be required to verify the action using a secondary authentication method.
Note: To choose the secondary authentication method, navigate to Roles > Login Authentications and select the required ‘Secondary Authentication Profile’.
The enterprise owner can click the ‘User Settings’ dropdown and select the actions on which they want to apply the second factor authentication.
Clicking the dropdown displays the following options:
- Select All
- Change Password
- Security Question
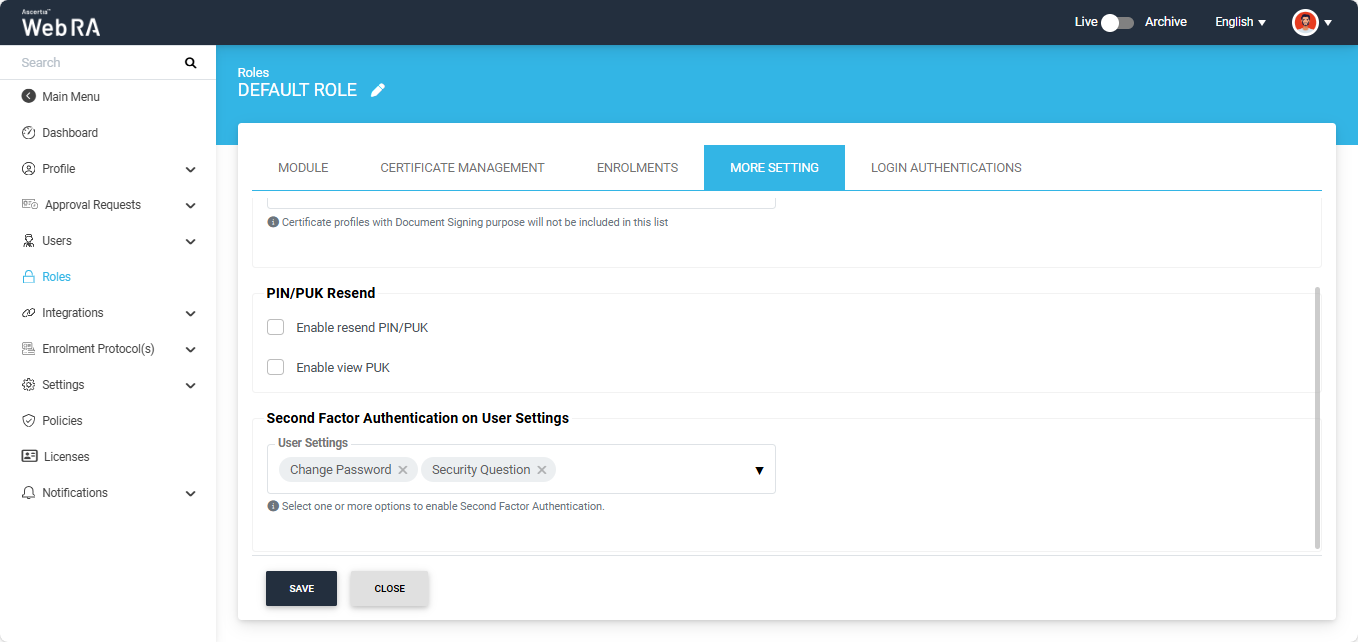
Select one or all options as required; the selected items will then appear in the dropdown field.
Click ‘Save’ to apply the settings.
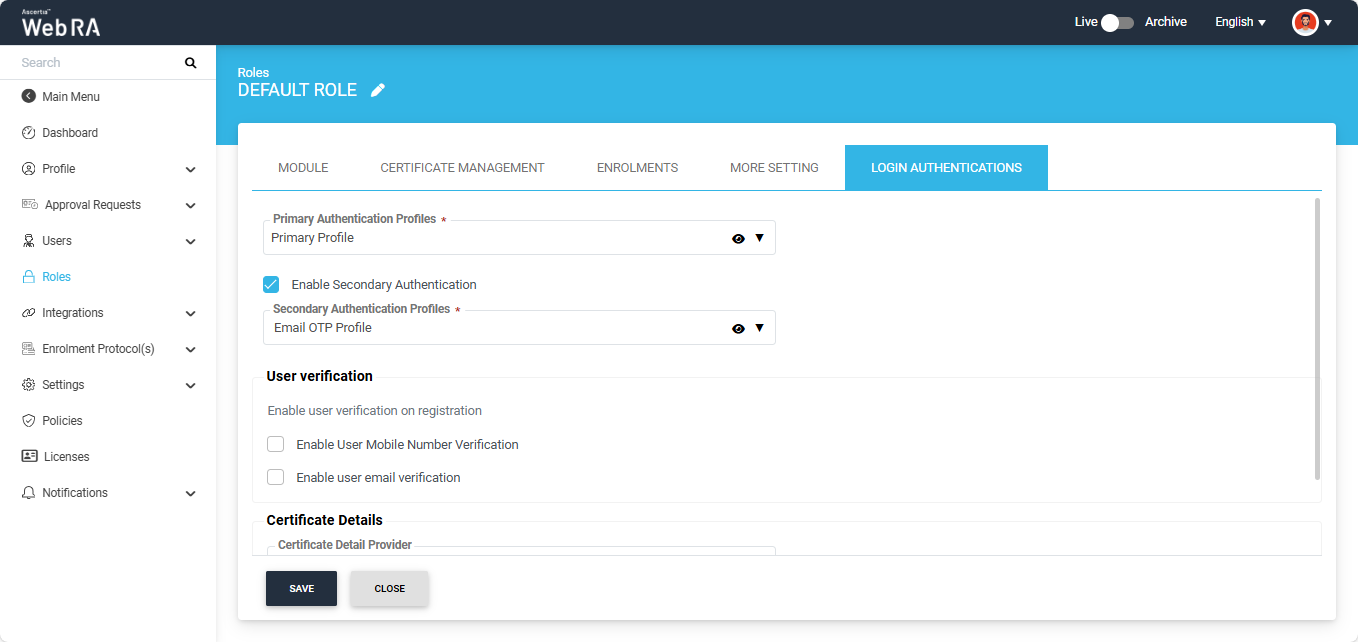
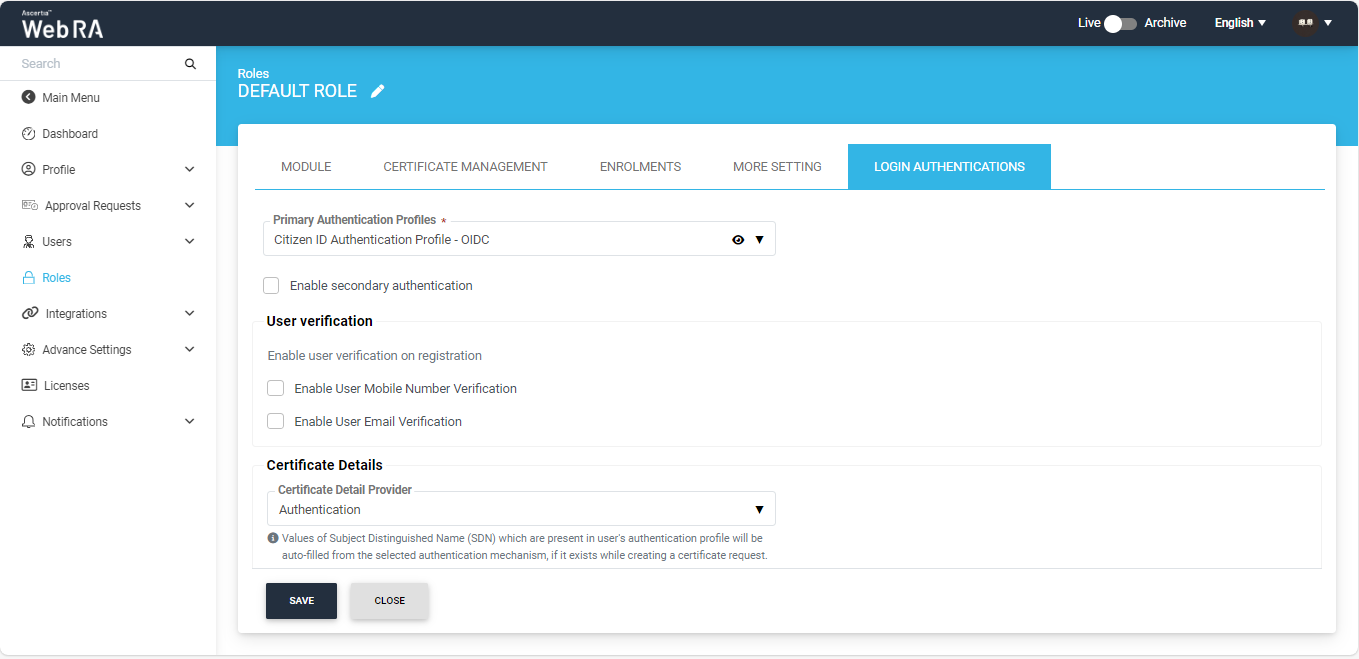
An operator can configure primary authentication and secondary authentication for login.
(If Secondary Authentication is enabled in the service plan, it will also appear in the same section)
|
Advance Settings |
|
|
Field |
Description |
|
Primary Authentication Profiles |
When primary authentication is configured as login authentication, it allows an enterprise RAO to login on ADSS Web RA User Portal through the authentication type that is configured in this profile. An operator can select from multiple primary authentication profiles here. |
|
Enable secondary authentication |
Tick this check box to enable secondary authentication. |
|
Secondary Authentication Profiles |
When secondary authentication is configured as login authentication, it allows an Enterprise RAO to login to ADSS Web RA web portal through the authentication type that is configured in this profile. |
Note: If secondary authentication is not configured in this section, the application will ignore the PIN/PUK policies that require secondary authentication
User Verification
The operator can enable or disable the below-given checkboxes if user mobile and email verification is required during registeration.
- Enable user mobile number verification
- Enable user email verification
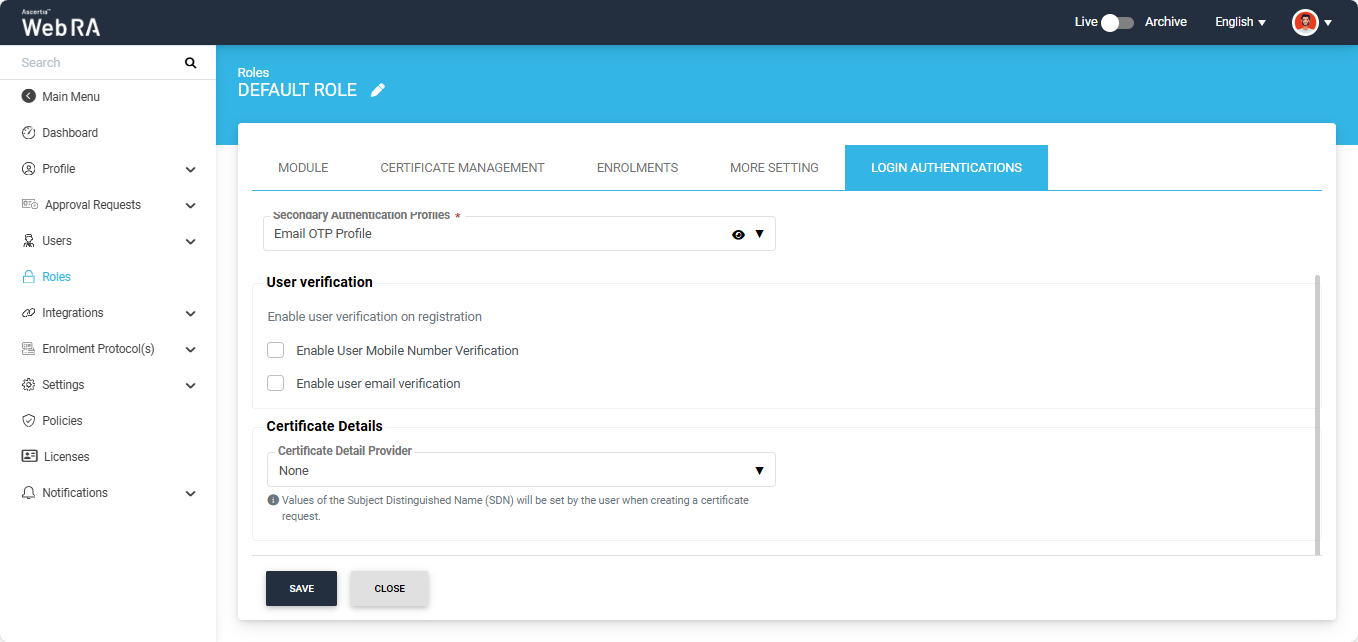
Certificate Details
An administrator can control SDNs and SAN extensions for certificate requests in the "Role" section from the admin portal. This is based on the mechanism selected from the "Certificate Detail Provider" drop down.
An operator can choose one of the following three mechanisms from the "Certificate Details" drop down:
- None
- Operator
- Authentication
|
Certificate Detail |
|
|
Field |
Description |
|
Authentication |
If Authentication is selected from the drop down then SDN, values will be filled by the user login authentication mechanism. Currently ADSS WebRA is supporting the following login mechanisms:
Note:
|
|
Operator |
An administrator will control the values of SDNs. |
|
None |
If None is selected from the drop down then users can fill the SDN values manually. |
Click "Roles", then click the tab "Login Authentications".
From the "Certificate Details Provider" drop down you can define the SDNs and SANs.
In case of None:
If an operator does not set any value to SDN in the certificate details, the user will set it while creating a certificate request. To enable this, select None.
Click Save.
In case of Operator:
If an operator wants to set and select SDNs and SANs, select Operator:
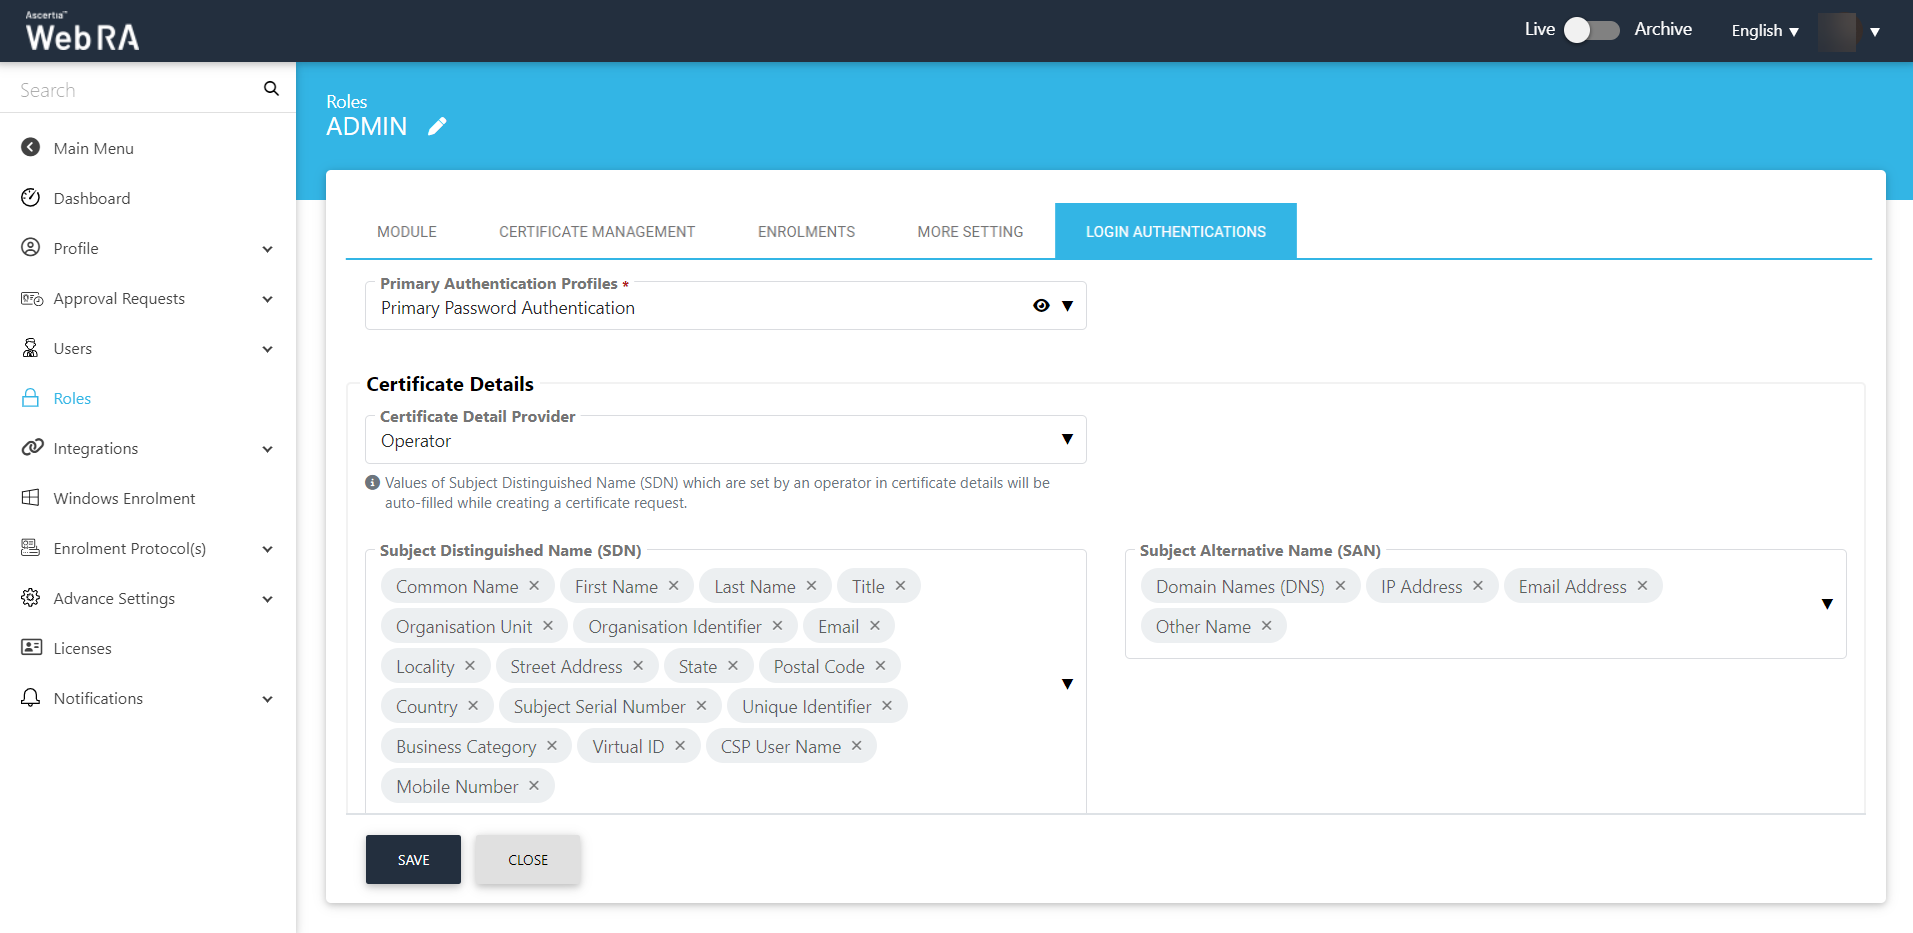
Values of Subject Distinguished Name (SDNs) which are present in user's authentication profile will be auto-filled from the selected authentication mechanism, if it exists while creating a certificate request.
Click Save.
In case of Authentication:
If an operator wants to set and select SDNs, select Authentication.:
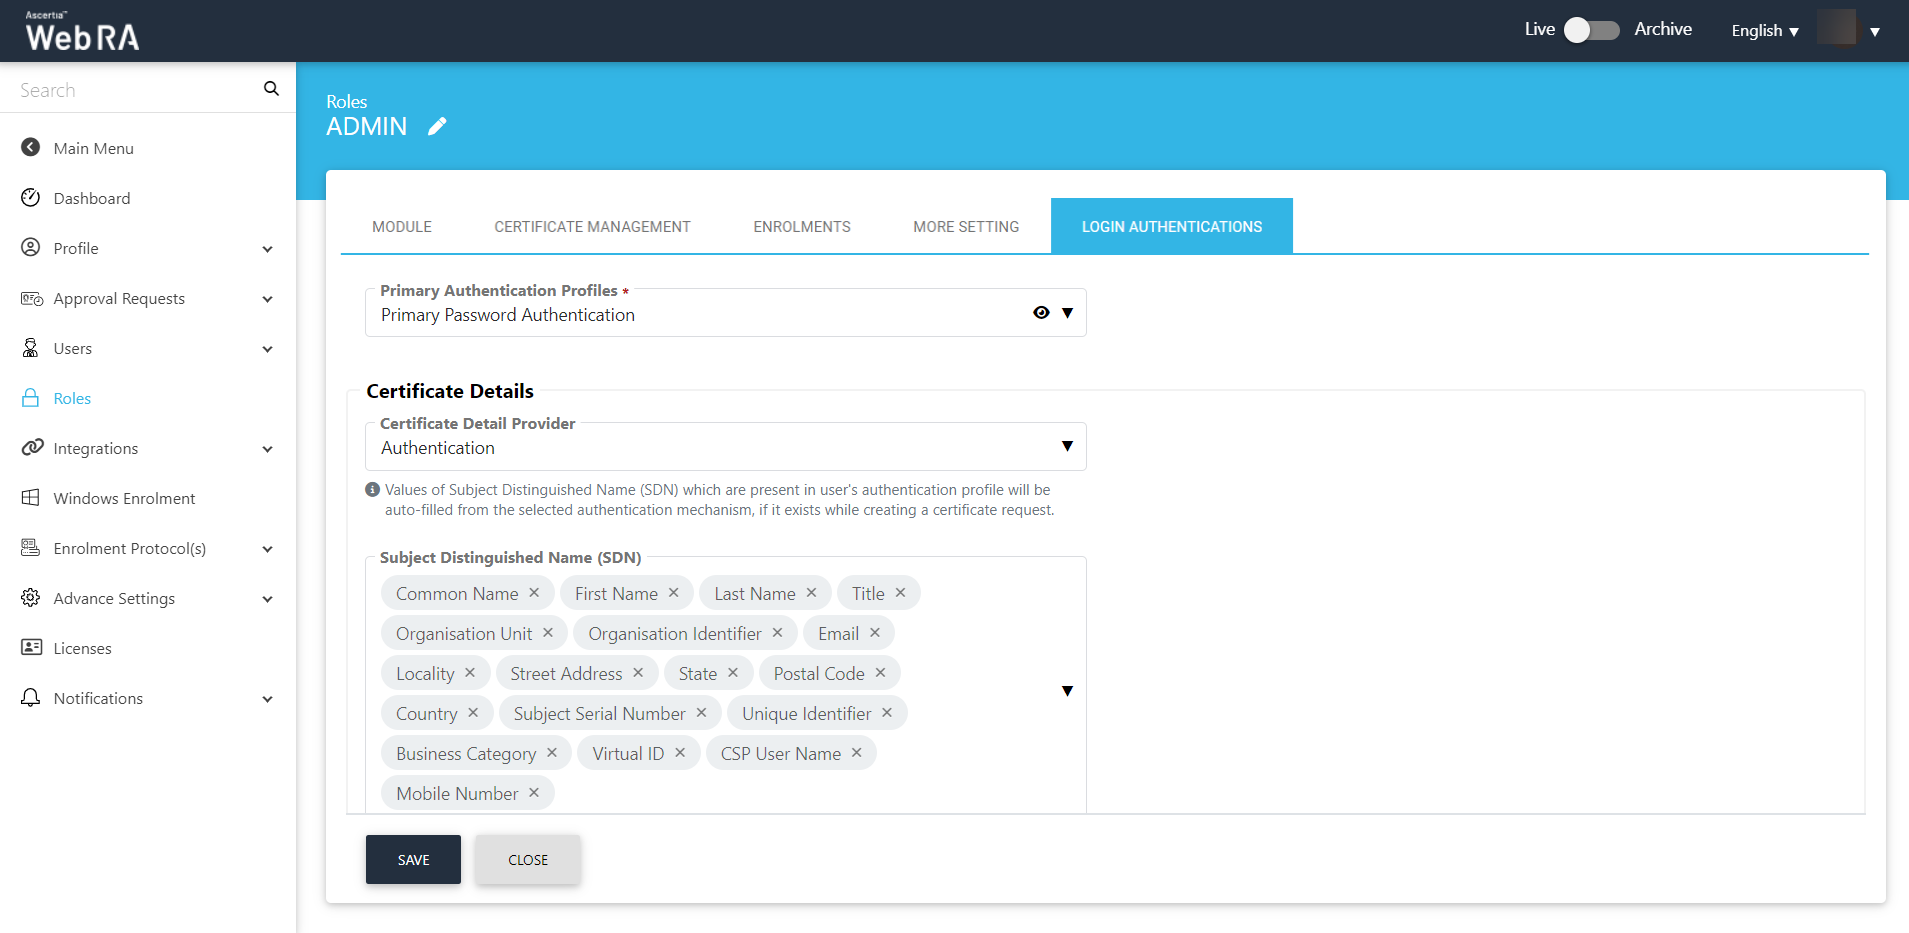
Values of Subject Distinguished Name (SDNs) which are present in user's authentication profile will be auto-filled from the selected authentication mechanism, if it exists while creating a certificate request.
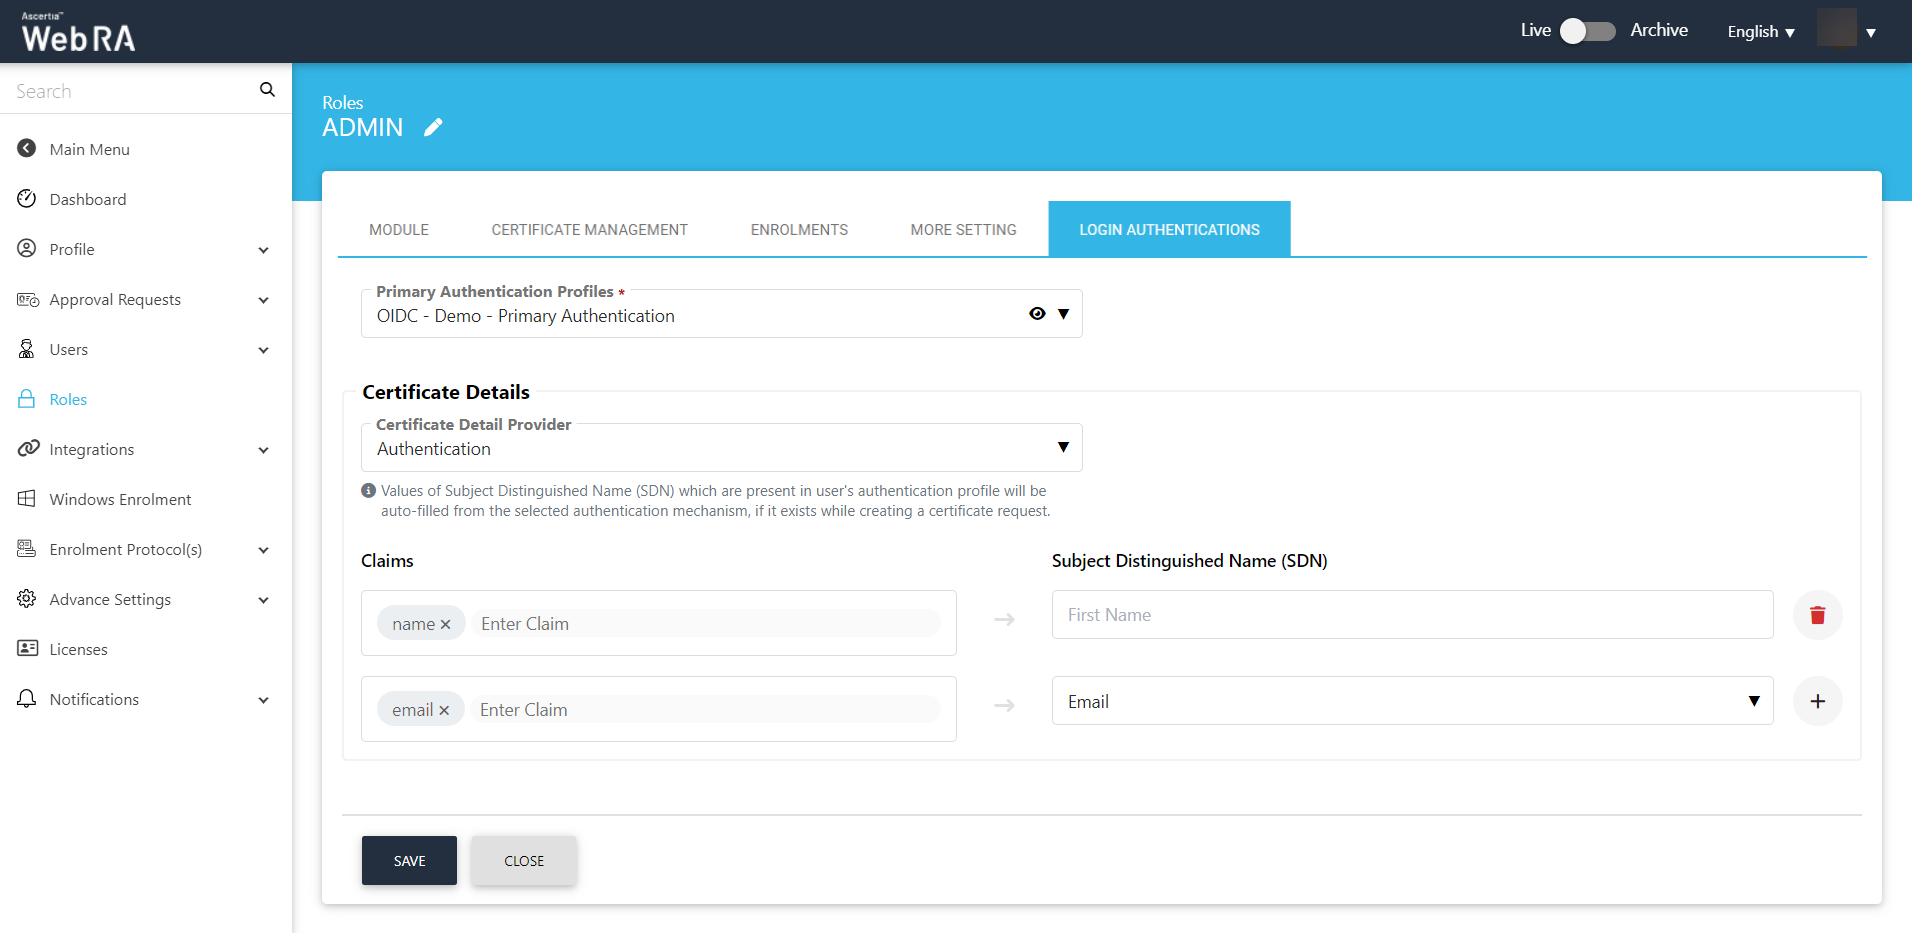
When Primary Authentication profile is OIDC,Saml,Azure AD or Active Directory, and you select Authentication as the Certificate Detail Provider
|
Certificate Detail |
|
|
Field |
Description |
|
Claims |
Enter a claim. You can set multiple claims based on different SDNs. |
|
Subject Distinguished Name (SDN) |
Select a SDN from the list and then click the + button to confirm your entry. |
Click Save.
Default Role (User Registration- Citizen ID)
When a user is registered through citizen ID, an operator will perform the following configurations:
- Registration form claim mapping.
- Enable auto-registration for Virtual ID and SigningHub.
Enable auto-registration for Virtual ID and SigningHub
Expand Enterprises > Registered > Enterprise Name > Manage > Roles.
Then click Edit against the Default Role.

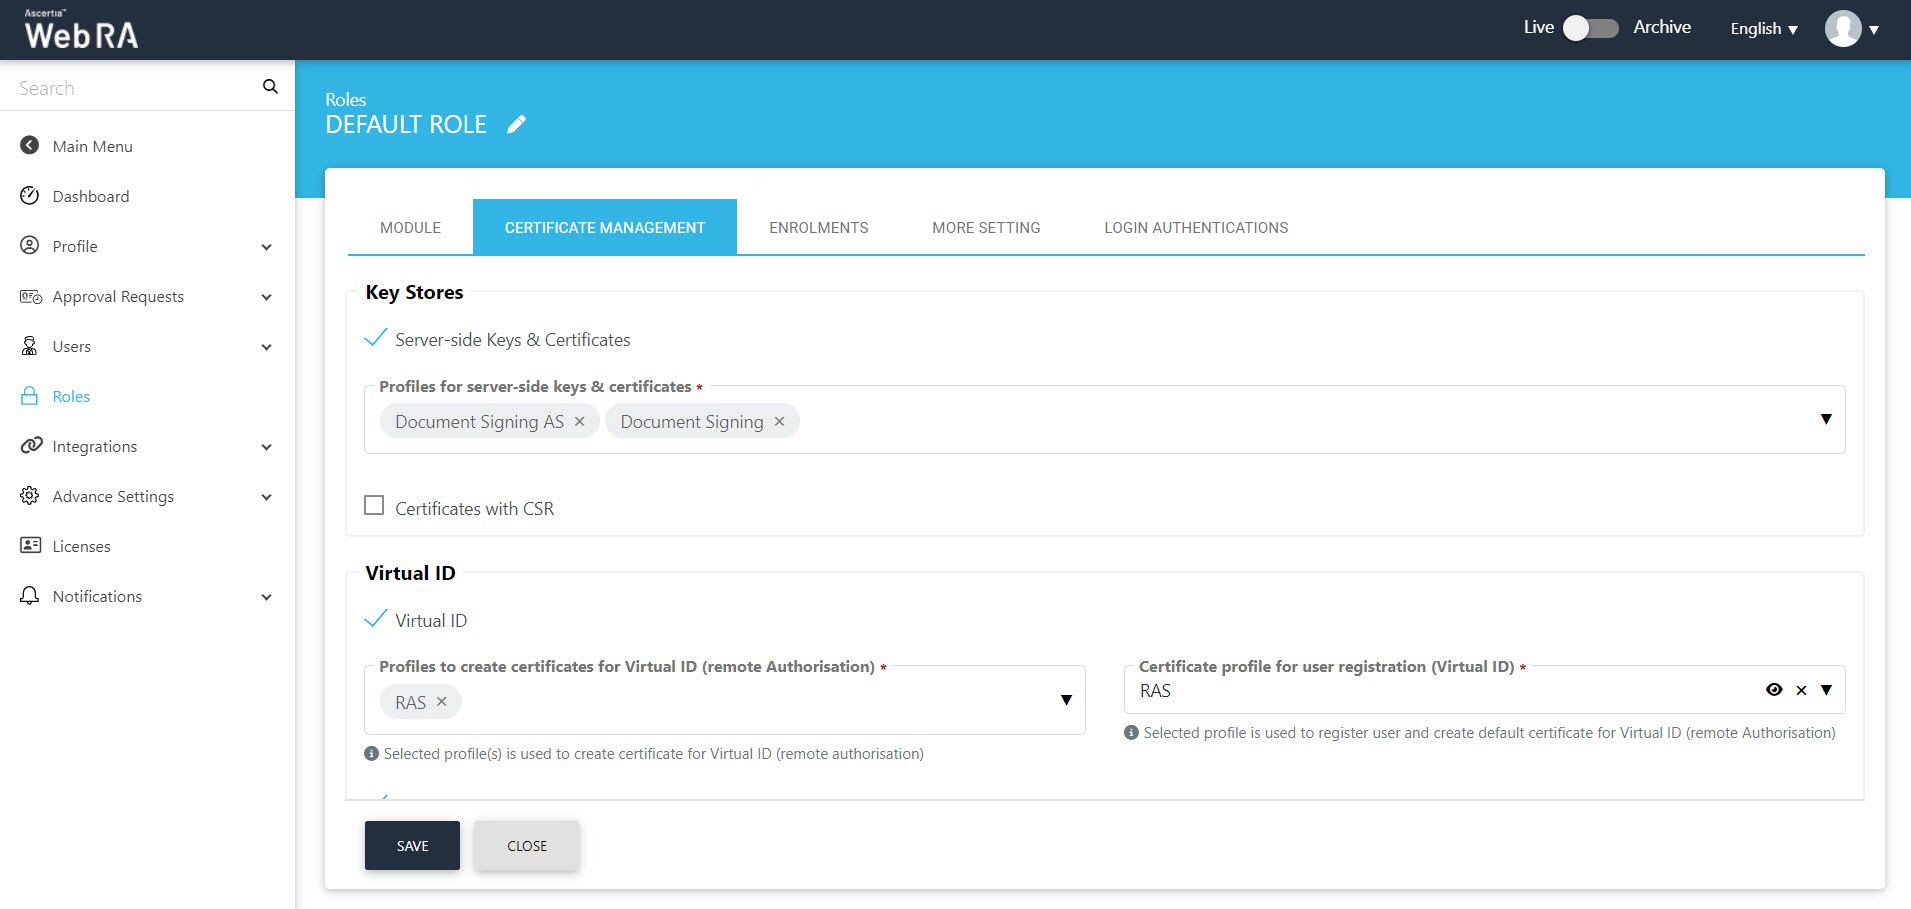
Click the Certificate Management tab.
Select the profiles from the Key Stores.
Then select the Virtual ID checkbox.
|
Virtual ID |
|
|
Field |
Description |
|
Profiles to create certificates for Virtual ID (Remote authorisation) |
Select a profile from the list to create Virtual ID certificates. |
|
Certificate profile for user registration (Virtual ID) |
Select a profile to create a Virtual ID user and to create a default Virtual ID certificate. |
Select the SigningHub check box
|
SigningHub (NCSC in this example) |
|
|
Field |
Description |
|
Default certificate profile for SigningHub |
Select None from this drop down. |
|
Enable SigningHub Auto Registration |
Select this check box to enable auto registration of SigningHub. |

Then click Save.
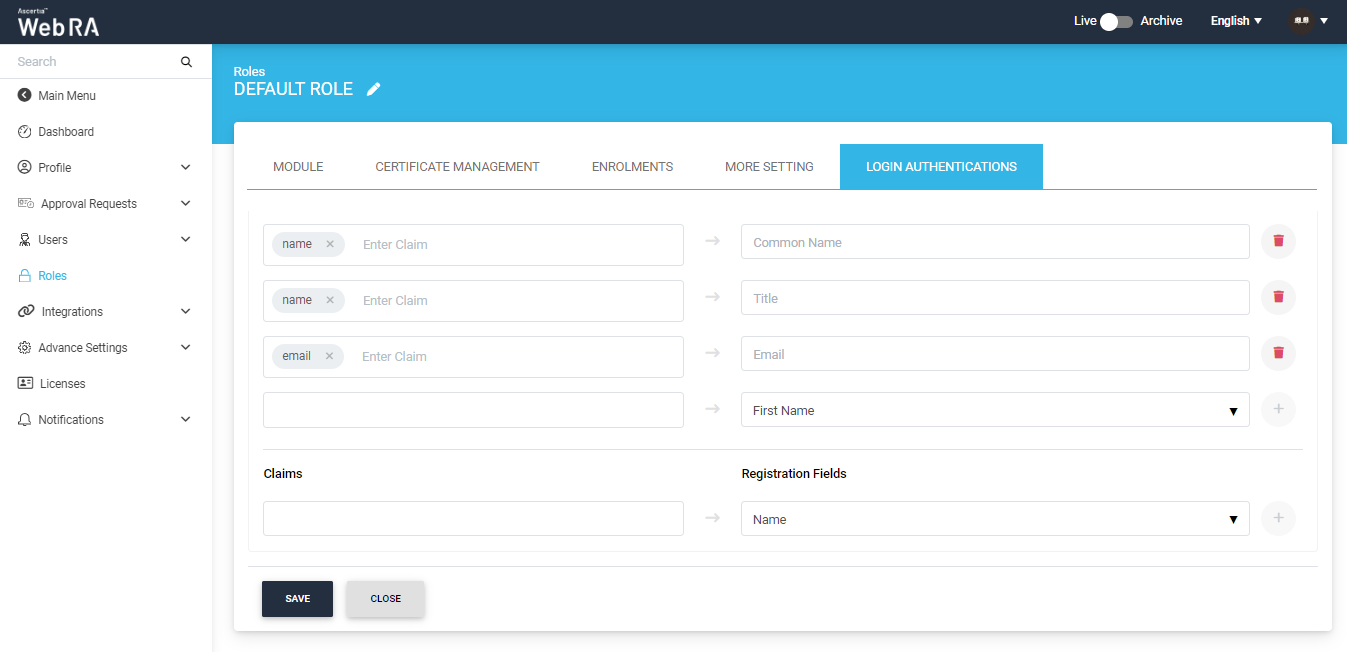
Registration form claim mapping
Click Login Authentications.
Select any third part authentication(SAML,AzurAD, Active directory and OIDC) as Primary Authentication Profile from the drop down.
|
Certificate Details |
|
|
Field |
Description |
|
Certificate Details Provider |
Select authentication from this drop down. |
|
Claims |
|
|
Claim |
Subject Distinguished Name (SDN) |
|
Select a claim against the SDN |
Click + and select SDN from the list. These fields include |
These claims will appear in the Sign up form under the SDN section.
|
Claims |
|
|
Claim |
Registration Fields |
|
Select a claim against the registration fields |
Click + and select SDN from the list. These fields include Name, Job Title, Virtual ID, Citizen ID, Default Capacity (for Signing purposes while provisioning certificate in SigningHub), CSP User Name, Email Address and Mobile Number. |
These claims will appear in the Sign up form under the user registration section.
Once you have completed all configurations, click Save.