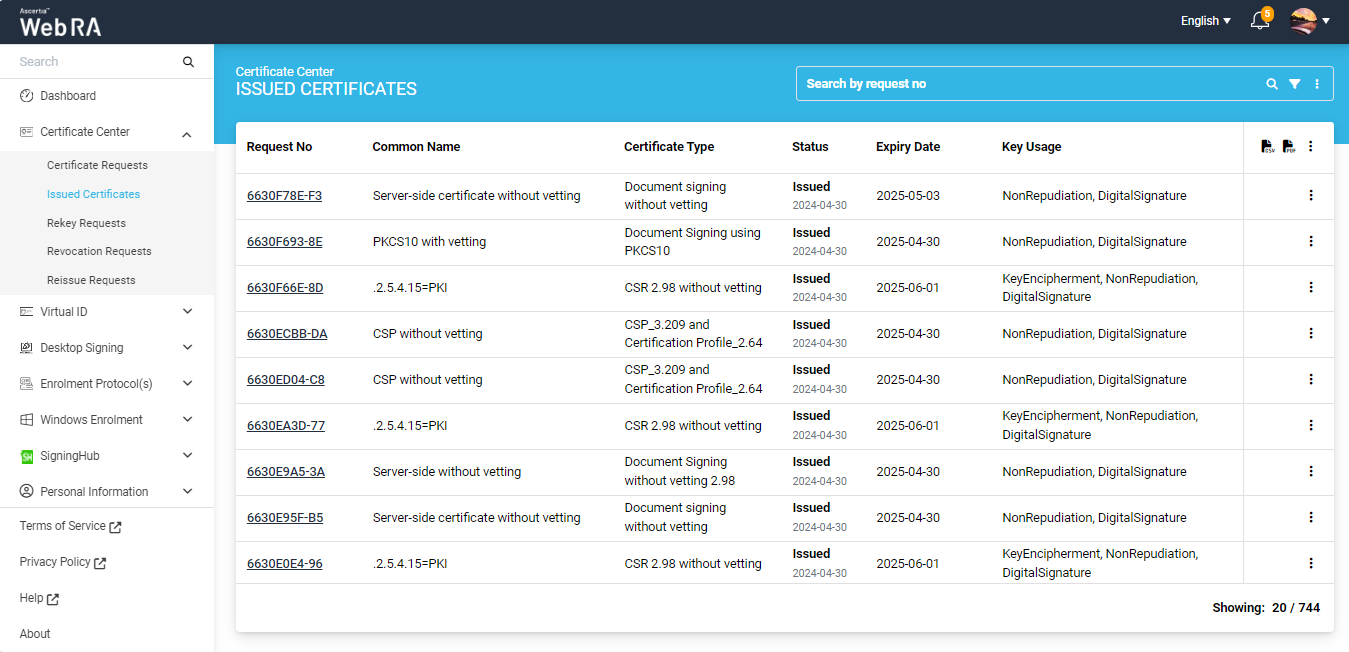
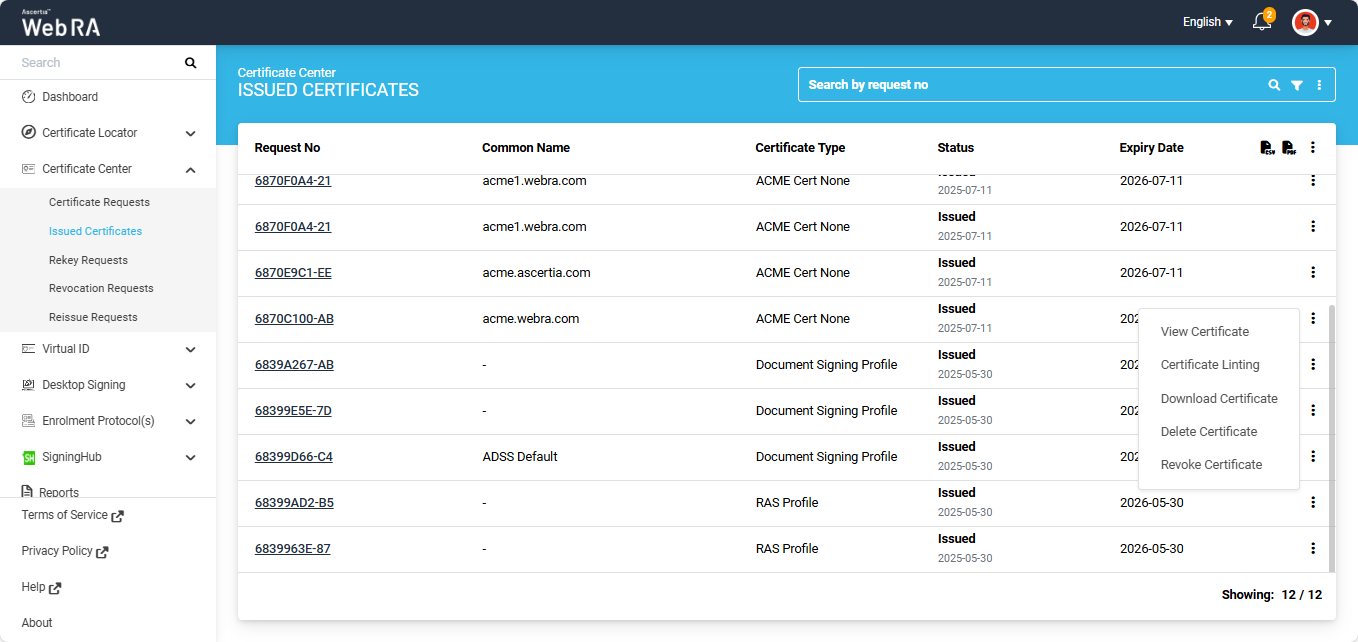
Issued Certificates
The Certificate Center displays all the certificates issued to an enterprise under the Issued Certificates section.
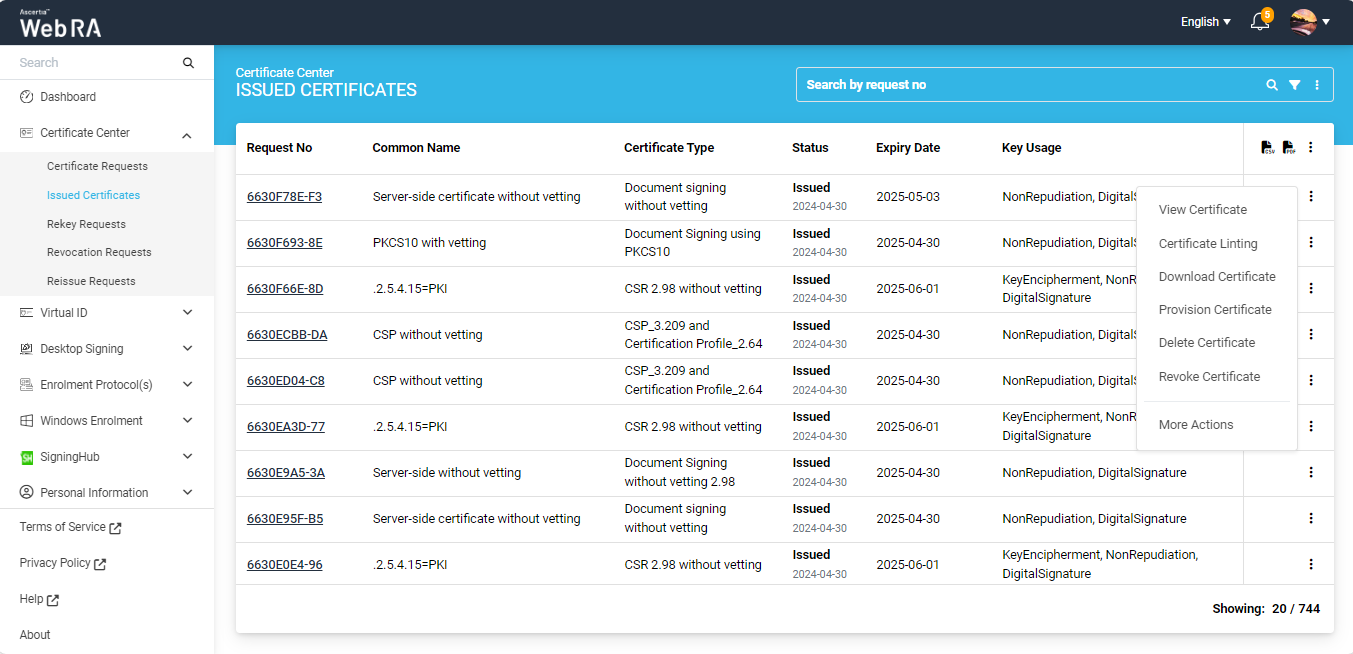
- View Certificate
- Download Certificate
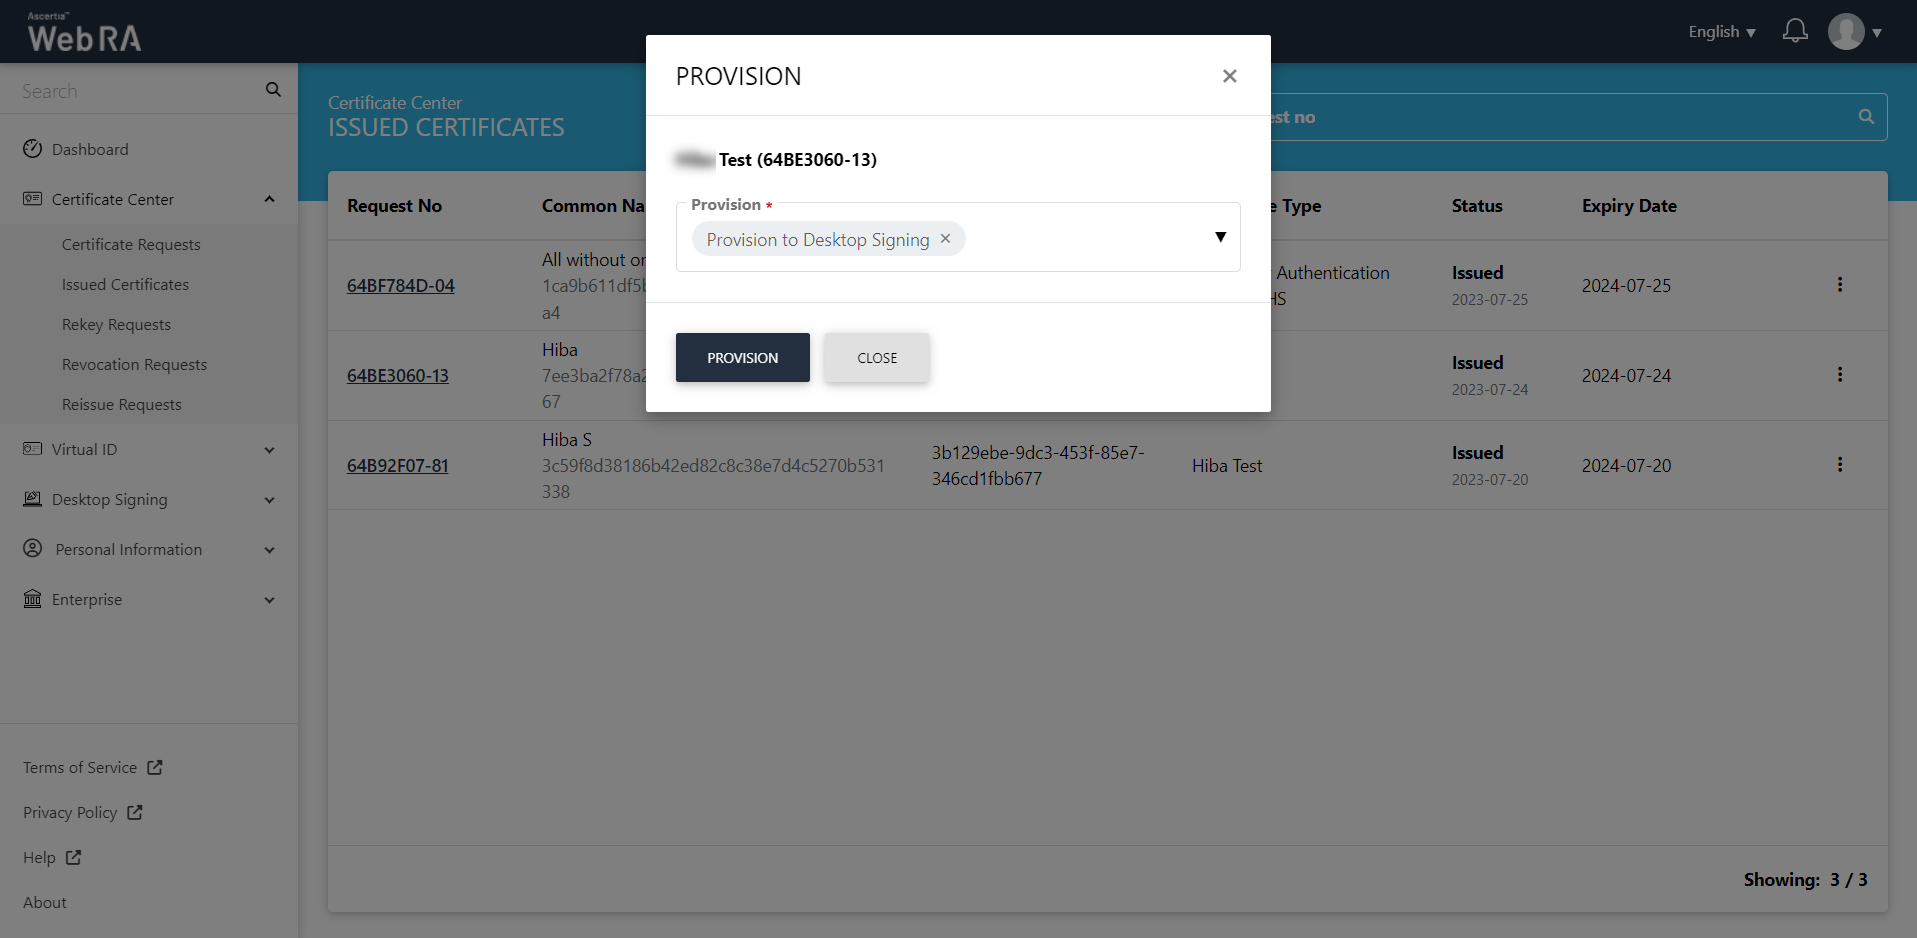
- Provision Certificate
- Delete Certificate
- Token Information
- History
- More Actions
On the web portal, from the left menu pane, navigate to Certificate Center > Issued Certificates from the left menu pane. The following screen will be displayed:
|
Field |
Description |
|
Sort |
User can sort the record by ay column on click of sort Icon |
|
Modify |
User can modify all columns |
|
Export |
User can Export all selected records on click of PDF and CSV icon |
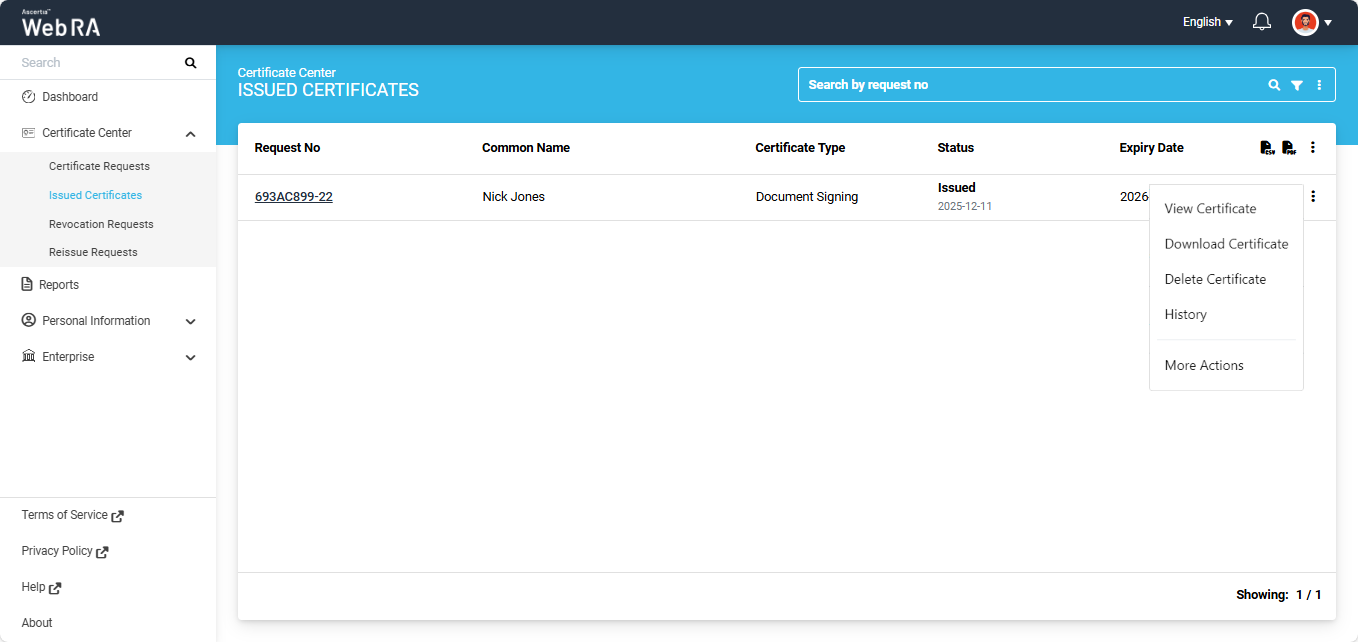
Click  button and you can perform a number of actions as displayed below:
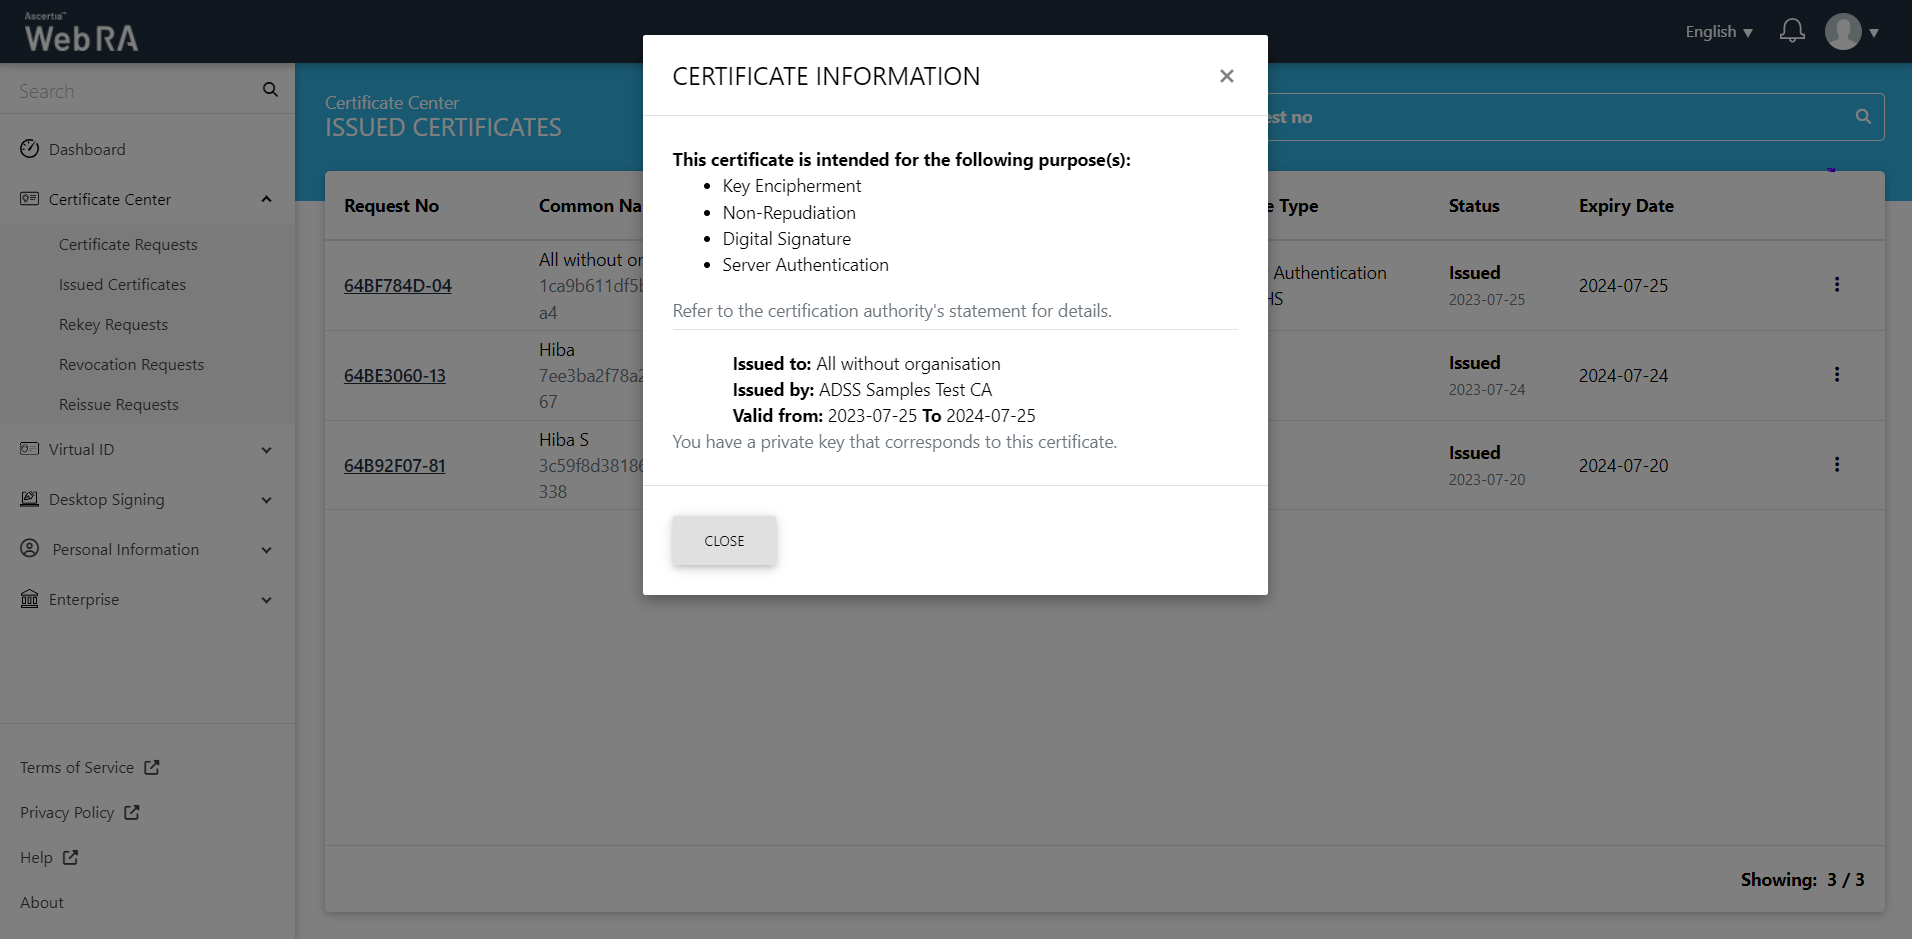
Click "View Certificate" against the certificate you want to view. The certificate information will be displayed. Then click "Close".
Click "Download Certificate" and the certificate will be downloaded on your machine.
Note: If ‘Enable one-time PFX download” option is enabled in the Certification Profile, the PFX can only be downloaded once. If the option is disabled, the PFX can be downloaded multiple times.
Click "Provision Certificate" and the certificate will be provisioned to your Desktop Signing account.
- Expand Requests > Issued Certificates.
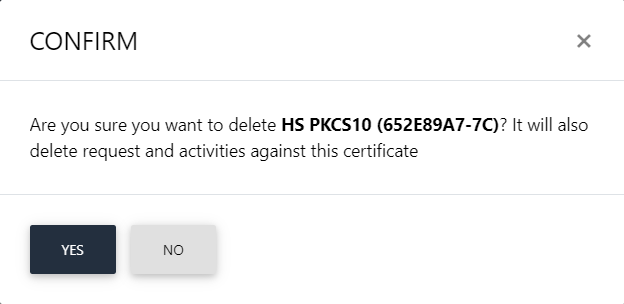
- Click against the certificate you want to delete and then click Delete Certificate.
- A confirmation dialog will appear as displayed below. It will also delete certificate (s) against this request,
This note appears according to the configurations in the Policy section in the Admin portal.
Extend Certificate Center > Issued Certificates from the left menu of the Web Portal.
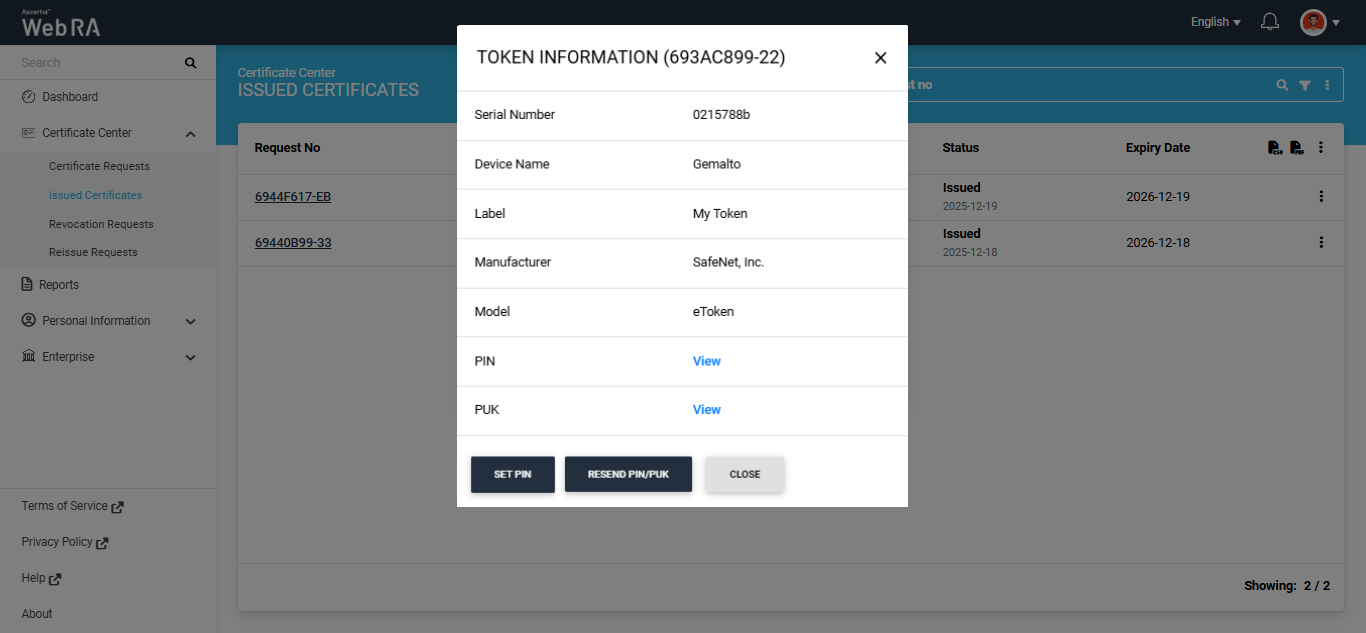
To view Token Information of a certificate, click the three-dot  icon next to the token certificate and select the ‘Token Information’ option.
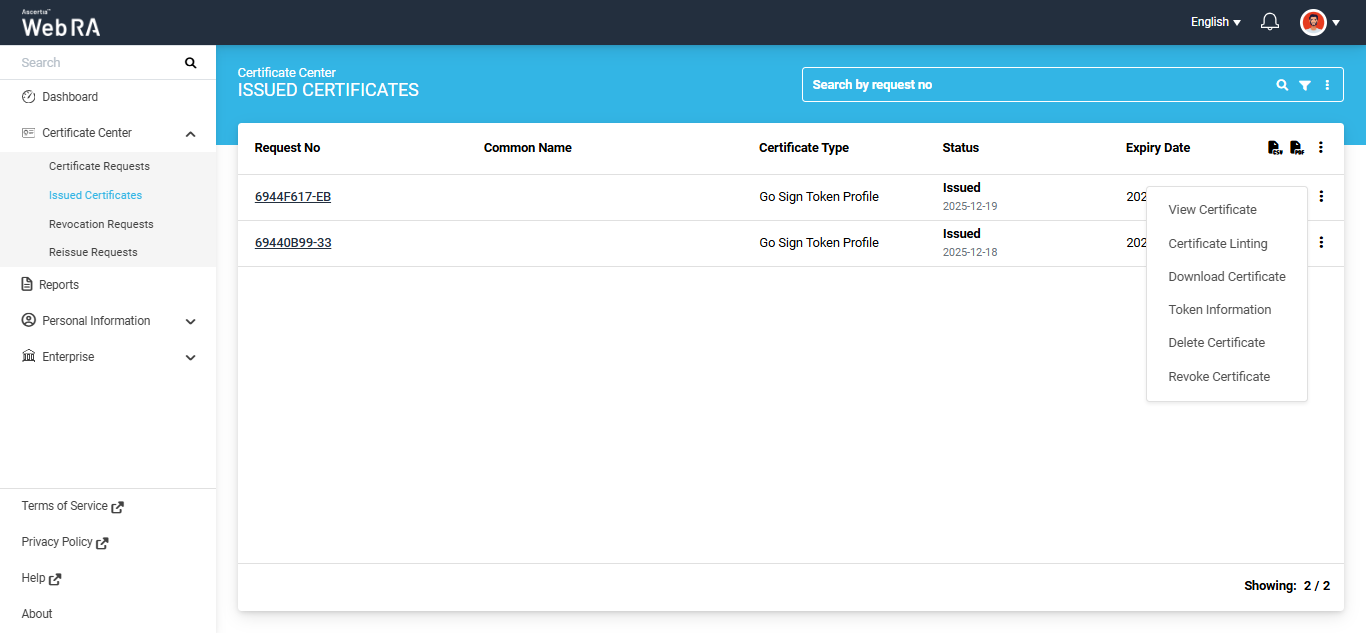
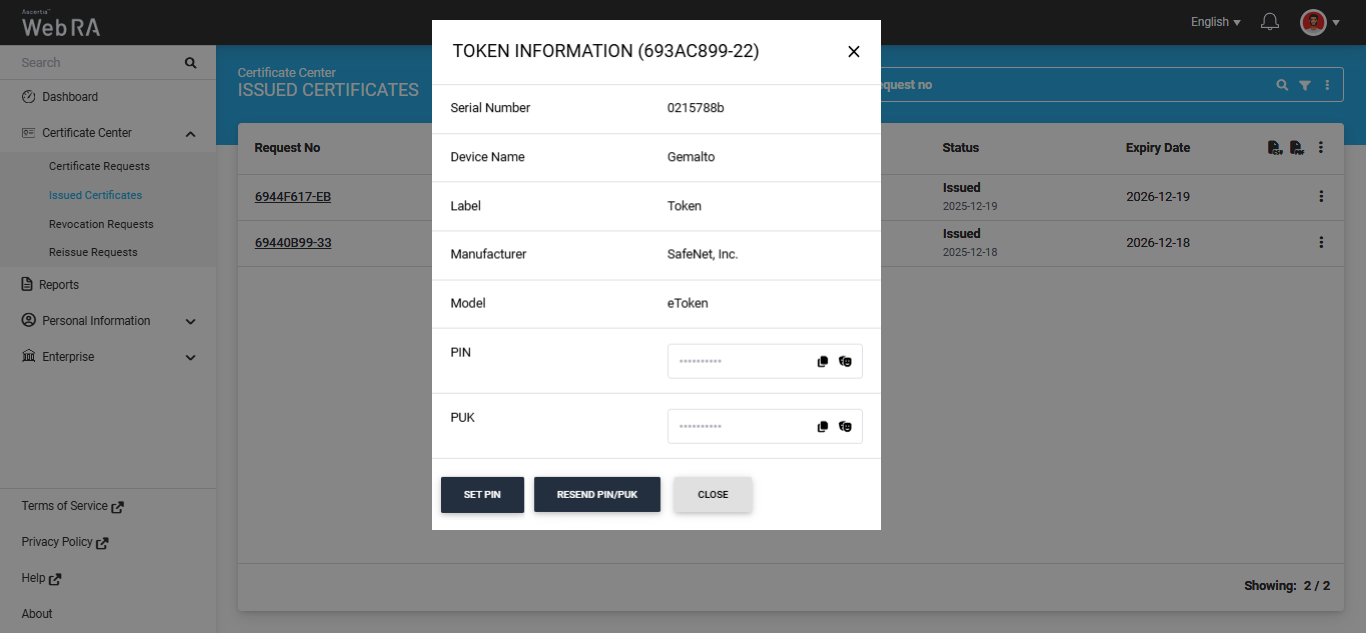
The ‘Token Information’ dialog will appear and display complete information about the token.
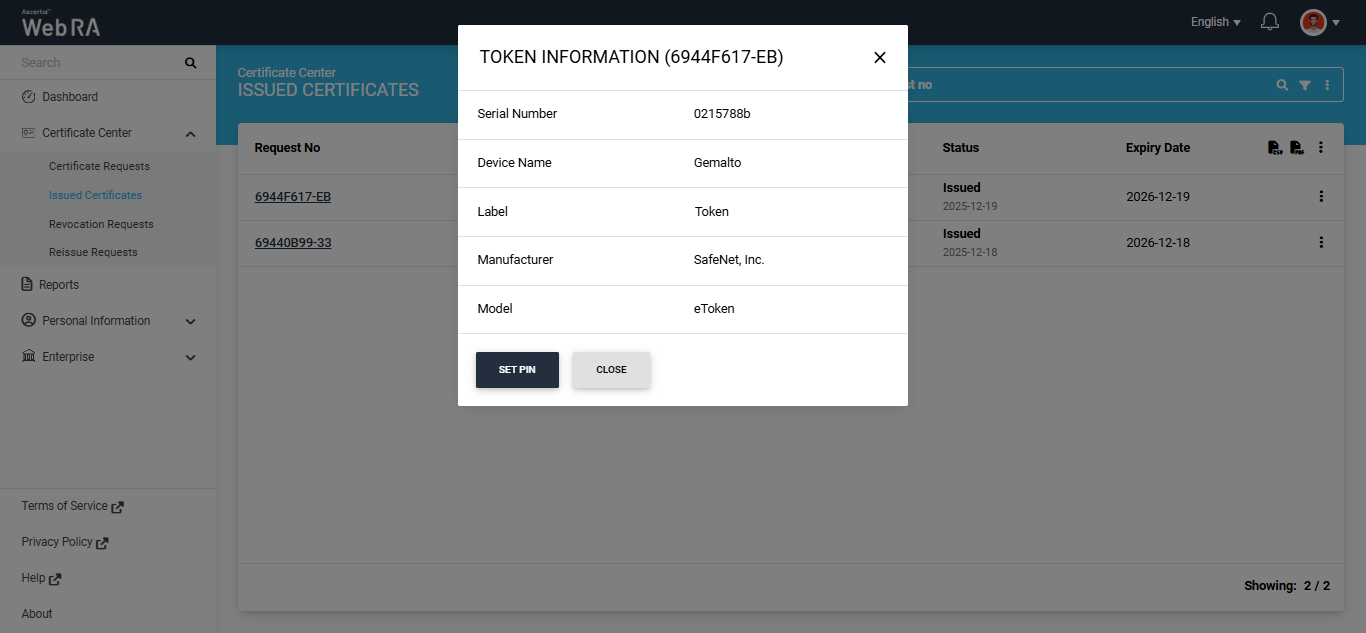
The ‘Token Information’ dialog will display the Serial Number, Device Name, Label, Manufacturer and Model.
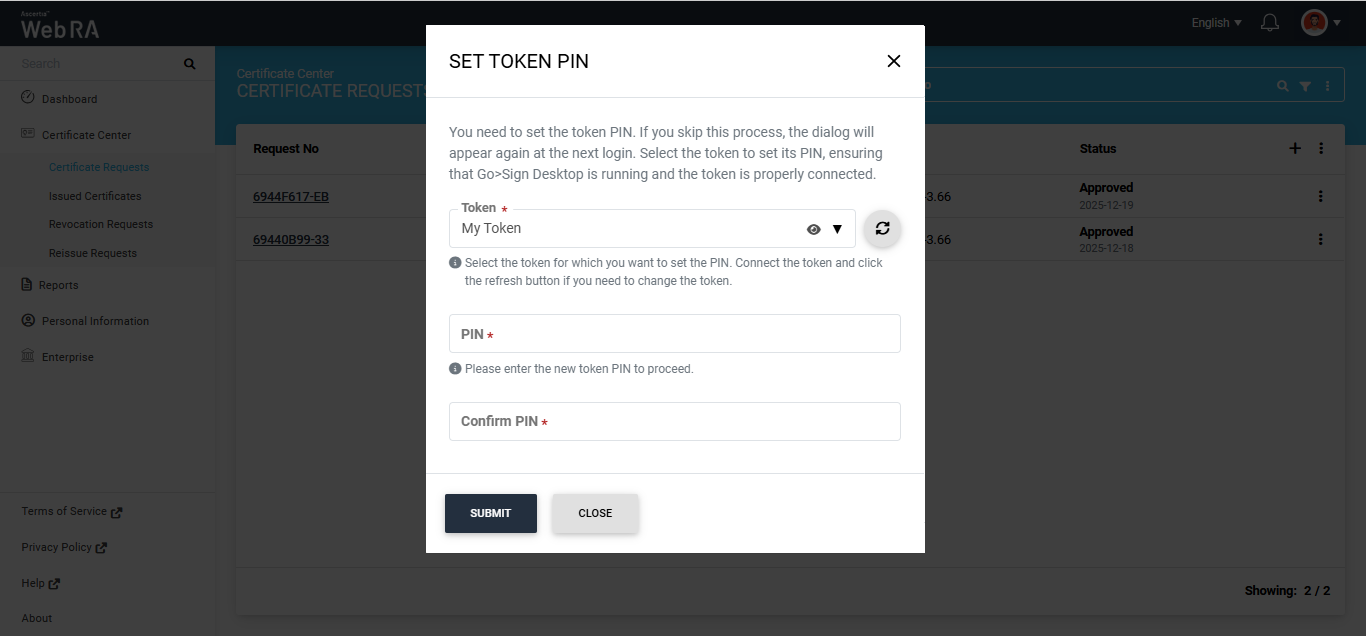
You can change the PIN of your token by clicking the ‘SET PIN’ button. Clicking this button will open the ‘SET TOKEN PIN’ dialog.
|
Field |
Description |
|
Token |
This dropdown field displays the token name. If multiple tokens are connected with your system, click the dropdown to select the required token from the list. Click the ‘Eye’ icon next to the token name to view additional details about the token. |
|
PIN |
Enter the new PIN value for the token in this field. |
|
Confirm PIN |
Re-enter the new PIN value in this field to confirm it. |
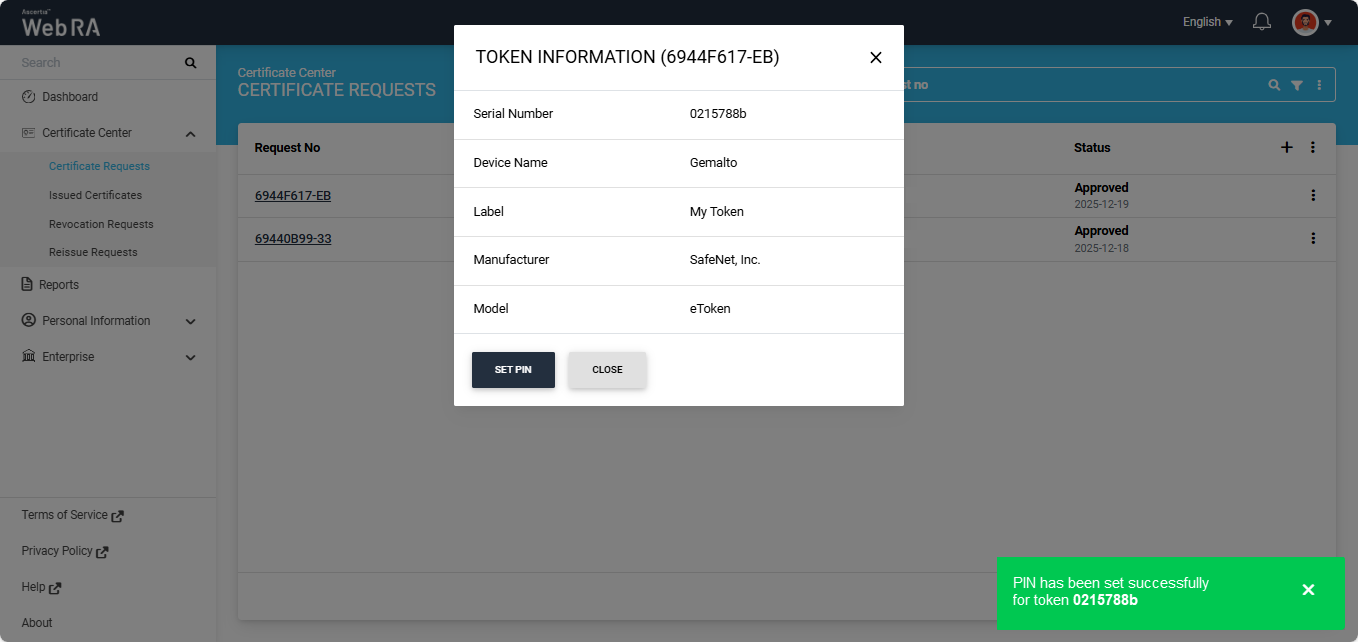
After entering all the required details, click ‘Submit’ to change the PIN. The system will then display a success alert on the screen.
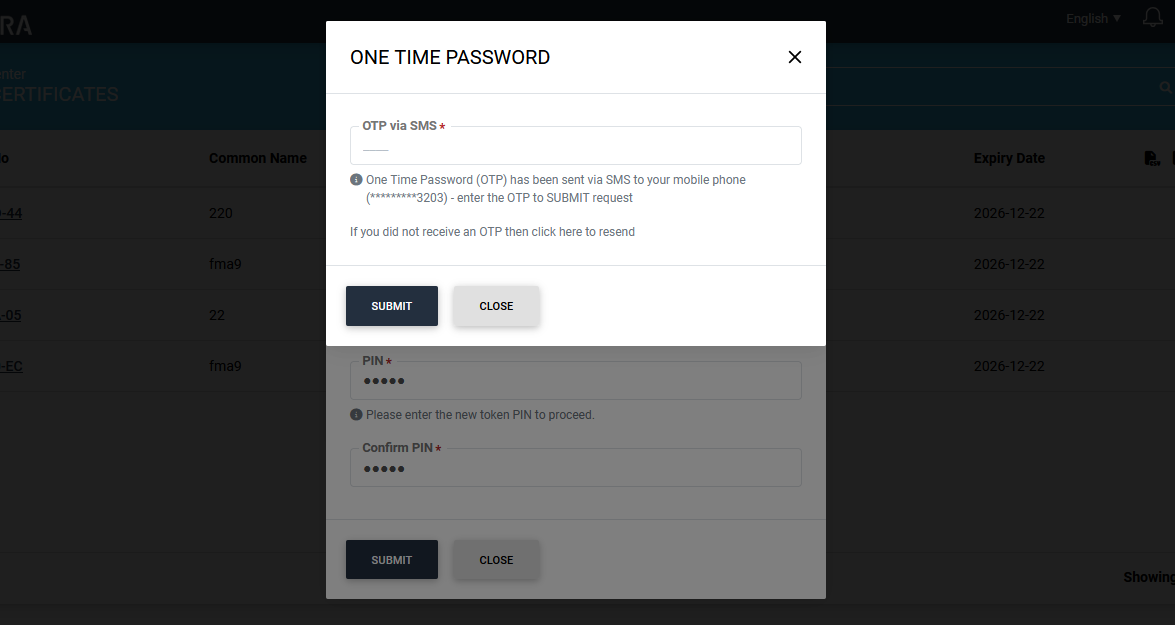
Note: If second factor authentication is enabled in the user role settings, you will be prompted to verify the PIN change using the configured secondary authentication method.
The Token Information dialog displays PIN and PUK information based on the following:
- Permissions assigned to the user role
- PIN/PUK password policies configured at the enterprise level
- The Enable Reset PIN/PUK setting configured in the certification profile
If the relevant permissions and settings are enabled in the user role and certification profile, the Token Information dialog will display the PIN and PUK information.
|
|
|

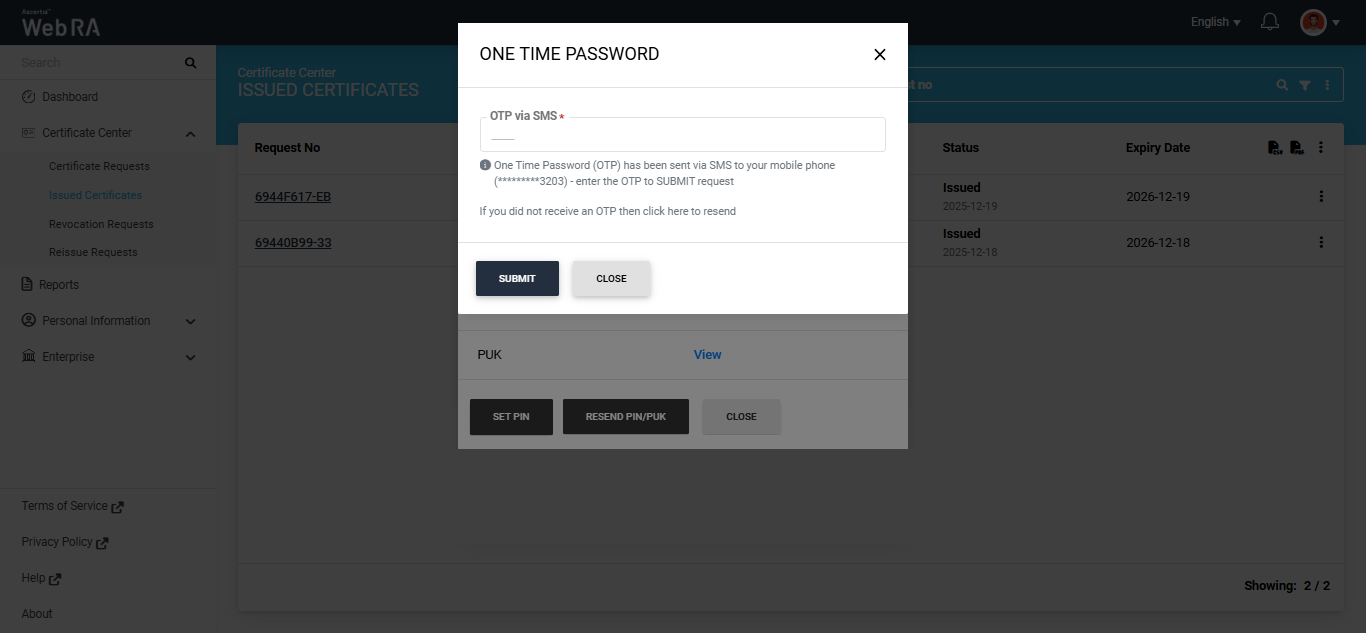
If the second-factor policy is enabled, the system will prompt you to authenticate the action using the configured second-factor authentication method.
After successful authentication, click the mask icon to reveal the value.
If you have revoked a certificate or reinstated a previously revoked certificate, you can view its action history. To do this, click the three-dotbutton next to the specific certificate and select 'History'.
You can see what action was performed on a certificate previously.
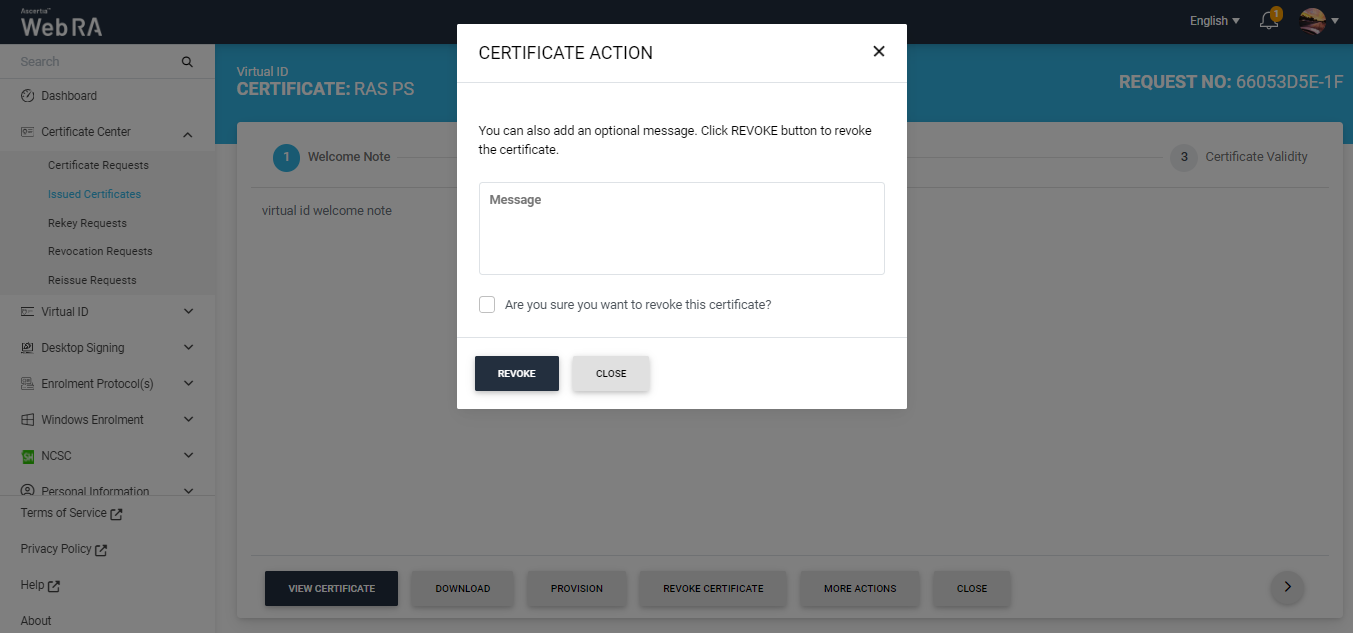
Click "More Actions" to revoke, rekey, reinstate or renew a certificate as per configured in the admin portal.