Certificate Import & Substitution
In this guide, you will learn how to import and substitute certificates issued by an external CA in the ADSS Web RA system.
The Certificate Substitution feature has been introduced in the Import Certificates module, allowing operators to revoke existing certificate(s) issued by an external CA and generate new certificate request(s) in the Web Portal using the selected destination profile.
The following headings are covered in this guide:
- Create an ADSS Server Connector
- Create a Certification Profile
- Create a Service Plan
- Create an Enterprise & Configure the Service Plan
- Create a Role in Enterprise & Assign Profiles
- How to Import Certificates in ADSS Server
- How to Import & Substitute Certificate(s) in Web RA
Create an ADSS Server Connector
Access the Web RA Admin account using the ADSS Web RA Admin portal configured URL.
Then, navigate to External Service > Connectors section.
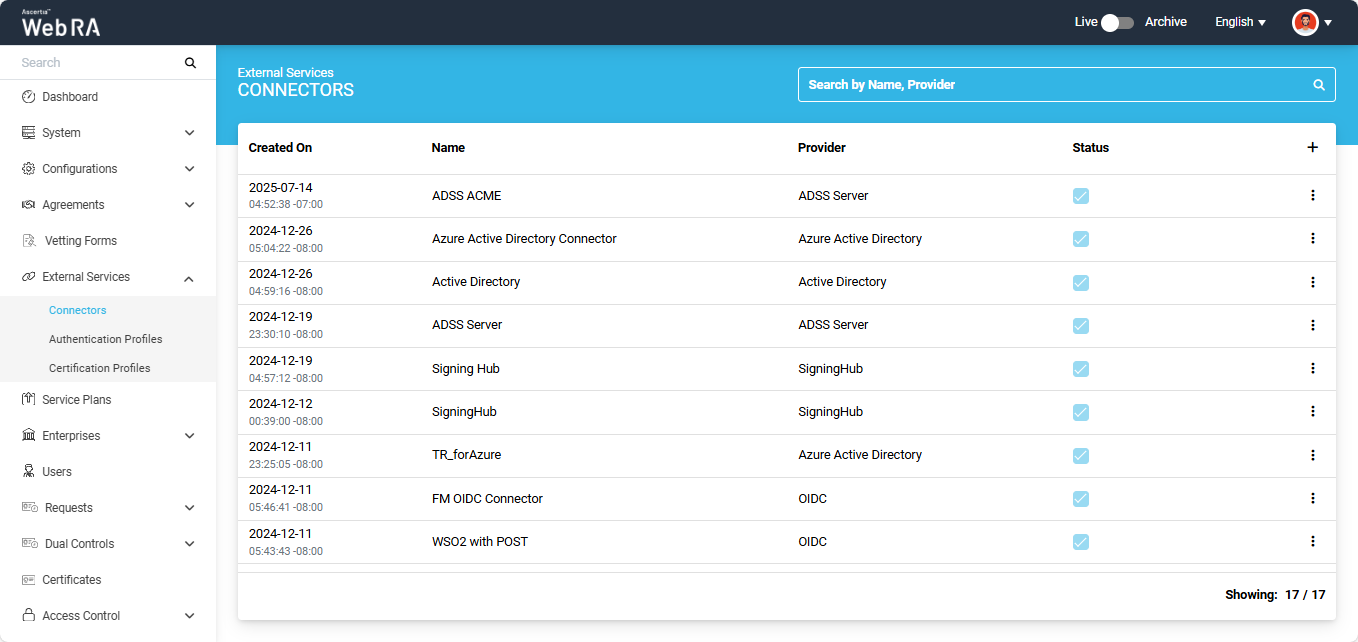
On the Connectors screen, click on ‘+’ icon to add a new connector.
The system will open ‘Basic Information’ section under the ‘Add’ connector screen.
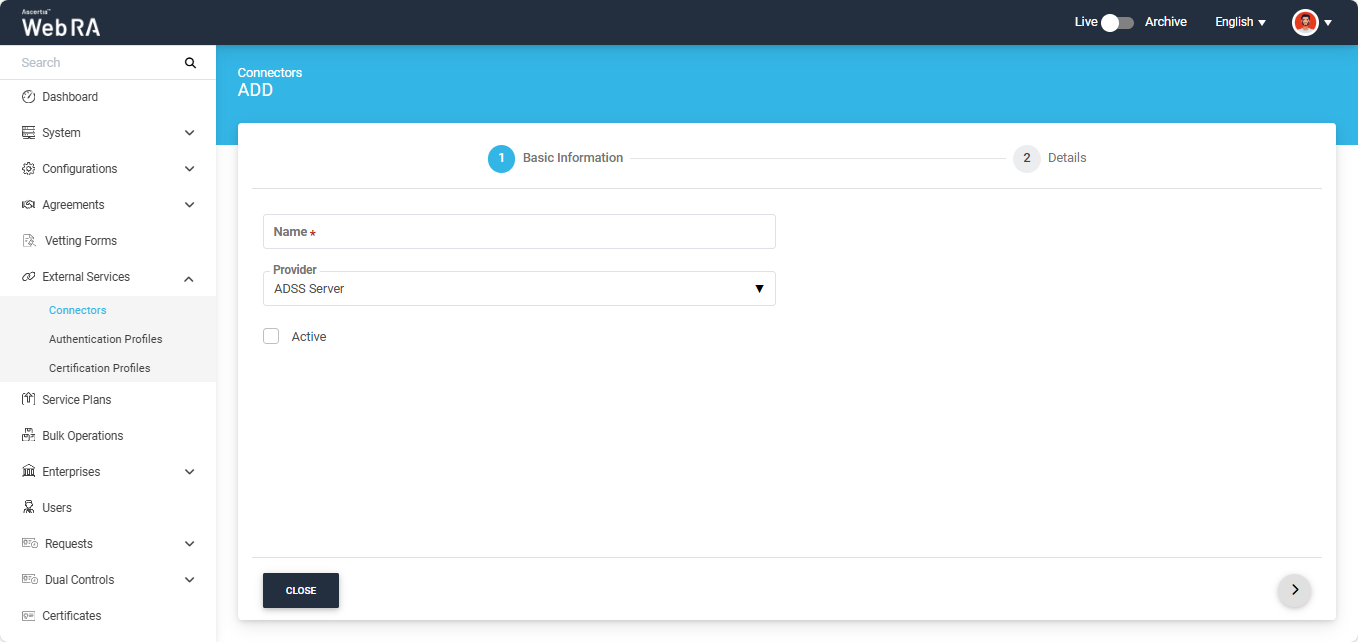
Provide the information on this screen as described in the table below:
|
Field |
Description |
|
Name |
Specify a unique name for this connector, e.g. ADSS Server. |
|
Provider |
Select ‘ADSS Server’ as the provider for this connector. |
|
Active |
The status of the connector should be checked as active. |
After entering the information click next to navigate to the ‘Details’ section.
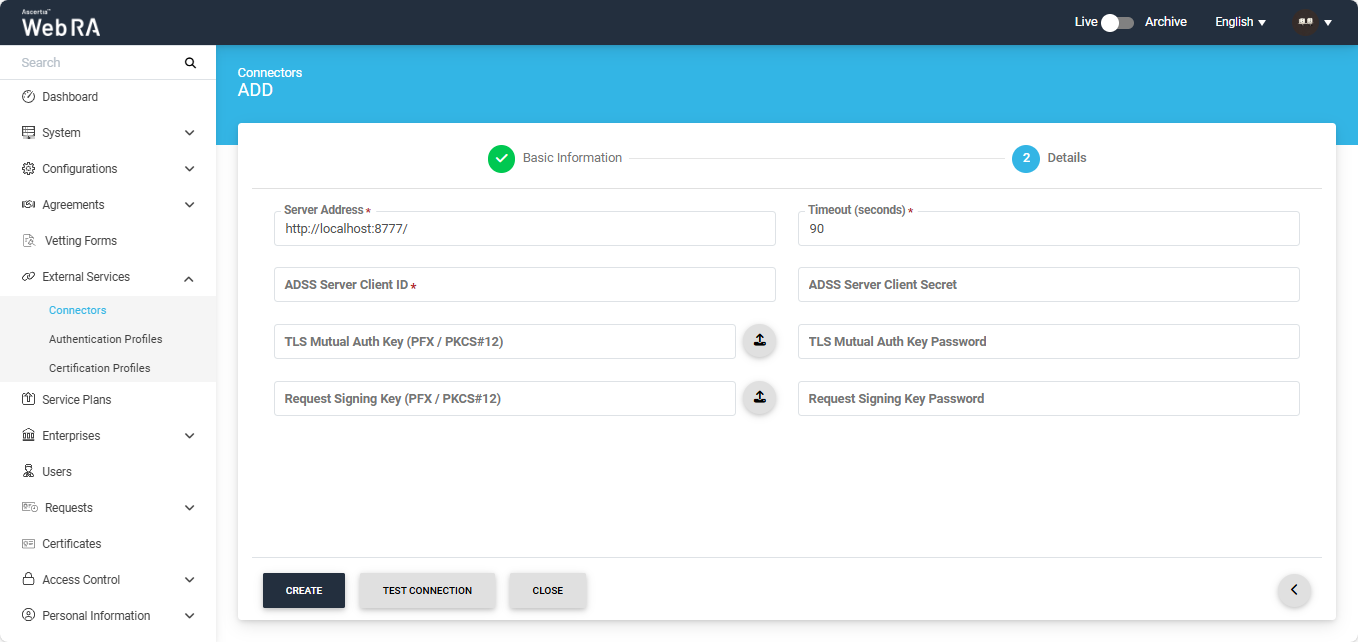
Provide information on this screen as described in the table below:
|
Field |
Description |
|
Server Address |
Specify the address and port number of ADSS Server. |
|
Time out |
Specify a timeout duration (in seconds), e.g. 300. This is the amount of time Web RA will wait for a response from the ADSS Server before displaying an error, in case the server becomes unresponsive. |
|
Client ID |
Specify the Client ID that has been configured in the Client Manager module of the ADSS Server for this connector. Note: Use the same Client ID which you used while creating the profile in ADSS Server. |
|
Client Secret |
Specify the client secret that has been generated in the ADSS Server against this Client ID. |
|
TLS Mutual Auth Key (PFX/PKCS#12) |
This field is optional. This is the certificate required to communicate with ADSS over mutual SSL communication. |
|
TLS Mutual Auth Key password |
This field is optional. This is the certificate PFX required to communicate with ADSS over mutual SSL communication. |
|
Request Signing Key (PFX/PKCS#12) |
This field is optional. This is the certificate required to encrypt the data used during communication with ADSS Services. |
|
Request Signing Key Password |
This field is optional. This is the certificate PFX required to encrypt the data used during communication with ADSS Services. |
After entering the required information, click ‘Save’.
To view the complete details on creating different types of connectors in ADSS Web RA, refer to the 'Connectors' section.
Create a Certification Profile
A certification profile is created in ADSS Web RA to configure ADSS profiles (Certification and/or CSP) for issuing different types of certificates to ADSS Web RA users. In other words, a certification profile (Certification and/or CSP) is created on the ADSS Server and is used in ADSS Web RA Admin for implementation.
Certification profiles define all the necessary configurations and business requirements, such as CA details, key algorithm, and validity, to issue the corresponding certificates for ADSS Web RA users.
To create a certification profile in the ADSS Web RA, the user must first create a Certification Service Profile in the ADSS Server. For more details on how to create a Certification Profile in ADSS Server, view the 'Creating a Certification Profile’ section.
Create a Certification Profile in ADSS Web RA
From the admin portal, expand External Services > Certification Profiles from the left menu to see the certification profiles listing screen.
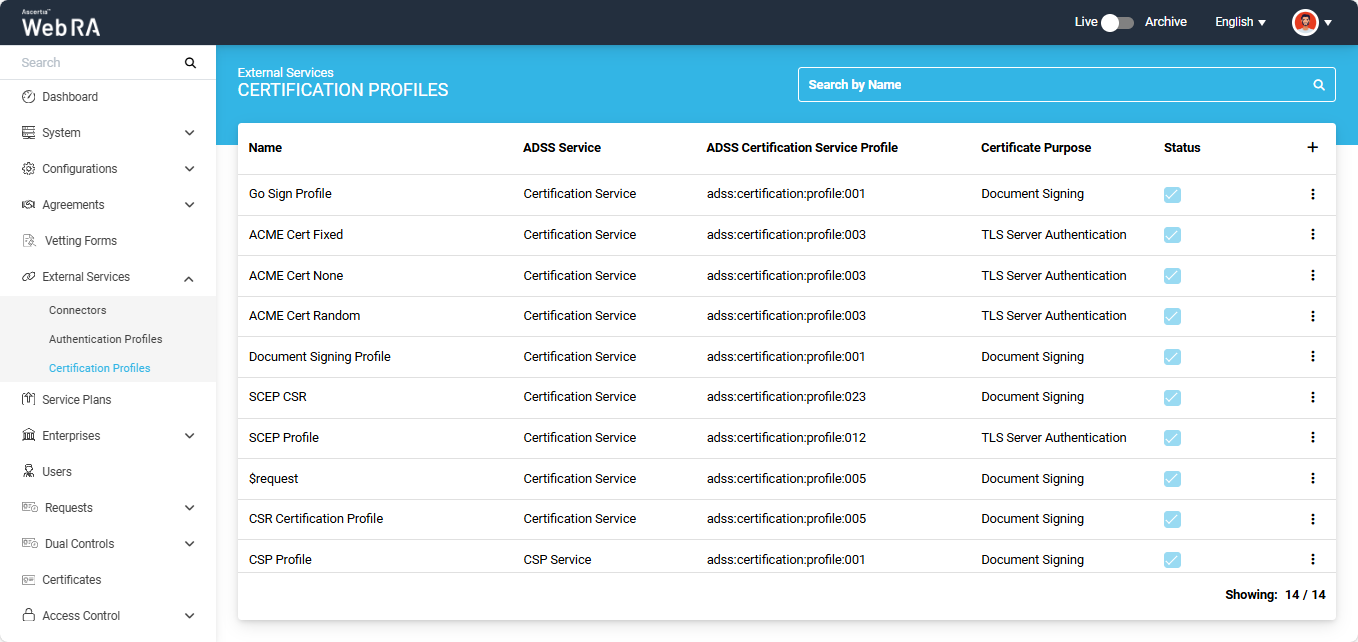
Click on the ‘+’ icon to add a create a new certification profile. The ‘Basic Information’ screen will appear.
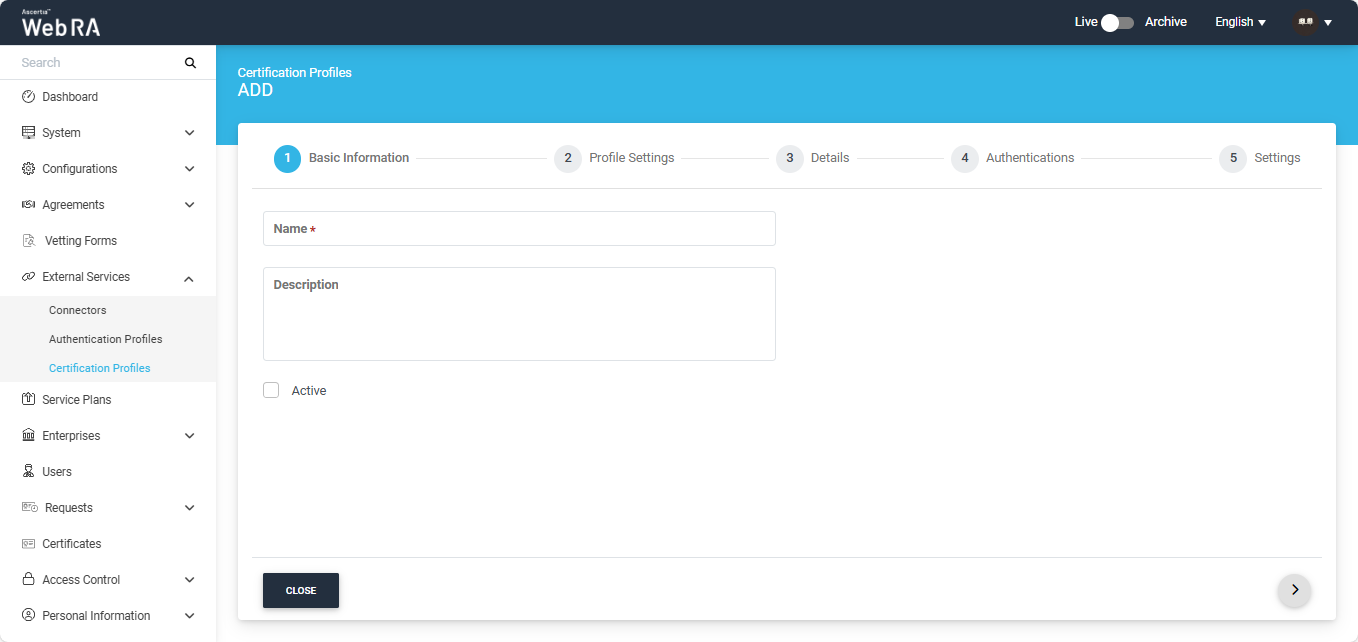
Basic Information
Specify the information in this screen as described in the table below:
|
Field |
Description |
|
Name |
Specify a unique name for the certification profile |
|
Description |
Specify any description related to this certification profile. |
|
Active |
Tick this check box to activate this profile. |
After specifying the details, click the next '>' button to access the ‘Profile Settings’ tab.
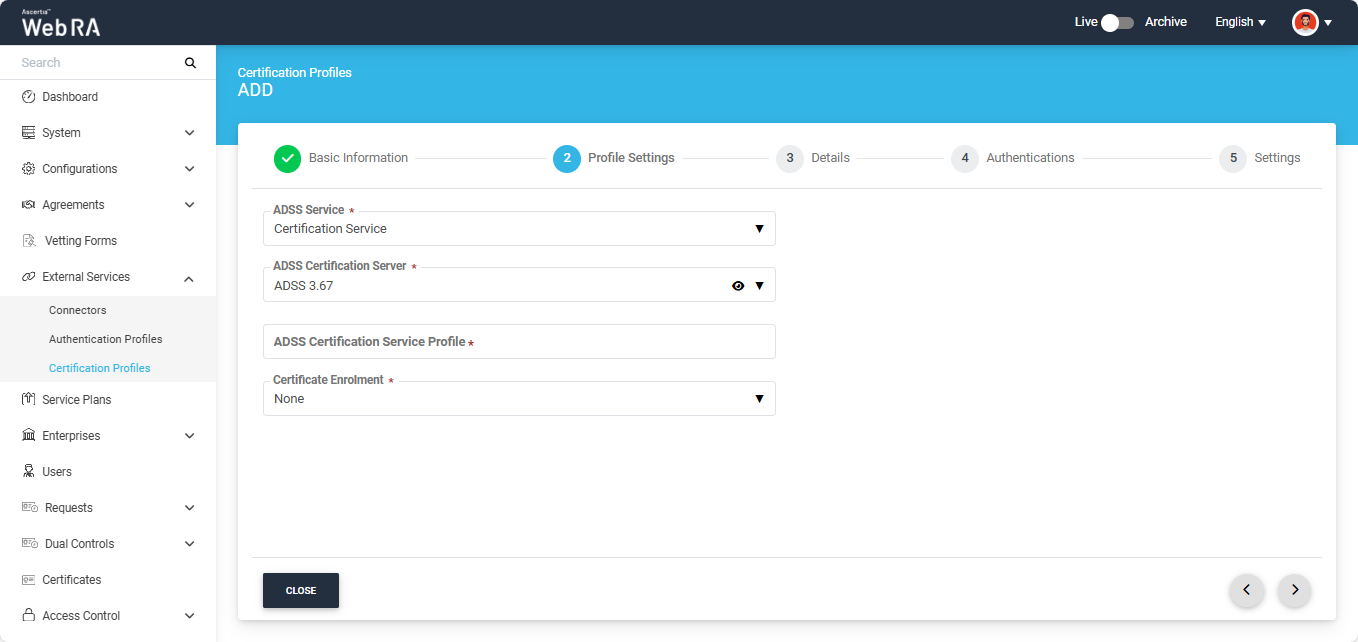
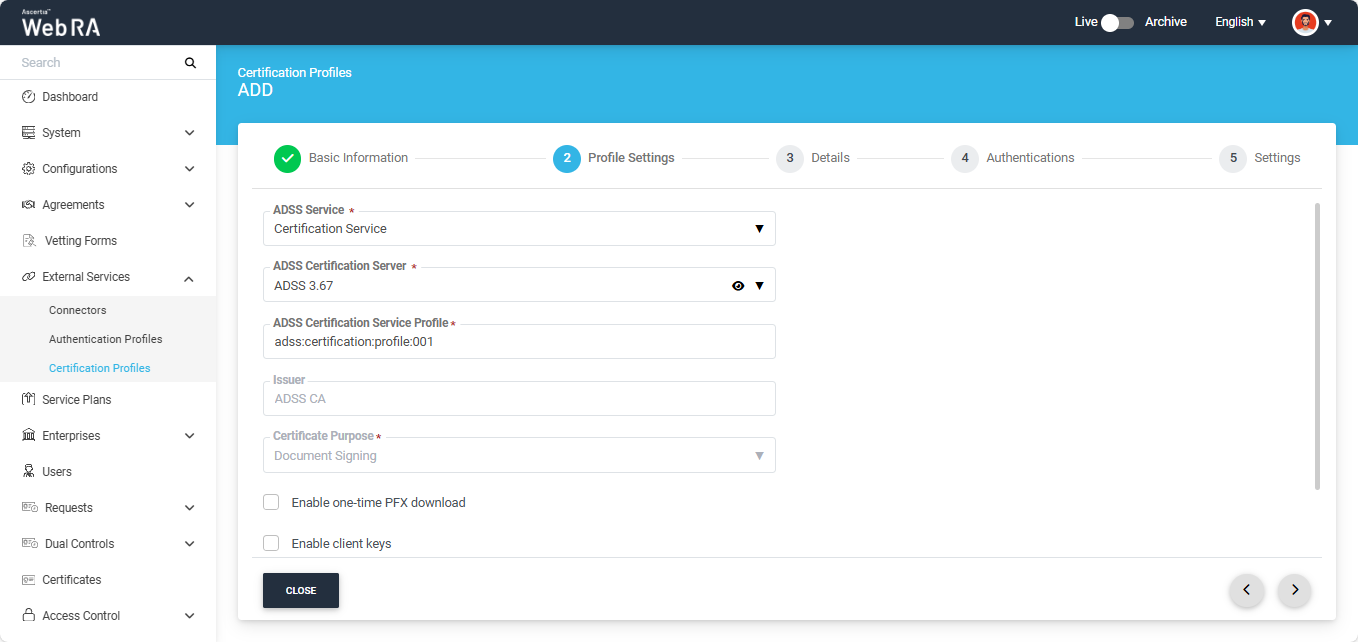
Profile Settings
In the 'Profile Settings' section, provide the required details in the ADSS Service, ADSS Certification Server, and ADSS Certification Service Profile fields. Then click the next ( > ) button to proceed to the Details tab.
Note: Windows Enrolment and Enrolment Protocols are not supported in 'Bulk Operations'.
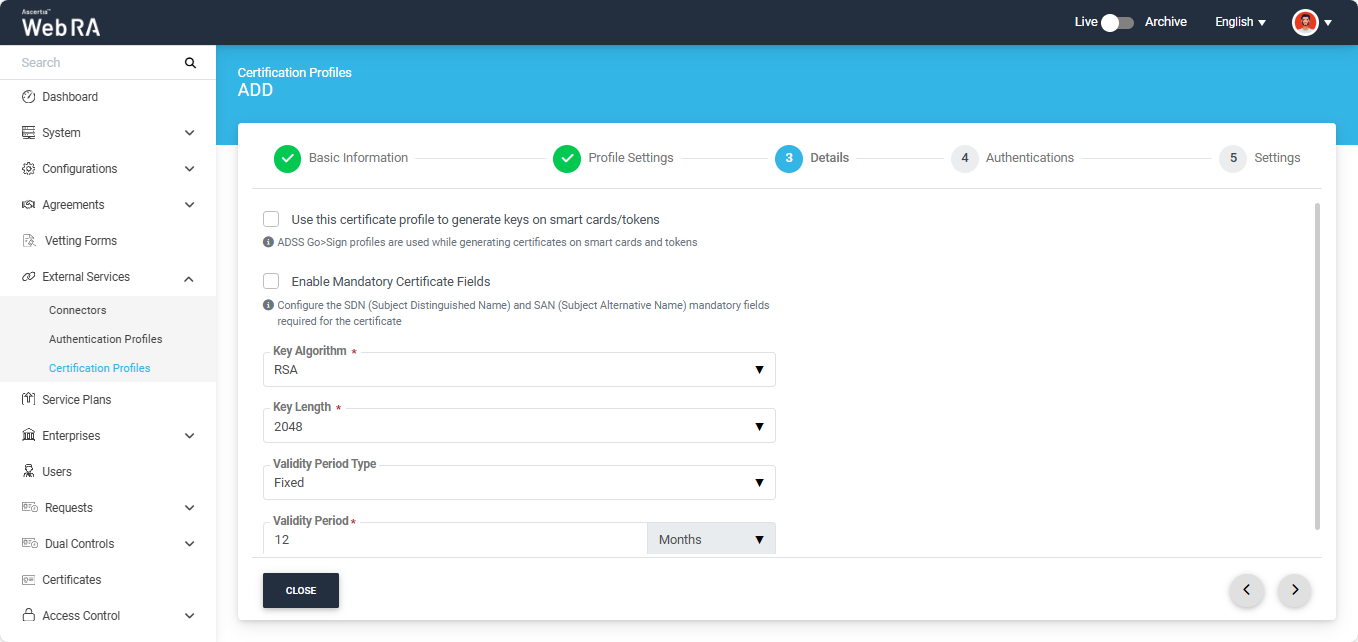
Details
Provide the required information in the 'Details' section and click the next ( > ) button to proceed to the 'Authentications' tab.
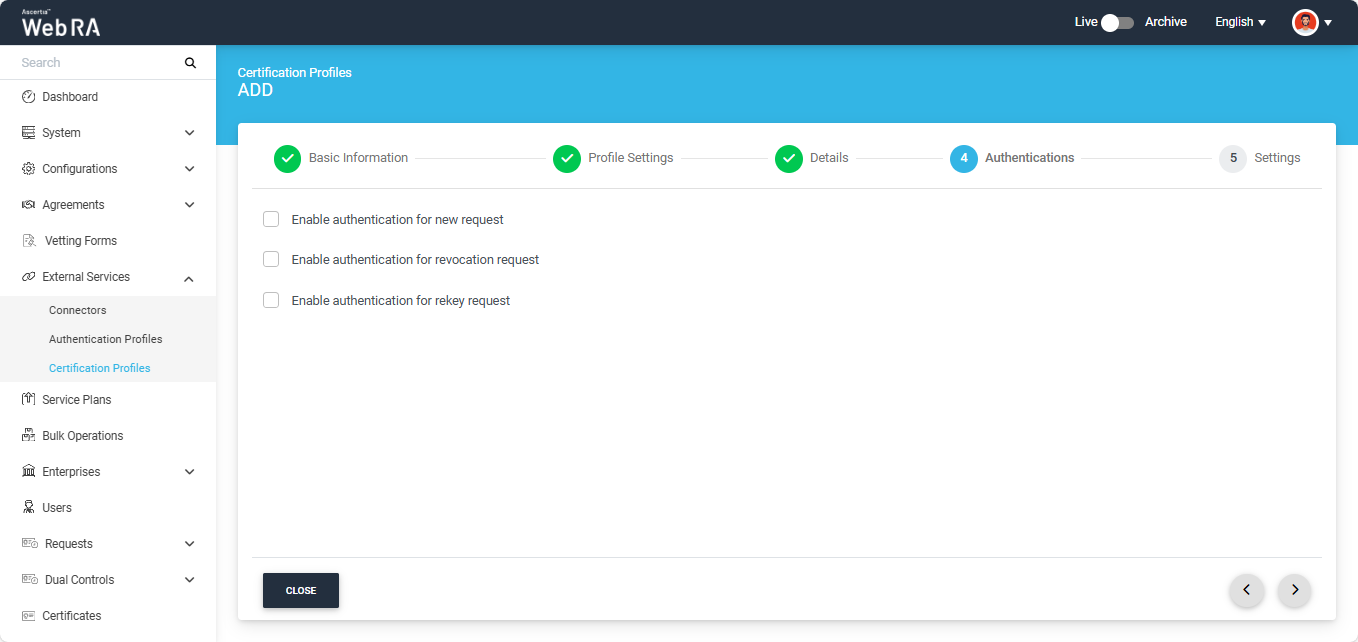
Authentications
Choose the required options on the 'Authentications' screen, then click the next ( > ) button to continue to the 'Advanced Settings' tab.
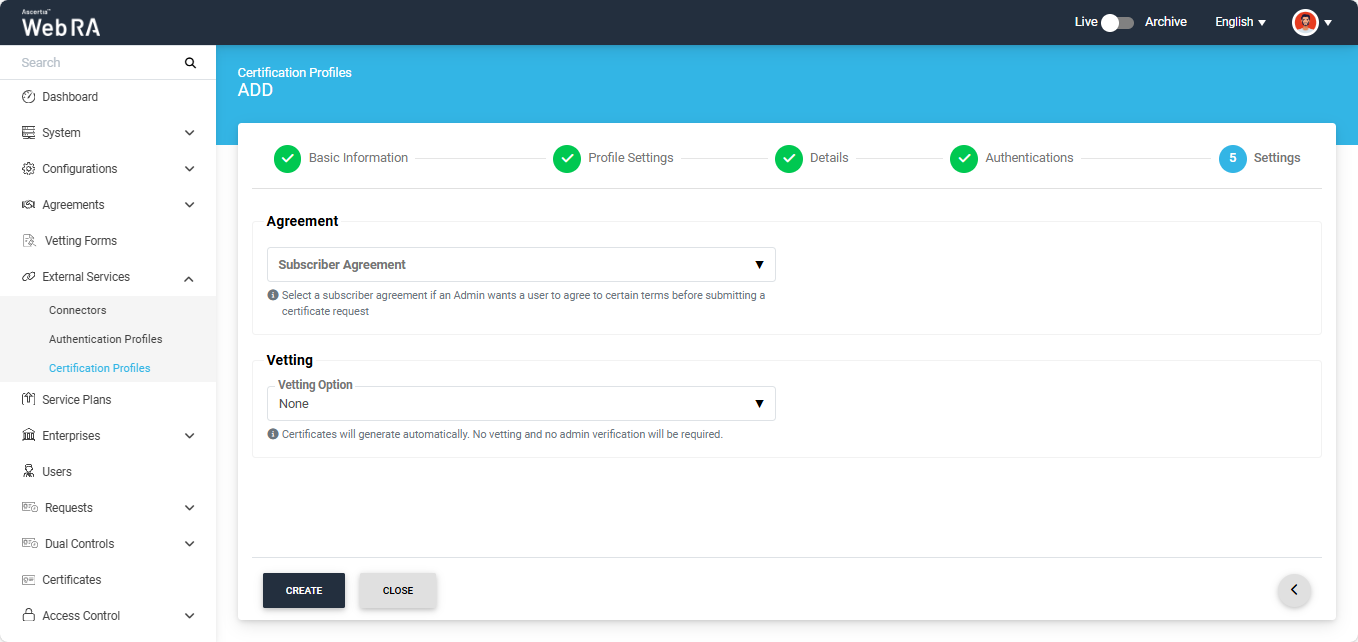
Advanced Settings
Choose the required options on the 'Agreement' screen, then click ‘Create’ to complete the process of creating a certification profile.
To view complete details on how to create different types of certification profiles in the ADSS Web RA system, refer to the 'Certification Profiles' section.
The next step is to create a ‘Service Plan’ in the ADSS Web RA.
- A service plan is a collection of allowed services and certificate types that are assigned to an Enterprise.
- A service plan (s) can be assigned to enterprises only. You cannot assign a Service Plan to the users directly.
- Based on your business requirements you can create multiple service plans to offer different set of certification services to different enterprises.
- You can configure one service plan in multiple enterprises but it is a good practice to create separate service plans for each enterprise if you are a service provider and there are many enterprises registered in the ADSS Web RA application.
- You can also change the service plan for a particular enterprise from the web portal.
Follow the below-mentioned steps to create a service plan.
- Click on the ‘Service Plan’ from the left tree menu
- Click ‘+’ from the grid header to create a new service plan
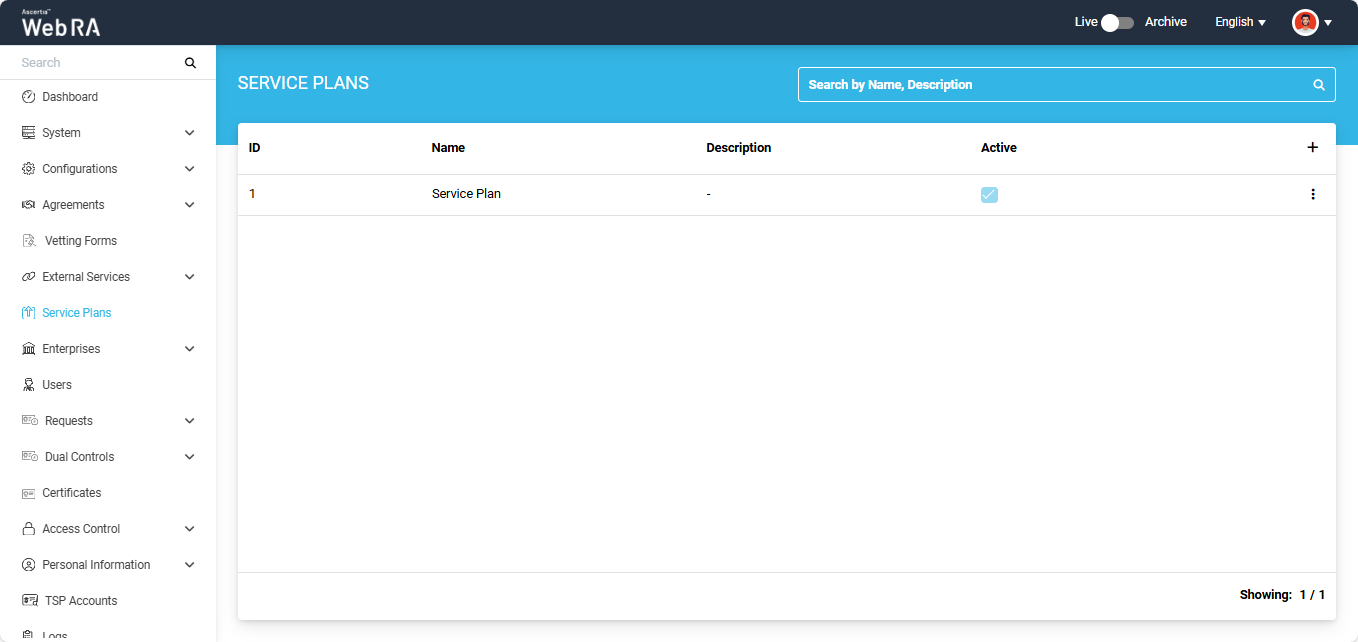
The system will display the ‘Add Service Plan’ screen. The first section that appears is ‘Basic Information’.
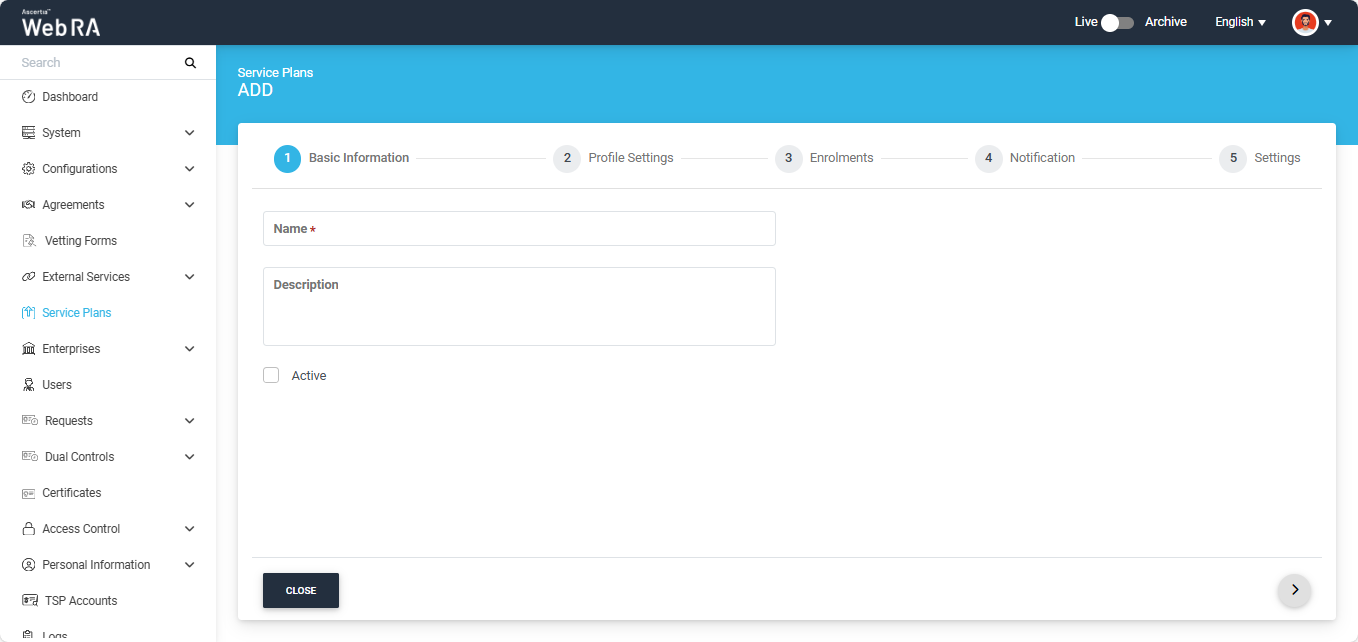
Basic Information
|
Field |
Description |
|
Name |
Specify a unique name for this service plan, such as My Service Plan. Service plans are used in the configuration of Enterprise Accounts. |
|
Description |
Specify any description related to this service plan for your record. |
|
Active |
Enable this check box to make this service plan active. Inactive service plans cannot be configured in the Enterprise Accounts. |
After entering the required information, click the next ( > ) button to navigate to the ‘Profile Settings’ screen.
Profile Settings
In this section, you have to configure the certification profile (s) you created for the import certificates & certificate substitution job.
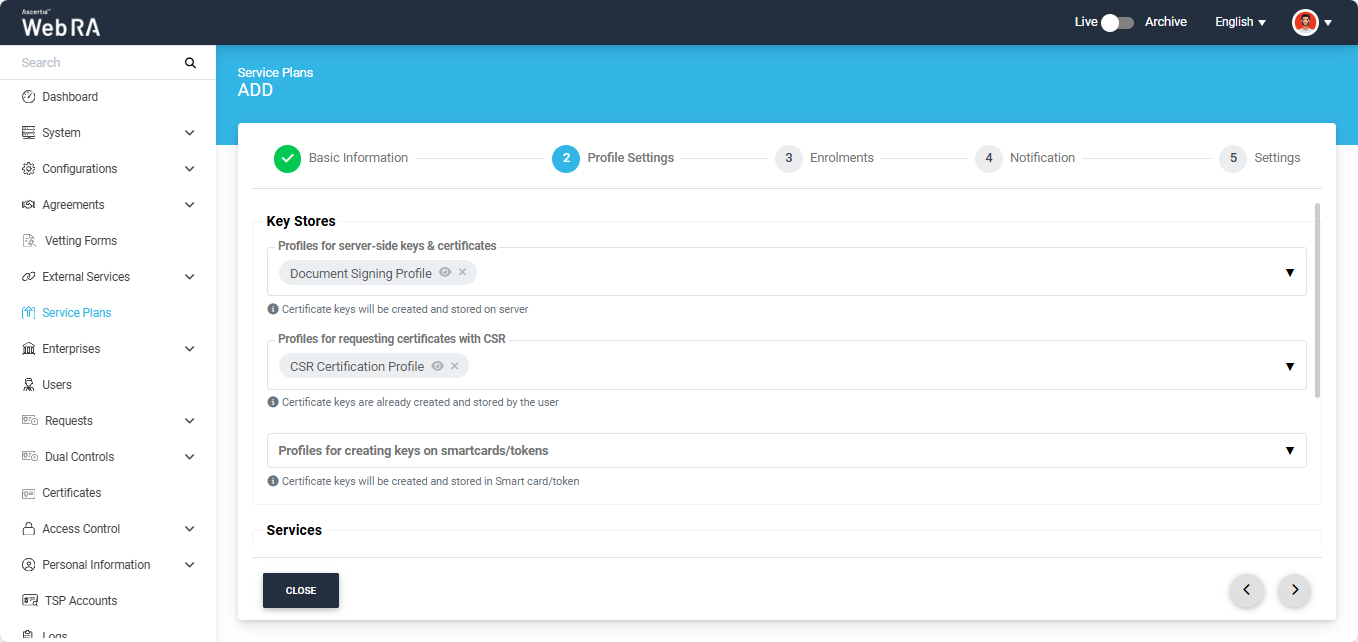
After configuring the profiles, provide the required details in the Enrolments, Notification, and Advanced Settings sections, then click Create on the Advanced Settings screen to create your service plan.
Note: Windows Enrolment and Enrolment Protocols are not supported in 'Bulk Operations'.
To view complete details on creating different types of service plans in the ADSS Web RA system, refer to the 'Service Plan' section.
Create an Enterprise and Configure the Service Plan
To create a new enterprise and configure the Service plan to it, expand Enterprises > Requests > Add (+) to access the ADD enterprise screen.
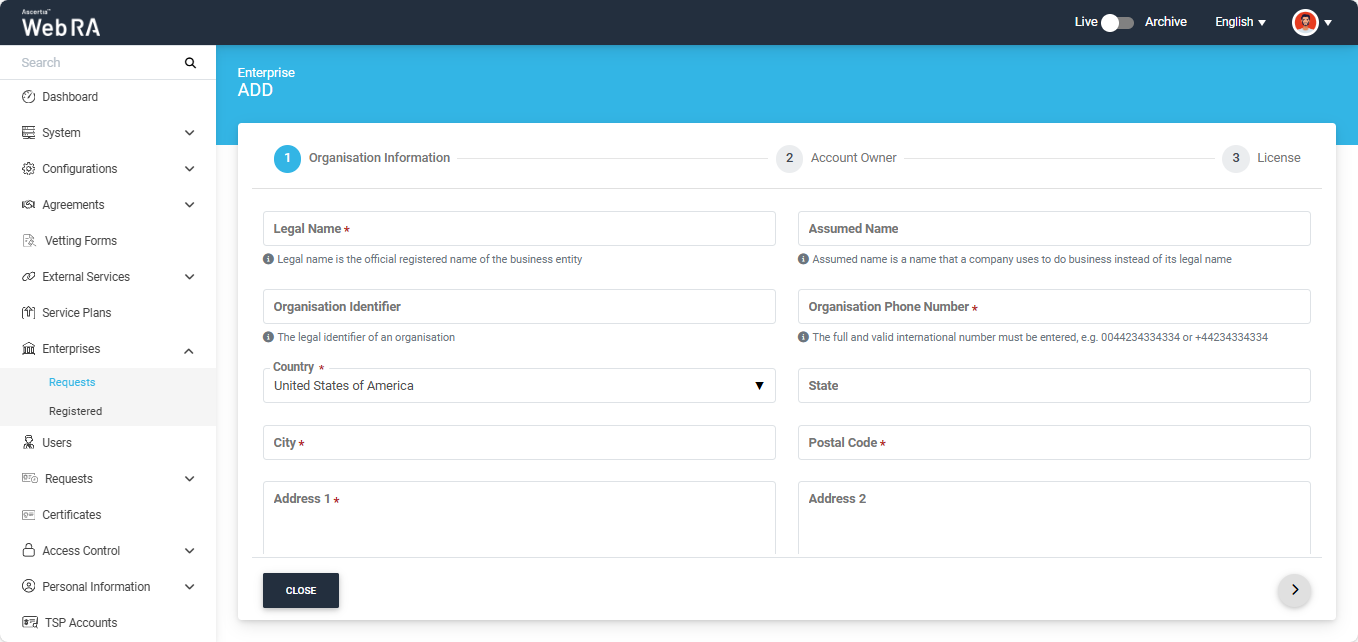
On this screen, enter the required information in their designated field and assign the service plan to the enterprise from the ‘Service Plan’ dropdown.
Then click next to navigate to ‘Account Owner’ screen.
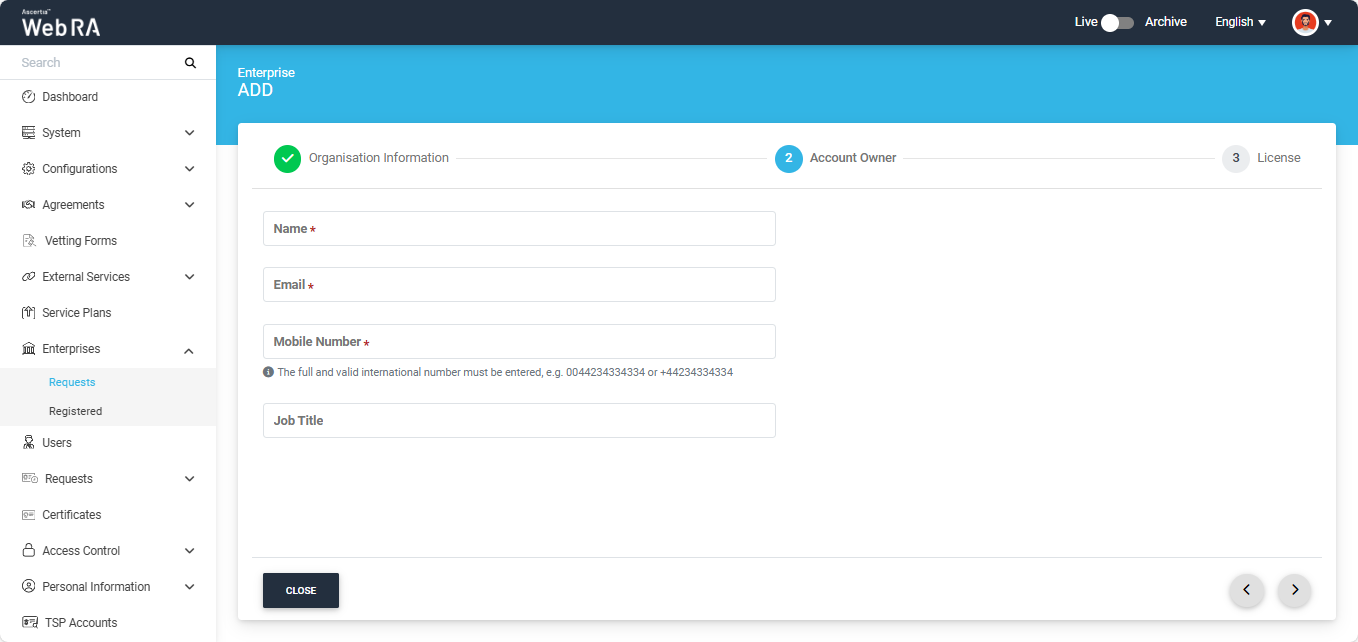
On this screen, mention the details of the enterprise owner and click next to navigate to the License screen.
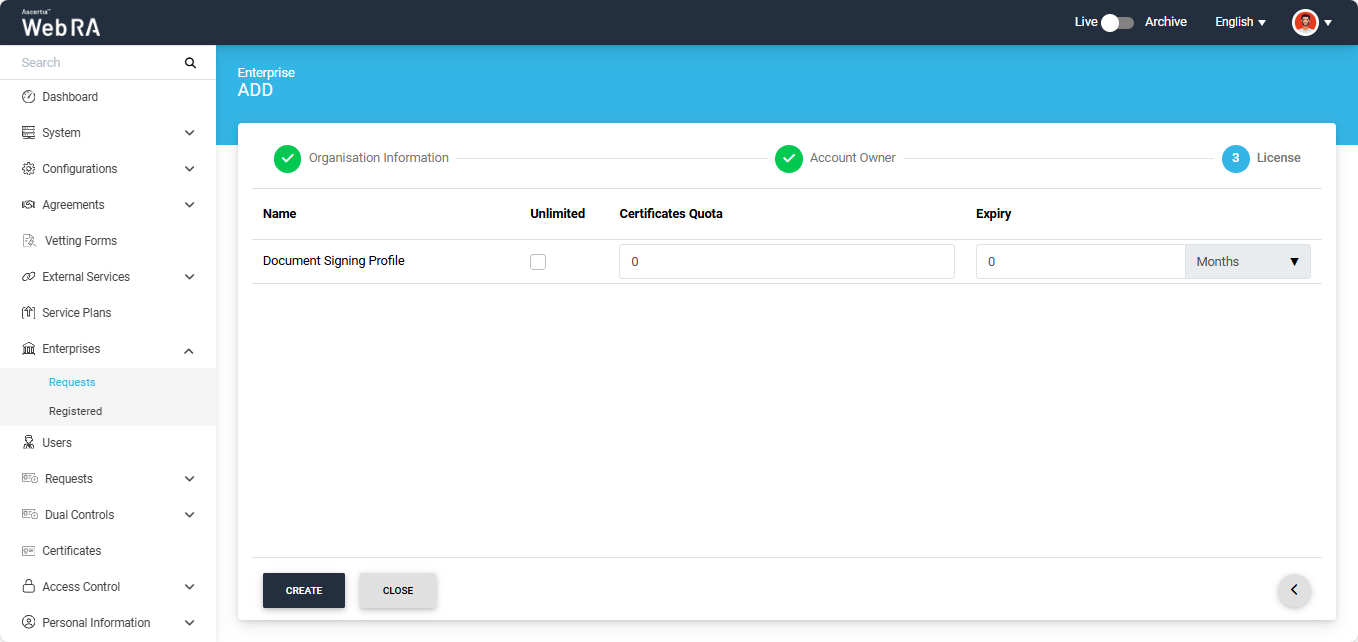
Assign the license quota from this screen for each certification profile and click ‘Create’.
Create a Role in the Enterprise and Assign the Profiles
Navigate to the ‘Roles’ screen by following the path given below:
Enterprises > Registered > Your Enterprise > Roles
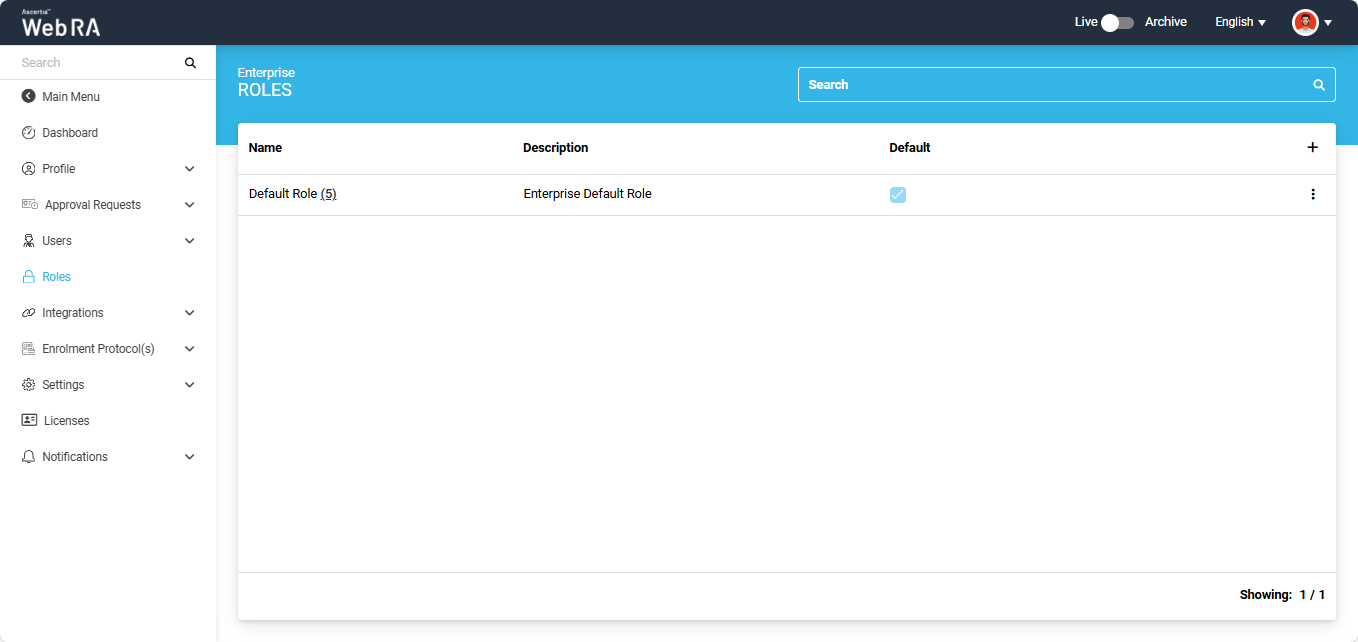
To add a new role, click the ‘+’ button. The system will display the ‘Add Role’ dialog on the screen.
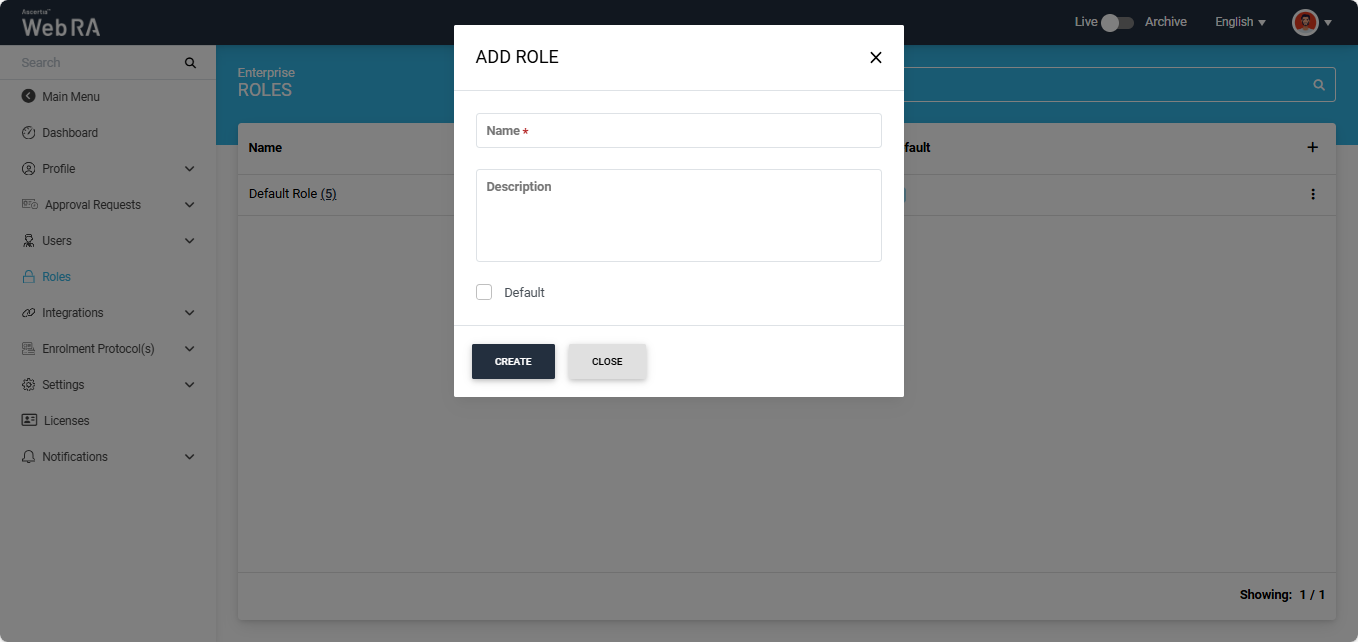
Enter the required name and description (optional) of the role. You can set the role to be used as default by enabling the ‘Default’ checkbox.
Once all the details are entered, click ‘Create’.
Once you create a role, the ‘Module’ screen appears, displaying all the available modules. The operator can choose to allow Read, Add/Edit, and Delete permissions for these modules as required.
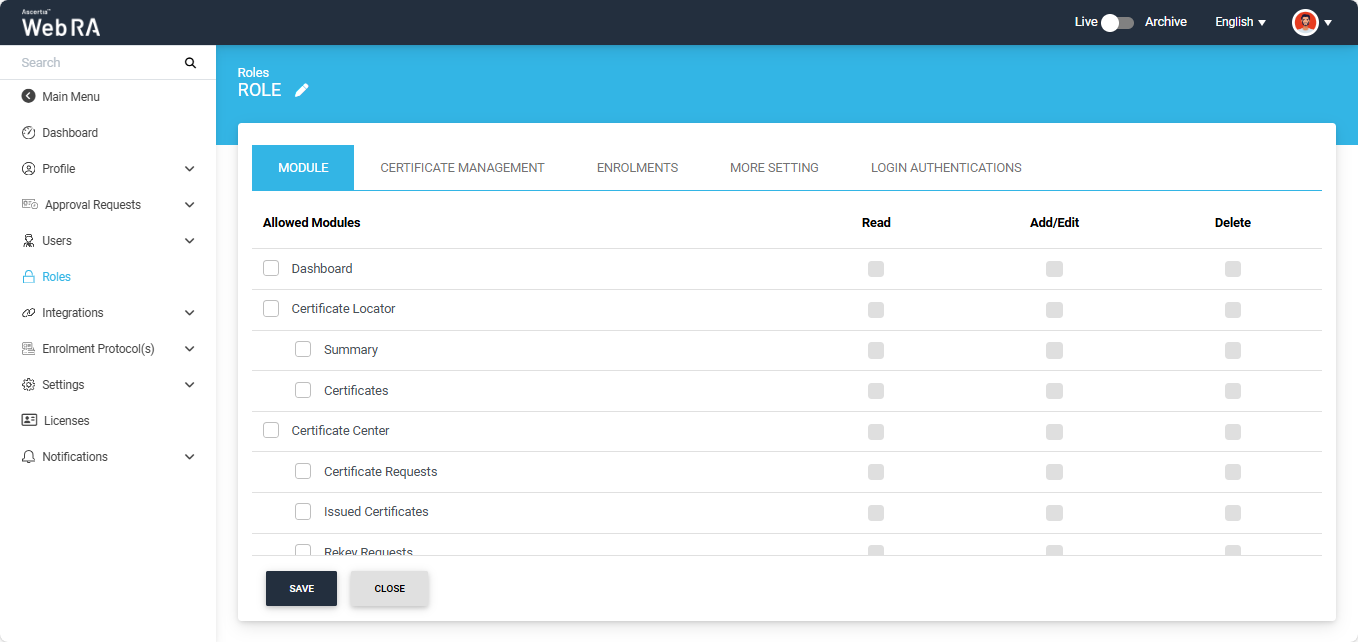
After enabling the required modules, navigate to the Certificate Management tab and select the necessary profiles. Once all changes have been made, click 'Save' to apply the updates to the role.
To view complete information about the Roles settings within an Enterprise, refer to the 'Manage Roles' section.
Importing Certificates in ADSS Server
To import certificates from an external CA into the ADSS Server, first place the certificates in the Import Certificates Utility and create the ZIP and Excel files.
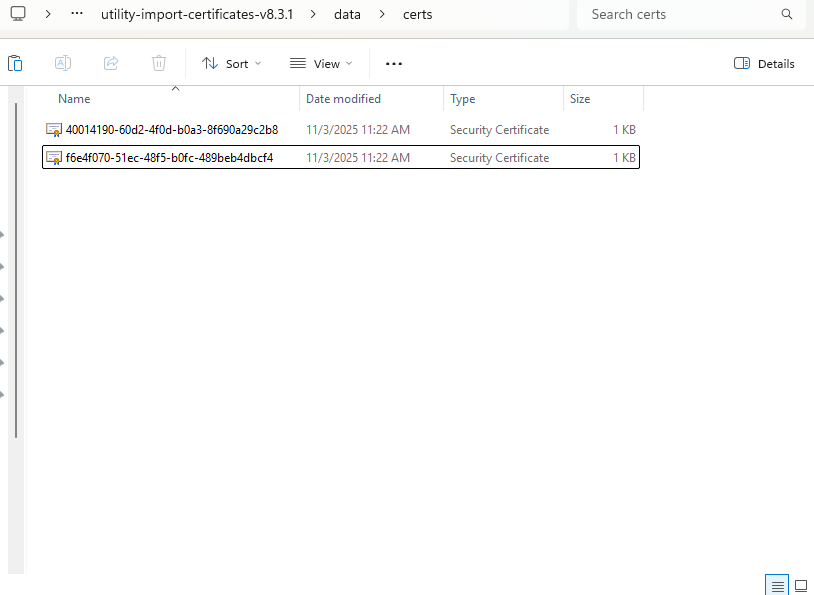
To do this, extract the import certificates utility package and navigate to the “utility-import-certificates-v8.3.1 > data > certs" folder within the utility.
Place the certificates you want to import into the ADSS Server in this folder, as shown in the image below.
After placing the certificates in the ‘certs’ folder, navigate to the "utility-import-certificates-v8.3.1 > bin" folder.
Then, click on the breadcrumb bar, type ‘cmd’, and press Enter. The command prompt window will appear.
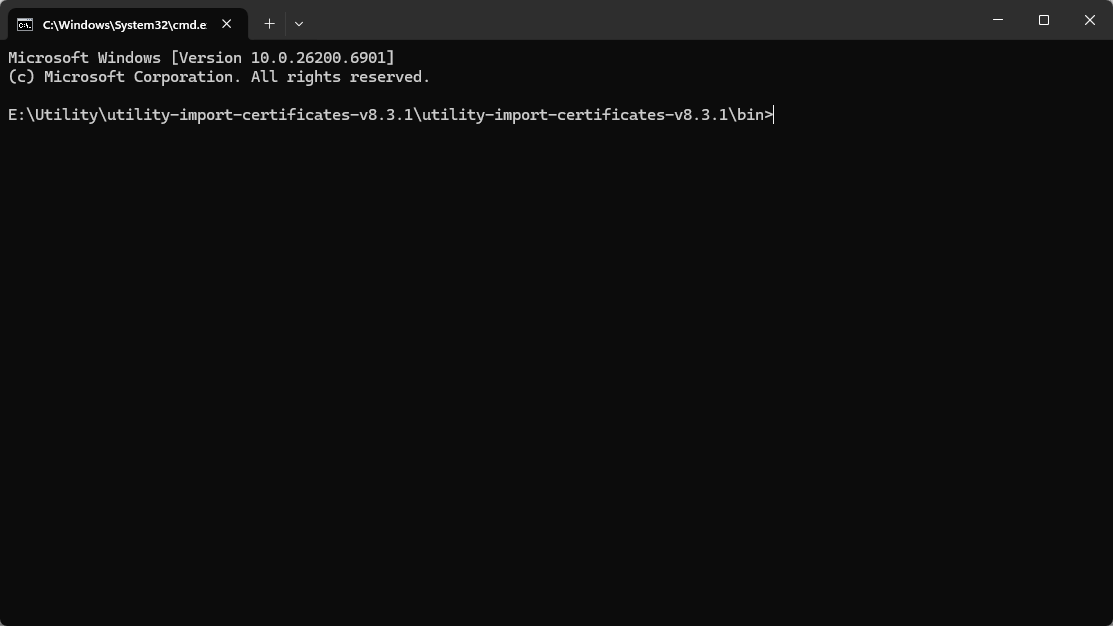
In the command prompt, run the following command:
'utility-import-certificates -c ../data/certs -o ../data/certs'
This command creates a ZIP and Excel file containing the certificate information, as shown in the screenshot below:
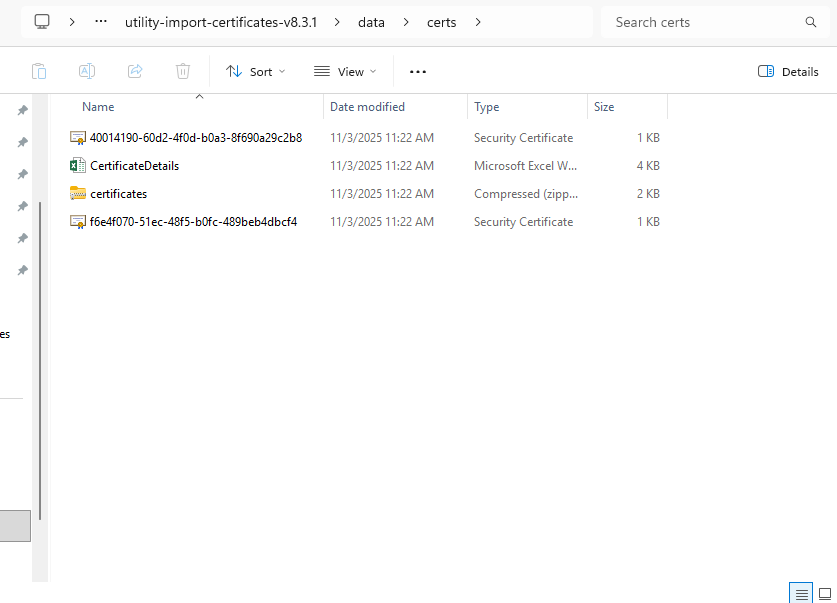
The Excel and ZIP file will contain the certificates you placed in the ‘certs’ folder.
Next, create an External CA in the ADSS Server Unity Console.
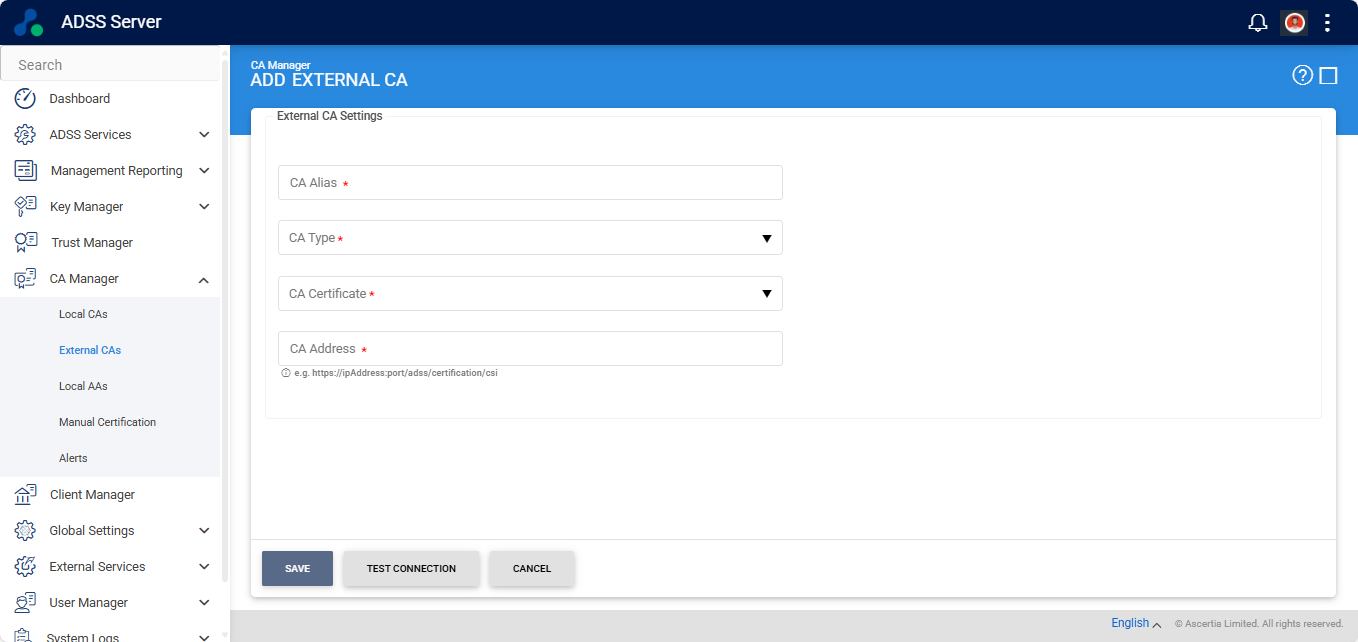
To add an External CA, expand CA Manager > External CAs, and click the ‘+’ icon.

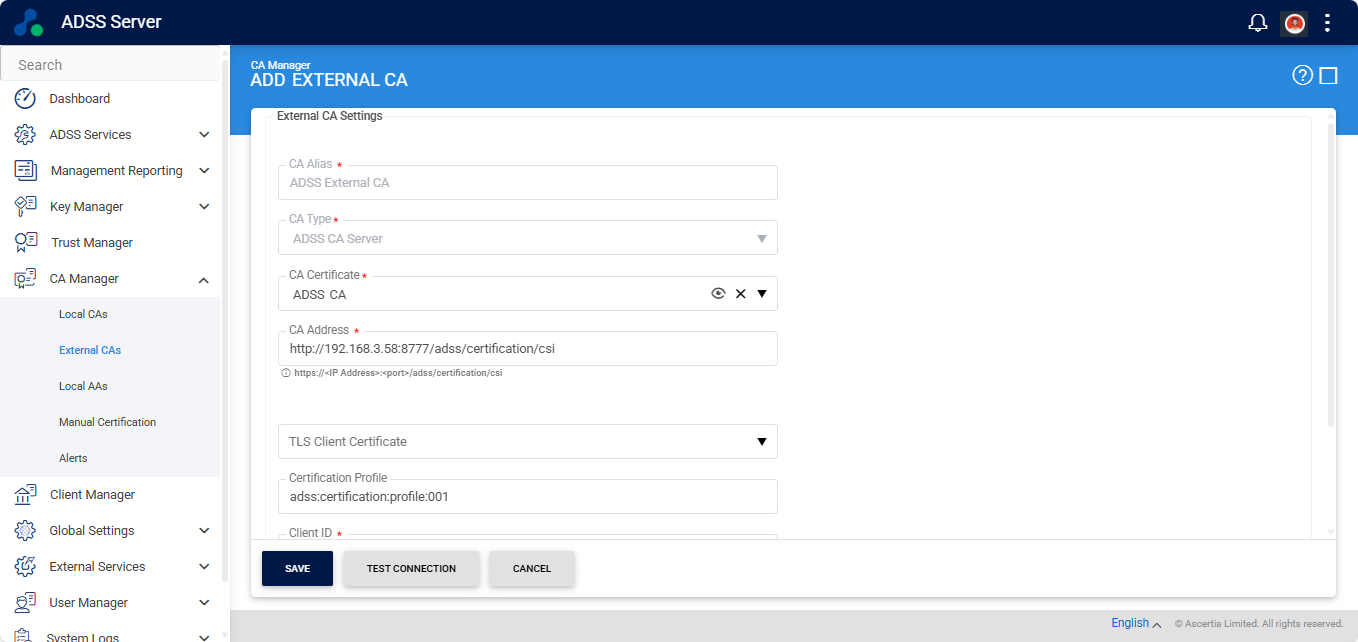
The system will display the ‘ADD External CA’ screen. Enter the required details in the mandatory fields, and click ‘Save’.
After adding the details, you can also click the ‘Test Connection’ button to verify that the external CA is working properly.
The newly added External CA will appear on the External CAs listing page.
To import the certificates into the ADSS Server, click the three-dot  icon next to the External CA entry, and select ‘Issued Certificates’.
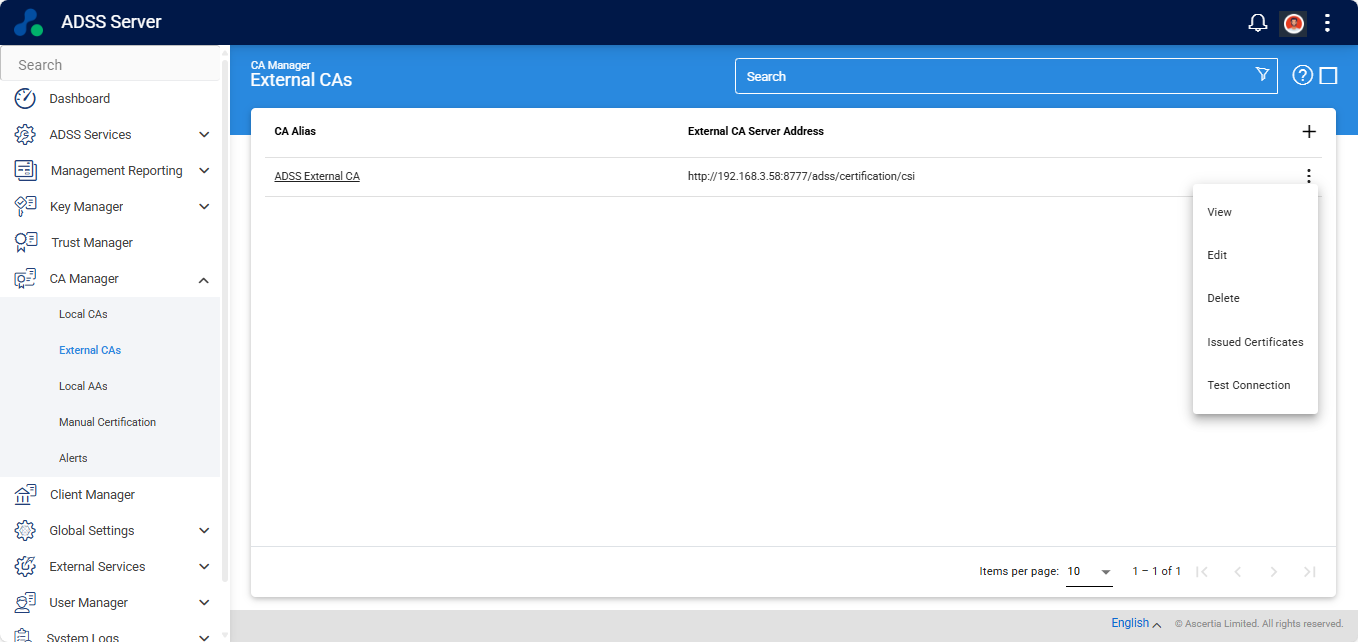
The system will display the ‘Issued Certificates’ listing. To import certificates, click the three-dot  icon located at the far right of the table header, and select ‘Import Certificates’.
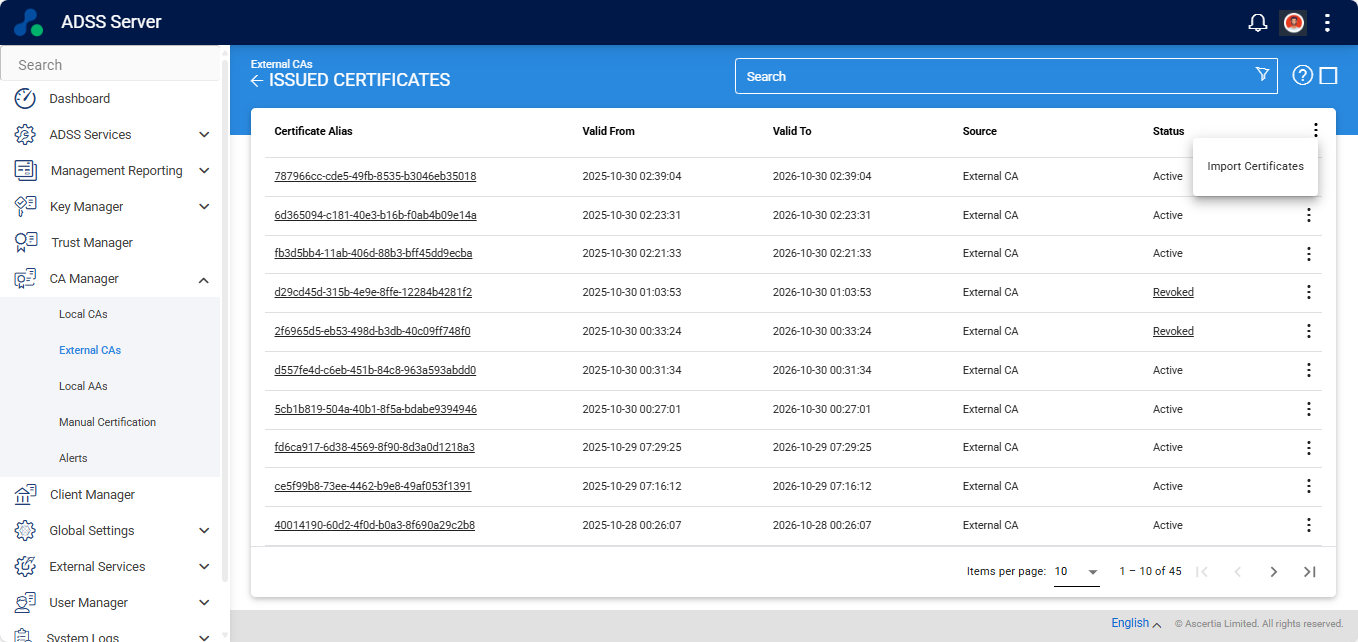
The system will display the ‘Import Certificates’ dialog.
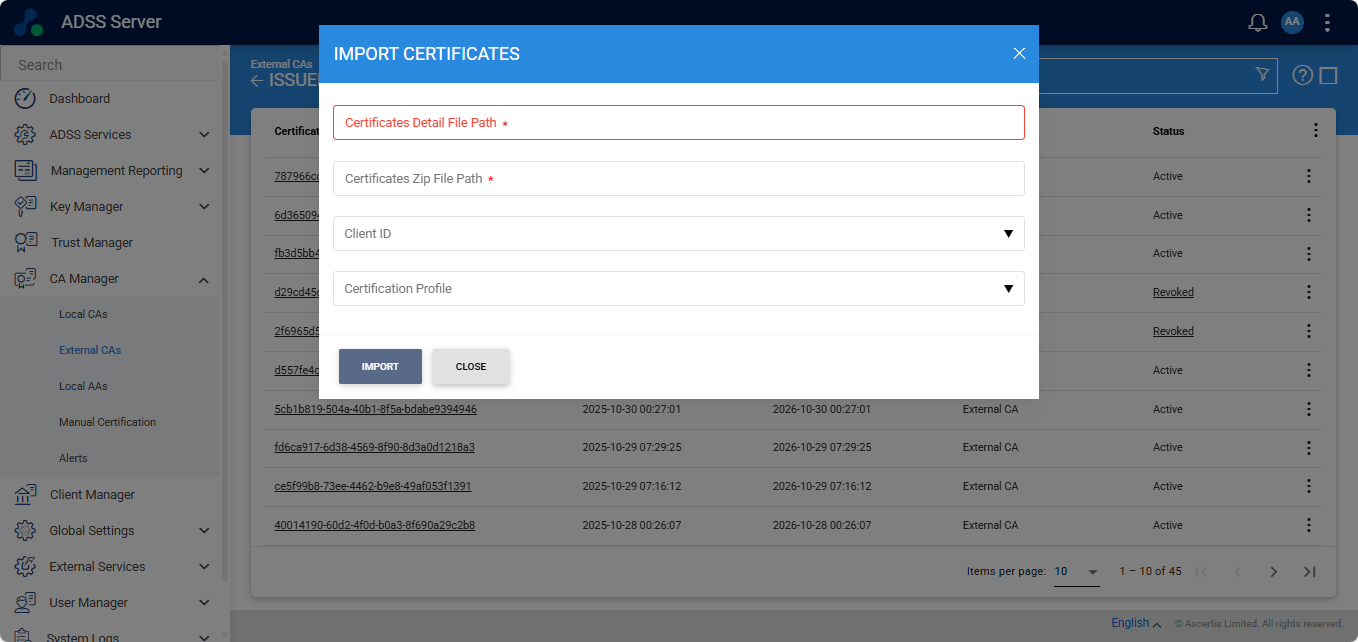
The items in the above screen are described below:
|
Items |
Description |
|
Certificate Details File Path |
Enter the path to the Excel file (.xlsx) that lists the certificates you want to import. This file is created by the Import Certificate Utility and includes the important details needed to register each certificate under the selected External CA. Make sure you use the details file generated for the same set of certificates you are importing. |
|
Client Zip File Path |
Enter the path to the ZIP file that contains the actual certificate files mentioned in the details file. This ZIP is generated by the Import Certificate Utility at the same time as the Excel file. The system reads this ZIP to match and attach the correct certificate file to each record in the details spreadsheet. |
|
Client ID |
Choose the client (such as an organization or application) that will be linked to the imported certificates. Connecting certificates to a client makes sure that client applications (like Web RA) can later manage them, for example, by revoking or reinstating them. |
|
Certification Profile |
Choose the certification profile for the imported certificates. This links the certificates to the correct rules and usage settings in the ADSS Server. It also ensures that client applications can manage the certificates properly, including life-cycle actions like revocation. |
Note: The Client ID and Certification Profile fields are optional. However, if they are not provided, the certificates will be imported, but revocation actions will not be possible.
After entering all the required details, click ‘Import’ to import the certificates that were originally issued by the external CA. All imported certificates will then appear in the ‘Issued Certificates’ listing.
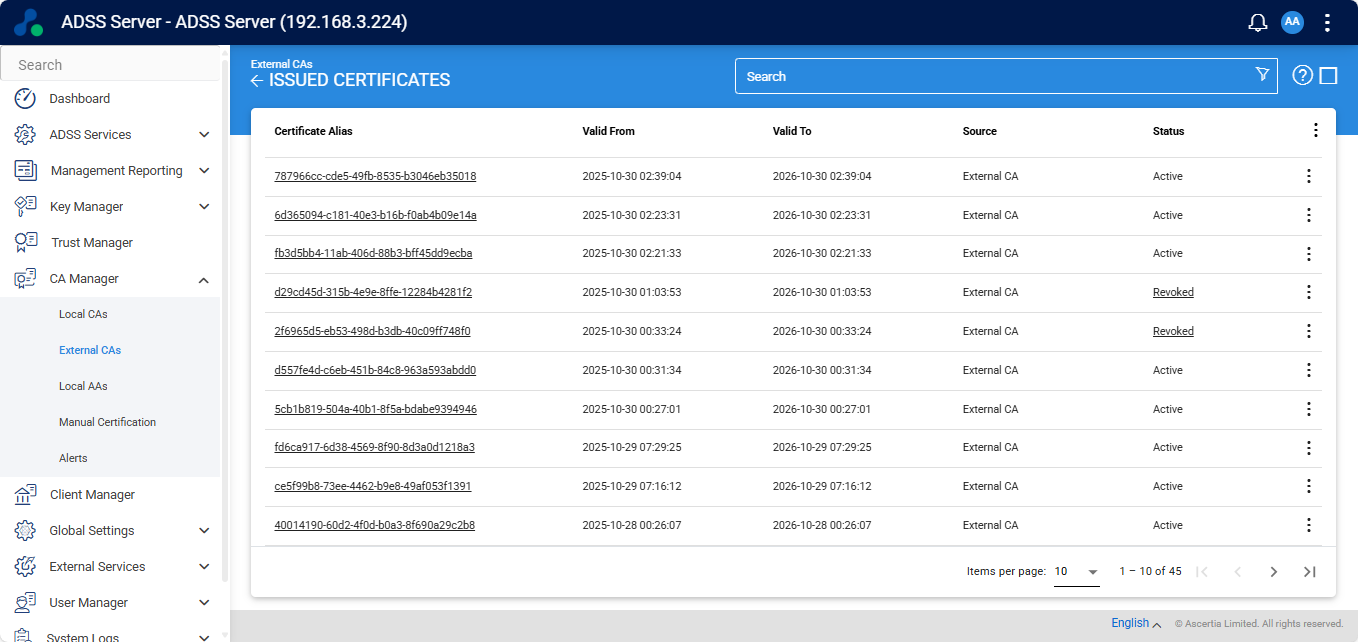
You can click on the ‘Certificate Alias’ of a certificate to view its complete details.
Importing Certificates in ADSS Web RA
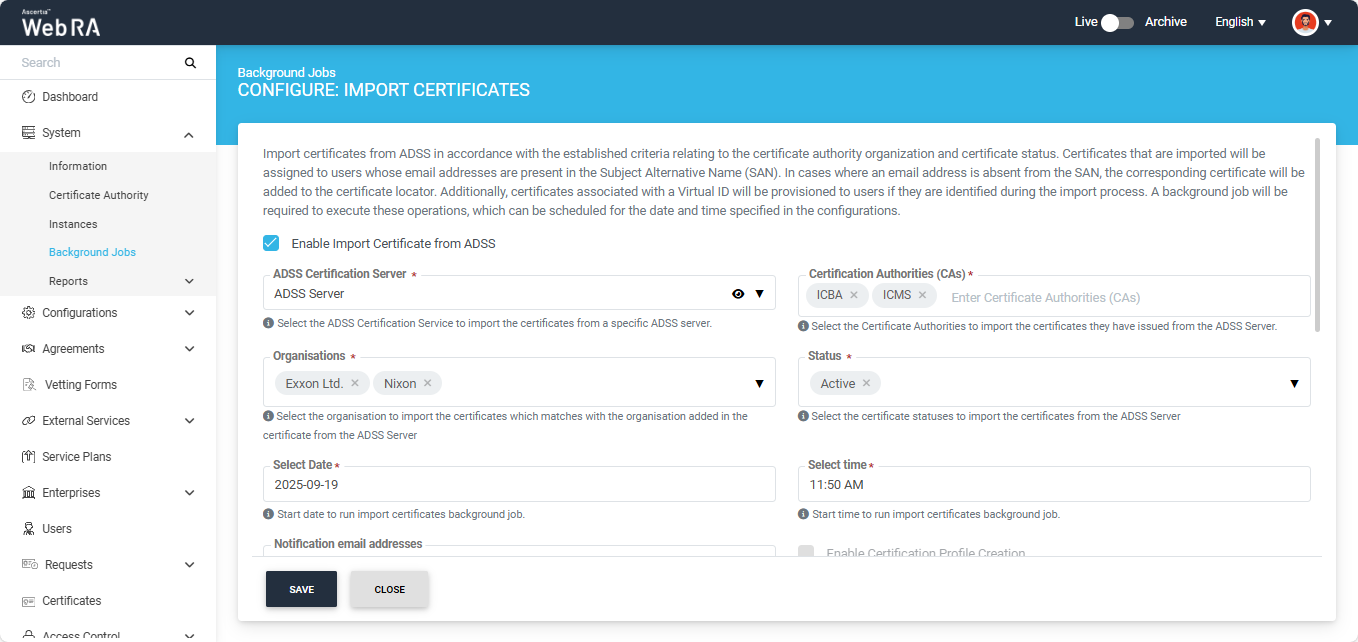
Expand Configurations > Import Certificates from the left menu of the Web RA Admin portal.
Import certificates from ADSS according to the established criteria related to the certificate authority organization and certificate status. Imported certificates will be assigned to users whose email addresses are present in the Subject Alternative Name (SAN). If an email address is absent from the SAN, the corresponding certificate will be added to the certificate locator. Additionally, certificates associated with a Virtual ID will be provisioned to users if identified during the import process. A background job will be required to execute these operations, which can be scheduled for the specified date and time in the configurations.
Here, the system displays the ‘Enable Import Certificate from ADSS’ checkbox. By default, the checkbox will appear disabled.
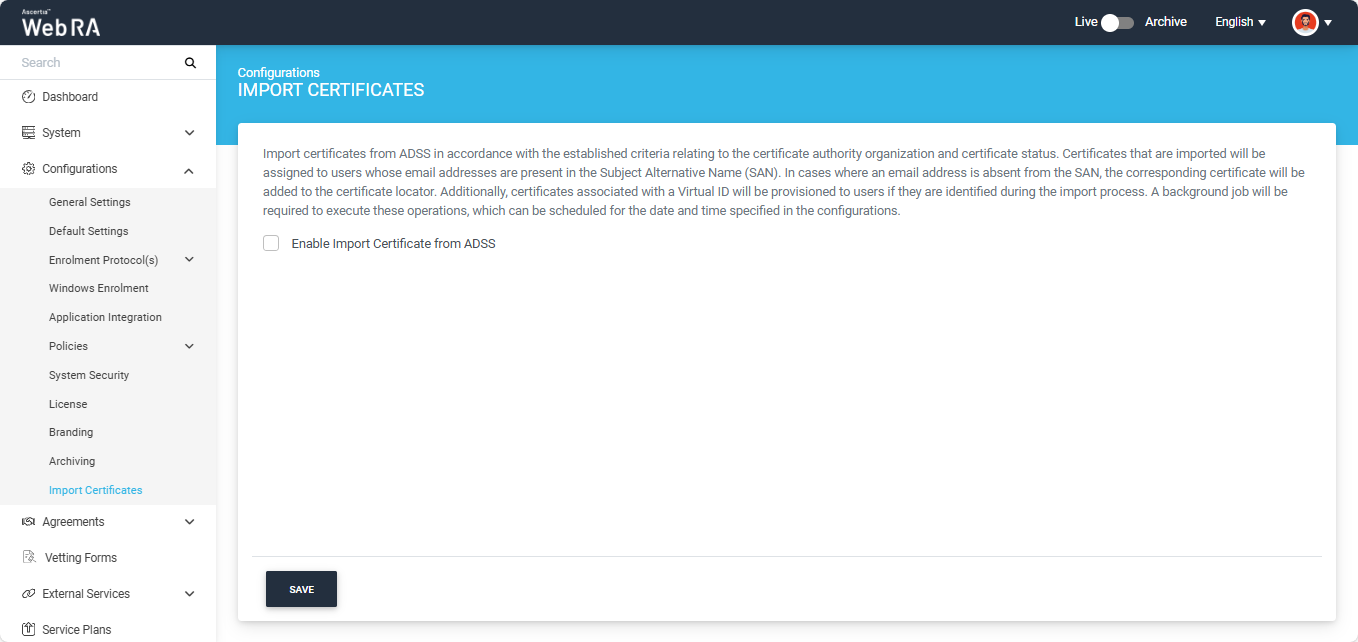
To configure the 'Import Certificates' setting in the system, select the 'Enable Import Certificate from ADSS' checkbox.
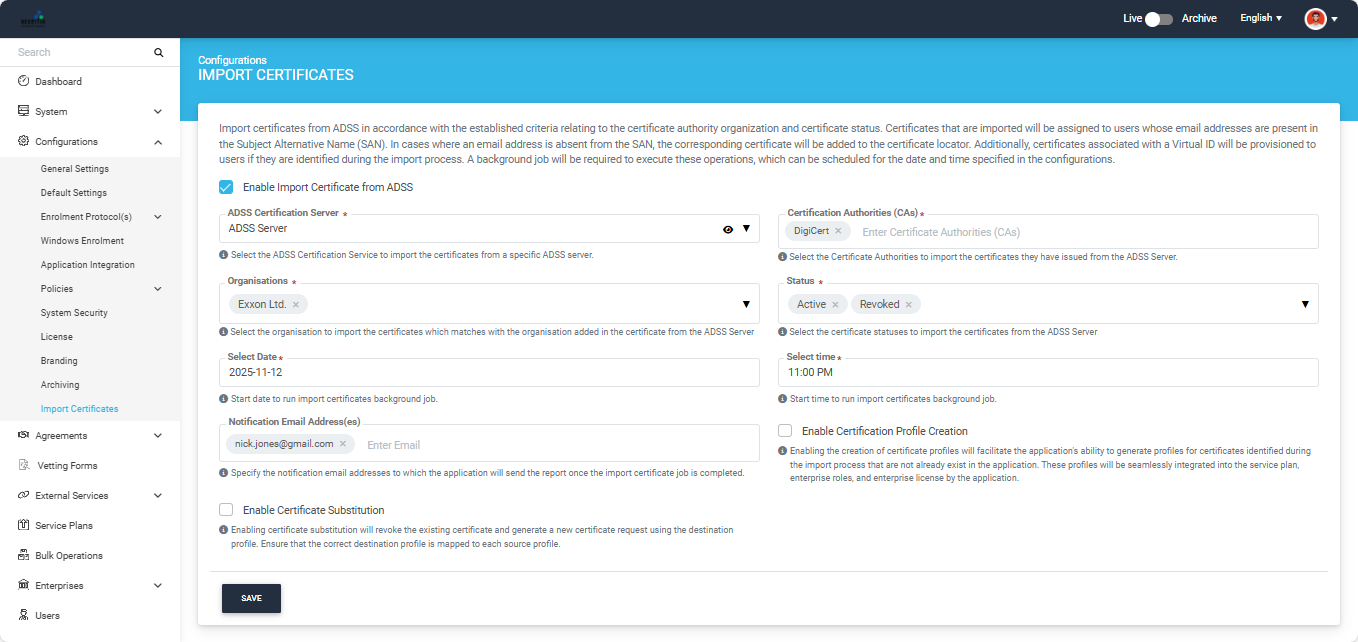
Once the checkbox is enabled, the system will display the following fields on the screen.
|
Field |
Description |
|
ADSS Certification Server |
From this dropdown, you will be required to select the related connector of ADSS Server from the connector list. |
|
Certification Authorities (CAs) |
Enter certification authorities (CAs) in this field. You can type and enter multiple CAs to import the certificates they have issued. |
|
Organisations |
Select one or more organisations from this dropdown to import certificates. Ensure the selected organisations match the organisation specified in the certificate from the ADSS Server. |
|
Status |
Select the certificate statuses (such as active, suspended, or revoked) that you want to use for importing the corresponding certificates from the ADSS Server. |
|
Select Date |
Select the date on which you want to schedule the import certificates background job. |
|
Select Time |
Select the time at which you want to run the import certificates background job. |
|
Notification Email Addresses |
Specify the email address(es) to which the application will send the report after the import certificate job is complete. |
|
Enable Certification Profile Creation |
Enabling this checkbox will allow the application to generate profiles for certificates identified during the import process that do not already exist in the application. These profiles will then be automatically integrated into the service plan, enterprise roles, and enterprise license by the application. |
|
Enable Certificate Substitution |
Enabling this checkbox will revoke the existing certificate that is being imported from ADSS Server against the provided source profile and generate a new certificate request using the selected destination profile. You have to make sure the correct destination profile is mapped to each source profile. |
Note: The system does not allow you to use the ‘Enable Certification Profile Creation’ option simultaneously with the ‘Enable Certificate Substitution’ option. If you want to create certification profiles for the certificates being imported, the substitution feature must be disabled.
When you select the ‘Enable Certificate Substitution’ checkbox, the system will display the ‘Source Profile’ and ‘Destination Profile’ sections.
Source Profile
The source profile is an ADSS Server profile that will be used to revoke the certificate(s) being imported.
Destination Profile
This is the certification profile created in ADSS Web RA system that will be used to generate a new certificate request for the certificate(s) being imported.
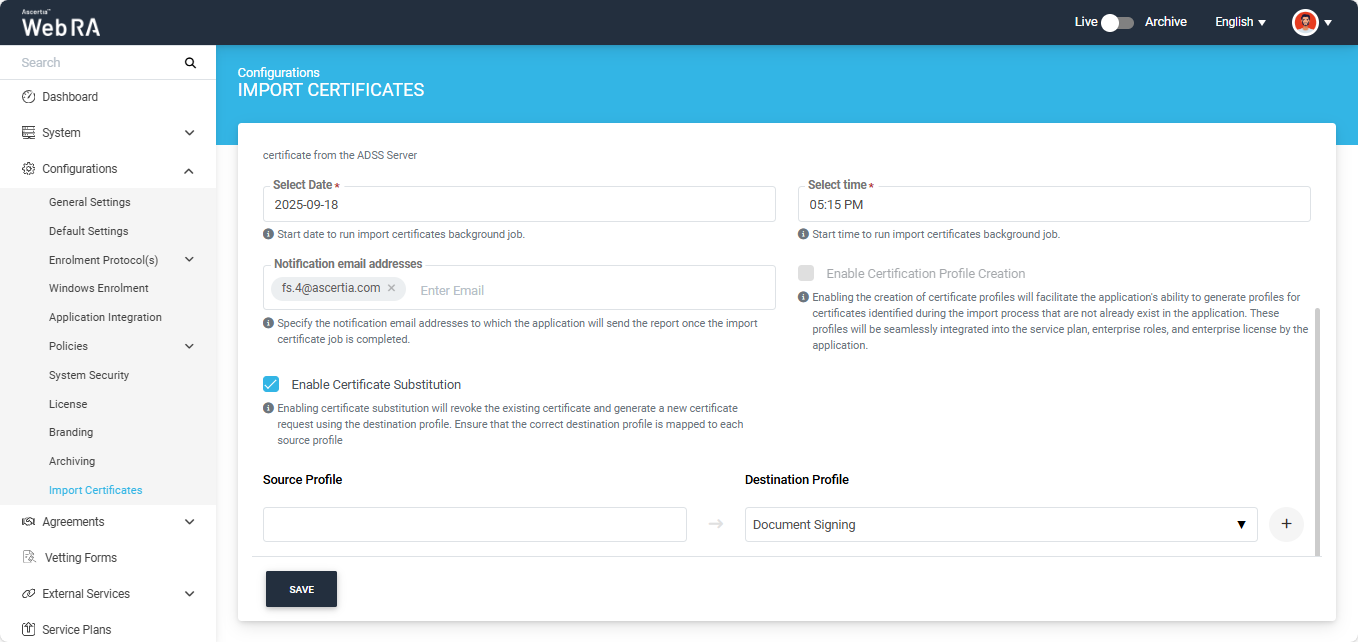
The ‘Source Profile’ box will be empty. Here, enter the ADSS certification profile against which you want the system to revoke the certificate(s) being imported from the ADSS Server.
The ‘Destination Profile’ dropdown will display the certification profile(s) configured in the organisation you have selected in the ‘Organisation’ dropdown above. By default, the first certification profile in the list will be displayed in the dropdown field.
Click the dropdown field to select the required profile from the list.

After making the required selection, click the ‘+’ button to map the source profile with the destination profile.
The mapped entry will appear in disabled form. You can delete the entry by clicking the ‘Delete  ’ icon.
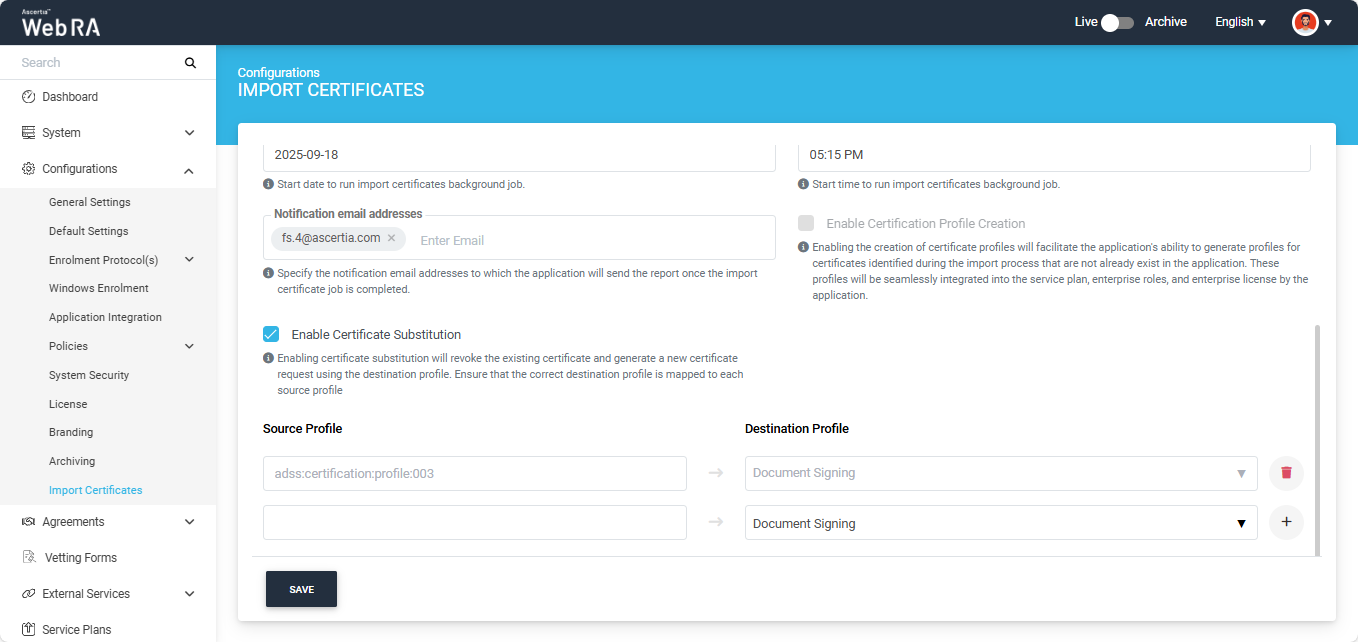
Multiple source profiles can be mapped to a single destination profile; however, the same source profile cannot be used more than once. The system will display an error message if you attempt to enter the same profile again.
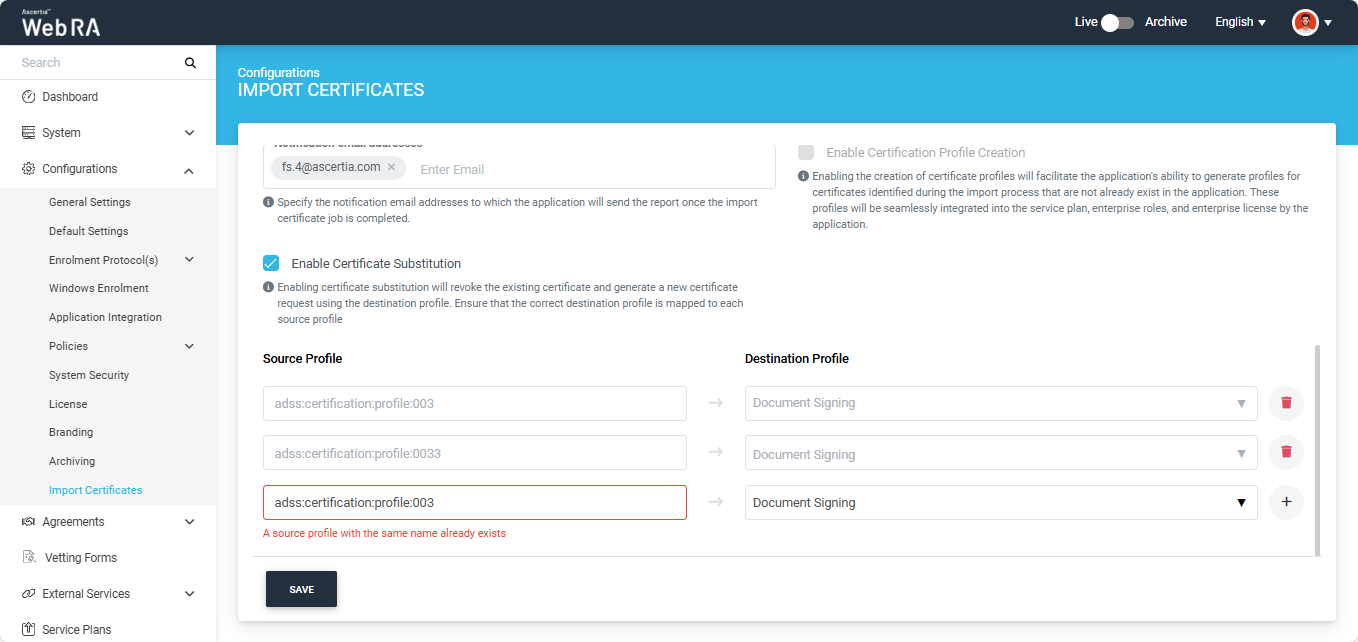
Once all the settings are configured, click the ‘Save’ button.
This scheduled background job will appear in the ‘Background Jobs’ listing under the ‘System’ module.
Note: After the Import Certificates background job is completed, all certificates that contain an email address in their SAN will be automatically substituted, and their draft requests will be created in the 'Certificate Requests' section of the Web Portal. Meanwhile, certificates that do not include an email address in their SAN will appear in the 'Certificates' listing of the Web Portal.
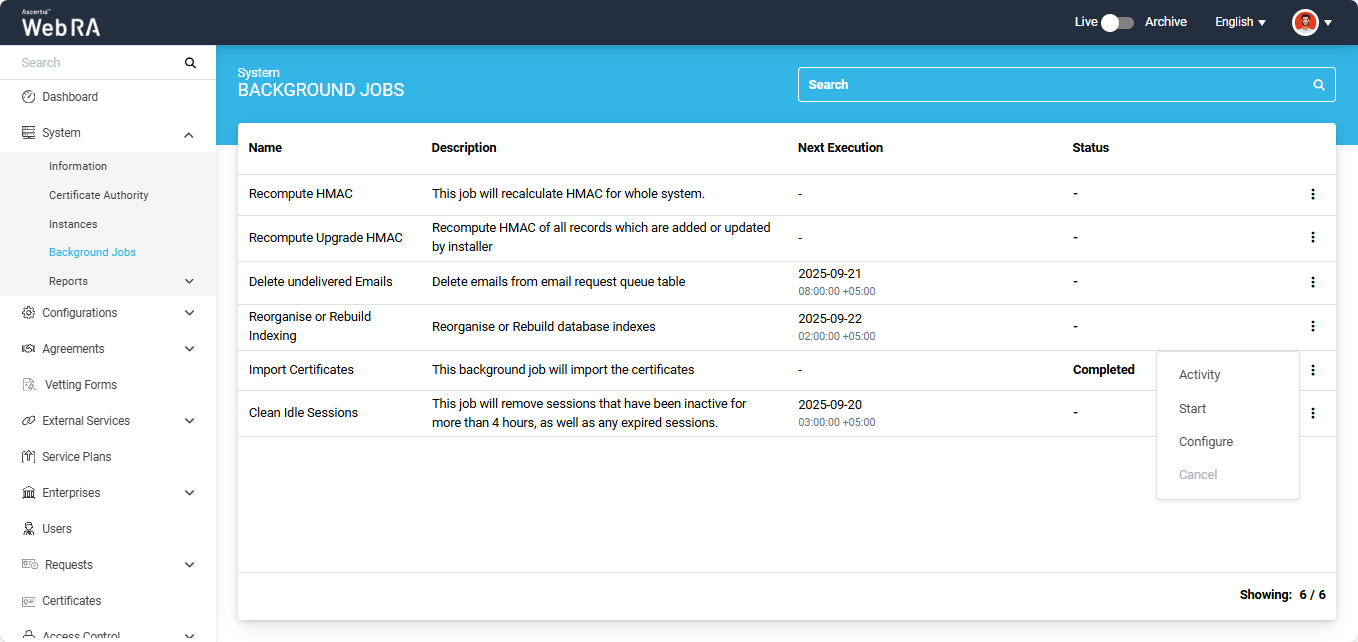
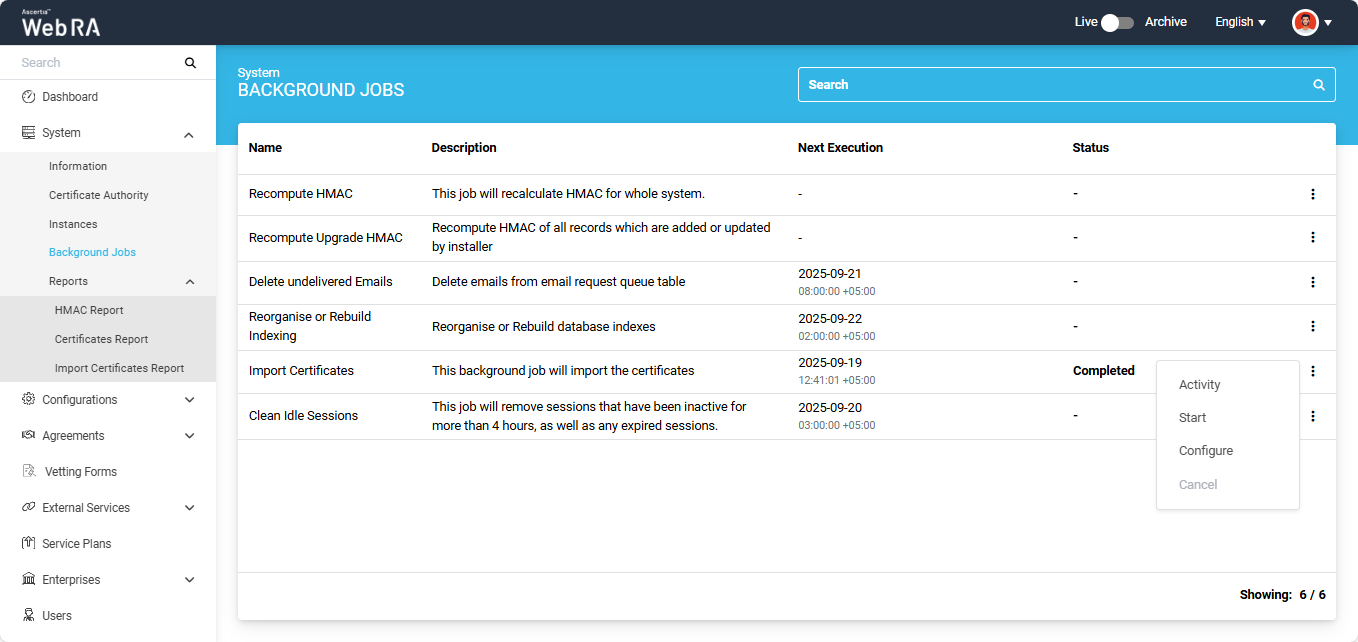
Background Jobs > Import Certificates
To access the Import Certificates module, expand System > Background Jobs > Import Certificates from the left menu of the Web RA Admin Portal.
This background job will import the certificates from the ADSS Server and generate an import certificates report. The report will then be shared on the email address(es) specified when scheduling the ‘Import Certificates’ background job.

In the ‘Next Execution’ column you can view the time and date when the next scheduled background job will run.
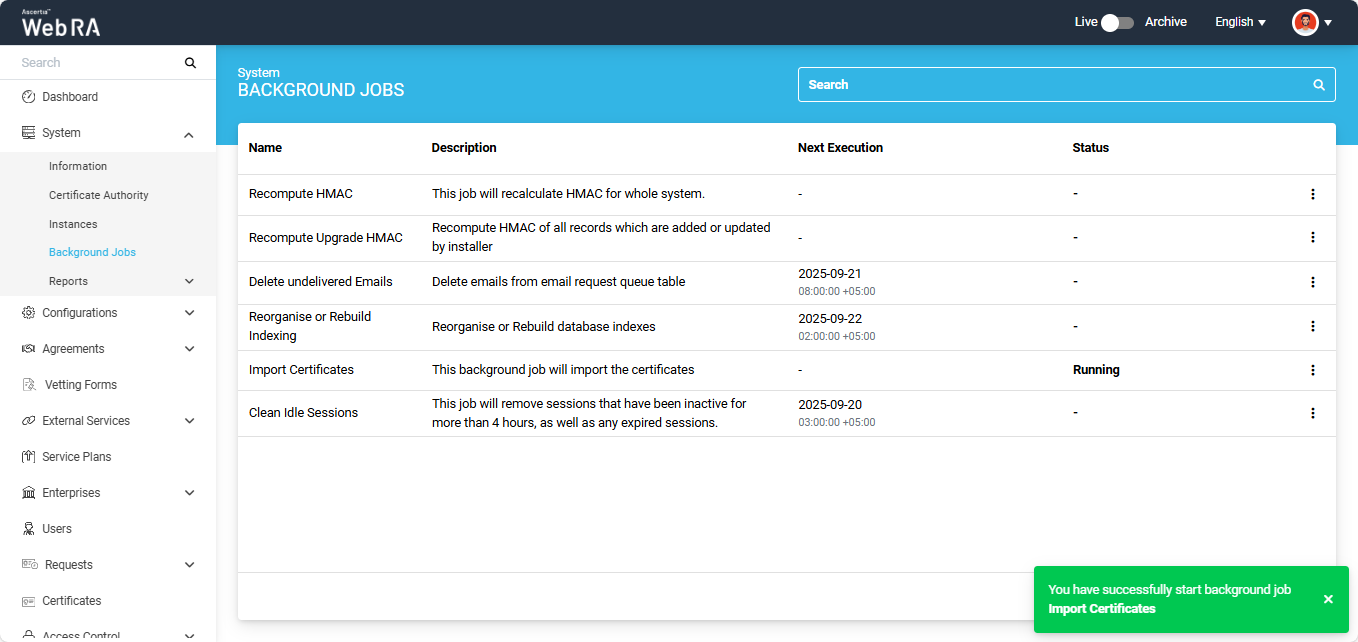
The status column will display the status of the background job. During the time of execution, the status will change to ‘Running’. After the completion of the job the status will appear as ‘Completed.
Once the job has been successfully executed, a report will be generated and will appear in the 'Import Certificates Report' page under the 'Systems > Reports' section.
The administrator has the option to manually start the import certificates job as well.
To do this, click the three-dot  icon next to the import certificates entry, and then select the 'Start' option.
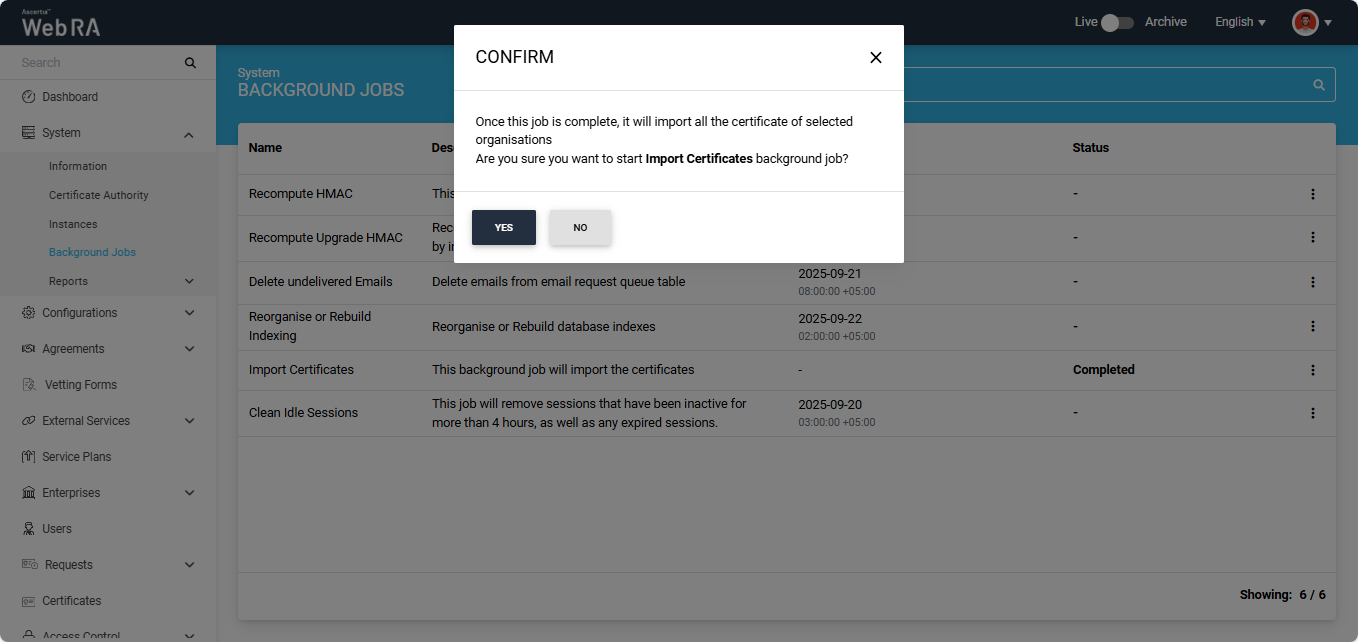
After selecting the start option, the system will display a confirmation dialog. Click ‘Yes’ to proceed.
A success notification will also appear in the bottom-right corner of the screen, stating the job has started.
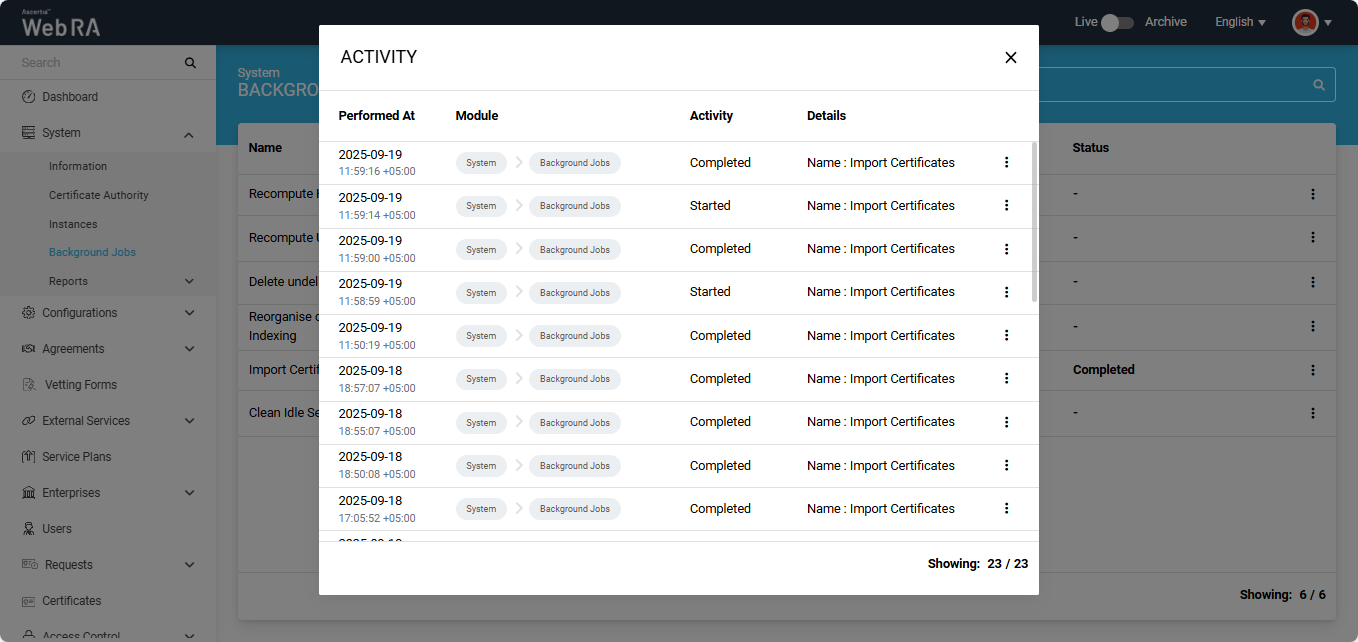
The system will create and save an activity entry whenever a background job is executed. All past activities can be seen from the ‘Activity’ dialog. To access the dialog, click the three-dot  icon and select the ‘Activity’ option.
The system will display the ‘Activity’ dialog on the screen.
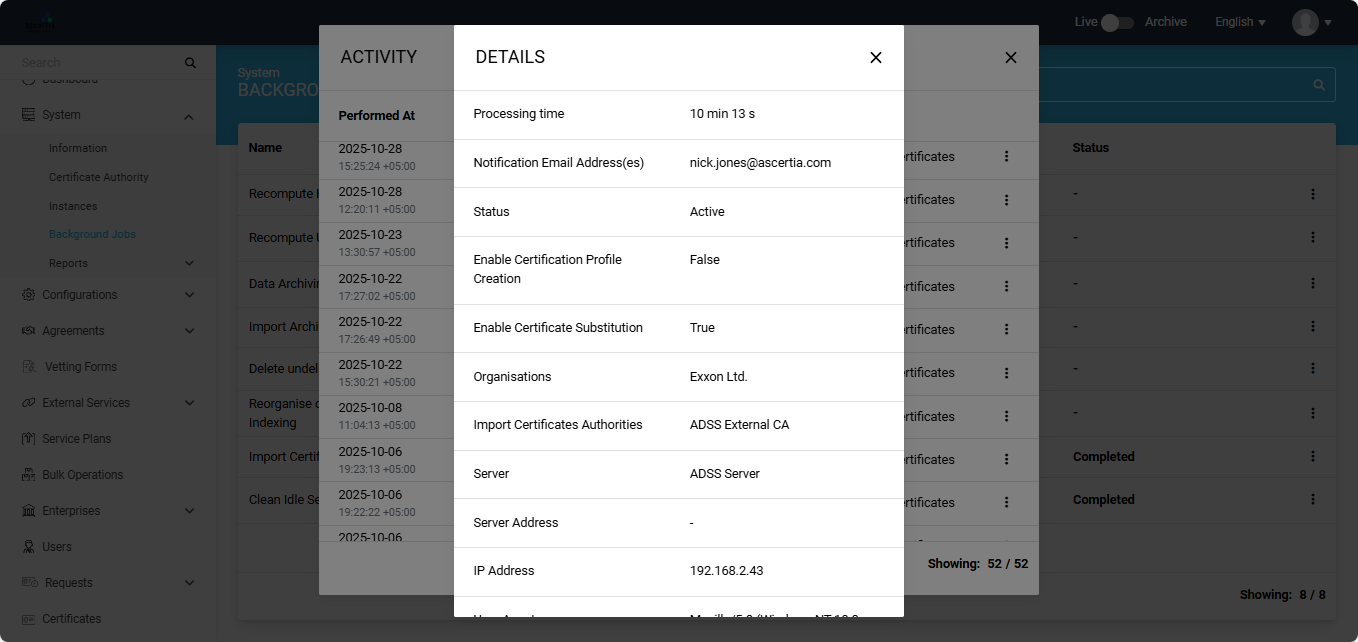
You can view complete details of the background job activity by clicking the three-dot  icon next to each entry and selecting the ‘Details’ option.
The system will display the ‘Details’ dialog containing the information about the activity.
If you want to make any change in the configurations of the background job, click the three-dot  icon and select the ‘Configure’ option.
The system will open the import certificates configuration page. Here, you can make the required changes in the configurations and implement them by clicking ‘Save’.
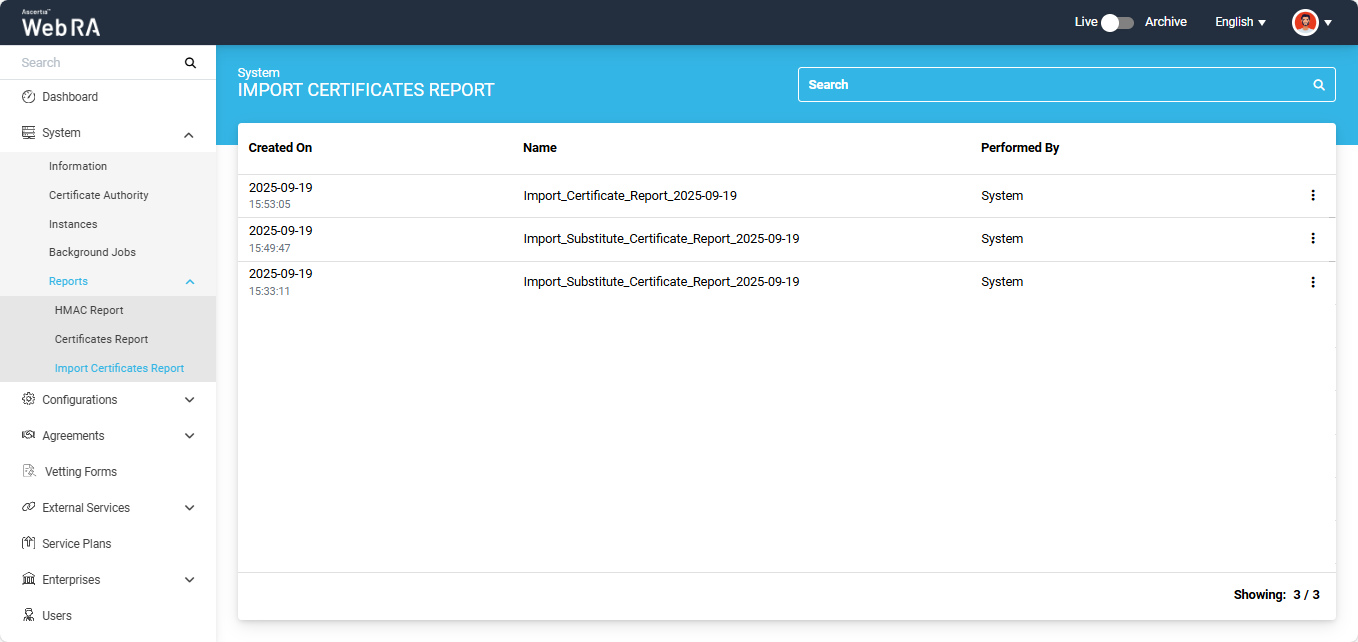
Import Certificates Report
Expand System > Reports > Import Certificates Report from the left menu of the Web RA Admin Portal.
The ‘Import Certificates Report’ section displays all reports generated after the successful completion of import certificates background jobs.
To access this page, expand System > Reports > Import Certificates Report tab from the left menu.
View Import Certificate Report
Expand System > Reports > Import Certificates Report from the left menu.
The import certificates report screen will appear, listing all generated reports along with their respective details.
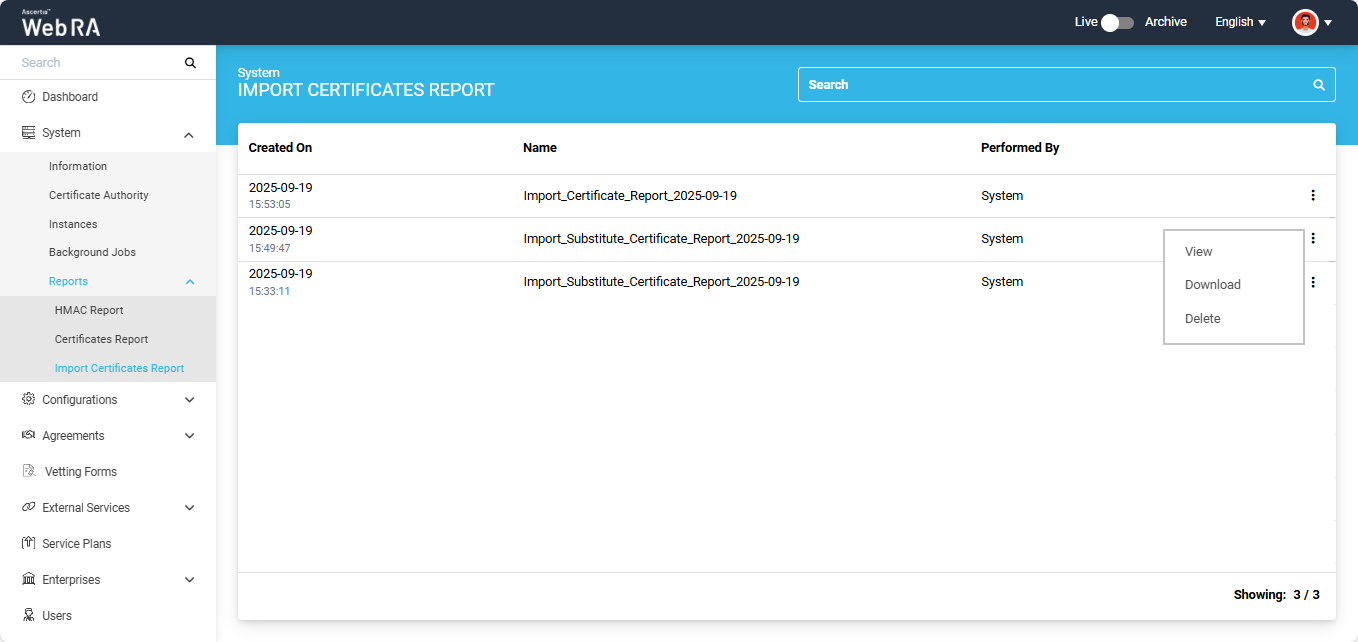
Click the three-dot  icon next to a report, then click the 'View' button.

The view screen will appear from where the operator can view the complete details of the report.
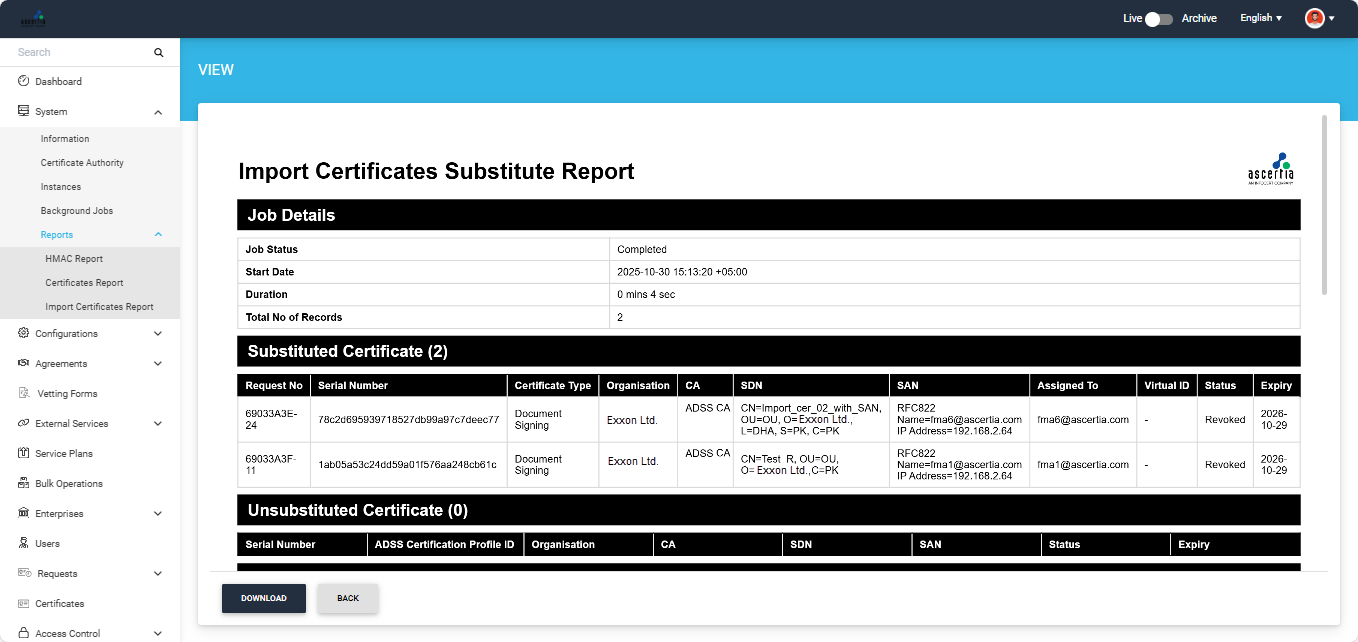
The operator can also download the report from the view screen by clicking the 'Download' button.
Click the 'Back' button to return to the Import Certificates Report listing screen.
Download Import Certificate Report
Expand System > Import Certificates Report from the left menu.
The import certificates report screen will appear, listing all the generated reports along with their respective details.
Click the three-dot  icon next to the report you want to download and select the 'Download' option. The report will be downloaded in your system.
Delete Import Certificate Report
Expand System > Reports > Import Certificates Report from the left menu.
The import certificates report screen will appear, listing all generated reports along with their respective details.
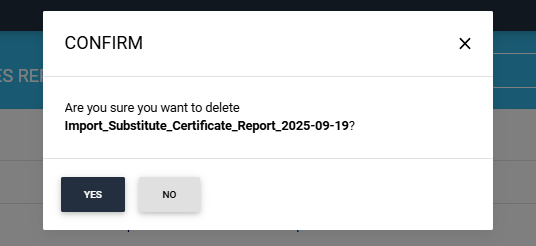
Click the three-dot  icon next to the report you want to delete and select the Delete' icon.
The system will display a confirmation message, click 'Yes' to proceed with deletion.
Web Portal
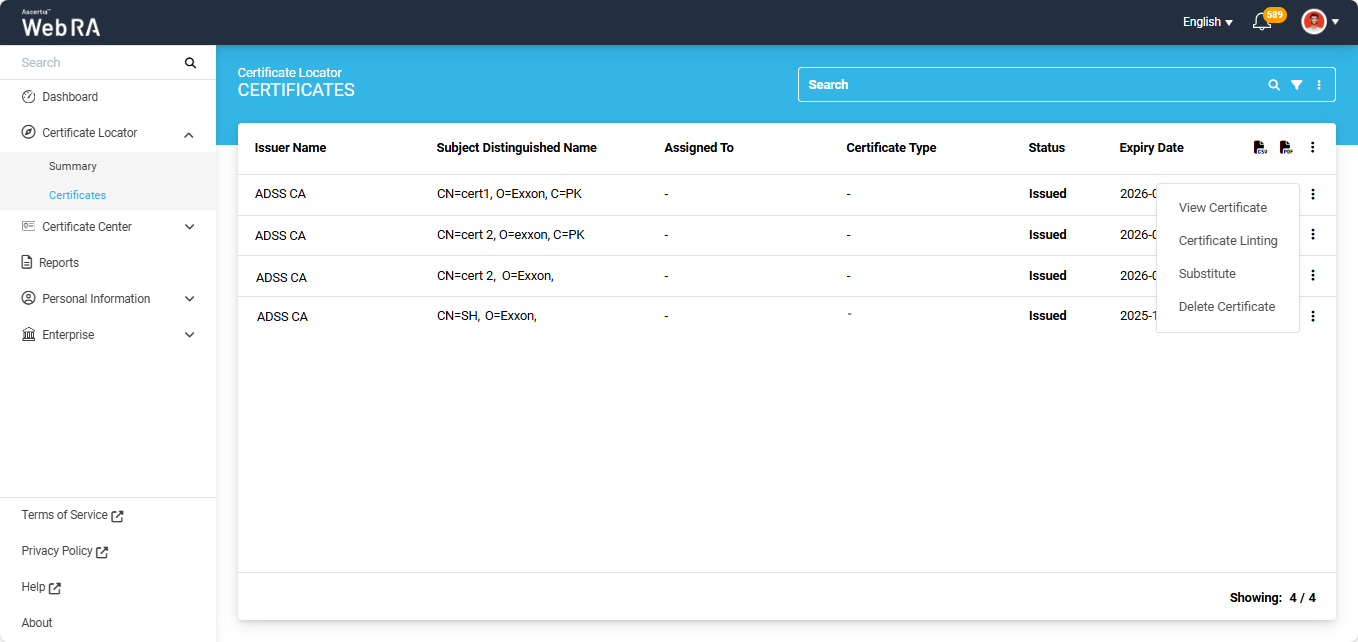
Expand Certificate Locator > Certificates section from the left menu of the user portal.
Substitute a Certificate
All certificates imported with the configuration of ‘Certificate Substitution’ can be substituted from this listing screen.
Note: After the background job is completed, only those certificates that do not have an email address in their SAN will appear in the 'Certificates' listing. All other certificates will be automatically substituted, and their draft requests will be created in the 'Certificate Requests' section.
To substitute a certificate, click on the three-dot  icon next to the certificate and click on the ‘Substitute’ tab.
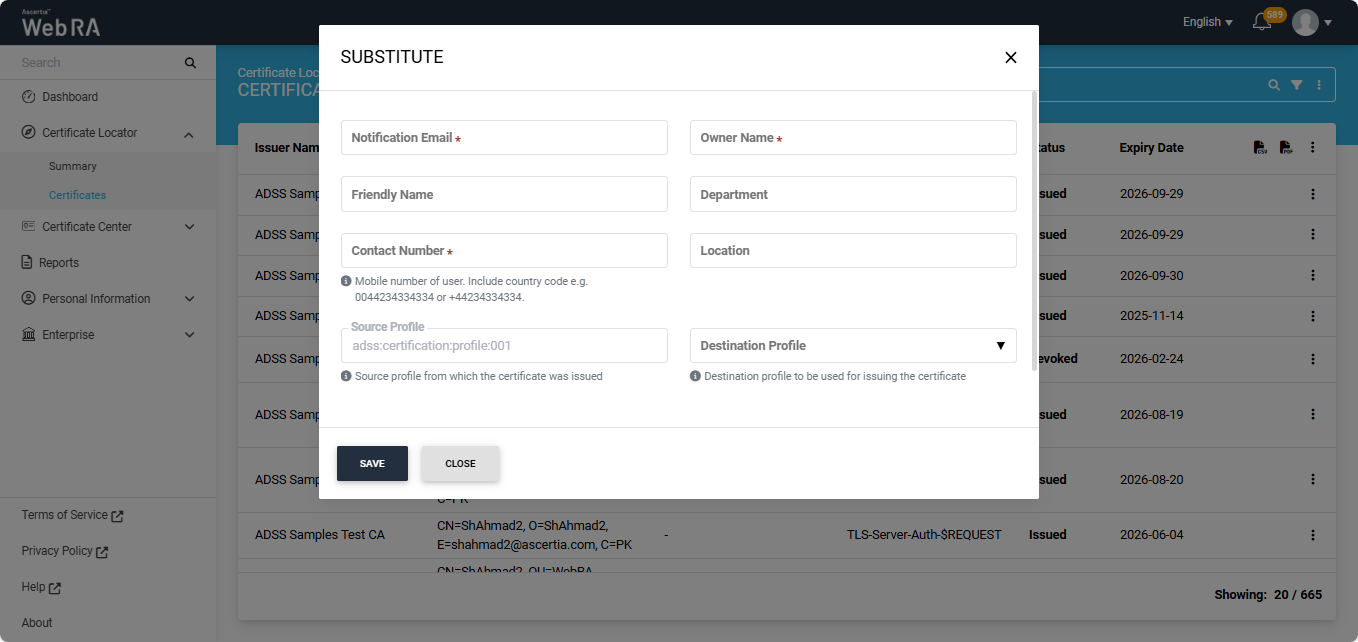
The system will display the ‘Substitute’ dialog on the screen.
|
Field |
Description |
|
Notification Email |
Enter the email address of the person to whom certificate is being assigned to. (This is a mandatory field) |
|
Owner Name |
Enter the owner name. (This is a mandatory field) |
|
Friendly Name |
Enter a friendly name of the user in this field. (Optional field) |
|
Department |
Enter the name of the department. (Optional field) |
|
Contact Number |
Enter the contact number of the user to whom the certificate is being assigned to. (This is a mandatory field). |
|
Location |
Enter the location details of the user. (Optional field). |
|
Source Profile |
This is the ADSS certification profile entered during the configuration of the import certificates background job. It will be displayed in a disabled state. |
|
Destination Profile |
This dropdown lists all Web RA certification profiles that were selected during the configuration of the import certificates background job. |
If a user is not yet part of the ADSS Web RA system, they will receive an activation email. Upon activation, the user can log in to the user portal to view their draft certificate request(s) and substituted certificate(s).
After selecting the ‘Destination Profile’ from the dropdown, the system displays two additional fields in the ‘Substitute’ dialog:
Request Type: Shows the request type of the new certificate being created based on the selected destination profile. This field appears in a disabled state.
Enter Additional Notification Email: Allows you to enter an additional notification email. This is an optional field.
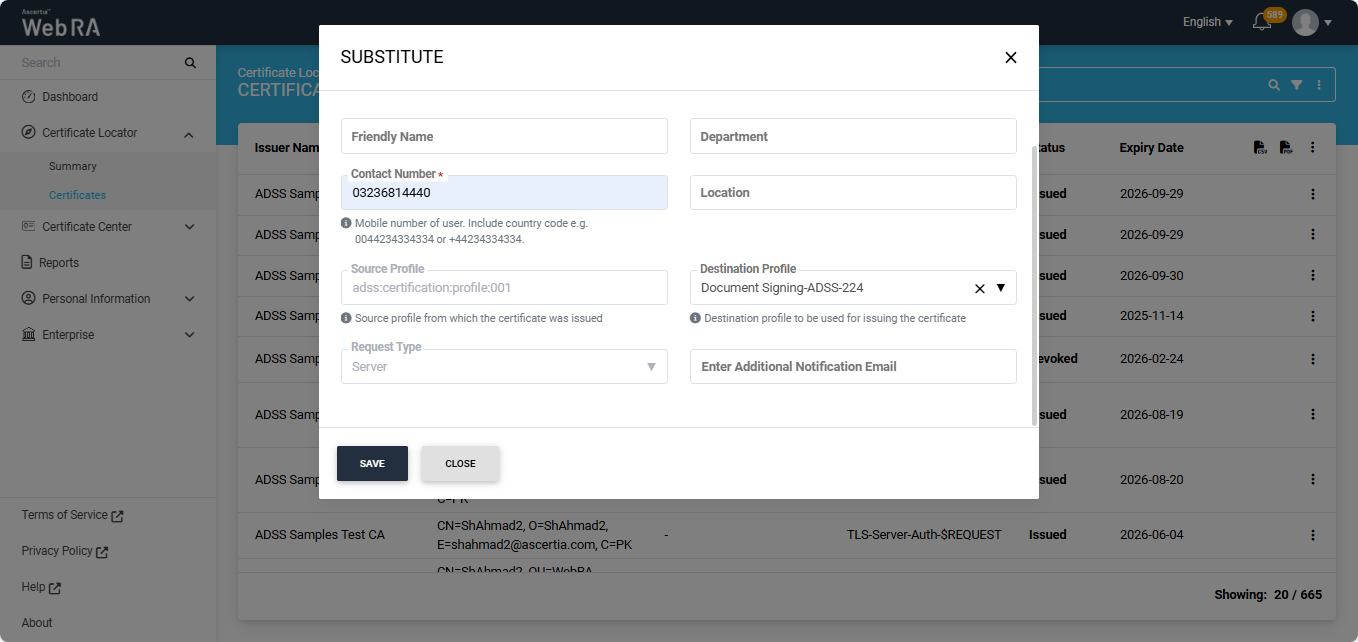
Once all the required fields have been filled, click Save. The certificate will be substituted, and the system will display a success notification at the bottom right of the screen.
The success notification text will show the email of the user to whom the certificate is assigned to.
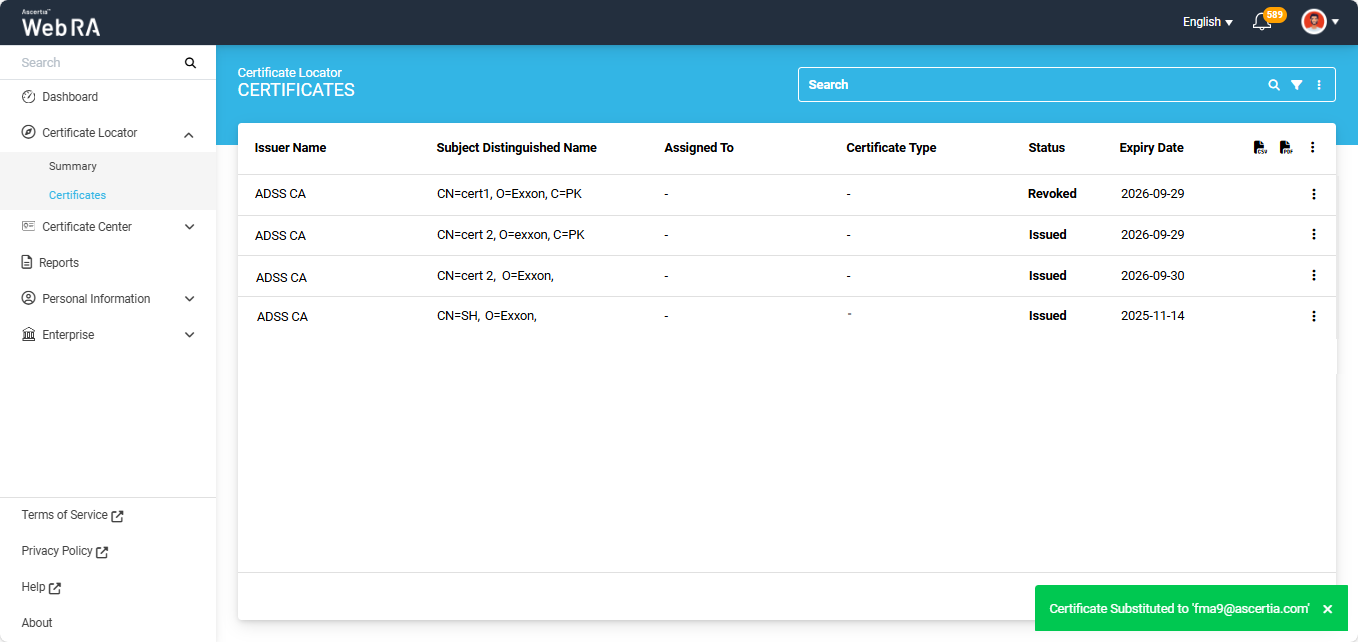
The status of the substituted certificate will appear as ‘Revoked’ in the ‘Certificates’ listing.
The system will also create a draft certificate request for the substituted certificate in the Certificate Request section of the Web Portal, which will include a Substituted Serial Number, as shown in the screenshot below.
Note: The substituted serial number can be used to check the status of the substituted certificate from the ADSS Server.
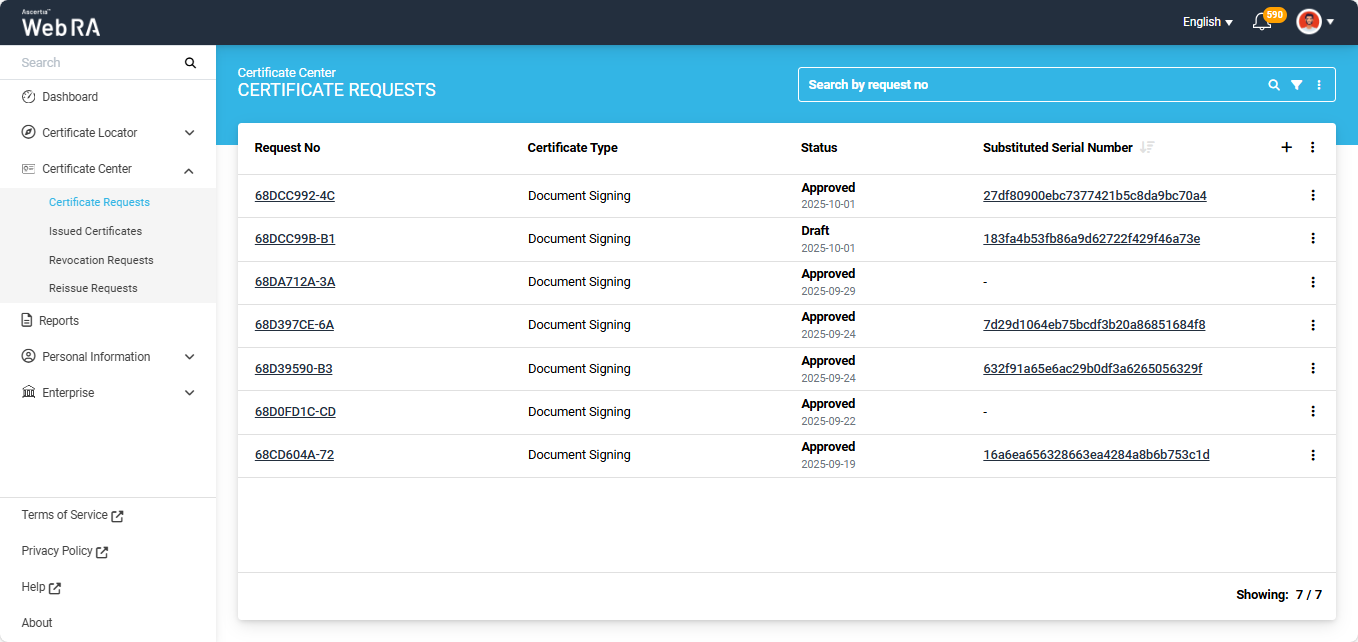
Certificate Center > Certificate Requests
Substituted Certificate Requests
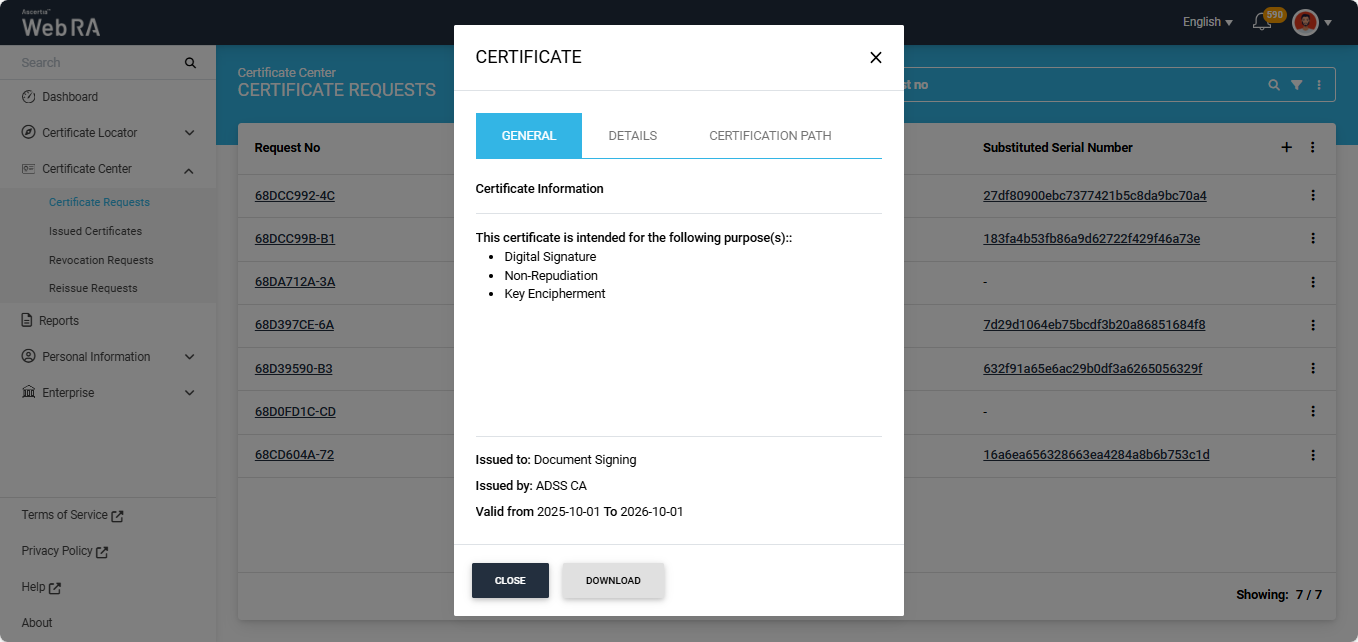
All substituted certificates will appear in draft state in the 'Certificate Request' listing. Each entry will display a 'Substituted Serial Number'. You can click on the substituted serial number to view complete details related to the certificate.
Clicking the serial number will open a dialog titled ‘Certificate’. Use the General, Details, and Certification Path tabs to view the required information.
You can also download the certificate in your computer by clicking the ‘Download’ button.
Note: The substituted serial number can be used to verify the status of the substituted certificate in the ADSS Server.
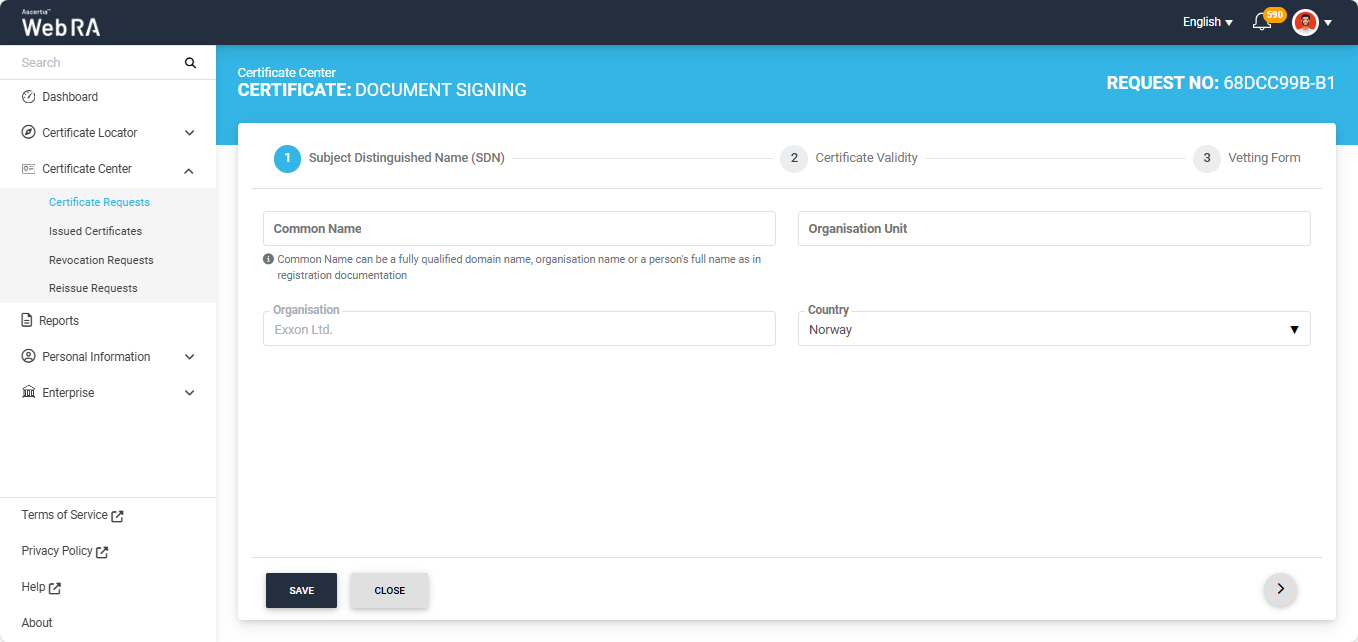
The user can generate the certificate by editing the draft certificate request.
To do this, click the three-dot  icon next to the certificate and select ‘Edit Request’. This will open the certificate request in ‘Edit’ mode.
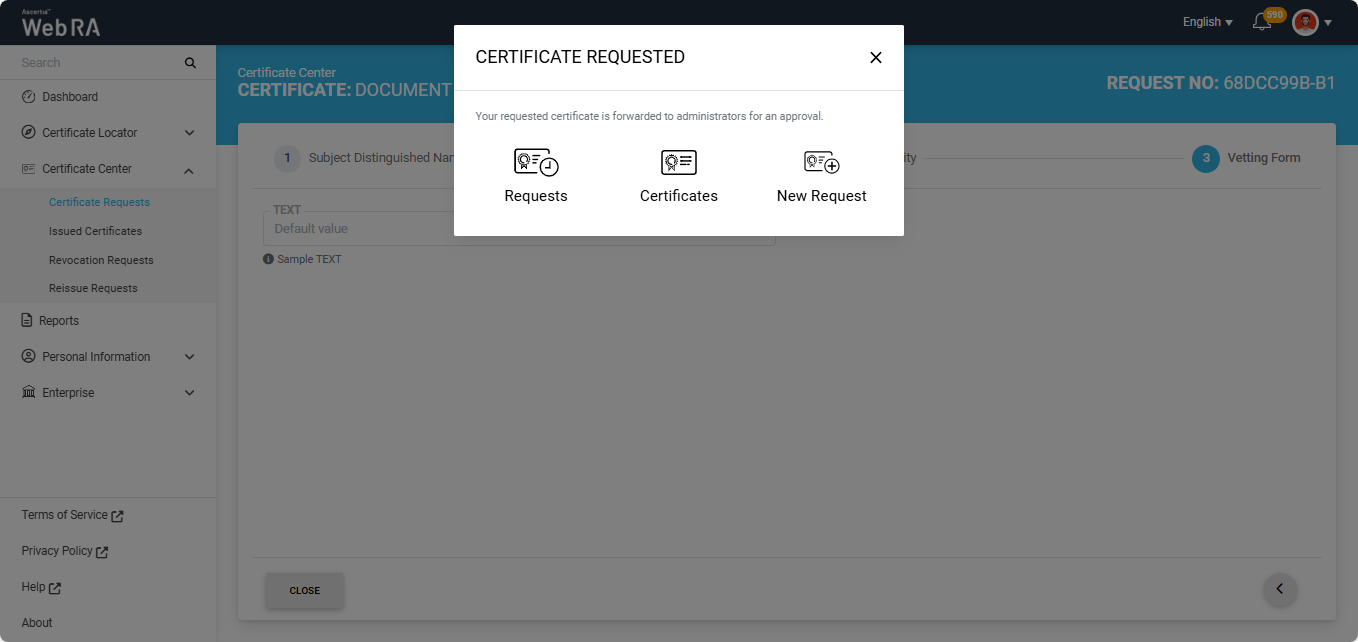
Navigate to the ‘Vetting Form’ screen and click ‘Submit’.
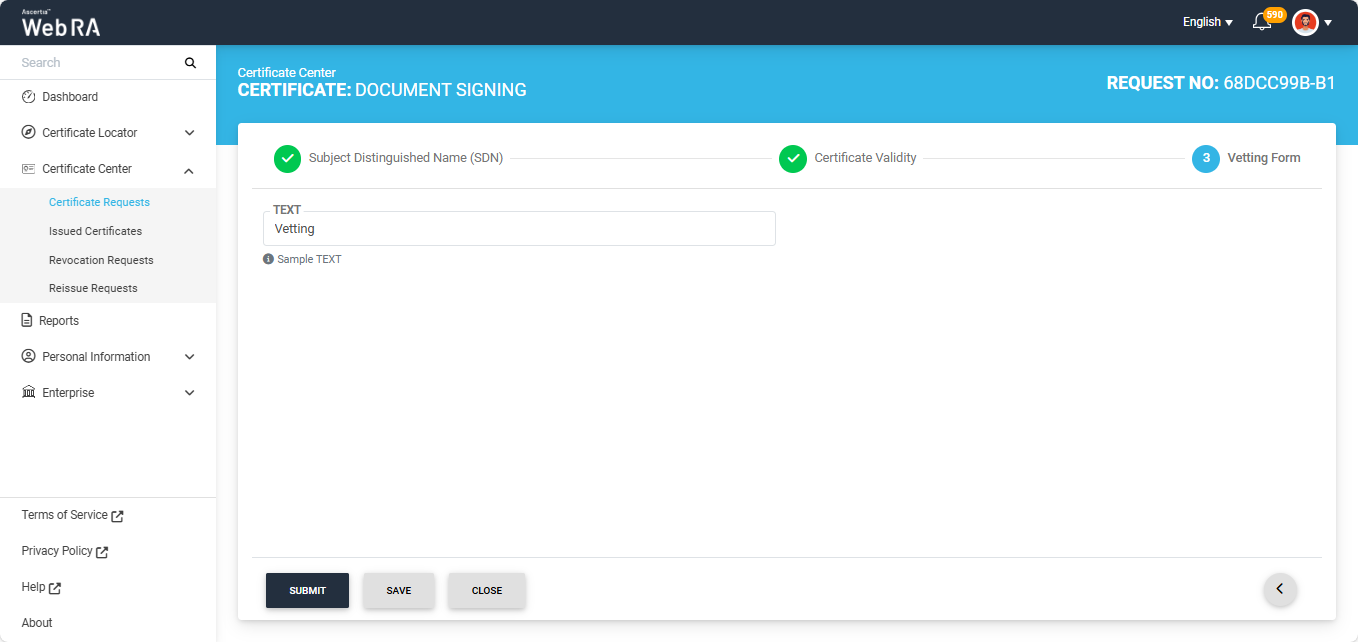
The certificate request will then be sent to the administrator for approval and the system will display the ‘Certificate Requested’ dialog on the screen.
If vetting is not enabled, the system will generate the certificate immediately and download it to the user’s computer.