Vetting Forms
Vetting is the process of thoroughly investigating someone, especially to ensure they are suitable for a job that requires secrecy, loyalty, or trustworthiness.
Similarly, digital certificates serve as legal identities for individuals and businesses. Certificate Authorities (CAs) are responsible for issuing these certificates to valid legal entities. To ensure that a requesting entity (whether an individual or a business) is authorised to obtain a certificate, CAs and Registration Authorities (RAs) implement a vetting process. This process validates the information provided by the requester, either automatically or manually.
Examples of vetting checks conducted by an RA or RAO can vary depending on the certificate type, but may include:
- Validity of the email address
- Proof of employment
- Proof of organization
- Proof of domain ownership
- Operational existence
- Physical address
- Final verification call, etc.
ADSS Web RA provides the option to define dynamic vetting forms for each certificate profile, allowing additional information to be collected with a certificate request. You can design these vetting forms within ADSS Web RA and associate them with Service Profiles, such as Certification Service Profiles or CSP Service Profiles. These forms are presented to the end user when they request a certificate associated with these profiles (e.g., an SSL certificate with an SSL certificate profile or a signing certificate with a signing certificate profile).
Vetting can be performed either by ADSS Web RA Administrators (Admin RAOs) or Enterprise Administrators (Local/Enterprise RAOs), depending on the criticality of the certificates. The time required for certificate issuance can range from hours to days, based on the complexity of the validation process.
In a typical use case, the following certificates are usually vetted by the Admin RAO due to the critical validation and responsibility they require:
- TLS Server Authentication certificates
- Code Signing certificates
- eSeal/Legal Person/Organizational certificates
On the other hand, the following certificates can be vetted by the Enterprise RAO and are typically issued within minutes to hours, depending on the vetting process:
- Document Signing certificates
- Email Signing certificates
- TLS Client Authentication certificates, etc.
|
|
An operator can choose whether a certificate will be vetted by the Administrator RAO or the Enterprise RAO from the Certification Profiles. |

Add a Vetting Form
- Click on the 'Vetting Forms' tab from the left tree menu.
- Then click
 from the grid header to add a new vetting form.
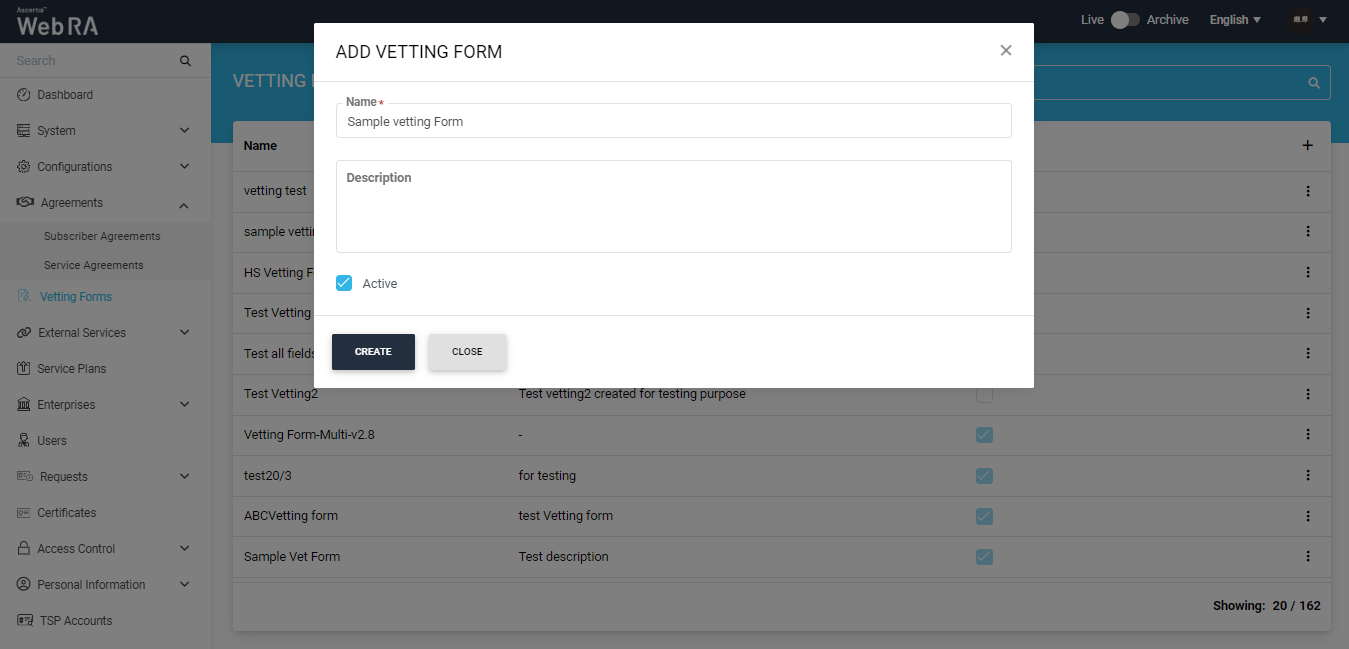
 - A dialog titled ‘ADD VETTING FORM’ will appear. Add the Name and Description in the designated fields.
- Once done, click on 'Create' to create the vetting form.
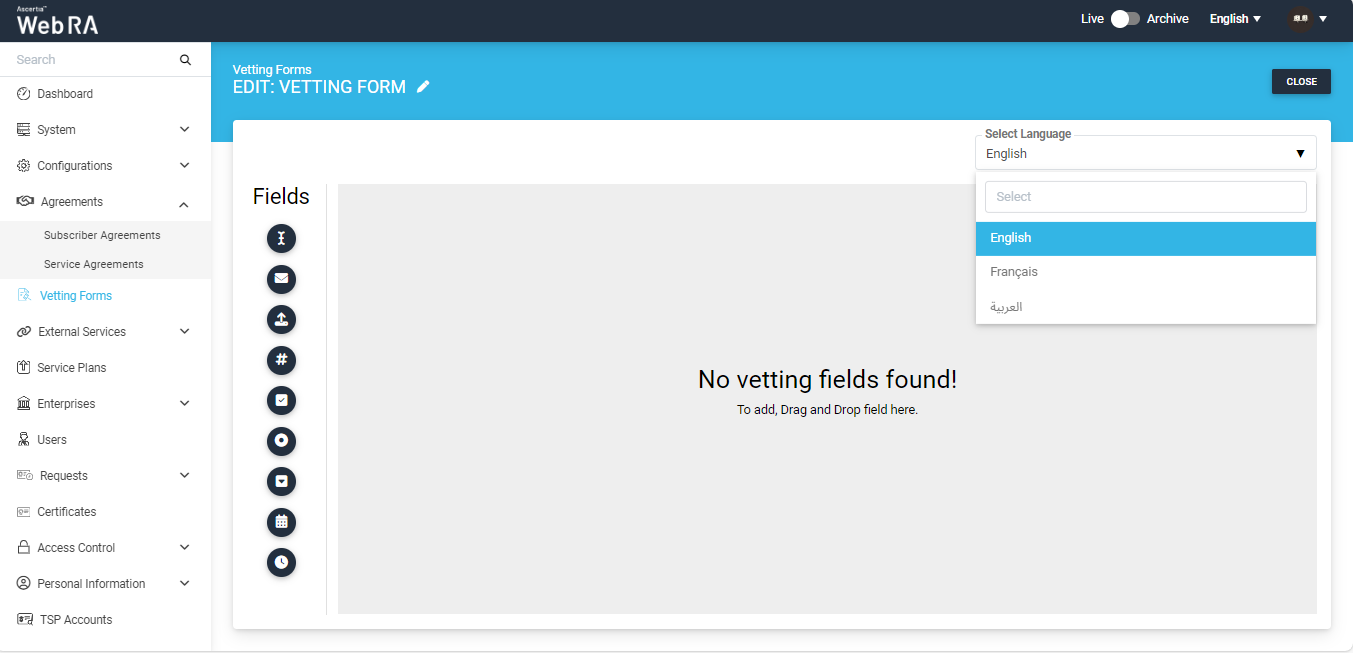
- The next screen includes a "Select Language" dropdown and fields that an operator can add to the vetting form, as shown in the screenshot below:
|
|
While creating a vetting form, the Select Language drop down will contain only allowed language that is configured in the default settings of the application. |

Configure a Vetting Form in Certification Profile
A vetting form is associated with each service profile (i.e., Certification and CSP) to facilitate the vetting process required for the issuance of respective certificates. The process of configuring a vetting form is identical for both service profiles. You can configure a single vetting form for both service profiles or create separate vetting forms for each.
Click here to configure a vetting form in certification profile.
- Expand External Services > Certification Profiles from the left menu.
- Then click
 from the grid header.
 - The Service Profile dialog will appear comprising of different screens, i.e. Basic Information, Profile Settings, Details, Authentications and Advanced Settings.
- In the Advance Settings tab, select Subscriber Agreement, Vetting details i.e. Vetting Option and Vetting Form.
- Select the check box Enable revocation vetting if required.
- Select the check box Only Admin RAO can vet certificate requests for this profile, if required.
Edit a Vetting Form
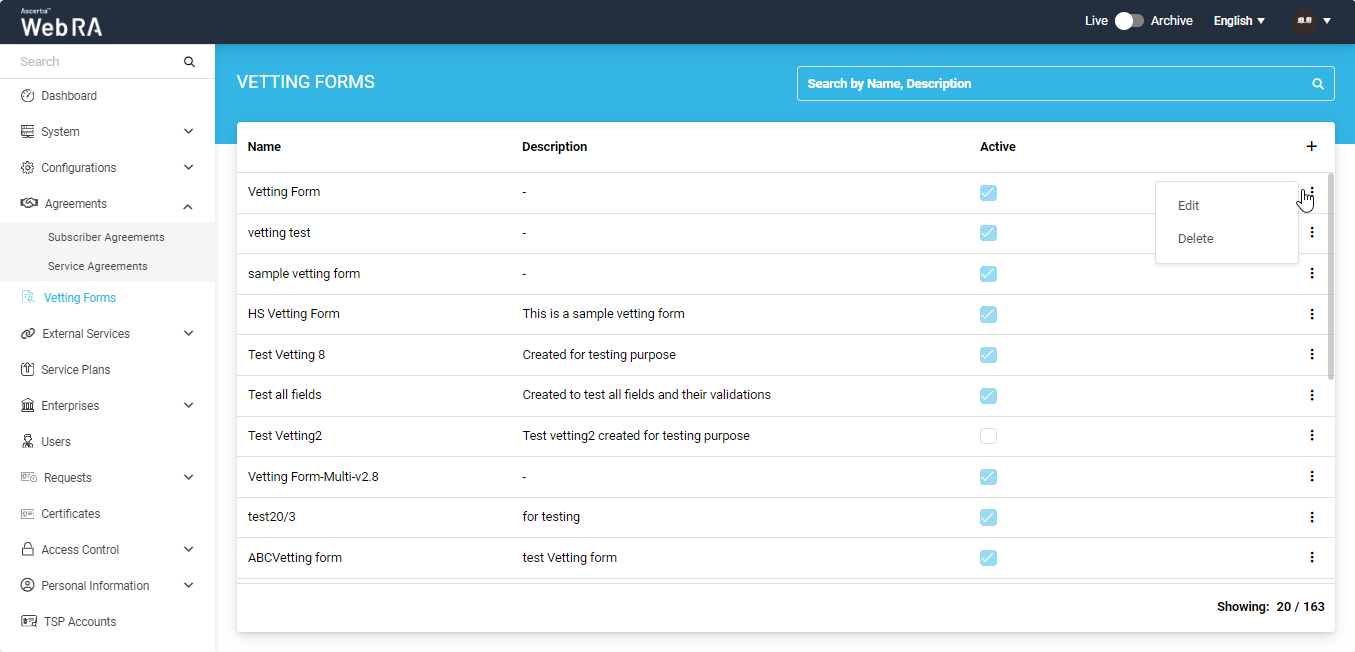
- Click Vetting Forms from the left menu.
- Search the Vetting Form (to edit) and click
 adjacent to it from the main grid and choose Edit option from menu.
- The vetting form screen will appear in an editable mode. Add/ Update/ Remove/ Change Properties of the fields in the form as required.
- Click Save to save your changes to the form.
|
|
As long as a vetting form is being used in the configurations of a service profile, it can not be edited. |
Delete a Vetting Form
- Click Vetting Forms from the left menu.
- Search the vetting form (to delete) and click
 adjacent to it from the main grid and choose the Delete option from menu.
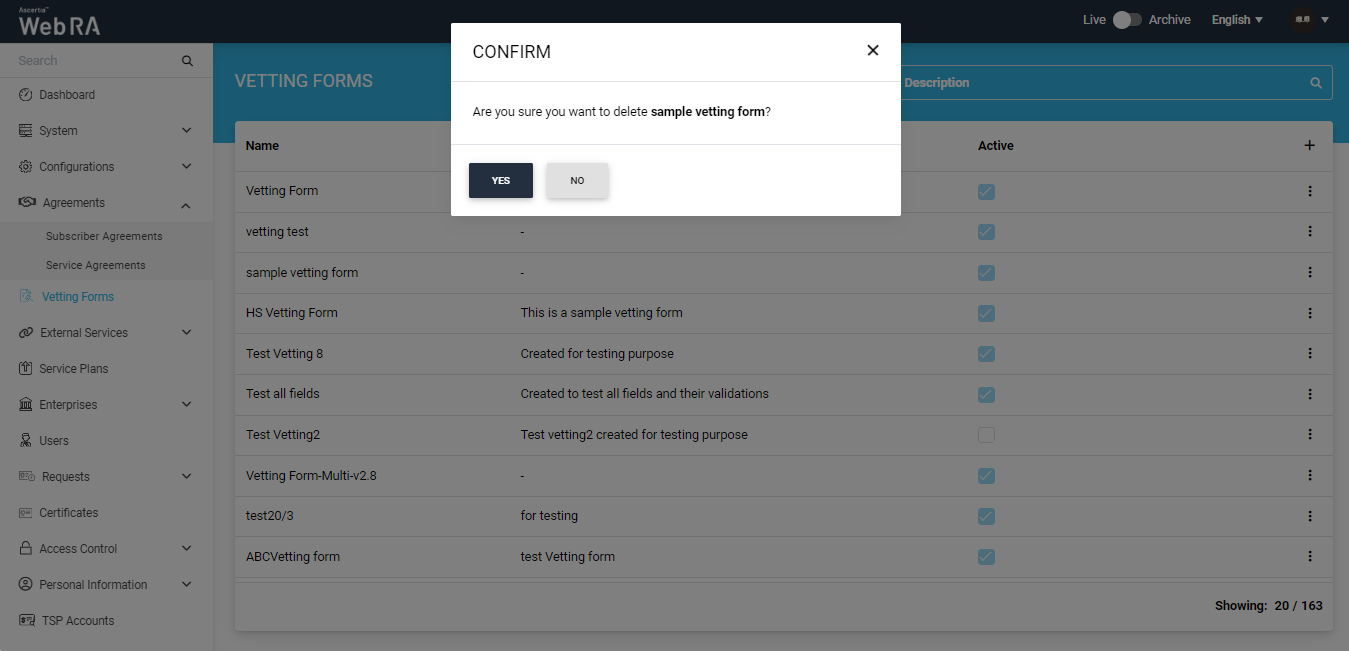
- A confirmation message will appear, click Yes.