Fresh Installation
Before starting the ADSS Web RA installation process, ensure that the following requirements are met:
- All prerequisites are installed on the ADSS Web RA machine. Without these, ADSS Web RA will not open or display any pages when accessed.
- An empty database is required if you are installing this version with PostgreSQL as fresh installation.
Once all the required prerequisites are installed and the database is prepared, you can start installing ADSS Web RA.
The ADSS Web RA package must be unzipped onto a disk that has sufficient space – a minimum of 100GB is recommended. This is
because the product is installed and runs from the location where the installation package is extracted.
Moreover, if you extract the installer on the Desktop, it will not work. Therefore, choose a proper drive or folder to extract it.
|
|
1) DO NOT include blank spaces in the installation folder name and path - use hyphen or underscore instead if required. |
|
ADSS Web RA installer generates all the required database tables and populates the default data required to run the system. Therefore, there is no requirement for separate SQL scripts or equivalent for non-SQL databases.
Once the above conditions are satisfied, launch the installer by right-clicking the file [WEBRA Installation-Dir]/setup/install and select Run as administrator from the menu will present the welcome screen.
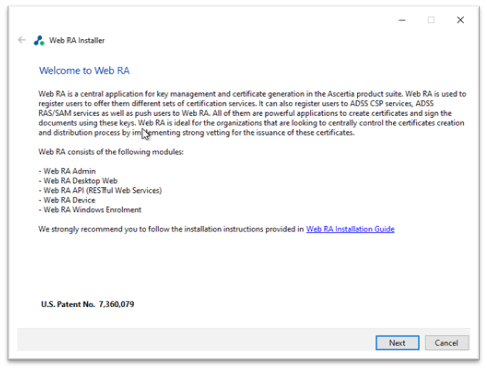
Click the 'Next' button to continue.
System requirements screen will appear next to validate if all the required prerequisites are installed or not. If any of ADSS Web RA system dependencies are not found, or not functioning, then Failed status will be shown corresponding to that component on the screen.
|
|
You can only proceed with the installation process once all system-related requirements show "Success" status on the System Requirements screen. |
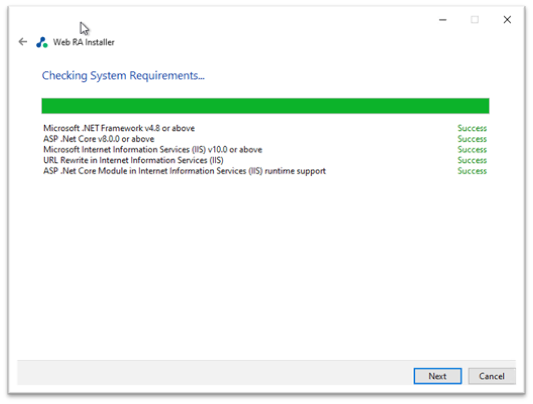
Click the 'Next' button to select the database type for installation.
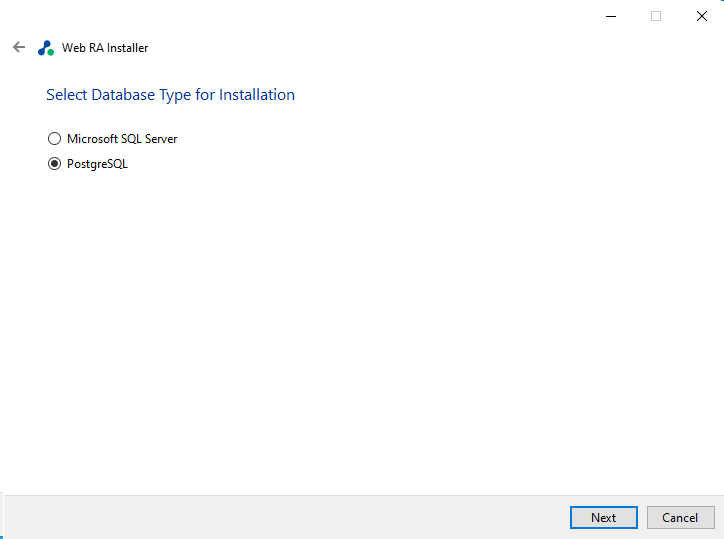
Select the “PostgreSQL” radio button and click “Next” to select the "Installation Type".
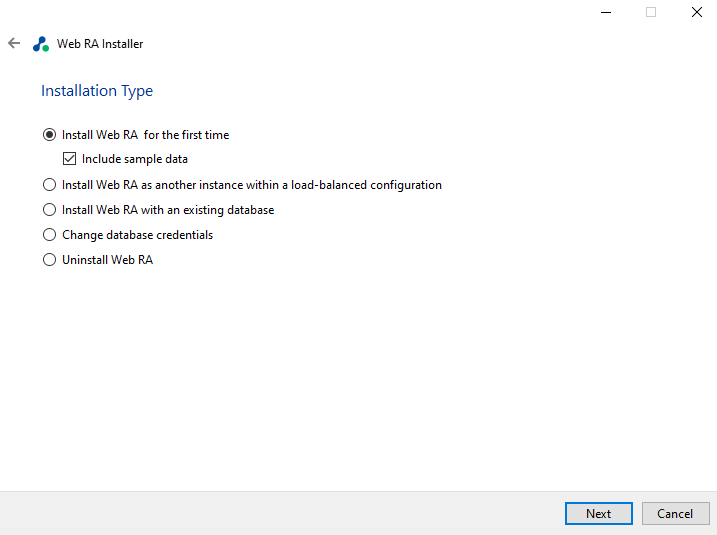
If you are installing ADSS Web RA for the first time or you wish to deploy a fresh installation with a new PostgreSQL database, then select “Install Web RA for the first time”. If you want to install Web RA with sample data, enable the ‘Include sample data” checkbox.
The “Install Web RA as another instance within a load-balanced configuration” option will install the ADSS Web RA instance in a load-balanced mode.
The “Install Web RA with an existing database” option will install ADSS Web RA against an existing ADSS Web RA database. For example, this option can be used to recover a system from a database back-up.
The “Change database credentials” option is used if the database password, user, database name and/or server is changed, and it needs to be updated in ADSS Web RA installation.
Select the last option Uninstall Web RA if you wish to uninstall ADSS Web RA from the system.
To install Web RA for the very first time, select the option “Install Web RA for the first time”.
You can include sample data in application during fresh installation. Sample data includes following data:
- Default ADSS Connector
- Default SMTP Connector
- Default ADSS Service Profile
- Default Subscriber Agreement
- Default Vetting Form
- Default Service Plan
- Default Authentication Profile
If “Include Sample Data” is not selected then above data will not be added when application installed.
Click Next button to view and accept the License Agreement.
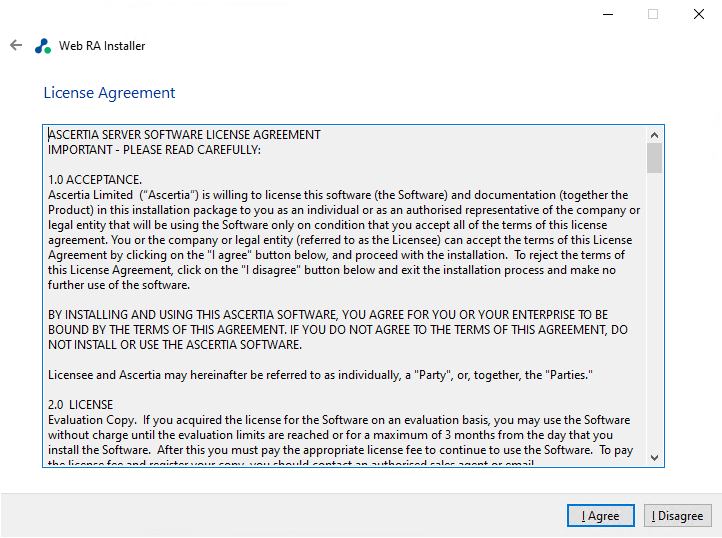
Click on I Agree button to proceed.
The next appearing screen will be for ReadMe text. This includes all features of current version. Click Next to proceed.
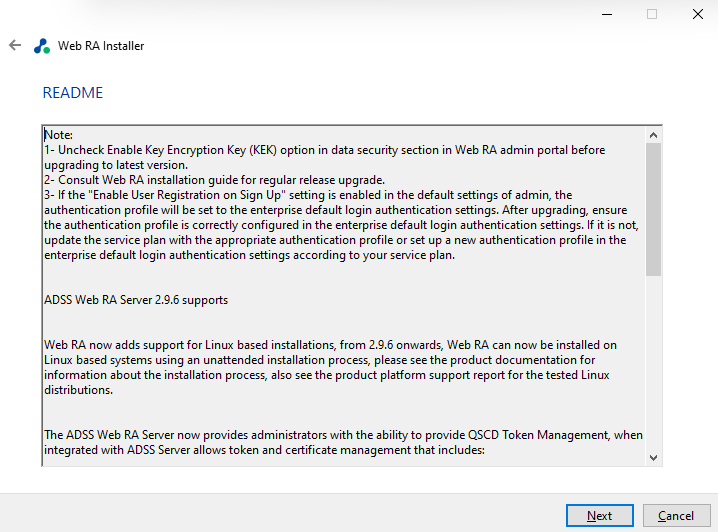
Click Next, the next appearing screen will be for setting up database configurations.

You can either choose to do a “Basic” installation or an “Advanced” one. If this is a basic installation, then use the first option “Basic” and provide the appropriate ADSS Web RA database credentials. The information displayed above is an example and you should configure the relevant settings for your own environment.
|
|
Once you enter the database credentials and select Next, the installer uses the information to test the database connectivity. If the installer can establish the connection with the database, then it will proceed with the installation. |
The following table explains the configuration options:
|
Field |
Description |
|
Database Server |
Database server IP or DNS name. |
|
Port |
It is the database listening port. - For PostgreSQL server the default port is 5432. |
|
Database Name |
Name of the database instance. Note: This must exist prior to the installation. |
|
Username |
Name of the database user. Note: This must exist prior to the installation. |
|
Password |
Password for the database user. Note: This must exist prior to the installation. |
If you select the "Advanced" option for database configurations, then the following screen will be shown.
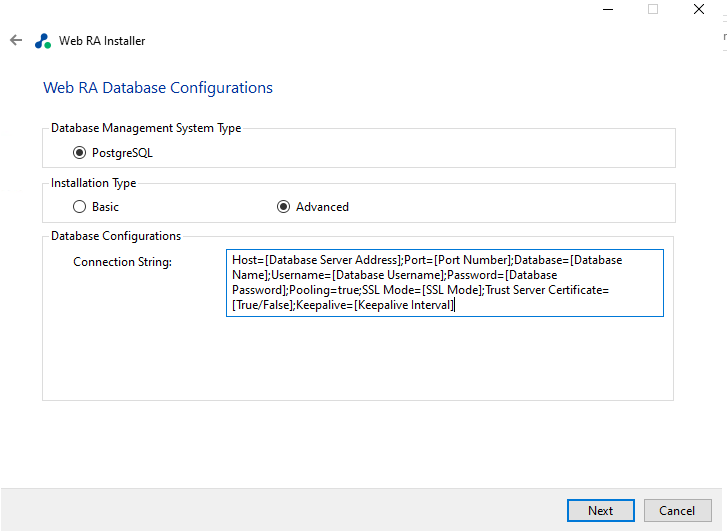
The information displayed above is an example and you should configure the relevant settings for your own environment.
|
|
Once you enter the database credentials and select Next, the installer uses the information to test the database connectivity. If the installer can establish the connection with the database, then it will proceed with the installation. A message will appear in case of any connectivity issue. |
The following table entails details of the Advanced configuration options:
|
Field |
Description |
|
ADSS Web RA Connection String |
The following is the sample connection string for PostgreSQL Server:
|
After completing the database configurations, click the Next button to select specific modules.

Select appropriate modules to install the required features.The fully qualified domain name field will be auto-filled with complete computer name. For each selected application, provide the web application name and port. A typical in-house installation of ADSS Web RA should only include Admin, Desktop Web, and the API. However, the device will be added at the end. Click Next to proceed.

The next step is to select “Windows Enrolment Modules”. For each selected application, provide the web application name and port, then click Next.

The information displayed above is an example, which you may change to suit your environment and organisation preferences. The names will appear as websites under IIS.
The following table explains details of the modules options:
|
Field |
Description |
|
ADSS Web RA Admin |
ADSS Web RA Admin is used by the administrators to manage the system wide configurations, service plans, user accounts and access control etc. |
|
ADSS Web RA Web |
ADSS Web RA Web is used to manage certificates for creation, renewal and revocation |
|
ADSS Web RA API |
REST API is used to integrate ADSS Web RA functionality within your own portal. |
|
ADSS Web RA Device |
ADSS Web RA device is used to manage device enrolment for certificate creation, renewal and revocation. This site will be deployed with http and https bindings |
|
ADSS Web RA SSL Device |
ADSS Web RA SSL device is used to manage device enrolment over SSL for certificate creation, renewal and revocation e.g. EST Protocol. This site will be deployed with https SSL |
|
ADSS Web RA Windows Enrolment |
Windows Enrolment is used to manage certificate renewal or auto-enrolment on a windows machine |
Click Next button to configure the SMTP server and email settings.
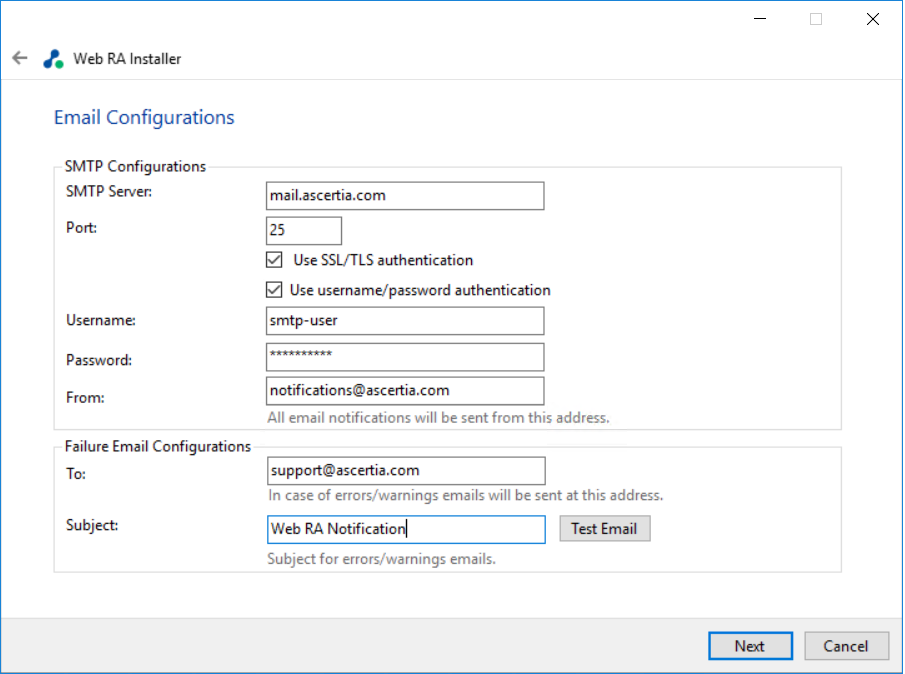
Configure SMTP Server and email settings for your environment. ADSS Web RA must have access to a suitable SMTP server without which users will not be able to receive registration emails that are required to complete the user registration process.
In addition to this, system generated email notifications will not received too. Although the latter will not prevent functionality, but it is not a recommended approach. The information displayed above is an example and you should setup configurations for your own environment.
The configuration items are explained in the following table:
|
Field |
Description |
|
SMTP Server |
Defines the email server address. This email server is used to send email notifications to users as required, such as for account registration, data sharing etc. It is also used for sending notification emails to ADSS Web RA administrators. |
|
Port |
Define the service port for the SMTP mail server. |
|
Use SSL/TLS Authentication |
Select this option if the SMTP mail server requires SSL/TLS. |
|
UserName |
Configure the SMTP mail server username that is used to send ADSS Web RA generated emails. |
|
Password |
Define the password to authenticate the SMTP server. |
|
From |
Configure the From email address that should be used to send notification emails to users and administrators. |
|
To |
Configure the email address where error notifications should be sent. |
|
Email Subject |
Define a subject line for the notification emails that are sent to the administrator, e.g. ADSS Web RA Alert. |
After configuring these SMTP settings, click Test Email button to verify that SMTP configurations are valid.
Note: If “Include Sample Data” is not selected then SMTP configuration screen will not appear.
Click the Next button to see the summary and complete the installation:
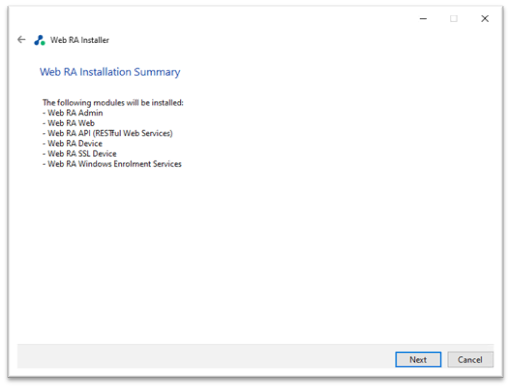
This screen shows the installation summary by listing the different product modules that will be installed.
If you think any listed item is incorrect then use the Back button (arrow towards the top-left of the dialogue box) to correct your choices before proceeding ahead.
Otherwise, click the Next button to continue with the installation.
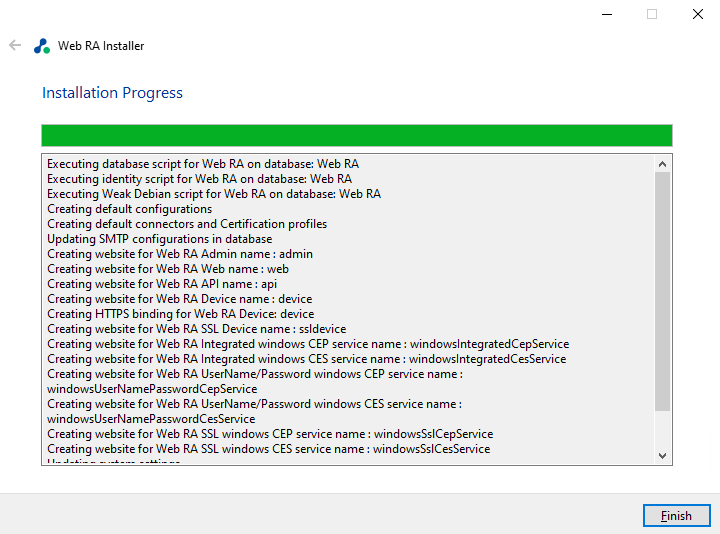
Click "Finish" to complete the installation process.
ADSS Web RA URLs
See these URLs to access the ADSS Web RA web sites:
|
Service |
URL Format |
Example |
|
ADSS Web RA Admin |
https://<machine-name>:PORT |
|
|
ADSS Web RA Web |
https://<machine-name>:PORT |
|
|
ADSS Web RA API |
https://<machine-name>:PORT |
|
|
ADSS Web RA Device |
https://<machine-name>:PORT |
|
|
ADSS Web RA SSL Device |
https://<machine-name>:PORT |
|
|
ADSS Web RA Windows Integrated CEP Service |
https://<machine-name>:PORT |
|
|
ADSS Web RA Windows Integrated CES Service |
https://<machine-name>:PORT |
|
|
ADSS Web RA Windows User Name Password CEP Service |
https://<machine-name>:PORT |
|
|
ADSS Web RA Windows User Name Password CES Service |
https://<machine-name>:PORT |
|
|
ADSS Web RA Windows SSL CEP Service |
https://<machine-name>:PORT |
|
|
ADSS Web RA Windows SSL CES Service |
https://<machine-name>:PORT |
Where necessary (i.e. browsing Admin website) your web browser will prompt you to select the appropriate certificate for authentication purposes. Note the installation process places the necessary certificates into the Windows Security Store, Internet Explorer, Edge, Chrome and related browsers that rely on the security store, can use them as such.
If you wish to use Firefox and similar web browsers that utilize their own respective security stores you will need to import adss-default-admin.pfx and WebRA-default-admin.cer from [WebRAInstallationDirectory]/setup/certs directory.
|
|
There are two options to set secure binding against each ADSS Web RA site:
The second option is recommended |
Once the bindings of IIS web sites have been put in place, access the ADSS Web RA administration console and make changes to the general configuration settings. This means changing the public and private URLs for the Desktop Web and API sites accordingly. Once this is complete, save the changes.
|
|
Microsoft Windows Server: TLS 1.3 is enabled by default for installations of Windows Server 2022, integrated applications should support this version of TLS. For application integrations that do not support this and need to be updated, customers can disable TLS 1.3 over TCP in the IIS Bindings. |
|


