Desktop Signing
Desktop Signing facilitates to register user ID and provides the capability to manage its certificates keys. Certificates generated and provisioned for Desktop Signing account can be used within the VCSP Desktop application to securely sign documents.
These certificates can be used for Advanced Electronic Signature, for the following purposes:
- Document Signing
- Client Authentication
A certificate request can be made for issuance/approval, renewal, or revocation.
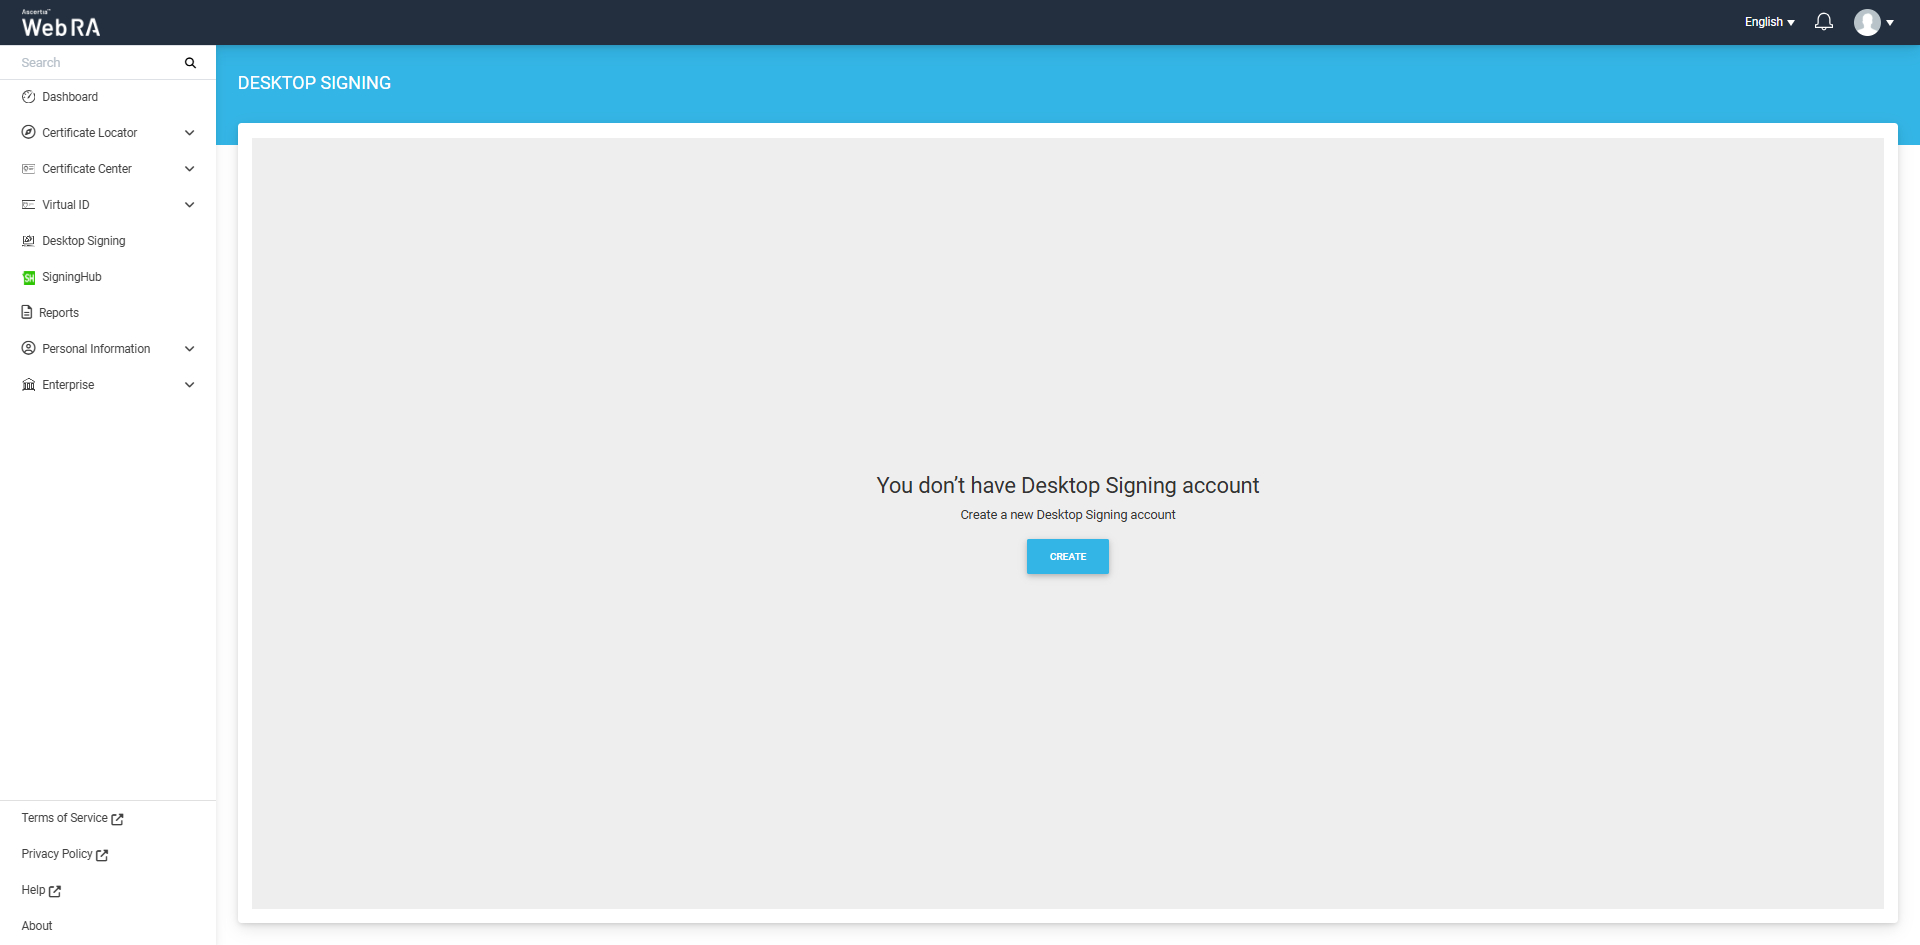
Navigate to the 'Desktop Signing' tab from the left menu, and the 'Create button will appear on the screen. This button enables you to create a Desktop Signing account for the first time.
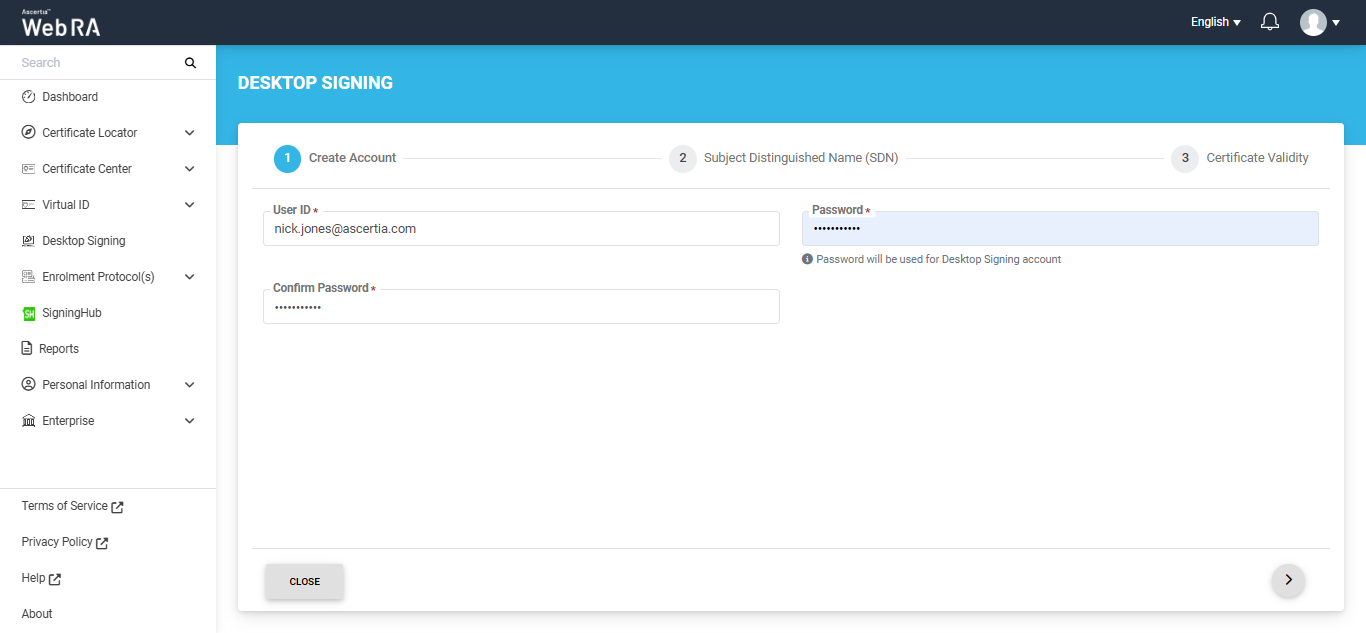
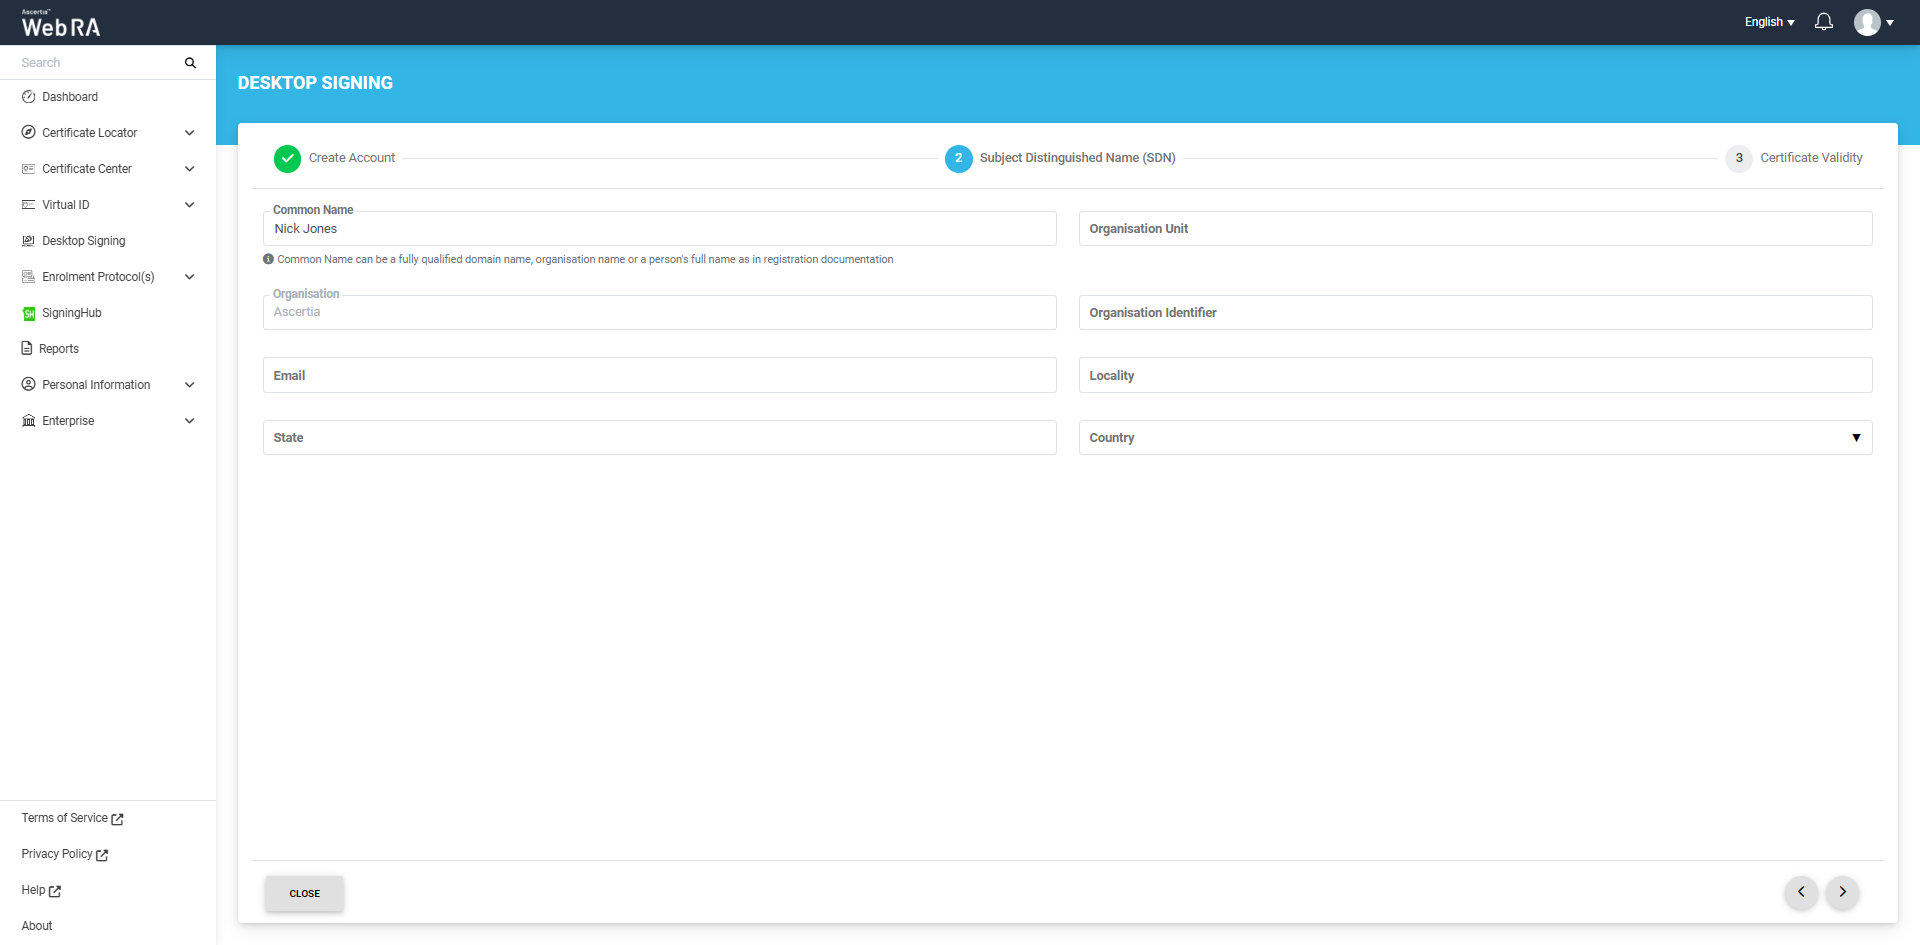
You will need to provide your user ID, password, full legal name, and other organisation-related information for certificate generation. Select the validity period for your certificate (if allowed by your Enterprise RAO).
Once your Desktop Signing account is successfully created, a dialog will pop up indicating that your account is created and can be used to sign the documents using VCSP desktop application.
Note: Desktop Signing account can also be created from the Dashboard section.
Create a New Desktop Signing Account
Click on 'Create' to set up a new Desktop Signing account for the first time.
On the 'Create Account' screen, enter your user ID and password. Click 'Next' after confirming your password.
On the Subject Distinguished Name (SDN) screen, enter the common name and address details, then click next.
Next, you will be required to select a validity period for the Desktop Signing certificate.
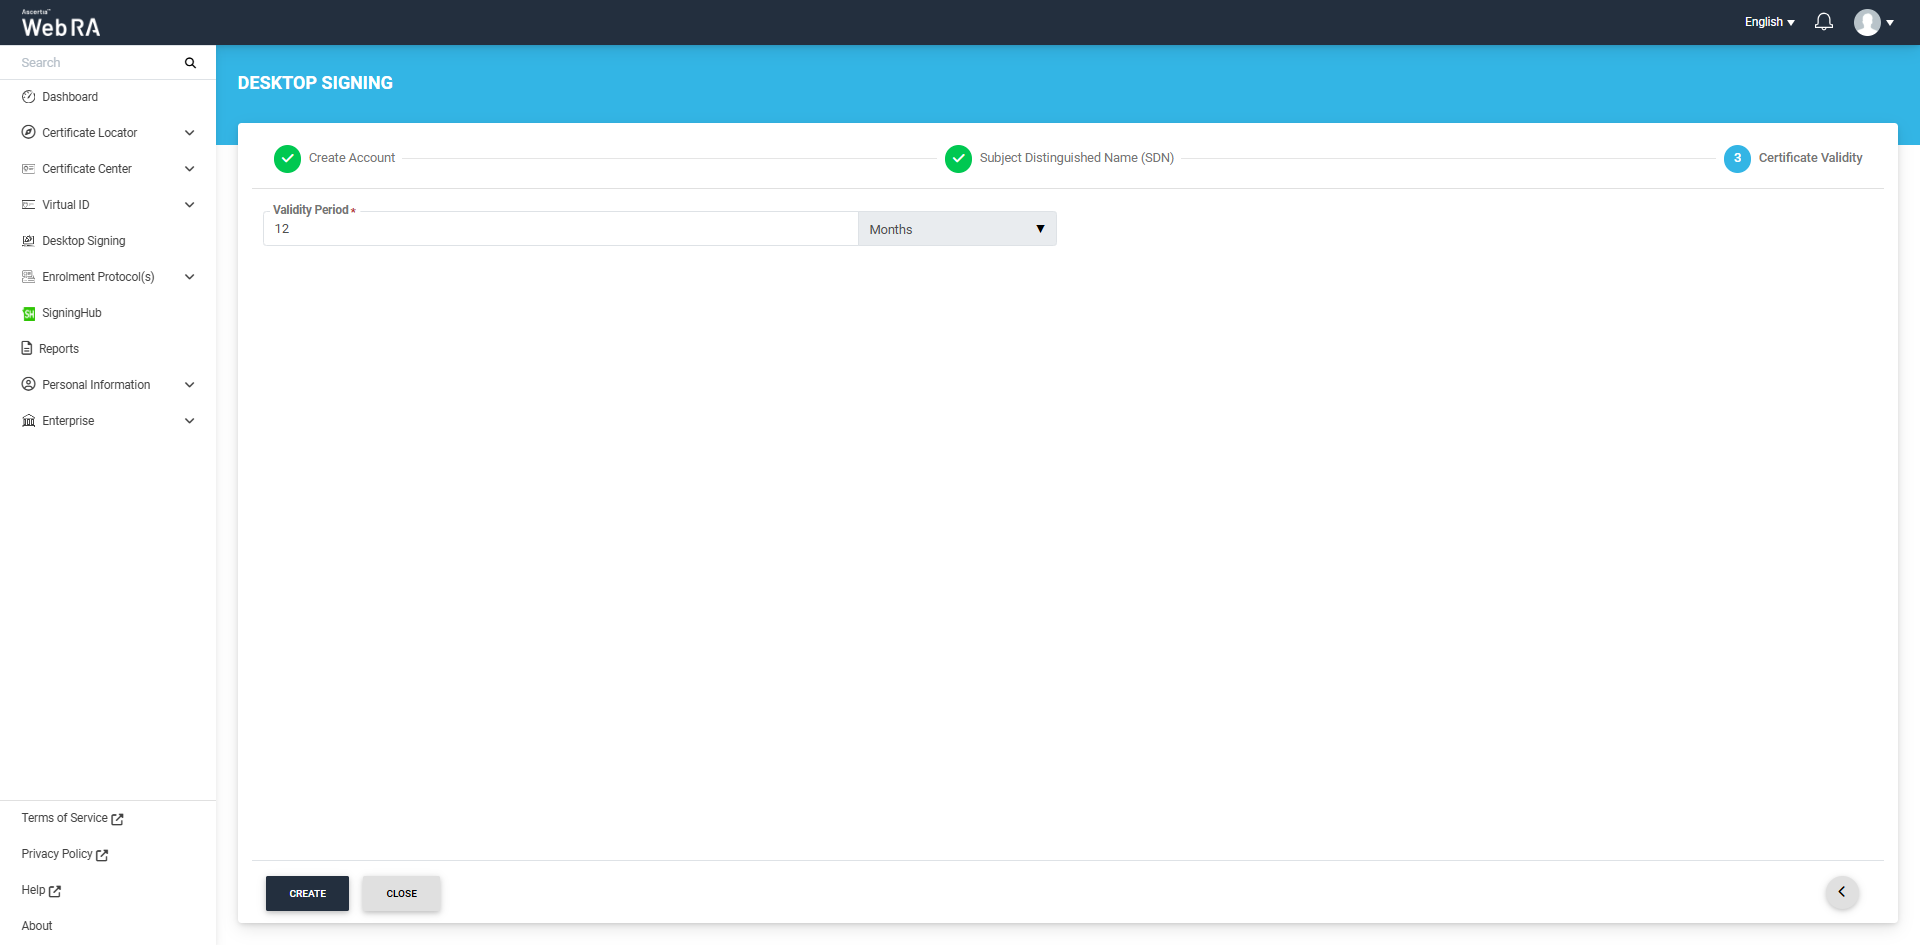
After specifying the validity period, click the 'Create' button. The system will create your account, generate your Desktop Signing certificate and download it in your system.
A dialog will also appear on the screen, confirming that the account has been created and can be used to sign documents using the VCSP desktop application.
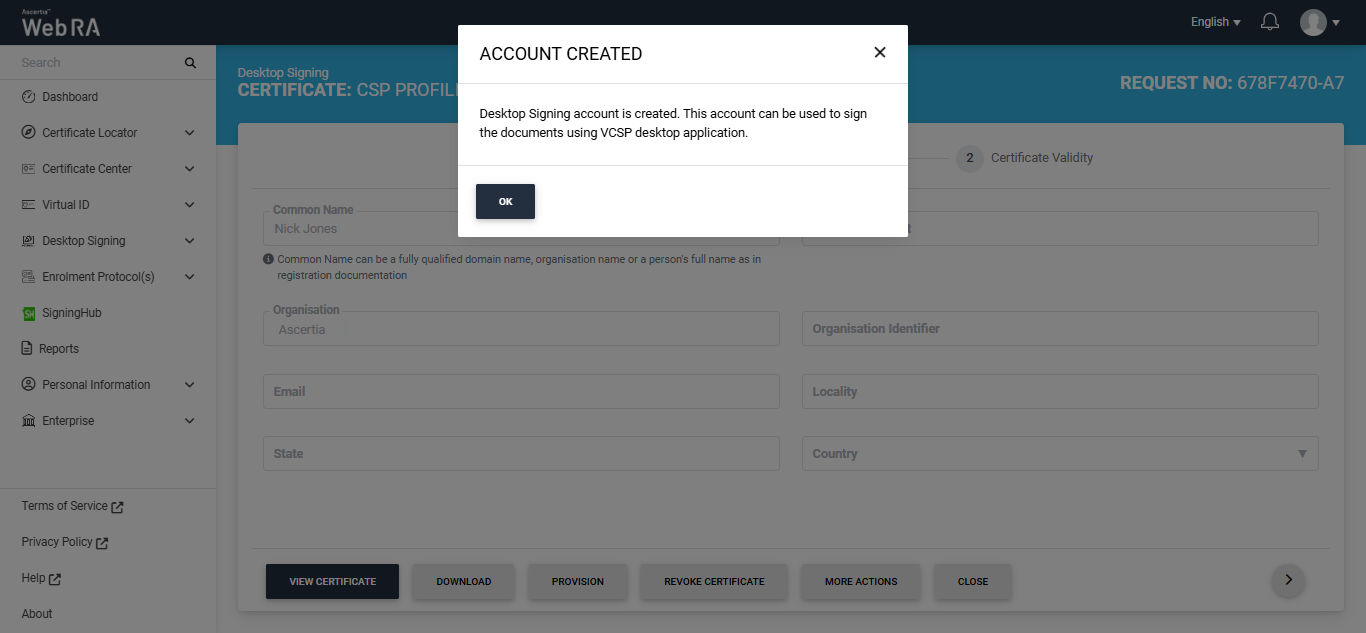
Click 'Ok' to close the dialog.
You can also view certificate information on this screen by clicking on the 'View Certificate' button and perform the following options:
- Download
- Provision
- Revoke Certificate
- More Actions (Rekey/Renew Certificate, Recover Key)
A certificate request with an approved status will appear under the "Certificate Requests" list. You can review the request details and also view or download the associated certificate. The same certificate will also appear under the "Issued Certificates" list.
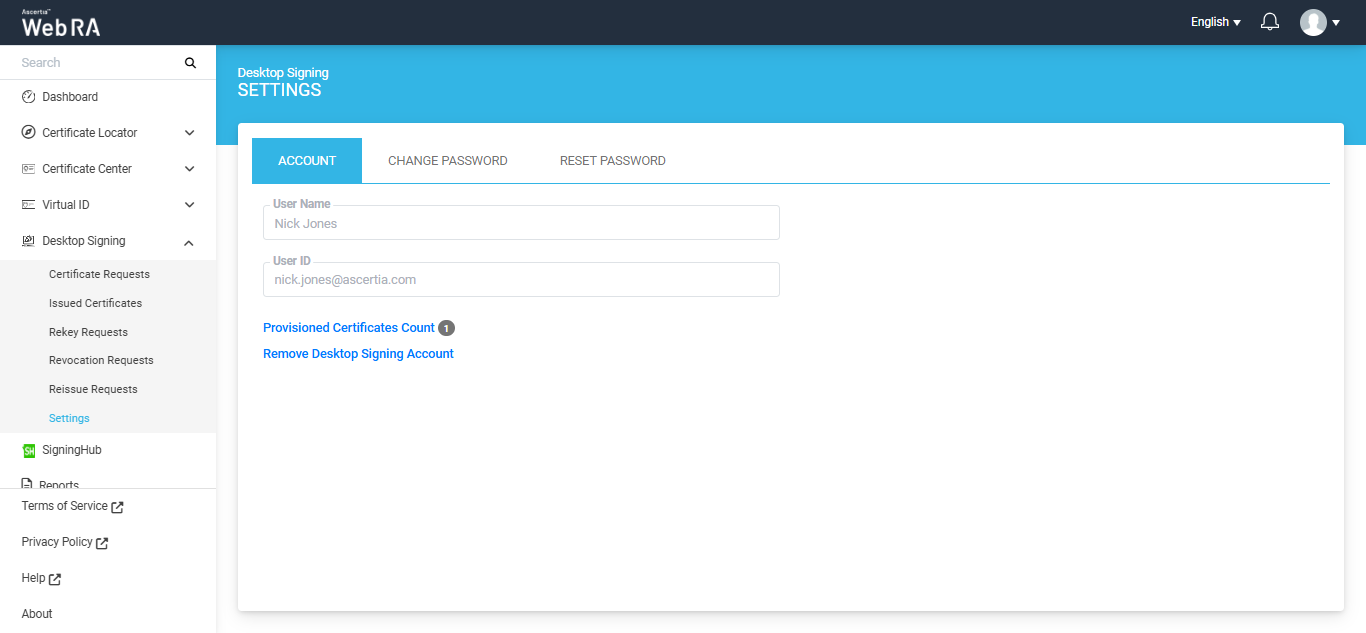
Moreover, if allowed in the user role, desktop signing certificates will be automatically provisioned after they are created. These certificates can then be used to sign documents. Users can view the count of provisioned certificates in the 'Settings' tab.
Create Desktop Signing Account Without Certificate
If the 'Configure Certification Profile' option is disabled in the certification profile, the Desktop Signing account will be created without its certificate in the Web RA system.
Navigate to the Desktop Signing tab from the left menu in the Web RA web portal, and click on 'Create' button.
The system will display three text fields on the screen, including:
- User ID
- Password
- Confirm Password
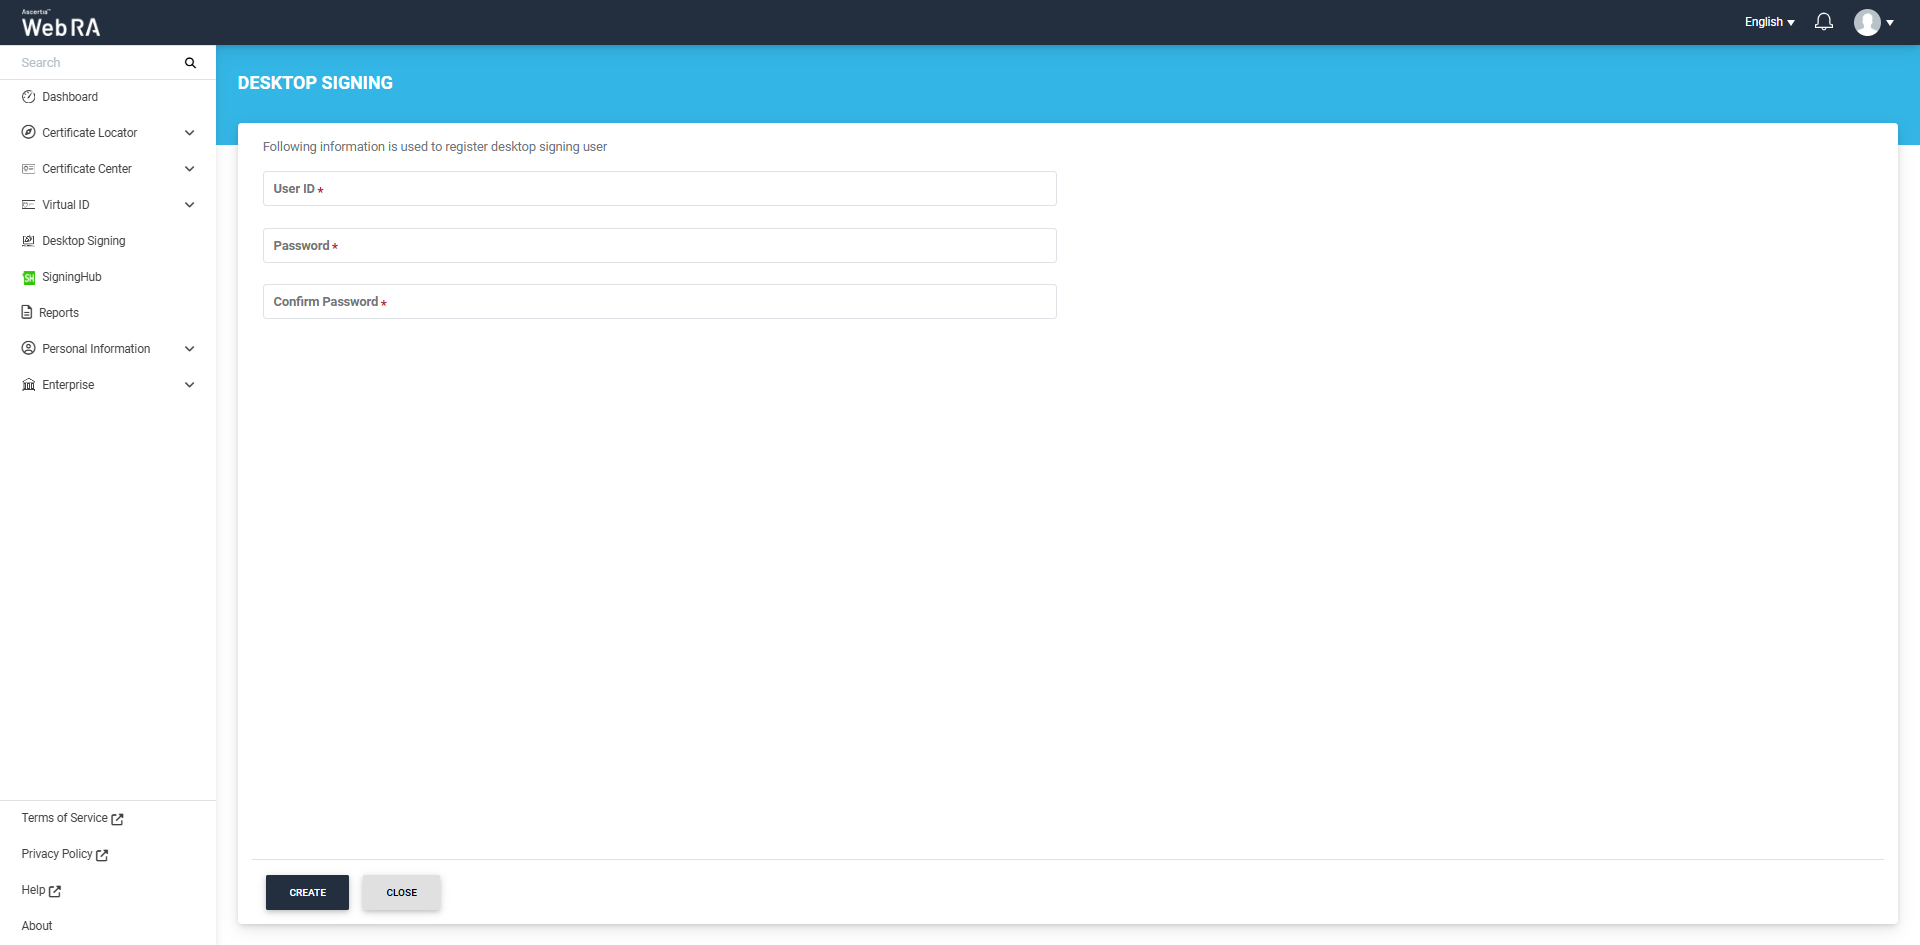
Enter the required details and click 'Create' button to create your Desktop Signing account.
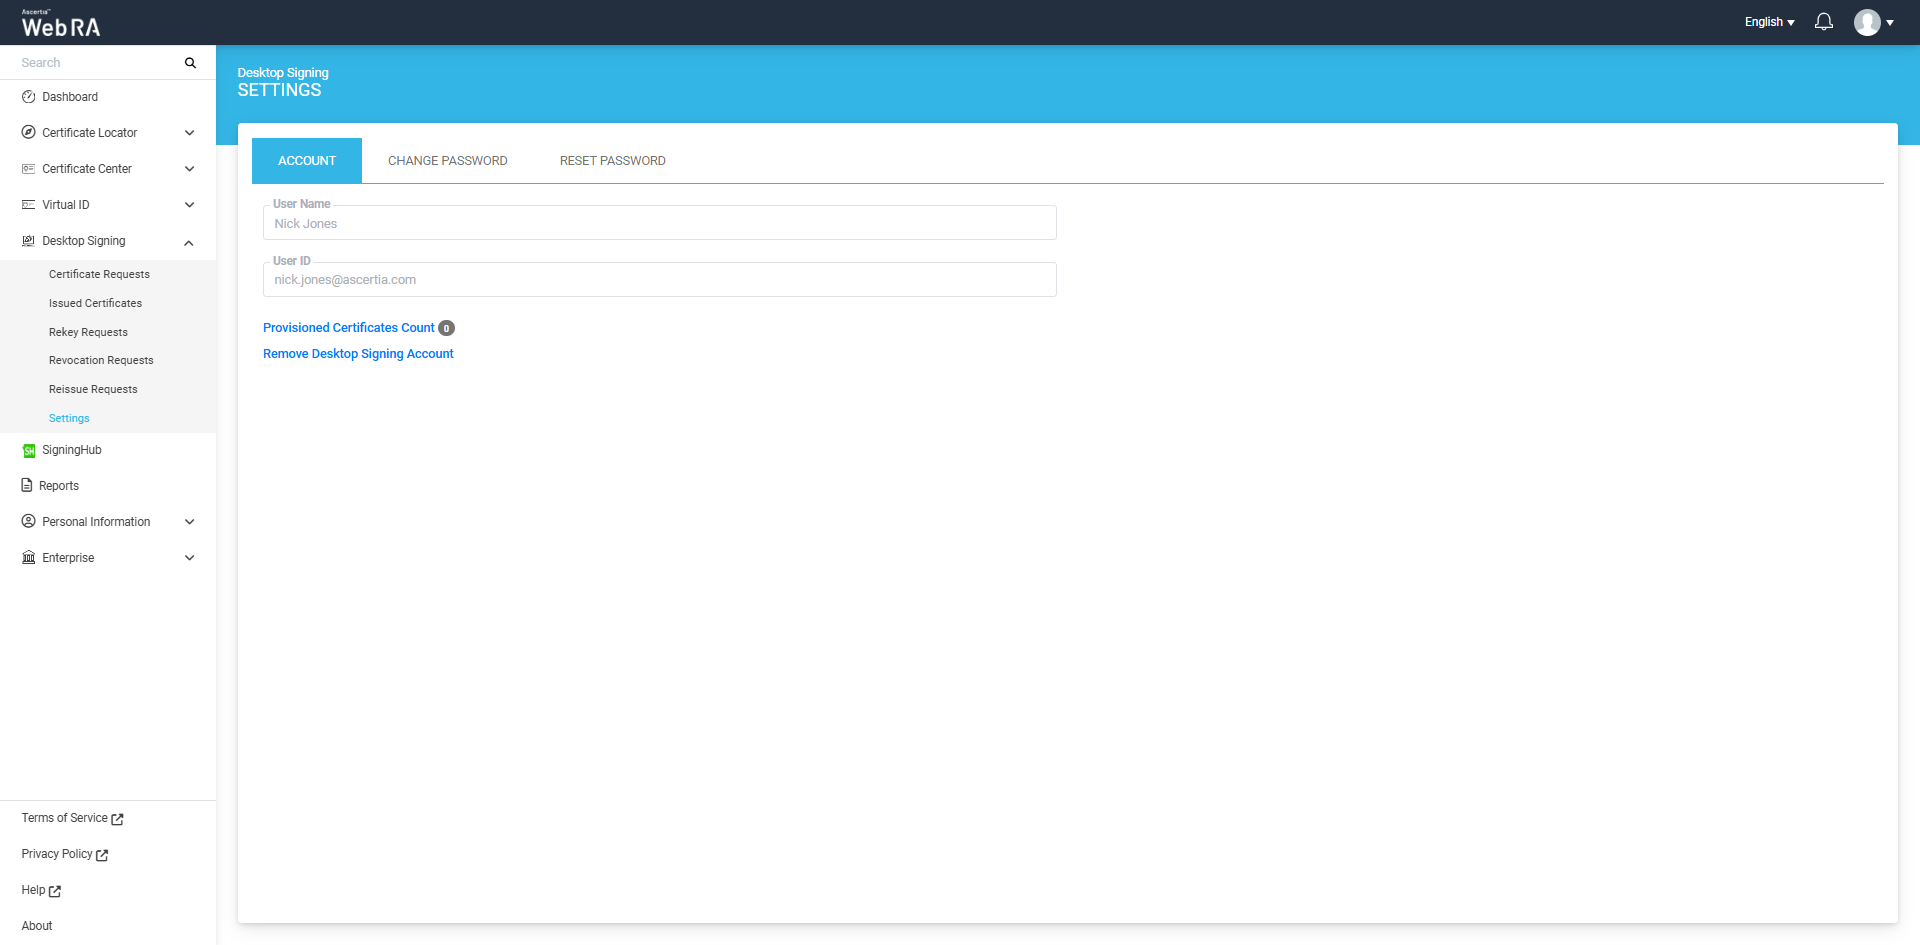
The Desktop Signing user will be created in the Web RA system and the 'Settings' screen will appear.
Document Signing from VCSP Application
All certificates generated and provisioned for Desktop Signing can be used within the VCSP Desktop application to securely sign documents.
The VCSP application enables remote signing directly from your desktop, securely managing certificates and allowing seamless document signing without needing to upload files to a hosted service.
Using VCSP, you can select your certificate while working in applications like Microsoft Word, PDF files, etc. Once you initiate a signing request, the application connects to the Go>Sign Mobile app for secure authorization, and the document is signed instantly.
How to Sign Documents Using the VCSP Application
To sign documents using the VCSP application, follow these steps:
1. Extract the VCSP Package
Extract the VCSP package you received to access the VCSP setup files.
2. Install the VCSP Application
Install the Virtual CSP application by running the ‘Virtual CSP’ setup file. Double-clicking the setup file will open the setup dialog, where you can complete the installation.
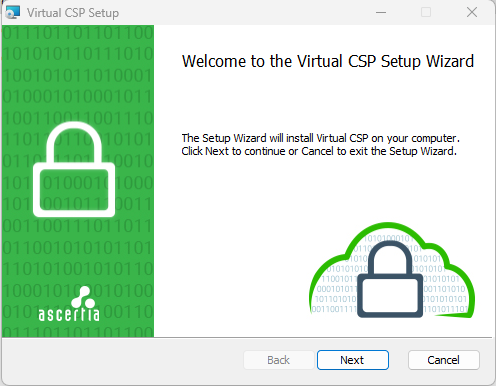
Follow the instructions in the setup wizard to complete the Virtual CSP setup.
3. Configure the VCSP Application
After installation, provide the configuration details in the ‘Virtual CSP – Configurations’ file. For that, navigate to "C:\Program Files (x86)\Ascertia\Virtual CSP", then double-click the 'VirtualCSP.Configuration' file to access configuration dialog.
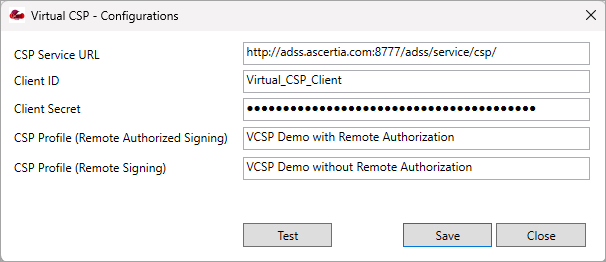
Enter the required details in the designated fields.
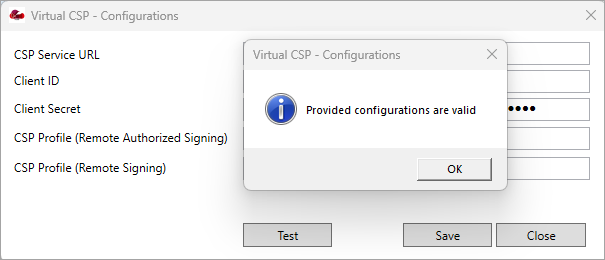
Click the ‘Test’ button to verify if the details you entered are valid and functioning. If the details are correct, a dialog will appear confirming that the configurations are valid.
Click 'Save' to save your configurations, and then click 'Close'.
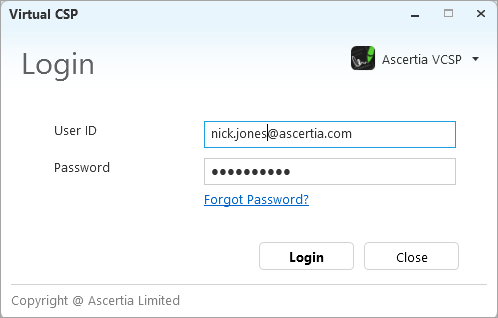
4. Log In to VCSP
Once the configurations are complete, log in to the VCSP application using your Desktop Signing account credentials. You can access the VCSP login window from the VCSP application icon on your Desktop.
5. Certificates Listing
After logging in, the VCSP application will display a list of all provisioned certificates in desktop signing account.

Note: To use a certificate for document signing, make sure you have installed the certificate along with its root certificates on your system and built the trust chain.
6. Open the PDF Document
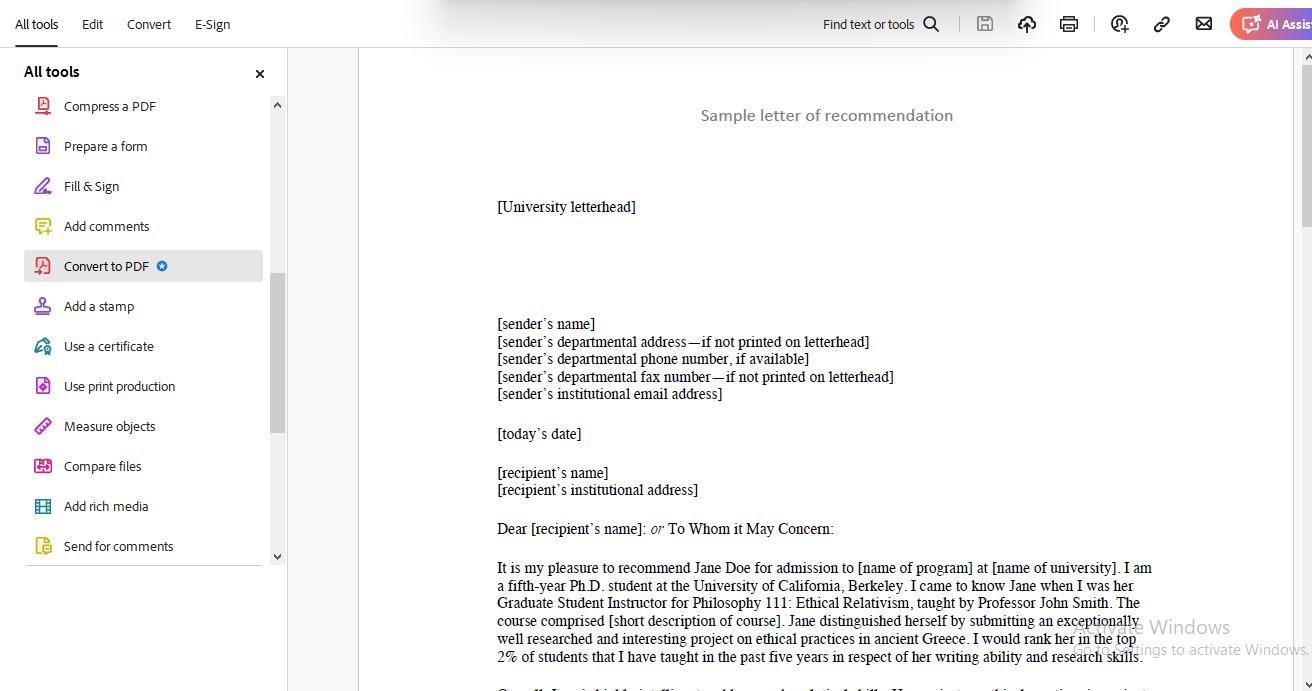
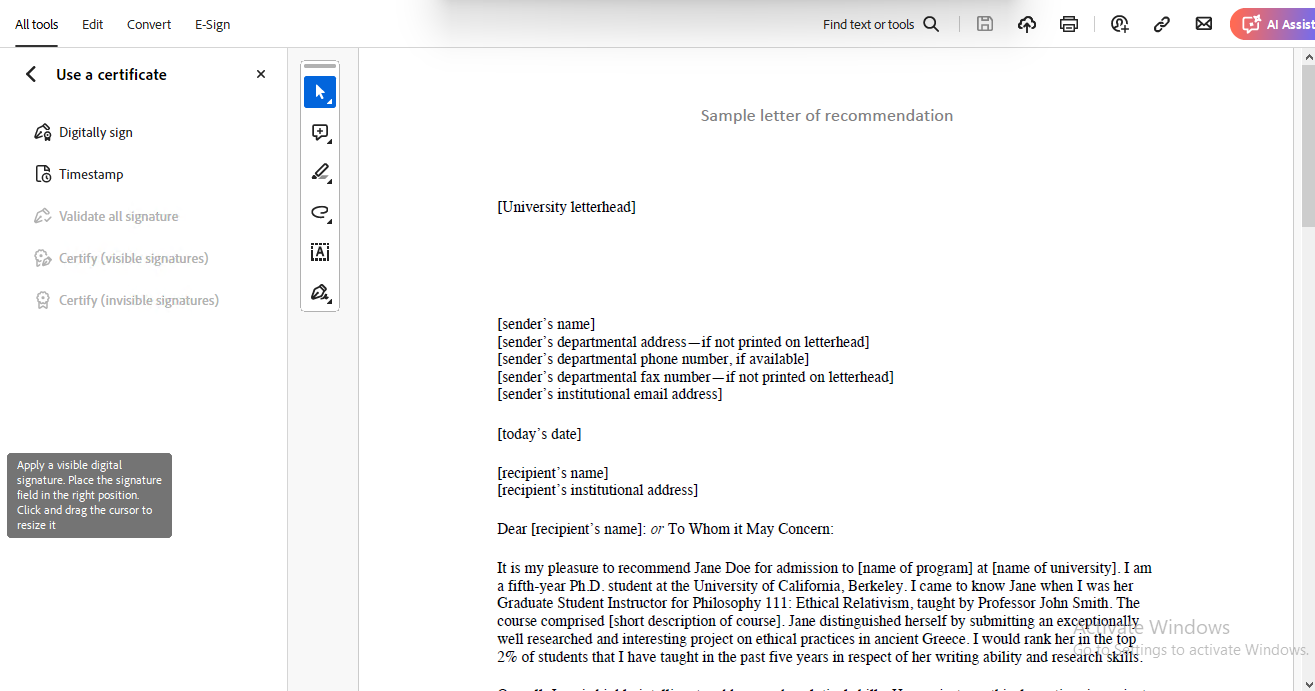
Open the PDF document you want to sign in Adobe Acrobat. Navigate to All Tools > Use a Certificate, and click on the ‘Use a Certificate’ option to view its sub-options.
7. Select Digitally Sign
From the sub-options, select ‘Digitally Sign’ and draw a signature field in your desired location within the PDF document.
8. Choose a Digital ID
A dialog titled ‘Sign with a Digital ID’ will appear, displaying all available certificates. Choose the digital ID you want to use for document signing and click ‘Continue’.

9. Authorise the Signing Request
The VCSP application will send a signing request to the Go>Sign Mobile app for authorisation. Install the Go>Sign Mobile App, configure it and register the device. Then approve the request under the "Remote Authorisation" section.

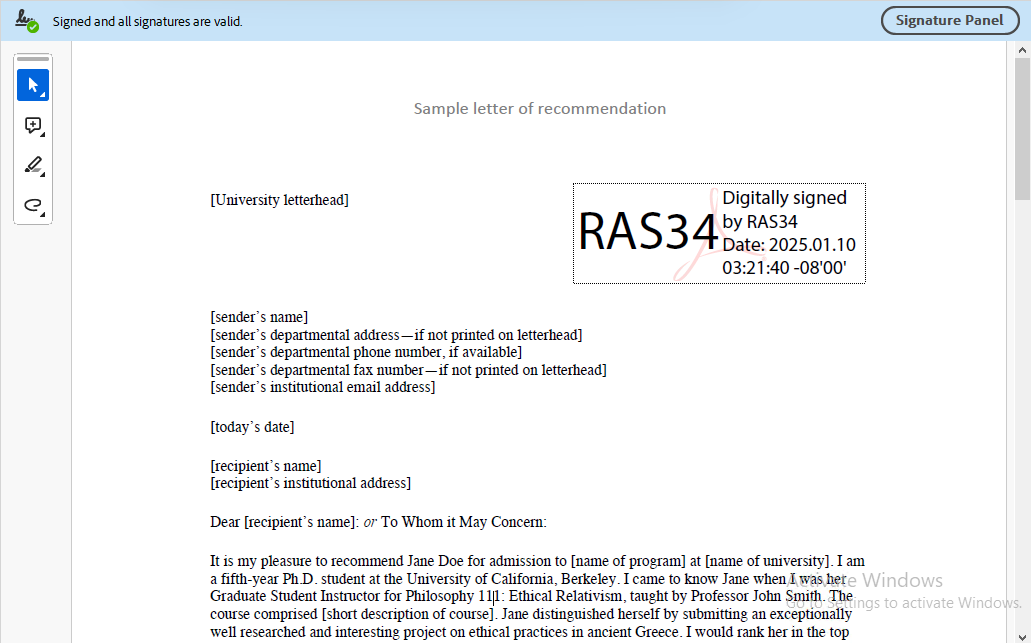
10. Signing Completed
Once the signing request is authorised via the Go>Sign Mobile app, the document will be Signed successfully. The signature field in the PDF document will display the certificate name along with the date and time of signing.
Note: If Remote authorisation is not configured on ADSS Server, the document will be signed automatically once you select the digital ID.