Certify the Web
This guide explains how to configure the Automatic Certificate Management Environment (ACME) in ADSS Web RA and use the Certify The Web client to request and manage ACME certificates. It provides step-by-step instructions for successfully issuing certificates through the ACME protocol.
The guide covers the complete workflow, from initial ACME configuration in Web RA to certificate issuance using the Certify The Web client.
The following table outlines the sections covered in this guide:
- ACME Configuration in ADSS Web RA System
- Step 1: Configure ACME from Configurations
- Step 2: Create an ADSS Server Connector
- Step 3: Create ACME Certification Profile
- Step 4: Configure ACME Certification Profile(s) in Service Plan
- Step 5: Configure ACME Settings in Enterprise
- ACME Settings in User Portal
- Pre-Requisites
- Install Certify The Web Application
- Add a Certificate Authority (CA)
- Add a Certificate Authority (CA) Account
- Issue a Certificate with External Account Binding Type: None
- Issue a Certificate with External Account Binding Type: Random
- Issue a Certificate with External Account Binding Type: Fixed
- Renewal of Certificates
ACME Configuration in ADSS Web RA System
Step 1: Configure Automatic Certificate Management Environment (ACME) from Configurations
Extend Configurations > Enrolment Protocol(s) > ACME from the Admin portal.
On the ACME screen, select the “Enable Automatic Certificate Management Environment (ACME)” checkbox to enable the ACME functionality.
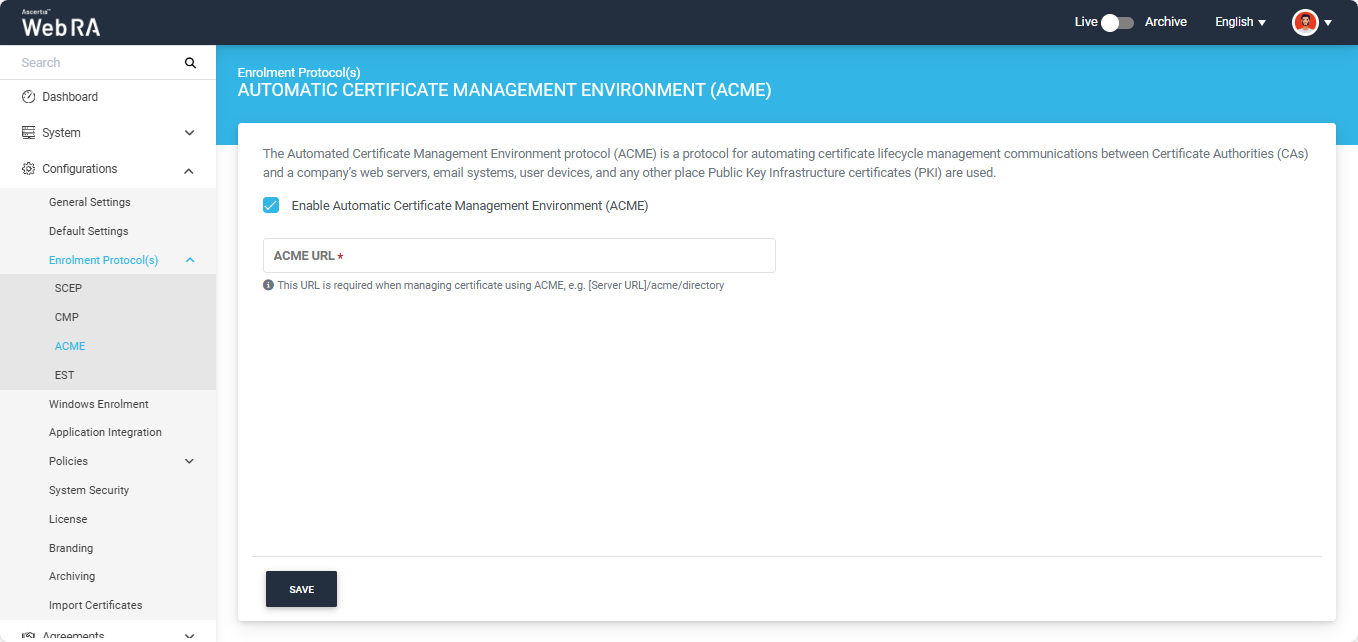
After enabling the checkbox, configure the ACME protocol by providing the ACME URL, which is the URL that the devices will use to communicate with ADSS Web RA for certificate generation.
Click ‘Save’ after providing the information in the designated field.
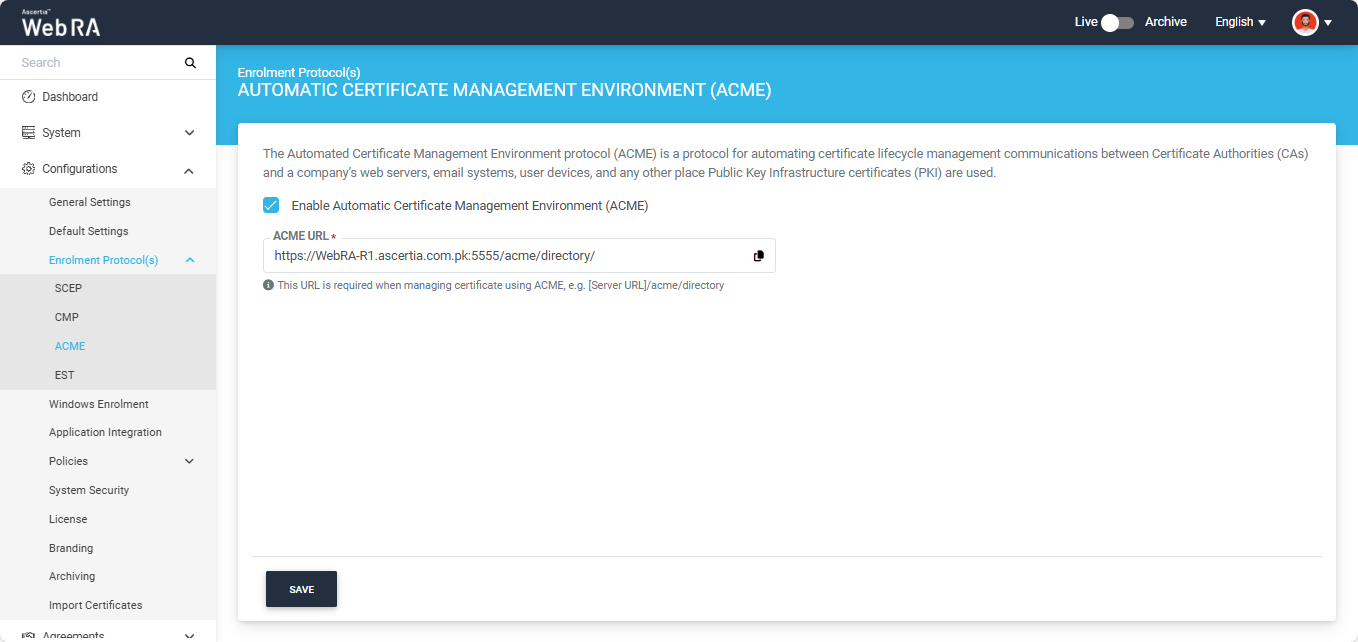
This ACME URL will be used to create Certificate Authority (CA) in Certify The Web ACME Client.
Step 2: Create an ADSS Server Connector
Access the Web RA Admin account using the ADSS Web RA Admin portal configured URL.
Then, navigate to External Service > Connectors section.
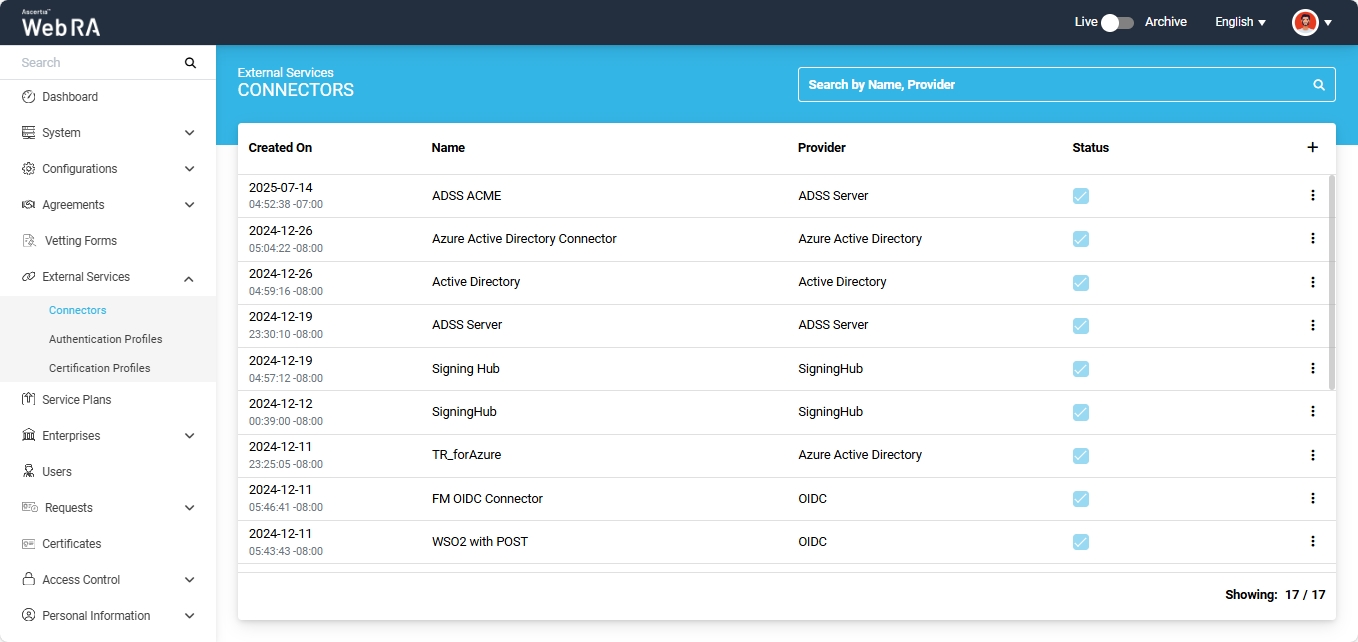
On the Connectors screen, click on ‘+’ icon to add a new connector.
The system will open ‘Basic Information’ section under the ‘Add’ connector screen.

Provide the information on this screen as described in the table below:
|
Field |
Description |
|
Name |
Specify a unique name for this connector, e.g. ADSS Server. |
|
Provider |
Select ‘ADSS Server’ as the provider for this connector. |
|
Active |
The status of the connector should be checked as active. |
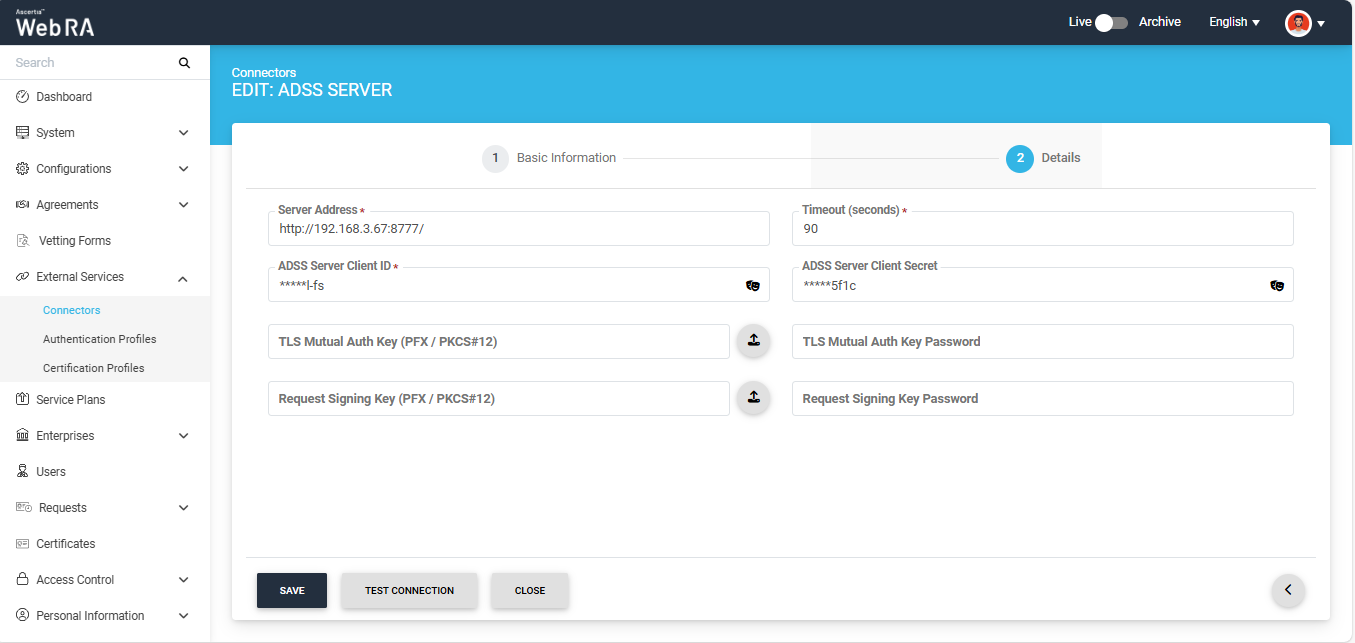
After entering the information click next to navigate to the ‘Details’ section.
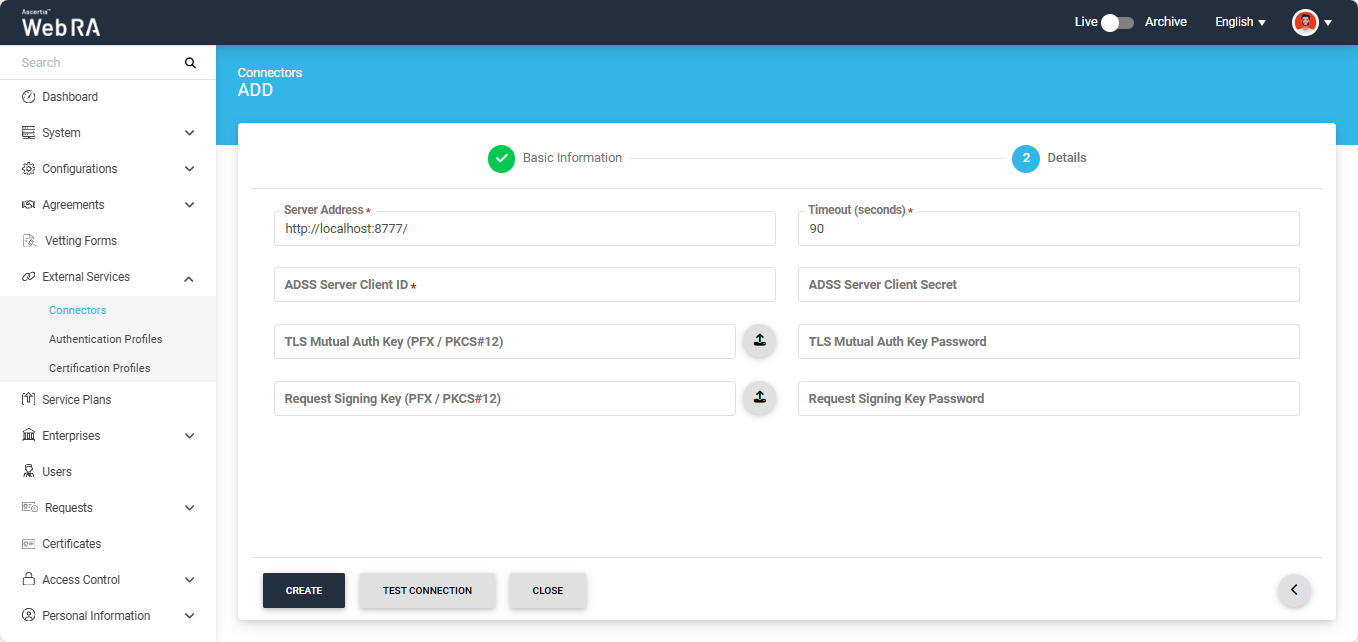
Provide information on this screen as described in the table below:
|
Field |
Description |
|
Server Address |
Specify the address and port number of ADSS Server. |
|
Time out |
Specify a timeout duration (in seconds), e.g. 300. This is the amount of time Web RA will wait for a response from the ADSS Server before displaying an error, in case the server becomes unresponsive. |
|
Client ID |
Specify the Client ID that has been configured in the Client Manager module of the ADSS Server for this connector. Note: Use the same Client ID which you used while creating the profile in ADSS Server |
|
Client Secret |
Specify the client secret that has been generated in the ADSS Server against this Client ID. |
|
TLS Mutual Auth Key (PFX/PKCS#12) |
This field is optional. This is the certificate required to communicate with ADSS over mutual SSL communication. |
|
TLS Mutual Auth Key password |
This field is optional. This is the certificate PFX required to communicate with ADSS over mutual SSL communication. |
|
Request Signing Key (PFX/PKCS#12) |
This field is optional. This is the certificate required to encrypt the data used during communication with ADSS Services. |
|
Request Signing Key Password |
This field is optional. This is the certificate PFX required to encrypt the data used during communication with ADSS Services. |
After entering the required information, click ‘Save'.
Step 3: Create an ACME Certification Profile
For the ACME protocol, you have to create separate certification profiles for each type of External Account Binding (EAB): None, Fixed, and Random.
These profiles will be used to issue the required certificates through the ACME client.
Extend External Services > Certification Profiles from the Admin portal.
Click on the ‘+’ icon to add a create a new certification profile. The ‘Basic Information’ screen will appear.

Basic Information
On this screen, provide a unique name for the profile and specify any description. Then, select the ‘Active’ checkbox to activate this profile.
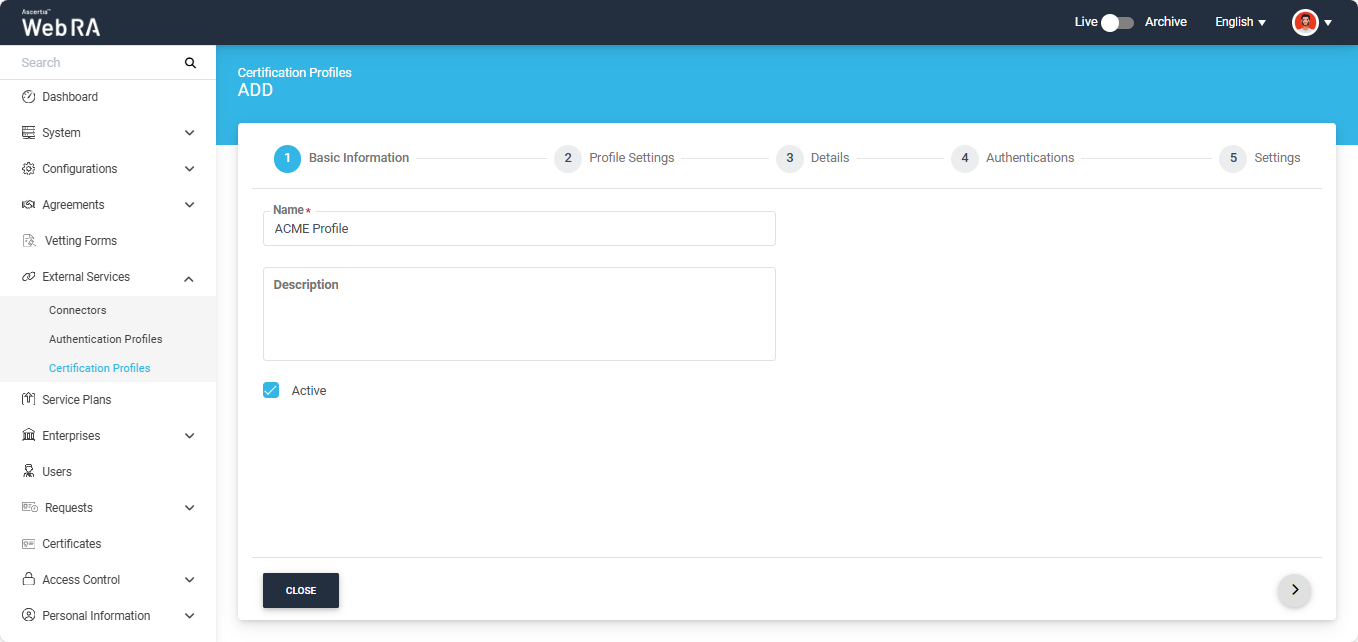
After entering the information, click > to navigate to the ‘Profile Settings’ section.
Profile Settings
On this screen, provide information as described in the table below:
|
Field |
Description |
|
ADSS Service |
This field will display the ADSS Services (i.e. Certification Service and CSP Service) that are available for ADSS Web RA. Select Certification Service. |
|
ADSS Certification Server |
This field will display the list of active ADSS connectors in ADSS Web RA. Select the one to use for this certification service profile, e.g: ADSS. |
|
ADSS Certification Service Profile |
In this field, enter the certification profile that you created on the ADSS Sever, e.g. adss:certification:profile:001. |
|
Issuer Name |
This field will display issuer CA name. This information is fetched from ADSS Server and is displayed in read-only format. |
|
Certificate Purpose |
This field will appear in a disabled form. It contains a list of standard certificate purposes which actually comes from ADSS, based on selected certification profile. A certificate will be generated based on provided certification profile ID, and it will be in a disabled form as it is configured under that ADSS Certification Service Profile. Possible certificate purposes could be Document Signing, TLS Server Authentication, Code Signing etc. ADSS Web RA supports the following types of TLS certificates:
In case of external CA this field will be enabled and operator can select certificate purpose. |
|
Certificate Enrolment |
From this dropdown you can select the following options:
|
To create a certification profile for ACME, you need to select ‘Enrolment Protocols’ option from the ‘Certificate Enrolment’ dropdown.
Then you have to select ‘ACME’ protocol from the ‘Select Enrolment Protocol(s)’ dropdown.
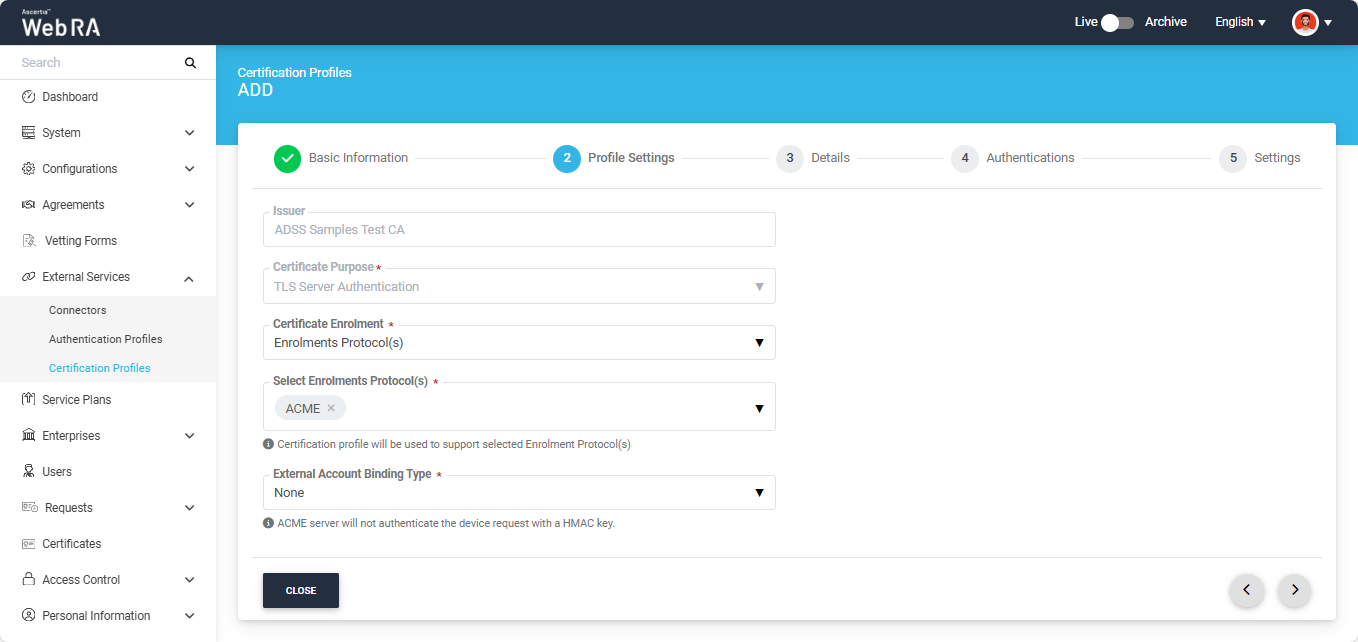
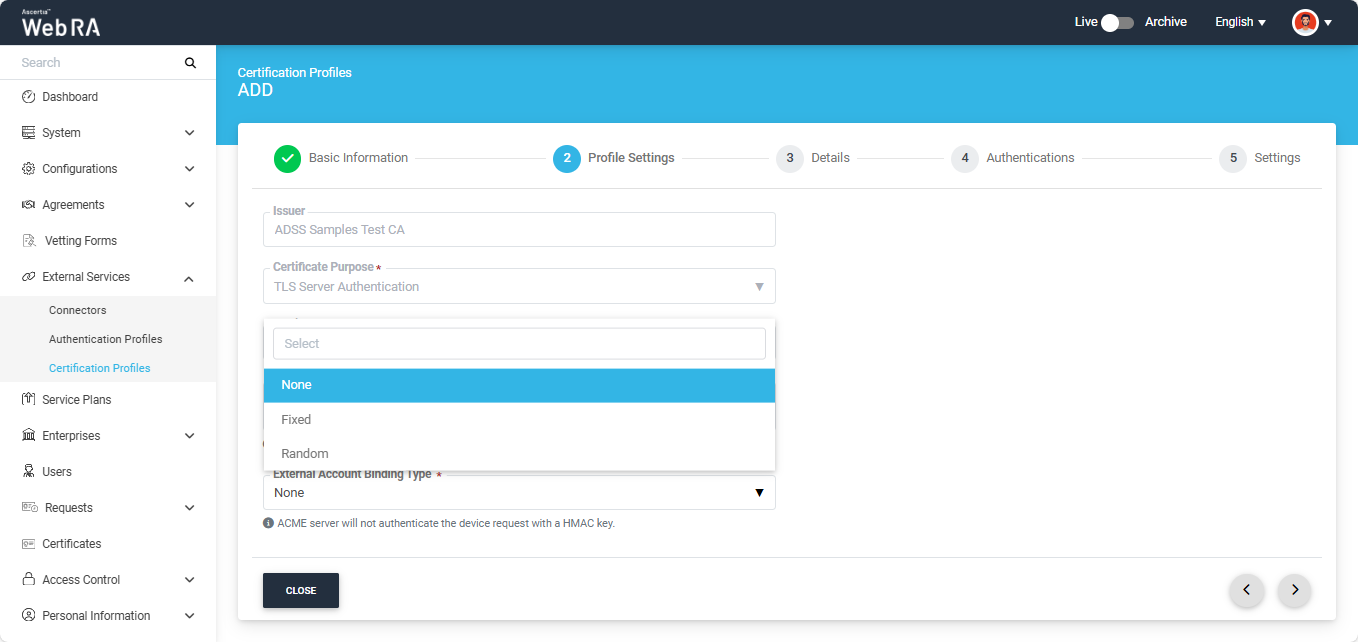
After selecting ‘ACME’ as the enrolment protocol, the system will display the ‘External Account Binding Type’ dropdown. This dropdown will display three options:
- None
- Fixed
- Random
External account bindings are used to associate an ACME account with an external account such as a CA custom database.
Choose an external account binding type from the drop down.
None: No binding is required. ADSS Web RA will process ACME requests using the default certificate profile settings defined here.
Fixed: A fixed HMAC key is generated and associated with the user’s existing ADSS Web RA account. This same key is used to authenticate each ACME request.
Random: A random HMAC key is generated for every ACME certificate request. This key is linked to the user’s existing ADSS Web RA account and used to authenticate that specific request.
If you have selected the ‘Fixed’ option as the binding type, the system will display the ‘HMAC Key’ field.
You can generate the HMAC key by clicking the ‘Generate’ button, and copy the key by clicking the folder icon next to the Generate button.

After making the required configurations from Profile Settings, click the Next ‘>’ button till the ‘Settings’ screen appears, then click ‘Create’ to complete the certification profile creation process.
Step 4: Configure ACME Profile(s) in Service Plan
You need to configure ACME certification profile(s) created above in the Service Plan so that users created under that Service Plan can use the ACME Enrolment Protocol feature.

Expand “Service Plan” tab from the left tree menu and click on the “+” icon to create a new service plan. The system will display the ‘Add’ service plan screen.
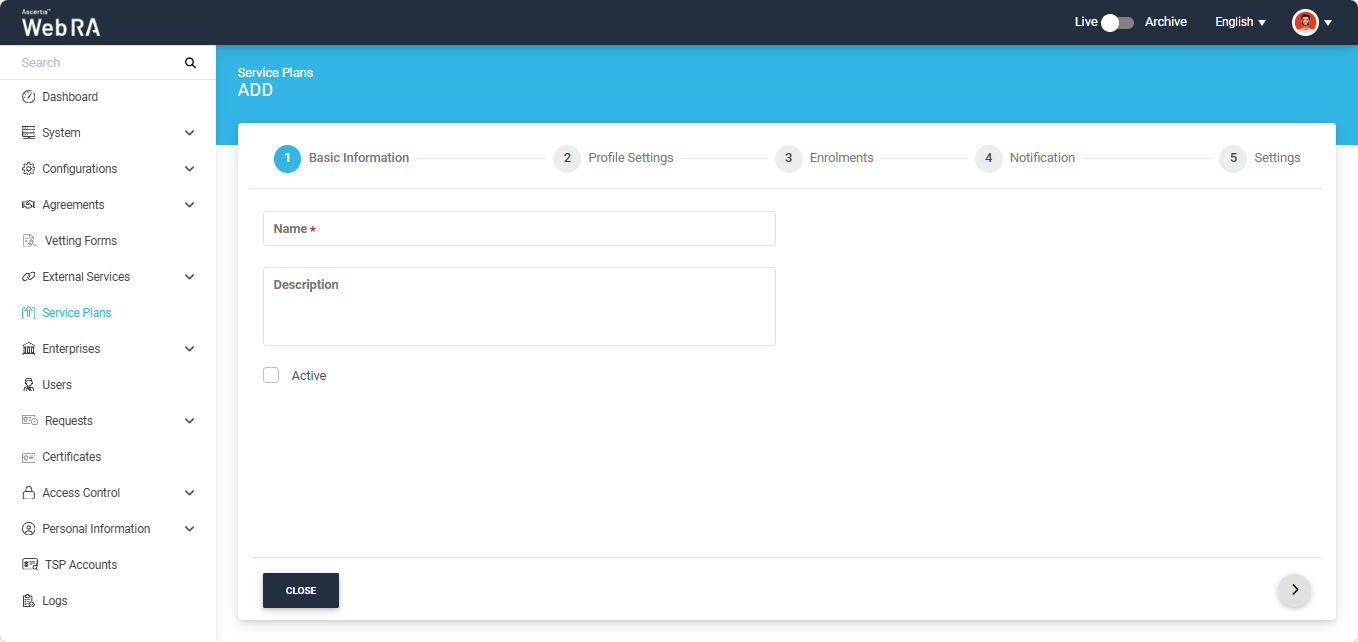
On this screen, enter the name of the service plan and an optional description. Then, enable the ‘Active’ checkbox. Inactive service plans cannot be configured under Enterprise Accounts.
After entering the details, click the ‘>’ button and navigate to the ‘Enrolments’ tab. Here, click on the ‘Profiles to create certificates for ACME’ dropdown and select the ACME certification profile(s) from the list.
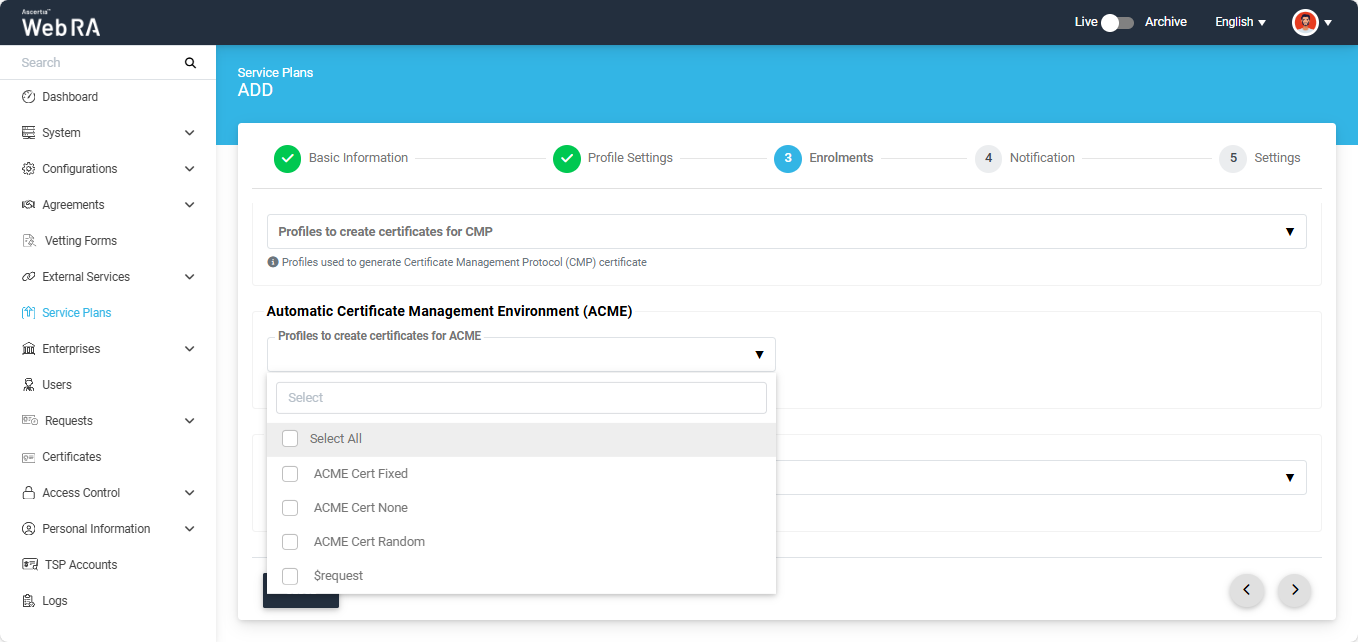
You can either associate a single profile with the service plan or select multiple profiles from the list, depending on your requirements.
After selecting the profile(s), select the default profile to generate a certificate for Automatic Certificate Management Environment (ACME).
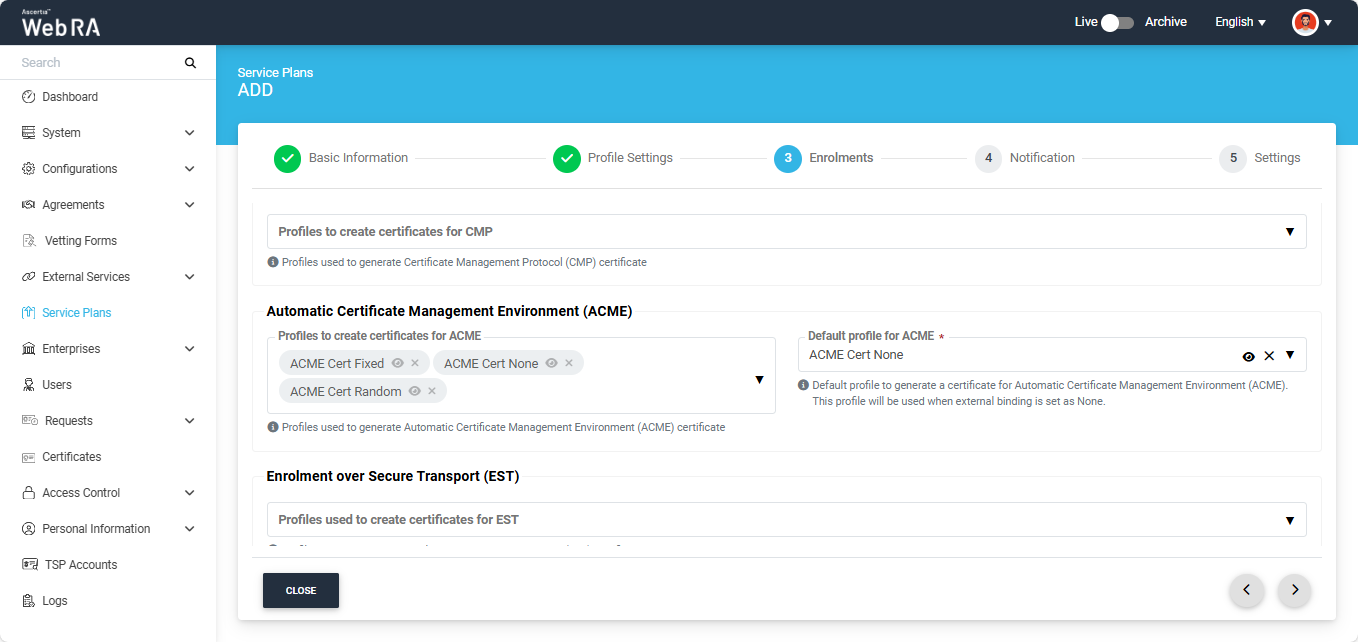
Once you have selected the ACME profiles, go to the ‘Settings’ screen and click ‘Create’ to finalise the new service plan.
Step 5: Configure ACME Settings in Enterprise
After configuring the ACME profile(s) in the service plan, navigate to the Enterprise section.
To create a new enterprise and configure the Service plan to it, expand Enterprises > Requests > Add (+) to access the ADD enterprise screen.
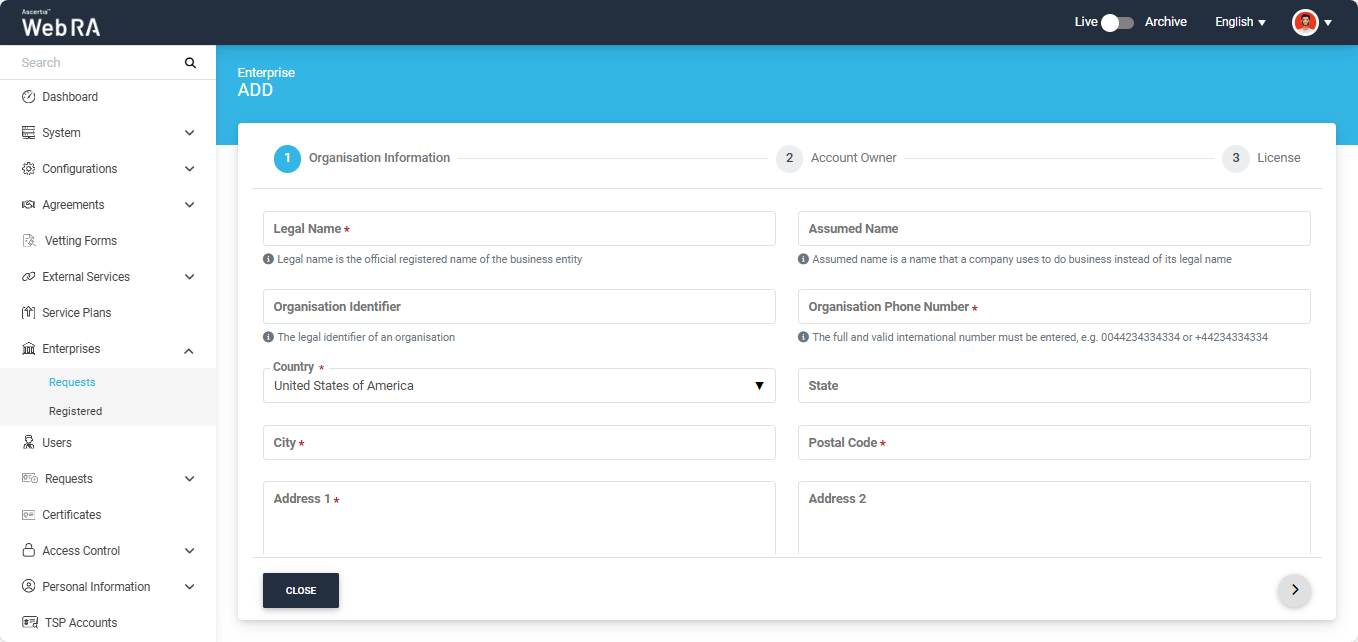
On this screen, enter the required information in their designated field and assign the service plan to the enterprise from the ‘Service Plan’ dropdown. Then click next to navigate to ‘Account Owner’ screen.
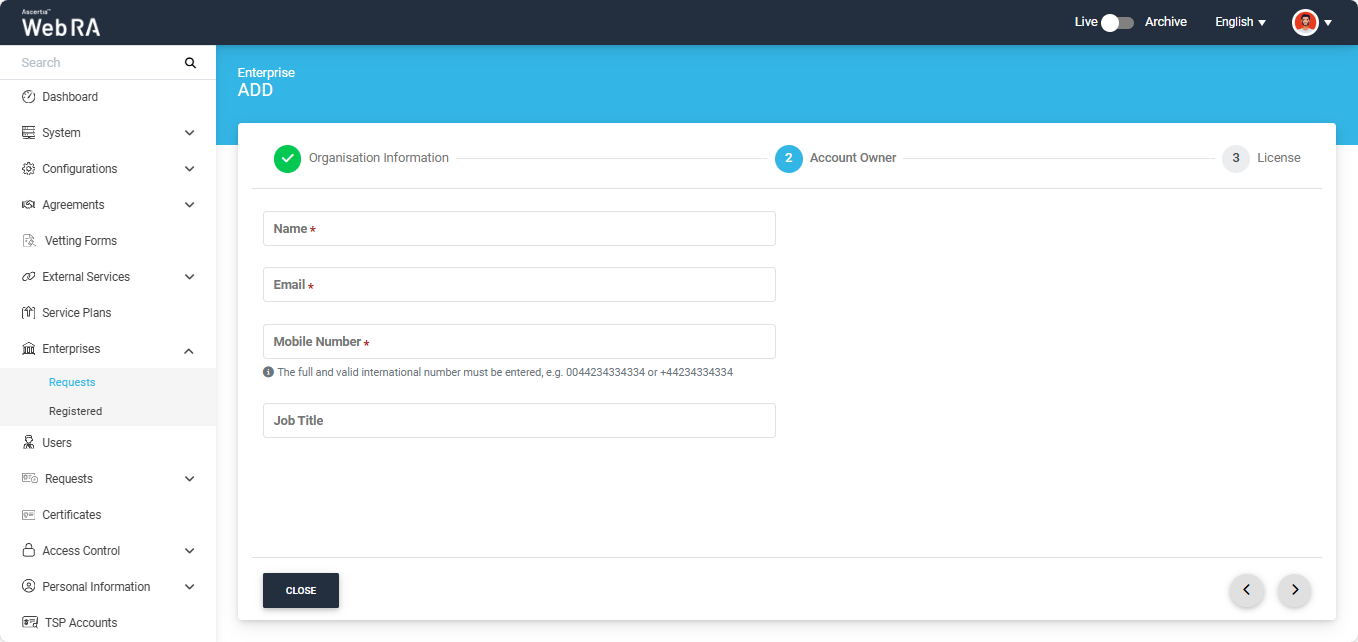
On this screen, mention the details of the enterprise owner and click next to navigate to the License screen.
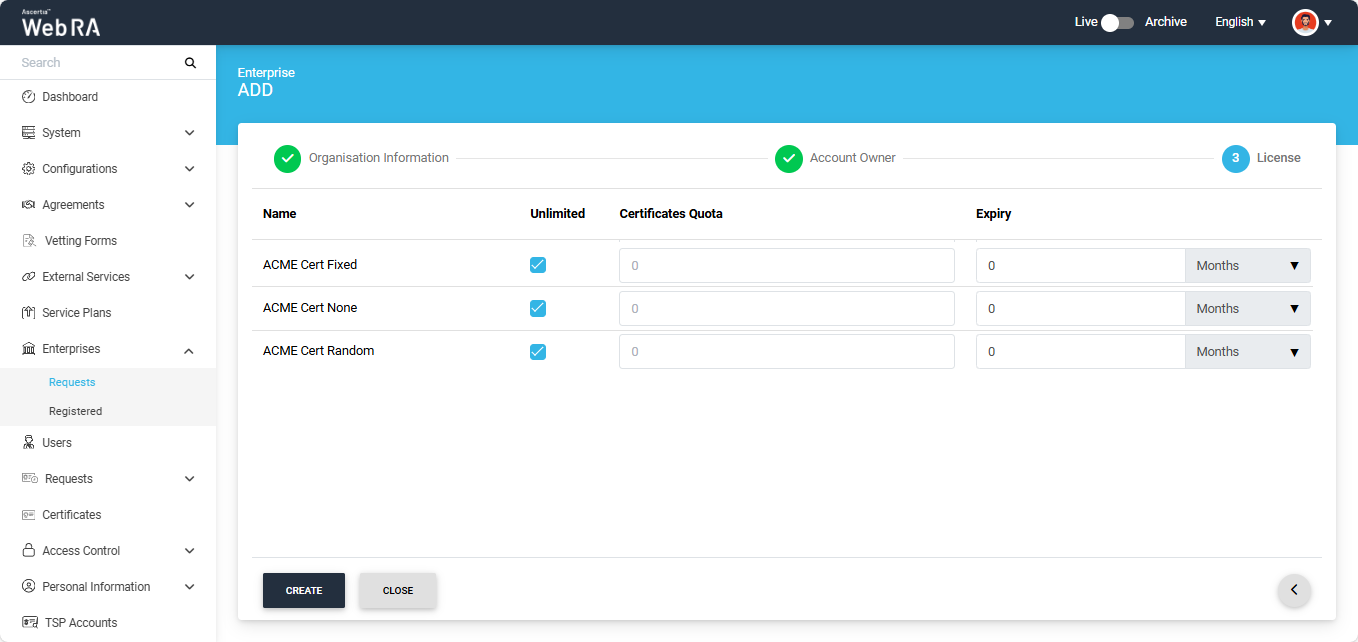
Assign the license quota from this screen for each certification profile and click ‘Create’.
ACME Configuration
Expand Enterprises > Registered, click the three-dot icon adjacent to your enterprise, and select ‘Manage’ from the popup menu that appears.
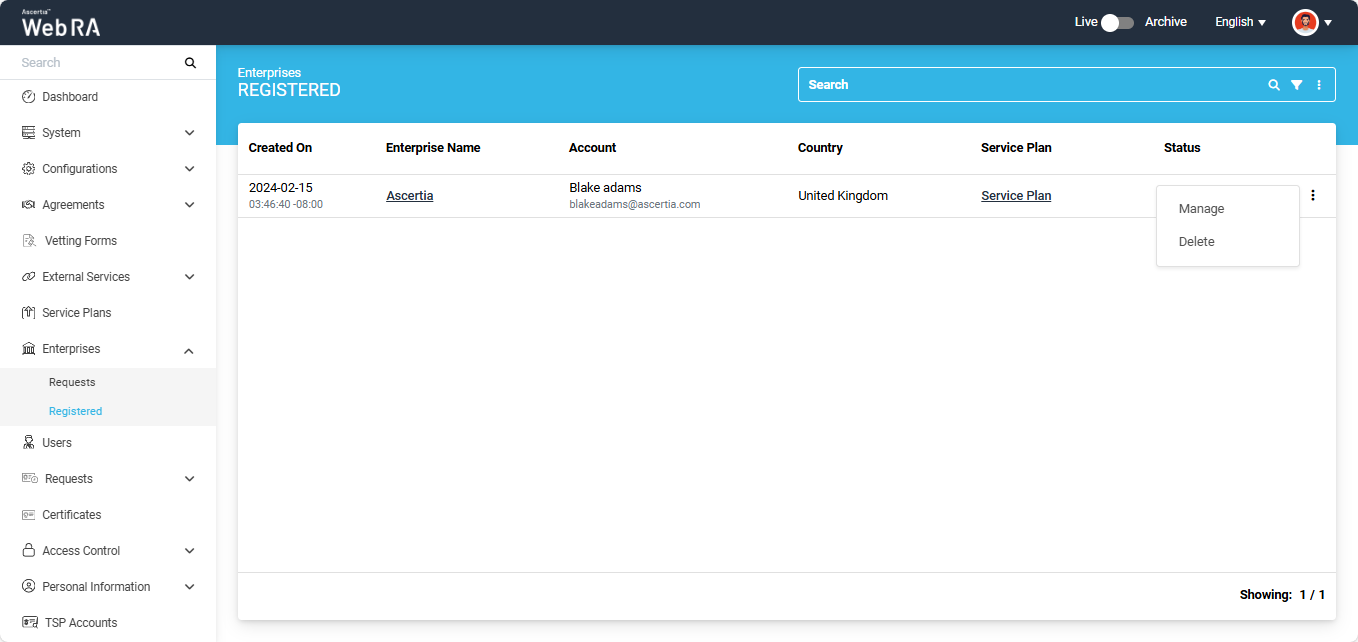
The system will navigate you to the Enterprise Dashboard screen.
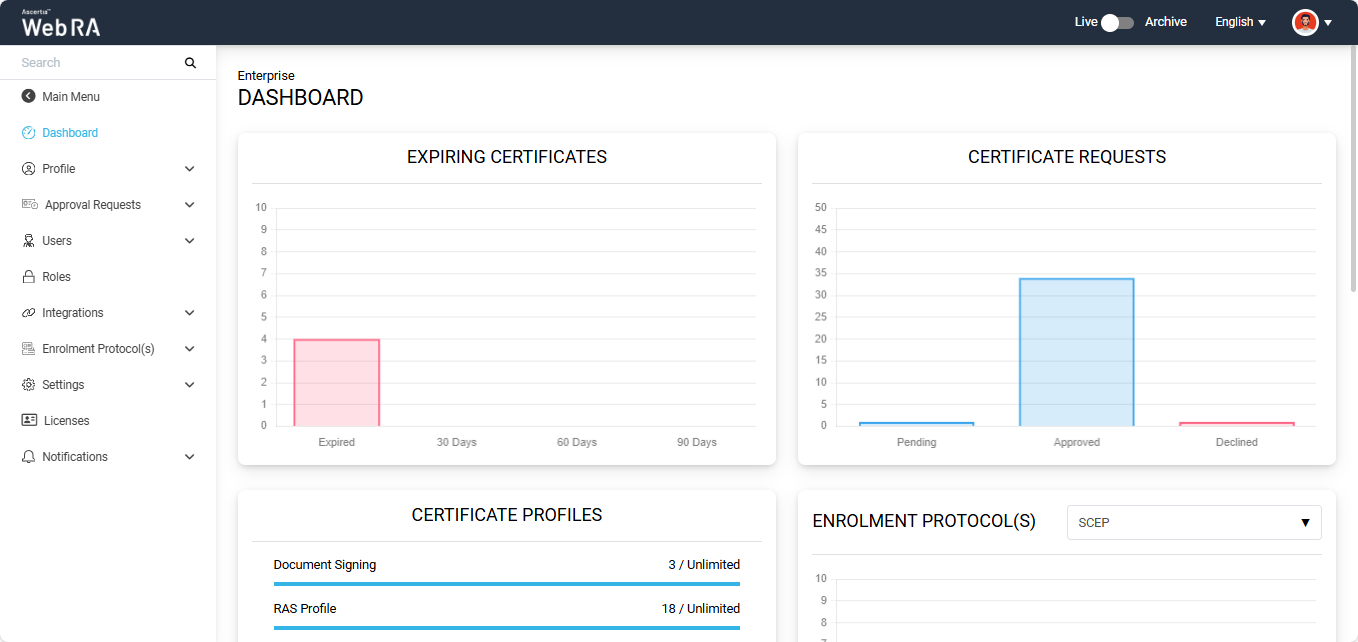
Now, expand Enrolment Protocol(s) > ACME to access the ACME configuration screen.
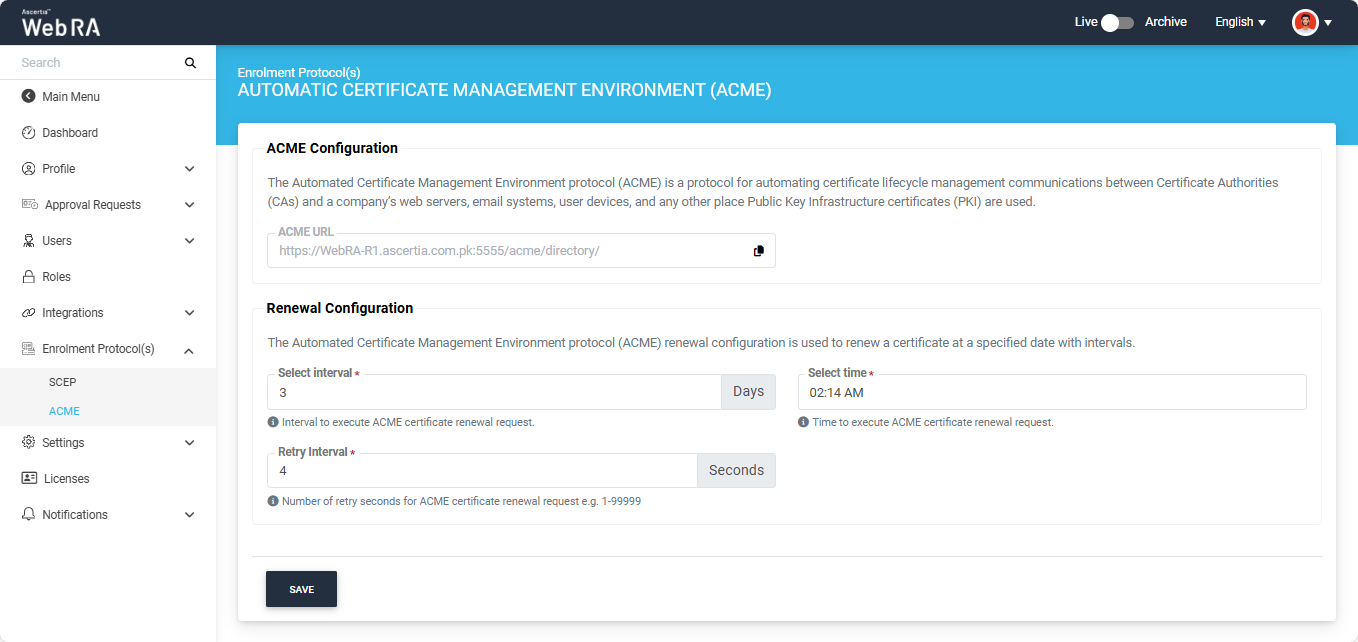
Here, ACME URL will appear in disabled form (added in the configuration section of the admin portal). This is the URL that the devices will use to communicate with ADSS Web RA for certificate generation.
Renewal Configuration
|
Field |
Description |
|
Select Interval |
You can set an interval at which the certificate renewal request will be initiated |
|
Select Time |
Set the time at which the certificate renewal request will be executed |
|
Retry Interval |
You can set the number of retry in seconds for ACME renewal request |
After making the required changes, click ‘Save’.
Enable Enrolment Protocol(s) from Enterprise > Roles
The Enrolment Protocol(s) section will only be visible in the user portal if the relevant settings are enabled in the Enterprise > Roles section.
To do that, navigate to the ‘Roles’ section under your Enterprise and click on the ‘Enrolments’ tab.
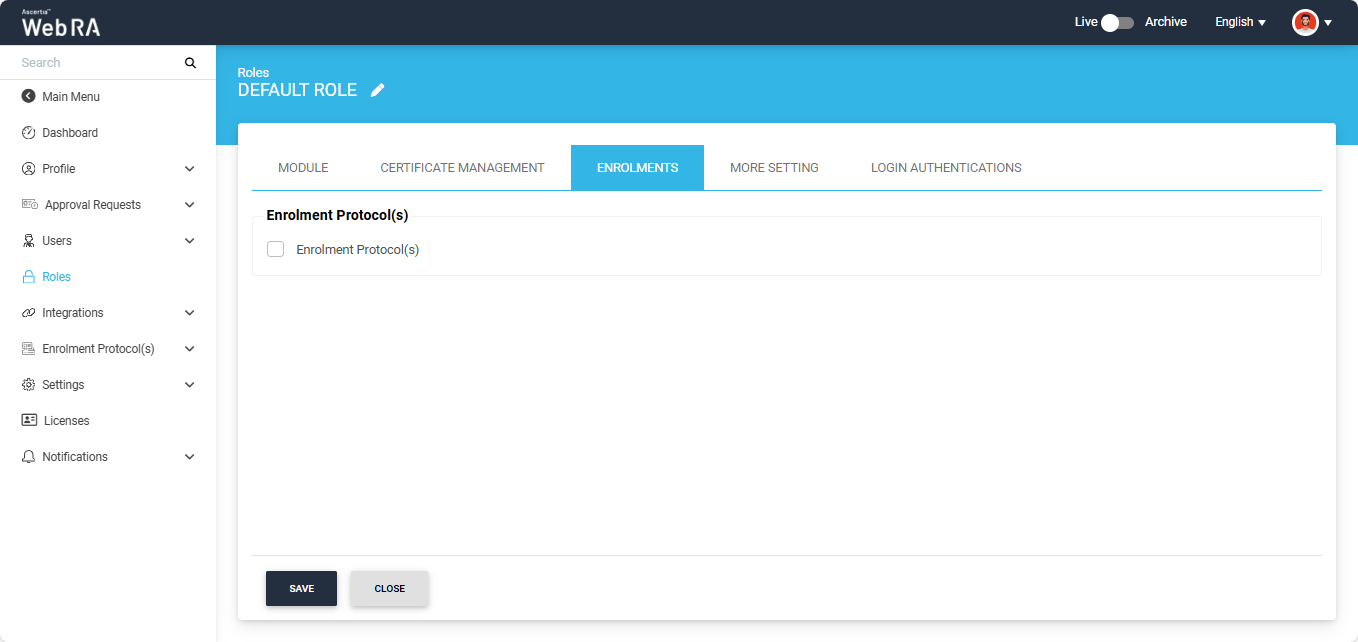
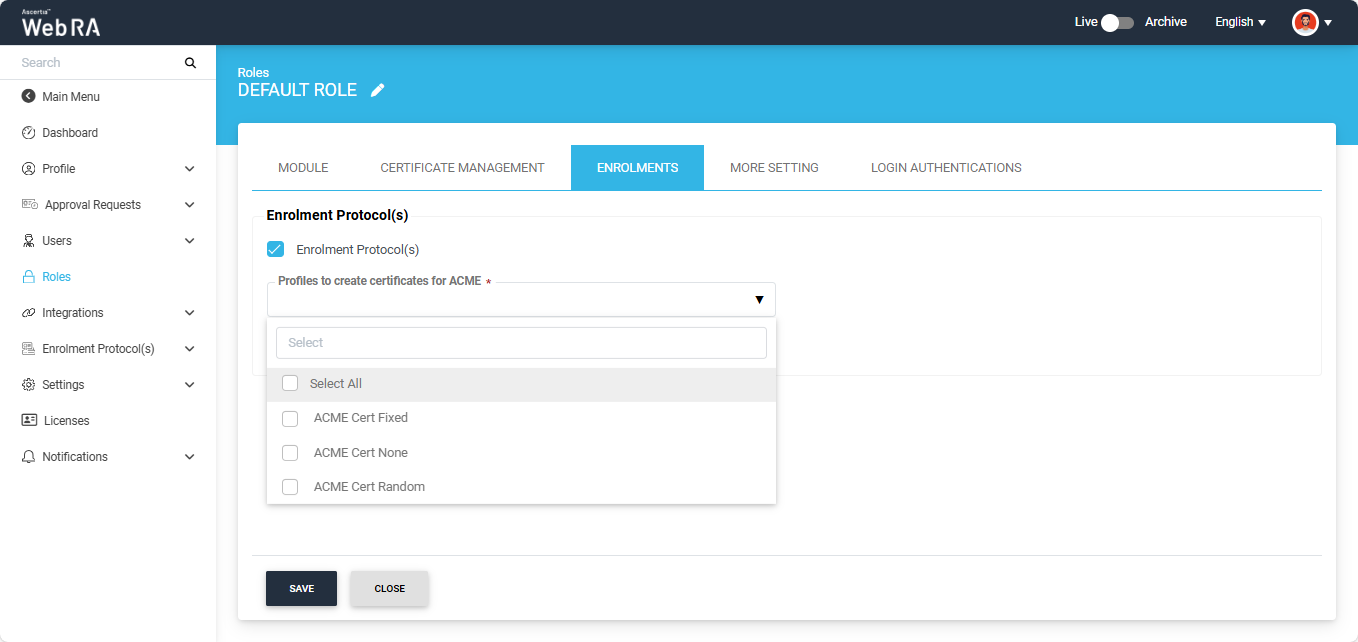
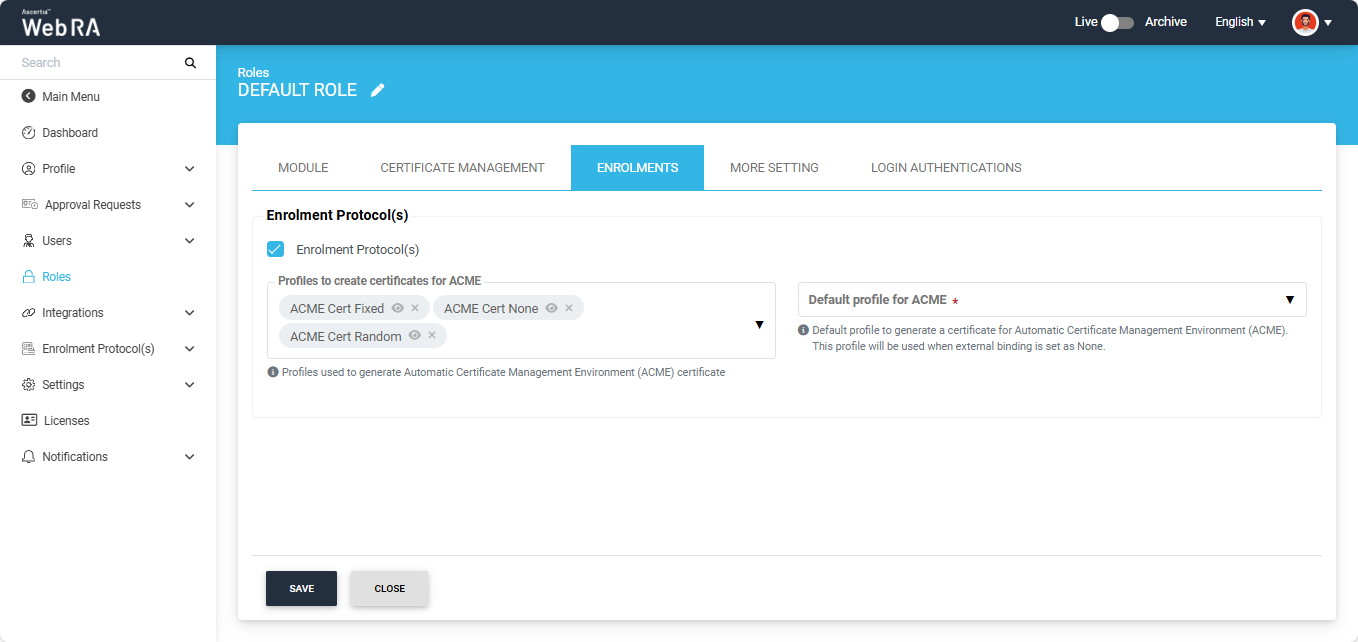
Here, enable the ‘Enrolment Protocol(s)’ checkbox and select ACME certification profile(s) from the ‘Profiles to create certificates for ACME’ dropdown.
After selecting the profile(s), choose the default profile for ACME and click ‘Save’.
After the ACME protocol has been configured through the Admin and Enterprise portals, the ACME Settings screen will appear as shown below.
From the user portal, expand Enrolment Protocol(s) > Settings > ACME.
This screen lists down the settings for the ACME protocol.
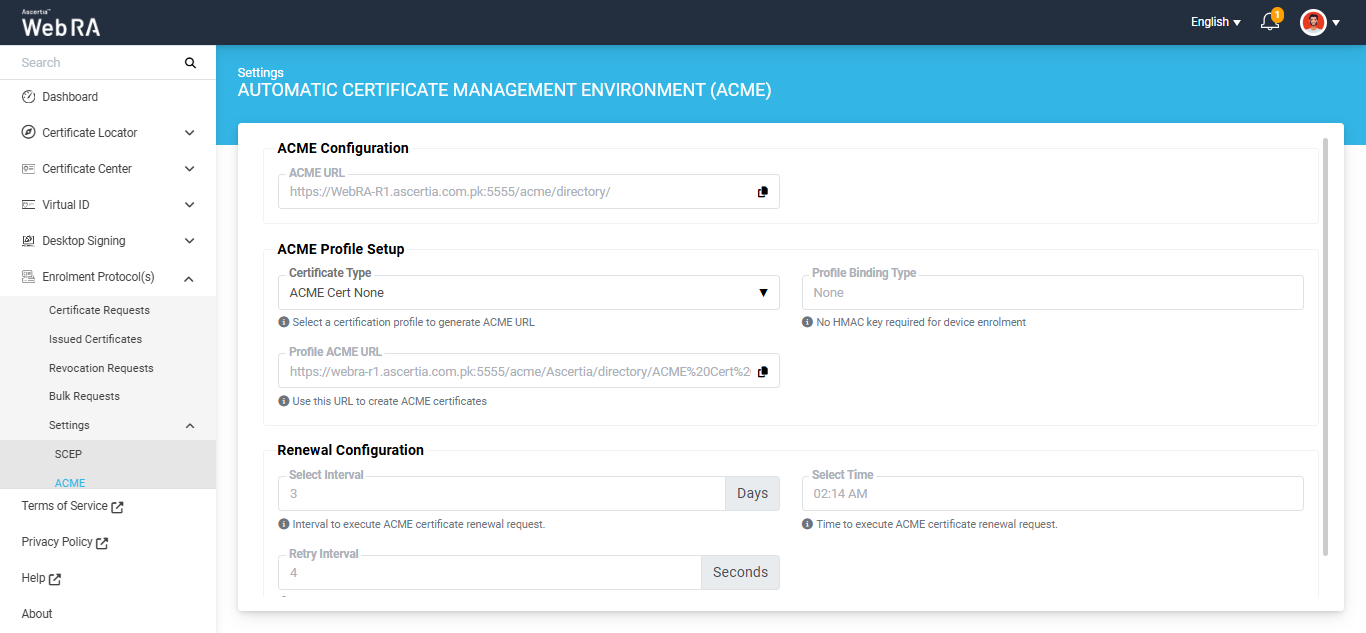
ACME Configuration
The ACME Configuration section will display the ACME URL in read-only mode (ACME URL is configured in the ADSS Web RA admin portal).
This ACME URL will be used to create Certificate Authority (CA) in Certify The Web ACME Client. You can copy this URL from this screen or from the Configurations > Enrolment Protocol(s) > ACME section in the Admin Portal.
Note: You can use the ACME URL (used to configure the ACME protocol in the Admin portal) to generate certificates for any binding type. Profile-specific ACME URLs can also be used for certificate generation, but each one works only for the binding type for which it was created.
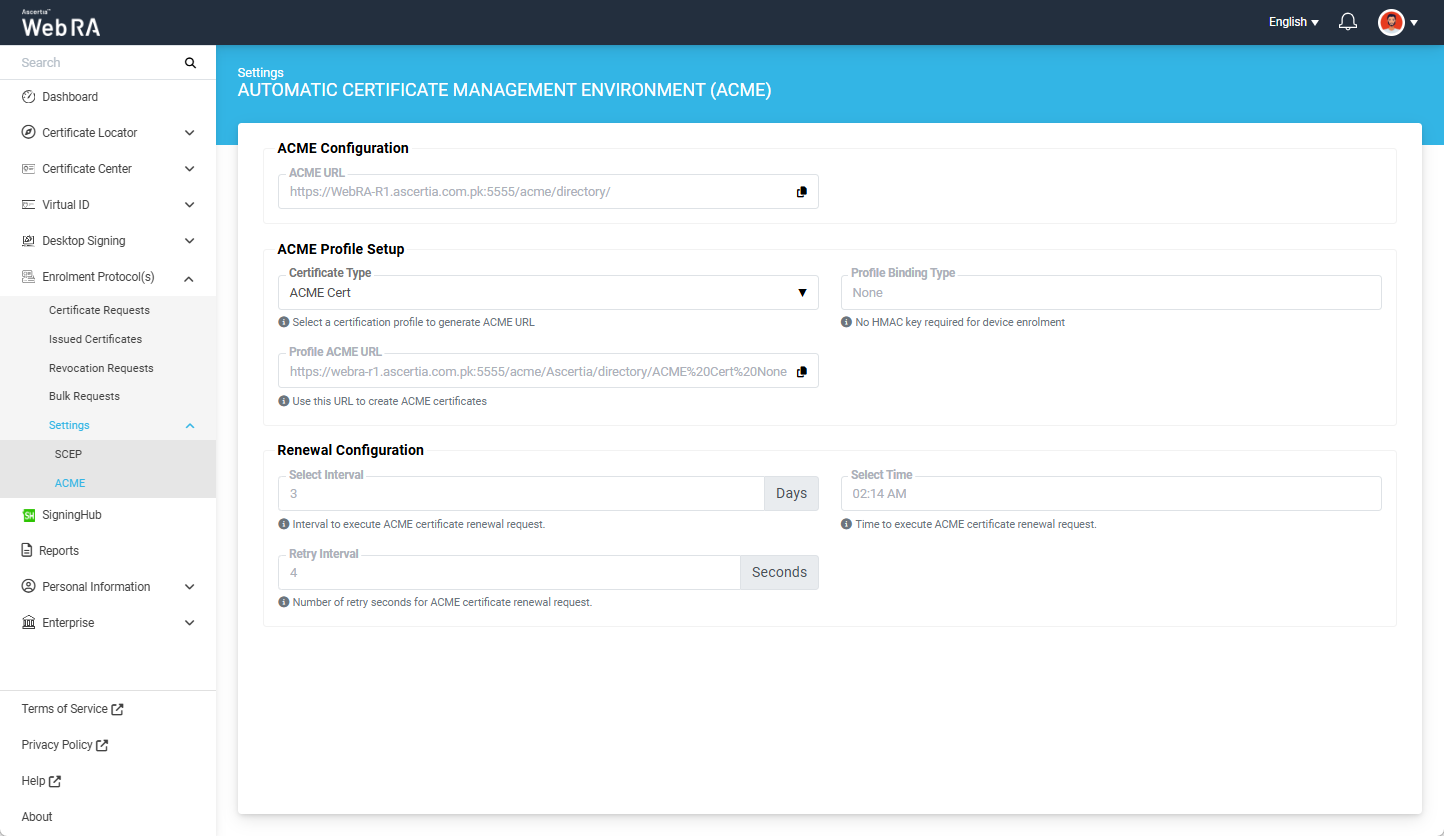
ACME Profile Setup
In this section, you can select the required certification profile to generate Profile ACME URLs for binding types: None, Fixed, and Random.
Select the certification profile from 'Certificate Type' dropdown. The remaining fields will appear based on the 'External Account Binding Type' configured in the certification profile.
The Profile ACME URL will appear in disabled (read-only) form and is used to create ACME certificates. Each binding type has a different URL.
- If the binding type is None, the word 'None' will appear at the end of the URL
- If the binding type is Fixed or Random, the respective word will appear at the end of the URL accordingly.
If you select a certification profile with the 'External Account Binding Type' set to 'None', the screen will display:
- Profile Binding Type as 'None' (in disabled form)
- The Profile ACME URL ending with the word 'None'.
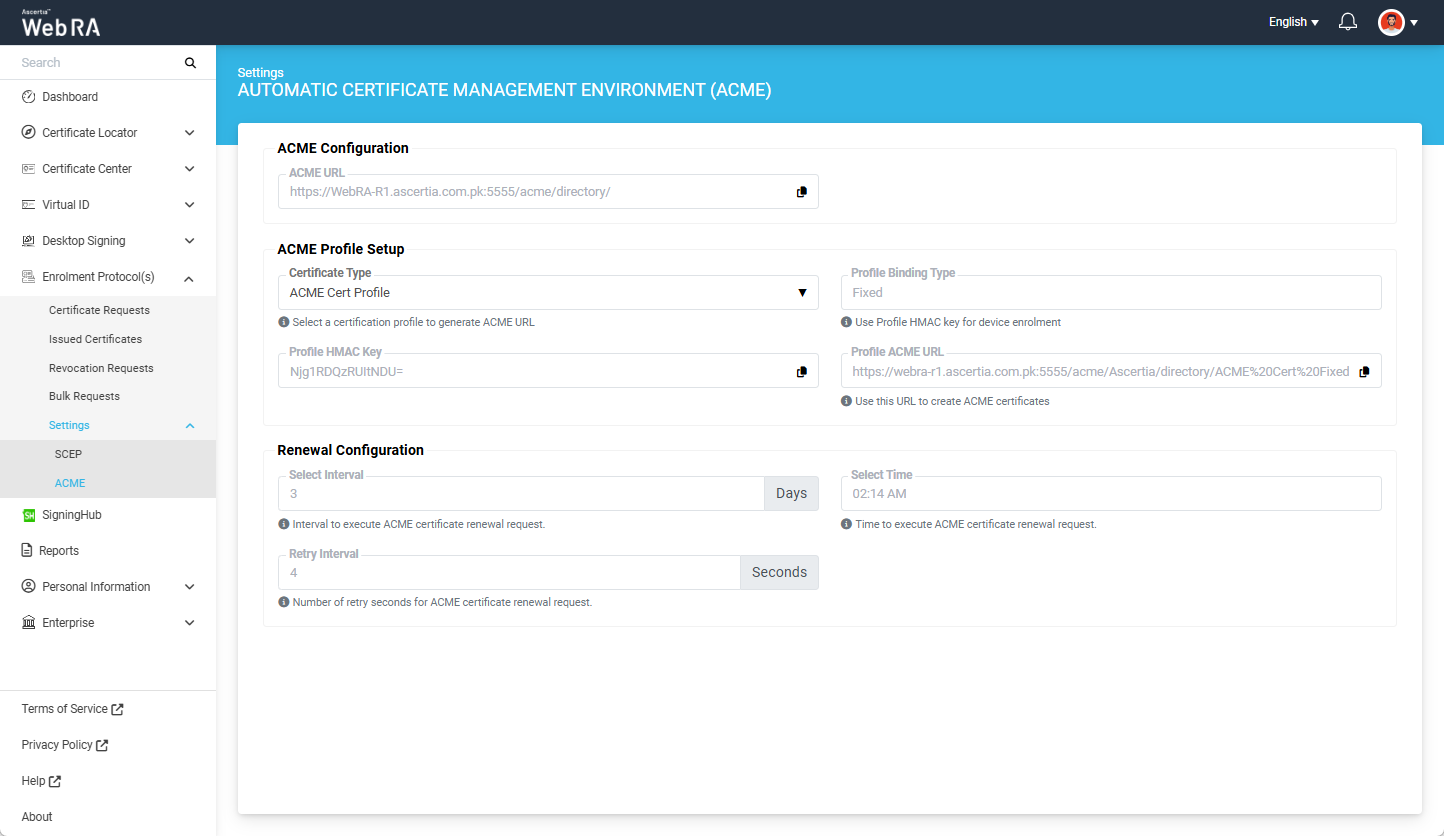
If you select a certification profile with the 'External Account Binding Type' set to 'Fixed':
- The 'Profile Binding Type' will appear as 'Fixed' (in disabled/read-only form)
- The Profile ACME URL will end with the word 'Fixed'.
- The system will also display the 'Profile HMAC Key' in a disabled (read-only) field, which can be copied by clicking the folder icon.
If you select a certification profile with the 'External Account Binding Type' set to 'Random':
- The 'Profile Binding Type' will appear as 'Random' (in disabled/read-only form)
- The Profile ACME URL will end with the word 'Random'.
The ‘Profile HMAC Key’ for the Random binding type is generated by system after creating a certificate request in the web portal. For Random type, the HMAC Key value is unique for each new certificate request.
Note: You can use the ACME URL (used to configure the ACME protocol in the Admin portal) to generate certificates for any binding type. Profile-specific ACME URLs can also be used for certificate generation, but each one works only for the binding type for which it was created.
1. Download the latest version of Certify The Web
Ensure that you are using the latest version of the ‘Certify The Web’ application. To obtain the most recent version, use the link provided below:
2. Configure the Host Name in IIS
Before issuing an ACME certificate, the required host name must be configured in IIS.
To do that, open the IIS Manager and right-click on the ‘Sites’ tab and select the ‘Add Website’ option.
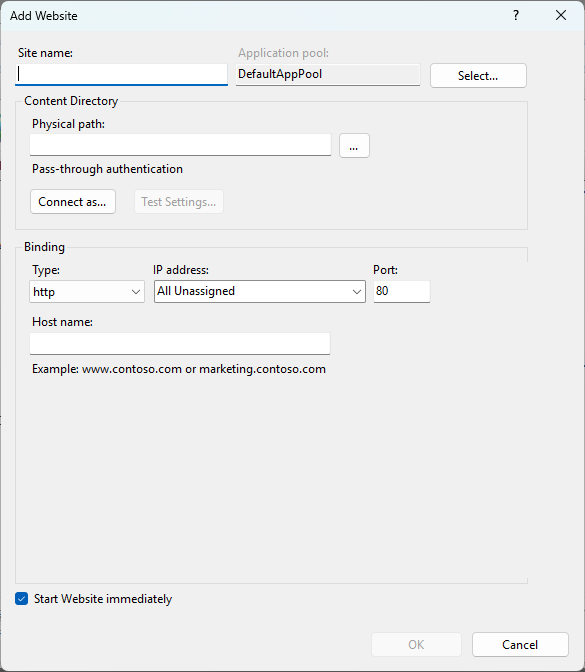
Here, specify the site name and host name in the respective fields. This host name is used by the ACME client during certificate validation and issuance.
Note:
The configured host name must be accessible on all machines involved in the certificate issuance process. This includes:
- The machine where the SSL certificate is going to be created
- The machine where the CA server is deployed
If the host name is not accessible on any of these machines, an entry must be added to the ‘hosts’ file on the relevant machine, mapping the host name to the appropriate IP address. This ensures that the host name can be accessed through a web browser from all required machines.
3. Place the web.config file in the HostName Directory
After confirming that the host name is accessible, place the below web.config file given below in the directory associated with the host name. The configuration is required to allow ACME validation to complete successfully during the certificate issuance.
<?xml version="1.0" encoding="utf-8"?>
<configuration>
<system.webServer>
<httpRedirect enabled="false" />
<validation validateIntegratedModeConfiguration="false" />
<staticContent>
<clear />
<mimeMap fileExtension="." mimeType="text/json" />
<mimeMap fileExtension=".*" mimeType="text/json" />
</staticContent>
</system.webServer>
<system.web>
<authorization>
<allow users="*" />
</authorization>
</system.web>
</configuration>
Install Certify The Web Application
Launch the ‘Certify The Web’ setup file downloaded from the official website.
The setup wizard will display the ‘License Agreement’ screen. Accept the agreement and click ‘Next’ to proceed.
Next, select the destination location where the Certify Certificate Manager will be installed. You can either enter the destination path manually or select it by clicking ‘Browse’.
After selecting the destination location, click ‘Next’ to proceed.
On the next screen, select the Start Menu folder or continue with the default folder selected by the setup. Click ‘Next’ to proceed.
The setup will then begin the installation. A progress bar will appear, displaying the status of the installation.
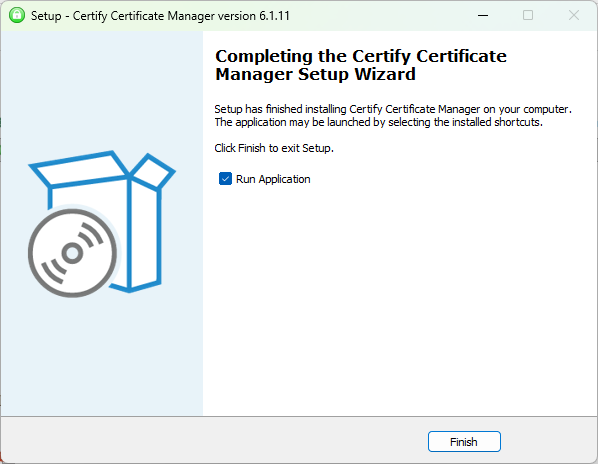
Once the installation is complete, the final screen will appear. Click ‘Finish’ to exit the setup wizard.
Add a Certificate Authority (CA)
Open the ‘Certify The Web’ application. The application dashboard will appear.
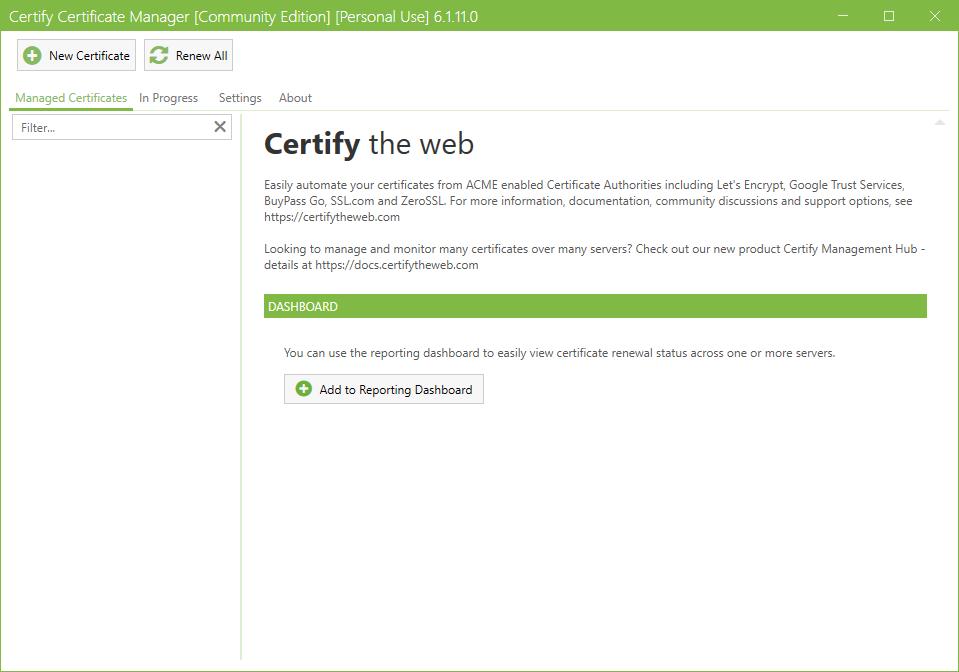
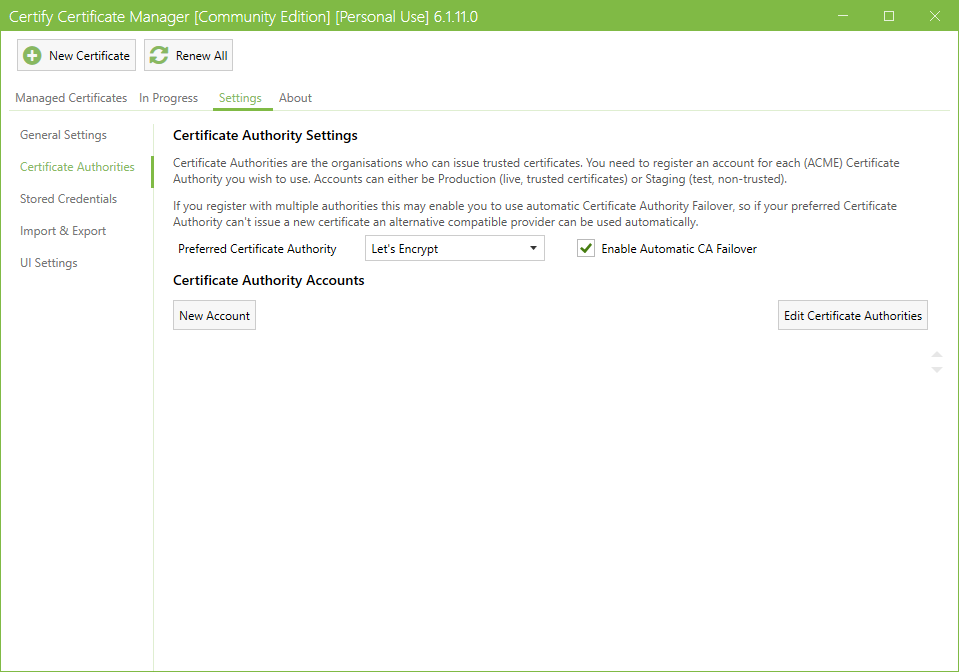
Click the ‘Settings’ tab located at the top of the screen, below the header.

From the left-hand menu, navigate to the ‘Certificate Authorities’ section.
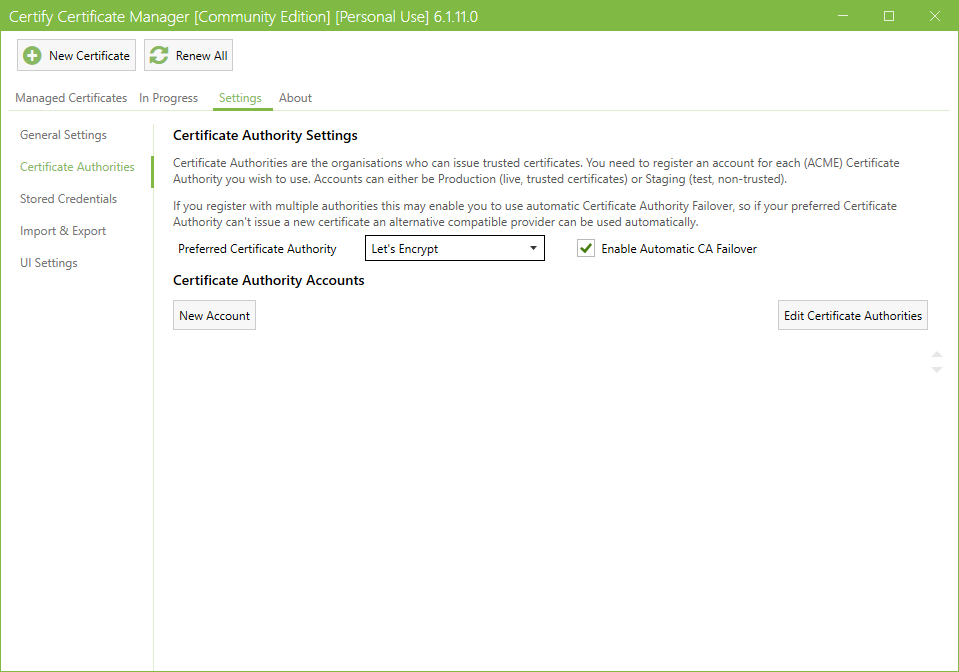
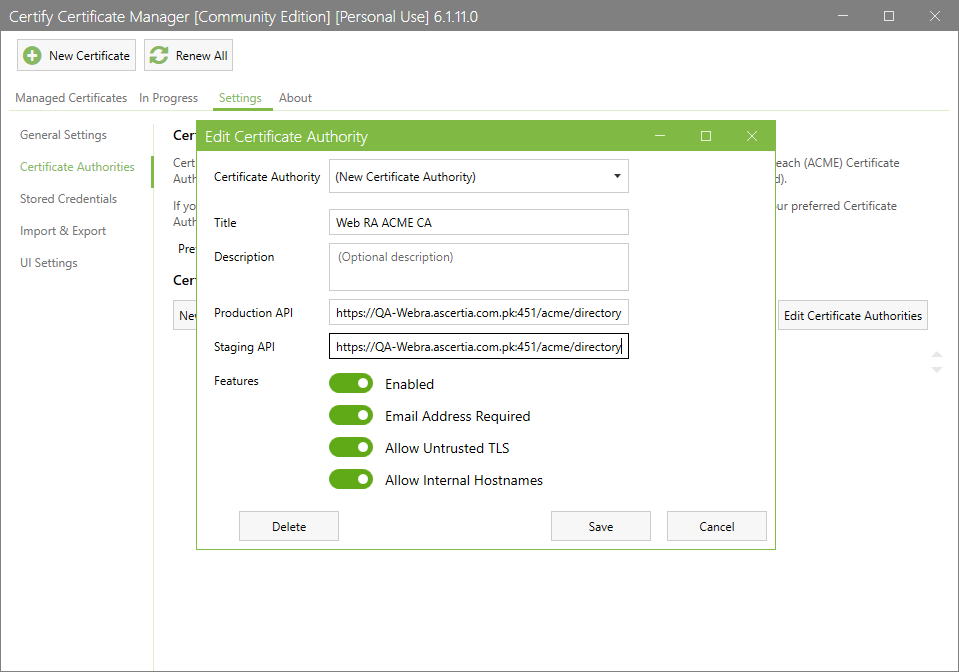
To add a new Certificate Authority, click ‘Edit Certificate Authorities’ button. This will open the ‘Edit Certificate Authority’ dialog.
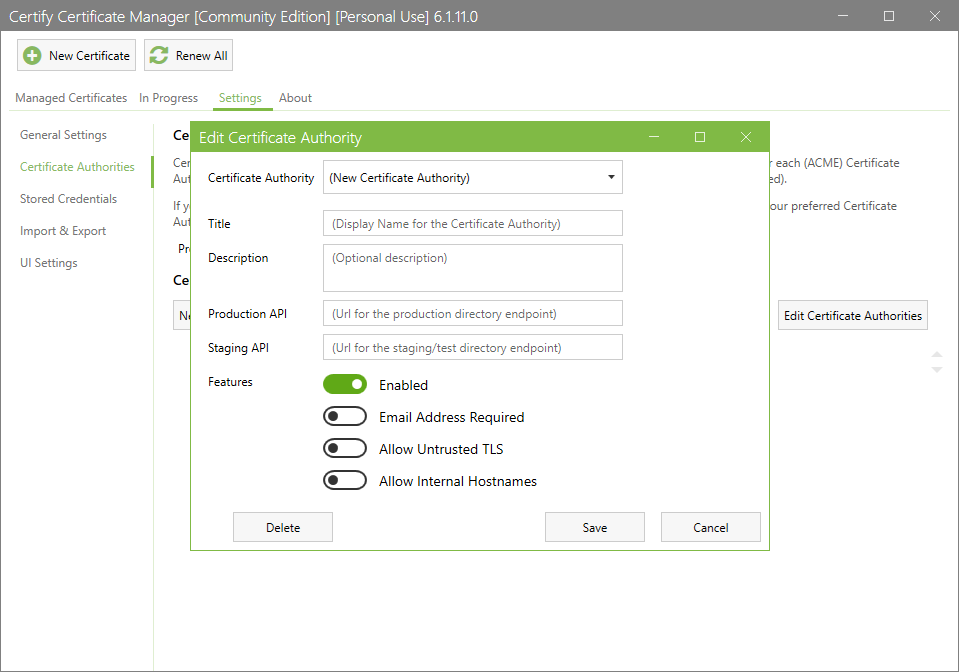
Enter the Web RA ACME CA server details required to create the SSL certificate, and enable the applicable checkboxes as required.
Note: You can get the production and staging API URLs from the Web RA application. Navigate to Configurations > Enrolments Protocol(s) > ACME section in the Web RA Admin portal.

After entering the required details, click ‘Save’. The new Certificate Authority (CA) will be added in the ACME client.
Add a Certificate Authority Account
After adding the certificate authority, you must add a new account.
To do this, click the ‘New Account’ tab in the ‘Certificate Authority Settings’ section.
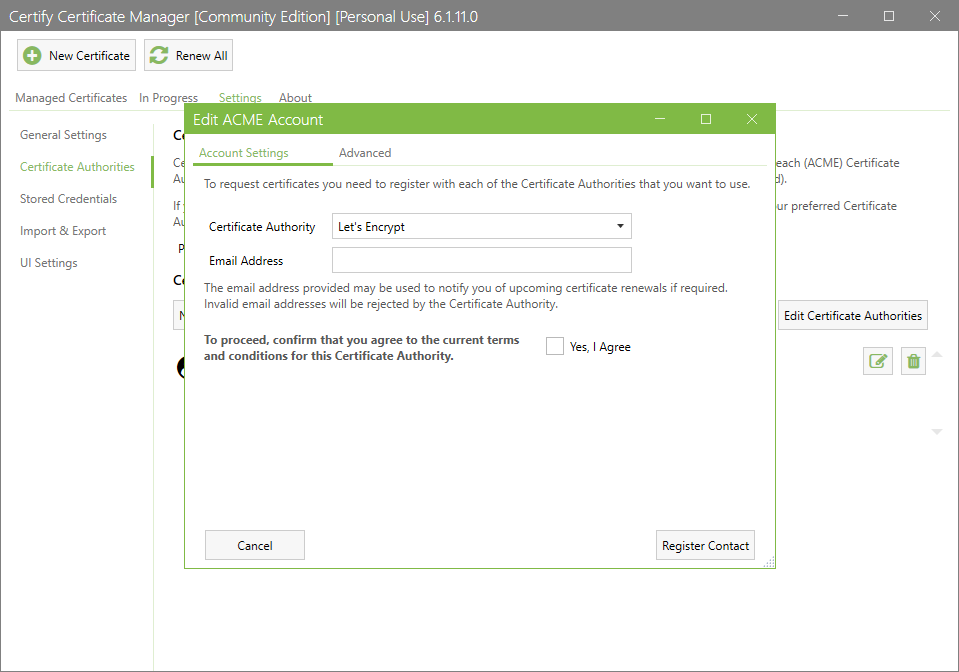
The application will display the ‘Edit ACME Account’ dialog.
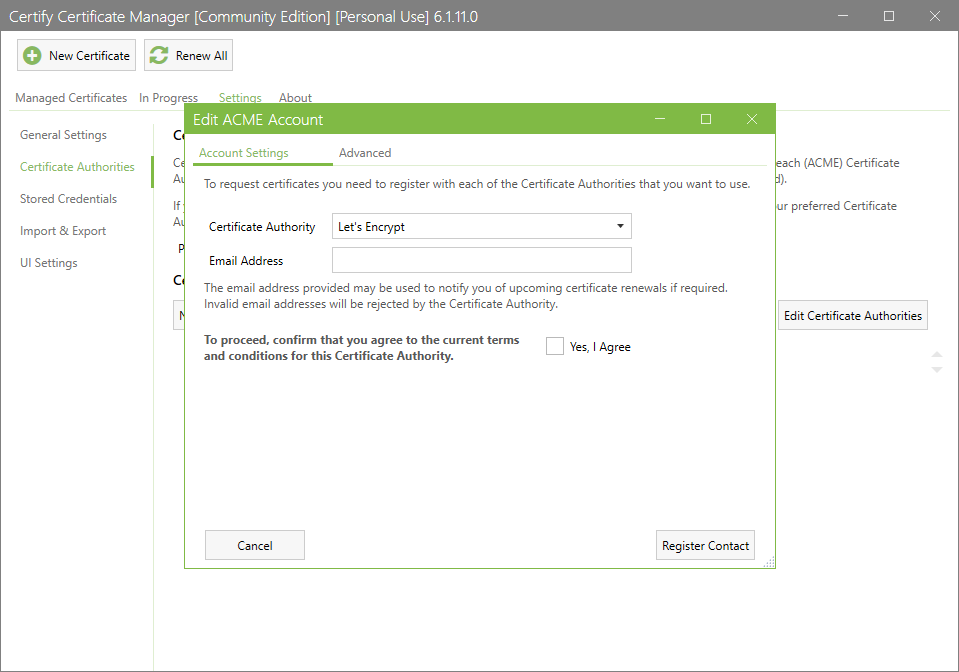
First, select the certificate authority you created from the ‘Certification Authority’ dropdown.
Enter an email address to associate with the account. This email address is used to receive notifications about upcoming certificate renewals.
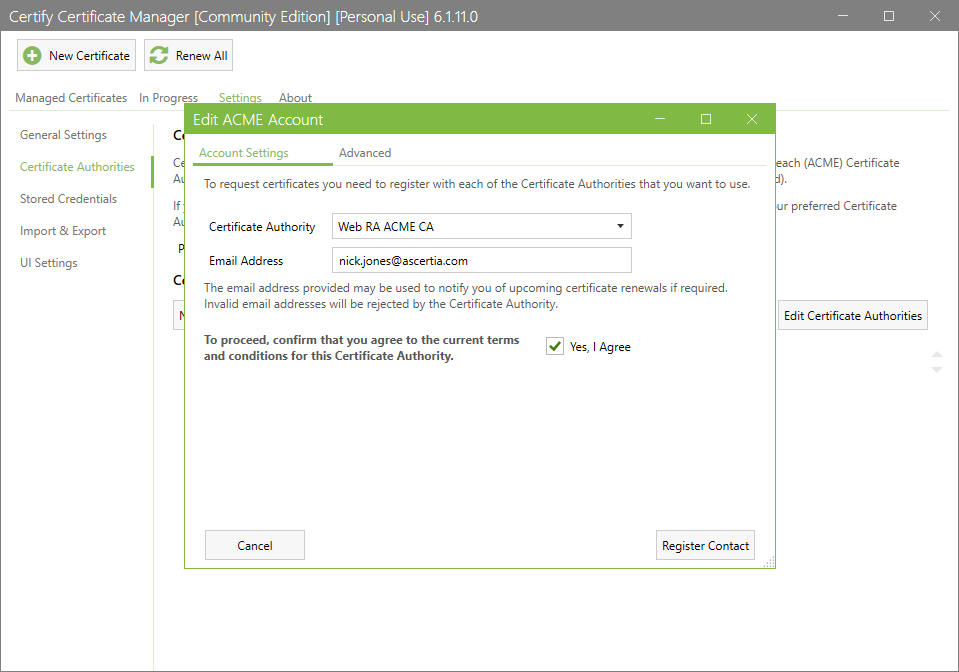
Ensure that the ‘Yes, I Agree’ checkbox is selected. If the checkbox is disabled, the ACME Client will not register the account.
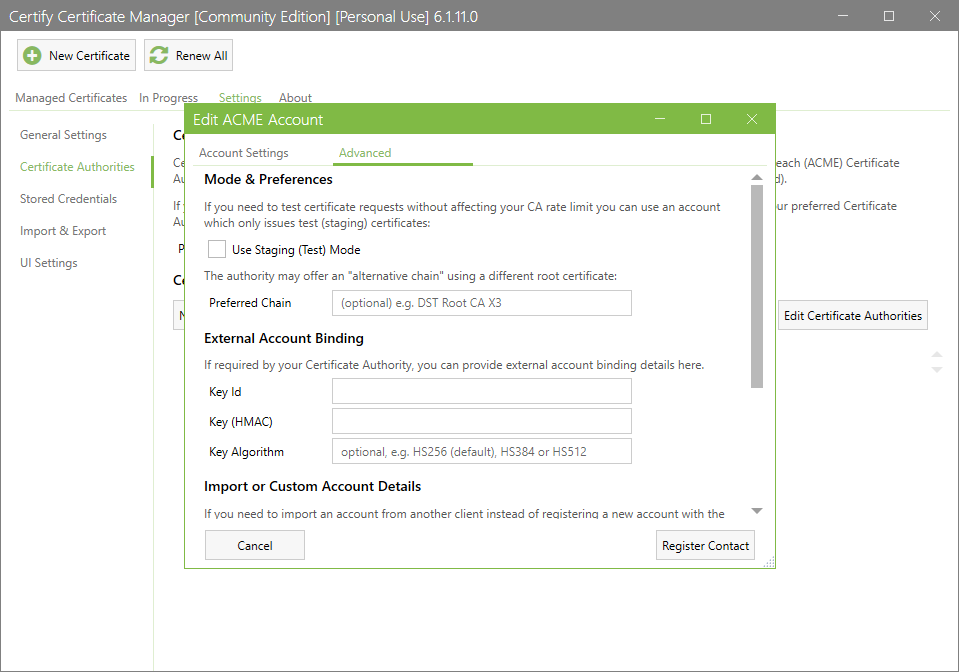
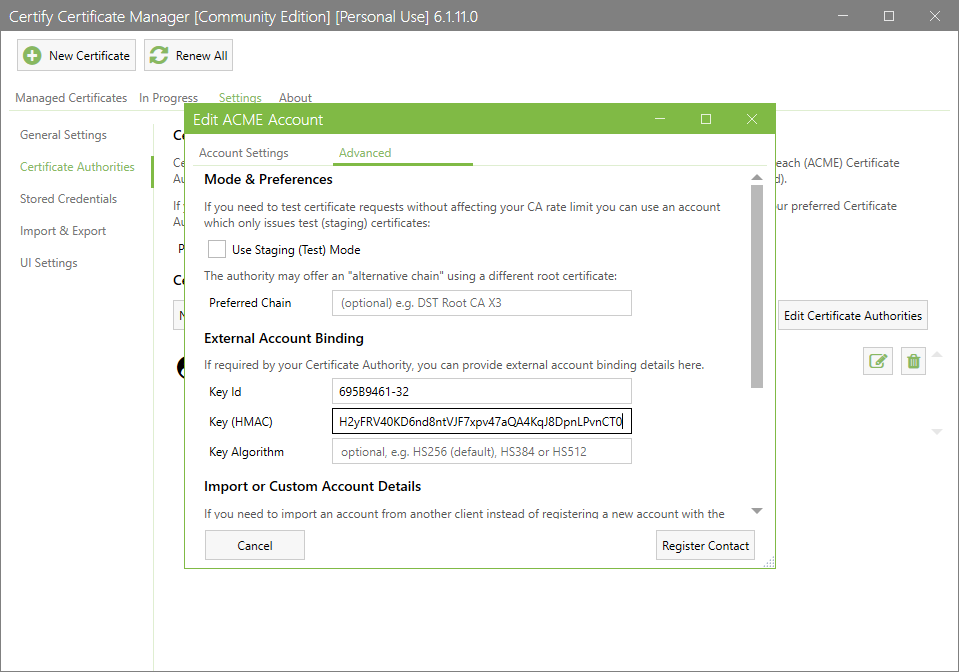
After selecting the certificate authority, navigate to the ‘Advanced’ tab. In this tab, enter the ‘External Account Binding’ details, that is, Key Id and Key (HMAC).
Note:
- External Account binding details are required only if the ‘Fixed’ or ‘Random’ binding type is selected in the Web RA certification profile. The Key Id and Key (HMAC) are not required when the binding type is set to ‘None’.
- To obtain the Key Id, you must first create a certificate request from the Web RA user portal for the certificate type that has external account binding (EAB) configured to ‘Fixed’ or ‘Random’.
- The Key Id is the ’Request No’ of the certificate request created in the user portal.
- For the ‘Fixed’ binding type, the Key (HMAC) value can be obtained by navigating to Enrolment Protocol(s) > Settings > ACME section in the user portal. There, you have to first select the required certificate type and copy the Key (HMA) value.
- For the ‘Random’ binding type, the Key (HMAC) is generated automatically when the certificate request is created.
The certificate generation process for each binding type is explained in the sections below.
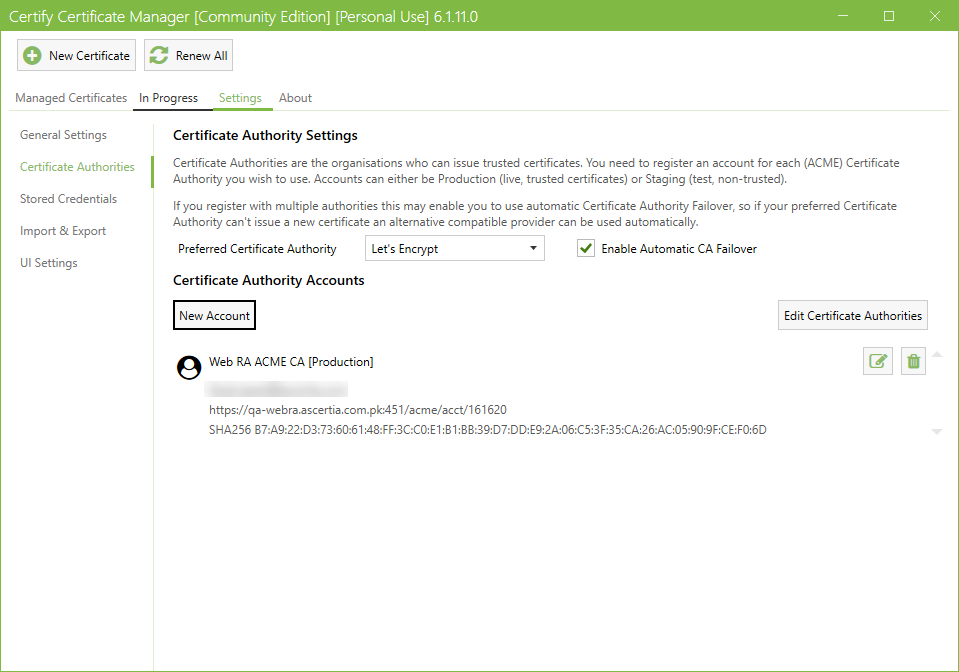
After entering the required details, click ‘Register Contact’. The newly added account will appear under the ‘Certificate Authority Accounts’ section.
You can now use this certificate authority account to create new certificates.
Issue a Certificate with External Account Binding Type: None
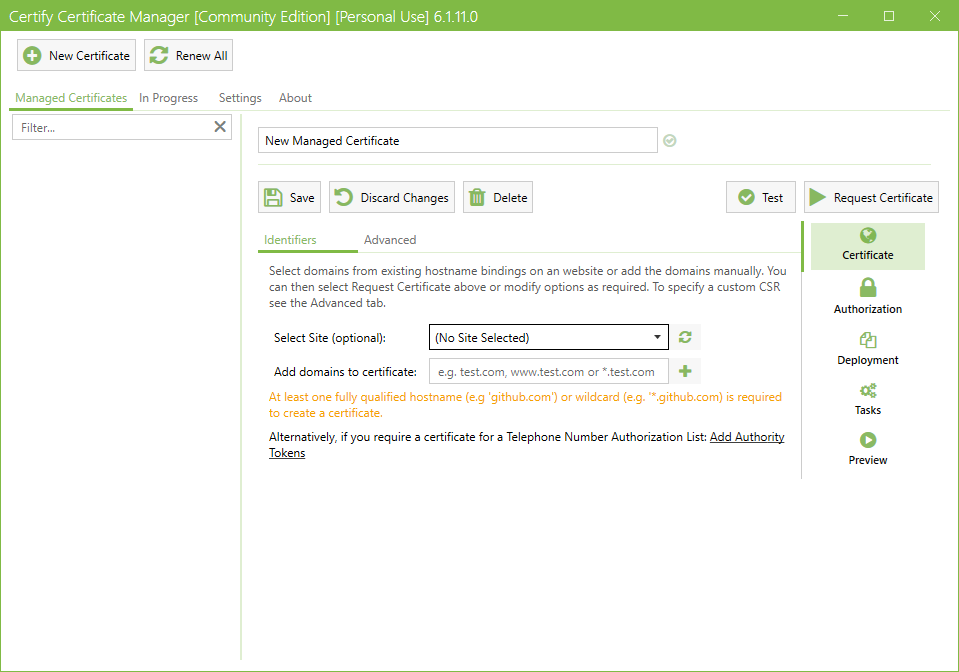
To generate a new certificate, click the ‘New Certificate’ button at the top of the application.

Next, select the site (host name) that you configured in IIS against which you want to issue the certificate.
Click the ‘Select site’ dropdown and choose the required host name from the list. Once the site is selected, the domain name information in displayed on the screen.
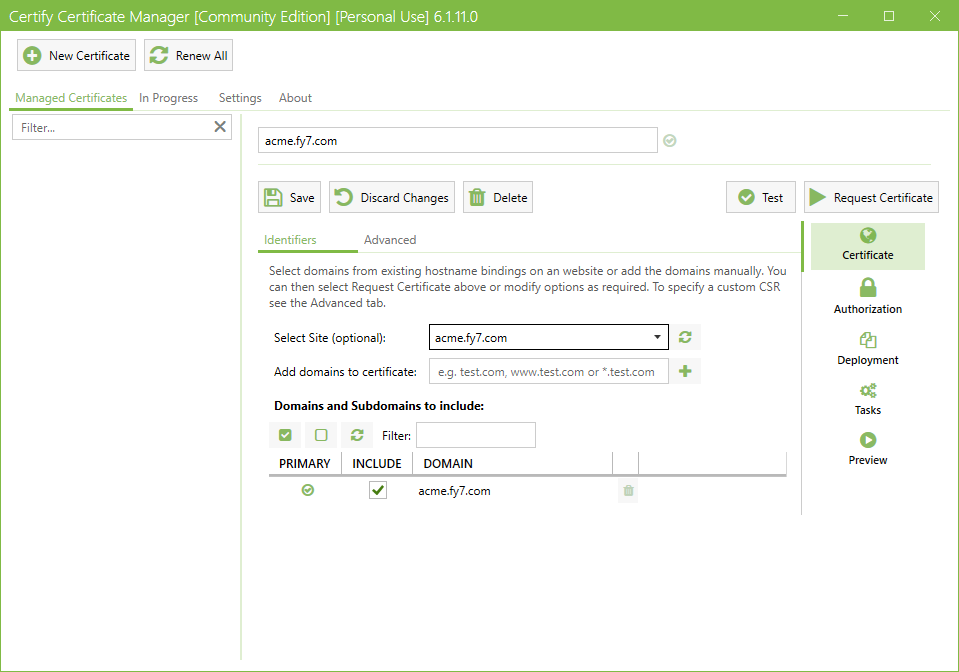
Note: In this document, we are using the ‘acme.fy7.com’ as a reference. You must select the host name you configured in the Pre-requisites step.
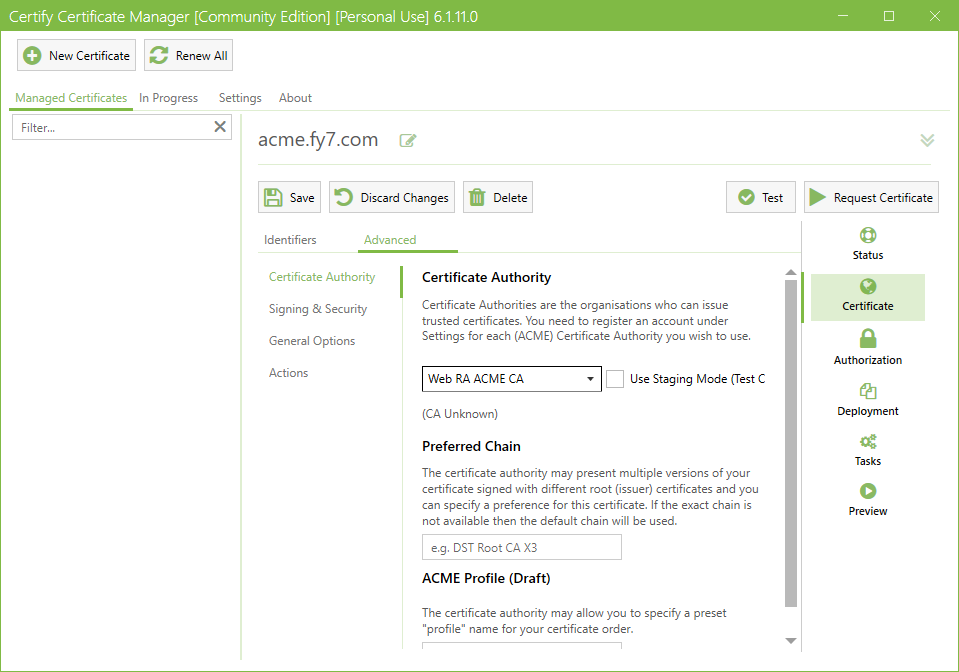
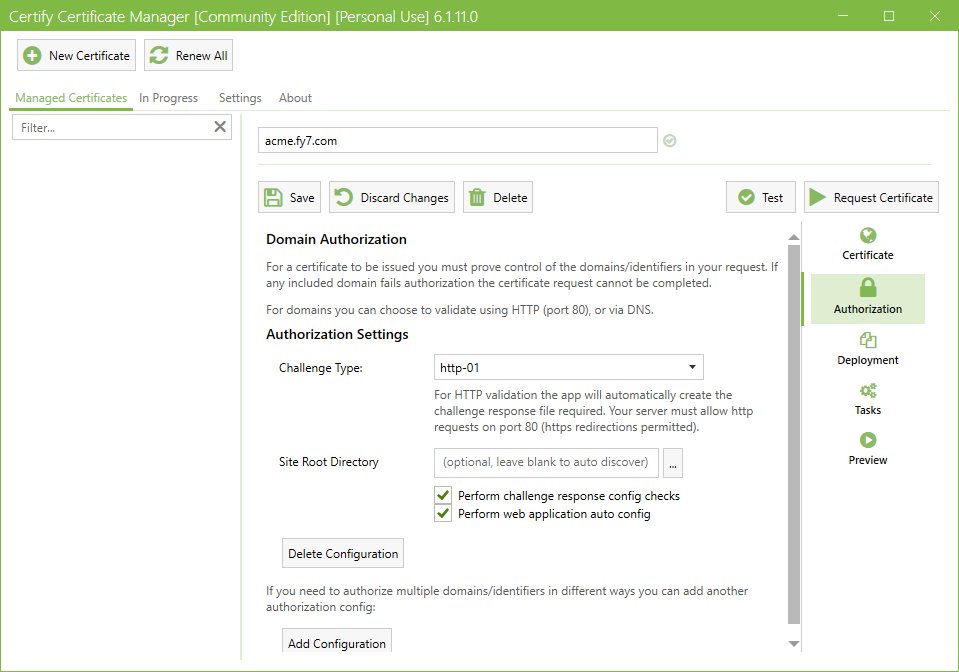
Navigate to the ‘Advanced’ tab and select the ‘Certificate Authority’ you configured for issuing the SSL certificate.
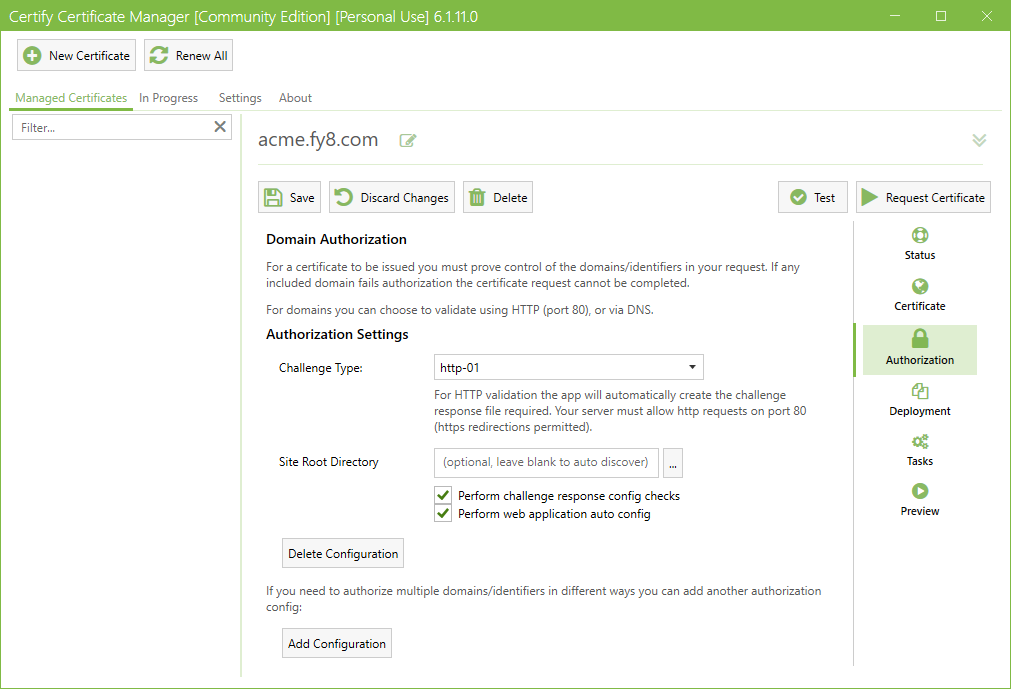
Next, go to the ‘Authorization’ section and select the challenge type ‘http-01’.
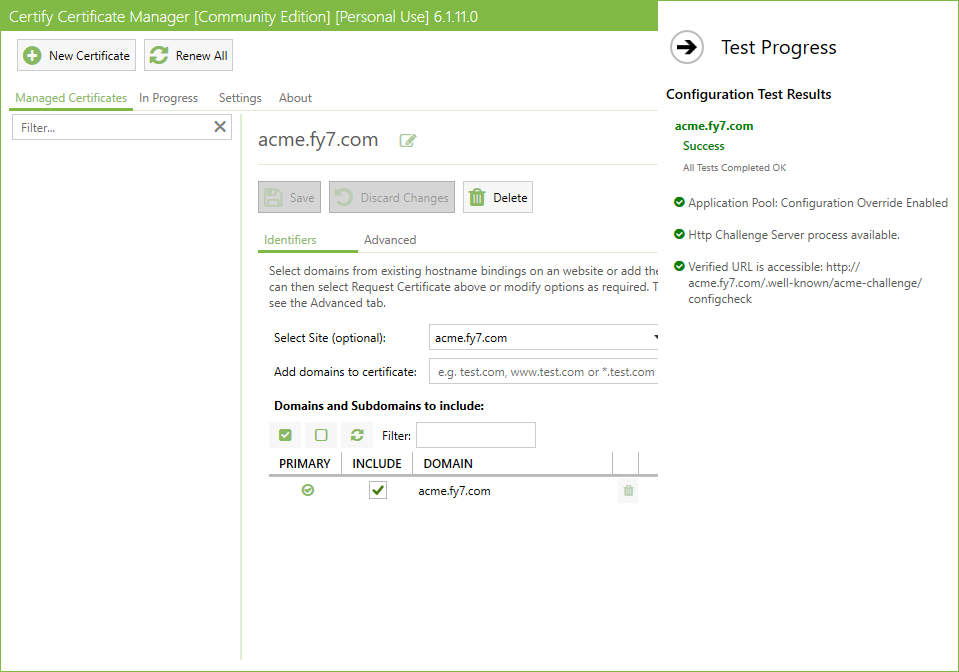
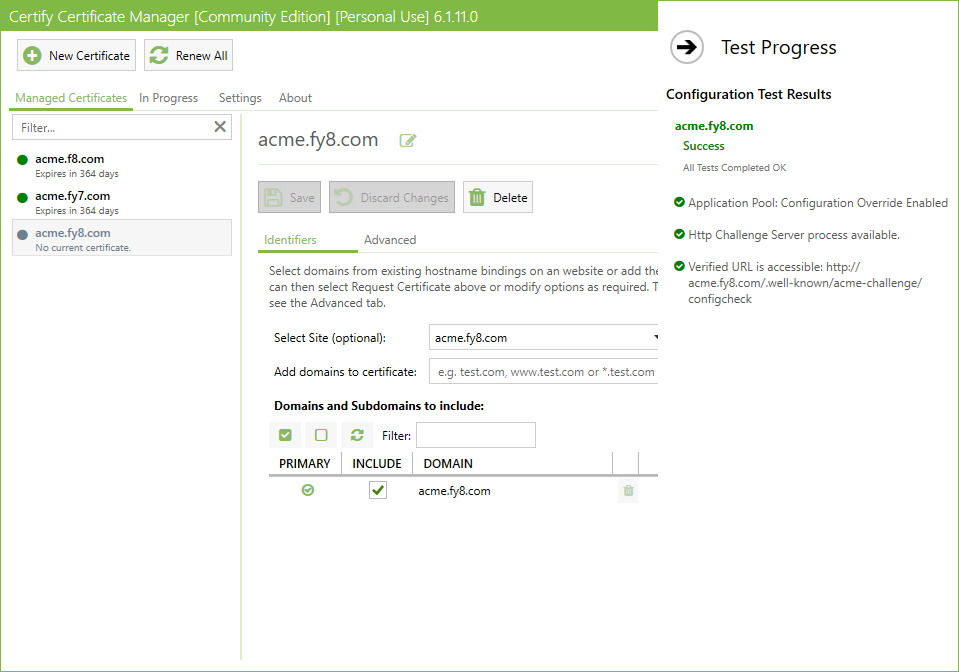
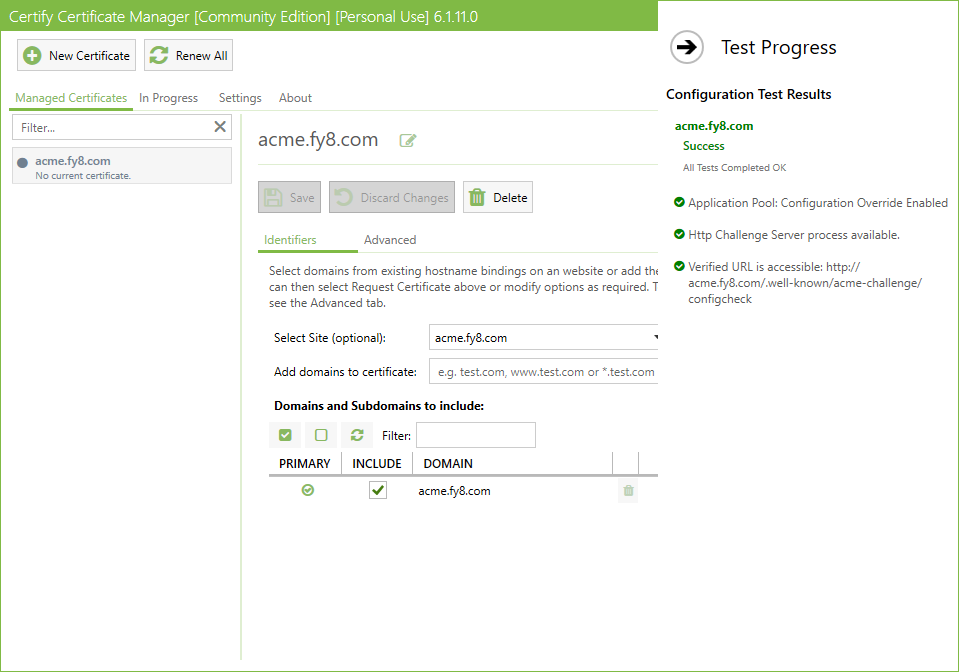
After making all the required selections, click the ‘Test’ button to verify that all configurations are working correctly.
Note: Performing the ‘Test’ step before requesting a certificate is optional; however, it is recommended to ensure that all configured settings are correct.
If the configuration test is successful, the Configuration Test Results will return a ‘Success’ status.
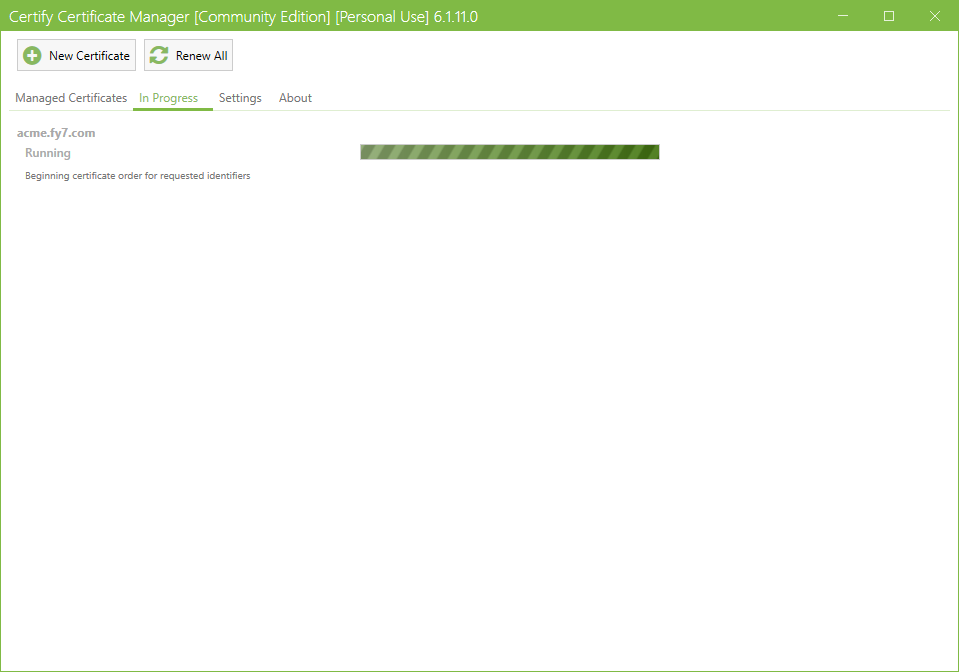
Now, click the ‘Request Certificate’ button to issue the certificate.
The ‘In Progress’ screen will appear, showing the ACME Client progress during the certificate request.
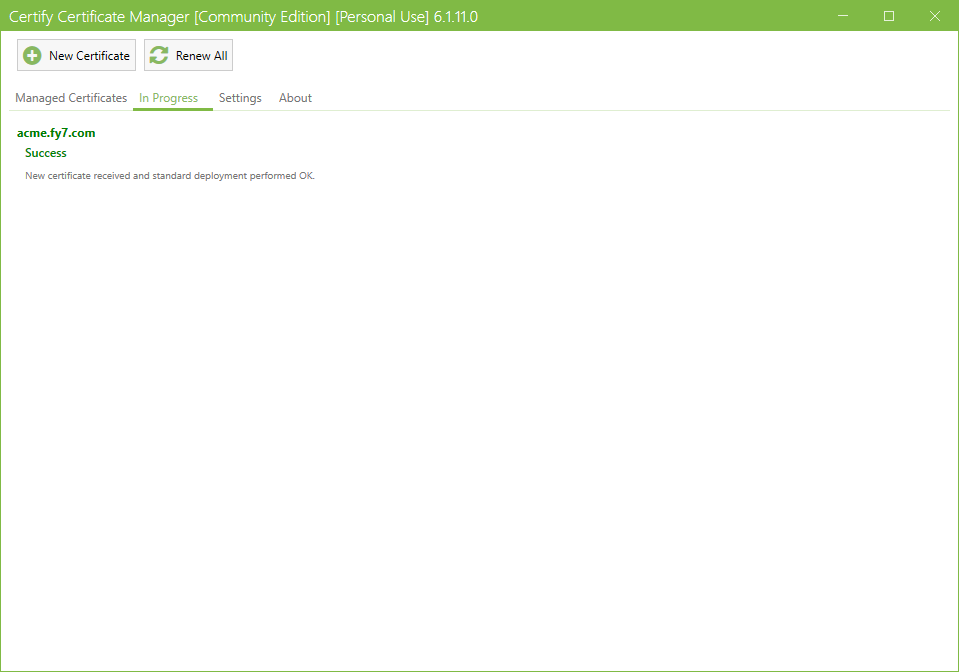
Once the request is complete, a ‘Success’ output will appear, and ACME Client will display the message: ‘New certificate received and standard deployment performed OK’.
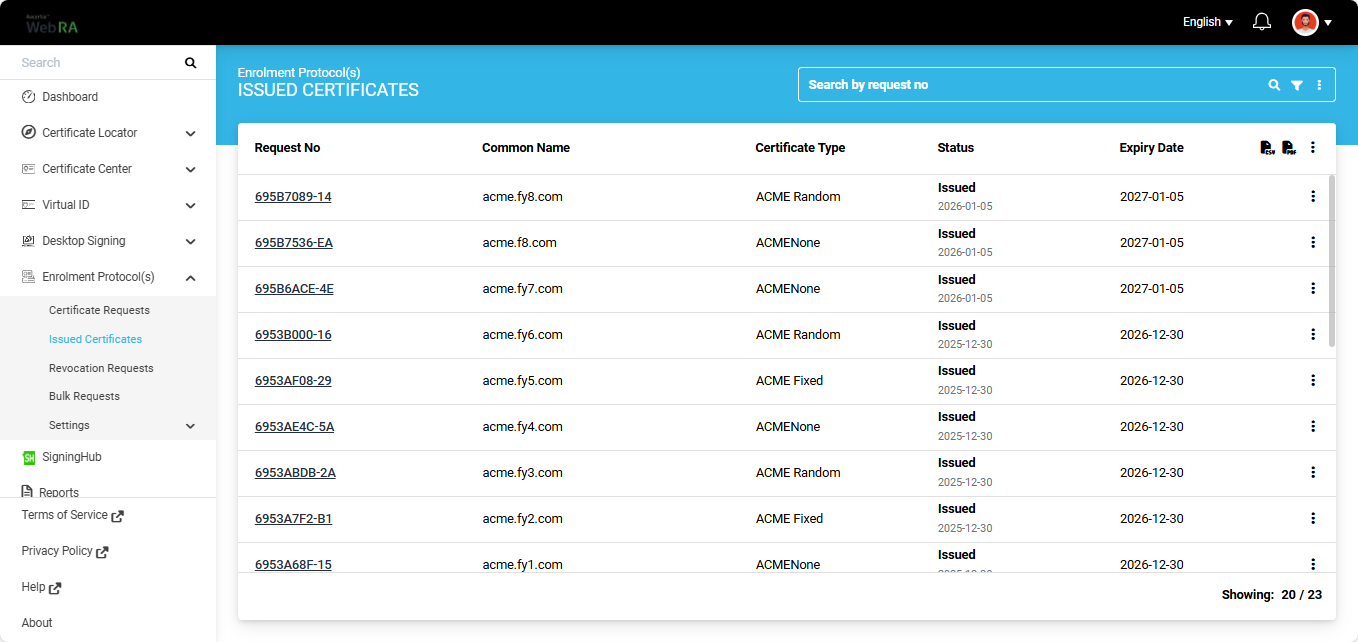
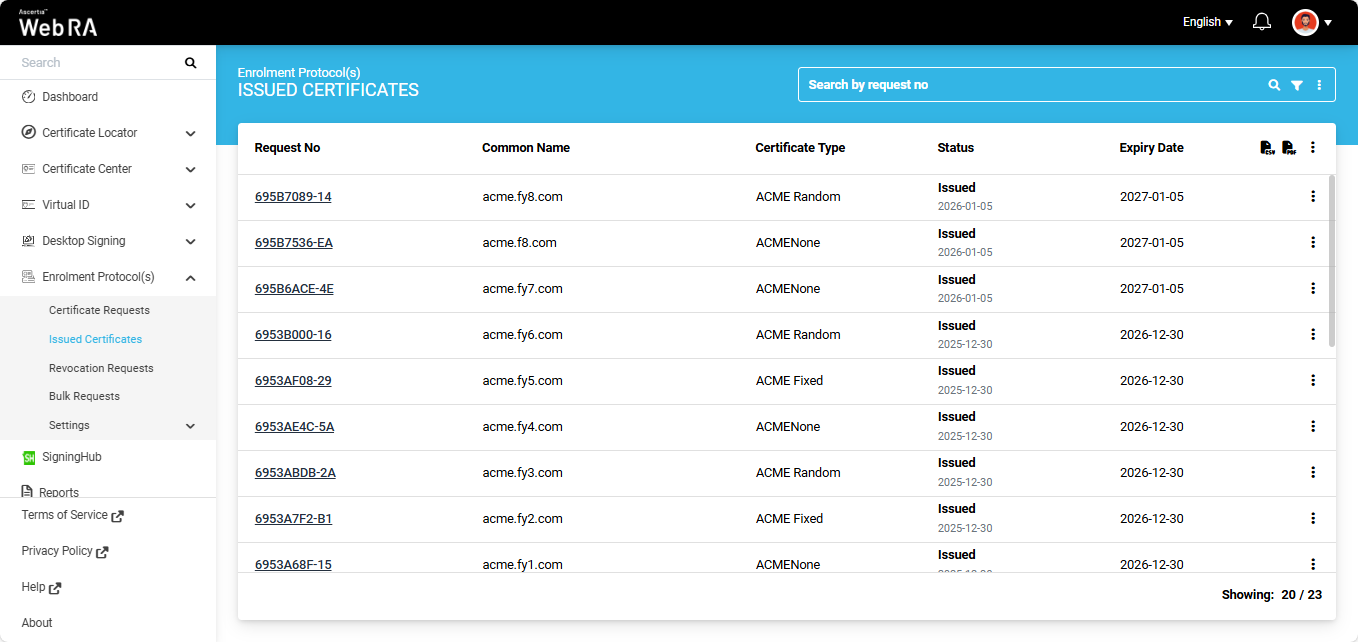
The newly issued certificate will appear at the top of the ‘Issued Certificate’ listing in the Web RA user portal.
To view certificate details, navigate to Enrolment Protocol(s) > Issued Certificates in the user portal. Click on the ‘Request No’ to view the details of the certificate.

Issue a Certificate with External Account Binding Type: Random
For the ‘Random’ binding type, you must first create a certificate request from the Web RA user portal.
Expand Enrolment Protocol(s) > Certificate Requests from the user portal.
Create a certificate request for the certificate type that has the external account binding (EAB) configured to ‘Random’.
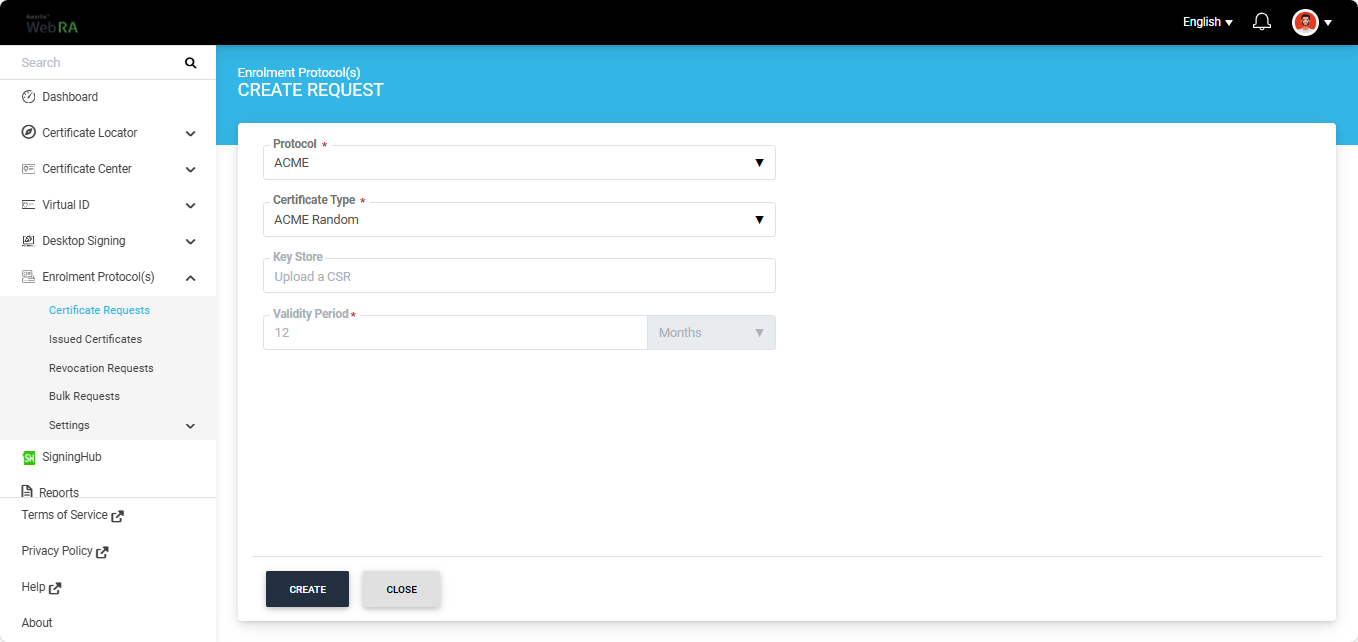
Then, on the ‘Device Information’ screen, enter your DNS name in the ‘Device ID’ field and generate the certificate request.

Once the certificate request is generated, the system will display the ‘Key Id’ and ‘Key (HMAC)’ values.
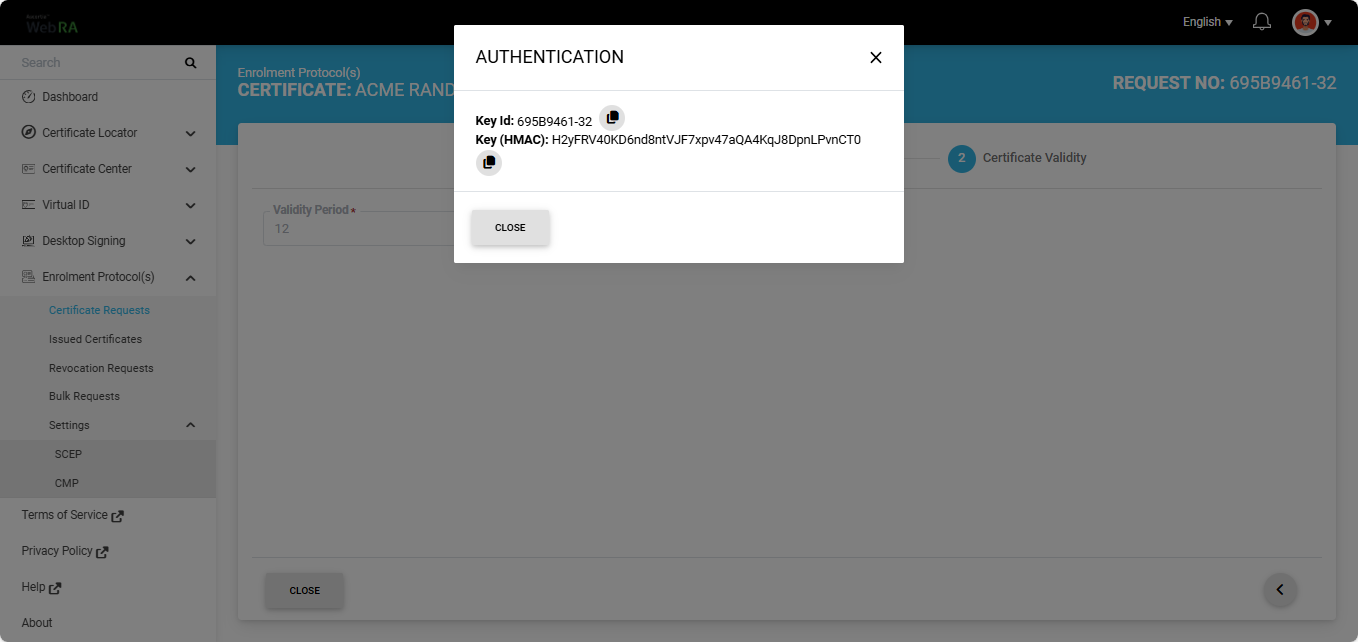
Copy the Key Id and Key (HMAC) values, as they are required to create the certificate authority account for the ‘Random’ binding type.
Create Certificate Authority Account for Random Binding Type
Navigate to Settings > Certificate Authorities section in the ACME Client and click ‘New Account’.
Select the certificate authority you created from the ‘Certificate Authority’ dropdown and navigate to the ‘Advanced’ tab.
Here, provide the ‘External Account Binding’ details that you copied after creating the certificate request. Once the details are entered, click ‘Register Contact’.
Issue the Certificate
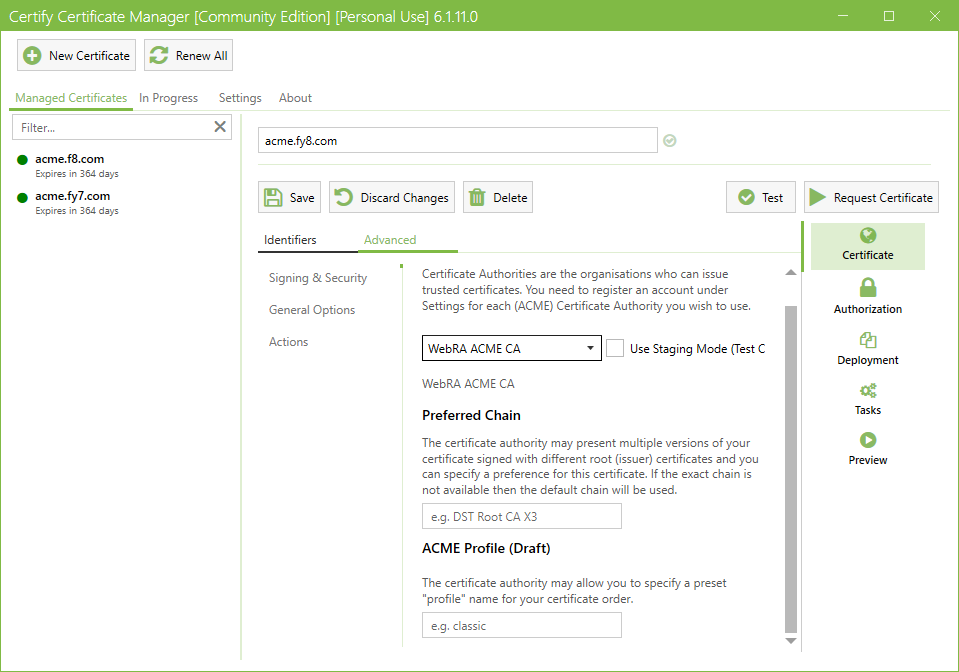
After creating the certificate request and certificate authority account, open the ACME Client and click the ‘New Certificate’ button at the top of the screen.
Select the site (host name) that you configured in IIS against which you want to issue the certificate.
Click the ‘Select site’ dropdown and choose the required host name from the list. Once the site is selected, the domain name information will appear on the screen.
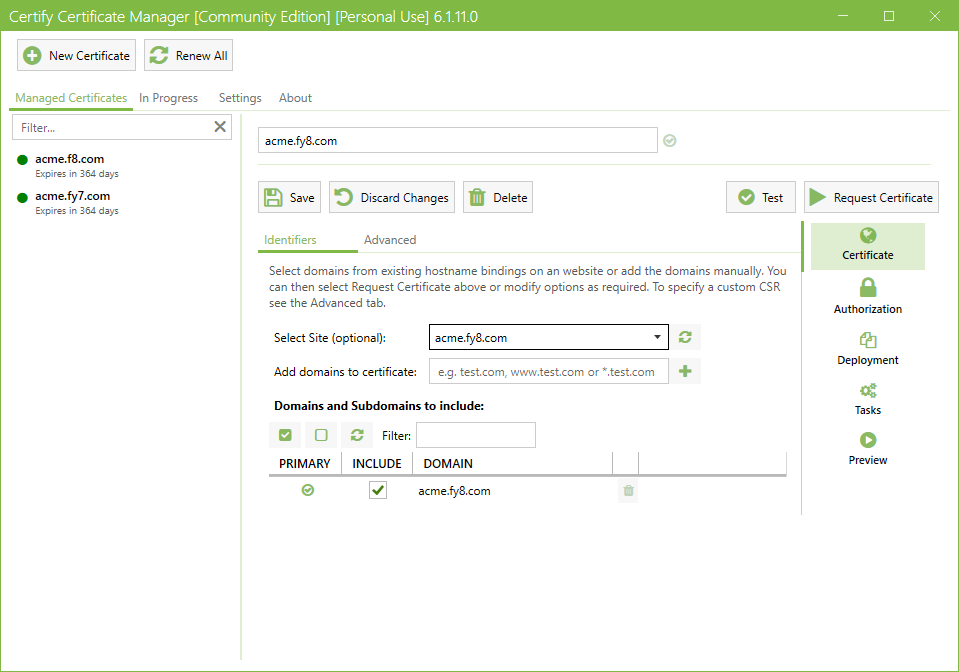
Note: In this example, ‘acme.fy8.com’ is used as a reference. You must select the host name you configured in the Pre-requisites step.
Navigate to the ‘Advanced’ tab and select the ‘Certificate Authority’ you configured for issuing the SSL certificate.

Next, go to the ‘Authorization’ section and select the challenge type as ‘http-01’.

After completing all required selections, click the ‘Test’ button to verify that all configurations are working correctly.
Note: Performing the ‘Test’ step before requesting a certificate is optional; however, it is recommended to ensure all configured settings are correct.
If the configuration test is successful, the Configuration Test Results will display a ‘Success’.
Now, click ‘Request Certificate’ to issue the certificate.
The ‘In Progress’ screen will appear, showing the ACME Client progress during the certificate request.

Once the request is complete, a ‘Success’ output will appear, and the ACME Client will display the message ‘New certificate received and standard deployment performed OK’.

The newly issued certificate will appear at the top of the ‘Issued Certificate’ listing in the Web RA user portal.
To view the certificate details, navigate to Enrolment Protocol(s) > Issued Certificates in the user portal and click the ‘Request No’ to view the certificate.
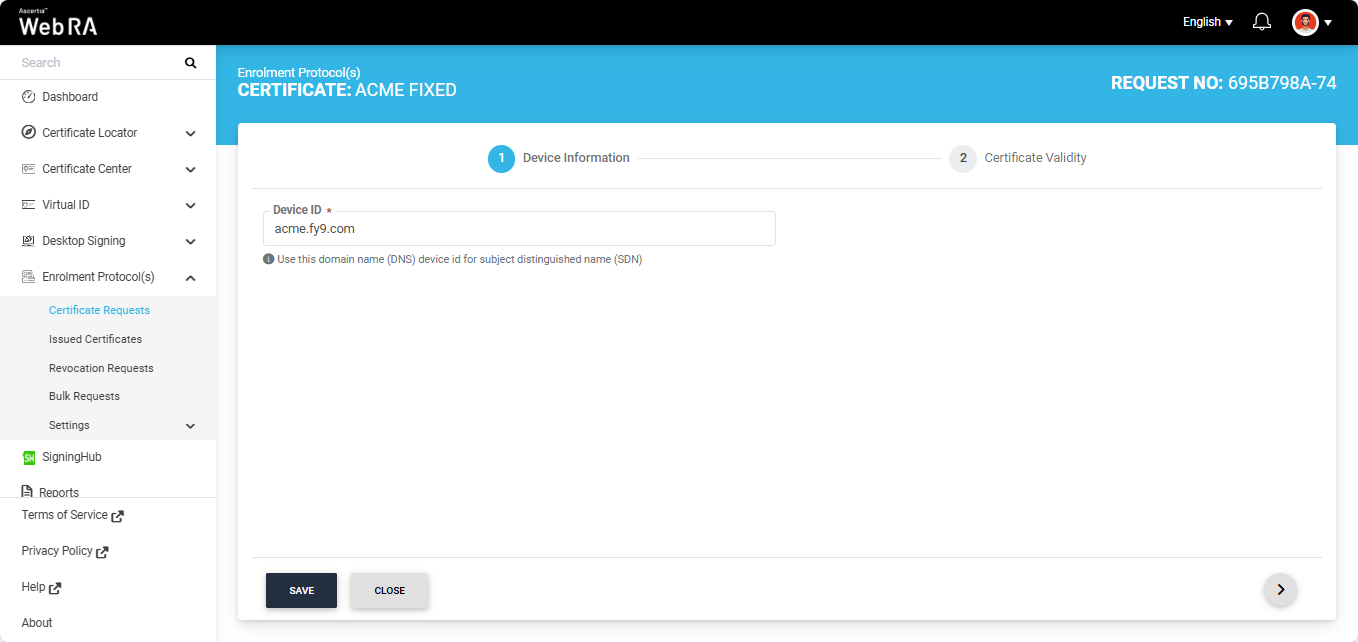
Issue a Certificate with External Account Binding Type: Fixed
For the ‘Fixed’ binding type, you must first create a certificate request from the Web RA user portal.
Expand Enrolment Protocol(s) > Certificate Requests from the user portal.
Create a certificate request for the certificate type that has the external account binding (EAB) configured to ‘Fixed’.

Then, on the ‘Device Information’ screen, enter your DNS name in the ‘Device ID’ field and generate the certificate request.
After creating the certificate request, go to the ACME Settings section by clicking the ‘Settings’ tab under “Enrolment Protocols” dropdown in the user portal. (Enrolment Protocol(s) > Settings > ACME).
Here, click on the ‘Certificate Type’ dropdown and select the certification profile that has the external account binding (EAB) configured to “Fixed”.

Copy the Profile HMAC Key, as it is required to create the certificate authority account for Fixed binding type.
Create Certificate Authority Account for Fixed Binding Type
Navigate to Settings > Certificate Authorities section in the ACME Client and click ‘New Account’.

Select the certificate authority you created from the ‘Certificate Authority’ dropdown and navigate to the ‘Advanced’ tab.
Here, provide the ‘External Account Binding’ details (Key Id and Key (HMAC)) that you copied.
Note: The Key ID is the ‘Request No’ of the certificate request created from the user portal.
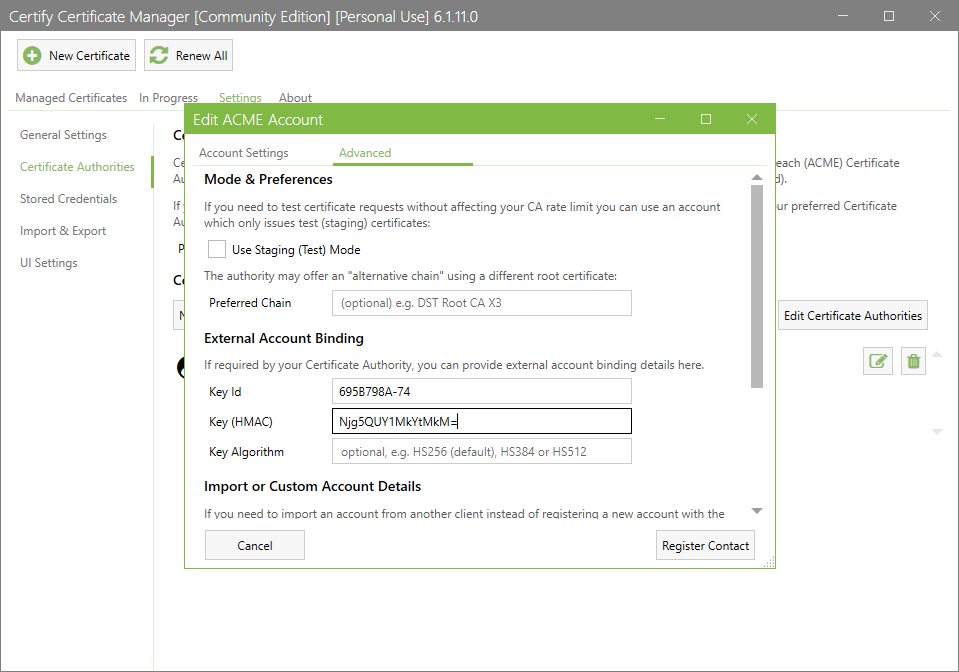
Once the details are entered, click ‘Register Contact’.
Issue the Certificate
After creating the certificate request and certificate authority account, open the ACME Client and click the ‘New Certificate’ button at the top of the screen.

Select the site (host name) that you configured in IIS against which you want to issue the certificate.
Click the ‘Select site’ dropdown and choose the required host name from the list. Once the site is selected, the domain name information will appear on the screen.

Note: In this example, ‘acme.fy8.com’ is used as a reference. You must select the host name you configured in the Pre-requisites step.
Navigate to the ‘Advanced’ tab and select the ‘Certificate Authority’ you configured for the issuance of SSL certificate.
Next, go to the ‘Authorization’ section and select the challenge type as ‘http-01’.
After completing all required selections, click the ‘Test’ button to verify that all configurations are working correctly.
Note: Performing the ‘Test’ step before requesting a certificate is optional; however, it is recommended to ensure all configured settings are correct.
If the configuration test is successful, the Configuration Test Results will display a ‘Success’ status.
Now, click ‘Request Certificate’ to issue the certificate.
The ‘In Progress’ screen will appear, showing the ACME Client progress during the certificate request.

Once the request process is complete, a ‘Success’ status will appear and ACME Client will display the message ‘New certificate received and standard deployment performed OK’

The newly issued certificate will appear at the top of the ‘Issued Certificate’ listing in the Web RA user portal.
To view the certificate details, navigate to the Enrolment Protocol(s) > Issued Certificates in the user portal and click the ‘Request No’ to view the certificate.
To configure certificate renewal settings according to your requirements, navigate to Settings > General Settings in the ‘Certify The Web’ ACME Client.
The ‘Renewal Settings’ section will appear at the top of the screen.
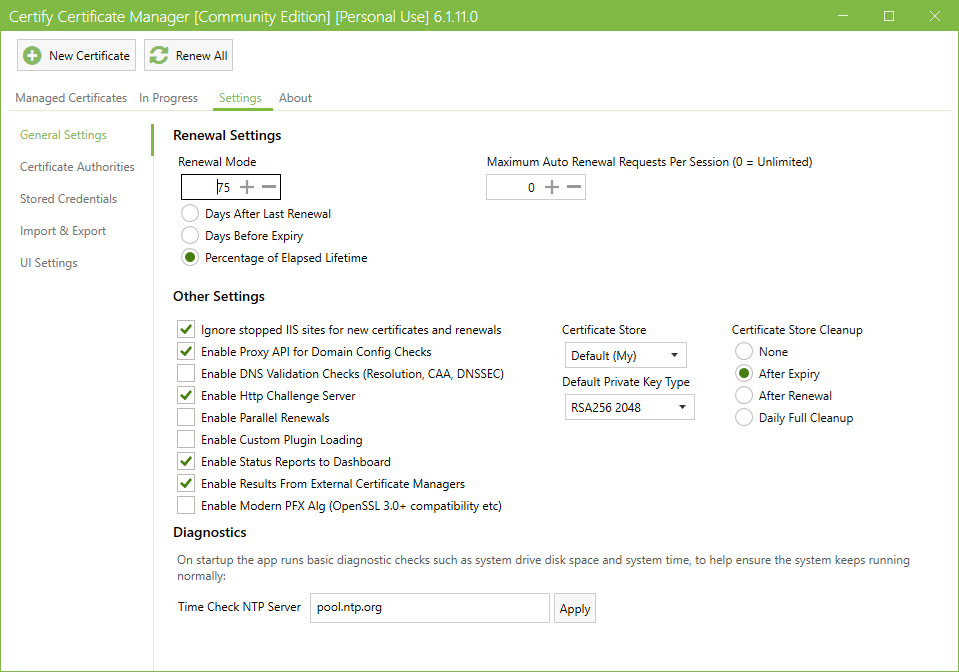
This screen provides the settings to control the certificate renewal process.
Auto Renewal of a Certificate
You can enable or disable automatic renewal for a specific site. To do this, navigate to the ‘Managed Certificates’ tab and select the site for which you want to modify the renewal settings.
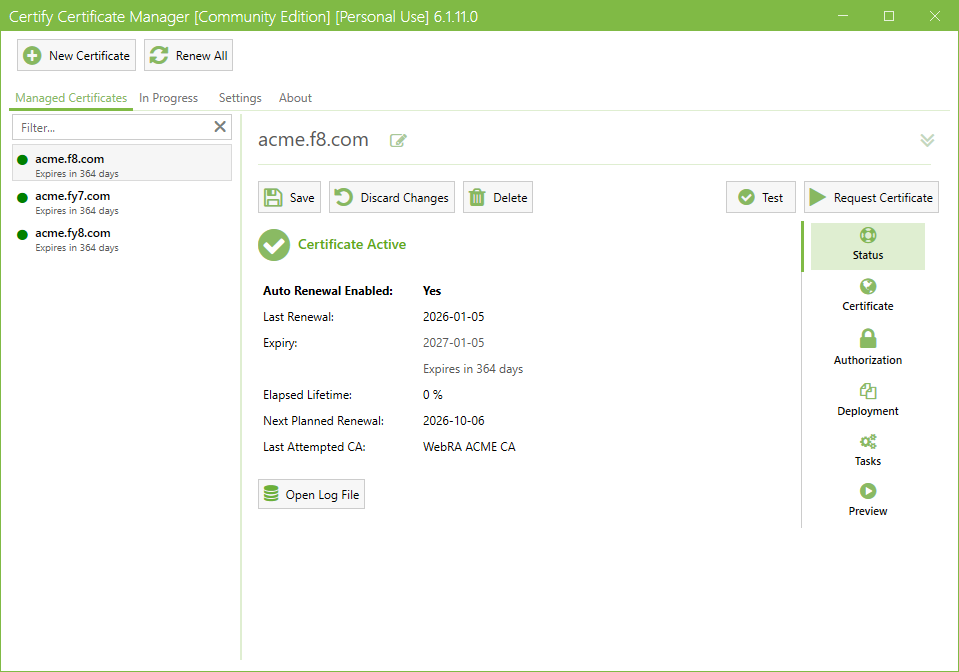
Next, go to Certificate > Advanced > General Options. From here, enable or disable the ‘Enable Auto Renewal’ checkbox as required.
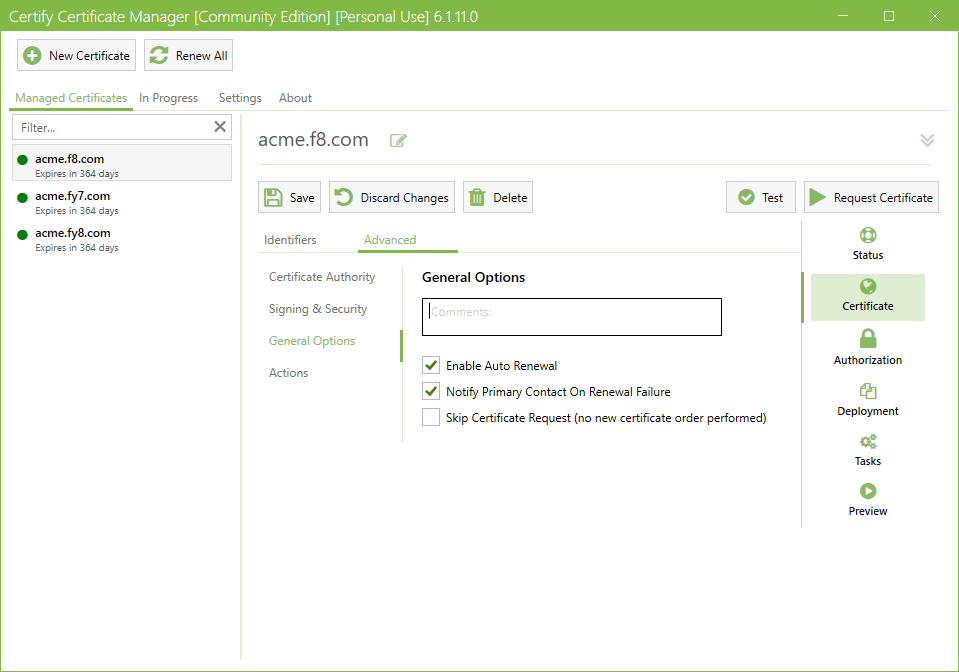
Click 'Save' to apply the changes.