
Digital Onboarding Reports
Digital Onboarding Reports
The Digital Onboarding Reports section displays the reports generated during the digital onboarding process. These reports contain the information captured during user identity verification and onboarding.
Note: Digital Onboarding reports are retained and displayed in this section only if Retain ID Verification Reports is enabled in the associated Digital Onboarding policy. Report retention is subject to the retention settings configured in the policy.
Expand System > Reports > Digital Onboarding Reports from the left-tree menu in the Admin portal to view the listing screen.
By default, the listing table displays the following columns:
|
Field |
Description |
|
User |
Name of the onboarded user. |
|
Enterprise |
Name of Enterprise in which the user is onboarded. |
|
Provider |
Provider used during the digital onboarding process. |
|
ID Document |
Identity document used to perform the digital onboarding. |
|
Performed By |
Name of the operator. |
|
Creation On |
Date and time when the report was created. |
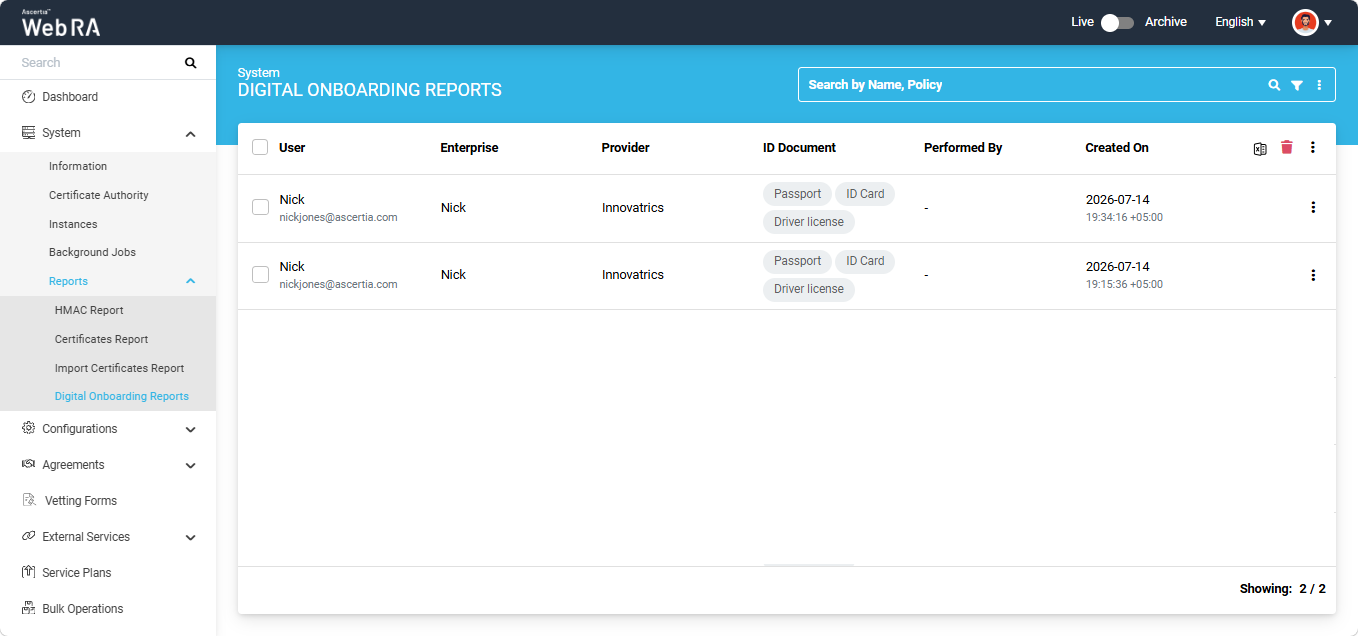
The following actions can be performed from the Digital Onboarding Reports section:
- Modify Columns
- View a Digital Onboarding Report
- Download a Digital Onboarding Report
- Delete a Digital Onboarding Report
- Download Evidence Report
Expand System > Reports > Digital Onboarding Reports from the left-tree menu in the Admin portal to view the listing screen.
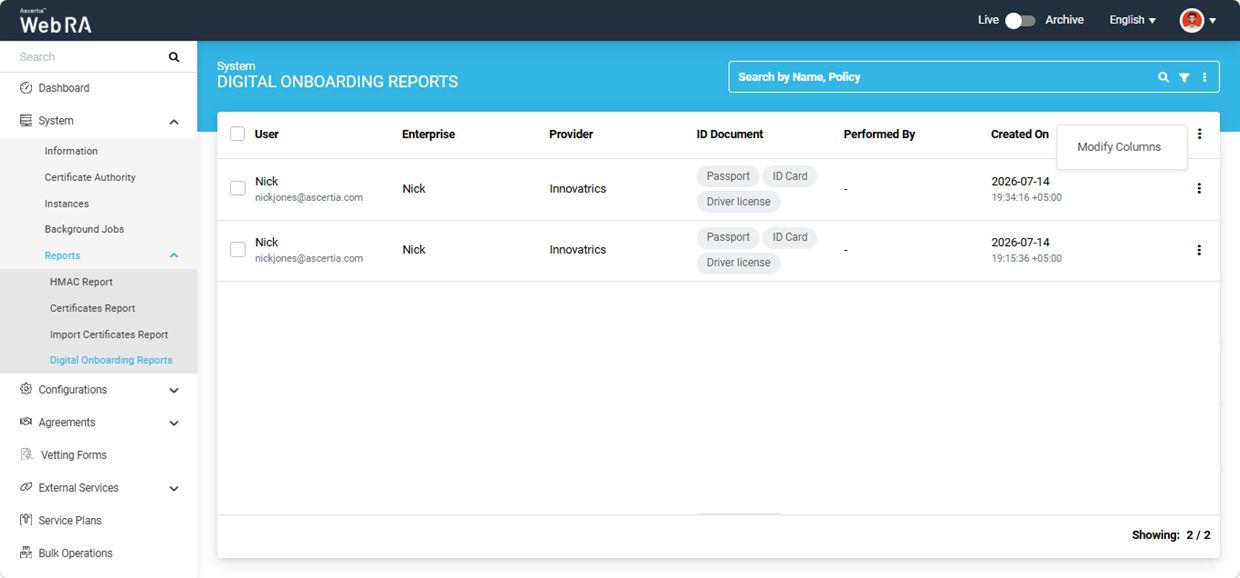
The operator can customise the columns displayed in the listing table. To do this, click the three-dot button at the extreme right of the table header and select 'Modify Columns'.
The 'Modify Columns' dialog appears. From the Column dropdown, select the required columns and click 'Apply'.
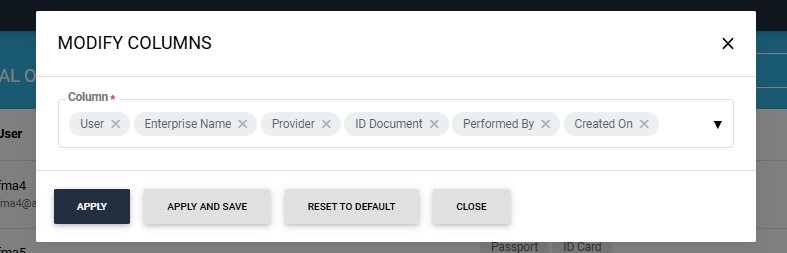
To retain the selected columns for future sessions, click 'Apply and Save'. To restore the default column configuration, click 'Reset to Default'.
Expand System > Reports > Digital Onboarding Reports from the left-tree menu in the Admin portal to view the listing screen.
To view a report, click the three-dot button corresponding to the required report and select 'View'.
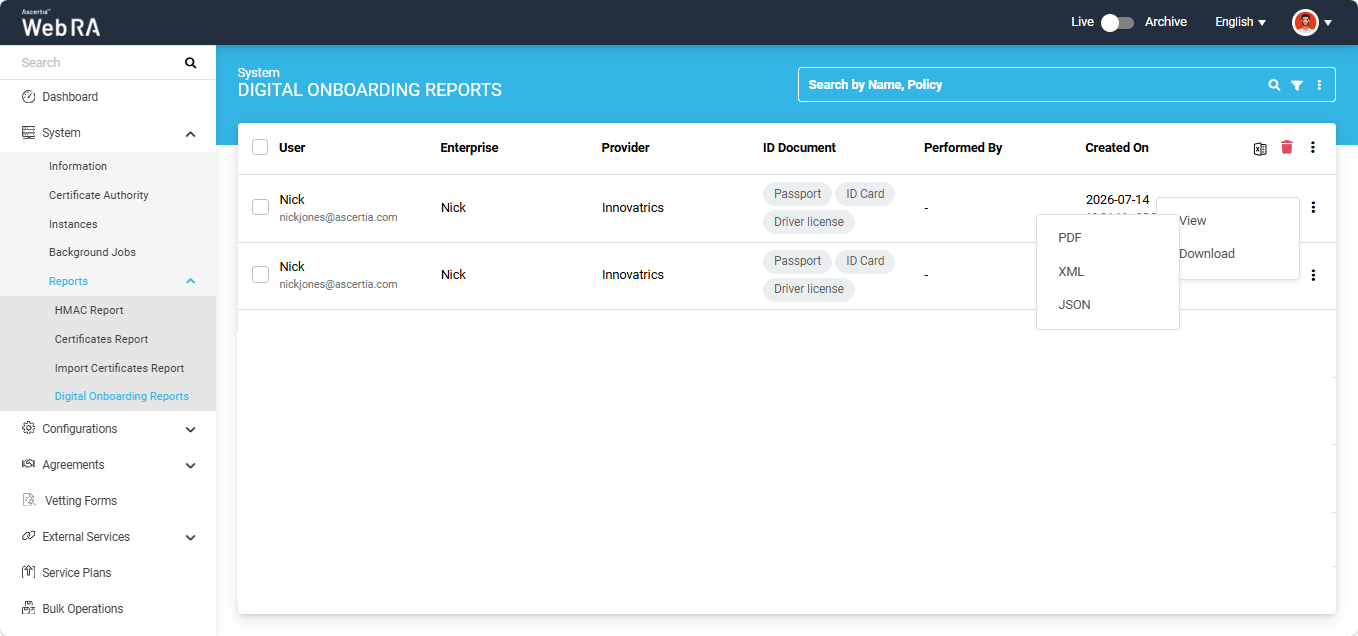
The system displays the available report formats. Select the required format to open the report.
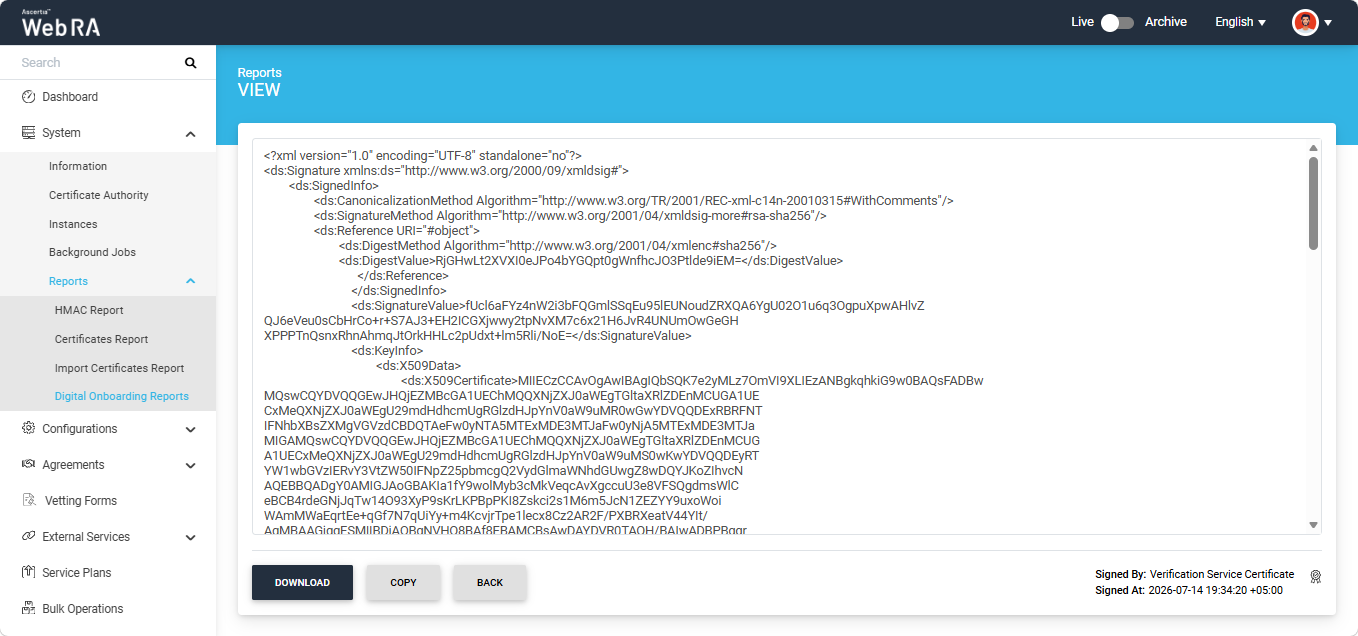
You can also download the report from this screen by clicking the ‘Download’ button. The report will be downloaded in the selected format.
Expand System > Reports > Digital Onboarding Reports from the left-tree menu in the Admin portal to view the listing screen.
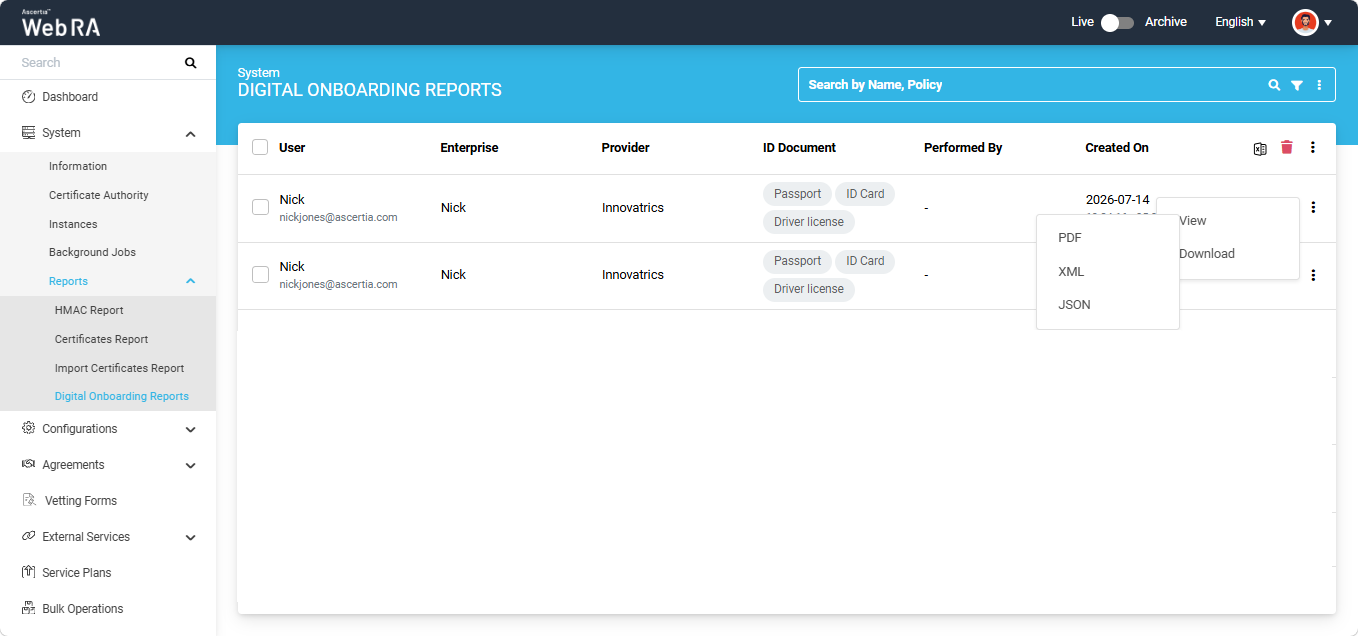
To download a report directly from the listing screen, click the three-dot button corresponding to the required report and select 'Download'.
The system displays the available report formats. Select the required format, and the report is downloaded to your computer.
Expand System > Reports > Digital Onboarding Reports from the left-tree menu in the Admin portal to view the listing screen.
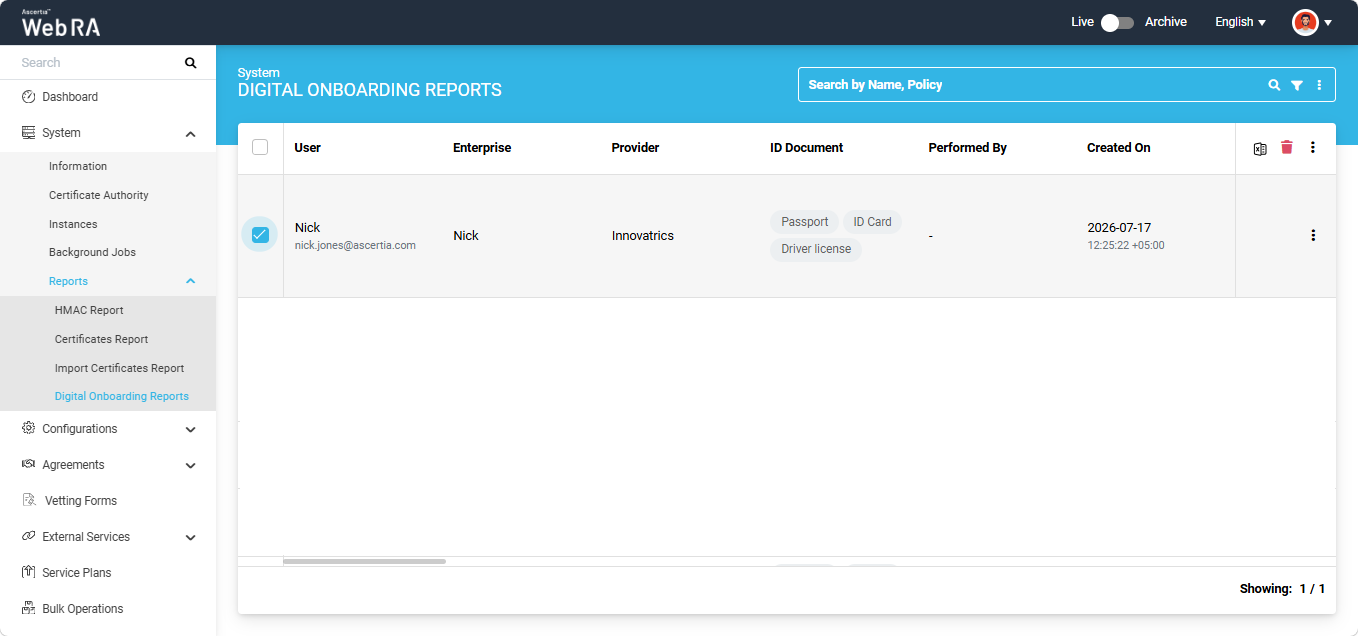
To delete a digital onboarding report(s) from the Web RA system, select the checkbox(es) of the report you want to delete and click the delete bin icon located at the right of the table header.
Expand System > Reports > Digital Onboarding Reports from the left-tree menu in the Admin portal to view the listing screen.
To download the evidence report, click the Excel icon located at the right of the table header. The report will be downloaded to your computer.