
CSR-based Requests
This section in the ADSS Web RA Admin portal lists down all CSR-based certificate requests.
Submit a Certificate Request (Client Authentication with CSR certificate type)
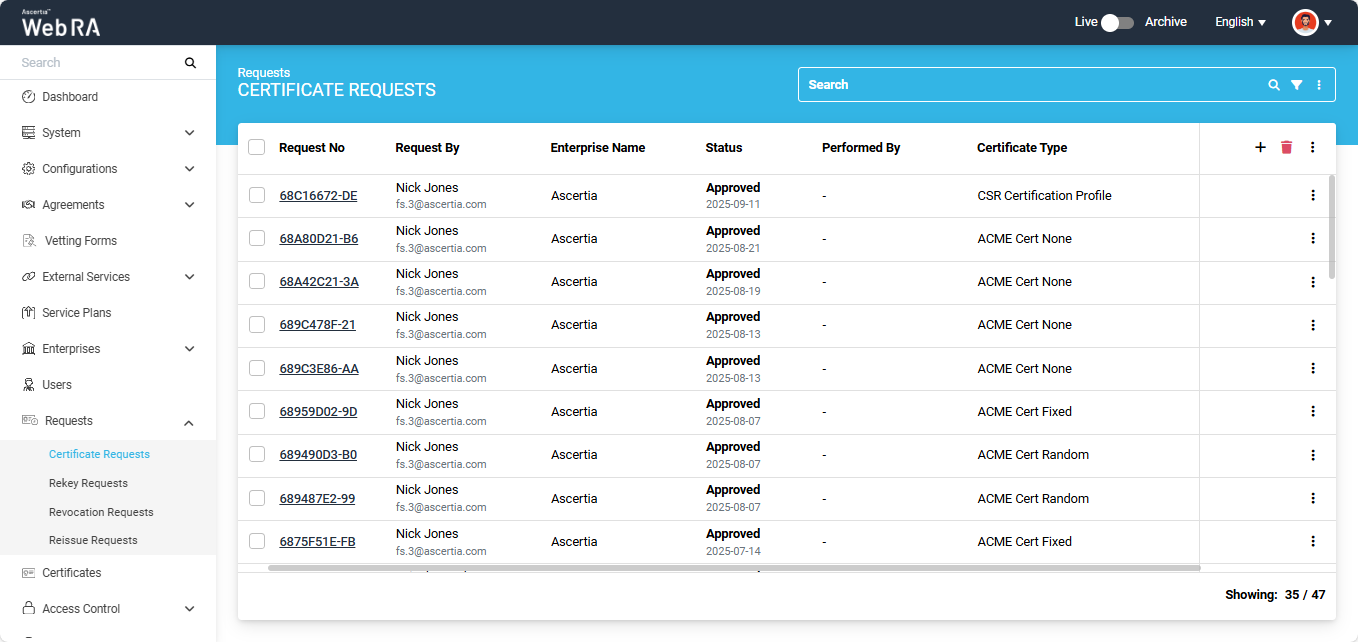
To create a new certificate request, expand Requests > Certificate Requests from the left menu pane in the admin portal. Then click the ‘+’ button from the grid header.
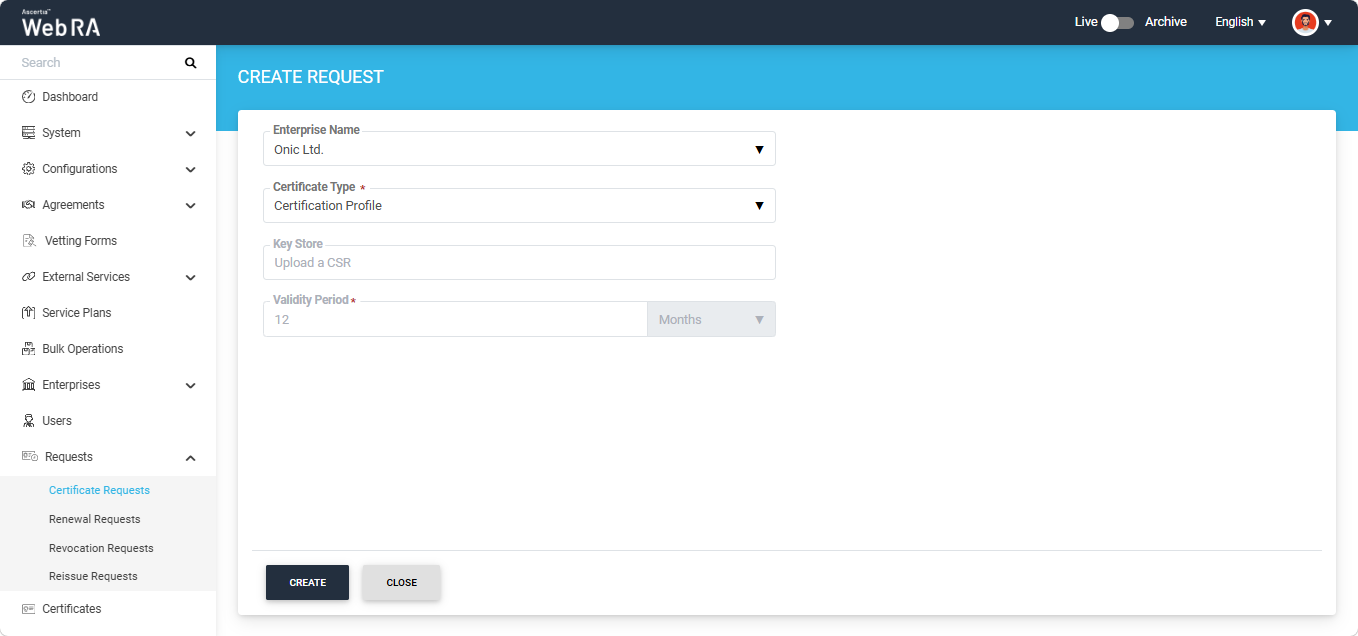
The system will display the ‘Create Request’ screen. Here, select your ‘Enterprise’ from the ‘Enterprise Name’ drop down, and select the ‘Certificate Type’.
|
|
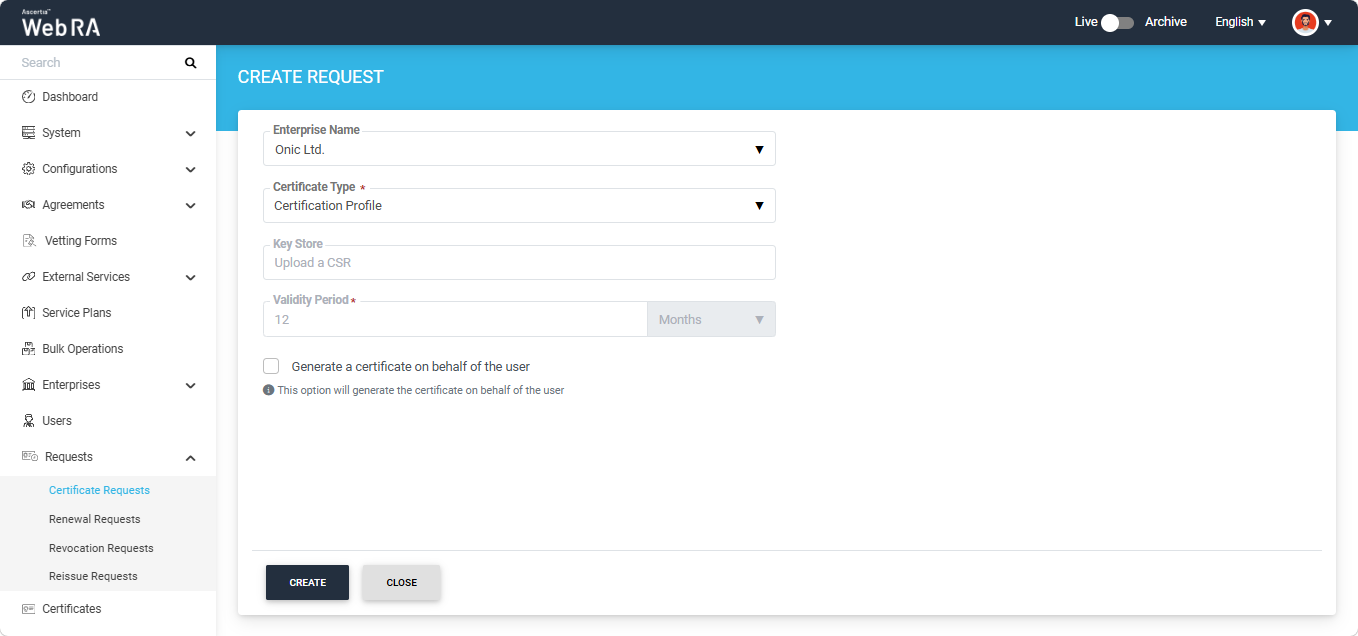
A checkbox titled ‘Generate a certificate on behalf of the user’ will appear on this screen if the policy for this option is enabled in the Enterprise > Policies > Requests section. |

Enabling this checkbox will allow the operator to generate a certificate on behalf of the user.
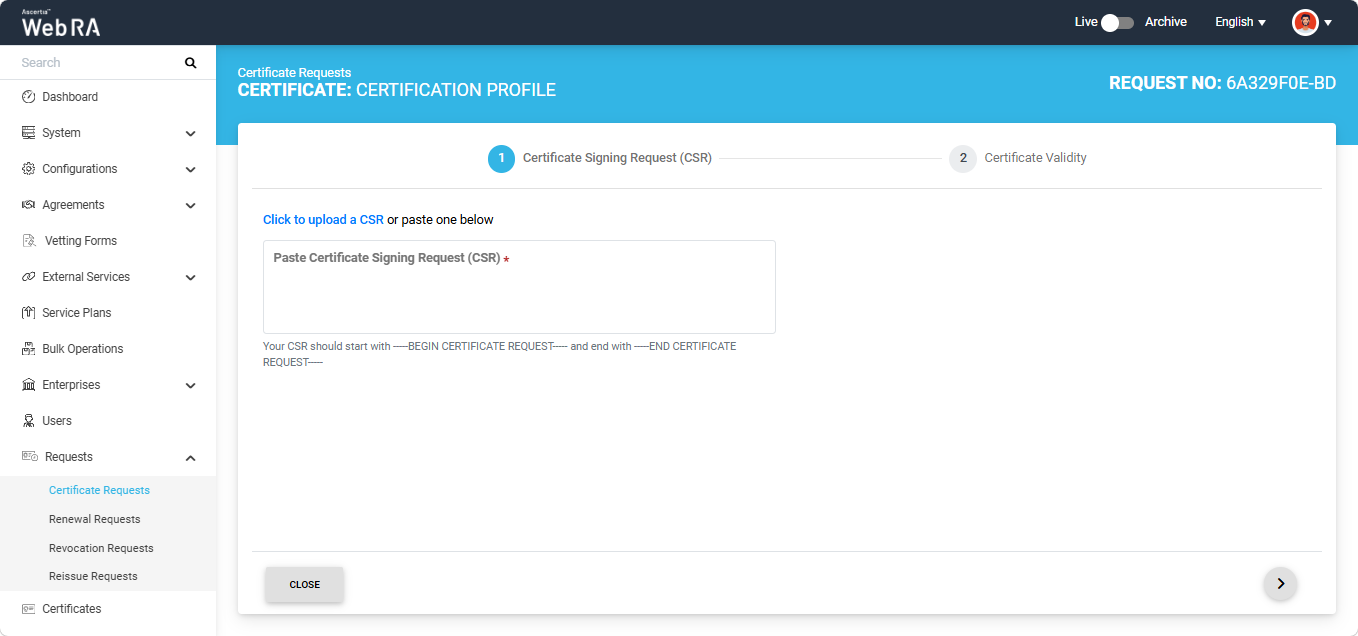
After making the required selection, click the ‘Create’ button. The system will display the ‘Certificate Signing Request (CSR)’ screen. Here, you will be required to either upload a CSR or paste the file in the given box.
After uploading the CSR, it will appear in the CSR field. You can also view the details of the CSR by clicking on the ‘Eye’ button.
ADSS Web RA Server supports the following attributes in a CSR:
- Common Name
- First Name
- Last Name
- Title
- Organisation Unit
- Organisation Identifier
- Locality
- Street Address
- State
- Postal Code
- Country
- Subject Serial Number
- Business Category
- DNS Name
- IP Address
- Email Address
- Other Name
- Public Key
- Public Key Algorithm
- Public Key Length
- Signature
- Signature Algorithm
- Version
- Key Size
- Fingerprint (SHA-1)
- Fingerprint (MD5)
- SANS
Meanwhile, the following attributes are not supported in a CSR by ADSS Web RA:
- Exponent
- Certificate Extensions
- Key Id Hash(rfc-sha1)
- Key Id Hash(sha1)
- Key Id Hash(bcrypt-sha1)
- Key Id Hash(bcrypt-sha256)
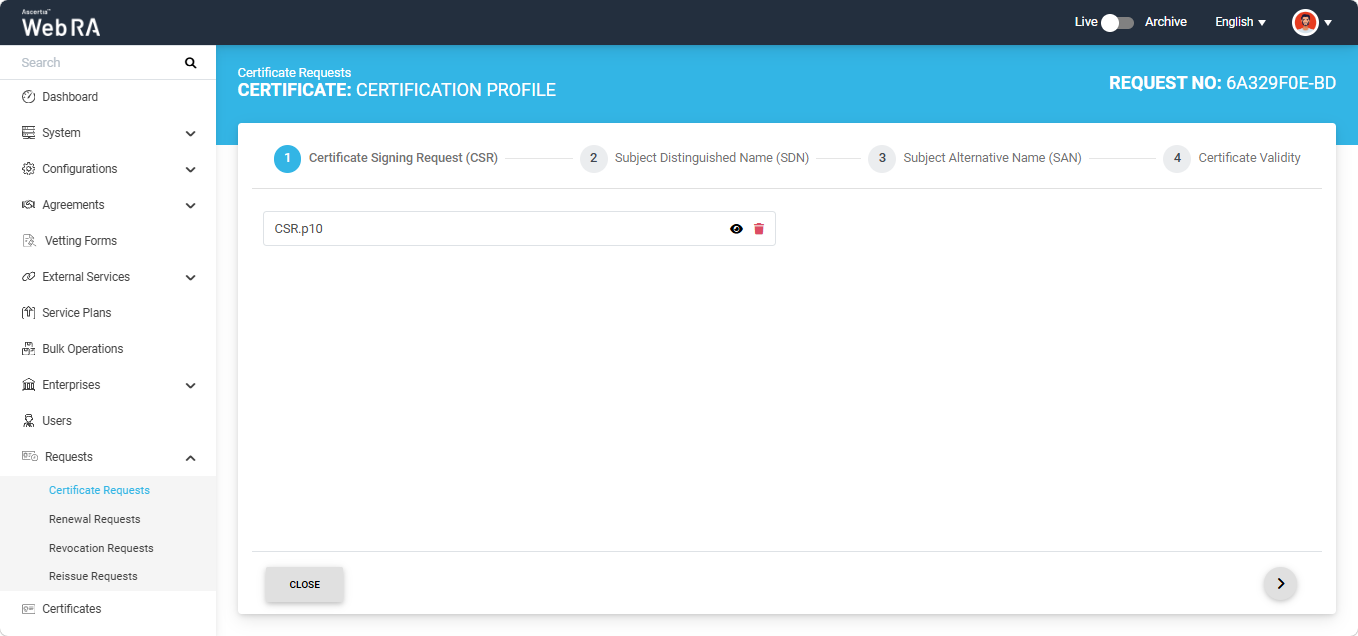
Once done, click the next ‘>’ button to proceed.
The system will display the ‘Subject Distinguished Name (SDN) screen. The fields in this screen will be auto-filled according to data available in the uploaded CSR.
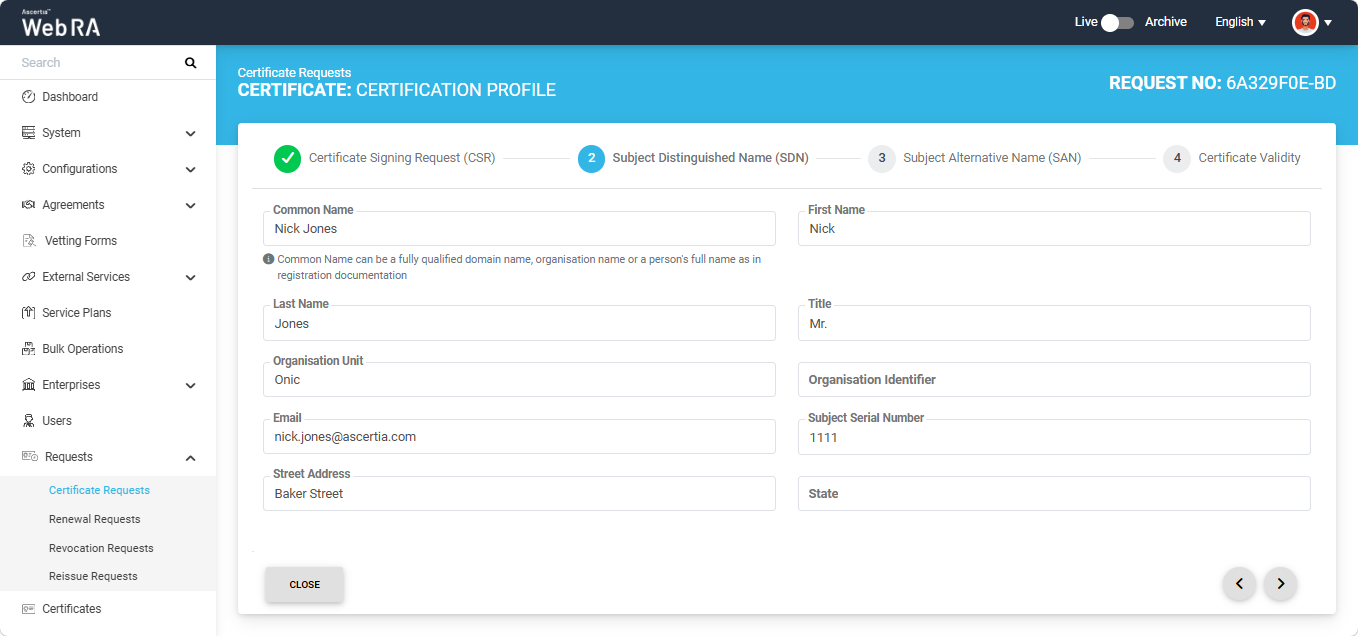
Note: If the 'Enable Document ID Pairing with Emails' policy is enabled in the Configurations module, and both the Email and Subject Serial Number fields are included in the Subject Distinguished Name (SDN), the system automatically associates the email address with the subject serial number when they are used together for the first time.
After an email address has been associated with a subject serial number, all future certificate requests using that email address must include the same subject serial number. If a different subject serial number is entered, the certificate request is rejected and an error is displayed. The following error will appear on the screen:
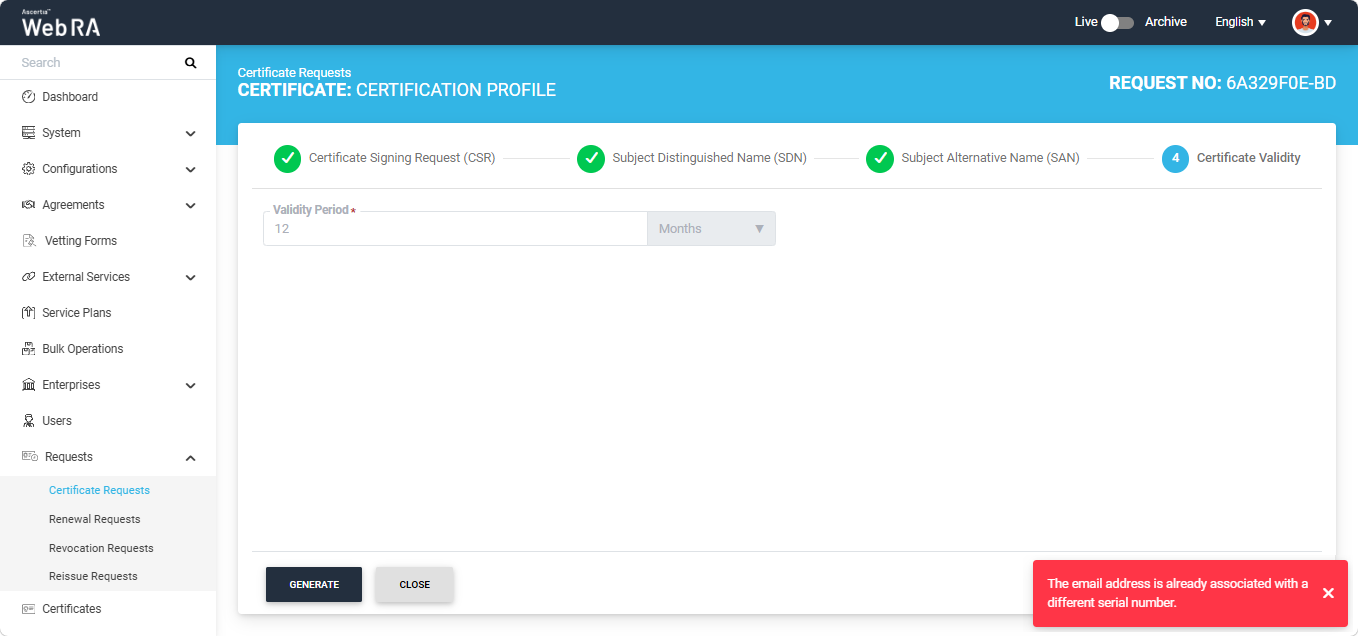
A single subject serial number can be associated with multiple email addresses; however, each email address can only be associated with one subject serial number.
If the 'Enable Document ID Pairing with Emails' policy is enabled and the Subject Distinguished Name (SDN) contains either multiple Email fields or multiple Subject Serial Number (SSN) fields, the system does not process the certificate request and displays an error.
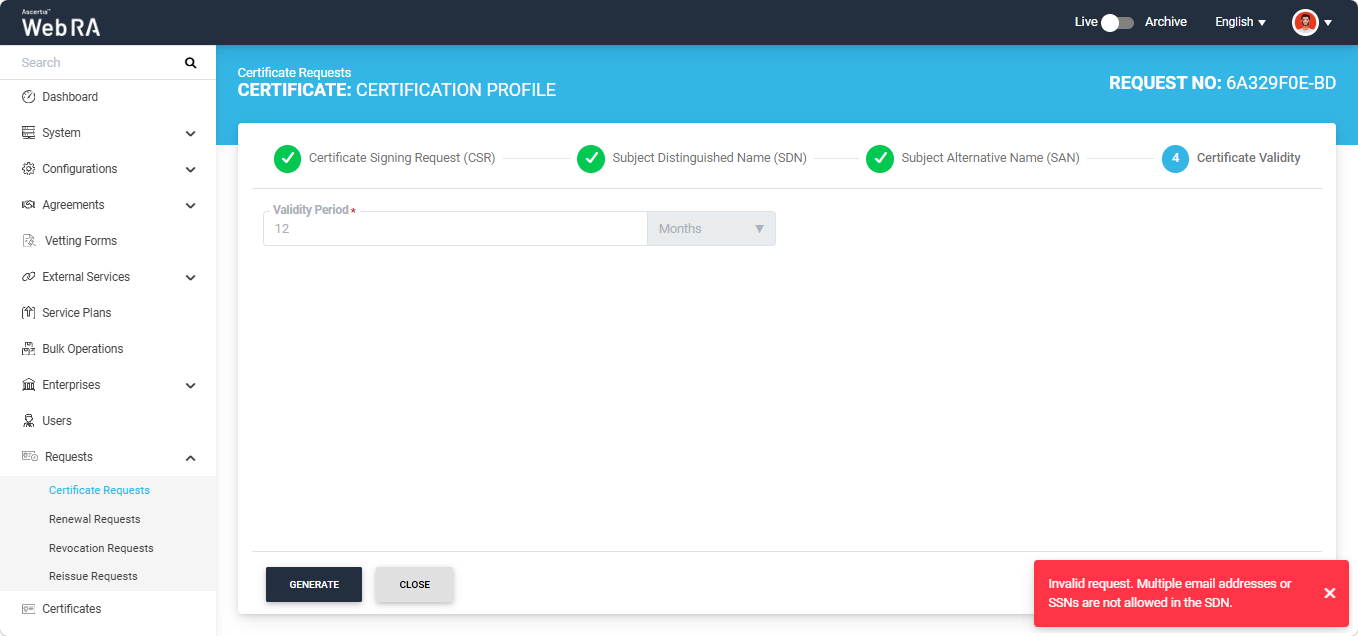
After reviewing the information, click the next ‘>’ button to navigate to the ‘Subject Alternative Name (SAN)’ screen. Enter the information in the fields as per your requirement.
|
|
If Email Validation checkbox is enabled in Configurations module and email address is present in the RFC822Name field of the Subject Alternative Names (SAN), the ownership verification screen will require you to complete email validation before generating the certificate. |
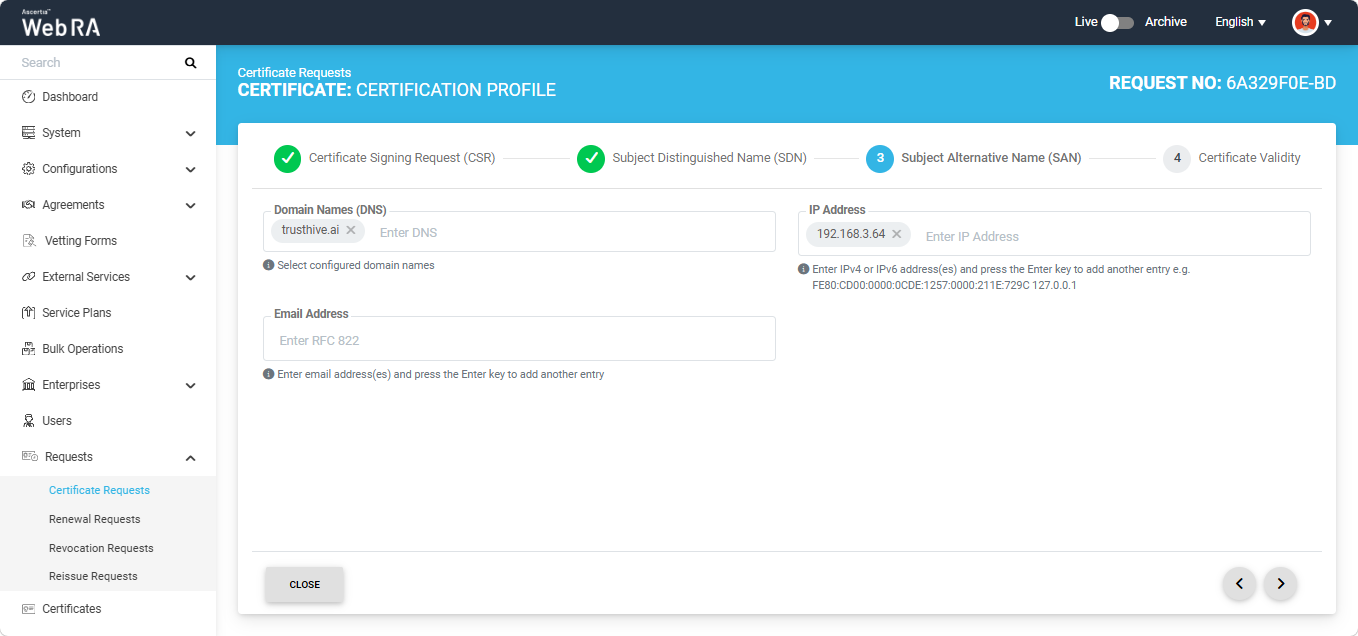
Note: If the CSR does not contain any SAN values, then the SAN screen will display the ‘No Subject Alternative Name (SAN)’ found’ text on the screen.
Click the next ‘>’ button to proceed to the ‘Certificate Validity’ screen.
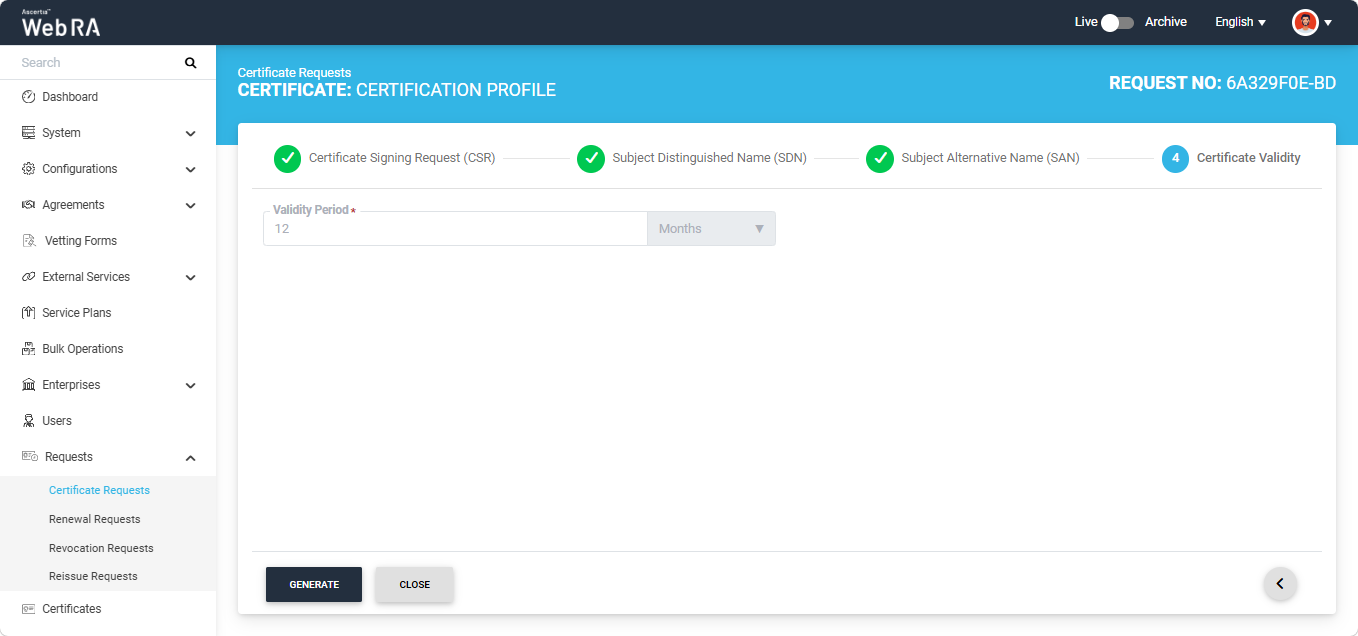
On this screen, click the ‘Generate’ button to create the certificate.
After clicking ‘Generate’, the certificate will be generated and the system will display a 'Certiticate Generated' alert on the screen.
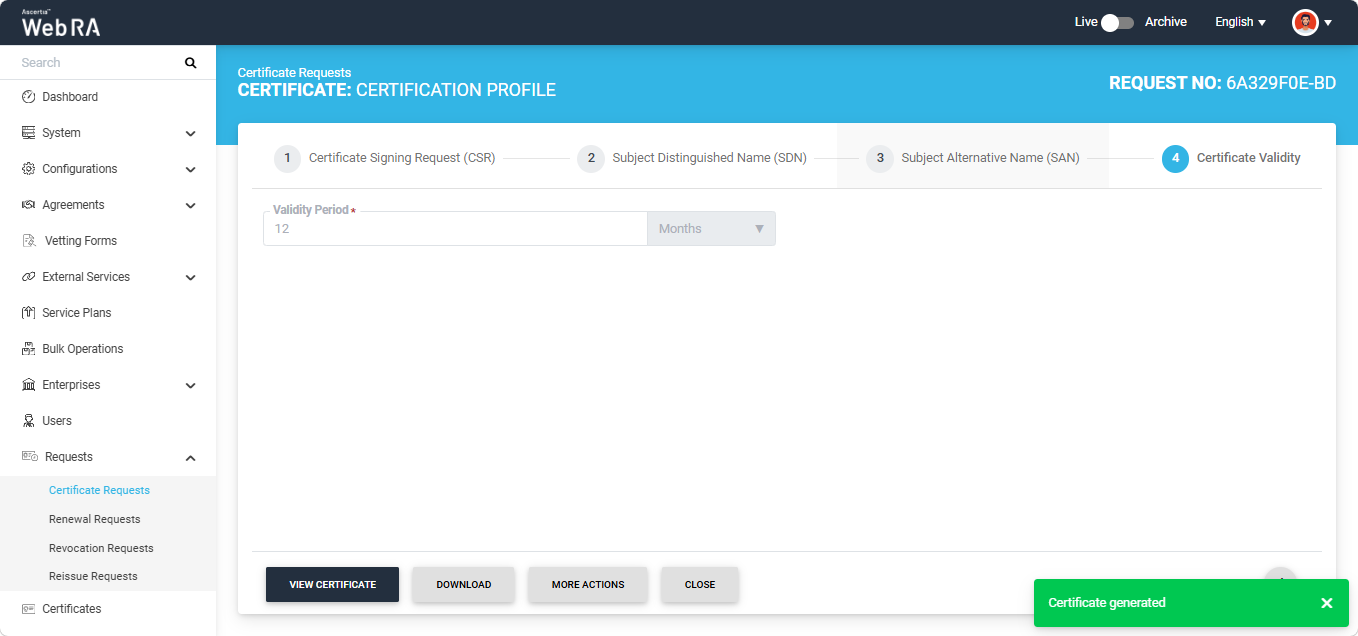
This certificate request will appear in the ‘Certificate Requests’ listing table as well.
Note: If the setting for Digital Onboarding is enabled in the Certification Profile, clicking the 'Generate' button displays a dialog containing the providers configured in the selected Digital Onboarding connector.
Select the required provider from the given options.
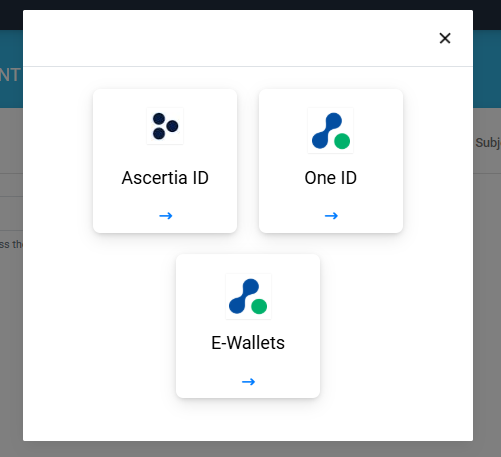
The system then displays a QR code. Scan the QR code using the Digital Onboarding mobile application.
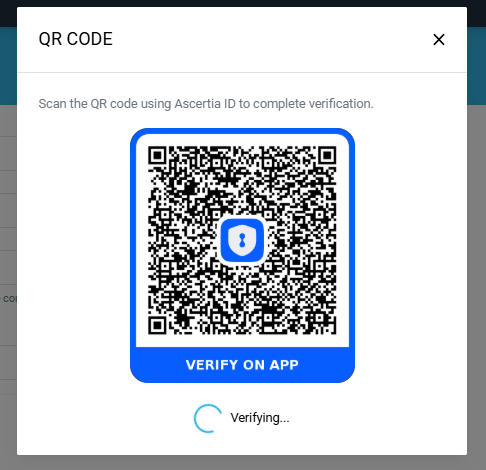
After scanning the QR code, complete the identity verification process by providing the required documents as configured in the Digital Onboarding policy.
Once the identity verification process is completed successfully, the QR code will disappear and the certificate request will be generated.
|
|
If the ‘Generate a certificate on behalf of the user’ checkbox is enabled, the system will display an additional screen titled ‘User Information’ next to the Certificate Validity screen. |
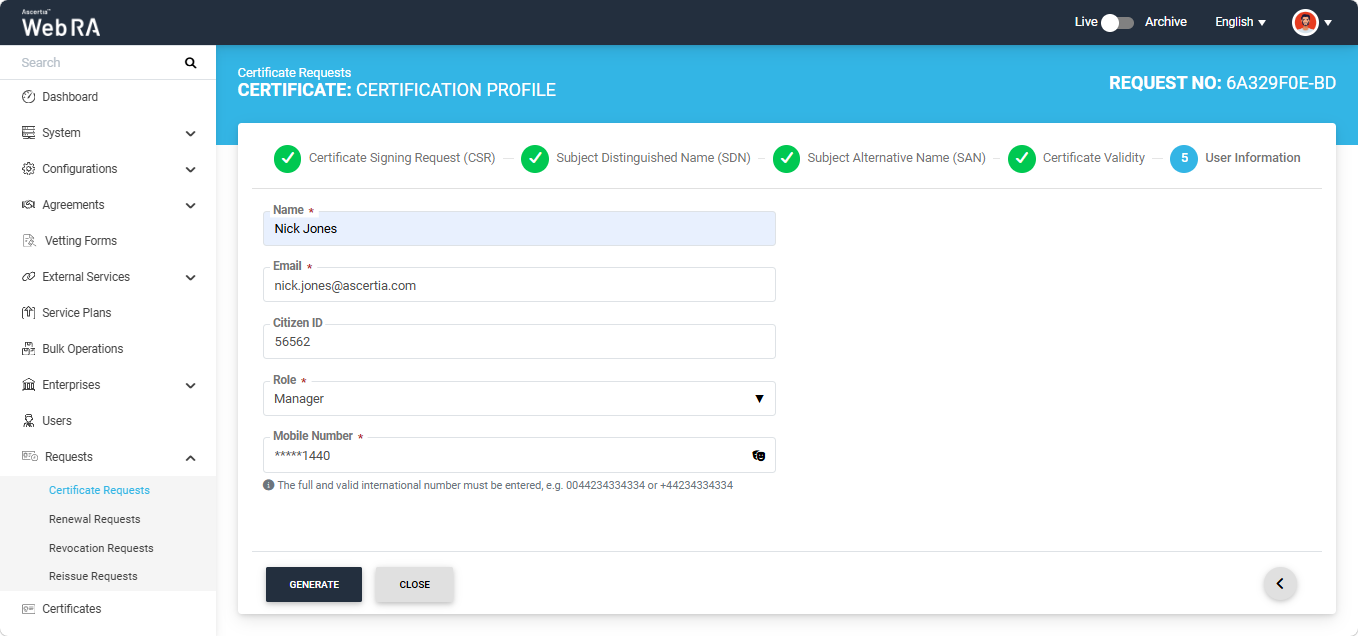
On this screen, you will be required to enter and select the Name, Email, Citizen ID, Mobile Number, and Role of the user for whom the certificate is being generated.
After entering the details, click ‘Approve’. The system will then display a subscriber agreement (if configured) for this user's profile.
When you agree to the subscriber agreement, the system will create an account for the user and generate the certificate. The user will receive an email regarding the account and certificate creation and is prompted to activate their account.
|
|
If the certificate is being created for a user who does not exist in the system, a new account will be created for the user along with the certificate. If the user already has a registered account in the Web RA system, only the certificate will be created. The user will be notified via email about the certificate generation. Meanwhile, if the user exists in the system but is not part of the enterprise where the certificate is being created, the system will send an invitation for the user to join that enterprise and will generate the certificate as well. |
How to Renew a Certificate
To renew a certificate before its expiration, you need to first open the certificate request generated from the Web RA system.
To do this, expand Requests > Certificate Requests from the left-tree menu in the Admin portal.
Then, click the request number of the certificate that you want to renew. Alternatively, click the three-dot button next to the certificate request entry and select the 'View Request' option.
The system will then open the certificate request in View mode.
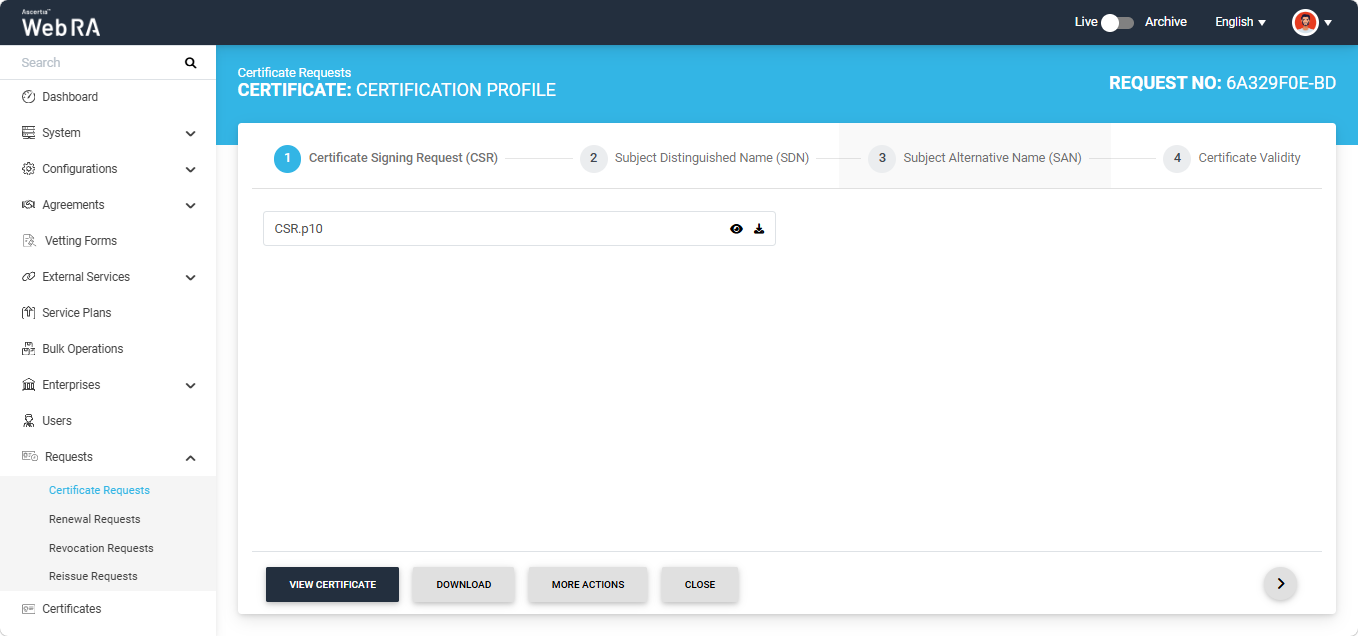
To renew the certificate, click the 'More Actions' button. A dialog titled 'Certificate Action' will appear on the screen.
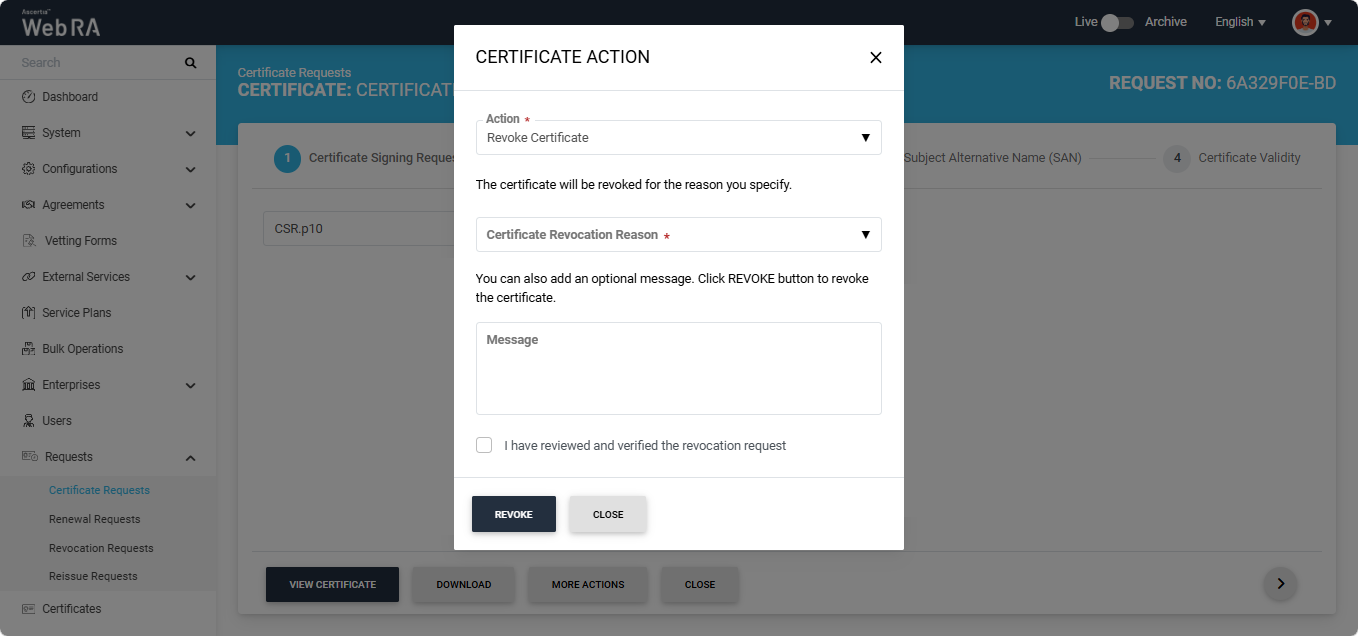
Click the 'Action' dropdown and select the 'Renew Certificate' option.
Note: The 'Renew Certificate' option appears in this dropdown only if the 'Renew Certificate' policy is selected in Configurations > Policies > Requests section under the certificate renewal settings.
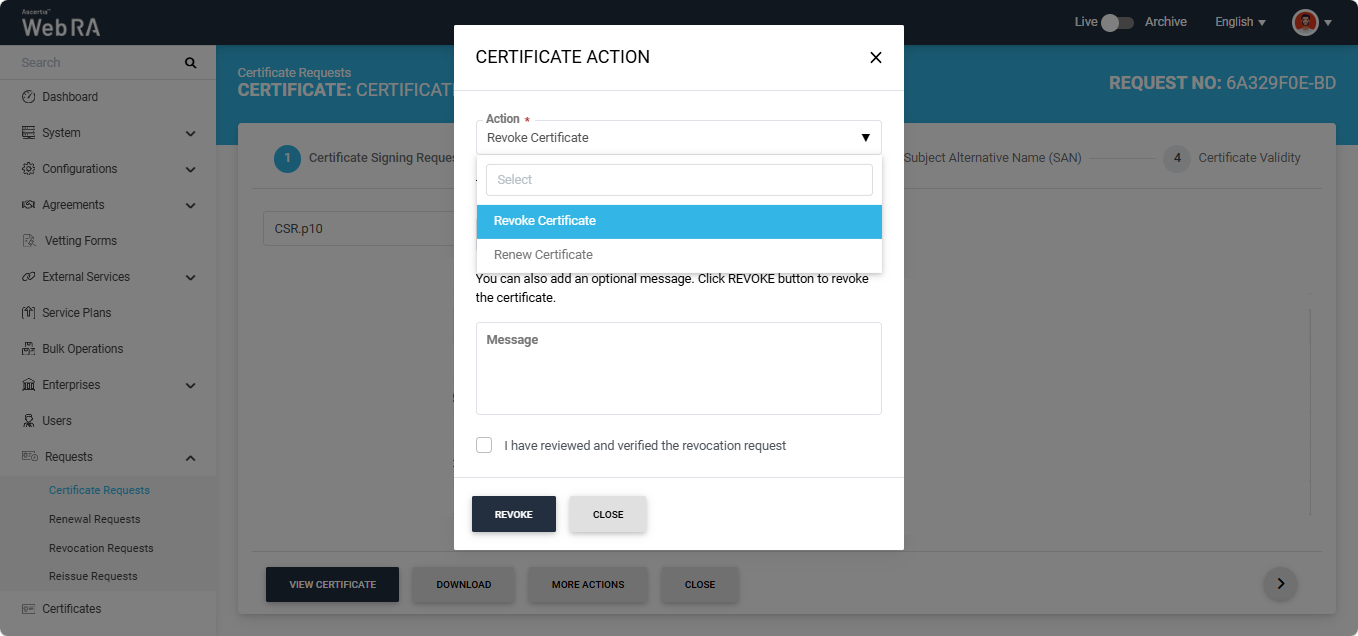
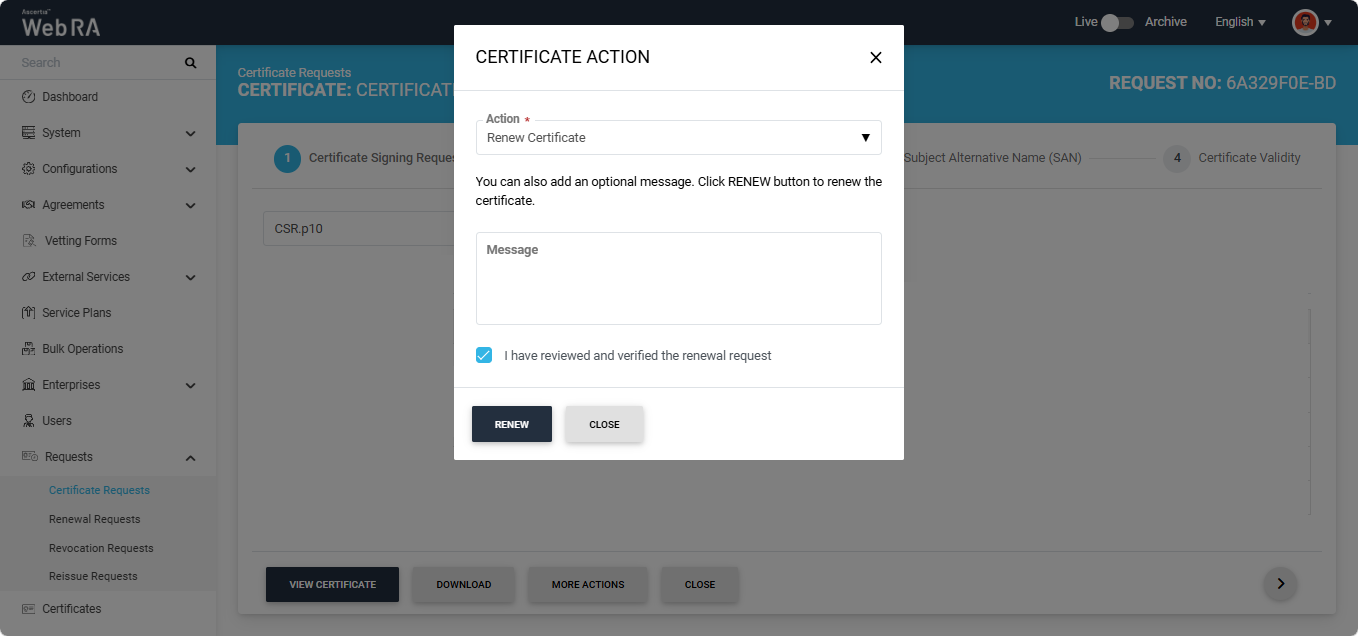
After selecting the required option, select the 'I have renewed and verified the renewal request' checkbox and click the 'Renew' button.
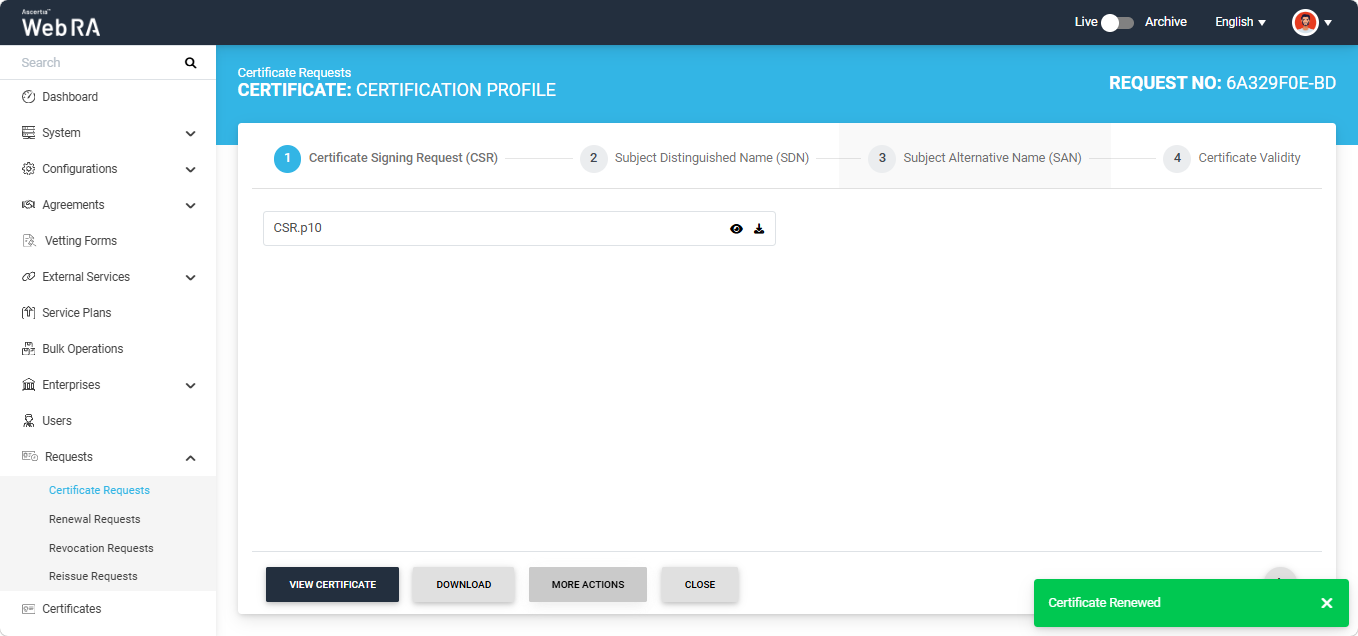
The certificate will be renewed, and the system will display a 'Certificate Renewed' alert on the screen.
Each certificate can be renewed only up to the renewal limit configured in the certification profile. For example, if a renewal limit of 1 is configured in the certification profile, a certificate can only be renewed once. Any subsequent attempt to renew the same certificate will result in an error being displayed by the system.
The following error will appear on the screen if you attempt to renew a certificate after the renewal limit has been reached.
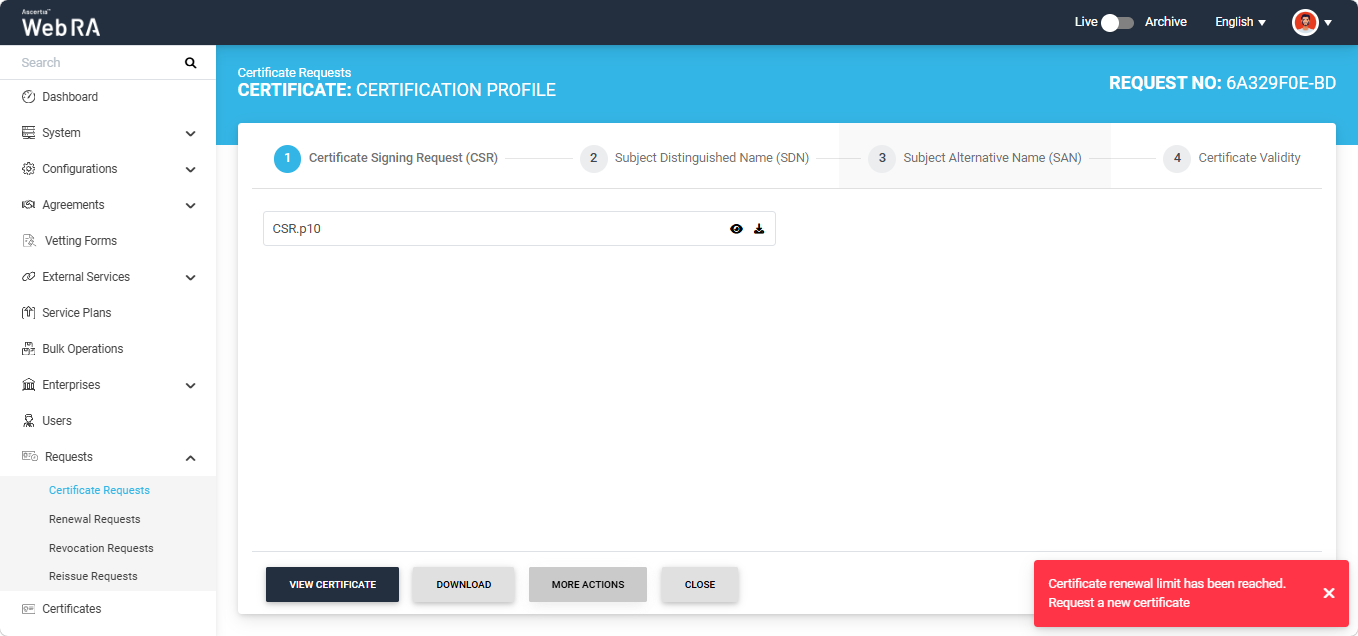
Note: If the renewal limit is set to zero in the certification profile, certificates generated under that certification profile cannot be renewed.