
Rekey Requests
In PKI, if an existing key is lost or compromised, rekeying a certificate generates a new key pair for the certificate.
- Rekeying a certificate generates a new key pair for the server certificate.
- For CSR- and smart card token-based certificates, rekeying creates a new certificate against the same request and does not revoke the previous certificate.
- In ADSS Web RA, rekeying is not available for expired or revoked certificates.
- Administrators can view, decline, or approve rekey requests.
As a pre-requisite, the rekey certificate option must be enabled in the Configuration > Policies > Certificate section of the admin portal.
The Request By section will display Citizen ID below the user name if it is enabled in the Configurations > Default Settings.
How to Approve a Rekey Request Submitted from the Web Portal
Expand Requests > Rekey Requests from the left-tree menu in the Admin portal. The Rekey Requests listing screen appears.
|
|
Note: Rekey requests submitted through the Web Portal appear on this screen for approval only if vetting is enabled in the associated certification profile. |

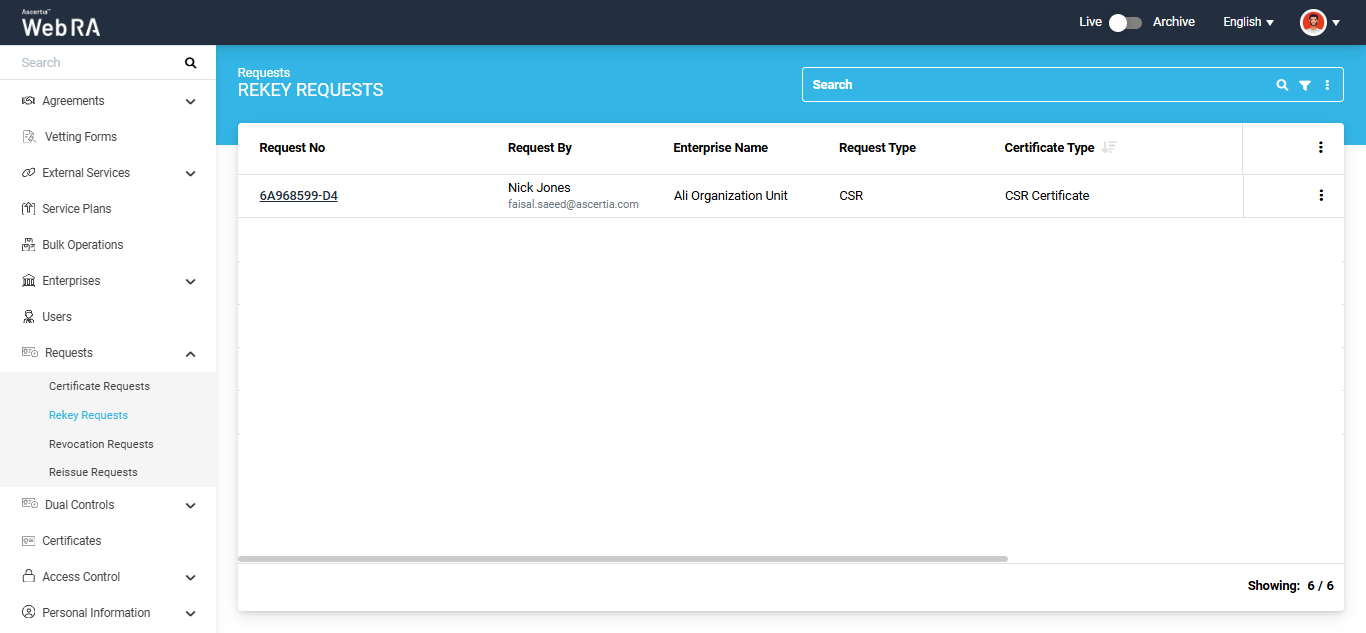
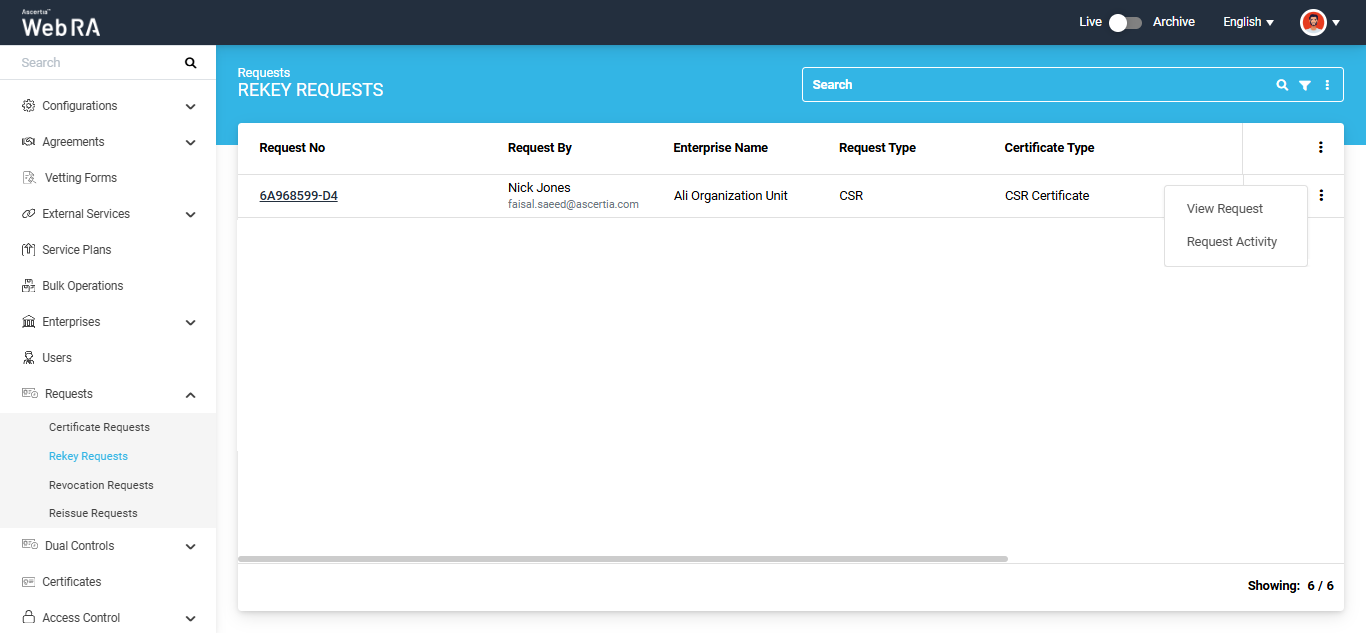
Click the  button next to the certificate that you want to rekey and select ‘View Request’.
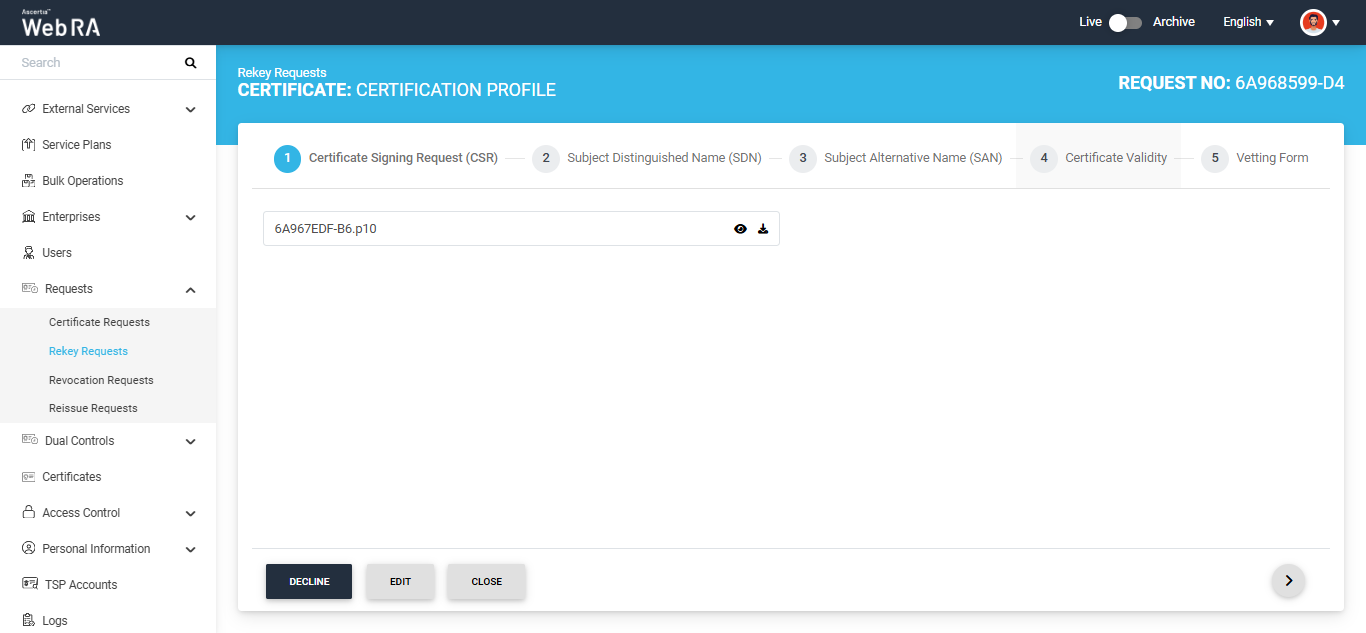
The system will open the certificate request in view mode and the ‘Certificate Signing Request (CSR)’ screen will appear.
|
|
Note: If the “Vertical Certificate Request Layout for Operators policy” is enabled in the Configurations > Policies > Requests section, the renewal request details will be displayed in a vertical layout to the dual control operator. All sections will appear on a single page, allowing the dual control operator to view the complete information by scrolling up and down. Once the operator approves the rekey request, the request continues to appear in the vertical layout on the current screen. However, if the operator closes the approved request and opens it again, the request is displayed using the default layout settings. |
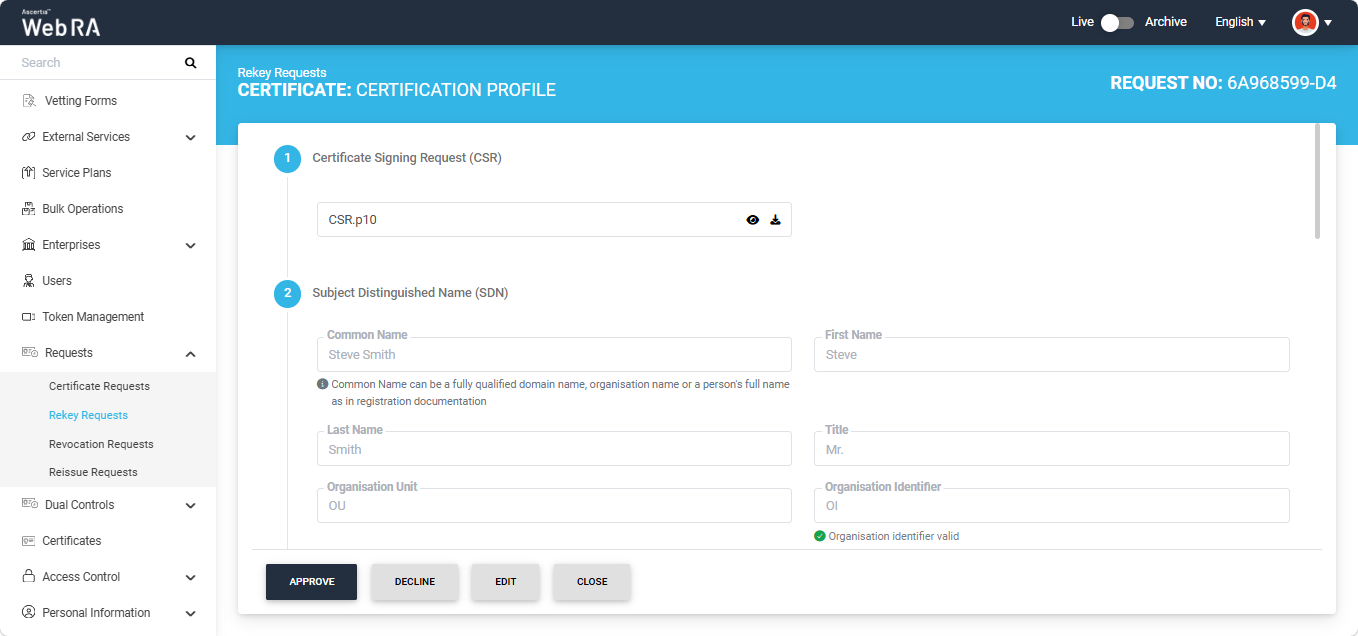
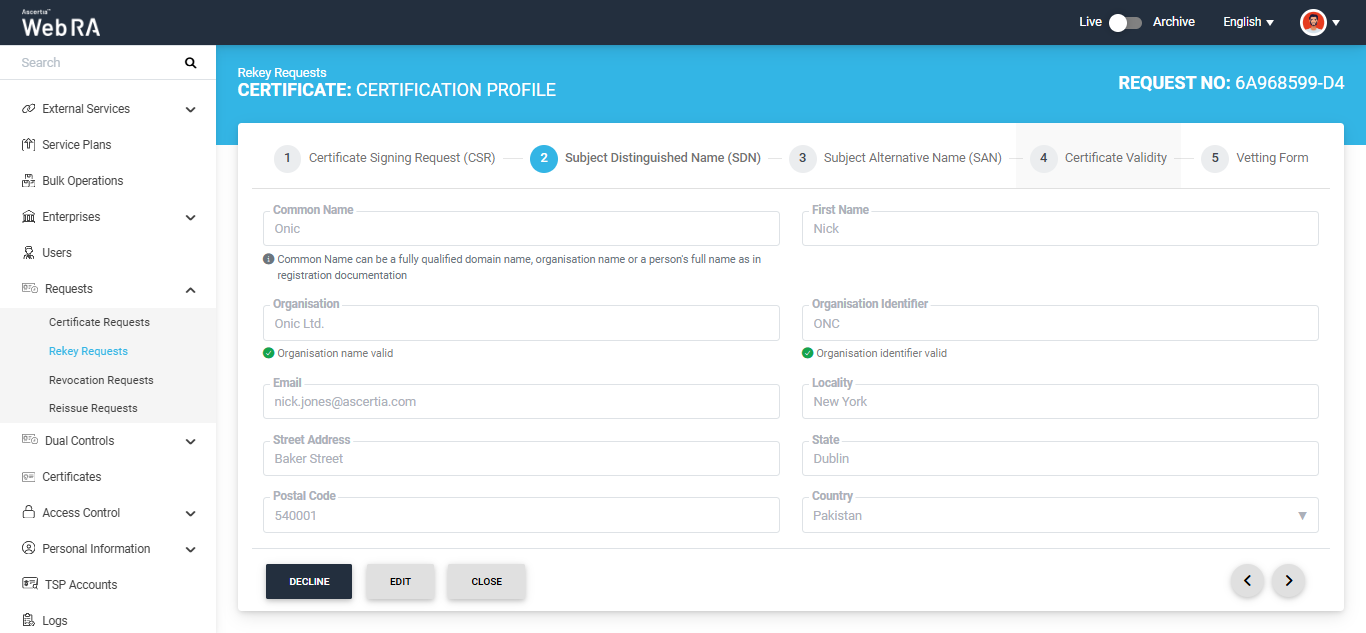
Click the next ‘>’ button to navigate to the ‘Subject Distinguished Name (SDN)’ screen.
|
|
Note: If the ‘Allow Operators to Edit New and Rekey Pending Requests’ setting is enabled in the Configurations > Policies > Requests module, the ‘Edit’ button will appear next to the Decline and Approve buttons. |

For Rekey Requests approval, the operator can only edit the email address in both the SDN and SAN sections.
If you want to change the email address, click the ‘Edit’ button. The system will make the email address field editable.
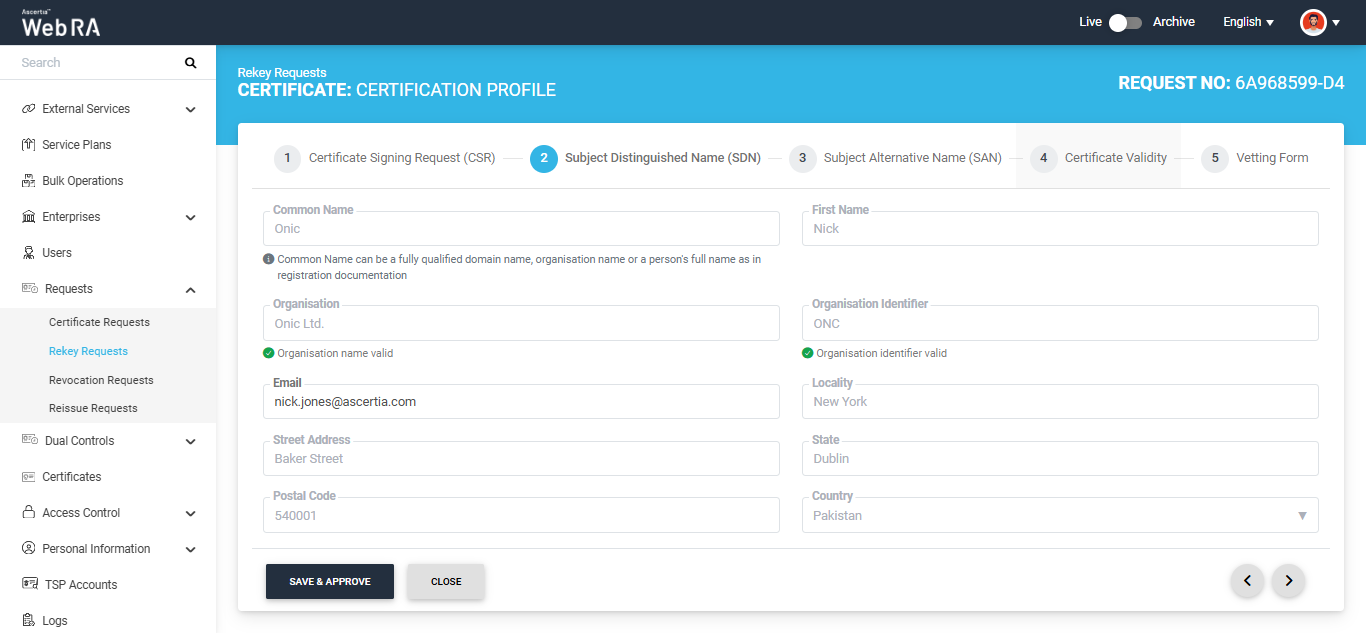
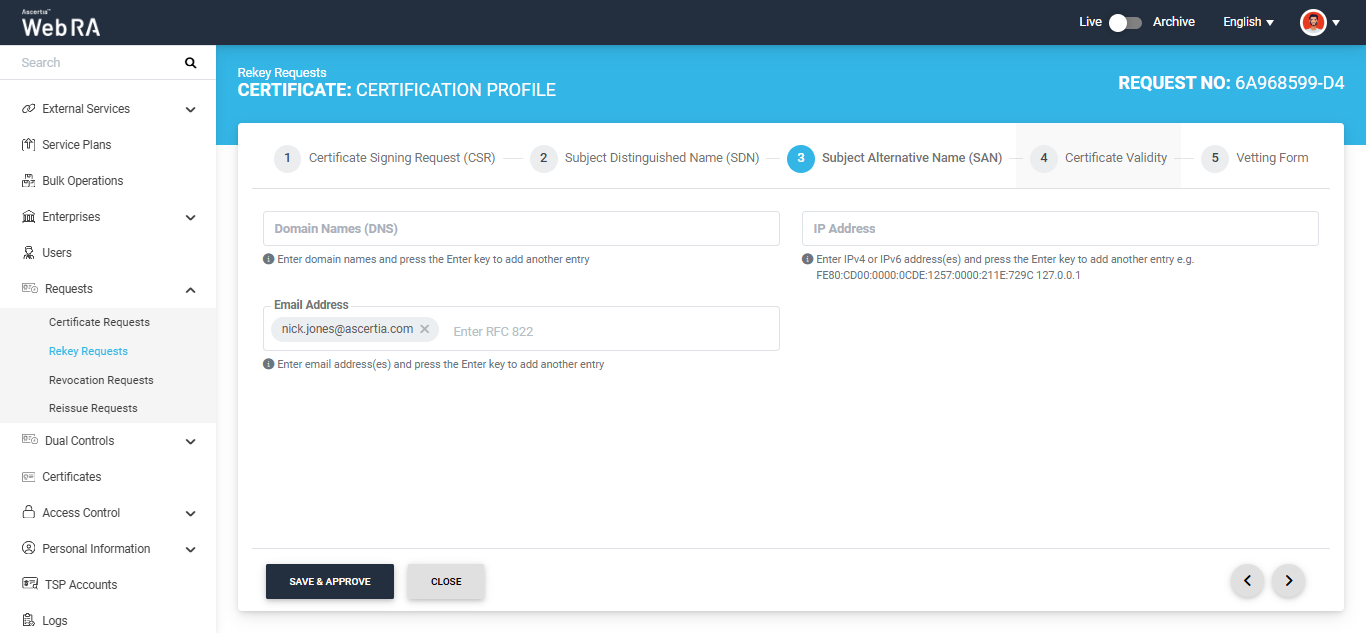
After making the required changes, click ‘Save & Approve’.
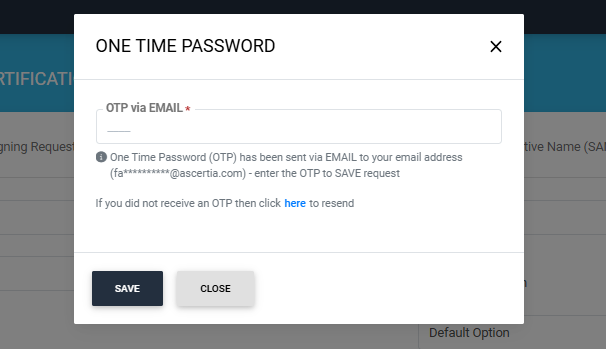
The system will display the secondary authentication dialog.
|
|
Note: The secondary authentication method displayed in the dialog depends on the Secondary Authentication Profile configured in the Pending Requests Settings section under Configurations > Policies > Requests. For example, if Email OTP is selected, the dialog will prompt you to enter the OTP received by email to save the changes. |
Enter the OTP in the dialog and click ‘Save’. The ‘Certificate Rekey’ dialog will appear.
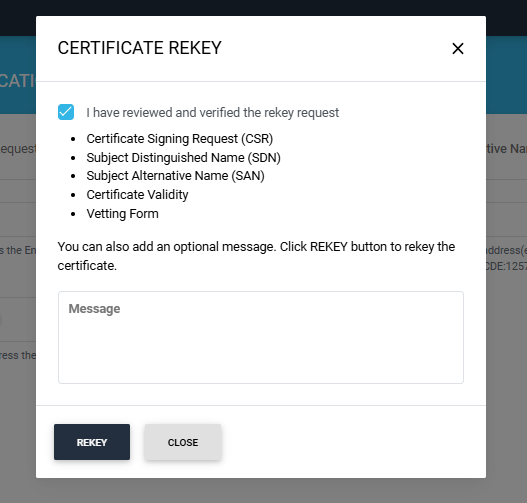
Select the ‘I have reviewed and verified the rekey request’ checkbox and click ‘Rekey’ to rekey the certificate. You can also add an optional message related to the rekey approval in the Message box.
The certificate request will be rekeyed, and a success alert will appear on the screen.
|
|
Note: If ‘Dual Control’ is enabled for the ‘Requests’ module in ‘Configurations > General Settings’, the rekey request will be transferred to the Dual Control operator for approval after the Enterprise RAO approves the request. |
|
|
Note:
|
Decline a Request
If you want to decline the certificate request instead, click the ‘Decline’ button. A 'Decline' dialog will appear. Enter the reason for declining the request in the 'Reason' box and click 'Decline'.
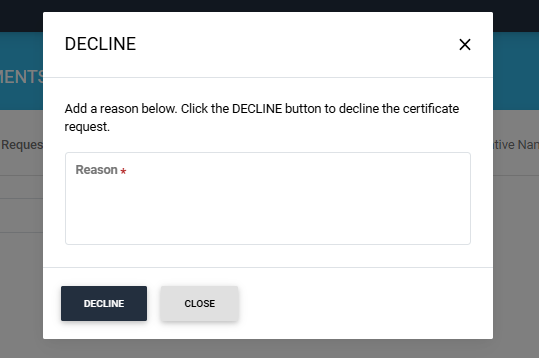
A success alert will appear on the screen indicating that the request has been declined.
Second Factor Authentication
If second factor authentication is enabled on certificate requests, the configured authentication mechanism will function accordingly. When a user clicks on the Generate button, the authentication window will appear, and once it accepts the selected method, it will generate a certificate.
The authentication mechanism can be one of the following:
- SMS OTP Authentication
- Email OTP Authentication
- Email & SMS Authentication
- SAML Authentication
- Active Directory Authentication
- Azure Active Directory Authentication
- OIDC Authentication