How to Integrate Power BI
How to Integrate Power BI with Web RA
This guide connects ADSS Web RA 2.10.2 to Microsoft Power BI so operators, enterprises and Web portal users can open Power BI reports inside Web RA.
Follow the steps below to complete the Power BI configuration and access the reports.
- Step 1: Prepare Power BI
- Step 2: Allow Power BI in the security headers
- Step 3: Create the Power BI connector
- Step 4: Set the default connector
- Step 5: Grant Application Reports permissions
- Step 6: Link workspaces to an enterprise
- Step 7: How to View Reports
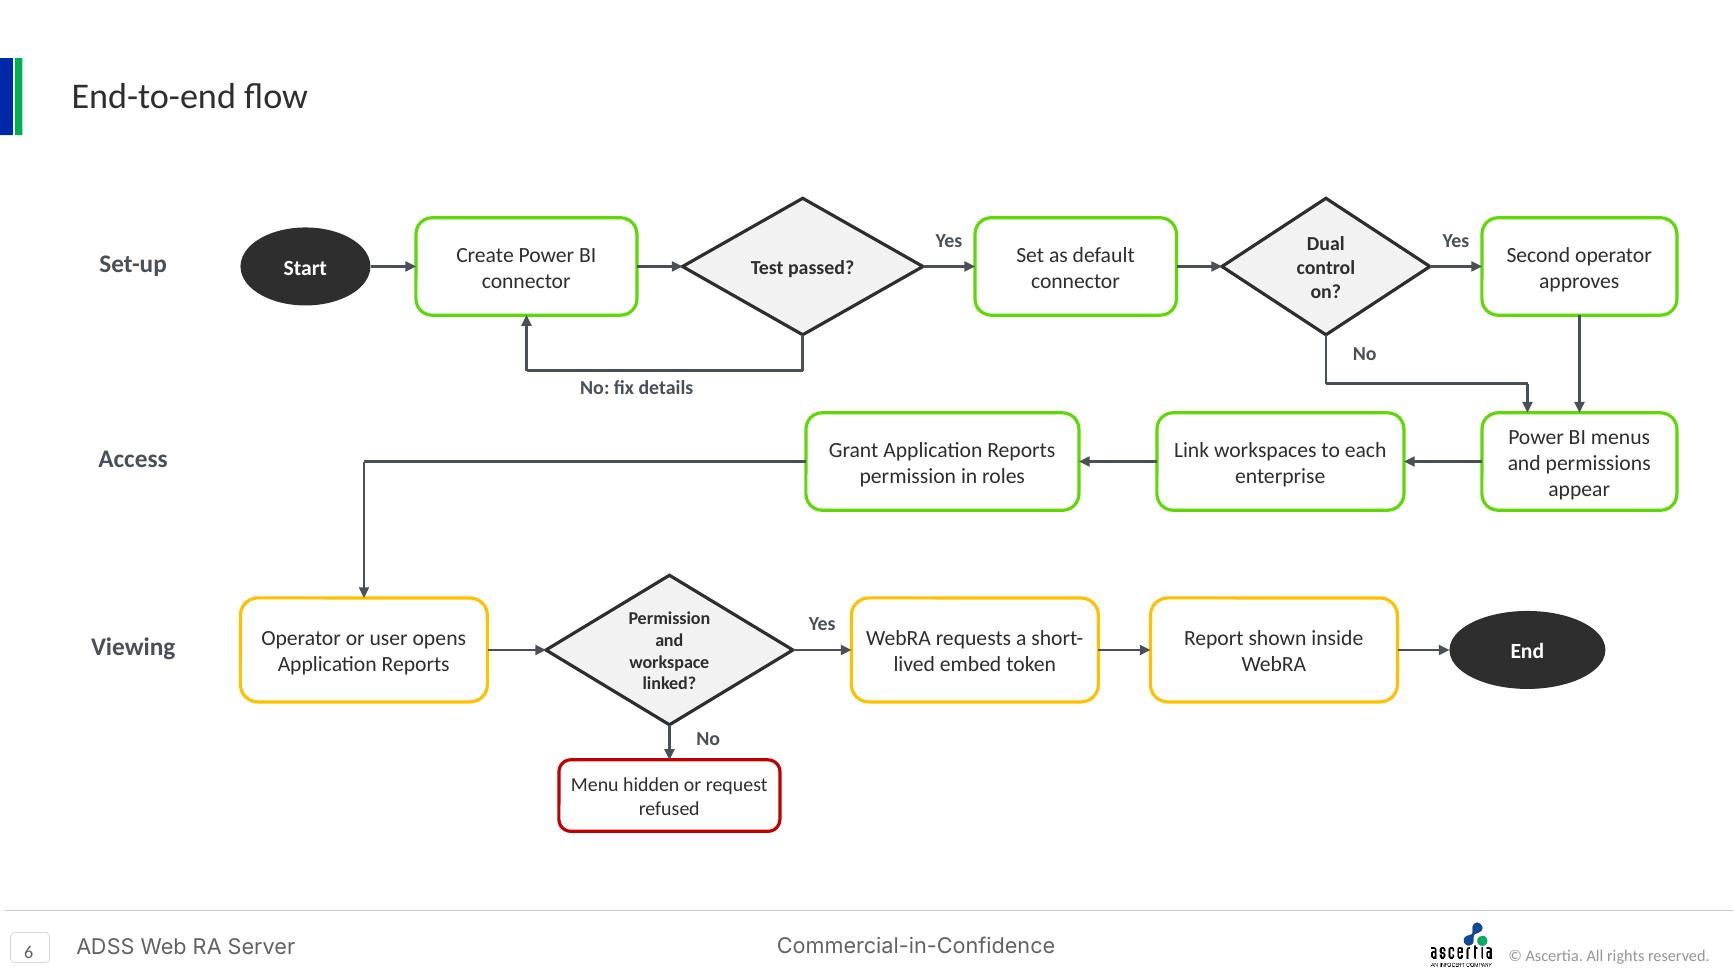
The flow chart below shows the whole journey.
|
|
You will need:
|

Web RA signs in to Power BI as an app (service principal), so it needs its own app registration with access to the workspaces you want to share.
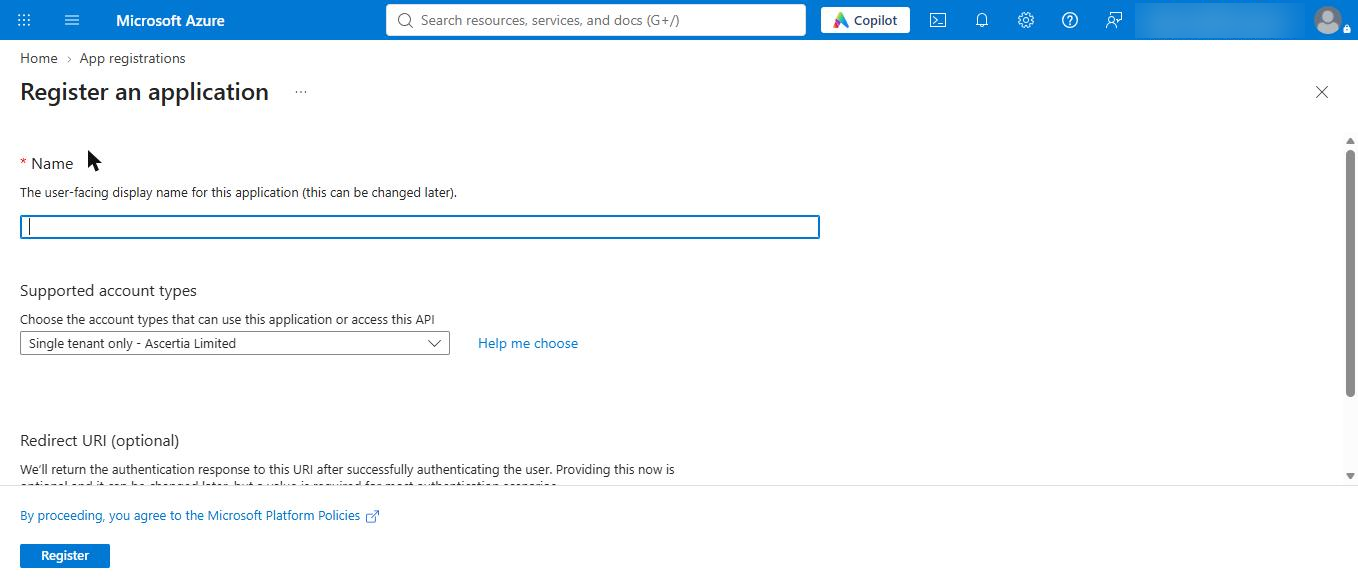
In the Azure portal, open Microsoft Entra ID › App registrations › New registration, name it (for example Web RA Power BI) and register it.
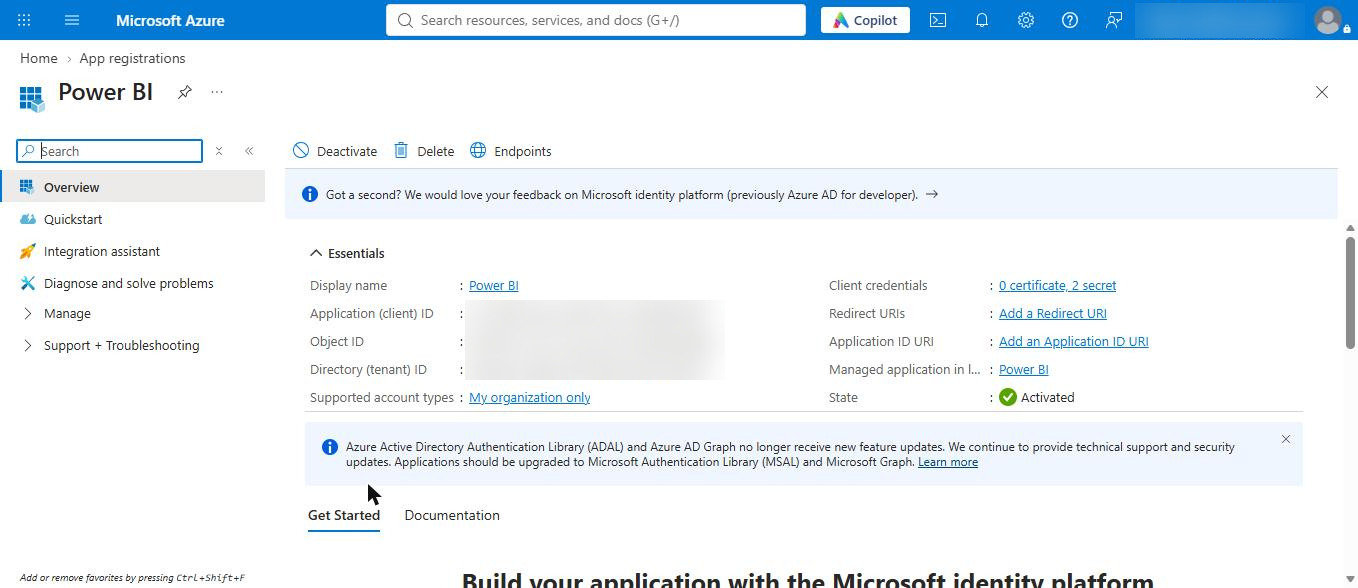
From the app’s Overview, copy the Application (client) ID and Directory (tenant) ID.
Under Certificates & secrets, create a client secret and copy its Value straight away; it is shown only once.
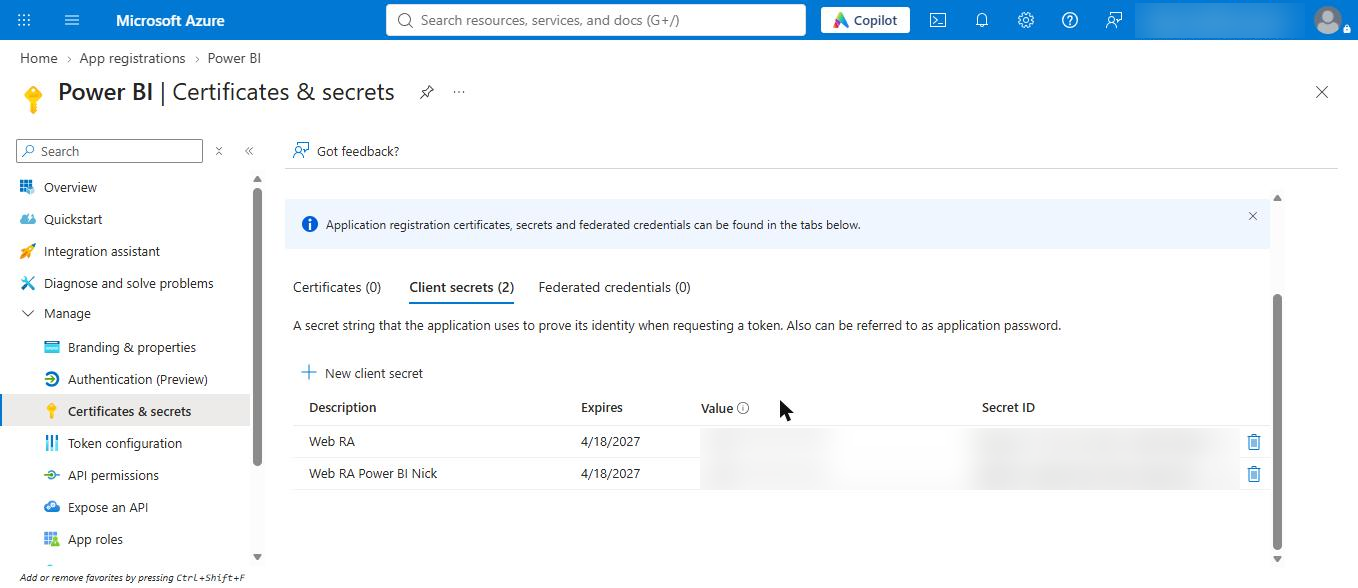
In the Power BI admin portal, under Tenant settings › Developer settings, enable Service principals can use Fabric/Power BI APIs for the security group that contains the app.
In each Power BI workspace you want in Web RA, open Manage access and add the app as Member (or Contributor).
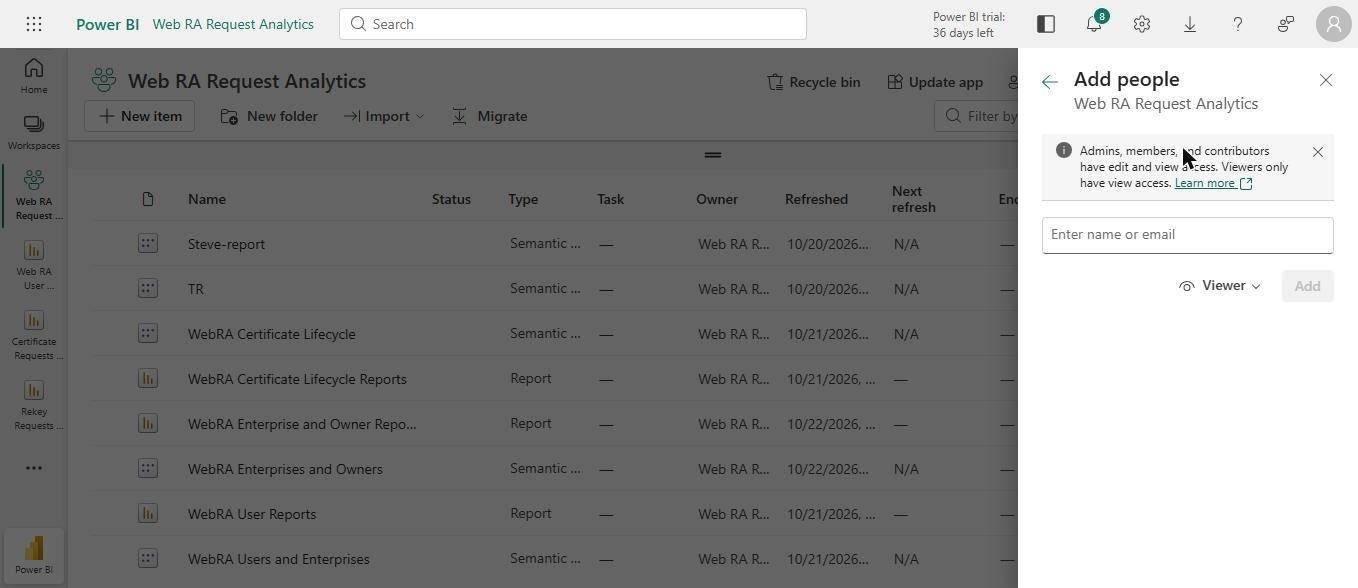
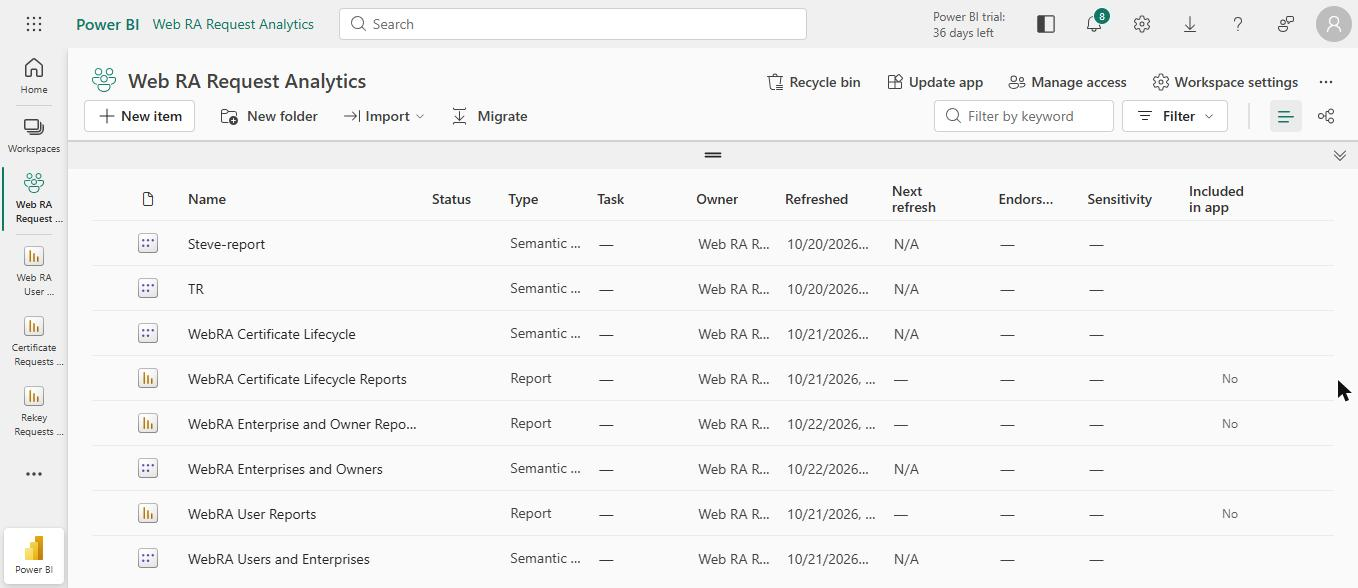
Make sure each workspace has at least one published report. For production, assign the workspaces to a paid capacity (Power BI Embedded or Premium); on a trial, reports show a “free trial version” banner.
Keep the client secret in a password manager; you will paste it into Web RA in Step 3.
Step 2: Allow Power BI in the security headers
Reports are shown in a frame loaded from https://app.powerbi.com, so the Content-Security-Policy of both the Admin and Web sites must allow it. Without this the report area shows a broken-page icon.
To learn how to update the headers for Power BI reports, refer to the Installation Guide (For Windows, For Linux).
In the existing Content-Security-Policy value, replace the child-src part with:
child-src 'self' https://www.google.com https://app.powerbi.com; frame-src 'self' https://www.google.com https://app.powerbi.com;
Leave the rest of the value unchanged.
|
Platform |
Where the header lives |
Apply the change |
|
Windows (IIS) |
web.config of WebRA.Admin and WebRA.Web, <customHeaders> › Content-Security-Policy |
Save the file; IIS picks it up on the next request |
|
Linux (nginx) |
The add_header Content-Security-Policy line in each Web RA server block (Admin on 443, Web on 81) |
sudo nginx -t && sudo systemctl reload nginx |
On Linux, web.config is not used. Check the header is live with curl -sk -D - -o /dev/null https://<server>:81/login | grep -i content-security; the output must contain app.powerbi.com.
The Web RA server also needs outbound HTTPS to login.microsoftonline.com, api.powerbi.com and app.powerbi.com.
Step 3: Create the Power BI connector
To create a Power BI connector, expand External Services > Connectors from the left-tree menu.
Then, click the add ‘+’ icon in the grid header.
The system will display the ‘Add Connector’ screen, which consists of two sections: Basic Information and Details.
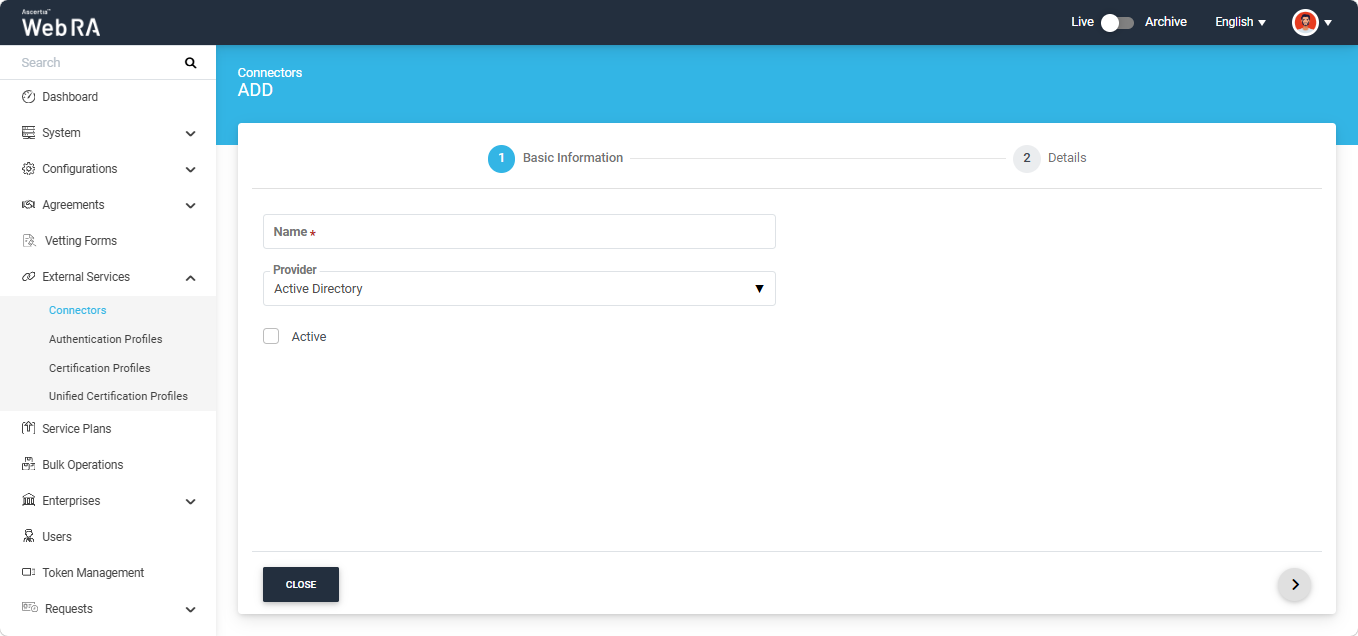
Basic Information
The fields appearing on the Basic Information screen are explained below:
|
Field |
Description |
|
Name |
Specify a unique name for this connector, for example: Power BI Connector. |
|
Provider |
Select Power BI as the provider for this connector. By default, Active Directory is selected. Click the Provider drop-down list and select Power BI. |
|
Active |
Select this check box to make this connector active. Inactive connectors cannot be configured in certification profiles. |
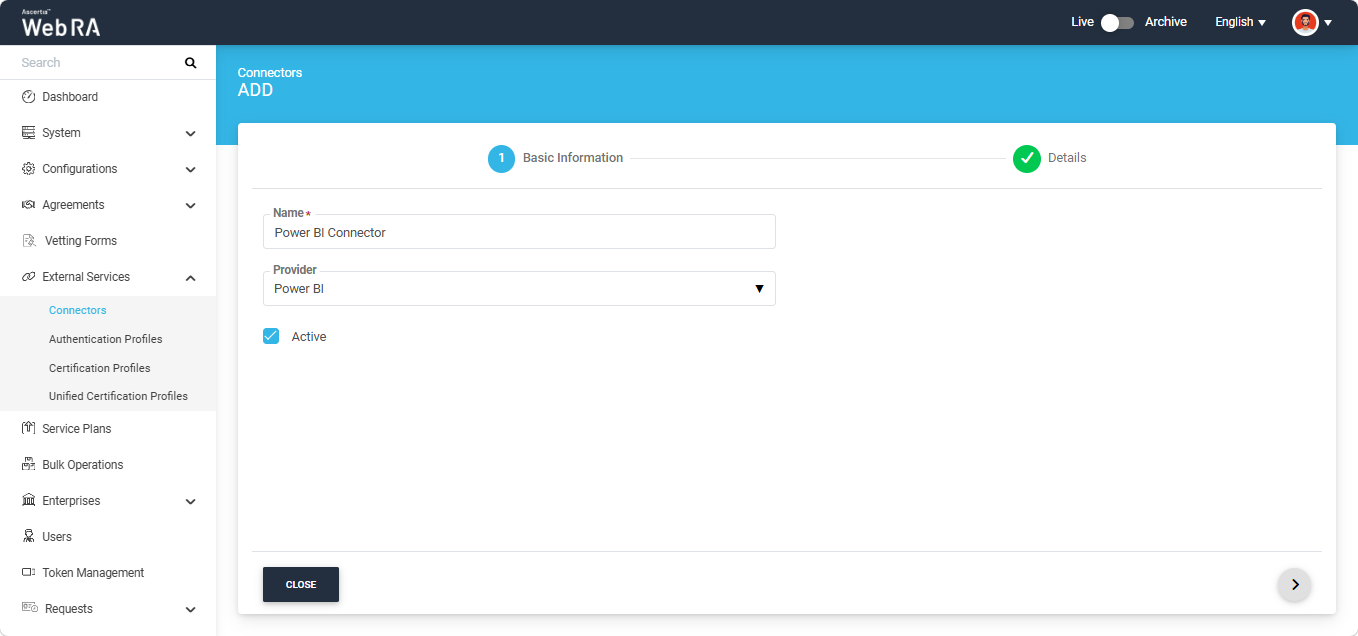
After specifying the information in the required fields, click the next ‘>’ button to navigate to the ‘Details’ section.
Details
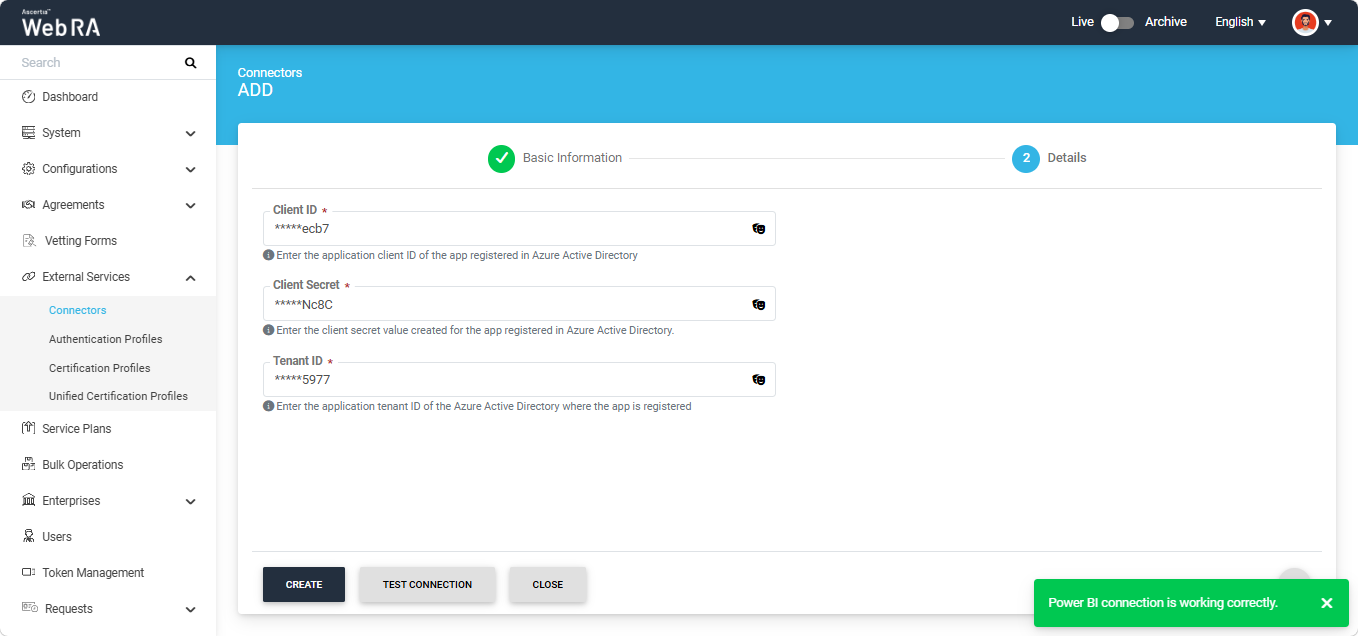
The fields appearing on the Details screen are explained below:
|
Field |
Description |
|
Client ID |
Enter the application client ID of the Power BI app registered in Azure Active Directory |
|
Client Secret |
Enter the client secret value created for the Power BI app registered in Azure Active Directory. |
|
Tenant ID |
Enter the application tenant ID of the Azure Active Directory where the Power BI app is registered. |
After entering the information in the required fields, click the ‘Test Connection’ button to verify that the connector configuration is correct and that the connection is working.
If the connection is successful, the system displays a success message confirming that the Power BI connection is working correctly.
Step 4: Set the default connector
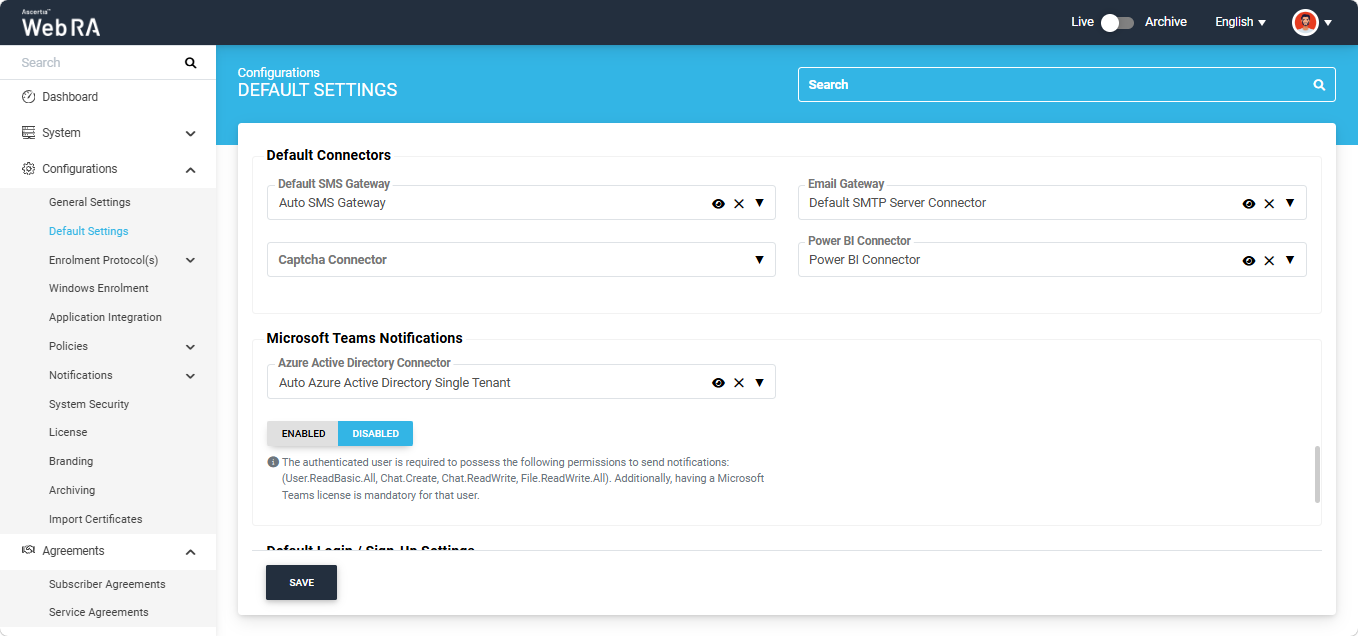
The Power BI connector must be selected under Configurations > Default Settings to enable Power BI integration across the application. If the connector is not configured here, the Power BI related configuration options and report access permissions will not be available in the application.
- Go to Configurations › Default Settings.
- In Default Connectors, select your connector in Power BI Connector.
- Click Save.
If 'Dual Control' is enabled for the Configurations module, the Power BI connector selection will be sent for approval; a second operator must approve before the change takes effect.
Step 5: Grant Application Reports permissions
The Application Reports permissions are disabled by default for all existing roles. To allow users to access Power BI reports, enable the relevant permissions for the required roles.
The permissions can be configured at the following levels:
1. Admin Portal – System Reports
To allow Operators to access Application Reports across all workspaces:
- Go to Access Control > Roles in the Admin Portal.
- Edit the required Operator role.
- Enable System > Reports > Application Reports (Read).
- Click Save.
2. Enterprise – Application Reports
To allow Operators to access Application Reports for a particular Enterprise:
- Go to Access Control > Roles in the Admin Portal.
- Edit the required Operator role.
- Enable Enterprises > Application Reports (Read).
- Click Save.
3. Web Portal – Application Reports
To allow Enterprise users to access Application Reports in the Web Portal:
- Go to Enterprises > Registered in the Admin Portal.
- Open the required Enterprise and navigate to Roles.
- Edit the required Enterprise role.
- Enable the Application Reports permission.
- Click Save.
Note: Users must sign out and sign back in to the Web Portal for the Application Reports menu to appear.
Step 6: Link workspaces to an enterprise
For the Enterprise Operator to access the Power BI reports, the required workspaces must first be linked to the Enterprise. Each Enterprise can access only the workspaces configured for it.
Navigate to your Enterprise from Admin Portal > Enterprises > Registered and select the required Enterprise.
Then expand Integrations > Power BI from the left-tree menu in the Enterprise.
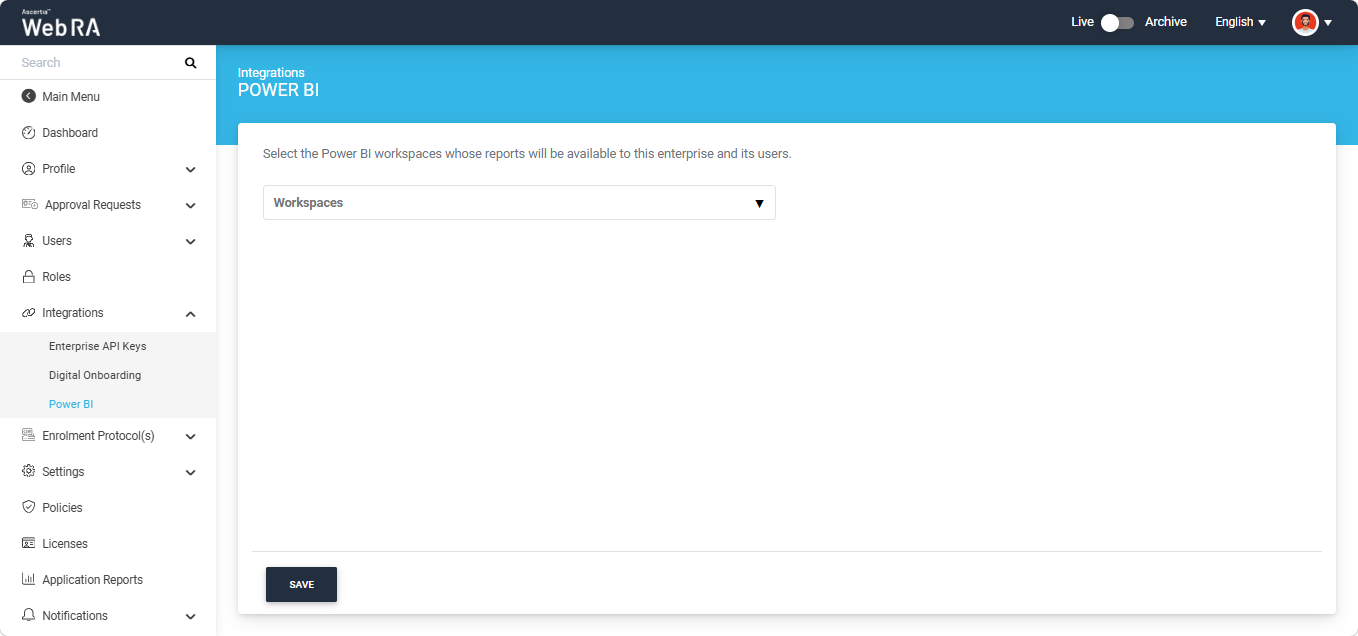
To select the required workspaces, click the Workspaces dropdown list. The system displays all available workspaces.
Select the required workspaces, or select Select All to make the reports from all available workspaces accessible to Enterprise users.
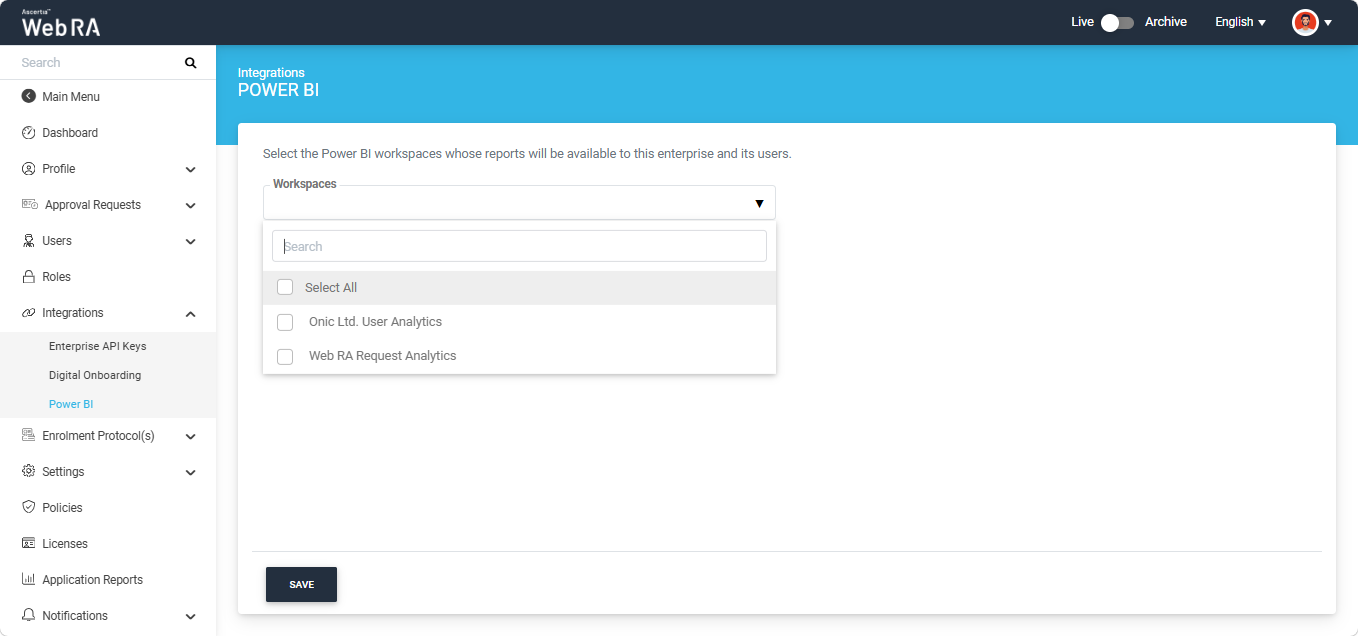
The selected Web RA workspaces will appear in the dropdown field.
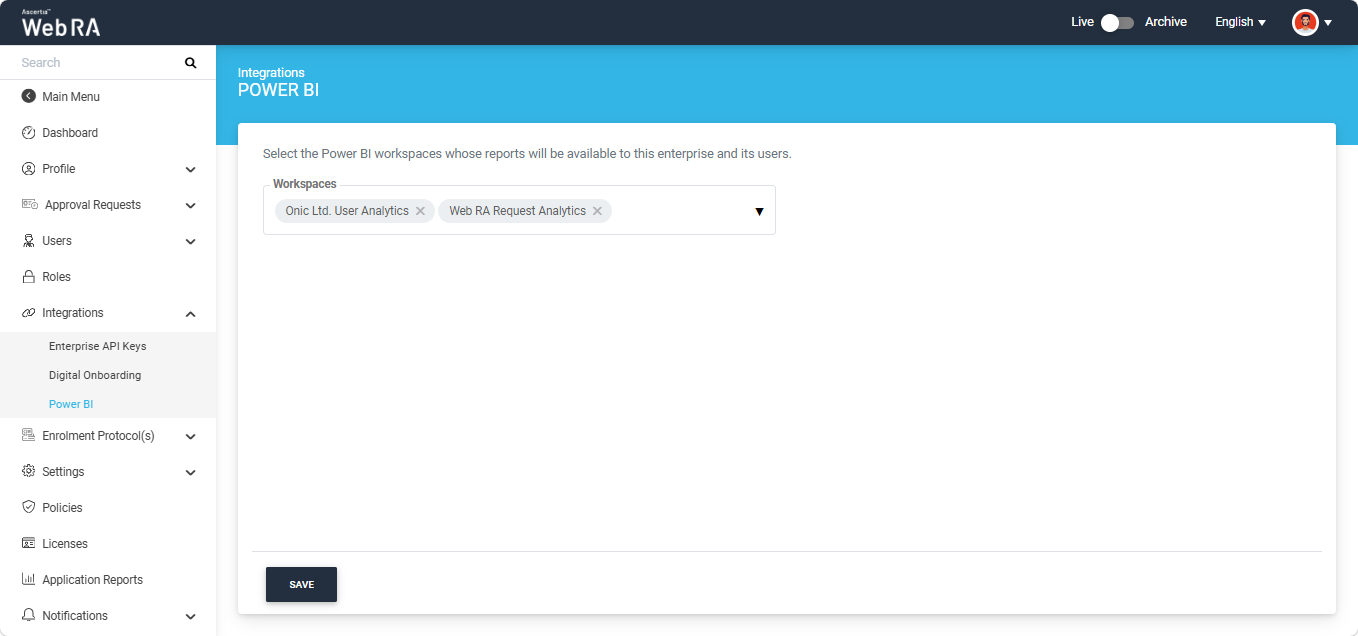
After selecting the workspaces, click the 'Save' button to implement the changes in the Web RA system.
The system displays the "Power BI workspaces saved Successfully' success alert on the screen.
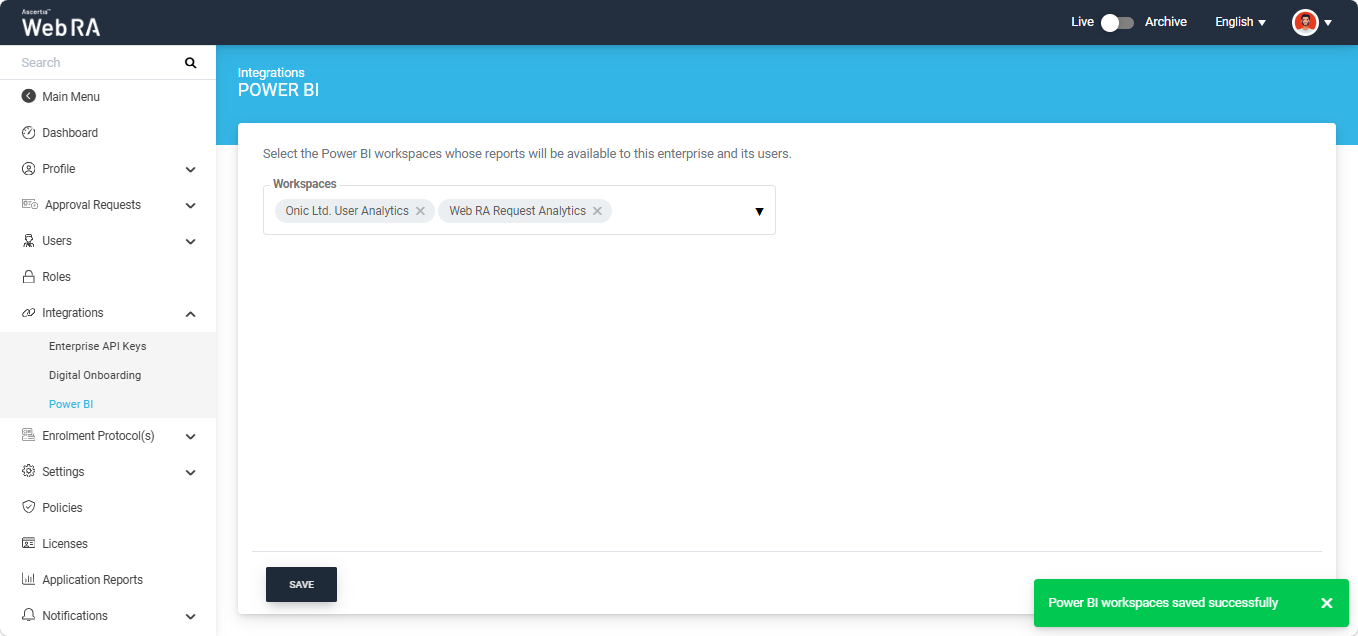
The Power BI reports appear in three places in the Web RA application.
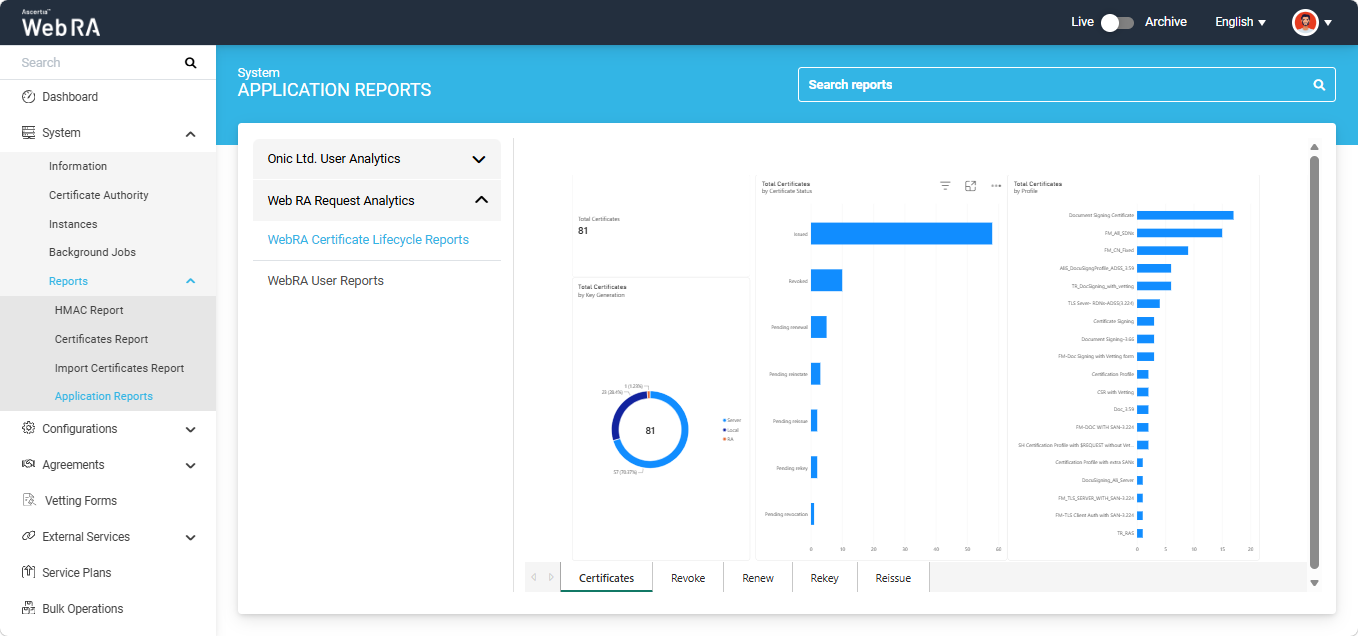
In Admin Portal
Expand System > Reports > Application Reports from the left-tree menu in the Admin portal.
To access the reports in a workspace, click the workspace name dropdown. The system expands the workspace to display all its associated reports.
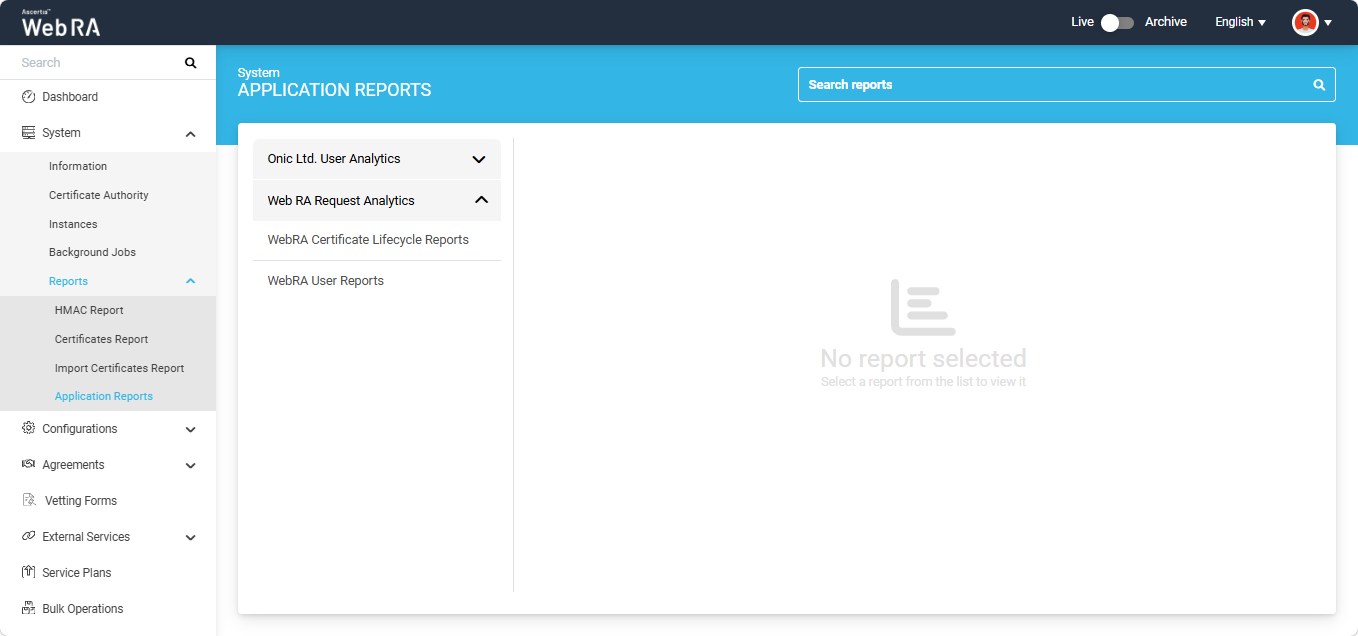
Select the report you want to view. The Power BI report will then be displayed on the right-hand side of the window.
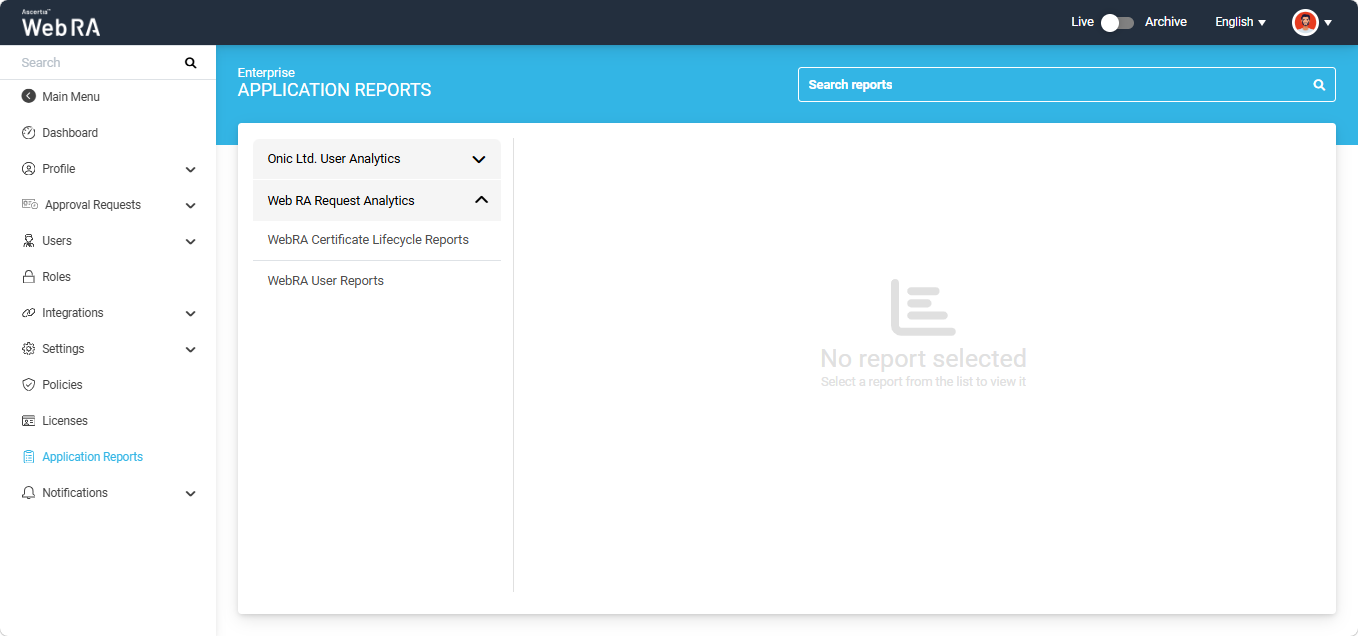
In Enterprise
Expand ‘Application Reports’ module from the left-tree menu in the Enterprise.
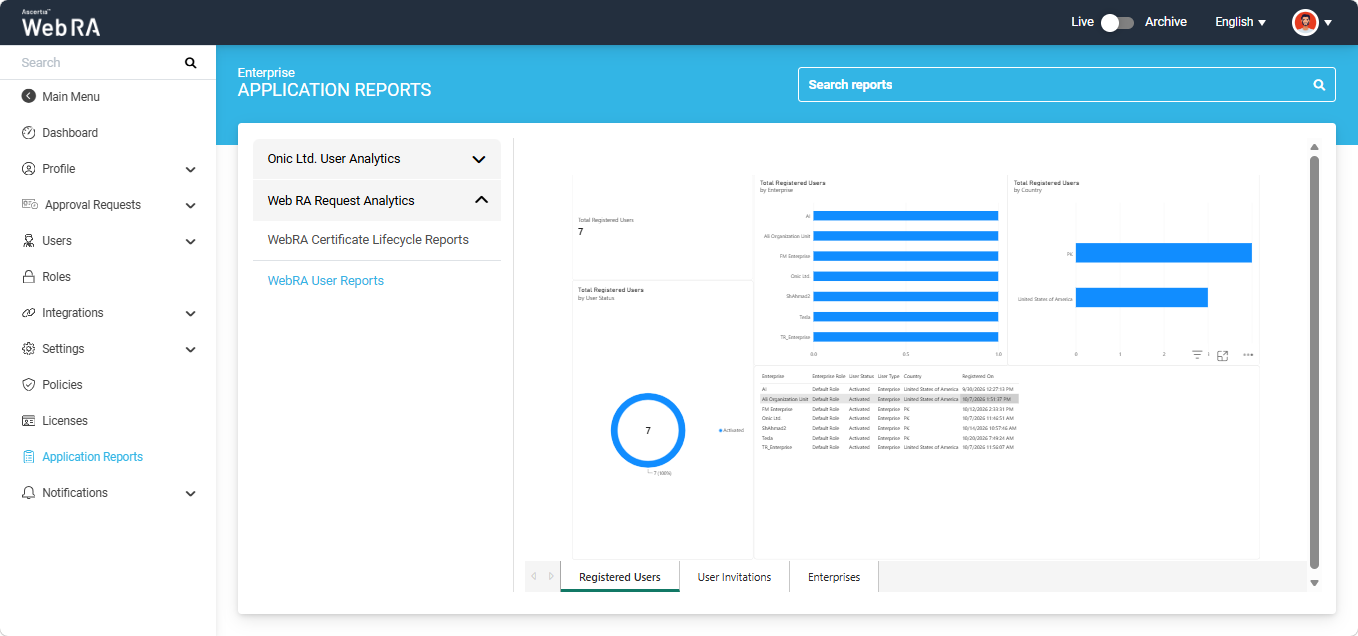
To access the reports in a workspace, click the workspace name dropdown. The system expands the workspace to display all its associated reports.
Select the report you want to view. The Power BI report will then be displayed on the right-hand side of the window.
In Web Portal
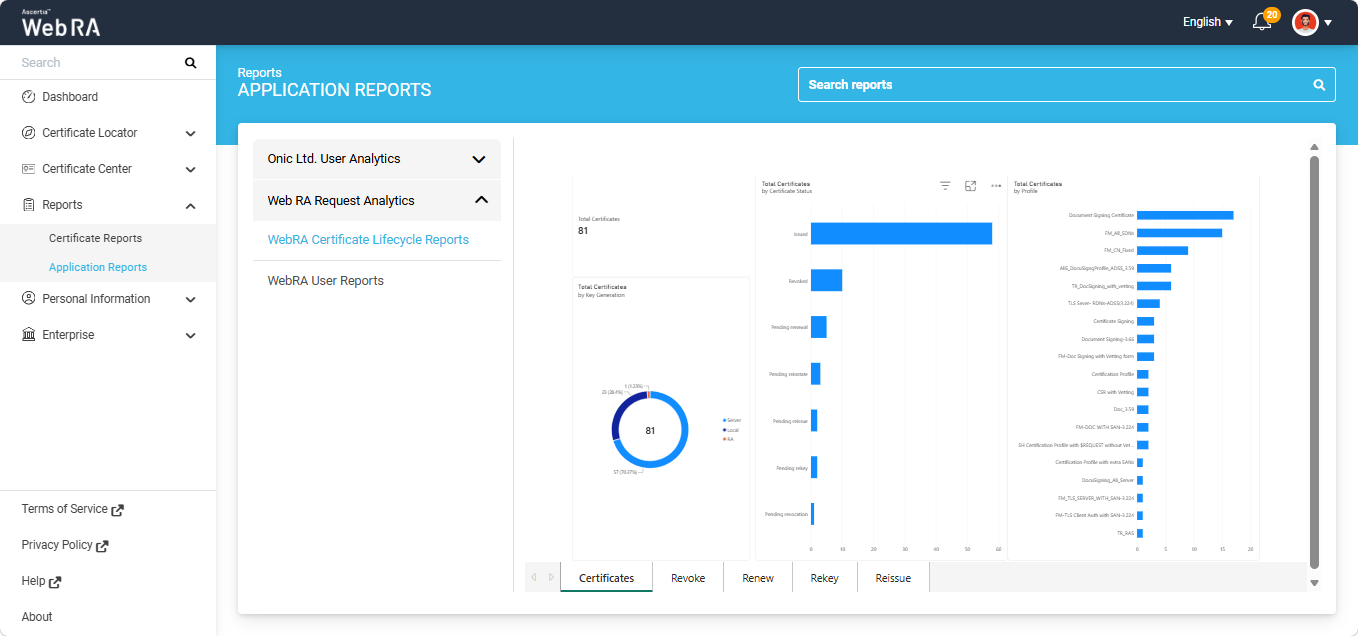
Expand Reports > Application Reports module from the left-tree menu in the Web Portal.
To access the reports in a workspace, click the workspace name dropdown. The system expands the workspace to display all its associated reports.
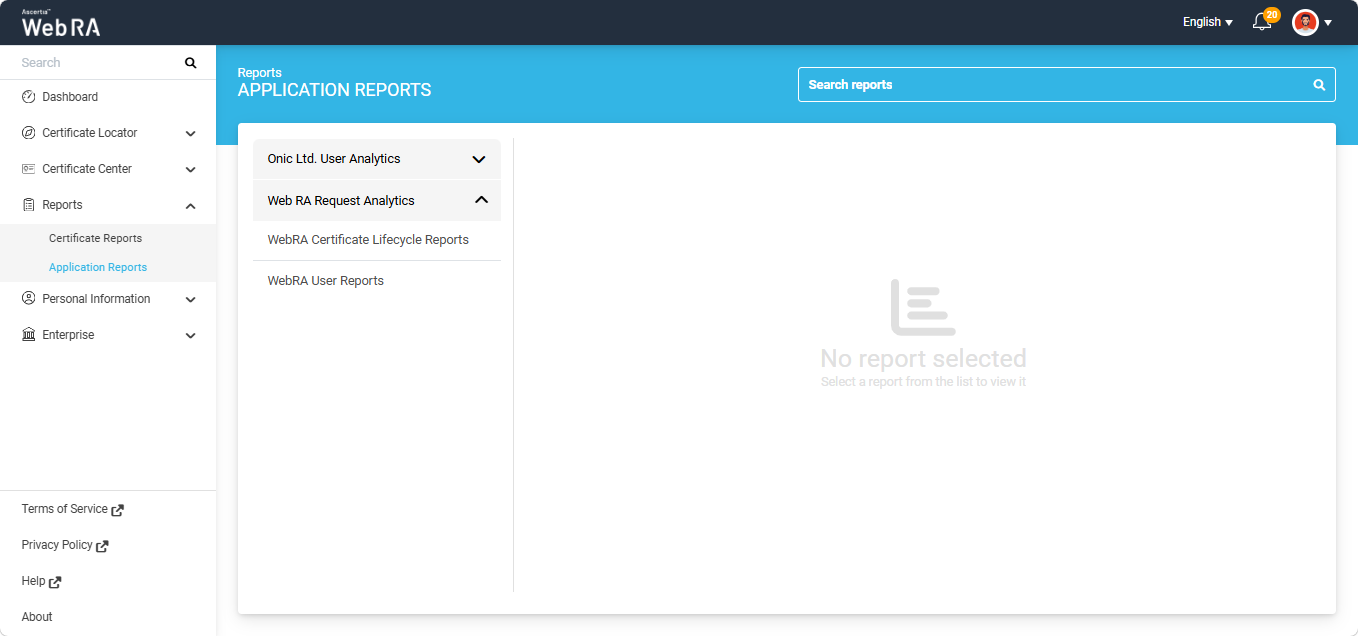
Select the report you want to view. The Power BI report will then be displayed on the right-hand side of the window.